manuals.online logo
Brands
  1. Home
  2. •
  3. Brands
  4. •
  5. Woodline
  6. •
  7. Outdoor Furnishing
  8. •
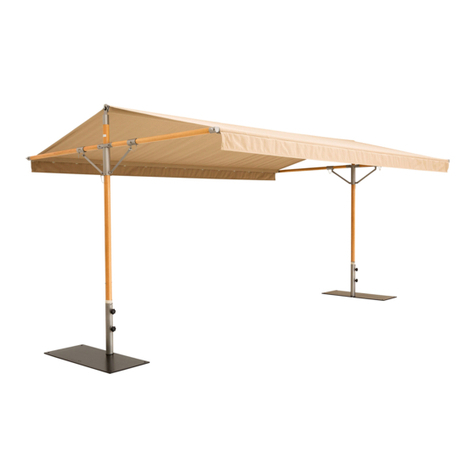
  9. Woodline PICOLLO EURO User manual

Woodline PICOLLO EURO User manual

1
2
3
4
5
6
7
8
9
10
12
13
11
1 / 9
7
8
1 x WOOD MAST
INSERT
1 x BASE SLEEVE
Latch Item Code: 13322-WL
Wood Mast Item Code: 13322-W
PARTS LIST
1 x M8 STUD
2 x M8 DOME NUTS
2 x M8 WASHERS
1 x BOOM WITH
ELBOW/PIVOT
Item Code: 13323
Item Code: 14239
2
1
1 x TENSION
HANDLE
1 x CABLE PULLY
1 x BUTTON
HEAD SCREW
1 x TILT HANDLE
(ALREADY FITTED TO PART 1)
Item Code: 09142
Item Code: 14236
Item Code: 12689
Item Code: 09131
3
4
5
6
Item Code: 09019
1 x CABLE GUIDE
1 x DOME NUT M5
2 x WASHERS M5
1 x BOLT M6
1 x DOME NUT M6
2 x WASHERS M6
1 x ALLEN KEY
HEADFITTING
D-Ring Safety Fixture
UNBRELLA CANOPY
FABRIC
UMBRELLA CANOPY FRAME
(SPOKES & STRUTS)
Item Code: 09157
Item Code: 09144
Item Code: SSPIFR-R30-W
Item Code: SSPIFR-R32-W
Item Code: SSPIFR-R35-W
Item Code: SSPIFR-S25-W
Item Code: SSPIFR-S30-W
Item Code: SSPICAN-R30
Item Code: SSPICAN-R32
Item Code: SSPICAN-R35
Item Code: SSPICAN-S25
Item Code: SSPICAN-
11
12
13
9
10
Item Code: 04022
Item Code: 09153
Item Code: SSDR1
PARTS LIST
REQUIRED TOOLS LIST
2 x ADJUSTABLE
CRESCENT WRENCH
(NOT SUPPLIED)
(INCLUDED)
14
PICOLLO EURO
(WOOD & ALUMINUM)
C
Distributor:
Shadescapes Americas
TEL: 970.527.7070
www.shadescapesamericas.com
[email protected]
PROTRADE & WOODLINE cc. 2000
STEP 1
STEP 7
STEP 2
STEP 6
PICOLLO EURO
IMPORTANT!! INSERT THE M8 STUD WITH DOME NUT
BEFORE LIFTING BOOM OUT OF BOX, AND FASTEN NUTS BEFORE
ROTATING ELBOW. ENSURE THAT M8 WASHERS ARE ON EACH SIDE. NOW THAT M8 STUD IS IN PLACE ROTATE ELBOW 90 .
LIFT WOOD MAST INSERT OUT OF BOX AND MOVE
TO STEP 7.
SLIDE THE WOOD MAST INSERT INTO
THE BASE SLEEVE.
O
A
B
7
8
2 / 9
REFERENCE ILLUSTRATION
2
2
4
5
9
1
1
3
6
7
8
STEP 3
3INSERT TENSION HANDLE
AND SECURE BY TURNING
CLOCKWISE.
STEP 4 INSERT SCREW WITH
PULLEY AT ANGLE.
SCREW IN 3-4 TURNS,
THEN FORCE PULLEY
DOWN INTO PLACE AND
TIGHTEN SCREW USING
ALLEN KEY.
4
5
STEP 5
6
SLIDE TILT HANDLE
INTO PLACE.
STEP 8
SECURE THE BASE SLEEVE TO THE WOOD
MAST INSERT WITH THE M6 BOLT
AND HARDWARE.
Distributor: Shadescapes Americas TEL: 970.527.7070 www.shadescapesamericas.com [email protected] © PROTRADE & WOODLINE cc. 2000
STEP 9
STEP 13
STEP 11 STEP 12
STEP 10
A
3 / 9
9
SECURE MAST TO BOOM
ELBOW WITH CABLE GUIDE
AND HARDWARE.
SLIDE WOOD MAST INTO
BOOM ELBOW.
THE WOOD MAST IS NOW
SECURED TO THE BOOM
WITH EBLOW/PIVOT. MOVE
TO STEP 12.
SLIDE ASSEMBLED MAST
AND BOOM ONTO THE MOUNT
SYSTEM. SEE SEPARATE
INSTRUCTIONS FOR MOUNT
ASSEMBLY DETAILS.
13
INSERT HEAD FITTING OF THE CANOPY FRAME
INTO THE BOOM. TO PROPERLY SECURE HEAD
FITTING, PLACE CABLE OVER THE PULLEY AND
PULL DOWN.
Distributor: Shadescapes Americas TEL: 970.527.7070 www.shadescapesamericas.com info@ shadescapesusa.com © PROTRADE & WOODLINE cc. 2000
STEP 14
SEE SEPARATE INSTRUCTIONS FOR MOUNT
ASSEMBLY DETAILS. INSTRUCTIONS ARE
INCLUDED IN MOUNT SYSTEM BOX.
OPEN THE UMBRELLA (SEE OPENING AND CLOSING INSTRUCTIONS PAGES 5 - 7).
OPENING & CLOSING GUIDELINES (SEE PAGES 5 - 7 FOR DETAILED OPENING & CLOSING INSTRUCTIONS)
* WHEN OPENING, MAKE SURE THE UMBRELLA OPENS FREELY.
* DO NOT FORCE THE UMBRELLA OPEN IF IT IS JAMMING. THIS WILL RESULT IN DAMAGE.
* IF THERE IS ANY RESISTANCE WHEN OPENING, ASSIST BY PULLING ON THE SPOKES TO FACILITATE THE FIRST PART OF THE
OPENING PROCESS.
* IF THIS PROCESS DOES NOT WORK, IT USUALLY MEANS ONE OR MORE OF THE SPOKES ARE LOCKED BEHIND OTHER
SPOKES. THIS IS MORE PREVALENT WITH THE SHORT SPOKES OF THE SQUARE CANOPY FRAME AS THEY CAN HOOK BEHIND
THE LONGER SPOKES. GENTLY TRY TO OPEN THE CANOPY FRAME AND LOOK BELOW THE CANOPY FABRIC TO SEE WHERE
THE SPOKES MAY BE JAMMED. THE JAMMED SPOKE CAN BE UNDONE BY GENTLY PULLING IT OUT FROM BEHIND THE OTHER
SPOKE AND STRUT (SHORTER SPOKES THAT CONNECT HUB TO THE LONGER SPOKES). THE UMBRELLA WILL THEN OPEN
FREELY.
* WHEN CLOSED, USE THE CANOPY TIE DOWNS SEWED ONTO THE FABRIC TO KEEP CANOPY FABRIC FROM MOVING IN THE
WIND. WHEN THE CANOPY FRAME IS COMPLETELY CLOSED MAKE SURE ALL LOOSE FABRIC IS PULLED OUT FROM BETWEEN
EACH SPOKE SO THE FABRIC DOES NOT BECOME JAMMED IN THE CANOPY FRAME. IF THE FABRIC BECOMES TRAPPED, THIS
MAY RESULT IN UNNECESSARY WEAR OF THE FABRIC AND SMALL HOLES MAY DEVELOP. SEE CANOPY FOLDING
INSTRUCTIONS ON PAGE 7.
STEP 1
STEP 2
STEP 3
4 / 9
SEE SEPARATE INSTRUCTIONS FOR
MOUNT ASSEMBLY DETAILS. INSTRUCTIONS
ARE INCLUDED IN THE MOUNT SYSTEM BOX.
PICOLLO EURO
Distributor: Shadescapes Americas TEL: 970.527.7070 www.shadescapesamericas.com [email protected] © PROTRADE & WOODLINE cc. 2000
EERRUUDDEECCOORRPPGGNNIITTLLIITT
SSNNRRUUTT22--11YYBBEESSIIWWKKCCOOLLCC--IITTNNAAGGNNIINNRRUUTTYYBBRREEVVEELLNNOOIISSNNEETTNNEESSOOOOLL..11PPEETTSS
E CANOPY FRAME BY PUSHING OR PULLING THE TILT LEVERHTTTLLIITT..22PPEETTSS
NOISNET-ER,,NNOOIITTIISSOOPPDDEERRIIUUQQEERREEHHTTNNIIRREEVVEELLTTLLIITTEEHHTTGGNNIIDDLLOOHHEELLIIHHWW..33PPEETTSS
RREEVVEELLNNOOIISSNNEETTEEHHTT
BBYY ..EESSIIWWKKCCOOLLCCGGNNIINNRRUUTT
TO THE REQUIRED POSITION.
WARNING!! THE TILT FUNCTION SHOULD ONLY BE USED IN LIGHT WINDS (SEE PAGE 8 FOR DETAILED WIND GUIDELINES).
PICOLLO OPENING & CLOSING INSTRUCTONS
Position A: Canopy Frame (1) is held in the closed position by
the Canopy Strap (2). The Tensioning Lever (3) is in
the locked position.
Position B: The Canopy Strap (2) is untied, and the Canopy
Frame (1) is released into a relaxed open position.
POSITION A POSITION B
POSITION C
POSITION D
1
2
Position C: The Coiled Handle (4) with attached hook has been pulled
downwards and attached to the upper loop of the Harness (5)
part of the Tensioning Lever (3). The Stainless Steel Cable (6) is
properly positioned over the Cable Pulley (7), and inside of the
Cable Guide (8). (For opening and closing details, see page 6)
Position D: The Canopy Frame is in the full open position. The Tensioning
Lever (3) is engaged with the Locking Latch (9) and is in the
locked position.
(1) Canopy Frame
(2) Canopy Strap
(3) Tensioning Lever
(4) Coiled Handle with hook
(5) Harness
(6) Stainless Steel Cable
(7) Cable Pulley
(8) Cable Guide
(9) Locking Latch
3
8
5
PICOLLO POSITIONS
67
4
3
3
Exploded Illustration 1
4
5 / 9
9
THE PICOLLO LATCH & LEVER TENSIONING SYSTEM IS VERY EASY TO USE. PLEASE
FOLLOW THESE INSTRUCTIONS CAREFULLY TO LEARN HOW TO USE THIS SYSTEM TO
OPEN AND CLOSE THE PICOLLO CANTILEVER UMBRELLA. ENSURE ALL USERS
ARE PROPERLY TRAINED.
*NOTE: THE FOLLOWING INSTRUCTIONS SHOULD BE USED ONLY AFTER THE PICOLLO
UMBRELLA HAS BEEN ASSEMBLED USING THE INSTRUCTIONS ON PAGES 1-3.
C
Distributor:
Shadescapes Americas
TEL: 970.527.7070
www.shadescapesamericas.com
[email protected]
PROTRADE & WOODLINE cc. 2000
7
6
8
4
5
3
11
10
9
3
6 / 9
4
3
10
9a
P
u
s
h
T
e
n
s
i
o
n
i
n
g
L
e
v
e
r
D
o
w
n
5
6
PICOLLO OPENING & CLOSING INSTRUCTIONS
TO OPEN THE CANOPY FRAME:
1. REMOVE CANOPY STRAP
a. Undo canvas Canopy Strap (1) that secures the Canopy Frame (2) in the
closed and folded postion.
2. UNLOCK LATCH AND RAISE THE TENSIONING LEVER
a. Identify the Latch & Lever Tensioning Plate (10) which is housed on the lower part of the
Picollo Mast (11).
b. Press the Locking Pin Lever (9a) to the left to unlock the Latch (9).
c. When the Locking Pin Lever (9a) is firmly in the left position, the Latch will be
disengaged from the Tensioning Lever (3), allowing it to be pulled out from the locked
position.
d. Pull the Tensioning Lever (3) away from the Latch & Lever Tensioning Plate (10) in an
upward direction. This will allow the Harness (5) to also move upwards to receive the
Hook attached to the bottom of the Coiled Handle (4).
3. PULL THE COILED HANDLE DOWN
a. Be sure the Stainless Steel Cable (6) is first fed through the center of the Cable Pulley (7)
and through the Cable Guide (8) on the Mast (11). This is done by guiding the Stainless
Steel Cable over the top of the Cable Pulley, and through the opening at the back of the
Cable Guide. If done properly, the Coiled Handle (4) will be resting just below the Cable.
b. Reach up and grab hold of the Coiled Handle with hook (4) positioned below the
Cable Guide (8).
c. Firmly holding the Coiled Handle (4), pull downwards, which will begin to open the
Canopy Frame (see Position C on page 5).
4. ATTACH THE HOOK TO THE HARNESS
a. Continue pulling the Coiled Handle (4) downward until you can easily guide the Hook
on the bottom of the Coiled Handle onto the top loop of the Harness (5).
5. PUSH THE TENSIONING LEVER DOWN UNTIL IT LOCKS
6. ATTACH THE D-RING SAFETY FITTING
a. Once the hook is securely on the Harness (5), push the Tensioning Lever (3) down until
a. Attach the D-ring Safety Fitting (12) by unscrewing the D-ring Bar (12a) and positioning
the D-ring around the holes in the Locking Latch (9).
b. Push the D-ring Bar through the holes of the Locking Latch (9) and the hole in the
Tensioning Lever (3), and screw clockwise until secure. Please refer to exploded
illustration 2 at left.
it is seated into the Locking Latch (9). You will hear a “click” as the spring loaded Latch
secures the Tensioning Lever in the locked position.
(3) Tensioning Lever
(4) Coiled Handle with Hook
(5) Harness
(6) Stainless Steel Cable
(7) Cable Pulley
(8) Cable Guide
(9) Locking Latch
(9a) Locking Latch Lever
(10) Latch & Lever
(11) Mast
(12) D-Ring Safety Fitting
(12a) D-Ring Bar
Exploded Illustration 2
Latch & Tensioning Lever (3)
in locked position
12
When locking the Tensioning
Lever in place, insert bar for
D-ring Safety Fitting
here. (When the canopy frame
is closed, place the D-ring
Safety Fitting in the Locking Latch
holes for safe keeping).
12a
Open Closed
9
Distributor: Shadescapes Americas TEL: 970.527.7070 www.shadescapesamericas.com [email protected] © PROTRADE & WOODLINE cc. 2000
TO LOWER THE CANOPY FRAME, REVERSE THE PROCESS:
4
5
11
9a
T
e
n
s
i
o
n
L
e
v
e
r
W
i
l
l
R
i
s
e
3
3
9a
Push Left
Strap
7 / 9
PICOLLO OPENING & CLOSING INSTRUCTIONS
CANOPY FOLDING INSTRUCTIONS
1. In order to avoid the Canopy Fabric from being jammed between the
frame components, it is important to pull the fabric out from the
Canopy Frame by putting a finger under the edge of the canopy
and pulling the fabric outwards. Do this for all panels and fold the
panels over each other like you would with a hand held umbrella.
2. Tie the Canopy Strap (2) tightly (see position A, and drawing at right)
as otherwise the canopy can move in windy conditions and get damaged
through rubbing.
3. For short term storage: We recommend a protective cover bag to protect
the canopy from dirt and prolong the life of the fabric. Pull the cover bag
over the canopy and secure it by closing the zipper.
4. Long term storage: If you are not using your Picollo for two weeks
or more, it is imperative to fold the canopy as described above, take
off the entire Canopy Frame (see Assembly Instructions for details)
and store it in a dry and clean place (out of reach of rodents) to avoid
soiling or damage.
1. UNLOCK THE LATCH
b. Position your right hand on the Tensioning Lever (3). Continue to securely hold the
Tensioning Lever (3) and use your left thumb to unlock the Locking Latch (9) by pushing
the Locking Latch Lever (9a) to the left, see exploded illustration 3. The Tensioning Lever
will automatically push outward firmly into your hand.
a. Remove the D-ring Safety Fitting (12) from the Locking Latch (9) by unscrewing the
D-ring Bar (12a) and pulling it out of the Locking Latch (see exploded illustration 2 on
previous page).
c. Continuing to use your right hand, allow the Tensioning Lever (3) to raise into the
upright position (see Position B on page 5).
d. While firmly holding the Coiled Handle (4), release the hook from the Harness (5),
and allow the Coiled Handle to slowly pull upwards toward the Cable Guide (8).
e. The Canopy Frame (1) will now be in the relaxed open position (see Position B).
f. To prevent loss of the D-ring Safety Fitting (12), re-attach it to the Locking Latch (9).
WARNING: DUE TO THE WEIGHT OF THE CANOPY FRAME (1), THE TENSIONING LEVER (3)
WILL QUICKLY PUSH OUTWARDS INTO THE PALM OF YOUR HAND AS SOON AS THE LATCH
(9) IS UNLOCKED. EXERCISE CARE BY KEEPING YOUR BODY IN AN UPRIGHT POSITION AND
AT A COMFORTABLE DISTANCE FROM THE TENSIONING LEVER. IF CHILDREN OR GUESTS
ARE PRESENT USE THE D-RING SAFETY FITTING. AVOID HAVING CHILDREN AND/OR
GUESTS TOUCH OR TRY TO USE THE LATCH & LEVER TENSIONING SYSTEM WITHOUT
PROPER INSTRUCTION AND/OR SUPERVISION.
WARNING: ALWAYS FOLLOW THE CANOPY FOLDING INSTRUCTIONS OUTLINED BELOW TO
PROPERLY FOLD THE CANOPY. ONCE FOLDED, USE THE CANOPY STRAP (2) TO SECURE
THE CANOPY FRAME. IMPROPER FOLDING MAY CAUSE ABRASIONS TO THE CANlOPY
FABRIC WHICH IS NOT COVERED UNDER THE MANUFACTURER’S LIMITED WARRANTY.
DO NOT PUT THE OPTIONAL PICOLLO COVER BAG ON THE CANOPY FRAME IF THE CANOPY
FABRIC IS DAMP OR WET.
Exploded Illustration 3
Latch & Tensioning Lever (3)
in locked position
Locking
Latch Lever
C
Distributor:
Shadescapes Americas
TEL: 970.527.7070
www.shadescapesamericas.com
[email protected]
PROTRADE & WOODLINE cc. 2000
8 | 9
PICOLLO
CARE AND MAINTENANCE
ALUMINUM PARTS, 304 STAINLESS STEEL & HARDWARE
*UMBRELLA STRUCTURE AND HARDWARE MUST BE CLEANED BY
SPRAYING WITH FRESH WATER ON OCCASION TO REMOVE DIRT
AND DUST BUILD UP.
*USE A SOFT COTTON CLOTH OR CHAMOIS TO WIPE DOWN THE
ANODIZED AND POWDER-COATED ALUMINUM SURFACES AS WELL
AS THE STAINLESS STEEL COMPONENTS AND HARDWARE.
*AVOID USING A SCOURER OR ABRASIVE MATERIALS AS THIS
COULD AFFECT THE INTEGRITY OF THE SURFACE FINISHES.
*THE WINCH AND LATCH SYSTEM MUST BE THOROUGHLY CLEANED
WITH FRESH WATER EVERY SEASON AND SHOULD BE LUBRICATED
WITH A SUITABLE OIL OR RUST REPELLANT TO AVOID UNNECESSARY
DAMAGE.
*IF IN A MARINE/SEASIDE ENVIRONMENT, THE MAINTENANCE
PROCEDURES DESCRIBED ABOVE MUST BE FOLLOWED MORE
FREQUENTLY. PROBLEMS RESULTING FROM FAILURE TO MAINTAIN
THE PRODUCTS ARE NOT COVERED UNDER WARRANTY.
SALIGNA EUCALYPTUS HARDWOOD
*ONCE A YEAR LIGHTLY SAND ALL EUCALUPTUS PARTS AND APPLY A
NEW COAT OF VARNISH. AS WITH ALL HARDWOOD PRODUCTS, TO
MAINTAIN ITS LUSTER, THE WOOD MUST BE MAINTAINED ANUALLY.
*AVOID USING A SCOURER OR ABRASIVE MATERIALS AS THIS COULD
AFFECT THE INTEGRITY OF THE SURFACE FINISHES.
*IF IN A MARINE/SEASIDE ENVIRONMENT, THE MAINTENANCE
PROCEDURES DESCRIBED ABOVE MUST BE FOLLOWED MORE
FREQUENTLY. PROBLEMS RESULTING FROM FAILURE TO MAINTAIN
THE PRODUCTS ARE NOT COVERED UNDER WARRANTY.
Distributor: Shadescapes Americas TEL: 970.527.7070 www.shadescapesamericas.com
[email protected] © PROTRADE & WOODLINE cc. 2000
PICOLLO
WIND GUIDELINES
& WARRANTY
THE PICOLLO IS DESIGNED TO HANDLE LIGHT TO MODERATE
WINDS IN THE FULLY OPENED HORIZONTAL POSITION. IN A
TILTED POSITION, THE CANOPOY WILL CATCH THE WIND AND
THERFORE IS RATED FOR LIGHT WINDS ONLY.
AS WITH ALL UMBRELLAS, USE COMMON SENSE AND LOWER
CANOPY AS WINDS INCREASE. NOTE THAT WIND IS NEVER A
CONSTANT FORCE AND WIND GUSTS CAN BE TWICE THE
AVERAGE WIND SPEED, THEREFORE IT IS RECOMMENDED TO
ALWAYS COLLAPSE THE CANOPY AND STRAP IT WHEN
UNATTENDED.
CANOPIES MUST BE CLOSED IN THE EVENT OF HEAVY RAIN,
THUNDERSTORMS, HAIL OR ANY SEVERE WEATHER CONDITIONS.
DAMAGE DUE TO WIND, ADVERSE WEATHER CONDITIONS OR
IMPROPER USE IS EXPLICITLY EXCLUDED FROM THE ONE-YEAR
DEFECTIVE PARTS WARRANTY COVERAGE.
BASIC GUIDELINES: PICOLLO
*DO NOT LEAVE THE PICOLLO UNATTENDED WHEN OPEN.
*CANOPY FRAME MUST BE OPENED TO MAXIMUM TENSION
AND KEPT IN THE NON-TILT POSITION TO ENSURE
OPTIMUM STABILITY IN ALL WEATHER CONDITIONS.
*AS WINDS INCREASE, COMPLETELY LOWER THE CANOPY
FRAME AND USE THE TIE DOWNS TO SECURE THE FRAME
PRIOR TO COVERING WITH THE PROTECTIVE COVER.
*ASK FOR ASSISTANCE WHEN CLOSING THE PICOLLO
DURING VERY WINDY CONDITIONS.
*DO NOT LEAVE THE CANOPY FRAME CLOSED IF NOT
COMPLETELY DRY.
SUNBRELLA CANOPY FABRIC
care and cleaning
One of the best ways to keep Sunbrella®fabrics
looking good and to delay deep or vigorous
cleaning is to properly maintain the fabrics. This
can be accomplished by simply brushing o dirt
before it becomes embedded in the fabrics,
wiping up spills as soon as they occur or spot
cleaning soon after stains occur.
General or light cleaning
• Brush o any loose dirt.
• Prepare a cleaning solution of 2 ounces
(1/4 cup) mild soap per gallon of
lukewarm water (less than 100° F/38°C).
• Use a sponge or a soft bristle brush to clean.
• Allow cleaning solution to soak into fabric.
•Rinse thoroughly to remove all soap residue.
• Allow fabric to air dry.
Spot cleaning
• Apply a light mist of mild soap and
water using a spray bottle.
• Work the solution into the stain by
lightly scrubbing the area with a
sponge or very soft bristle brush.
•Rinse thoroughly to remove all soap residue.
• Blot excess moisture with a clean,
soft towel or sponge.
• Wet-vacuum or blot excess water.
• Air dry. Repeat steps 3 and 4 until
all soap residue is removed.
For removable Sunbrella fabric
Hand washing
• Soak fabric in a solution of 1/4 cup mild
soap per gallon of lukewarm water.
• Use a sponge or a soft bristle
brush as necessary.
• Rinse thoroughly to remove all soap residue.
• Air dry.
Machine washing
Machine wash in cold water (less than
100° F/38°C). Depending on wash load size,
use normal amounts of mild laundry soap and
add 8 ounces (1 cup)of bleach.
Allow fabric to air dry.
Heavy cleaning for
stubborn stains and mildew
Sunbrella fabric does not promote mildew
growth, however, mildew may grow on dirt and
other foreign substances that are not removed
from the fabric. To clean mildew, or other
stubborn stains:
• Prepare a solution of 8 ounces (1 cup)
of bleach and 2 ounces (1/4 cup) of
mild soap per gallon of clean water.
• Spray on entire area and allow to soak
into the fabric for 15 minutes.
• Remove stain with a sponge, clean
towel or very soft bristle brush.
•Rinse thoroughly to remove all soap residue.
• Allow fabric to air dry.
• If stain and/or mildew are severe,
bleach quantities may be increased.
Re-treating the
fabric for ease of cleaning
Sunbrella fabrics have a special finish that
enhances water repellency. The finish is
designed to last for several years of normal use,
but may be refreshed after a thorough cleaning
or extended use.
Glen Raven recommends 303 High Tech Fabric
Guard as the preferred re-treatment product
™
for Sunbrella fabrics.
Applying 303 High Tech
Fabric Guard™
303 should be applied to Sunbrella fabrics
after each thorough cleaning, which typically
removes the original finish and reduces the
fabric’s water repellency.
• Clean Sunbrella fabric, using one
of the cleaning methods.
• Allow Sunbrella to completely air dry.
• Apply 303 Fabric Guard in a well-ventilated
area following instructions on the container.
• Apply 303 in a thin, even coat and
allow fabric to dry completely.
• Apply a second thin, even coating
of 303. Two light coatings are more
eective in restoring fabric water
resistance than a single heavy coating.
• A 15-ounce bottle provides coverage
of up to 50 square feet of fabric.
For more information,
visit www.303products.com.
Professional cleaners
In evaluating the services of a professional firm,
you should inquire about the firm’s experience in
working with Sunbrella fabricsand knowledge of
cleaning and re-treatment requirements.
DO NOT dry clean Sunbrella fabrics.
Helpful hints
Protect the area around your Sunbrella fabric when
using a bleach solution – bleach may discolor non-
Sunbrella fabrics. Always rinse Sunbrella thoroughly
to completely remove bleach.
Sunbrella fabric air-dries very quickly.
Machine drying is not necessary.
If fabric has some wrinkling, use an iron, if
necessary, but only on the synthetic* setting.
As some irons exceed the recommended
100° F/38°C temperature on the synthetic
setting, test a small inconspicuous area before
ironing entire piece.
DO NOT use a steamer or iron set to steam setting.
*Synthetic fabric heat settings normally do not exceed 150°F/66°C.
• This warranty protects the original
purchaser of Sunbrella fabric.
• This warranty protects against Sunbrella
fabric becoming unserviceable due to
color or strength loss from normal usage
and exposure conditions, including
sunlight, mildew, and atmospheric chemicals.
• This warranty covers Sunbrella fabric only.
• This warranty does not cover normal care
and cleaning; damage from misuse, or abuse,
improper installation, or costs associated with
replacement of the fabric, including labor
and installation.
• Glen Raven’s liability is expressly limited to
this warranty. Glen Raven reserves the right
to inspect the fabric submitted for the claim.
• Glen Raven will supply new equivalent fabric
to replace the fabric that becomes
unserviceable.
• Sunbrella is normally a component of an end
product such as an awning, umbrella, or cushion.
Consumers and end-users should contact the
fabricator, dealer, or retailer from whom you
purchased the end product.
•
the original purchase date.
FABRIC WARRANTY
Glen Raven Custom Fabrics, LLC
1831 North Park Avenue, Glen Raven, NC 27217 USA
t. 336.221.2211 / f. 336.586.1169
www.sunbrella.com
SUNBRELLA IS A REGISTERED TRADEMARK OF GLEN RAVEN, INC.
®
9|9

Other Woodline Outdoor Furnishing manuals

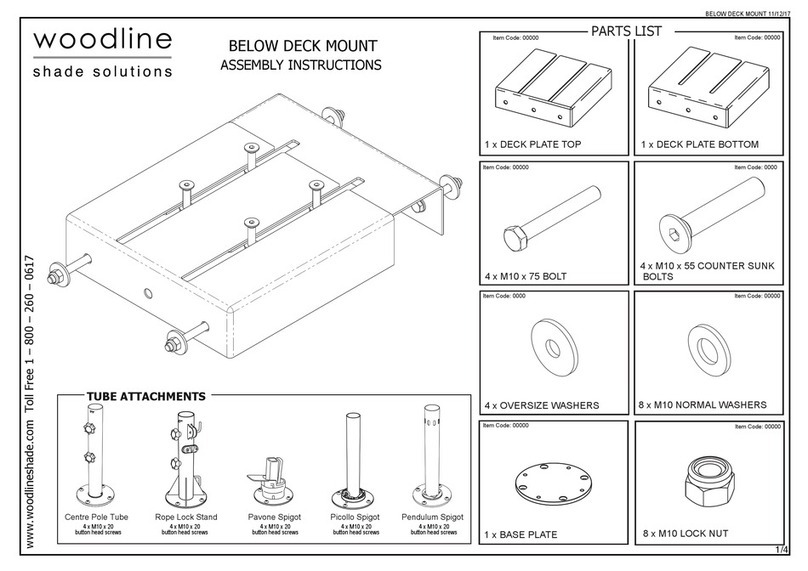
Woodline BELOW DECK MOUNT User manual

Woodline

Woodline BELOW DECK MOUNT User manual

Woodline Shade Solutions Papillon User manual

Woodline

Woodline Shade Solutions Papillon User manual

Popular Outdoor Furnishing manuals by other brands

modway EEI-2252 quick start guide

modway

modway EEI-2252 quick start guide

Premium Poly Patios Luxcraft / Crestville Plain 5 ft. Poly... quick start guide

Premium Poly Patios

Premium Poly Patios Luxcraft / Crestville Plain 5 ft. Poly... quick start guide

Sunjoy L-GG067PST Assembly instructions

Sunjoy

Sunjoy L-GG067PST Assembly instructions

Hanover NAPDNS7PC-GRY Assembly instructions

Hanover

Hanover NAPDNS7PC-GRY Assembly instructions

domi LGMF1559 Assembly manual

domi

domi LGMF1559 Assembly manual

TREX TXL1D81 Assembly instructions

TREX

TREX TXL1D81 Assembly instructions

Polywood 4601LAFX Assembly instructions

Polywood

Polywood 4601LAFX Assembly instructions

New England Arbors ups Bordeaux Assembly guide

New England Arbors

New England Arbors ups Bordeaux Assembly guide

Forever Redwood THE THICK TIMBER TOLEDO WOOD PAVILION Assembly instructions

Forever Redwood

Forever Redwood THE THICK TIMBER TOLEDO WOOD PAVILION Assembly instructions

Crivit 291788 Instructions for use

Crivit

Crivit 291788 Instructions for use

Hay Palissade series instruction manual

Hay

Hay Palissade series instruction manual

Essential Garden UCG-KSN#09360100-3 Use and care guide

Essential Garden

Essential Garden UCG-KSN#09360100-3 Use and care guide

Costco A102010700 manual

Costco

Costco A102010700 manual

U-Line H-5181 Installation

U-Line

U-Line H-5181 Installation

Party Warehouse Peg & Pole 10m x 15m Setup instructions

Party Warehouse

Party Warehouse Peg & Pole 10m x 15m Setup instructions

Uberhaus Sunshelter Moderna Assembly instructions

Uberhaus

Uberhaus Sunshelter Moderna Assembly instructions

PARK WAREHOUSE 488be105-2 quick start guide

PARK WAREHOUSE

PARK WAREHOUSE 488be105-2 quick start guide

Garden Treasures GSS00133B manual

Garden Treasures

Garden Treasures GSS00133B manual

manuals.online logo
manuals.online logoBrands
  • About & Mission
  • Contact us
  • Privacy Policy
  • Terms and Conditions

Copyright 2025 Manuals.Online. All Rights Reserved.