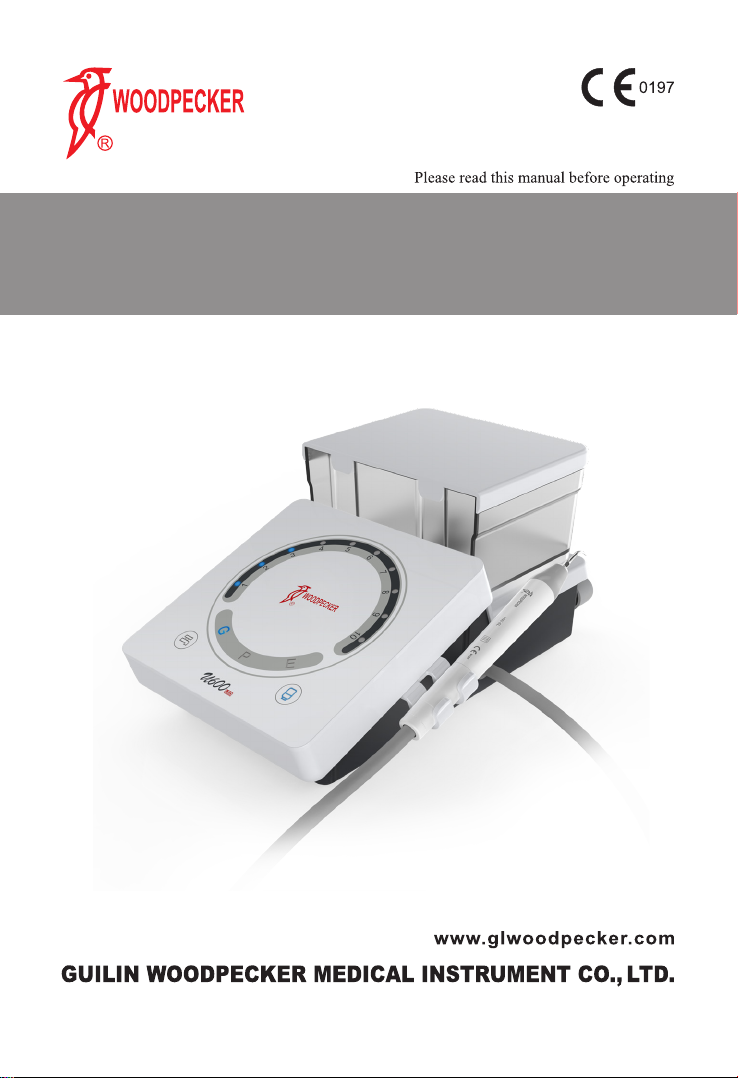
Woodpecker U600 LED User manual

U600 LED ULTRASONIC SCALER
INSTRUCTION MANUAL

Contents
1. The installation and components of equipment .................................................1
2. Installation and adjustment ................................................................................3
3. Maintenance.......................................................................................................4
4. Cleaning, Disinfection and Sterilization ...........................................................8
5. Precaution ........................................................................................................14
6. After service.....................................................................................................16
7. Symbol instruction...........................................................................................16
8. Environmental protection.................................................................................16
9. Manufacturer’s right ........................................................................................17
10. European authorized representative...............................................................17
11. EMC - Declaration of conformity..................................................................17
12. Statement........................................................................................................20
TABLE OF OPERATING POWER OF THE TIPS.............................................21

1
1. The installation and components of equipment
1.1 Instruction
Guilin Woodpecker Medical Instrument Co., Ltd. is a professional
manufacturer in researching, developing and producing ultrasonic scalers. The
product is mainly used for teeth cleaning and also an indisensable equipment for
teeth disease prevention and treatment.
The ultrasonic scaler U600 LED has scaling, perio, endo and auto-water
supply functions with the following features:
1.1.1 The handpiece is detachable and can be autoclaved to high temperature
134°C and high pressure 0.22Mpa.
1.1.2 Automatic frequency tracking ensures that the machine always works on
the best frequency and more steadily.
1.1.3 Digital control, easy operation and more ecient for scaling.
1.2 Components
1.2.1 The components of machine are listed in the packing list.
1.2.2 Product performance and structural composition
Ultrasonic scaler U600 LED is composed of electrocircuit, water way and
ultrasonic transducer.
1.2.3 Scope of application
Ultrasonic scaler U600 LED is used for the dental calculus elimination and
root canal treatment.
1.3 The main technical specications
1.3.1 Technical specications of ultrasonic scaler
a) Main unit input: 220-240V~ 50Hz/60Hz 150mA
b) Output primary tip vibration excursion: ≤90μm
c) Output half-excursion force: <2N
d) Output tip vibration frequency: 28kHz±3kHz
e) Output power: 3W to 20W
f) Main unit fuse: T0.5AL 250V
g) Water pressure: 0.01MPa to 0.5MPa
h) Weight of main unit: 1.8kg
i) Operating mode: Continuous operation
j) Type of protection against electric shock: class II equipment
k) Degree of protection against electric shock: Type BF applied part
l) Applied part of the equipment: handpiece and tip
m) Degree of protection against harmful ingress of water: Ordinary
equipment, the foot switch is drip-proof equipment (IPX1)
n) Degree of safety of application in the presence of a Flammable Anesthetic
Mixture with air, Oxygen or Nitrous Oxide: Equipment not suitable for being used

2
in the presence of a ammable anesthetic mixture with air, oxygen or nitrous oxide.
1.4 Instruction of the main components
Instruction and component sketch map
1.4.1 Front of the main unit sketch map
Picture 1
1.4.2 Back of the main unit sketch map
Picture 2
1.4.3 Instruction of using wrench

3
Picture 3
Picture 4
2. Installation and adjustment
2.1 Operation
2.1.1 Open the packing box, make sure that all the parts and accessories are
complete according to the packing list, take the main unit out of the box, and put
it on the the stable plane facing to the operator.
2.1.2 Turn the water control knob to the max according to the picture 1

4
direction, Do not screw it over tight in case of damage. [ note 1]
2.1.3 Insert the plug of the foot switch to its socket. (see picture 2)
2.1.4 Connect one end of the water pipe to the water entrance, and the other
end to the clean water sourse. (see picture 2)
2.1.5 Choose the scaling tip according to the requirement, and x the scaling
tip with the wrench. ( see picture 4)
2.1.6 Turn on the power switch, the power indicator lighted and the machine
is ready for work. Touch panel is applied to this machine, water supply mode or
power can be adjusted by directly touching the water supply mode identication
or power indicator on the touch panel.
2.1.7 Under normal working condition, the frequency of the tips is very high,
light touch and a certain to-and-fro motion will eliminate the tartar without
obvious heating, overexetion and overatay are forbidden.
2.1.8 Vibrating intensity: Adjust the vibrating intensity according to your
need, usually adjust to the middle grade, and adjust the vibrating during the
clinical treatment according to the patient's sensitivity and the rigidity of the
tartar.
2.1.9 Step on the foot switch, the tip begins to vibrate, and the LED lamp
on the top of the handpiece shines. Release the foot switch, the LED lamp keep
shining for 10 seconds.
2.1.10 Water volume adjustment: Step on the foot switch, and the tip begins
to vibrate, then turn the water control switch to fine spray to cool down the
handpiece and clean the teeth.
2.1.11 The handpiece can be handled in the same gesture as a pen in hand.
2.1.12 Be sure not to make the end of the tip touch the teeth vertically, and not
use too much pressure when the tip touch the surface of the teeth, in order not to
hurt the teeth and the tip.
2.1.13 After finishing operation, keep the machine working for 30 seconds
with the water supply to clean the handpiece and the tip.
2.1.14 Unscrew the scaling tip and sterilize it.
Note: Don't screw the scaling tips when stepping on the foot switch, and
the machine is working.
3. Maintenance
3.1 Troubleshooting

5
Fault Possible cause Solutions
The scaling tip doesn't
vibrate and there is no
water owing out when
stepping on the foot
switch.
The power plug is in loose
contact.
Make the plug insert to
the socket well.
The foot switch is in loose
contact.
Insert the foot switch to
its socket tightly.
The fuse in the main unit is
broken. Contact our dealers or us.
The scaling tip doesn't
vibrate but there is
water owing out when
stepping on the switch.
The tip is in loose contact.
Screw the tip on the
handpiece tightly (See
Picture 6).
The connect plug between
the handpiece and the circuit
board is in loose contact.
Contact our dealers or us.
Something wrong with the
handpiece.
Send the handpiece to our
company to repair.
Something wrong with the
cable. Contact our dealers or us.
The scaling tip vibrates
but there is no spray
when stepping on the
foot switch.
The water control knob is
not on.
Turn on the water contrl
knob [note 1].
The vibration of the tip
becomes weak.
The tip hasn't been screwed
on to the handpiece tightly.
Screw the tip on the
handpiece tightly (See
Picture 4).
The tip is loose because of
vibration.
Screw on the tip tightly
(See Picture 4).
The coupling between the
handpiece and the cable isn't
dry.
Dry it by the hot air.
The tip is damaged [note 2]. Change a new one.
There is water seeping
from the coupling
between the handpiece
and cable.
The waterproof "O"ring is
damaged.
Change a new waterproof
"O"ring.

6
Fault Possible cause Solutions
There is water flow
out when turn off the
power.
There is impurity in the
solenoid valve.
Contact with the
local distributor or
manufacturer.
The handpiece
generates heat.
The amount of spouting
water is too little.
Turn the water control
switch to a higher grade
[note 1].
The potentiometer is broken. Change a new one.
The amount of spouting
water is too little.
The water control knob is a
low grade.
Turn the knob to a high
grade [note 1].
The water pressure is not
enough.
Enhance the water
pressure.
The water pipe is jammed.
Clean water pipe with
multi-function syringe
[note2].
The u-file doesn't
vibrate.
The screw is loose. Tighten it.
Endochuck is damaged. Change a new one.
There is noise coming
from the endochuck. The screw is loose. Tighten it.
LED light don't work
Poor contact Contact tightly
Something wrong with LED
light Change a new one
There is no water
coming out from the
handpiece (automatic
water supply mode).
There is air in the water
pipe.
Turn the water control
to the Max, reinsert the
bottle.
If the problem still can't be solved, please contact local dealer or manufacturer.
3.2 Notice
[Note 1] The water control knob can adjust the water volume according to the
symbol.
[Note 2] To clean the water pipe with the multi-function syringe of the dental
unit ( see picture 5):

7
picture 5
a) Snip the water pipe at a distance of 10cm to 20cm from the water entrance.
b) Turn on the power switch, get through to the power.
c) Connect the multi-function syringe of the dental unit to the water pipe.
d) Screw o the scaling tip or pull out the handpiece.
e) Step on the foot switch.
f) Turn on the switch of the multi-function syringe, press the air or water into
the water pipe to clean and eliminate the impurity.
[Note 3 ] If the scaling tip has been screwed on tightly and there is ne spray
too, the following phenomena show that the scaling tip is damaged:
a) The vibrating intensity and the pulverization degree become weak
obviously.
b) During operating, there is some buzz when the scaling tip is working.
3.3 Cleaning mode
The liquid pipeline of the machine must be rinsed after each use of the clinical
liquid to reduce the crystal accumulation and the bacteria in the liquid pipe.
Operation
1.Put distilled water or mineral substance into water tank.
2.Press the automatically water supply button and outside water button at the
same time (1s) to start the “Cleaning mode” after buzzer beeps. The button of
automatic water supply mode would ashes and others buttons will go out.
3.Link the connector and the handpiece with the drainage device.
4.Step the pedal, the device would start self-cleaning. After that the pedal
could be loosen.
5.After cleaning for 30s, the device would stop self-cleaning. Or u can stop by
step the pedal again or press the automatic water supply button.
6.After cleaning, press the automatically water supply button and outside
water button at the same time (1s) to exit the “Cleaning mode” after buzzer
beeps.

8
4. Cleaning, Disinfection and Sterilization
The cleaning, disinfection and sterilization of handpiece, tip, and
wrench (include torque wrench and Endo wrench) are as follow.
Unless otherwise stated, they will be hereinafter referred to as
“products”.
Warnings
The use of strong detergent and disinfectant (alkaline pH>9 or acid
pH <5) will reduce the life span of products. And in such cases, the
manufacturer takes no responsibility.
Do not clean the handpiece with ultrasound cleaning machine.
This device shall not be exposed to high temperature above 138℃.
Processing limit
The products have been designed for a large number of sterilization
cycles. The materials used in manufacture were selected accordingly.
However with every renewed preparation for use, thermal and chemical
stresses will result in ageing of the products. The maximum number of
sterilizations for handpiece is 600 times. For tips, it is 300 times. And for
wrench, it is 1000 times.
4.1 Initial processing
4.1.1 Processing principles
It is only possible to carry out effective sterilization after the
completion of eective cleaning and disinfection. Please ensure that, as
part of your responsibility for the sterility of products during use, only
sufficiently validated equipment and product-specific procedures are
used for cleaning/disinfection and sterilization, and that the validated
parameters are adhered to during every cycle.
Please also observe the applicable legal requirements in your country
as well as the hygiene regulations of the hospital or clinic,especially with
regard to the additional requirements for the inactivation of prions.
4.1.2 Post-operative treatment
The post-operative treatment must be carried out immediately, no
later than 30 minutes after the completion of the operation. The steps are
as follows:
1. Let the Ultrasonic scaler works for 20-30 seconds under irrigation
mode to ush the handpiece and tip;
2. Remove the handpiece from the Ultrasonic scaler, and rinse away
the dirt on the surface of product with pure water (or distilled water/
deionized water);

9
3. Dry the product with a clean, soft cloth and place it in a clean tray.
Notes
a) The water used here must be pure water, distilled water or
deionized water.
4.2 Preparation before cleaning
Steps
Tools: Torque wrench, tray, soft brush, clean and dry soft cloth.
1. Remove the tip from product with torque wrench provided by
Guilin Woodpecker Medical Instrument Co., Ltd, and then put the tip and
wrench into a clean tray.
2. Unscrew the nipple of product counterclockwise, remove the
sealing ring, light pipe, and LED lamp(if any), and put them in the tray.
3. Use a clean soft brush to carefully brush the joints between product
and the connector of cable, front thread, horn, nipple, seal ring, light pipe
and LED lamp(if any) until the dirt on surface is not visible. Then use
soft cloth to dry the product and accessories and put them into a clean
tray. The cleaning agent can be pure water, distilled water or deionized
water.
Disassembling steps
4.3 Cleaning
The cleaning should be performed no later than 24 hours after the
operation.
The cleaning can be divided into automated cleaning and manual
cleaning. Automated cleaning is preferred if conditions permit.
4.3.1 Automated cleaning
•The cleaner is proved to be valid by CE certication in accordance
with EN ISO 15883.
•There should be a ushing connector connected to the inner cavity
of the product.
•The cleaning procedure is suitable for the product, and the irrigating
period is sucient.
•Do not clean the handpiece with ultrasound.

10
It is recommended to use a washer-disinfector in accordance with
EN ISO 15883. For the specic procedure, please refer to the automated
disinfection section in the next section “Disinfection”.
Notes
a) The cleaning agent does not have to be pure water. It can be
distilled water, deionized water or multi-enzyme. But please ensure that
the selected cleaning agent is compatible with the product.
b) In washing stage, the water temperature should not exceed 45 °C,
otherwise the protein will solidify and it would be dicult to remove.
c) After cleaning, the chemical residue should be less than 10mg / L.
4.4 Disinfection
Disinfection must be performed no later than 2 hours after the
cleaning phase. Automated disinfection is preferred if conditions permit.
4.4.1 Automated disinfection-Washer-disinfector
•The washer-disinfector is proved to be valid by CE certication in
accordance with EN ISO 15883.
•Use high temperature disinfection function. The temperature does
not exceed 134 ° C, and the disinfection under the temperature cannot
exceed 20 minutes.
•The disinfection cycle is in accordance with the disinfection cycle in
EN ISO 15883.
Cleaning and disinfecting steps by using Washer-disinfector
1. Carefully place the product into the disinfection basket. Fixation of
product is needed only when the product is removable in the device. The
products are not allowed to contact each other.
2. Use a suitable rinsing adaptor, and connect the internal water lines
to the rinsing connection of the washer-disinfector.
3. Start the program.
4. After the program is nished, remove the product from the washer-
disinfector, inspect (refer to section “Inspection and Maintenance”) and
packaging (refer to chapter “Packaging”). Dry the product repeatedly if
necessary (refer to section “Drying”).
Notes
a) Before use, you must carefully read the operating instructions
provided by the equipment manufacturer to familiarize yourself with the
disinfection process and precautions.
b) With this equipment, cleaning, disinfection and drying will be
carried out together.

11
c) Cleaning: (c1) The cleaning procedure should be suitable for the
product to be treated. The flushing period should be sufficient (5-10
minutes). Pre-wash for 3 minutes, wash for another 5 minutes, and rinse
it for twice with each rinse lasting for 1 minute. (c2) In the washing
stage, the water temperature should not exceed 45 °C, otherwise the
protein will solidify and it is dicult to remove. (c3) The solution used
can be pure water, distilled water, deionized water or multi-enzyme
solution, etc., and only freshly prepared solutions can be used. (c4)
During the use of cleaner, the concentration and time provided by
manufacturer shall be obeyed. The used cleaner is neodisher MediZym
(Dr. Weigert).
d) Disinfection: (d1) Direct use after disinfection: temperature ≥ 90 °
C, time ≥ 5 min or A0 ≥ 3000.
(d2)Sterilize it after disinfection and use: temperature ≥ 90 ° C, time
≥ 1 min or A0 ≥ 600.
(d3) For the disinfection here, the temperature is 93 ° C, the time is 2.5
min, and A0>3000.
e) Only distilled or deionized water with a small amount of
microorganisms (<10 cfu/ml) can be used for all rinsing steps.
(For example, pure water that is in accordance with the European
Pharmacopoeia or the United States Pharmacopoeia).
f) After cleaning, the chemical residue should be less than 10mg / L.
g)The air used for drying must be ltered by HEPA.
h) Regularly repair and inspect the disinfector.
4.5 Drying
If your cleaning and disinfection process does not have an automatic
drying function, dry it after cleaning and disinfection.
Methods
1. Spread a clean white paper (white cloth) on the at table, point the
product against the white paper (white cloth), and then dry the product
with filtered dry compressed air (maximum pressure 3 bar). Until no
liquid is sprayed onto the white paper (white cloth), the product drying is
completed.
2. It can also be dried directly in a medical drying cabinet (or oven).
The recommended drying temperature is 80℃~120℃ and the time
should be 15~40 minutes.
Notes
a) The drying of product must be performed in a clean place.

12
b) The drying temperature should not exceed 138 °C;
c) The equipment used should be inspected and maintained regularly.
4.6 Inspection and maintenance
In this chapter, we only check the appearance of the product. After
inspection, if there is no problem, the handpiece should be immediately
reassembled, installing the sealing ring, LED, light guide, and cone head
in sequence to the handpiece, and then tighten the cone head clockwise.
4.6.1 Check the product. If there is still visible stain on the product
after cleaning/disinfection, the entire cleaning/disinfection process must
be repeated.
4.6.2 Check the product. If it is obviously damaged, smashed,
detached, corroded or bent, it must be scrapped and not allowed to
continue to be used.
4.6.3 Check the product. If the accessories are found to be damaged,
please replace it before use. And the new accessories for replacement
must be cleaned, disinfected and dried.
4.6.4 If the service time (number of times) of the product reaches the
specied service life (number of times), please replace it in time.
4.7 Packaging
Install the disinfected and dried product and quickly package it in a
medical sterilization bag (or special holder, sterile box).
Notes
a) The package used conforms to ISO 11607;
b) It can withstand high temperature of 138 °C and has sufficient
steam permeability;
c) The packaging environment and related tools must be cleaned
regularly to ensure cleanliness and prevent the introduction of
contaminants;
d) Avoid contact with parts of dierent metals when packaging.
4.8 Sterilization
Use only the following steam sterilization procedures (fractional pre-
vacuum procedure*) for sterilization, and other sterilization procedures
are prohibited:
• The steam sterilizer complies with EN13060 or is certified
according to EN 285 to comply with EN ISO 17665;
• The highest sterilization temperature is 138 ° C;
• The sterilization time is at least 4 minutes at a temperature of

13
132℃/134℃ and a pressure of 2.0 bar ~ 2.3 bars.
• Allow a maximum sterilization time of 20 minutes at 134 °C.
Verication of the fundamental suitability of the products for eective
steam sterilization was provided by a veried testing laboratory.
Notes
a) Only products that have been eectively cleaned and disinfected
are allowed to be sterilized;
b) Before using the sterilizer for sterilization, read the Instruction
Manual provided by the equipment manufacturer and follow the
instructions.
c) Do not use hot air sterilization and radiation sterilization as this
may result in damage to the product;
d) Please use the recommended sterilization procedures for
sterilization. It is not recommended to sterilize with other sterilization
procedures such as ethylene oxide, formaldehyde and low temperature
plasma sterilization. The manufacturer assumes no responsibility for the
procedures that have not been recommended. If you use the sterilization
procedures that have not been recommended, please adhere to related
eective standards and verify the suitability and eectiveness.
* Fractional pre-vacuum procedure = steam sterilization with
repetitive pre-vacuum. The procedure used here is to perform steam
sterilization through three pre-vacuums.
4.9 Storage
1 Store in a clean, dry, ventilated, non-corrosive atmosphere with a
relative humidity of 10% to 93%, an atmospheric pressure of 70KPa to
106KPa, and a temperature of -20 °C to +55 °C;
2 After sterilization,the product should be packaged in a medical
sterilization bag or a clean sealing container, and stored in a special
storage cabinet. The storage time should not exceed 7 days. If it is
exceeded, it should be reprocessed before use.
Notes:
a) The storage environment should be clean and must be disinfected
regularly;
b) Product storage must be batched and marked and recorded.
4.10 Transportation
1. Prevent excessive shock and vibration during transportation, and
handle with care;

14
2. It should not be mixed with dangerous goods during transportation.
3. Avoid exposure to sun or rain or snow during transportation.
The cleaning and disinfection of main unit are as follows.
• Before each use, wipe the surface of the connector of cable and
cable with a soft cloth or paper towel soaked in 75% medical alcohol.
Repeat the wipe for at least 3 times.
• Before each use, please let the Ultrasonic scaler work under
irrigation mode for 20-30s, then install the handpiece.
• After each use, please let the Ultrasonic scaler work under irrigation
mode for 20-30s, then remove the handpiece.
• After each use, wipe the surface of the connector of cable and cable
with a soft cloth soaked in clean water (distilled or deionized water) or a
clean disposable wipe. Repeat the wipe for at least 3 times.
5. Precaution
5.1 usage notice
5.1.1 Keep the scaler clean before and after operation.
5.1.2 The scaling tip, wrench and handpiece must be sterilized before each
treatment.
5.1.3 Don't screw the scaling tip when stepping on the foot switch.
5.1.4 The scaling tip must be fastened. There must be ne spray coming out
from the tip when operating.
5.1.5 Change a new one when the tip is damaged or worn excessively.
5.1.6 Don't twist or rub the tip.
5.1.7 While scaler working, the heat of scaling tip will become higher if there
is no water owing out, please keep the water ow smoothly.
5.1.8 Don't use impure water source, and be sure not to use normal brine
instead of pure water source.
5.1.9 If use the water source without hydraulic pressure, the water surface
should be one meter higher than the head of the patient.
5.1.10 Don't knock or rub the handpiece.
5.1.11 After each clinical operation with clinical liquid, change a bottle with
puried water, turn the water supply to max, make the machine work with auto-
water supply for 30 seconds in order to keep the water way and spare parts clean
and durable.
5.1.12 Please put the power plug into the socket easy to pull out, to make sure
it can be pull out in emergency.
5.1.13 When using the equipment, please keep the water get through
smoothly, otherwise patient's tooth surface would be injured by overheat in the
handpiece.

15
5.1.14 After operating, turn off power source supply, and then pull out the
plug.
5.1.15 As a professional manufacturer of medical instruments, we are only
responsible for the safety on the following conditions:
Ⅰ.The maintenance, repair and modication are made by the manufacturer
or the authorized dealer.
Ⅱ. The changed components are original of "WOODPECKER" and operated
correctly according to instruction manual.
5.1.16 The screw thread of the scaling tips produced by other manufacturers
maybe coarse, rusty and collapsed, which will damage the screw thread of the
handpiece irretrievably. Please use "WOODPECKER" brand scaling tip.
5.1.17 Please select a suitable power when using dierent type of tips (refer to
"TABLE OF OPERATING POWER OF THE TIPS").
5.2 Contraindication
5.2.1 The patient who has hemophilia is not allowed to use this equipment.
5.2.2 The patient or doctor who equips with heart pacemaker is forbidden to
use this equipment.
5.2.3 The heart disease patient, pregnant woman and children should be
cautious to use the equipment.
5.3 Storage and maintenance
5.3.1 The equipment should be handled carefully and lightly. Be sure that it is
far from the vibration, and is installed or kept in a cool, dry and ventilated place.
5.3.2 Don't store the machine together with the articles that are combustible
poisonous, caustic, or explosive.
5.3.3 This equipment should be stored in a room where the relative humidity
is 10% ~ 93%, atmospheric pressure is 70kPa to106kPa, and the temperature is
-20°C ~ +55°C.
5.3.4 Please turn o the power switch and pull out the power plug when the
equipment is not used. If the machine is not used for a long time, please make it
get through to the power and water once per month for ve minutes.
5.4 Transportation
5.4.1 Excessive impact and shake should be prevented in transportation. Lay
it carefully and lightly and don't invert it.
5.4.2 Don't put it together with dangerous goods during transportation.
5.4.3 Avoid solarization and getting wet in rain or snow during transportation.
5.5 Working condition
5.5.1 Environment temperature: +5°C to +40°C
5.5.2 Relative humidity: 30% ~75%
5.5.3 Atmosphere pressure: 70kPa to 106kPa
5.5.4 A temperature of the water at the inlet: not higher than +25°C

16
6. After service
We oer one year free repair to the equipment according to the warranty card.
The repair of the equipment should be carried out by professional technician.
We are not responsible for any irretrievable damage caused by the not
professional person.
7. Symbol instruction
Trademark Ordinary equipment
Alternating current Drip-proof
Date of manufacture Manufacturer
Class II equipment Type BF applied part
Foot switch interface Used indoor only
Adjustment for the water
ow
Sterilizable up to the
temperature specied
Mode of outside-water
system Mode of auto-water system
Water entrance pressure Follow Instructions for Use
CE marked product Earth (ground)
Adjustment for the water ow,in Mode of auto-water system
Appliance compliance WEEE directive
Atmospheric pressure for storage
Temperature limitation for
storage
Humidity limitation for
storage
Authorised Representative in the EUROPEAN COMMUNITY
8. Environmental protection
Please dispose according to the local laws.

17
9. Manufacturer’s right
We reserve the rights to change the design of the equipment, the technique,
ttings, the instruction manual and the content of the original packing list at any
time without notice. If there are some differences between blueprint and real
equipment, take the real equipment as the norm.
10. European authorized representative
11. EMC - Declaration of conformity

18
Table of contents
Other Woodpecker Media Converter manuals