manuals.online logo
Brands
  1. Home
  2. •
  3. Brands
  4. •
  5. WorkPro
  6. •
  7. Indoor Furnishing
  8. •
  9. WorkPro Oceanic Installation guide

WorkPro Oceanic Installation guide

Item 2724332
version / versión 1121
Assembly instructions and warranty information
Instrucciones para el ensamblaje e información sobre la garantía
Date Manufactured / Fecha de fabricación:
____________
Lot # / Número de lote:
____________
Oceanic
MESH/Fabric
egronomic
high-back excutive chair
malla/tela
silla ejecutiva egronomica
con respaldo alto
SUPPORTS UP TO 275 LBS
SOPORTA HASTA 275 LBS
If you have any questions, please call 1-800-949-9974
Distributed by: Office Depot, LLC
6600 North Military Trail, Boca Raton, FL 33496 USA
WorkPro is a registered trademark of OMX, Inc.
© 2021 Office Depot, LLC. All Rights Reserved.
Made in USA with US and foreign components
AD
EFG
F
D
C
A
D
A
Parts / Par
Assembly Instructions / Instrucciones de armado:
Carefully unpack all parts, identify them with the parts list and read all instructions before assembly.
Desembale cuidadosamente todas las piezas, identifiquelas con la lista de piezas y lea todas las
instrucciones antes de armar la silla.
Step 1
Place the Star Base (A) upside down and insert 5
casters (C) into the holes located on the bottom of the
Star Base.
Paso 1
Coloque la base con forma de estrella (A) en posicion
invertida e inserte 5 ruedecillas (C) en los orificios de
la base.
Step 2
Turn the Star Base over and insert the Gas Lift (D)
through the center hole located on the top of the Star
Base (A).
Paso 2
De vuelta la base con forma de estrella e inserte el
tubo neumatico (D) en orificio central que se
encuentra en la parte superior de la base con forma
de estrella (A).
Star Base
Base con forma de estrella
Quantity/Cantidad: 1
Type B Back Screw
Tornillos de respaldo tipo B
Quantity/Cantidad: 3
16mm (M8 x 1.25)
Casters
Ruedecilla
Quantity/Cantidad: 5
Gas Lift
Tubo neumatico
Quantity/Cantidad: 1
Allen Wrench
Llave Allen
Quantity/Cantidad: 1
Seat Cushion with Mechanism
Almohadon del asiento con mecanismo
Quantity/Cantidad: 1
Assembled Back
Respaldo armado
Quantity/Cantidad: 1
Step 3
Put the pre-assembled Seat Cushion (F) unit over the Gas Lift (D). Align the
hole at the center of the Seat Plate with the top of the Gas Lift (D). Then press
down with even pressure until they are firmly secured.
Paso 3
Coloque el asiento (F) unido sobre el tubo neumatico (D). Alinee el agujero al
centro del placa del asiento con la punta del piston de gas (D). Presione
firmemente hacia abajo hasta que sa encuentren firmemente unidos.
Call Us First!
DO NOT RETURN TO STORE
For immediate help with assembly or production information
call our toll-free number. 1-800-949-9974
Mon-Fri 8am to 8pm EST
Our staff is ready to provide assisstance.
Damaged or missing parts from our facility in 1-2 business days
G
E
B
F
F
D
A
Step 4
Insert assembled back (G) into the seat mechanism (F) as shown. Tighten the Screws (B) with Allen
wrench (E).
Note that Screws (B) and Allen Wrench (E) can be found on the metal support component of the Back (G).
Paso 4
Inserte el respaldo armado (G) en el mecanismo del asiento (F) tal como se indica. Ajuste los
tornillos (B) con la Llave Allen (E).
Tenga en cuenta que los tornillos (B) y la Llave Allen (E) se pueden encontrar en el componente de soporte
metalico (G).
REMOVING SEAT PLATE FROM GAS LIFT:
Raise the chair to the highest level, then step on the Star Base (A).
Hold the handle and seat cushion (F) with two hands. Shake the
seat (F) to separate the Gas Lift (D).
COMO RETIRAR LA PLACA DEL ASIENTO
DEL TUBO NEUMATICO:
Levante la silla al nivel mas alto, luego pise la base (A), sujete el
apoyabrazos y el cojin del asiento (F) con las dos manos. Sacuda
el asiento (F) para separar el tubo neumatico (D).
D
A
REMOVING GAS LIFT FROM STAR BASE:
Hold the Star Base (A), and hit the bottom of the Gas Lift (D) with a hammer to separate the Gas Lift (D) from
the Star Base (A).
COMO QUITAR EL TUBO NEUMATICO DE LA BASE CON FORMA DE
ESTRELLA:
Tome la base de la silla (A) y golpee la parte inferior del tubo neumatico (D) con un martillo suave para
separar el tubo neumatico (D) de la base. Care and cleaning instructions for the fabric:
Wipe with a clean cloth dampened with a mild upholstery detergent solution.
A soft bristle may be used to remove ingrained soil.
Spot clean as above.
Treat spills and stains as soon as possible.
Persistent stains may require treatment by a professional cleaner.
May be cleaned with dry powder cleaners.
Allow to dry thoroughly before reuse.
Instrucciones de cuidado y limpieza de la tela:
Pase un pano limpio humedecido con una suave solucion de detergente para tapiceria.
Puede usar utensilios con cerdas suaves para quitar la suciedad incrustada.
Limpie minuciosamente como se menciona anteriormente.
Limpie los derrames y las manchas lo mas pronto posible.
Es posible que un limpiador professional deba tratar las manchas dificles de sacar.
Se puede limpiar con limiadores en polvo.
Deje secar completamente antes de su reutilizacion.
To Adjust Arm Height:
Locate the buttons on the chair arms. Press the buttons to allow the arms to move up or down freely, then release the buttons once
the desired height is reached.
Para ajustar la altura de los apoyabrazos:
Presione los botones de los apoyabrazos de la silla. Presione los botones para permitirle que se muevan los apoyabrazos
libremente despues libere los botones una vez que alcance la altura deseda.
To Adjust Arm Angle:
Hold armpad and pivot to the left and right as shown.
Para ajustar el angulo de los apoyabrazos:
Suejete la almohadilla del apoyabrazos y gire hacia la izquierda o hacia la derecha, tal como se indica.
Operating Instructions
Istrucciones de uso

Other WorkPro Indoor Furnishing manuals

WorkPro 12000 Series Installation guide

WorkPro

WorkPro 12000 Series Installation guide

WorkPro FLEX User manual

WorkPro

WorkPro FLEX User manual

WorkPro 410-868 User manual

WorkPro

WorkPro 410-868 User manual

WorkPro 6000 Series User manual

WorkPro

WorkPro 6000 Series User manual

WorkPro 3325882 User manual

WorkPro

WorkPro 3325882 User manual

WorkPro 1500 Series Installation guide

WorkPro

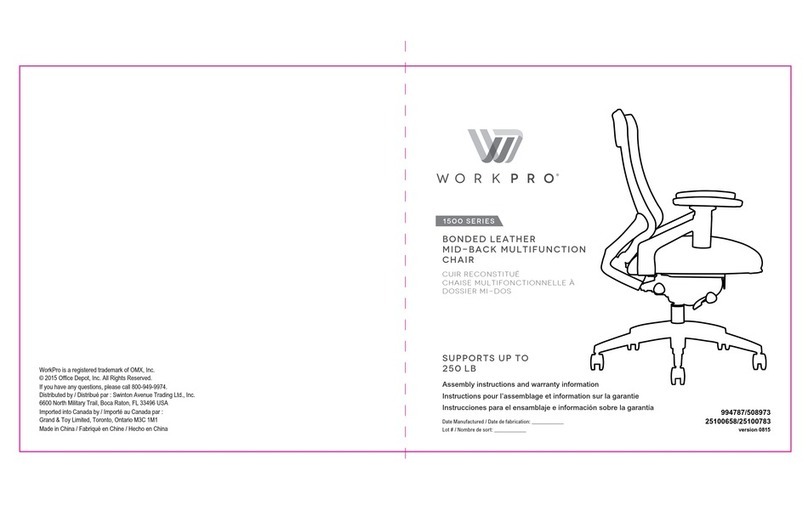
WorkPro 1500 Series Installation guide

WorkPro BELBROOK User manual

WorkPro

WorkPro BELBROOK User manual

WorkPro 9411027 Installation guide

WorkPro

WorkPro 9411027 Installation guide

WorkPro SENTRIX 9579648 User manual

WorkPro

WorkPro SENTRIX 9579648 User manual

Popular Indoor Furnishing manuals by other brands

Regency LWMS3015 Assembly instructions

Regency

Regency LWMS3015 Assembly instructions

Furniture of America CM7751C Assembly instructions

Furniture of America

Furniture of America CM7751C Assembly instructions

Safavieh Furniture Estella CNS5731 manual

Safavieh Furniture

Safavieh Furniture Estella CNS5731 manual

PLACES OF STYLE Ovalfuss Assembly instruction

PLACES OF STYLE

PLACES OF STYLE Ovalfuss Assembly instruction

Trasman 1138 Bo1 Assembly manual

Trasman

Trasman 1138 Bo1 Assembly manual

Costway JV10856 manual

Costway

Costway JV10856 manual

moss DESIGN Caisson Credenza Assembly instructions

moss DESIGN

moss DESIGN Caisson Credenza Assembly instructions

Aquaglide FULL DECK 15.0 owner's manual

Aquaglide

Aquaglide FULL DECK 15.0 owner's manual

AREBOS AR-HE-SW30 user manual

AREBOS

AREBOS AR-HE-SW30 user manual

Till-Hilft Fulda 87005.330 Assembly instructions

Till-Hilft

Till-Hilft Fulda 87005.330 Assembly instructions

Twoey Outside 2010 quick start guide

Twoey Outside

Twoey Outside 2010 quick start guide

Hettich Easys 200 operating instructions

Hettich

Hettich Easys 200 operating instructions

The bedboss RELAX 404 Series owner's manual

The bedboss

The bedboss RELAX 404 Series owner's manual

Oeseder Möbelindustrie Bern 991 720 Assembly instructions

Oeseder Möbelindustrie

Oeseder Möbelindustrie Bern 991 720 Assembly instructions

Costway HW68469 user manual

Costway

Costway HW68469 user manual

Next ALIX A27743 Assembly instructions

Next

Next ALIX A27743 Assembly instructions

BROSA Hans Assembly guide

BROSA

BROSA Hans Assembly guide

Prodigg MINIKA PBA015T-FUR installation manual

Prodigg

Prodigg MINIKA PBA015T-FUR installation manual

manuals.online logo
manuals.online logoBrands
  • About & Mission
  • Contact us
  • Privacy Policy
  • Terms and Conditions

Copyright 2025 Manuals.Online. All Rights Reserved.