Wow! Stuff! Attacknid Operating and maintenance manual

Images have been used for the purposes of illustrations only. 6+
Instructional Manual
For easy to follow instructions on assembling and battling
your Attacknid go to www.combatcreatures.com

Red Skin set
x 6 Vertical skins x 3 large horizontal skins
x 3 small horizontal skins
6 x Combat Armor set
20 x Foam
Dissector discs
(12 fit into the weapon)
1 x RC hand set
Requires 2 x AA batteries
(not included)
1 x Attacknid Cap
1 x Electronic
Weapons Elevator
Additional tools required
Cross Head screwdriver
1 x Battle
Brain
2 x Targets
1. 14.
www.combatcreatures.com
Contents
1 x Attacknid
Requires 4 x AA batteries (not included)
2200
DĂŶƵĨĂĐƚƵƌĞƌƐEĂŵĞ ŚŝŶĂ/ŶĚƵƐƚƌŝĞƐ>ƚĚdtŽǁ^ƚƵī
DĂŶƵĨĂĐƚƵƌĞƌƐĚĚƌĞƐƐ ƌĞĂƟǀĞ/ŶĚƵƐƚƌŝĞƐĞŶƚƌĞtŽůǀĞƌŚĂŵƉƚŽŶ^ĐŝĞŶĐĞWĂƌŬ
tŽůǀĞƌŚĂŵƉƚŽŶtsϭϬϵd'h<
dLJƉĞŽĨƋƵŝƉŵĞŶƚ ƩĂĐŬŶŝĚ
DŽĚĞůEƵŵďĞƌ ͲϭϬϬϭ
zĞĂƌŽĨDĂŶƵĨĂĐƚƵƌĞ ϮϬϭϮ
ƉƉůŝĐĂƟŽŶŽĨŽƵŶĐŝůŝƌĞĐƟǀĞ;ƐͿ ϭϵϵϵϱdŚĞZĂĚŝŽƋƵŝƉŵĞŶƚĂŶĚdĞůĞĐŽŵŵƵŶŝĐĂƟŽŶƐ
dĞƌŵŝŶĂůƋƵŝƉŵĞŶƚϮϬϬϬ;ĂŶĚŝƚƐĂŵĞŶĚŝŶŐĚŝƌĞĐƟǀĞƐͿ
^ƚĂŶĚĂƌĚ;ƐͿƚŽǁŚŝĐŚŽŶĨŽƌŵŝƚLJŝƐĚĞĐůĂƌĞĚ E62479Eϲ0950EϯϬϭϰϴϵͲϭϯEϯϬϬ44ϬͲϭͲϮ
/ŚĞƌĞďLJĚĞĐůĂƌĞƚŚĂƚƚŚĞĞƋƵŝƉŵĞŶƚŶĂŵĞĚĂďŽǀĞŚĂƐďĞĞŶƚĞƐƚĞĚĂŶĚĨŽƵŶĚƚŽĐŽŵƉůLJǁŝƚŚƚŚĞƌĞůĞǀĂŶƚƐĞĐƟŽŶƐ
ŽĨƚŚĞĂďŽǀĞƌĞĨĞƌĞŶĐĞĚƐƉĞĐŝĮĐĂƟŽŶƐdŚĞƵŶŝƚĐŽŵƉůŝĞƐǁŝƚŚĂůůĞƐƐĞŶƟĂůƌĞƋƵŝƌĞŵĞŶƚƐŽĨƚŚĞŝƌĞĐƟǀĞƐ
WůĂĐĞ tŽůǀĞƌŚĂŵƉƚŽŶh< 'ƌĂĞŵĞdĂLJůŽƌ
ĂƚĞ ϮϭƐƚ:ƵŶĞϮϬϭ3 ŝƌĞĐƚŽƌ
Made in China
Declaration of conformity
1 x Dissector
Bolt ‘N’ Battle
Attachment

Insert the Electronic
Weapons Elevator
1. Unpack the Attacknid from its
packaging. Slide in the Electronic
Weapons Elevator in to the top
part of the Attacknids body,
(see figure 1.) It should sit level with
the top surface of the Attacknid.
This enables the Weapons System
to be moved up and down using the
remote control handset.
RC hand set
Small Targets
Large Targets
2.
13. www.combatcreatures.com
Preparing for Battle
3. Position each of the vertical skins
on the uprights of the legs (there
are 6 in total).
These simply click and lock these
into position (see Figure 3).
3
2
1
Symptom Cause Solution
Attacknid will not sync with
the controller
1. Batteries are low
2. It is the wrong controller,
Attacknid only pairs with the
controller it comes with
1. Change batteries
2. Use original controller
1. Disc is jammed
2. Dissector Attachment is not
properly inserted
1. Remove all discs and
re-insert
2. Remove and re-attach your
weapon ensuring it is
locked in *
Weapon will not fire
1. You have the wrong battle
mode
1. Switch from ON to
Battle Mode
The Battle Brain in
not working
*Maximise Disc Firing Range!
There is considerable skill required to fire the discs long distances. The key is to time the press and release of the
fire button. To fire multiple discs keep the button pressed down. To fire single discs the maximum distance press the
fire button and release immediately after it has fired. This ensures the next disc can be fired a long distance.
Note that jamming of the weapon is more likely to occur when the fire button is released just as the disc is moving in
to the motor mechanism. This can be reduced by releasing fire button immediatly after a disc has fired.
1. It is not properly inserted 1. See this manual or website on
how to complete
Combat armor will not go on
Troubleshooting guide
Spare parts
Fore more detailed troubleshooting and to order spare parts go to
www.combatcreatures.co.uk.
Clipping on your Red skins
2. There are 6 horizontal skins
(one for each leg). 3 small and 3
larger skins.
The Larger skins go onto the larger
legs and the Smaller skins go onto
the smaller legs.
Horizontal skins simply click and lock
into place, (see figure 2.)
Red Skin set Combat Armor Foam discs

4. Preparing your Attacknid
for battle. Placing the Combat
Armor onto the legs.
Align the two bottom pins
on the armor with the two
bottom holes in each leg
(see Figure 4.)
Then firmly push the
bottom two pins into the
bottom of the leg, as the
armor is spring loaded.
6. When a direct hit occurs to the
Combat Armor then it pings off
(see figure 6.)
The aim is to remove all your
opponents armor!
For more information on Battle
Modes go to page 10.
5. They simply click and lock into
position (see Figure 5.)
3. 12.
www.combatcreatures.com
This device complies with Part 15 of the FCC Rules.
Operation is subject to the following two conditions:
(1) This device may not cause harmful interference, and
(2) This device must accept any interference received, including interference that may cause
undesired operation.
WARNING: Changes or modifications to this unit not expressly approved by the party
responsible for compliance could void the users authority to operate the equipment.
NOTE: This equipment has been tested and found to comply with the limits for a Class B
digital device, pursuant to Part 15 of the FCC Rules. These limits are designed to provided
reasonable protection against harmful interference in a residential installation. This
equipment generates, uses and can radiate radio frequency energy and, if not installed and
used in accordance with the instructions, may cause harmful interference to radio
communications. However, there is no guarantee that interference will not occur in a
particular installation. If this equipment does cause harmful interference to radio or
television reception, which can be determined by turning the equipment off and on, the user
is encouraged to try to correct the interference by one or more of the following measures:
·Reorient or relocate the receiving antenna.
·Increase the separation between the equipment and receiver.
·Connect the equipment into an outlet on a circuit different from that to which the receiver
is connected.
·Consult the dealer or an experienced radio/TV technician for help.
The manufacturer is not responsible for any radio or TV interference caused by unauthorized
modifications to this equipment. Such modifications could void the user’s authority to
operate the equipment.
Combat Armor
4
6
5

Please ensure that batteries
are installed by an adult.
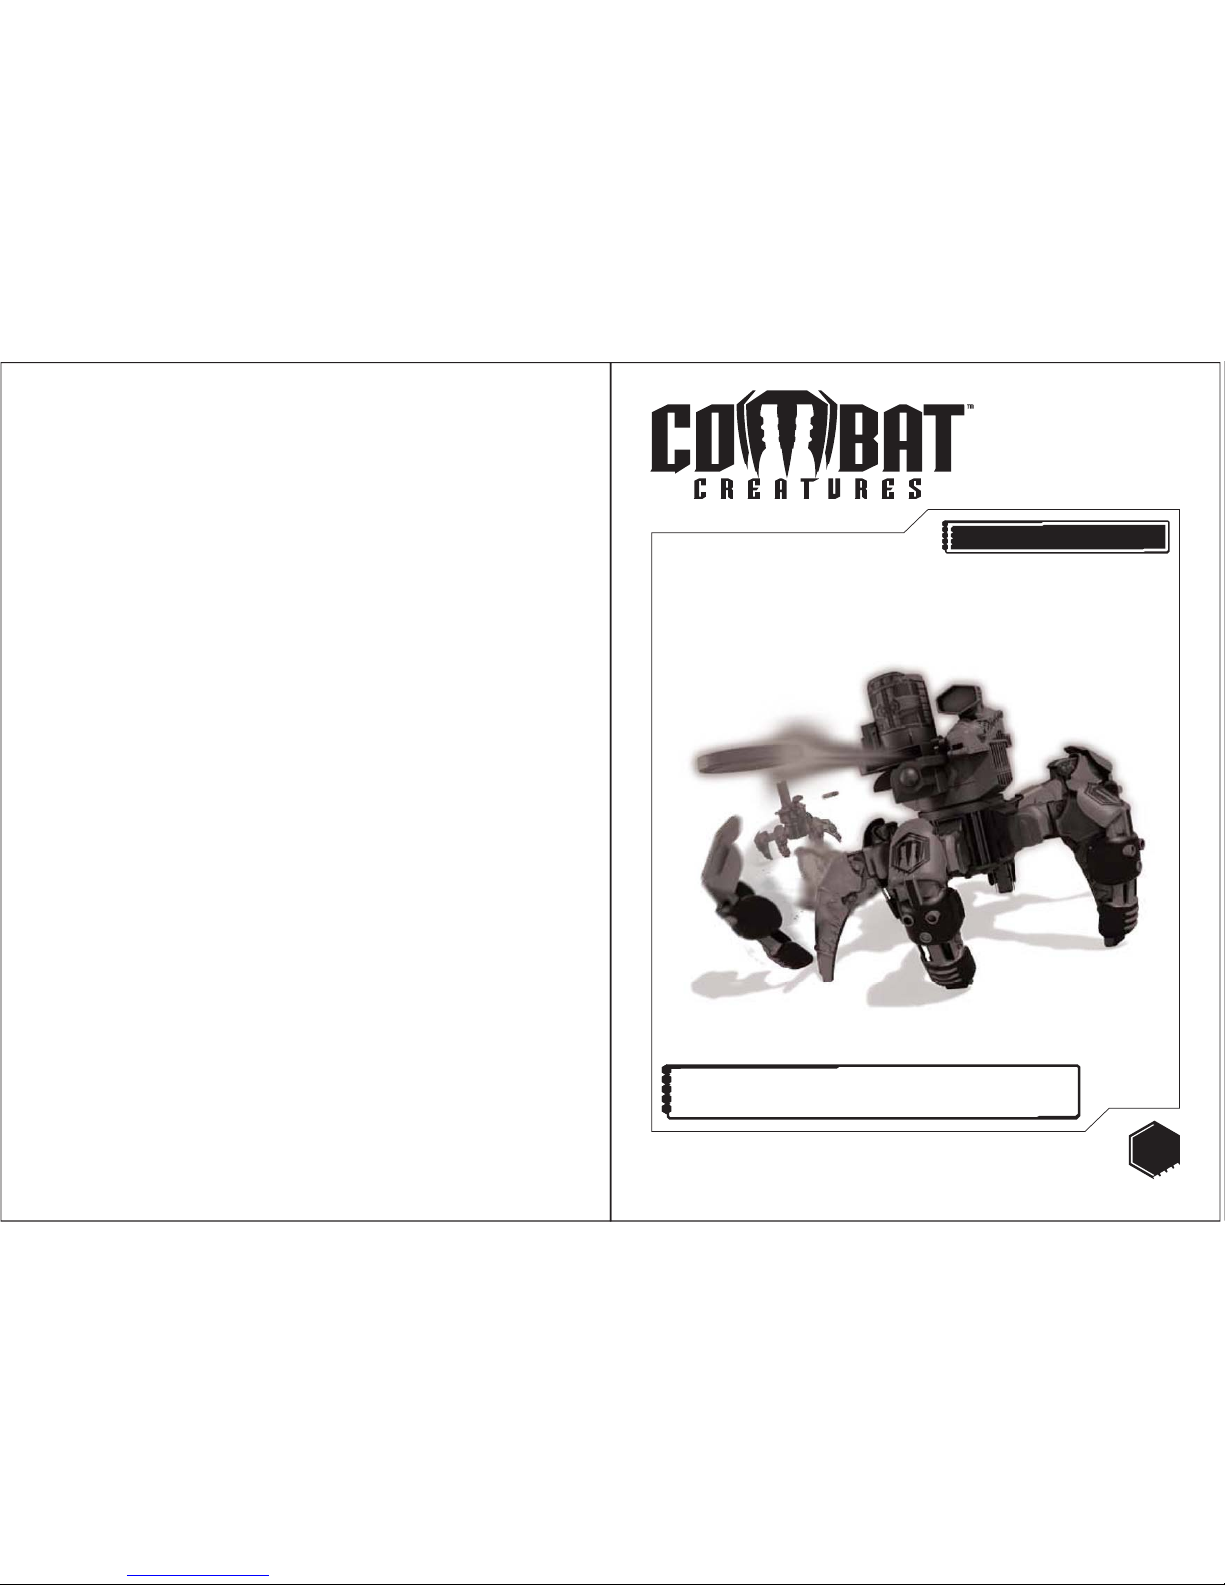
The Attacknid
The Attacknid requires
4 x AA batteries (not included.)
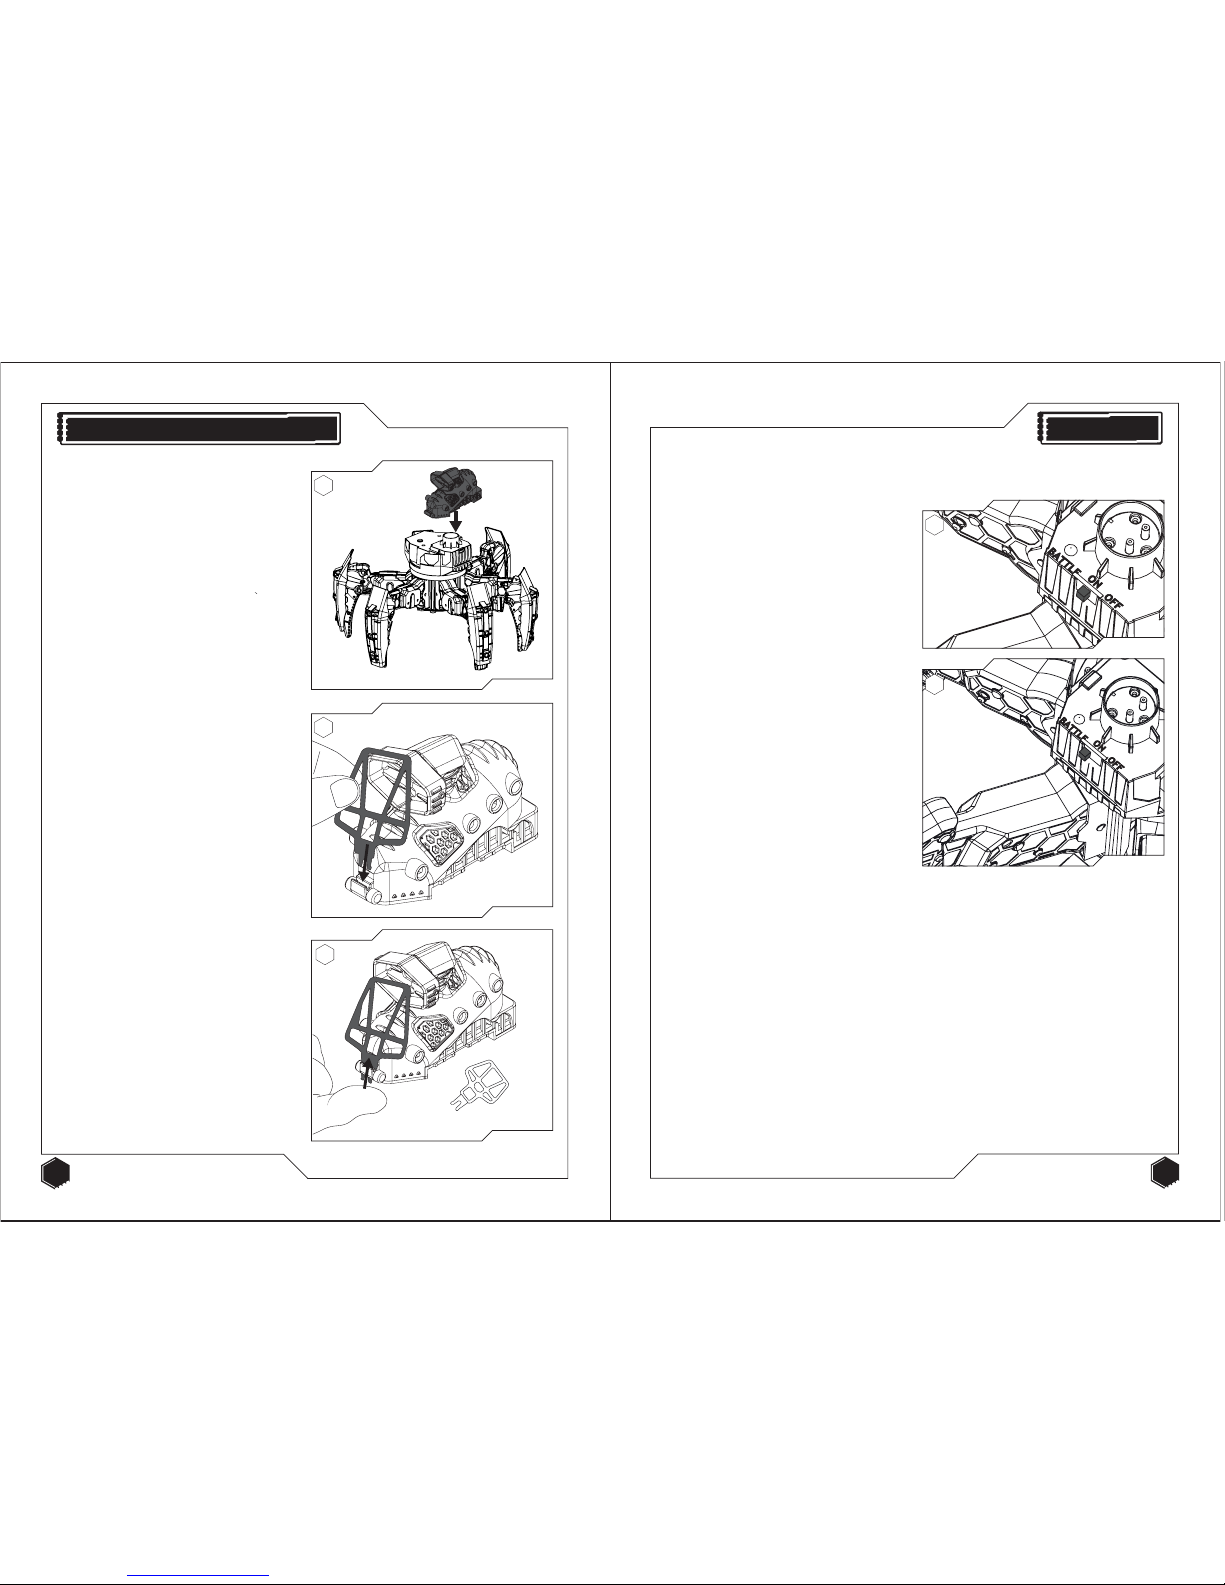
7. Unscrew the battery cover
using a cross head
screw driver (see figure 7.)
8. Remove the battery cover
by pulling from the right
hand edge, (see figure 8.)
Remote Control
The controller requires
2 x AA batteries (not included.)
10. Unscrew the battery
compartment using a cross
head screwdriver.
Insert the batteries
according to the polarity
shown (see figure 10.)
Screw the battery cover
back into place.
9. Insert the batteries
according to the polarity
shown (see figure 9.)
Screw the battery cover
back into place.
4.
11. www.combatcreatures.com
!
Not suitable for children under 3 years old due to small parts which may represent a choking
hazard. Recommended for use by children over 6 years old.
This product operates on 2.4ghz frequency.
Do not aim at eyes or face
Don’t use near crowds
Do not aim at people or animals
Only us missiles designed for this product
Do not attempt to catch the missiles
Do not put your face over the missile even if it is not being used
Do not launch any improvised object other than the one supplied or recommended by
the manufacturer.
Please retain this information for future reference. Adult supervision required.
Made in China.
Battery Information
• Rechargeable batteries are only to be charged under adult supervision;
• Rechargeable batteries are to be removed from the toy before being charged;
• Different types of batteries or new and used batteries are not to be mixed;
• Do not mix alkaline, standard (carbon-zinc), or rechargeable (nickel-cadmium) batteries;
• Batteries are to be inserted with the correct polarity;
• Exhausted batteries are to be removed from the toy;
• The supply terminals are not to be short-circuited.
Always :
• Make sure battery compartments are secure.
• Use batteries of the correct size and type.
• Fit batteries correctly observing the plus and minus marks on the battery
and compartment.
• Replace a whole set of batteries at one time.
• Remove dead batteries from equipment.
• Remove batteries from appliance that will not be used again for a long time.
• Please remember that batteries should be kept away from young children as they could
be easily swallowed.
• Seek medical advice if you believe a cell has been swallowed.
• Please ensure that batteries are installed by an adult prior to use.
Never
• Dispose of batteries in a fire.
Consumers have a significant role to play in reducing the impact of waste electrical and
electronic equipment on the environment, you can help by re-using or recycling
such equipment.
The crossed out wheelie-bin symbol indicates that the product & batteries must not be
disposed of in domestic waste as they contain substances which can be damaging to the
environment and human health.
If you cannot re-use or recycle the product or batteries, please use designated collection
points, or civic recycling facilities to dispose of them.
Conforms to the safety requirements of ASTM F963.
Inserting the batteries
7
9
10
8

10.
5. www.combatcreatures.com
Attaching the Battle Brain
11
11. Position the Battle Brain onto the top
of the Attacknid, (see figure 11.)
NOTE: The Battle Brain will only fit one way.
12. The Battle Brain target slides into the
clip on the front of the brain,
(see figure 12.)
These simply click and lock into position.
13. Changing your Battle Brain target.
Simply push the two pins from the
bottom of the clip (see figure 13.)
There are sizes two targets. The Large
target is easier to hit but change to
the smaller target once you have
practiced and have improved your skills.
12
13
22. Training Mode
(Turn to ‘ON’ position, see figure 22.)
The Attacknid can be moved around
with the handset. You can fire weapons
and the Battle Armor can be hit and
blasted off.
The LED on the Attacknid head will be
solid green.
Game Play
Now the Armor and Weapons have been assembled your Attacknid is ready for battle!
There are two gaming modes, Training mode and Battle mode.
Initially, the LED on the Attacknid will flash green in Battle mode. It then moves through the
series of colours below until it has been killed.
Kill Switch:
Flashing Green: Battle mode - Healthy no hits
Flashing Amber: Battle mode - Hit once
Flashing Red: Battle mode - Critical - hit twice
Flashing Multi-coloured: SHUTDOWN - hit three times
Each time the Attacknid as well as the colour of LED changing it ‘shudders’ so it is clear it has
been hit. ON the third hit the Attacknid shuts down. To continue playing you need to turn it
OFF and then back to Battle mode.
Combat armor
When a direct hit occurs to the Combat armor (aim for logo) then it pings off. The aim is to
remove all of your opponents armor!
23. Battle Mode
(Switch to battle mode, see figure 23.)
Once Battle mode has been activated
the Kill switch on the Battle Brain has
been activated. To use this, clip-on one of
the two sizes of targets provided (see
page 5 on how to do this.)
It takes a lot of skill to hit the targets,
so start off with the larger target as
this is easier to hit. The smaller one
needs a more accurate shot.
Battle Mode between 2 Attacknids can
be made more even to compensate for
the skill levels of the players.
22
23

14. The Bolt ‘N’ Battle Attachment holds up
to 12 discs.
The foam discs simply drop in to the
attachment hopper, (see figure 14.)
An extra 8 discs come in the box.
15. Make sure that the Bolt ‘N’ Battle
attachment is on the closed position.
(See figure 15.)
To attach the Bolt ‘N’ Battle
attachment for the Dissector Discs,
simply mount the system onto the top
face of the Attacknid, (see figure 15.)
Simply plug the attachment into the
appropriate slot on top of the
Attachnid. Making sure the Bolt ‘N’
Battle attachment is facing the same
direction as the Battle Brain.
9. 6.
www.combatcreatures.com
Bolt ‘N’ Battle Attachment: Dissector Discs
19. To reload the weapon system,
simply feed the discs to the top of
the hopper. (See figure 19.)
When re-loading ensure the
Electronics Weapon Elevator is
down, and that all discs are flat and
fitted properly. This will reduce any
jamming during play.
Note: The hopper will hold 12 discs
and fire 1 disc at a time.
20. Move the Bolt ‘N’ Battle
attachment up and down, using
buttons H and I on your handset
(see figure 21.)
This controls the Electronic
Weapons Elevator up or down
changing the angle of your weapon.
NOTE: Discs will fire in a slight curving motion. It takes skill and practice to fire and hit
your target. See Trouble shooting guide (page 13) on how to maximise distance of
firing and reducing jamming of discs.
NOTE: See page 9 for details on Firing your Bold ‘N’ Battle attachment.
Firing your Weapon
18. Press Button F on the handset,
to fire your weapon system.
(See figure 18.)
Note: You can only fire the weapon
system when the Attacknid
is stationary.
14
15
18
19
20
21
NOTE: Before attaching the Bolt ‘N’ Battle attachment make sure the Auto adjustor is in
the horizontal position. Manually adjust this if necessary.

8.
7. www.combatcreatures.com
NOTE: You can only fire the weapon system when the Attacknid is stationary,
Operating the Attacknid
ON/OFF
switch
LED
Indicator
Fire
button
Search
Light
Micro
movement
Electronic Weapons
Elevator - up
Electronic Weapons
Elevator - down
Forward
Button
Rotate
the head
Backwards
Button
Syncing the Attacknid and Handset
Once all the batteries have been inserted and both handset and Attacknid have been turned
on. The syncing process will take 2-3 seconds to pair with each other.
The light on the handset will constantly flash until you move the Attacknid.
NOTE: You can sync up to 20 Attacknids in the same area.
Getting ready for battle
16. Firstly slide the controller
ON/OFF switch to the
on position.
(See figure 16.)
17. Next slide the Attacknid
on/off button to the on
position for training mode or
go to battle mode.
(See figure 17.)
See page 10 for more details
on gaming modes.
16
17
jj
jj
Button Actions
Button C This moves your Attacknid forward in the direction the head
is facing
Button D Rotates your head in any direction
Button E Lets you reverse your Attacknid
Button F Lets you fire your weapon system (see page 9 for more detailed
descriptions on firing your weapon system)
Button H and I This is the Electronic Weapons Elevator it lets you fire your
weapon in different angles (see page 9 for more details on firing
your weapon system)
Button G Search light that comes on the Weapon System
Button J Rotates the head in small movements
Table of contents
Other Wow! Stuff! Toy manuals
Popular Toy manuals by other brands

Hangar 9
Hangar 9 Cessna 182 Skylane instruction manual

Fisher-Price
Fisher-Price 73455 instructions

My Little Pony
My Little Pony The Movie quick start guide

Menuett
Menuett 012134 operating instructions

LeapFrog
LeapFrog ABCs & Activities Wooden Table instruction manual

Jamara
Jamara Spider instruction manual