xtorm XE110 ESSENTIAL User manual

MANUAL
XE110 ESSENTIAL
Gebruiksaanwijzing
Gebrauchsanweisung
Mode d’emploi
Bruksanvisning
Brugsvejledning
Käyttöopas
Uživatelská příručka
Používateľská príručka
Εγχειρίδιο χρήσης
دليل المستخدم

SPECIFICATIONS PRODUCT OVERVIEW
10.000 mAh Li-ion / 37Wh
1x USB-C 15W (5V-3A)
1x USB-A 15W (5V-3A)
120x63x25 mm
233 grams
1x USB to USB-C cable
1x Manual
1 2
In/Output
USB-C 15W
USB 15W
Power Button
LED Power Indicator
Official Xtorm Label
1
2
3
3
4
4
5
5
2 1

CHARGING YOUR DEVICE
COMPATIBLE
DEVICES
3
3A Connect the USB end of the charging cable to the USB-A output of the Power Bank
and the other end to the input of your device. The charging will start automatically.
3B Charging some devices requires a charging cable other than the one supplied.
E.g. an Apple Lightning®or a Micro USB cable.
4A Connect the USB-C end of the charging cable to output 1 of the Power Bank and the
USB end to a wall charger.
4B For the fastest charging possible use a 15W charger. This will fully recharge the Power
Bank within 4 hours.
RECHARGING THE POWER BANK 4
B
A
A
B

LED POWER INDICATOR5
A
A
BB
IN THE BOX 6
1 2 3
XE110 Essential
Power Bank
USB to USB-C cable
Manual
1
2
3
5A Press the Power Button once to display the battery level remaining in the Power Bank
via the LED display.
5B Each lit LED light indicates 25% remaining energy in the Power Bank. At 4 lit lights,
the Power Bank is fully charged.

1 SPECIFICATIONS
2 PRODUCT OVERVIEW
3 CHARGING YOUR DEVICE
3.A Connect the USB end of the charging cable to the USB-A output of the Power Bank and
the other end to the input of your device. The charging will start automatically.
3.B Charging some devices requires a charging cable other than the one supplied. E.g. an
Apple Lightning®or a Micro USB cable.
4 RECHARGING THE POWER BANK
4.A Connect the USB-C end of the charging cable to output 1 of the Power Bank and the USB
end to a wall charger.
4.B For the fastest charging possible use a 15W USB-C PD charger. This will fully recharge the
Power Bank within 4 hours.
EN - ENGLISH
5 LED POWER INDICATOR
5.A Press the Power Button once to display the battery level remaining in the Power Bank via
the LED display.
5.B Each lit LED light indicates 25% remaining energy in the Power Bank. At 4 lit lights, the
Power Bank is as good as fully charged.
6 IN THE BOX

NL - NEDERLANDS
1 SPECIFICATIES
2 PRODUCT OVERZICHT
3 OPLADEN VAN JOUW APPARAAT
3.A Sluit het USB uiteinde van de oplaadkabel aan op de USB-A uitgang van de Powerbank en
het andere uiteinde op de ingang van je apparaat.
3.B Voor het opladen van sommige apparaten is een andere oplaadkabel nodig dan de bijge-
leverde USB naar USB-C kabel. Bijv. een Apple Lightning® of Micro USB kabel.
4 OPLADEN VAN DE POWER BANK
4.A Sluit het USB-C uiteinde van de oplaadkabel aan op uitgang 1 van de Powerbank en het
andere uiteinde op een wandlader.
4.B Gebruik een 15W USB-C oplader voor het snelst mogelijke opladen. Hierdoor is de Power-
bank binnen 4 uur weer volledig opgeladen.
5 LED-STROOMINDICATOR
5.A Druk eenmaal op de aan/uit-knop om het resterende batterijniveau in de powerbank via
het LED-scherm weer te geven.
5.B Elk brandend LED-lampje geeft 25% resterende energie in de Power Bank aan. Bij 4
brandende lampjes is de Power Bank zo goed als volledig opgeladen.
6 IN DE DOOS

1 SPEZIFIKATIONEN
2 PRODUKTÜBERSICHT
3 AUFLADEN IHRES GERÄTS
3.A Schließen Sie das USB-Ende des Ladekabels an den USB-A-Ausgang der Power Bank und
das andere Ende an den Eingang Ihres Geräts an. Der Ladevorgang wird automatisch gestartet.
3.B Für das Aufladen einiger Geräte ist ein anderes als das mitgelieferte Ladekabel erforderlich.
Z.B. ein Apple Lightning®- oder ein Micro-USB-Kabel.
4 WIEDERAUFLADEN DER POWER BANK
4.A Schließen Sie das USB-C-Ende des Ladekabels an Ausgang 1 der Power Bank und das
USB-Ende an ein Wandladegerät an.
4.B Für das schnellstmögliche Aufladen verwenden Sie ein 15-W-USB-C-PD-Ladegerät. Damit
wird die Power Bank innerhalb von 4 Stunden vollständig aufgeladen.
DE - DEUTSCH
5 LED-POWER-ANZEIGE
5.A Drücken Sie die Einschalttaste einmal, um den verbleibenden Akkustand in der Power
Bank über die LED-Anzeige anzuzeigen.
5.B Jede leuchtende LED-Anzeige zeigt 25 % verbleibende Energie in der Power Bank an. Bei
4 leuchtenden Lichtern ist die Power Bank so gut wie voll geladen.
6 IN DER BOX

1 SPÉCIFICATIONS
2 PRÉSENTATION DU PRODUIT
3 CHARGER VOTRE APPAREIL
3.A Connectez l’extrémité USB du câble de charge à la sortie USB-A de la batterie et l’autre
extrémité à l’entrée de votre appareil. La charge démarre automatiquement.
3.B Le chargement de certains appareils nécessite un câble de chargement autre que celui
fourni. Par exemple, un câble Apple Lightning®ou un câble Micro USB.
4 RECHARGE DE LA BANQUE D’ALIMENTATION
4.A Connectez l’extrémité USB-C du câble de charge à la sortie 1 de la batterie et l’extrémité
USB à un chargeur mural.
4.B Pour la charge la plus rapide possible, utilisez un chargeur PD USB-C de 15W. Cela per-
mettra de recharger complètement la batterie en 4 heures.
FR - FRANÇAIS
5 INDICATEUR D’ALIMENTATION LED
5.A Appuyez une fois sur le bouton d’alimentation pour afficher le niveau de batterie restant
dans la batterie via l’écran LED.
5.B Chaque lumière LED allumée indique 25% d’énergie restante dans le Power Bank. Lorsque
4 voyants sont allumés, la batterie est considérée comme entièrement chargée.
6 DANS LA BOÎTE

1 ESPECIFICACIONES
2 DESCRIPCIÓN DEL PRODUCTO
3 CARGA DE SU DISPOSITIVO
3.A Conecta el extremo USB del cable de carga a la salida USB-A del Power Bank y el otro
extremo a la entrada de tu dispositivo. La carga se iniciará automáticamente.
3.B La carga de algunos dispositivos requiere un cable de carga distinto al suministrado. Por
ejemplo, un cable Apple Lightning®o un cable Micro USB.
4 RECARGA DEL POWER BANK
4.A Conecta el extremo USB-C del cable de carga a la salida 1 del Power Bank y el extremo
USB a un cargador de pared.
4.B Para la carga más rápida posible, utiliza un cargador USB-C PD de 15W. Esto recargará
completamente el Power Bank en 4 horas.
ES - ESPAÑOL
5 INDICADOR LED DE ENCENDIDO
5.A Pulsa el botón de encendido una vez para mostrar el nivel de batería restante en el Power
Bank a través de la pantalla LED.
5.B Cada luz LED encendida indica el 25% de energía restante en el Power Bank. Con 4 luces
encendidas, el Power Bank está como totalmente cargado.
6 EN LA CAJA

1 ESPECIFICAÇÕES
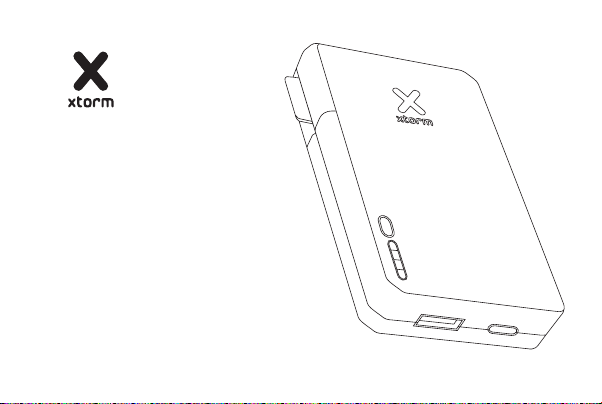
2 VISÃO GERAL DO PRODUTO
3 CARREGAR O SEU DISPOSITIVO
3.A Ligue a extremidade USB do cabo de carregamento à saída USB-A do Power Bank e a
outra extremidade à entrada do seu dispositivo. O carregamento começará automaticamente.
3.B O carregamento de alguns dispositivos requer um cabo de carregamento diferente do
fornecido. Por exemplo, um Apple Lightning®ou um cabo Micro USB.
4 RECARREGAR O BANCO DE ENERGIA
4.A Ligue a extremidade USB-C do cabo de carregamento à saída 1 do Power Bank e a
extremidade USB a um carregador de parede.
4.B Para o carregamento mais rápido possível, utilizar um carregador USB-C PD de 15W. Isto
irá recarregar totalmente o Power Bank dentro de 4 horas.
PT - PORTUGUÊS
5 INDICADOR DE ALIMENTAÇÃO LED
5.A Prima uma vez o botão Power Button para visualizar o nível de bateria restante no Banco
de Energia através do visor LED.
5.B Cada luz LED acesa indica 25% de energia restante no Banco de Força. Com 4 luzes
acesas, o Banco de Energia está tão bom como completamente carregado.
6 NA CAIXA
Table of contents
Other xtorm Accessories manuals

xtorm
xtorm FS401 User manual

xtorm
xtorm FS402 User manual

xtorm
xtorm XB098 User manual

xtorm
xtorm AL390 User manual

xtorm
xtorm XB401 TITAN User manual

xtorm
xtorm XR202 RUGGED PRO User manual

xtorm
xtorm DS200 User manual

xtorm
xtorm FS400U-10K User manual

xtorm
xtorm AL400 User manual

xtorm
xtorm AL-385 User manual


