manuals.online logo
Brands
  1. Home
  2. •
  3. Brands
  4. •
  5. Xtracycle
  6. •
  7. Bicycle
  8. •
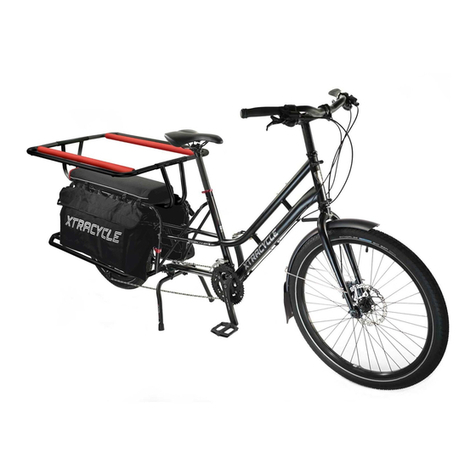
  9. Xtracycle Freeradical User manual

Xtracycle Freeradical User manual

Other manuals for Freeradical

1

Other Xtracycle Bicycle manuals

Xtracycle RFA Sport User manual

Xtracycle

Xtracycle RFA Sport User manual

Xtracycle RFA User manual

Xtracycle

Xtracycle RFA User manual

Xtracycle RFA User manual

Xtracycle

Xtracycle RFA User manual

Xtracycle SWOOP User manual

Xtracycle

Xtracycle SWOOP User manual

Xtracycle STOKER User manual

Xtracycle

Xtracycle STOKER User manual

Xtracycle Freeradical User manual

Xtracycle

Xtracycle Freeradical User manual

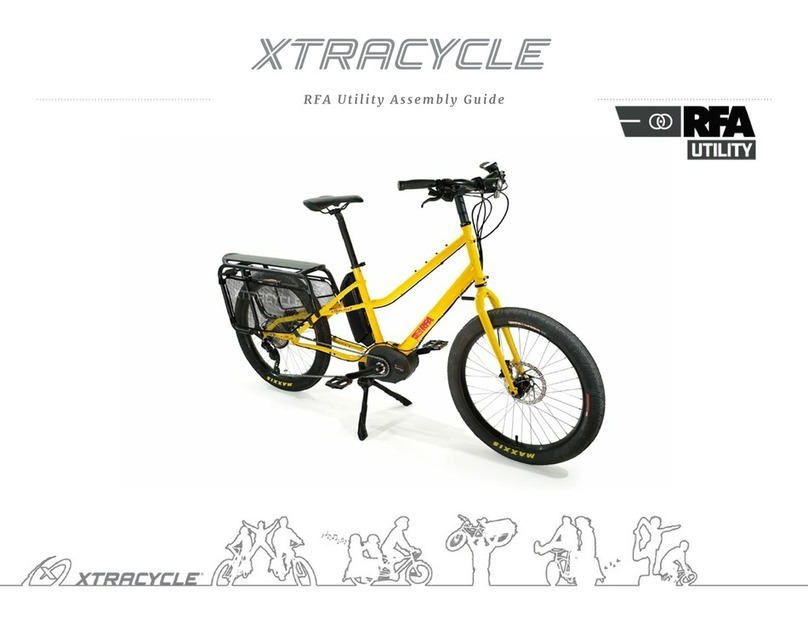
Xtracycle RFA Utility User manual

Xtracycle

Xtracycle RFA Utility User manual

Xtracycle RFA User manual

Xtracycle

Xtracycle RFA User manual

Xtracycle Swoop 2021 User manual

Xtracycle

Xtracycle Swoop 2021 User manual

Xtracycle EdgeRunner Swoop User manual

Xtracycle

Xtracycle EdgeRunner Swoop User manual

Xtracycle STOKER User manual

Xtracycle

Xtracycle STOKER User manual

Xtracycle Stoker 2021 User manual

Xtracycle

Xtracycle Stoker 2021 User manual

Xtracycle RFA 2021 User manual

Xtracycle

Xtracycle RFA 2021 User manual

Xtracycle Swoop 4ST1000 User manual

Xtracycle

Xtracycle Swoop 4ST1000 User manual

Popular Bicycle manuals by other brands

Grace ONE manual

Grace

Grace ONE manual

Woosh Gran Camino manual

Woosh

Woosh Gran Camino manual

Razor FLASHRIDER 360 user manual

Razor

Razor FLASHRIDER 360 user manual

TAUBIK SOHO 2.0 user manual

TAUBIK

TAUBIK SOHO 2.0 user manual

Oxybul FREEbul 331067 manual

Oxybul

Oxybul FREEbul 331067 manual

Cycle Force Group BICYCLE BABY TRAILER & JOGGER Assembly instructions

Cycle Force Group

Cycle Force Group BICYCLE BABY TRAILER & JOGGER Assembly instructions

Giant TWIST FREEDOM DX datasheet

Giant

Giant TWIST FREEDOM DX datasheet

RAMBO R1000X2M-FF-BFD manual

RAMBO

RAMBO R1000X2M-FF-BFD manual

Vermeiren SAFARI Maintenance manual

Vermeiren

Vermeiren SAFARI Maintenance manual

Velec A2/36V owner's manual

Velec

Velec A2/36V owner's manual

Cervélo S3 2019 Assembly manual

Cervélo

Cervélo S3 2019 Assembly manual

Festo EGSC-BS-KF Instructions & Operating

Festo

Festo EGSC-BS-KF Instructions & Operating

Gio Electric H1 Volt owner's manual

Gio Electric

Gio Electric H1 Volt owner's manual

Huka orthros manual

Huka

Huka orthros manual

DAHON CIAO - 2009 manual

DAHON

DAHON CIAO - 2009 manual

Aprimatic ONDA 500 Installation, use and maintenance instructions

Aprimatic

Aprimatic ONDA 500 Installation, use and maintenance instructions

Greyp G6 Series user manual

Greyp

Greyp G6 Series user manual

Babboe Carve-E user manual

Babboe

Babboe Carve-E user manual

manuals.online logo
manuals.online logoBrands
  • About & Mission
  • Contact us
  • Privacy Policy
  • Terms and Conditions

Copyright 2025 Manuals.Online. All Rights Reserved.

1078 60th Street Oakland, CA 94608 888.537.1401
16
14
15
10
12
11
9
1
13
7
1
4
1
6
5
3
1
2
1. Rear Upright
2. Rear Bridge (No Step)
3. Long Stay
4. Brake Post
5. Dropout
6. Short Stay
7. Kickstand Plate (Serial#)
8. Front Upright
9. Dropout Boss
10. Boss Hog
11. Spacer Washer
12. Special Nut
13. Front Bridge
14. Top Stay (Grab to lift)
15. Front Attachment Plate
(FAP) Rubber pad attached
16. Tongue
17. V-rack
18. SnapDeck
19. FreeLoader
20. H-rack (Optional Accessory)
8
4
8
18
17
19
20
Yippee!
We congratulate and thank you for joining the growing ranks of Xtracycle owners people
around the world figuring out happier, hipper, friendlier, richer, cooler, more soulful
ways to get around and live and have fun. For us, this company and our products are
about making the world a better place; by, among other things, minimizing pressure on
the environment and giving people satisfying transportation choices. We re confident
that in some way the Xtracycle sport utility bicycle will change your world and leave
you inspired. We appreciate your business. Ride on!
This manual is an introduction to owning, using, and caring for a FreeRadical. It also
contains instructions for correctly and safely installing a FreeRadical on a bicycle.
The FreeRadical installation is meant to be carried out by a professional
bicycle mechanic only! Installing a FreeRadical incorrectly, or installing
it on an incompatible bike, can result in damage to the FreeRadical and the
bicycle as well as injury or death to the rider!!! Always follow the
"Before You Ride" instructions included in this manual before you ride.
That’s why they’re called that!
You will also find a bit of information on living simply and
fighting for good and beauty in the world. Please do! And check
out the accessories for expanding your carrying capacity, and
Xtracycle goodies for spreading the love.
A WARRANTY CARD is included with this Owner s Manual. Please fill it out
immediately and return it to Xtracycle at the address on the back of this
manual; doing so will greatly facilitate future warranty claims and help us
know you and your needs better. You can also fill out the warranty
registration on line at www.xtracycle.com, if you prefer. (You needn’t
worry about us selling your name to anyone; we don’t believe in junk mail.)
This Owner’s Manual is intended to be used only as a supplement to your original
bicycle’s owners manual, which covers essential topics like braking, night riding,
bike maintenance and inspection, principles of safe cycling, bike fit, and off-road
and other riding techniques. Read and understand both manuals before you ride!!!
A
A
Anatomy of a FreeRadical
Rear Iso View
FreeLoader Boss
Chainring Bolt
15mm Bolt
Long Stay
Fender Boss
Disc Brake Caliper Mount
Brake Post
Boss Hog
Kickstand Plate (Serial #)
Front Upright
Top Stay (Use as Handle)
Rear Upright
Rear Bridge (No Step) Derailleur Hanger
& Dropout
Fender Boss
Short Stay
Front Bridge
Fender Boss
32mm Bolt
Dropout Boss
French Nut
Spacer Washer
FreeLoader Boss
FreeLoader Boss
Boss Hog
32mm Bolt
Dropout Boss
Boss Hog
Bottom Stay
Front Attachment Plate
Washer
Nut
Tube of Gibralter
Bottom Stay
Tongue
FAP Bolt
These are instructions for properly attaching a FreeRadical to a bicycle. FAILURE TO
FOLLOW THESE INSTRUCTIONS PRECISELY MAY RESULT IN INJURY OR DEATH! Conversely, following these
instructions precisely may result in healthy robustness and increased life expectancy! This
installation should only be undertaken by a professional bicycle mechanic. Please read through the
entire assembly instructions before proceeding.
Tools required for installation and adjustment:
5mm allen wrench
6mm allen wrench
8mm allen wrench
adjustable wrench
cable and housing cutter
phillips-head screwdriver
chain tool
metric ruler˚
repair stand (optional)
!WARNING
Slide the Special Nuts into the bike’s
dropouts, positioning the Tongue above the
bike s chainstay bridge (or kickstand
plate if it has one). Do not tighten the
bolts yet.
NOTE: Attaching the FreeRadical is easiest
with the bike held upside-down in a repair
stand. If you don’t have a repair stand,
remove the bike’s seat to work upside-down
(the bike, not you) with greater
stability.
Insert the two short bolts (or the
optional Quick Release skewers, if
included) into the Dropout Bosses from the
outside, loosely placing the Special Nuts
(see "Step 3 continued" to determine
whether the Spacer Washers not shown
here are needed).
Okay, go!
Remove the chain, rear derailleur,
rear brakes, rear wheel, and kickstand
from the bike to which the FreeRadical
will be attached.
D.O. >7mm; don’t use Spacer Washer
135mm O.L.D. and 7mm D.O.
<135mm O.L.D. and/or <7mm D.O.
Bolt
Upright
Bike’s
Dropout (D.O.)
Special Nut
Boss Hog
Spacer
Washer
Spacer on wrong side of D.O.
NOTE: The Front Uprights are spaced for bikes with a 135mm over-locknut dimension*
(O.L.D.) standard on mountain bikes since 1997 and 7mm-thick dropouts (diagram 3a). On an
older bike or a bike with thinner dropouts, you may need to add Spacer Washers between
the Boss Hogs and the dropouts (diagram 3b). If the dropouts still aren’t wide enough
(i.e., there’s space between the Spacer Washers and the Boss Hogs), the rear triangles
can be safely spread by many professional bicycle shops with specialty tools.(Exceptions
are composite frames, and very inexpensive steel and aluminum frames, i.e. department-
store quality, which CANNOT be safely spread.) Doing so will not weaken the frame but may
void its warranty. Check with the manufacturer to be sure. Alternatively, a Narrow O.L.D.
Fit Kit that addresses this problem can be ordered from Xtracycle.
Conversely, on an aluminum bike with a 135mm over-locknut dimension the thick dropouts
require that you squeeze the rear triangles together. If the dropouts are 9mm thick or
less, this slight squeeze does not require special tools. Breezer/Ritchey flange style
dropouts require a spacer to keep the flange from hitting the upright (diagram 3a).
Do not put a Spacer Washer between the Special Nut and the dropout in any situation
(diagram 3c). DO NOT USE SPACER WASHERS IF THE BIKE’S DROPOUTS ARE THICKER THAN 7mm!
Doing so will prevent the Special Nuts from seating in the Boss Hogs (see "Step 5") and
will make it impossible to securely fasten the FreeRadical to the bike (diagram 3d)!
The over-locknut dimension is the measurement from the outer face of one locknut on the axle to the outer face
of the other locknut. The locknuts are the parts of the axle set that butt up against the inside face of the
dropouts when the wheel is installed normally.
3a
3d
3c
3b
*
Using the long bolt (or optional quick-release skewer), attach the Tongue according
to step a, b, OR c depending on the bicycle s construction. (If using quick-release
skewers, also follow their instructions.) In all cases, first apply the rubber
cushion to the flat side of the FAP. The cushion rests against the bicycle frame.
{a} Chainstay bridge (or kickstand plate on top of chainstays): Tongue rests on
bridge (or kickstand plate); FAP placed beneath chainstays; bolt runs through Tongue
to washer and nut on underside of FAP (diagram 4a). Bolt needn t run through bridge
but may.
{b} Kickstand plate on the underside of the chainstays: FAP rests on chainstays,
Tongue rests on it, and bolt runs through both to washer and nut on the underside of
the bike s kickstand plate (diagram 4b).
{c} No kickstand plate or chainstay bridge (not pictured): two FAPs must be used
(order another from Xtracycle: 888.537.1401); FAPs sandwich chainstays; Tongue rests
on top of upper FAP; bolt runs through Tongue, through upper FAP, and through lower
FAP to washer and nut.
4a OR 4b
Remember, the bikes pictured
here are upside down!
chainstay
bridge FAP
FAP
kickstand
plate
Tighten the Tongue bolt to 100in•lbs (11.3Nm), being careful to center the Tongue
between the chainstays. Next, tighten the dropout bolts to 120in•lbs (13.6 Nm) by
turning the Allen heads.
IT IS CRUCIAL THAT THE NUTS FOR THE DROPOUT BOLT BE SEATED INSIDE THE
BOSS HOGS! If they aren't, the FreeRadical can't be tightened onto the bike
sufficiently and will come off during use! DO NOT USE SPACER WASHERS IF THE BIKE'S
DROPOUTS ARE THICKER THAN 7mm!
{6.7} smile, you're more than half way there!
Turn the bike right side up in the repair stand. Mount the rear
derailleur and rear brakes on the FreeRadical as per the original
bicycle's owner's manual or component manufacturer's assembly guide.
NOTE: The FreeRadical is designed for long-arm cantilever brakes
(aka V-Brakes and linear-pull brakes) and won't work safely
without them. If needed these can be ordered from Xtracycle.
!WARNING
!WARNING
Replace old rear derailleur and brake cables with the new ones
provided, trimming new cable housing as necessary and installing
the Rollamajig (optional accessory) if it's included. The
derailleur cable should be routed between the seat stay and the
Front Upright, then beneath the Boss Hog, and then under the
Short Stay to keep it optimally protected.
{Rollamajiggin'}
Do not use the Rollamajig on derailleurs where the cable housing
enters directly from the front (e.g. SRAM Di.R.T. models).
Place the rear wheel into the FreeRadical's dropouts as per the original bicycle's
owner's manual. (Many companies have this information on their Web site.)
When installing the wheel on an older bike, you may need to
replace the axle with a longer one: Measure the axle. For a quick-release
system, the axle MUST be between 138mm and 146mm long! For a non-QR system,
the axle must be at least 170mm! Don't take any chances with a mis-sized axle;
either too long or too short and the wheel could fall off when least expected.
If it doesn't meet the specifications above, replace it.
¥The bottom of the Rollamajig should
line up approximately with the bottom
of the derailleur (as shown in diagram).
¥If you are using Gore cables, cut the
liner back so it doesn’t touch the
pulley.
¥Make sure the cable is fully seated in
the cable groove.
Re-install the chain, adding links from the kit to the existing chain. Create a chain
one link longer than what’s needed to stretch around the big cog and big ring and
through the rear derailleur simultaneously. (The chain supplied is sized such that if
the bike’s chain was sized correctly, joining the two will yield the correct length for
the sport utility bicycle.) Unless a special size was ordered, the supplied chain is
intended to mate with 8-, 7-, and 6-speed chains. Do not attempt to mate the chain with
other sizes. Additionally, not all brands of chain are compatible with each other. Only
a professional bicycle mechanic can make the call. If the bike’s chain is worn, or a
special size is needed, or the makes are incompatible, the appropriate chain can be
ordered from Xtracycle. Attempting to connect incompatible chains can
result in sudden chain breakage while riding and lead to a crash. Improper/inadequate
chain pin connections can also lead to chain separation under stress while riding and
lead to a crash.
Don t stop following directions now!!! Excellent FreeRadical performance
DEPENDS on proper strapping and tensioning of the FreeLoaders!
{1} Make sure that the FreeLoader is taut on the V-rack. Squeeze the rack
sides together (stand the V-rack on the floor oriented like a "C" while
pushing down on the top) and stretch the FreeLoader flaps tight, i.e.
towards the V-rack ends.
{2} Place the right V-rack in the right-side Uprights, making sure both
ends seat all the way. This takes practice, and is often best achieved by
guiding the front and rear simultaneously, with each hand grabbing an
Upright while feeding in the V-rack ends.
*lineup
Adjust the brakes and derailleur as per the original bicycle’s owner’s manual or
component manufacturer’s assembly guide. Bolt the supplied kickstand to the
Kickstand Plate of the FreeRadical, aligning it such that, viewed from above,
the arm (NOT the mounting plate) is parallel to the Front Bridge when extended.
Make sure it doesn’t protrude into the spokes when stowed.
NOTE: With internally geared bikes and single-speeds, proper chain tension is
achieved by adjusting the fore/aft position of the entire FreeRadical in the
bicycle’s dropouts.
!WARNING
{1} Position the SnapDeck so the snap
pieces on one side are placed against the
inside of the V-rack. The front snap
piece should be just in front of the
front flap of the FreeLoader, nesting in
the V-rack’s indentation (not all
models), and the rear snap piece should
be just in front of the rear flap of the
FreeLoader (figure 12a). When installed
correctly, the SnapDeck’s nose should be
even with the plane of the V-racks’
nearly vertical front legs.
{2} With one side seated, simply press
down on the top of the deck until it
snaps into place. Keep your
thumbs and fingers from getting between
the SnapDeck and the V-racks while
installing to avoid pinching.
Removal
To remove, use your thumbs to push in and
up on the SnapDeck edge while your
fingers pull on the V-rack (figure 12b).
{3} Tension the bottom of the FreeLoaders
by tightening the straps equally. The front
strap goes to the outside of the Front
Upright, passes behind the chainstay, then
returns to the outside of the Front Upright
and into the ladder-lock buckle (diagram
10a). The rear strap goes to the outside of
the Long Stay, goes under, then comes
around behind the Rear Upright to the
ladder-lock buckle (diagram 10b). It DOES
NOT go around the Rear Bridge. The
FreeLoader should be completely taut, i.e.
no wrinkles! If the straps are completely
tight and the FreeLoader isn’t completely
taut, remove the assembly from the
FreeRadical frame and go back to step 1 to
re-tension the FreeLoader on the V-rack.
{4} Repeat steps 1—3 for the left V-rack.
!DANGER
12a
12b
1
2
3
NOSTEP
1
2
3
11b
11a
rear
front
Questions? Please see the technical FAQ on our Web site <www.xtracycle.com>
or call 888.537.1401
Xtracycle LLC warrants Xtracycle products to be free from defects in material and workmanship
subject to the conditions and limitations set forth below. Xtracycle’s sole obligation under
this warranty is to repair or replace the product(s), at Xtracycle’s option.
¥The FreeRadical frame is warranted for the lifetime of the product while with the
original owner.
¥Components are warranted for one year.
¥In no event shall Xtracycle be liable for any loss, inconvenience or consequential
damages.
¥This warranty does not cover damage due to wear and tear, overloading, misuse, abuse,
neglect, accidents, improper assembly or repair, or anything else beyond Xtracycle s
immediate control. A partial list of preventable damage not covered by this
warranty: rusting of the FreeRadical; delamination of the SnapDeck; galvanic
corrosion at FreeRadical/V-rack joints; bending of the FreeRadical s Long Stays by
overloading behind the dropouts (more than 100 pounds is too much here); failure of
your rear wheel; disfiguration of the rack sockets; plastic buckle failure due to
over-tightening straps; and damage resulting from stunt riding, jumping, acrobatics,
competitive riding, or commercial use.
¥Xtracycle will be the sole arbiter of whether or not damage is due to defects in
materials and workmanship.
¥Warranty claims require proof of purchase and must be made through an authorized
dealer.
¥The labor required to remove and/or re-fit and readjust the FreeRadical is not
covered by this warranty.
¥Any postage, insurance or shipping costs incurred in sending your FreeRadical for
service are your responsibility.
We of course want you to get the utmost enjoyment and utility from your FreeRadical and will
seek to assist you, for a nominal charge, in remedying any injuries that it may sustain. You
should be aware that installation of the FreeRadical may void the manufacturer s warranty on
your bicycle.
In addition to being good for your mind, your body, your community, and your planet, cycling can be very
dangerous. Cycling with two people on one bike and/or with cargo can be even more dangerous. The user of this
product should know that participating in cycling may involve serious injury or death.
Always wear a helmet; this includes any passengers. There is absolutely, positively no question that they
help prevent injury and save lives.
Standing, kneeling, or sitting backwards or sideways (both legs on the same side of the bike) on the SnapDeck
while the bike is moving or stopped can easily result in broken limbs, loss of control of the bike, destroyed
rims, a destroyed bike frame, or worse.
Carrying a load and riding a long-wheelbase bike both require getting accustomed to. Practice maneuvering and
braking on a flat, hazard- and traffic-free street with and without a load before going out into the world.
Carrying a seated passenger or heavy load involves risks, foremost of which can be decreased braking power
and increased stopping distance. Always make sure you have at least two well-adjusted brakes. Drum, roller,
or coaster brakes ARE NOT suited to hilly riding or heavy loads and can fail under serious strain when you
need them most! We strongly recommend rim and/or disc brakes, though these carry their own risks: under
severe loads (as when carrying a passenger or cargo at high speed) a very strong front brake can lead to
failure of the front fork. For this reason, don’t use the front brake by itself; the rear or rear and front
brake should be used in all braking situations.
The user of this product acknowledges both an understanding and an assumption of the risks involved in
cycling, cycling with cargo, and cycling with a passenger. Children incapable of riding a bike on their own
or under the age of 6 should not ride on the FreeRadical as passengers, unless it’s equipped with the
Xtracycle Child Seat accessory. Children should not ride as passengers without an adult operating the
Xtracycle SUB.
No warning is a substitute for good judgement. Use yours always. If you have reason to suspect that your own
judgement isn’t great, share your plans with somebody you respect, and ask for a second opinion.
!WARNING