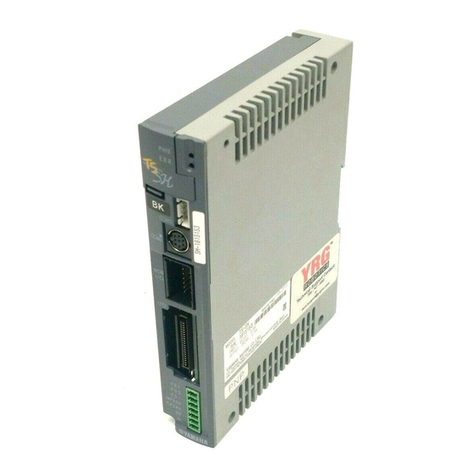
Yamaha TS-P User manual

User’s Manual ENGLISH E
TS-P
YAMAHA SINGLE-AXIS ROBOT CONTROLLER
IM Operations
882 Soude, Naka-ku, Hamamatsu, Shizuoka 435-0054.Japan
URL http://www.yamaha-motor.jp/robot/index.html
YAMAHA MOTOR CO., LTD.
E113-Ver. 5.01


i
Introduction
Introduction
Thank you for purchasing the TS-P Controller (hereafter referred to simply as
"Controller"). Please read this manual carefully to ensure correct and safe use of this
controller.
Main functions
Function Explanation Reference Section
Positioning
operation
Moves the robot slider to the specified position.
There are 4 types of position operation:
1. Positioning operation Section 5.3
"Positioning operation".
2. Positioning merge operation
Section 5.3.3
"Positioning merge
operation".
3. Push operation Section 5.3.4
"Push operation".
4. Decel. Push Section 5.3.5
"Deceleration push operation".
*Positioning can be specified in an "absolute
position" or "relative position" format.
Point data
Specifies the slider position (point).
Up to 255 points of point data can be handled.
Each point includes the following elements:
RUN Type, Position, Speed, Accel., Decel., Push
Force, Zone (-), Zone (+), Near Width (In-Position
Zone), Jump, Flag, Timer.
Section 3.2
"Point data".
Point table type
setting
The "point data type" setting can be selected as
"Standard setting" or "Custom setting". This is
possible only from the support software.
Section 3.2
"Point data".
Origin search Performs an origin search (return-to-origin)
simply by entering a return-to-origin command.
Section 5.1
"Operation procedure".
Section 5.2
"Origin search".
JOG operation
and current
position teaching
Robot JOG operation and current position teaching
can be performed from the host controller.
Section 5.3
"Positioning operation".
Soft limit
function
Sets the robot's movement range. This function is used
to avoid collisions, etc., when obstacles are present.
Section 5.7.1
"Soft limit function"
Output function
The following statuses can be selected and output
to the host controller.
Point No. output, alarm No. output, zone output,
personal zone output, near output (in-position
zone output), push status, origin return completion
status, warning output, movement-in-progress
output, manual mode status.
Section 4.3
"I/O signal details".
Alarm history
Saves up to 50 of the most recent alarms. The
following elements are saved:
Cause, start time, position, speed, operation status,
operation point, elec. current, voltage, input, output.
Section 6.2
"Alarm recording function".
Operation modes
Exclusive I/O and communication control is possible.
Section 5.6
"Operation modes".
Support tools
HT1 (Handy Terminal)
Offers point and parameter data editing/
monitoring functions.
TS-Manager (PC software for Windows)
Support software for data designing,
debugging, maintenance, and management.
TS-Monitor (LCD monitor)
LCD monitor integrated with the controller
main body that displays the various statuses,
current position, and alarm information.
HT1 Operation Guide
Section 5.8
"TS-Monitor (Option)"
ii
About this manual
iii
About this manual
This manual is divided into 3 main parts: Safety Cautions, Controller Guide, and a
Supplement (HT1 Operation Guide, Communication Command Guide, Daisy Chain
Guide). In order to use the controller and optional devices in an efficient manner,
users should read the parts which are pertinent to the objective in question.
Moreover, after reading this manual, keep it on hand for easy referencing as
needed, and always make it available to the end user.
Configuration of this manual
Contains the handling cautions related to the
controller and the optional Handy Terminal. Be
sure to read these cautions before using the
equipment, and strictly observe them at all times.
Explains the controller functions, as well as the
controller installation and operation procedures.
Be sure to read this section before operating the
controller, and strictly observe the instructions at
all times.
•Safety Cautions
•Controller Guide
Be sure to read this section before writing the data,
such as parameter or point data, or operating the
robot using a communication unit, such as a personal
computer through the RS-232C communication.
Communication
Command Guide
Explains the daisy chain function of the TS series
robot controllers.
Daisy Chain Guide
•Supplement
HT1 Operation Guide
Explains the procedures for using the HT1
(Handy Terminal) to edit point data, and to
operate the robot, etc.
Use any of the following methods for referencing this manual content during
controller installation, operation, and adjustment procedures.
Keep this manual close at hand for referencing when performing
■
installation, operation, and adjustments.
Display the CD-ROM version of this manual onscreen for referencing
■
when performing installation, operation, and adjustments.
Print out the required pages of this manual from the CD-ROM in
■
advance, and use them for reference when performing installation,
operation, and adjustments.
Although every effort was made to ensure that this manual content is accurate and
complete, please contact YAMAHA if errors, misprints, or omissions are found.
For information related to the robot unit, support software, and other optional
devices, please refer to the operation manuals for those items.

ii iii
Safety alert symbols and signal words
The following safety alert symbols and signal words are used in this manual to
describe safety concerns, handling precautions, prohibited or mandatory action and
key points when using this product. Make sure you fully understand the meaning of
each symbol and signal word and comply with the instructions.
DANGER
"DANGER" indicates an imminently hazardous situation which, if not avoided, will
result in death or serious injury.
WARNING
"WARNING" indicates a potentially hazardous situation which, if not avoided, could
result in death or serious injury.
CAUTION
"CAUTION" indicates a potentially hazardous situation which, if not avoided, could
result in minor or moderate injury or damage to the equipment or software.
Indicates a prohibited action related to the handling of this product. Read the
content carefully to ensure that the prohibited action is not performed.
[Example]
Indicates a mandatory action related to the handling of this product. Read the
content carefully to ensure that the mandatory action is performed.
[Example]
Mandatory action
Cut off power

iv
CE marking
v
CE marking
1. Safety standard
Cautions regarding compliance with EC Directives
■
The YAMAHA robot (robot and controller) is not, in itself, a robot system. The
YAMAHA robot is just one component that is incorporated into the customer's
system (built-in equipment), and YAMAHA robots are in compliance with the EC
Directives as they apply to built-in equipment. Therefore, this does not guarantee
EC Directive compliance in cases where the robot is used independently.
Customers who incorporate a YAMAHA robot into a system which will be shipped
to, or used in, the EU, should therefore verify that the overall system is compliant
with EC Directives.
•Differences between a YAMAHA robot (robot and controller), and a robot system:
A YAMAHA robot (robot and controller) is just one component in a robot system, and is not,
in itself, a robot system.
This is because a YAMAHA robot does not include the "end effectors" or "any equipment,
devices, or sensors required for the robot to perform its tasks", as defined in the EN10218-
1:2006 Standard, Item –3.20.
Applicable EC Directives and their related standards
■
The following table lists the Directives (and related standards) which apply to the
robot's CE Marking compliance.
EC Directive Related Standards
Machinery
Directive
2006/42/EC
EN ISO12100-1: Safety of machinery - Basic concepts Part1
EN ISO12100-2: Safety of machinery - Basic concepts Part2
EN ISO14121-1: Safety of machinery - Risk assessment
EN60204-1 : Safety of machinery - Electrical equipment of machines
EMC Directive
2004/108/EC
EN 55011 : EMC Emission of ISM Equipment
EN 61000-6-2 : EMC Immunity for Industrial Environments
Referred standards: EN ISO10218-1: Safety requirements - Part1:Robot
Cautions regarding the official language of EU countries
■
For YAMAHA robots that will be installed in EU countries, the language used for
the user's manuals, CE declarations, and operation screen characters is English
only, except for warning labels.
Warning labels only have pictograms or else include warning messages in
English. In the latter case, Japanese language messages might be added.

iv
v
CE marking
2. Safety measures
Usage Conditions
■
The usage conditions which apply to the YAMAHA robot series are described
below.
•EMC (Electromagnetic Compatibility)
YAMAHA robots are designed for industrial environments. (Applicable standard
relating to the EMC Directive: Refer to the EN61000-6-2 Standard, Item 1
"Scope".)
EMC Directive compliance requires that the customer have the final product
(over equipment system) evaluated, with any necessary measures being
implemented.
•Installation conditions
·YAMAHA robots are classified as "built-in equipment", and feature a "Class
I" protective structure with regard to electrical shocks. Be sure to ground the
robot and robot controller in order to ensure electrical shock protection.
·The robot controller case is not designed to meet the "enclosure" requirement
specified by the EN60204-1 Standard. Suitable protection should therefore
be provided to prevent contact electrical shock hazards, and to protect the
controller from dust and water, etc., in the ambient environment.
·Regarding insulation coordination, YAMAHA robots are designed for the
following conditions (refer to the IEC60664-1 Standard):
Over-voltage category II
Pollution degree 2
Suitable measures should be taken if the robot is to be used in environments
more severe than those shown above.
•Explosion-proof
The robot and controller do not have explosion-proof specifications, and the
robot should therefore not be used in environments exposed to flammable
gases which could explode or ignite, or to gasoline and solvents, etc.
3. Robot safety measures
Electrical Shock Prevention Measures
■
Use the protective ground terminal in order to ensure safety with regard to
electrical shocks. For details, refer to the robot's operation manual.

vi
CE marking
vii
4. EMC countermeasure example
Regarding EMC directives, the customer's final product (entire system) including
the YAMAHA robot must provide the necessary countermeasures. We at YAMAHA
determine a model for single units of YAMAHA robots (controller, robot, and
peripheral device) and verify that it complies with the relevant standards of EMC
directives.
In order to ensure the customer's final product (entire system) complies with EMC
directives, the customer should take appropriate EMC countermeasures. Typical
EMC countermeasures for a single unit of YAMAHA robot are shown for your
reference.
CAUTION
The examples shown here are the countermeasures tested under our installation
conditions. When our product is installed in the customer's system, the test
results may differ due to the difference in the installation conditions.
●Configuration
CAUTION
As shown in the drawing below, install the ferrite cores and noise filter as close to
the controller as possible. Also install another ferrite core as close to the robot as
possible.
L
N
L1
N1
ROB I/O
MOTOR
IO
COM1
EXT
RGEN
Single-axis robot
External safety circuit
Controller
Meaning of symbols
Surge absorber LT-C12G801WS : SOSHIN ELECTRIC CO., LTD.
Noise filter NAP-10-472 : COSEL CO., LTD.
Ferrite core ZCAT3035-1330 : TDK
Ferrite core ZCAT2132-1130 : TDK
Ferrite core 2 turns
Power supply
(100 to 115V)
(200 to 230V)
Ground
I/O circuit or
network
Handy Terminal with
ENABLE switch
Regenerative unit

vi
vii
CE marking
●Countermeasure components
(1) Surge absorber
Always install an external surge absorber to protect the controller from
surge noise that may be generated by lightning.
A recommended surge absorber is shown below.
• Recommended surge absorber
Manufacturer : SOSHIN ELECTRIC CO., LTD.
Type No. : LT-C12G801WS
Status indicator
green : normal
red : abnormal
φ4.3
+0.3
-0.1
25 ±1.0
4
33.5 ±1.0
19 ±1.0
Wire (line)
(Black) Wire (earth)
(Green/Yellow)
38 ±1.0
22.5 ±1.0
250 +25
-0
28 ±1.0
4±0.5
Dimensional outline
Unit: mm

viii
CE marking
ix
(2) Noise filter
Always install an external noise filter to reduce conduction noise to the
power supply line.
A recommended noise filter is shown below.
• Recommended noise filter
Manufacturer : COSEL CO., LTD.
Type No. : NAP-10-472
Dimensional outline
Terminal block cover
Input
Mounting hole
Output
Input
Output
* Terminal cover is closed
Type No. label
2-φ4.8
6-M4
Protective earth (PE)
Terminal
block cover
Mounting plate
±0.5
82
92
77
15
53
±0.5
45
12
41 (2)
8
(3.5) 27
Tolerance: ±1
Unit: mm
(3) Ferrite core
Install ferrite cores according to the customer's final product (entire system).
Recommended ferrite cores are shown below.
・Recommended ferrite core 1
Manufacturer : TDK
Type No. : ZCAT3035-1330
39.0±1
34.0±1
30.0±1
13.0±1
Dimensional outline
Unit: mm

viii
ix
CE marking
・Recommended ferrite core 2
Manufacturer : TDK
Type No. : ZCAT2132-1130
20.5±1
11.0±1
36.0±1
32.0±1
Dimensional outline
Unit: mm

x
Safety cautions
xi
Safety cautions
The controller was designed and manufactured with ample consideration given to
safety. However, incorrect handling or use may lead to injury, fire, electrical shocks,
or other accidents or equipment failures. To prevent possible problems, be sure to
observe the following safety cautions at all times.
Also carefully read the safety cautions listed in the robot user's manual and follow
all instructions given there.
DANGER
Never enter the robot movement range during operation.
Entering the movement range while the robot is in motion could
result in serious accidents or death. A safety enclosure or area
sensor with a gate interlock function should be installed to keep all
persons safely out of the robot's movement range.
Always turn the main power breaker OFF and establish an
"emergency stop" status before performing tasks within
the robot's movement range.
Failing to do so could result in serious accidents or death. (See
Section 2.8 "Connecting the EXT connector".)
The controller and robot were designed as general-
purpose industrial equipment, and cannot be used
for the following applications.
·In medical equipment systems which are critical to human life.
·
In systems which significantly affect society and the general public.
·In environments which are subject to vibration, such as aboard
ships and vehicles.
For safety purposes, be sure to install an "emergency
stop" circuit.
Use the controller's "emergency stop" input terminal to install a main
power shutoff circuit (required).

x
xi
Safety cautions
WARNING
•Installation environment
Use only in environments where the prescribed
ambient temperature and humidity are maintained.
Usage in other environments could cause electrical shocks, fires,
malfunctions, and product deterioration.
Do not use in environments which are subject
to vibration and impact shocks, electromagnetic
interference, electrostatic discharges, and radio
frequency interference.
Usage in these environments could cause malfunctions and
equipment failure.
Do not use in environments which are exposed to
water, corrosive gases, metal cutting chips, dust, or
direct sunlight.
Usage in these environments could cause malfunctions and
equipment failure.
Do not use in flammable or explosive environments.
Usage in these environments could hamper operating tasks, and
could possibly cause injuries.
Provide ample space to ensure that tasks (teaching,
inspections, etc.) can be performed safely.
Failing to provide adequate space makes tasks difficult to perform,
and can cause injuries.
Secure the equipment firmly to a non-flammable
vertical wall of metal material.
The controller and the regenerative unit become hot during
operation, and must be secured to a metal wall in order to prevent
the risk of fires.
Install in a well ventilated site with ample space
around the equipment.
Failing to do so could cause malfunctions, equipment failure, and fires.

xii
Safety cautions
xiii
•Wiring and connections
Always shut off the power to the controller before
performing wiring work and connecting cables.
Failing to do so could result in electrical shocks and equipment
failure.
When connecting cables, use care to avoid subjecting
the connectors to impact shocks or excessive loads.
Failing to do so could result in connector pin deformation, and
internal PCB damage.
Handle cables with care to avoid damaging them.
Do not attempt to modify the cables, and avoid pulling them or
placing heavy objects on them. These actions could damage the
cable, possibly resulting in malfunctions and electrical shocks.
Be sure that cable connectors and terminals are fully
inserted and securely fastened.
Tighten the fastening screws securely. Failing to do so could cause a
poor connection, possibly resulting in malfunctions.
Securely ground the power terminal block's ground
terminal.
Failing to do so could result in electrical shocks.
•Operation and handling
The controller and the HT1 should be operated only
by personnel who have received safety and operation
training.
Operation by an untrained person is extremely hazardous.
Set the payload, acceleration, and deceleration to
appropriate values.
Payload, acceleration, and deceleration settings which differ greatly
from the actual values will result in operation time loss, shorten the
robot life, and cause vibration. Be sure to set them to appropriate
values.
Do not enter the robot's movement range while power
is supplied to the controller.
Doing so could result in a serious accident, injury, or death.

xii
xiii
Safety cautions
•Operation and handling
Do not touch the controller or robot during operation.
The controller and robot unit become hot during operation, and
touching them could result in burn injuries.
Do not remove the controller or HT1 covers, and do
not attempt to disassemble or modify them.
Doing so could result in fires or equipment failure.
Do not touch or operate the controller or HT1 with wet
hands.
Doing so could result in electrical shocks or equipment failure.
Immediately turn off the power if abnormal odors,
sounds, or smoke are noticed during operation.
Failing to do so could result in electrical shocks, fires, or equipment
failure. Stop operation immediately, and contact your YAMAHA
representative.
•Maintenance and inspection
Perform maintenance and inspection tasks only when
instructions for doing so are provided by YAMAHA.
Maintenance and inspections performed by a person who lacks the
proper knowledge or training is extremely hazardous.
Shut off the power to the controller before performing
inspections and maintenance tasks.
Shut off the power and wait at least 10 minutes before beginning the tasks.
Failing to do so could result in electrical shocks or burn injuries from
touching areas which are still hot or from touching components where a
high-voltage condition remains for a short period after a power OFF.

xiv
Safety cautions
xv
CAUTION
Use the controller and robot only in the prescribed
combinations.
Unsuitable combinations could result in fires and equipment failure.
Save the controller's internal data to an external
memory device.
The controller's internal data could be unexpectedly lost, and should
therefore be backed up to an external device.
Do not use solvents such as thinner, benzene, or
alcohol, etc., to wipe (clean) the HT1 surfaces.
Doing so can cause the surface sheet and printing to peel off, and
can cause equipment failure. The HT1 surface should be gently
wiped with a soft, dry cloth.
Do not use a hard or pointed object to operate the
HT1 keys.
Doing so could scratch the keys and cause malfunctions and
equipment failure. The HT1 keys should be operated with the
fingertips.
When disposing of this product, it must be handled as
industrial waste.
Either dispose of the product in accordance with the local
regulations, or engage a commercial disposal service to handle the
disposal.

xiv
xv
Warranty
Warranty
For information on the product warranty, please contact your local agent where you
purchased your product.

xvi
MEMO

Contents 1
Contents
Chapter 1 Overview
1.1 Unpacking check 1-1
1.2 Part names and functions 1-1
1.3 System configuration 1-3
1.4 Installation and operation sequence 1-4
Chapter 2 Installation and wiring
2.1 Installation method 2-1
2.1.1 Controller main body 2-1
2.1.2 Regenerative unit (RGT) 2-2
2.1.3 Regenerative unit (RGU-2) 2-2
2.2 Installation conditions 2-3
2.3 Wiring 2-4
2.3.1 Power supply connection 2-4
2.3.2 Malfunction prevention measures 2-7
2.4 Connecting the robot 2-8
2.5 Connecting the communication unit 2-10
2.6 Connecting the regenerative unit 2-13
2.6.1 Connecting the RGT 2-13
2.6.2 Connecting the RGU-2 2-14
2.7 Connecting the I/O signals 2-15
2.8 Connecting the EXT connector 2-16
2.8.1 EXT connector wiring 2-16
2.8.2 EXT connector signal names and functions 2-17
2.8.3 Circuit details 2-19
2.9 Connecting the I/O unit 2-21
2.10 Safety circuit construction example 2-26
2.10.1 Performance level 2-26
2.10.2 Circuit configuration examples 2-27
Chapter 3 Data setting
3.1 Data overview 3-1
3.2 Point data 3-2
3.2.1 "Standard setting" type 3-3

2 Contents
Contents 3
3.2.2 "Custom setting" type 3-4
3.3 Point data details 3-5
3.4 Parameter data 3-9
3.4.1 Parameter list 3-9
3.4.2 Parameter details 3-12
Chapter 4 I/O signal functions
4.1 I/O specifications 4-1
4.1.1 I/O specifications 1 (NPN and PNP type) 4-1
4.1.2 I/O specifications 2 (CC-Link type) 4-2
4.1.3 I/O specifications 3 (DeviceNet type) 4-4
4.2 I/O signal list 4-6
4.3 I/O signal details 4-7
4.3.1 Input signal details 4-7
4.3.2 Output signal details 4-9
Chapter 5 Operation
5.1 Operation procedure 5-1
5.1.1 Overall operation timing chart 5-1
5.1.2 Alarm occurrence and clearing 5-3
5.2 Origin search (return-to-origin) 5-4
5.2.1 Origin point detection method 5-4
5.2.2 Origin point and coordinates relationship 5-7
5.2.3 Return-to-origin timing chart 5-8
5.3 Positioning operation 5-9
5.3.1 Basic operation 5-9
5.3.2 Positioning timing chart 5-13
5.3.3 Positioning merge operation 5-15
5.3.4 Push operation 5-17
5.3.5 Deceleration push operation 5-19
5.3.6 Continuous operation 5-20
5.3.7 Output function 5-21
5.3.8 Speed switch function 5-22
5.3.9 Operation examples 5-23
5.4 MANUAL mode 5-26
5.4.1 MANUAL mode timing chart 5-26
5.4.2 JOG movement 5-27
5.4.3 TEACH (Teaching) 5-28
5.5 Remote commands 5-29
This manual suits for next models
1
Table of contents
Other Yamaha Controllers manuals

Yamaha
Yamaha MJC8 User manual

Yamaha
Yamaha G10 User manual

Yamaha
Yamaha TS-S User manual

Yamaha
Yamaha RCX222 User manual

Yamaha
Yamaha MLC-200 User manual

Yamaha
Yamaha ERCX Series User manual

Yamaha
Yamaha RCX142 User manual

Yamaha
Yamaha SRCP30 User manual

Yamaha
Yamaha RCX340 Operating and installation instructions

Yamaha
Yamaha MCX-10 User manual

Yamaha
Yamaha SRCP User manual

Yamaha
Yamaha ENSPIRE Controller User manual

Yamaha
Yamaha Nexo NXAMP4X4 User manual

Yamaha
Yamaha MCP1 User manual

Yamaha
Yamaha Mark IV User manual

Yamaha
Yamaha RCX40 User manual

Yamaha
Yamaha SRCD Series Owner's manual

Yamaha
Yamaha DRCX User manual

Yamaha
Yamaha MJC8 User manual

Yamaha
Yamaha AFC1 User manual