manuals.online logo
Brands
  1. Home
  2. •
  3. Brands
  4. •
  5. Yamaha
  6. •
  7. Music Mixer
  8. •
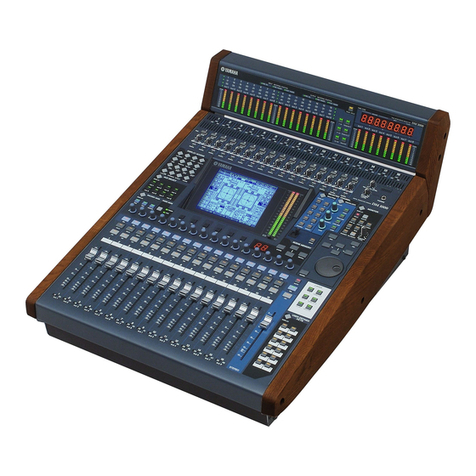
  9. Yamaha DS2416 User manual

Yamaha DS2416 User manual

Setup Guide
Setup GuideSetup Guide
Setup Guide
V 2.0
Revised: 04-12-00
Yamaha DS2416 Setup Guide
1
Contents:
1
11
1 Connecting The System 2
2
22
2 Digital 328 Setup 3
3
33
3 DS2416 Setup 5
Digital 328 v2 and
Digital 328 v2 andDigital 328 v2 and
Digital 328 v2 and
Yamaha DSP Factory
Yamaha DSP FactoryYamaha DSP Factory
Yamaha DSP Factory
Spirit Digital 328 v2
2
Connect audio connections as shown in the diagram below. Coaxial S/PDIF cables must be
connected from the DS2416 S/PDIF output to the 328 S/PDIF input and vice versa.
Besides the digital S/PIDIF connections, the DS2416 has analog inputs and outputs. The DS2416
outputs can be connected to any 328 input – Stereo 1 for example. The inputs can be derived
from any 328 output, such as a pair of aux sends or the mix output, depending on how you wish
to record.
328 S
/
PDIF Out ÎDS2416 S
/
PDIF In
DS2416 S
/
PDIF Out Î328 S
/
PDIF In
Connecting The System
Connecting The SystemConnecting The System
Connecting The System
1
Analogue Connections
Analogue ConnectionsAnalogue Connections
Analogue Connections
Digital Connections
Digital ConnectionsDigital Connections
Digital Connections
Yamaha DS2416 Setup Guide
3
To configure the Digital 328 as the wordclock master, enter the 328 Menu pages by pressing the
<MENU> button on the right hand side of the LCD display. Using the encoder beneath the
display, scroll up or down until the ‘Clock Source Sel’ menu is highlighted, and press <ENTER>.
Here, the sample rate at which you wish to work is also determined. Select ‘Internal:44.1kHz’ or
‘Internal:48.0kHz’, depending on the chosen sample rate:
The S/PDIF Input on the console must be routed to a suitable destination. The available options
are one of the 2 Stereo Inputs, one of the 2 FX Returns or as a Digital 2 Track Return.
So, the input which should be used will depend on which other inputs are connected. It is likely
that the most suitable input would be either Stereo 2 or as a digital 2 Track Return.
Enter the menu pages by pressing the <MENU> button on the right hand side of the LCD
display. Using the encoder beneath the display, scroll up or down until the ‘SPDIF I/P Setup’
menu is highlighted and press <ENTER>. Using the encoder select the input required and press
<ENTER>.
For example
Similarly, the S/PDIF Output from the console must be routed from a suitable source. The
available options are Auxiliary Ouput 1/2, 3/4 FX 1/2 or the Mix output. If the Auxiliary or FX
Outputs are selected, they are used as a stereo source, 1 acting as the left channel and 2
acting as the right channel. If an Auxiliary output is selected, both the S/PDIF digital output and
the analogue sends will be active.
<W
or
d
c
l
oc
k
S
rc.
>
Internal:44.1kHz
< SPDIF Input >
R
oute To: STE-2
< SPDIF Input >
R
oute To: 2TRK
or
S/PDIF Input
S/PDIF InputS/PDIF Input
S/PDIF Input
S/PDIF Output
S/PDIF OutputS/PDIF Output
S/PDIF Output
2
Digital 328 Setup
Digital 328 SetupDigital 328 Setup
Digital 328 Setup
<W
or
d
c
l
oc
k
S
rc.
>
Internal:48.0kHz
or
Selecting one of these destinations will override an analogue signal
present at that input.
NOTE
Spirit Digital 328 v2
4
Enter the menu pages by pressing the <MENU> button on the right hand side of the LCD
display. Using the encoder beneath the display, scroll up or down until the ‘SPDIF O/P Setup’
menu is highlighted and press <ENTER>. Using the encoder select the output required and
press <ENTER>.
For example
< SPDIF Output >
Src From: AUX1/2 or
<
SPDIF
O
u
t
pu
t
>
Src From: MIX
< SPDIF Input >
R
oute To:NOWHERE
< SPDIF Output >
Src From:NOWHERE
In addition for both S/PDIF Input and Output, an option of ‘Nowhere’ is
available as a destination or source. If only a S/PDIF input was
required, for example, the output source should be set to ‘Nowhere’.
NOTE
Yamaha DS2416 Setup Guide
5
Reference will need to be made to the DS2416 documentation, and documentation supplied with
audio sequencers and other software.
The DS2416 Patch Utility is also required. This should also be downloaded from the
Yamaha website:
http://www.yamaha.co.jp/product/proaudio/homeenglish/navi/index.htm
This enables the card to be set to slave to the 328’s master clock.
Wordclock
Run the
patch.exe
application.
First click the ‘DIO #1’ tab and set the clock source to DI (Digital In) so that the card slaves to
the 328 master clock as shown below:
DS2416 Setup
DS2416 SetupDS2416 Setup
DS2416 Setup
DS2416 Patch Utility
DS2416 Patch UtilityDS2416 Patch Utility
DS2416 Patch Utility
3
The DS2416 relies on third party software, and for the purpose of
illustration,
C-Console
DS2416
by C-Mexx will be used.
C-Console
provides stand alone control of the DS2416’s functions without
requiring direct integration into a sequencer package. For further
information visit http://www.c-mexx.com.
NOTE
Spirit Digital 328 v2
6
Configuring DS2416 S/PDIF I/O
Click on the ‘Master & InPatch #1’ tab and activate the S/PDIF inputs by clicking both S/PDIF
switches:
The pan controls should also be panned hard left and right and the Stereo output activated:
The 328 SPDIF output will then be routed into the DS2416 card available for hard disk recording
and the output will be routed to the 328 input as selected on page 3.
Do not close the DS2416 Patch application as the card’s clock will
revert to its default internal state.
NOTE
If using the
patch.exe
application alone (ie without an application such
as
C-Console
), it must also be used to activate the DS2416 S/PDIF
input.
NOTE
Yamaha DS2416 Setup Guide
7
If using C-Mexx
C-Console
for control of the DS2416, the digital S/PDIF input appears again on
channels 19 and 20 but
C-Console
of course offers far more control.
C-
C-C-
C-Mexx C-Console
Mexx C-ConsoleMexx C-Console
Mexx C-Console
Open C-Console and click View |
In Patch | New and ensure that
the S/PDIF input is set to be
active on channels 19 and 20 as
shown (left).
The 328 S/PDIF output will now
appear on channels 19 and 20 on
the DS2416 C-Console control
surface as indicated on the
following page. From this input
the 328 S/PDIF output can be
routed to other software
applications for hard disk
recording.
For further information, relevant
C-Mexx C-Console documentation
should be consulted.
patch.exe
must still be run and left active in the background if slaving
clock from the 328. If using the DS2416 as the master clock source,
patch.exe
does not need to be run.
NOTE
Spirit Digital 328 v2
8
Digital 328 S/PDIF output
appears on DS2416 input
channels 19 and 20
Yamaha DS2416 Setup Guide
9
Spirit by Soundcraft
Harman International Industries Ltd., Cranborne House,
Cranborne Road, Potters Bar, Herts EN6 3JN, England.
Tel: +44 (0)1707 665000 Fax: +44 (0)1707 665461
web: http://www.spiritbysoundcraft.com
e-mail: spiritsupport@soundcraft.com
spiritdig@harman.com (US)

Other manuals for DS2416

2

Other Yamaha Music Mixer manuals

Yamaha IMX644 Manager User manual

Yamaha

Yamaha IMX644 Manager User manual

Yamaha NUAGE User manual

Yamaha

Yamaha NUAGE User manual

Yamaha MC1202 User manual

Yamaha

Yamaha MC1202 User manual

Yamaha TF5 User manual

Yamaha

Yamaha TF5 User manual

Yamaha ProMix 01 User manual

Yamaha

Yamaha ProMix 01 User manual

Yamaha PM1200 User manual

Yamaha

Yamaha PM1200 User manual

Yamaha M7CL StageMix V1.5 User manual

Yamaha

Yamaha M7CL StageMix V1.5 User manual

Yamaha MW12 User manual

Yamaha

Yamaha MW12 User manual

Yamaha DMC1000 User manual

Yamaha

Yamaha DMC1000 User manual

Yamaha GA32/12 GA24/12 User manual

Yamaha

Yamaha GA32/12 GA24/12 User manual

Yamaha MG12/4 User manual

Yamaha

Yamaha MG12/4 User manual

Yamaha QL Series Instructions and recipes

Yamaha

Yamaha QL Series Instructions and recipes

Yamaha PM5D User manual

Yamaha

Yamaha PM5D User manual

Yamaha MG10 User manual

Yamaha

Yamaha MG10 User manual
Yamaha MC1203 User manual

Yamaha

Yamaha MC1203 User manual

Yamaha PM1D Manager V2 Instructions and recipes

Yamaha

Yamaha PM1D Manager V2 Instructions and recipes

Yamaha M7CL StageMix V1.5 Installation and operation manual

Yamaha

Yamaha M7CL StageMix V1.5 Installation and operation manual

Yamaha MonitorMix User manual

Yamaha

Yamaha MonitorMix User manual

Yamaha AG06 User manual

Yamaha

Yamaha AG06 User manual

Yamaha AM802 User manual

Yamaha

Yamaha AM802 User manual

Yamaha CL3 User manual

Yamaha

Yamaha CL3 User manual

Yamaha PM3500 User manual

Yamaha

Yamaha PM3500 User manual

Yamaha MG20XU User manual

Yamaha

Yamaha MG20XU User manual

Yamaha QL5 User manual

Yamaha

Yamaha QL5 User manual

Popular Music Mixer manuals by other brands

ETC ColorSource AV Setup guide

ETC

ETC ColorSource AV Setup guide

Mackie 406M owner's manual

Mackie

Mackie 406M owner's manual

Alto GHIBLI 16 owner's manual

Alto

Alto GHIBLI 16 owner's manual

Fredenstein MixCube operating manual

Fredenstein

Fredenstein MixCube operating manual

AudioArts Engineering audio console r-55e Technical manual

AudioArts Engineering

AudioArts Engineering audio console r-55e Technical manual

Behringer PRO MIXER DX100 user manual

Behringer

Behringer PRO MIXER DX100 user manual

Mackie Onyx 1220 owner's manual

Mackie

Mackie Onyx 1220 owner's manual

Behringer PRO MIXER DX2000USB user manual

Behringer

Behringer PRO MIXER DX2000USB user manual

PRESONUS StudioLive RML16AI quick start guide

PRESONUS

PRESONUS StudioLive RML16AI quick start guide

Omnitronic RM-1422FX USB user manual

Omnitronic

Omnitronic RM-1422FX USB user manual

Biamp ADVANTAGE RPM Series Operation manual

Biamp

Biamp ADVANTAGE RPM Series Operation manual

Ahuja AMX-812 Operation manual

Ahuja

Ahuja AMX-812 Operation manual

Ecler eSAM603 user manual

Ecler

Ecler eSAM603 user manual

Rolls MixMate 2 RM74 Specifications

Rolls

Rolls MixMate 2 RM74 Specifications

ALLEN & HEATH MixWizard Series user guide

ALLEN & HEATH

ALLEN & HEATH MixWizard Series user guide

Phonic MX 300 user manual

Phonic

Phonic MX 300 user manual

SoundCraft GIGRAC 1000st user guide

SoundCraft

SoundCraft GIGRAC 1000st user guide

Panasonic WR-XS3 operating instructions

Panasonic

Panasonic WR-XS3 operating instructions

manuals.online logo
manuals.online logoBrands
  • About & Mission
  • Contact us
  • Privacy Policy
  • Terms and Conditions

Copyright 2025 Manuals.Online. All Rights Reserved.