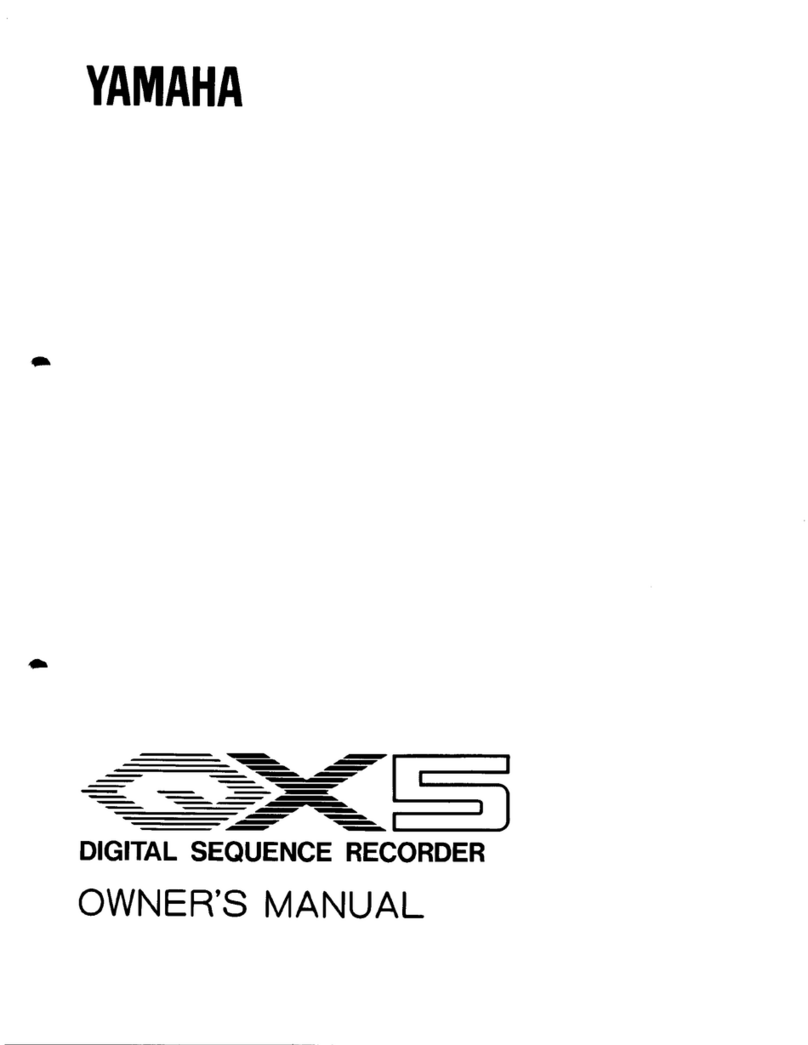
Yamaha QX5 User manual

YAMAHA
DIGITAL
SEQUENCE
RECORDER
OWNER’S
MANUAL

ABOUT
THIS
MANUAL
Thank
you
for
purchasing
the
QX5
Digital
Sequence
Recorder.
The
QX5
is
an
8
track
MIDI
sequencer
with
extensive
editing
functions
and
superb
flexibility,
yet
easy
to
learn
and
simple
to
use.
In
order
to
understand
the
QX5
and
take
full
advantage
of
its
capa-
bilities,
please
read
through
this
manual
and
try
out
the
examples.
CONTENTS
ABOUT
THIS
MANUAL...
1
HOW
DOES
THE
QX5
WORK?....
2
FEATURES
wa
4
PRECAUTIONR
ss
sseeree
eette
reeeo
5
OPERATION
GUIDE
eee
eee
eee
6
FRONT/REAR
PANEL
7
RECORDING
REALTIME
RECORDING
PUNCH
IN
RECORDING
....
we
16
STEP
BECORHDING
<<
ss
nsigna
eZ
Vane
aeree
17
EVENT
EDIT...........
MEASURE
EDIT
..
TRACK
EDIT
.
38
we
AT
MIDI
Zs
ena
zaoa
44
OTHER
FUNCTIONSG....................
‘
TAPE
SYNC
46
47
IDEAS
AND
SUGGESTIONS
MESSAGES
48
SYSTEM
EXCLUSIVE
DATA
FORMAT
SPECIFICATIONS
MIDI
IMPLEMENTATION
CHART
WHAT’S
HEXADECIMAL?
WHAT'S
MIDI?

HOW
DOES
THE
QX5
WORK?
This
section
will
give
you
a
quick
overview
of
the
QX5.
When
you
play
a
MIDI
keyboard,
it
sends
messages
indicating
which
note
was
played
and
how
strongly,
sustain
pedal
on/off,
etc.
The
OX5
digitally
records
these
messages
and
can
“play”
them
back,
causing
a
MIDI
tone
generator
to
produce
sound.
To
use
the
QX5,
you
need
a
MIDI
keyboard
and
at
least
one
MIDI
tone
generator
or
synthesizer.
—
——
T
back
MIDI
eet
ic
MIDI
IN
Mibi
our
ua
OUT
MIDI
IN
ET
Di
Tone
MIDI
anen
|
L
For
example
you
can
use
a
Yamaha
DX7
as
MIDI
keyboard,
a
Yamaha
TX816
as
tone
generator
and
add
a
Yamaha
RX11
for
drum
tracks.
MIDI
OUT
MIDI
IN
MIDI
OUT
Dror
wd
IN
MIDI
THRU
MIDI
IN
see
|
The
QX5
can
record
MIDI
data
in
three
ways.
RECORDING
Realtime
Notes
are
recorded
in
the
timing
that
you
play
them.
Punch
In
The
same
as
realtime
recording,
but
you
can
set
the
point
at
which
recording
will
begin
and
end.
-
Step
You
can
use
a
MIDI
keyboard
to
enter
notes
and
specify
their
timing
and
gate
time
using
the
QX5
panel
switches.
8
tracks
of
MIDI
data
can
be
stored, edited,
saved
and
loaded
independently.
EIGHT
TRACKS
Recording
is
always
done
on
track
1.
When
you
have
finished
recording
a
track,
you
can
exchange
track
1
with
an
empty
track
(2-8)
and
record
again.
Channel
information
is
recorded,
and
each
track
can
contain
independent
MIDI
data
of
up
to
16
channels.
Tracks
can
be
joined,
mixed,
cut,
deleted,
exchanged,
etc.
Each
track
can
be
turned
on
or
off for
playback.
N

THIRTY-TWO
MACROS
EDITING
Event
Edit
Measure
Edit
Track
Edit
Think
of
a
macro
as
a
“floating
track.”
A
macro
contains
the
same
data
as
a
track,
and
tracks
and
macros
can
be
freely
exchanged.
A
macro
number
can
be
inserted
at
any
point
in
a
track.
When
playback
comes
to
that
point
in
the
track,
the
data
in
the
macro
will
begin
playing
along
with
the
data
in
the
tracks.
Up
to
4
macros
can
be
playing
at
once.
Measure
1
Track
1
MACRO
03
*
|
Track
2
MACRO
02
MACRO
05
*
Macros
are
handy
for
repeated
phrases,
or
as
temporary
storage.
There
is
no
limit
to
the
capacity
of
a
track
or
macro,
but
the
total
number
of
recorded
notes
(tracks
+
macros)
must
be
less
than
20,000.
(If
Note
On
Velocity
data
is
recorded,
capacity
is
about
15,000
notes.)
Since
the
QX5
“records”
data,
not
sound,
you
have
complete
freedom
to
change
a
performance
after
it
has
been
recorded.
There
are
three
ways
to
edit
what
you
have
recorded.
Edit
individual
MIDI
“events”.
You
can
go
in
and
change,
insert,
delete,
or
change
the
timing
of
individual
notes
or
data
such
as
Program
Change
messages.
Edit
individual
measures.
You
can
delete,
insert
and
copy
measures,
and
selectively
remove
or
change
certain
data
from
specified
measures.
Edit
whole
tracks.
You
can
exchange,
copy,
mix,
erase,
and
connect
tracks,
and
transfer
specified
data
to
another
track
or
macro.
~

Tracks
&
Macros
Memory
Capacity
Relative
Tempo
3
Position
Memories
Auto
Locate
Punch
In/Out
Record-
ing
Step
Recording
Unlimited
Editing
4
Setup
Memories
MIDI
re-channelizing
Tape
Sync
Backlit
LCD
Tape
or
MIDI
Save/-
Load
STOPI
FEATURES
The
OX5
offers
an
unprecedented
array
of
features
in
a
compact
unit,
just
the
right
size
for
placing
on
top
of
a
keyboard,
and
is
the
same
width
as
the
TX7
Tone
Generator
and
RX21
Rhythm
Programmer
for
easy
stacking.
8
tracks
(p.
2)
and
32
macros
(p.
3)
give
you
great
versatility
in
your
composing
and
arranging.
You
can
record
approximately
20,000
notes
(15,000
when
recording
velocity
data).
Recording
controller
data
(Aftertouch,
etc.)
will
also
use
memory.
Tempo
changes
can
be
inserted
at
any
point.
Three
measure
positions
can
be
stored
and
jumped
to
at
the
touch
of
a
switch.
Recording
can
be
set
to
automatically
begin
from
a
certain
measure.
You
can
set
recording
to
begin
and
end
at
specified
measures.
A
MIDI
keyboard
and
the
OX5
pane!
switches
can
be
used
to
enter
complex
phrases
note
by
note.
Recorded
data
can
be
edited
by
track,
measure
or
event
(p.
3).
MIDI
reception
and
transmission
conditions
and
QX5
settings
can
be
set
and
stored
in
4
memories
for
instant
recall.
Each
incoming
and
outgoing
channel
of
MIDI
messages
can
be
independently
re-assigned
to
a
different
channel.
An
FSK
tape
sync
signal
can
be
recorded
on
tape
to
synchronize
the
QX5
with
a
multitrack
recording.
The
two-line
16-character
LCD
is
backlit
for
easy
visiblity
even
in
dim
lighting.
Sequence
data
can
be
saved
to
and
loaded
from
a
data
cassette
tape
or
a
MIDI
data
managing
device.
lf
you
are
a
little
unsure
about
your
understanding
of
MIDI,
go
and
read
p.
53
“What's
Hexadecimal!”
and
p.
55
“What's
MIDI?”

PRECAUTIONS
on
LOCATION
HANDLING
POWER
CABLE
CLEANING
ELECTRICAL
STORMS
(LIGHTNING)
ELECTROMAGNETIC
FIELDS
Avoid
placing
the
QX5
in
direct
sunlight
or
close
to
a
source
of
heat.
Also,
avoid
locations
in
which
the
device
is
likely
to
be
subjected
to
vibration,
excessive
dust,
cold
or
moisture.
Avoid
applying
excessive
force
to
the
switches,
dropping
or
rough
handling.
While
the
circuitry
is
of
reliable
integrated
circuit
design,
the
QX5
should
be
treated
with
care.
Always
grip
the
plug
directly
when
removing
it
from
an
AC
receptacle.
Removing
the
plug
from
the
AC
receptacle
by
pulling
the
cable
can
result
in
damage
to
the
cable,
and
possibly
a
short
circuit.
It
is
also
a
good
idea
to
disconnect
the
QX5
from
the
AC
receptacle
if
you
don’t
plan
to
use
it
for
an
extended
period
of
time.
~
Use
only
a
mild
detergent
on
a
cloth,
and
dry
with
a
soft
cloth.
Never
use
solvents
(such
as
benzine
or
thinner)
since
they
can
melt
or
discolor
the
finish.
Computer
circuitry,
including
that
in
the
QX5,
is
sensitive
to
voltage
spikes.
For
this
reason,
the
QX5
should
be
turned
off
and
unplugged
from
the
AC
receptacle
in
the
event
of
an
electrical
storm.
This
precaution
will
avoid
the
chance
that
a
high
voltage
spike
caused
by
lightning
will
damage
the
device.
Computer
circuitry
is
also
sensitive
to
electromagnetic
radiation.
Television
sets,
radio
receivers,
transmitters
and
transceivers,
and
wireless
microphone
or
intercom
systems
are
all
potential
sources
of
such
radiation.
The
QX5
should
not
be
placed
too
close
to
such
devices.

STEP
RECORD
STEP
FREE
MEMORY
r
1
OPERATION
GUIDE
The
QX5
Top
Panel
contains
a
JOB
TABLE
to
show
how
to
enter
job
groups
and
quick
guides
of
EVENT
EDIT
and
STEP
RECORD.
It
is
for
your
reference
when
you
operate
the
QX5.
YAMAHA
e
EVENT
EDIT
JOB
TABLE
MEASURE
BEAT
CLOCK
r
fom
fa
250
1/04
080%
064
4 —
Le
STEP TIME
GATE
TIME
VELOCITY
DISPLAY
M=0001-01-00/96
1/04
080%
064
STEP
TIME
CLOCK
STEP TIME
CLOCK
1/02
192
1/03
128
1/04
1/06
1/08
4/12
M=0001-01-00/96
NOTE
(1)
C..3
064
—_
—
——
—
Y
Y v
EVENT
EDIT
SEARCH
CHANGE
v
MEAS
EDIT
COREY
DELETE
REMOVE
TRACK
EDIT
EXCHANGE
COPY
LOAD/SAVE
TAPE
SAVE
TAPE
LOAD
TAPE
VERIFY
EVENT
DATA
TR.DOWN
CLEAR
CUT
INSERT
EXTRACT
CLOCK
MOV
THIN
OUT
SHIFT
SHIFT
QUANTIZE
TRANSPOSE
VELOCITY
GATE
TIME
CRESCENDO
CREATE
MIDI
TRANSMIT
MIDI
RECEIVE
SETUP STORE
SETUP
RECALL
NOTE
PROGRAM
AFTER
TOUCH
EXCLUSIVE
PITCH
BEND
MACRO
CONTROL
TEMPO
MODE
MEASURE
SEARCH
FA
CHANGE
SETUP
MONITOR
MIDI
1
MIDI
2
1/16
1/24
1/32
1/48
1/64
1/96
24
JOB
TABLE
EVENT
EDIT
Search
Change
STEP
RECORD
Step
Time
Gate
Time
Velocity
Free
Memory
BEAT/MEASURE
INPUT
MONITOR
INPUT
ASSIGN
CLICK
OUTPUT
MONITR
OUTPUT
ASSIGN
REPEAT
VELOCITY
MEM.PROTECT
AFTER
TOUCH
FOOT
SWITCH
PITCH
BEND
LOCATE
DELAY
REMOTE
IN
REMOTE
OUT
ECHO
DEVICE
NUMBER
F3
BACK
pa
F2
CURSOR
=i
+1
DELETE
INSERT
REPLACE
Få
SHIFT
+
RECORD
SHIFT
+
STOP
SHIFT
+
START
CONTROL
CHNG
SYS.EXCLUSIVE
The
four
main
function
switches
(Tempo,
Measure,
Track
and
Clock)
each
access
two
job
groups,
one
group
when
double-clicked,
and
one
group
when
pressed
while
holding
[SHIFT].
To
exit
from
the
Job
mode,
press
one
of
these
function
switches
or
{SHIFT]
+
[RESET].
This
guide
contains
an
illustration
of
the
LCD,
a
list
of
events
and
a
diagram
of
EDIT
operations.
For
details
see
EVENT
EDIT
(p.
20).
When
the
cursor
is
hidden,
use
(<),
(œ)
to
move
through
track
1
searching
for
events
you
want
to
change.
Press
(JOB)
to
switch
from
Search
to
Change.
The
cursor
will
start
blinking.
Use
(CURSOR)
to
select
what
you
will
change
(Position,
Event,
Data),
and
use
[F3]
(<1),
(>)
to
change
the
value.
Then,
you
need
to
Delete,
Insert
or
Replace
the
event
using
[SHIFT]
and
RECORD}/|STOP|/([START].
This
guide
contains
illustrations
of
the
LCD
and
a
table
showing
the
number
of
clocks
per
step.
For
details
see
STEP
RECORDING
(p.
17).
Time
value
of
the
note
(1/2
—1/96).
Length
the
note
is
held,
displayed
as
a
percentage
of
the
Step
Time.
Force
with
which
the
note
is
played
(1
—
127).
Unused
memory
in
blocks
of
80
notes.
By
pressing
[DISPLAY],
you
can
display
the
current
position;
measure,
beat,
clock.

FRONT
PANEL
LCD
TEMPO
MEASURE
TRACK
CLOCK
DISPLAY
(CLICK)
FRONT/REAR
PANEL
DELETE
STEP
BACK
TE
REST
oa
dod
MEASURE
TRACK
CLOCK
_
DISPLAY
AUTO
LOCATE
Hija
MEAS
EDIT
“ea
a
9
RESET
SHIFT
TEMPO
c
osc
C4
"CURSOR
7 >
AEC
MODE
A
two-row
16-character
Liquid
Crystal
Display,
backlit
for
high
visibility.
*
The
Job
Guide
on
p.
6
describes
the
functions
of
the
following
4
switches
when
pressed
with
[SHIFT]
and
when
double-clicked.
Display
and
change
the
current
tempo.
The
LED
blinks
to
indicate
the
current
tempo.
While
[SHIFT]
is
pressed,
you
can
recall
and
set
the
Tempo
Memories.
Move
through
the
measures
of
a
song
(fast
forward
and
rewind).
While
(SHIFT
is
pressed,
you
can
recall
and
set
the
Measure
Memories.
Each
track
can
be
switched
on
or
off.
{F1]-[F4]
switch
tracks
1-4.
While
SHIFT]
is
pressed,
[F1]-[F4]
switch
tracks
5-8.
The
QX5
can
be
controlled
by
its
own
internal
clock,
MIDI
clock,
or
tape
(FSK)
clock.
While
[SHIFT]
is
pressed,
the
Clock
Output
can
be
turned
on
or
off.
Select
display
mode.
Tempo,
Measure,
Track
and
Clock
can
each have
their
own
display
(with
help
message)
or
all
be
shown
in
one
display
(no
help
messages).
When
pressed
with
[SHIFT],
the
click
is
turned
on
or
off.
AUTO
LOCATE
(RESET)
When
this
is
on,
pressing
[START]
will
begin
recording
or
playback
from
the
measure
RECORD
(REC
MODE)
STOP/CONTINUE
in
the
first
(left)
Measure
Memory.
The
LED
indicates
Autolocator
On.
You
can
loop
between
the
current
measure
and
the
first
Measure
Memory
by
pressing
SHIFT]
+
[START].
By
pressing
[SHIFT]
with
this
switch,
you
can
abort
the
current
operation.
Enter
record
mode.
When
[RECORD]
is
pressed
with
[SHIFT],
the
Record
Mode
will
change.
Stop
recording
or
play.
If
pressed
again,
play
will
continue
from
that
point.
If
pressed
after
[RECORD],
recording
wil!
begin
from
that
point.
N
l

START
(ENTER)
Start
recording
or
play
from
the
beginning
of
the
song.
When
editing,
executes
the
selected
function.
*
Switches
[F1]-[F4]
perform
the
function
indicated
in
the
LCD
above
the
corresponding
numbers
[F1]
-
[F4].
F1
(JOB)
When
performing
a
Setup,
Edit
or
Load/Save
function,
[F1]
steps
through
the
jobs.
F2
(CURSOR)
When
performing
a
Setup,
Edit
or
Load/Save
function,
moves
the
cursor.
F3(<2)
When
performing
a
Setup,
Edit
or
Load/Save
function,
decrements
the
data
indicated
by
the
cursor.
EA)
When
performing
a
Setup,
Edit
or
Load/Save
function,
increments
the
data
indicated
by
the
cursor.
SHIFT
Used
to
access
the
functions
printed
in
purple
below
the
keys.
Holding
down
SHIFT]
reverses
the
movement
of
the
and
[CURSOR]
keys.
REAR
PANEL
TAPE
OUT
N
FOOT
$w
CLICK
OUT
MIDI
THRU
All
messages
received
at
MIDI
IN
are
sent
unchanged
from
this
terminal.
MIDI
OUT
Sequence
playback
and
other
MIDI
messages
are
sent
from
here.
You
may
set
the
MIDI
OUT
to
echo
back
messages
received
at
MIDI
IN.
MIDI
IN
MIDI
messages
coming
in
to
this
terminal
can
be
recorded
by
the
QX5.
TAPE
OUT
In
play
and
record
mode,
this
sends
an
FSK
tape
sync
signal.
In
load/save
mode,
it
sends
sequence
data
to
tape.
TAPE
IN
In
play
and
record
mode,
this
receives
an
FSK
tape
sync
signal.
in
load/save
mode,
it
receives
sequence
data
from
tape.
FOOT
SW
An
optional
footswitch
such
as
the
FC4
or
FC5
can
be
used
to
start,
stop
or
continue
playback
or
recording.
CLICK
OUT
The
metronome
signal
is
output
from
this
jack
to
an
external
mixer
or
amp.
The
internal
click
tone
will
go
off
if
this
is
connected.

SIMPLE
RECORDING
EXAMPLE
To
give
you
a
general
idea
of
how
to
use
the
OX5,
we
will
show
you
how
to
record
in
real
time.
CONNECTIONS
SETTINGS
Memory
Protect
Echo
Channel
Assign
Connect
the
QX5
to
your
keyboard
and
tone
generator
as
shown
on
p.
2.
If
you
are
using
the
OX5
with
a
single
MIDI
synthesizer,
connect
the
synthesizer
MIDI
OUT
to
QX5
MIDI
IN,
and
QX5
MIDI
OUT
to
the
synthesizer
MIDI
IN.
Recording
on
the
QX5
is
usually
very
simple;
just
press
[RECORD]
and
then
START].
But
in
order
to
make
this
example
absolutely
foolproof,
we
will
make
sure
all
settings
are
correct.
We
will
give
detailed
explanations
of
each
function
later.
For
us
to
record,
memory
protect
must
be
off.
Double-click
the
[TEMPO]
switch
(quickly
press
it
twice).
Press
three
times
to
get
the
Memory
Protect
display,
a
and
press
<1
to
make
it
read
“MEM.PROTECT
OFF.”
-
(Press
three
times)
(Press
twice)
|
TEMPO
ital
£3)
ab
4>MEM.
PROTECT
EVENT
EDIT
JOB
<a
OF
F
We
need
to
hear
ourselves
play,
so
we
will
set
the
QX5
to
transmit
all
messages
received
at
MIDI
IN
directly
from
MIDI
OUT.
(This
is
called
Echo
Back.)
Dou-
ble-click
the
[CLOCK]
switch.
Press
twice
to
get
the
Echo
display,
and
press
<j
or
t
to
make
it
read
“DIRECT”.
(Press
twice)
(Press
twice)
CLOCK
(Fi
EJ
[Ea
3>ECHO
LOAD/SAVE
JOB
< G
DIRECT
We
want
to
record
MIDI
messages
coming
in
on
channel
1,
and
play
them
back
on
the
same
channel.
Check
to
make
sure
that
your
keyboard
is
transmitting
on
—
channel
1
and
that
your
tone
generator
is
receiving
channel
1
(see
the
owner's
manual
for
each
device).
Double-click
the
|TRACK]
switch.
The
display
will
show
“INPUT
ASSIGN",
with
a
blinking
cursor
at
the
lower
far
left.
The
number
at
the
cursor
should
be
“1”.
If
not,
use
<I
or
&
to
change
it
to
“1”.
(Press
twice)
(Press
if
—
9
23456789
10
11
12
13
141516
TRACK
EDIT
<a

Clock
Track
1
On
Realtime
Record
Metronome
START
RECORDING
Press
and
the
display
will
show
“OUTPUT
ASSIGN.”
In
the
same
way
you
did
with
Input
Assign,
make
sure
the
far
left
number
is
“1”.
co.
2>OUTPUT
ASSIGN
=
23456789
1011
12
13
1415
16
We
will
set
the
QX5
clock
to
[INTERNAL].
Press
[CLOCK]
and
then
[F4].
The
display
will
show
“CLOCK
IN=INT”
or
“C=INT.”
cock
——
CLOCK
IN=INT
„|
T5120
M=0001-01
—
*
Tape
Midi
Int]
|P=*x.......
C=INT
F3
E3
For
us
to
record
on
track
1,
it
must
be
turned
on.
Press
[TRACK]
and
then
to
make
“1”
or
“*”
appear.
(Each
time
you
press
[F1],
“1”
or
“*”
will
alternate
with
“.”)
a
|
es
PLAY
TR=%*.......
T=120
M=0001-01
or
TRACK
EDIT
JOB
Trl
Tr2
Tr3 Tr4
While
holding
down
[SHIFT],
press
[REC
MODE].
Each
time
you
press
(REC
MODE],
the
display
will
move
between
“REALTIME”,
“PUNCH
IN”,
and
“STEP.”
Make
it
read
“REALTIME.”
RECORD
alla
REALTIME
250
j
REC
MODE
While
holding
down
[SHIFT],
press
[CLICK]
to
turn
the
metronome
on
or
off.
(If
it’s
too
fast,
or
sounding
in
a
strange
time
signature,
just
leave
it
off.
We
will
explain
how
to
set
this
later.)
SHIFT
DISPLAY
CLICK
When
you
selected
the
recording
mode,
the
Record
LED
came
on.
Pressing
START]
will
begin
recording.
After
a
two-measure
countdown,
anything
you
play
will
be
recorded.
Play
20
or
30
measures
so
that
we
have
something
to
work
with.
Ready
to
record
REALTIME
250
T=120
M=0001-01
RECORD
Ll
REC
MODE
—
Countdown
Begin
recording
REALTIME
250
REALTIME
249
T=120
COUNT=08
T=120
M=0001-01
ENTER
When
you
have
played
enough,
press
[STOP/CONTINUE].
Both
LEDs
will
go
off.
10

Pressing
[START]
will
playback
what
you
have
just
recorded.
Press
[MEASURE
PLAYBACK
and
use
<I
to
“rewind”
or
“fast-forward.”
Start/Stop/Continue
The
|STOP/CONTINUE|
key
is
dual-function.
Pressing
[STOP/CONTINUE|
during
playback
or
recording
will
stop.
Press
it
again
to
continue
playback
or
recording
from
that
point.
For
example,
you
can
stop
playback
(press
[STOP]),
use
<I>
to
find
the
measure
you
want,
and
continue
from
that
point.
When
stopped,
pressing
[START]
will
playback
or
record
from
the
beginning.
Working
through
the
above
should
give
you
an
idea
of
what
MIDI
recording
is
like.
To
fully
understand
the
pos-
sibilities
and
freedom
the
QX5
gives
you,
go
on
and
read
the
rest
of
this
manual,
taking
time
to
try
out
each
function.
11

>
MAIN
FUNCTIONS
The
four
main
functions
(Tempo,
Measure,
Track
and
Clock)
can
be
accessed
by
pressing
one
of
the
four
switches
and
using
[F1]-[F4]
to
change
the
setting.
You
have
a
choice
of
displays
for
these
4
functions.
DISPLAY
TEMPO
Tempo
Memory
Recall
Tempo
Memory
Save
Tempo
Memory
You
may
choose
to
display
all
four
function
settings
together,
or
separately.
To
switch
display
modes,
press
[DISPLAY].
When
displayed
separately,
the
lower
line
of
the
LCD
will
remind
you
what
[F1]-[F4]
do
(ie.
a
“help”
message)
for
each
function.
Whichever
display
is
selected,
[TEMPO],
[MEASURE],
and
will
select
the
function,
and
[F1]-[F4]
will
change
the
settings.
In
the
“together”
display,
the
blinking
cursor
indicates
which
function
is
selected.
Once
you
are
familiar
with
the
QX5,
the
“together”
display
may
be
more
convenient,
but
in
this
manual
the
illustrations
will
always
be
the
“separate”
display.
M=0001-01
eC
CLICK
PLAY
TR=1.......
i
MEASURE=0001-01
DISPLAY
TEMPO=120
P
Fast
Down
U
Press
and
use
[F3]
and
[F3]
to
change
the
tempo
between
40
and
300,
indicating
the
number
of
quarter
notes
per
minute.
While
you
hold
down
EJ,
the
tempo
will
be
multiplied
by
4.
This
is
useful
when
you
want
to
quickly
find
a
certain
section
while
playing
back.
has
no
effect
in
Tempo
mode.
TEMPO=120
Fast
Down
Up
EJ
You
can
preset
3
different
tempo
for
instant
recall.
Press
and
the
display
will
show
the
three
preset
tempo.
Pressing
[F2]
-
[F4]
while
holding
|SHIFT|
will
set
the
tempo
to
the
selected
value.
To
change
a
tempo
preset,
continue
holding
and
press
[Fi].
The
cursor
will
start
blinking
on
the
“S”
of
“Save.”
Now
press
[F2]
-
[F4]
to
save
the
current
tempo
in
a
preset.
(Hold
down)
(Continue
holding)
Preset
tempo
is
recalled.
l
|
SHIFT
SHIFT
EZ)
TEMPO=120
TEMPO=096
>
+
Cc]
Save
096
100
O75
C
—
Save
O96
100
O75
(Hold
down)
(Continue
holding)
Current
tempo
is
saved
I
SHIFT
FI
|
TEMPO=120
SHIFT
Fa
TEMPO=120
C
L
Nilav
vs
096
100
075
a.
Save
096
120
075
Ae
&
Ea
12

13
MEASURE
Measure
Memory
TRACK
NOTE
i
aaa
If
Clock
is
set
to
MIDI
or
TAPE
(see
p.
14),
you
will
not
be
able
to
change
the
tempo.
It
will
only
be
displayed.
If
there
is
no
MIDI
clock
producing
device
connected,
or
if
the
tape
is
stopped,
the
displayed
tempo
will
be
0.
TEMPO=000
TEMPO=000
x
MIDI
CLOCK
x *
TAPE
CLOCK
x
Press
[MEASURE]
and
use
and
to
move
backward
or
forward.
[FT]
will
take
you
to
measure
1
(the
beginning
of
the
song)
and
will
move
to
the be-
ginning
of
the
current
measure
(beat
1).
Beat
Measure
MEASURE=0027-01
0001-01
Back
Fwd
If
you
are
at
beat
100
or
beyond,
the
display
will
show
the
last
two
places.
(It
is
possible,
though
unusual,
to
have
more
than
100
beats
in
a
measure.)
If
more
than
one
track
is
on,
the
measure
marks
of
the
lowest-numbered
track
will
be
used.
(It
is
possible
to
have
different
time
signatures
for
different
points
in
each
track.
See
Beat/Measure,
p.38.)
You
can
preset
three
different
measure
numbers
and
jump
to
them
instantly.
Press
[SHIFT]
and
the
display
will
show
the
three
preset
measures.
Press
[F2]-[F4]
to
jump
to
the
preset
measure.
To
change
the
measure
memories,
move
to
the
measure
you
want
to
save
using
[F3]
and
[F4],
then
press
[F1]
while
holding
[SHIFT].
The
“S”
of
“Save”
will
begin
blinking.
Press
[F2]-[F4]
to
save
the
current
measure
position
in
a
preset.
If
the
measure
position
is
999
or
above,
it
will
be
displayed
as
999.
MEASURE=0027-01
Save
121
015
105
SHIFT
Cl
A
A
A
A
The
measure
memory
is
used
in
Auto
Locate
(p.
16),
and
and
measure
memories
are
used
in
Punch
In
(p.
16).
Each
of
the
8
tracks
can
be
set
to
Off,
Muted,
or
On.
Press
[TRACK]
and
use
[Fi]
-
[F4]
to
switch
tracks
1-4.
Pressing
[F1]
-
[F4]
while
holding
[SHIFT]
will
switch
tracks
5-8.
PLAY
TR=1.......
PLAY
TR=1.......
Tri
Tr2
Tr3
Tr4
i
TrS
Tr6
Tr? Tr8
HIFT
Fa
C+
A
Fa
(d

`
Track
On/Off
Track
Mute
CLOCK
Internal
Clock
MIDI
Clock
Tape
Clock
Clock
Out
While
stopped,
you
can
switch
tracks
1-8
On
or
Off.
(This
will
automatically
return
you
to
measure
1.)
When
a
track
that
contains
data
is
turned
on,
its
number
will
be
displayed.
When
a
track
that
has
no
data
(or
has
come
to
the
end
of
it)
is
switched
on,
a
“*”
is
displayed.
As
you
near
the
end
of
a
multi-track
composition,
the
track
numbers
will
change
to
“*”
as
they
run
out
of
data.
in
the
example
below,
tracks
1-5
are
on,
but
tracks
3
and
5
have
no
more
data.
PLAY
TR=12x*4%...
Trl
Tr2
Tr3 Tra
During
playback,
you
can
switch
tracks
between
On
and
Mute
(indicated
by
“_*).
A
Muted
track
will
not
send
data.
When
is
pressed
or
the
data
in
the
track
ends,
Muted
tracks
are
reset
to
On.
In
the
example
below
(during
playback),
tracks
1,2,3
and
8
still
have
data,
but
only
3
and
8
are
playing.
PLAY
TR=
_3%%*..8
Trl
Tr2
Tr8
Tr4@
Press
[CLOCK]
and
use
[F2]-[F4]
to
select
the
master
timing
clock
for
the
QX5.
CLOCK
IN=INT
Tape
Midi
Int
S)
A
4
The
QX5
internal
clock
determines
the
tempo.
When
[INT]
is
selected,
you
can
change
the
tempo
from
the
QX5
panel
keys
(p.
7).
A
MIDI
clock-producing
device
(rhythm
programmer,
sequencer,
etc.)
connected
to
the
QX5
MIDI
IN
will
determine
the
tempo.
An
FSK
tape
sync
signal
received
at
the
Tape
In
jack
will
determine
the
tempo.
(See
Tape
Sync,
p.
47.)
You
can
choose
whether
or
not
to
transmit
clock
(timing)
data
from
MIDI
OUT
and
Tape
Out.
Hold
down
[SHIFT]
and
use
and
to
turn
Clock
Out
off
and
on.
CLOCK
OUT=OFF
Off
On
SHIFT
5
S
A
If
you
switch
this
during
playback,
the
display
will
change
immediately,
but
the
clock
signals
will
begin
on
the
next
beat.
Tape
Out
will
not
send
clock
data
while
the
OX5
is
stopped.
14

RECORDING
All
recording
is
done
on
track
1. In
order
to
record,
track
1
must
be
on
(p.
13)
and
Memory
Protect
must
be
off
(p.
39).
When
you
press
[RECORD],
the
Record
LED
will
light,
the
display
will
show
the
currently
selected
Record
Mode
(Realtime,
Punch
In,
Step),
and
the
measure
counter
will
move
to
the
beginning
of
the
current
measure.
When
the
Record
LED
is
lit,
you
will
not
be
able
to
enter
other
modes.
Press
again
to
exit
record
mode.
Recording
Mode
You
can
change
the
Record
Mode
by
pressing
[REC
MODE]
while
holding
SHIFT].
(When
power
is
first
turned
on,
Realtime
Record
is
selected.)
RECORD
SHIFT
REC
MODE
REALTIME
250
PUNCH
IN
250
STEP
250
T=120
M=0001-01
T=120
M=0001-01
1/04
080%
064
Realtime
recording
is
where
the
QX5
records
your
performance
just
as
you
play
REALTIME
it.
The
number
in
the
upper
right
indicates
the
size
of
free
memory
in
blocks
of
about
RECORDING
80
notes
(without
velocity).
In
Record
mode,
holding
down
will
speed
the
tempo
up
x4,
and
will
decrease
and
increase
tempo
just
as
in
Tempo
mode.
Tempo
memories
(p.
12)
can
be
recalled,
but
not
saved.
Free
memory
Tempo
x
4
Slower
Faster
REALTIME
250
uza
d
Fa
T=120
M=0001-01
CJJI
JOB
CURSOR
<a
>
Tempo
Position
Countdown
To
record
from
the
beginning,
press
[START].
To
record
from
the
current
measure,
press
[CONTINUE].
If
Clock=Internal,
you
will
get
a
2-measure
countdown
(me-
~
tronome
and
display)
before
recording
begins.
You
can
send
a
Program
Change
message
during
the
countdown,
and
it
will
automatically
be
recorded
at
the
top
of
the
measure
you
begin
recording
on.
If
Clock=MIDI
or
Tape,
there
is
no
countdown.
Also,
if
you
have
set
Click
to
Manual
(see
p.
38)
and
turned
it
off,
there
will
be
no
countdown.
Ready
to
record
Press
Start
Countdown
begins
Recording
begins
RECORD
START
=
REALTIME
250
=
REALTIME
249
T=120
COUNT=08
T=120
M=0001~01
REC
MODE
ENTER
15

Measure
Marks
Auto
Locate
PUNCH
IN
RECORDING
Enter
Punch
In
Record
mode
Punch
In/Qut
Points
Whether
or
not
the
metronome
automatically
comes
on
during
recording
will
depend
on
the
Click
setting
(p.
38),
but
you
can
always
turn
it
on/off
by
pressing
while
holding
[SHIFT].
The
metronome
is
accented
on
the
first
beat
of
each
measure.
If
tracks
2-8
are
playing,
the
measure
marks
(p.
24)
in
those
tracks
will
determine
how
the
measure
marks
are
recorded.
If
no
other
tracks
are
playing,
the
Beat/Measure
setting
(p.
38)
will
determine
the
measures.
(You
can
take
ad-
vantage
of
this
to
produce
some
interesting
polyrythms!)
If
track
1
is
shorter
than
other
tracks
and
the
current
measure
is
past
the
end
of
track
1
when
you
continue
recording,
empty
measures
will
be
filled
in
appropriately.
To
stop
recording,
press
[STOP].
The
Record
and
Start
LEDs
will
go
off,
and
the
display
will
show
“Executing”,
then
return
to
the
previous
mode.
In
Realtime
Record,
you
can
use
the
Auto
Locate
function
to
start
recording
from
a
specified
measure.
If
you
press
when
Auto
Locate
is
off,
you
will
begin
recording
(or
playback)
from
measure
1.
But
if
you
press
when
the
Auto
Locate
is
on,
recording
(or
playback)
will
begin
from
the
measure
memory
(see
p.
13).
If
you
press
during
recording,
you
will
begin
recording
from
the
measure
memory,
and
data
already
recorded
will
be
lost.
A
Start
message
received
via
MIDI
will
make
the
QX5
start
play
or
record
from
measure
1,
regardless
of
Auto
Locate.
See
also
Loop
Playback,
(p.
46).
Punch
In
recording
is
much
like
Realtime
recording.
However,
even
though
both
the
Record
and
Start
LEDs
will
be
on,
actual
recording
will
be
done
only
between
specified
measures.
Set
the
Punch
In/Out
points
using
the
Measure
Memory
function
(p.13).
is
the
Punch
In
point,
is
the
Punch
Out
point.
Press
[DISPLAY]
to
show
either
the
current
position
or
the
beginning
(punch
in)
and
end
(punch
out)
of
recording.
oseLaY
[PUNCH
IN
199
C>
CLICK
PUNCH
IN
199
T=120
M=0024-01
T=120
0030..
0051
Current
measure
and
beat
Punch
in/out
points
When
you
press
[CONTINUE]
or
[START],
the
QX5
will
playback
normally
until
it
reaches
the
Punch
In
point,
when
recording
will
begin.
When
it
reaches
the
Punch
Out
point,
playback
will
resume.
There
is
no
countdown
for
Punch
In
re-
cording.
Suppose
you
wanted
to
rerecord
a
few
measures
in
the
middle
of
a
song.
Set
the
Punch
In/Out
points,
move
to
a
spot
a
few
measures
before
the
section,
and
Continue
recording.
Play
along
with
the
already
recorded
performance.
When
you
reach
the
Punch
In
point,
the
recorded
part
will
drop
out,
and
your
new
performance
will
be
recorded.
When
you
come
to
the
Punch
Out
point,
the
old
performance
will
reappear.
Playback
Begin
recording
Resume
playback
Track
ULL
«CLL
Punch
In
Punch
Out
16

STEP
RECORDING
Step
Recording
Display
Clock
Begin
Recording
STEP
RECORDING
PARAMETERS
Step
Time
17
When
you
press
[STOP],
the
measure
counter
will
return
to
the
point
where
you
started
or
continued
playback
before
punch
in.
This
is
very
handy
when
making
repeated
tries
over
the
same
section.
You
can
set
a
footswitch
(p.
39)
to
CONTINUE/STOP,
and
if
you
make
a
mistake,
press
the
footswitch
and
have
another
try!
NOTE
In
Punch
In
Record,
you
can
use
the
Auto
Locate
function
to
start
playback
from
a
specified
measure.
See
p.
16.
This
is
where
you
use
the
QX5
keys
and
a
MIDI
keyboard
to
enter
data
step
by
step,
making
it
possible
to
create
phrases
that
would
be
difficult
to
play
in
real
time.
Measure
marks
are
created
according
to
the
Beat/Measure
setting,
and
are
not
affected
by
measure
marks
of
other
tracks.
To
speed
up
data
entry,
Gate
Time,
Velocity,
Ties,
and
Rests
can
be
entered
using
MIDI
controllers
such
as
Modulation
Wheel,
Data
Entry
Slider
etc.
(Quick
Input
Via
MIDI,
p.
19.)
By
pressing
[DISPLAY],
you
can
choose
between
displaying
the
amount
of
free
*
memory,
or
displaying
your
current
position
(measure,
beat,
clock).
You
will
probably
want
to
display
the
position
most
of
the
time.
Free
memory
Measure
Beat
Clock
STEP
170
1/04
080%
064
DISPLAY
3
M=0001-01-00/96
CLICK
—
————
For the
OX5,
the
smallest
subdivision
of
time
is
the
“clock”.
One
QX5
internal
clock
is
1/384th
of
a
whole
note.
Thus,
a
whole
note
is
384
clocks,
and
a
quarter
note
is
96
clocks.
In
the
case
of
4/4
time,
each
beat
will
have
96
clocks.
You
can
see
that
the
number
of
clocks
per
beat
will
differ
according
to
the
Beat/Measure
setting
(p.
38).
For
x/4
time,
96
clocks
per
beat;
for
x/8
time,
48
clocks
per
beat;
and
for
x/16
time,
24
clocks
per
beat.
When
you
press
or
[CONTINUE],
Step
Recording
will
begin.
Notes
you
play
on
the
MIDI
keyboard
will
be
recorded
at
intervals
of
the
step
time.
The
actual
timing
with
which
you
press
the
keys
does
not
matter.
For
example
if
the
Step
Time
is
1/16,
each
note
will
be
a
sixteenth
note.
To
enter
chords,
press
several
notes
together.
To
record
single
notes,
each
note
must
be
released
before
the
next
is
pressed.
You
can
send
Program
Changes
from
the
keyboard
as
usual,
and
they
will
be
recorded
along
with
the
notes,
but
without
a
time
interval.
As
usual,
|CURSOR]
moves
the
blinking
cursor,
and
«t>
change
the
data
at
the
cursor.
Step
Time
is
the
time
vaiue
of
the
note.
Each
time
you
enter
a
note
or
chord,
the
position
will
advance
by
one
of
these
steps,
Step
Time
is
variable
from
1/2
to
1/96.
M=0001-01-00/96
1/08
080%
KBD
Step
Time
1/2
-
1/96
k
u
~r

Gate
Time
Velocity
STEP
RECORDING
EXAMPLE
STEP
RECORDING
SWITCHES
Tempo
(Delete)
Measure
(Step
Back)
Track
(Tie)
Clock
(Rest)
Auto
Locate
(Protect)
Gate
Time
is
the
percentage
of
the
Step
Time
the
note
will
sound.
If
gate
time
is
100%,
a
quarter
note
will
last
exactly
96
clocks.
A
gate
time
of
10%
would
be
the
same
as
playing
staccato.
Use
to
move
the
blinking
cursor
to
Gate
Time,
and
use
«r>
to
set
it
between
10%
and
300%
in
steps
of
5%.
(Also
see
Quick
Input
Via
MIDI,
p.19).
M=0001-01-00/96
1/08
080%
KBD
Gate
time
10%
-
300%
Velocity
can
be
set
to
a
fixed
value
(1-127)
or
set
to
KBD,
when
the
velocity
produced
by
the
keyboard
will
be
used.
(Also
see
Quick
Input
p.19).
M=0001-01-00/96
1/08
080%
KBD
Velocity,
KBD
1-127
As
an
example,
enter
Step
Recording
mode
and
press
[START].
Press
to
select
the
position
display.
Press
to
move
the
blinking
cursor
to
Step
Time
and
use
«r>
to
make
it
read
1/8.
Notes
we
enter
now
will
be
eighth
notes.
Press
and
release
a
note
on
the
MID!
keyboard.
Notice
that
our
position
is
now
M=0001-01-
48/96.
Each
beat
is
96
clocks
(assuming
Beat/Measure
is
4/4),
and
an
eighth
note
is
half
a
beat.
Press
and
release
another
note.
The
position
is
now
M=0001
-02-
00/96,
indicating
the
second
beat
of
the
first
measure.
No
notes
yet
After
the
first
note
M=0001-01-00/96
M=0001~01-48/96
1/08
080%
064
1/08
080%
064
After
the
second
note
M=0001-02-00/96
1/08
080%
064
In
Step
Recording
mode,
the
[TEMPO],
[MEASURE],
[TRACK],
[CLOCK]
and
AUTO
LOCATE]
switches
have
the
following
functions.
Erase
the
previous
event
(Note
or
Program
Change).
If
more
than
one
event
had
the
same
timing,
all
will
be
erased.
Move
back
one
step
time
interval
without
deleting
anything.
This
is
valid
only
immediately
after
inputting
a
note.
It
extends
the
timing
of
that
note
by
one
Step
Time.
(Also
see
Quick
Input
p.
19.)
This
inputs
a
rest
corresponding
to
the
Step
Time.
(Also
see
Quick
Input
P.
19.)
This
will
protect
data
that
has
already
been
Step
Recorded.
After
pressing
this,
you
will
not
be
able
to
Delete
data.
18

Shift
+
Tempo
Delete
one
measure.
(Delete
Measure)
Shift
+
Track
Insert
a
Measure
mark
(p.
24)
at
the
current
position.
This
function
can
be
used
(Insert
Measure
Mark)
to
input
complex
time
signatures.
Shift
+
Clock
Fill
the
remaining
part
of
the
measure
with
rests.
(Fill
Rests)
For
quick
input
of
Gate
Time,
Velocity,
Tie
and
Rest,
you
can
specify
a
MIDI
QUICK
INPUT
VIA
controller
to
input
the
data
from
a
DX
or
KX
keyboard.
Press
to
get
the
display
MIDI
you
want,
and
use
«1>
to
select
the
MIDI
control
number
that
you
will
use
to
;
input
the
data.
When
“Off”
is
selected,
the
data
can
be
set
only
from
the
QX5.
For
example,
if
you
select
contro!
number
6
for
Gate
Time,
moving
a
DX7
Data
Entry
Slider
will
adjust
Gate
Time.
You
might
set
Modulation
Wheel
(control
number
1)
to
adjust
Velocity,
Data
Entry
—1/No
(control
number
97)
to
input
a
Tie,
and
Data
Entry
+1/Yes
(control
number
96)
to
input
a
Rest.
You
will
see
the
QX5
Gate
Time
and
Velocity
display
change
as
you
move
the
controller.
SHIFT
a
|
an,
Cc
pete
ote.
el
TIME
pore
sie
ee
63
——
i
3>TIE
4>REST
|
097
096
OFF,
64-121
OFF,
64-121
There
is
a
table
of
MIDI
control
numbers
on
p.
22.
NOTE
Gate
Time
can
be
adjusted
via
MIDI
over
a
range
of
10%
to
95%.
To
set
Gate
Times
of
100%-300%,
use
the
QX5
front
panel
switches.
Other manuals for QX5
4
Table of contents
Other Yamaha Recording Equipment manuals

Yamaha
Yamaha POCKETRAK User manual

Yamaha
Yamaha CS6R Instruction Manual

Yamaha
Yamaha Audiogram6 User manual

Yamaha
Yamaha R-1000 User manual

Yamaha
Yamaha DEQ5E User manual

Yamaha
Yamaha YSP-500 User manual

Yamaha
Yamaha Q2031B User manual

Yamaha
Yamaha TX-802 User manual

Yamaha
Yamaha SPX900 User manual

Yamaha
Yamaha CDR-HD1500HDD User manual

Yamaha
Yamaha D5000 User manual

Yamaha
Yamaha POCKETRAK CX User manual

Yamaha
Yamaha RM1x User manual

Yamaha
Yamaha FX500B User manual

Yamaha
Yamaha FS1R User manual

Yamaha
Yamaha MY8-SDI-ED User manual

Yamaha
Yamaha NUAGE User manual

Yamaha
Yamaha MCX-C15P User manual

Yamaha
Yamaha TG55 Quick start guide

Yamaha
Yamaha MDF2 User manual