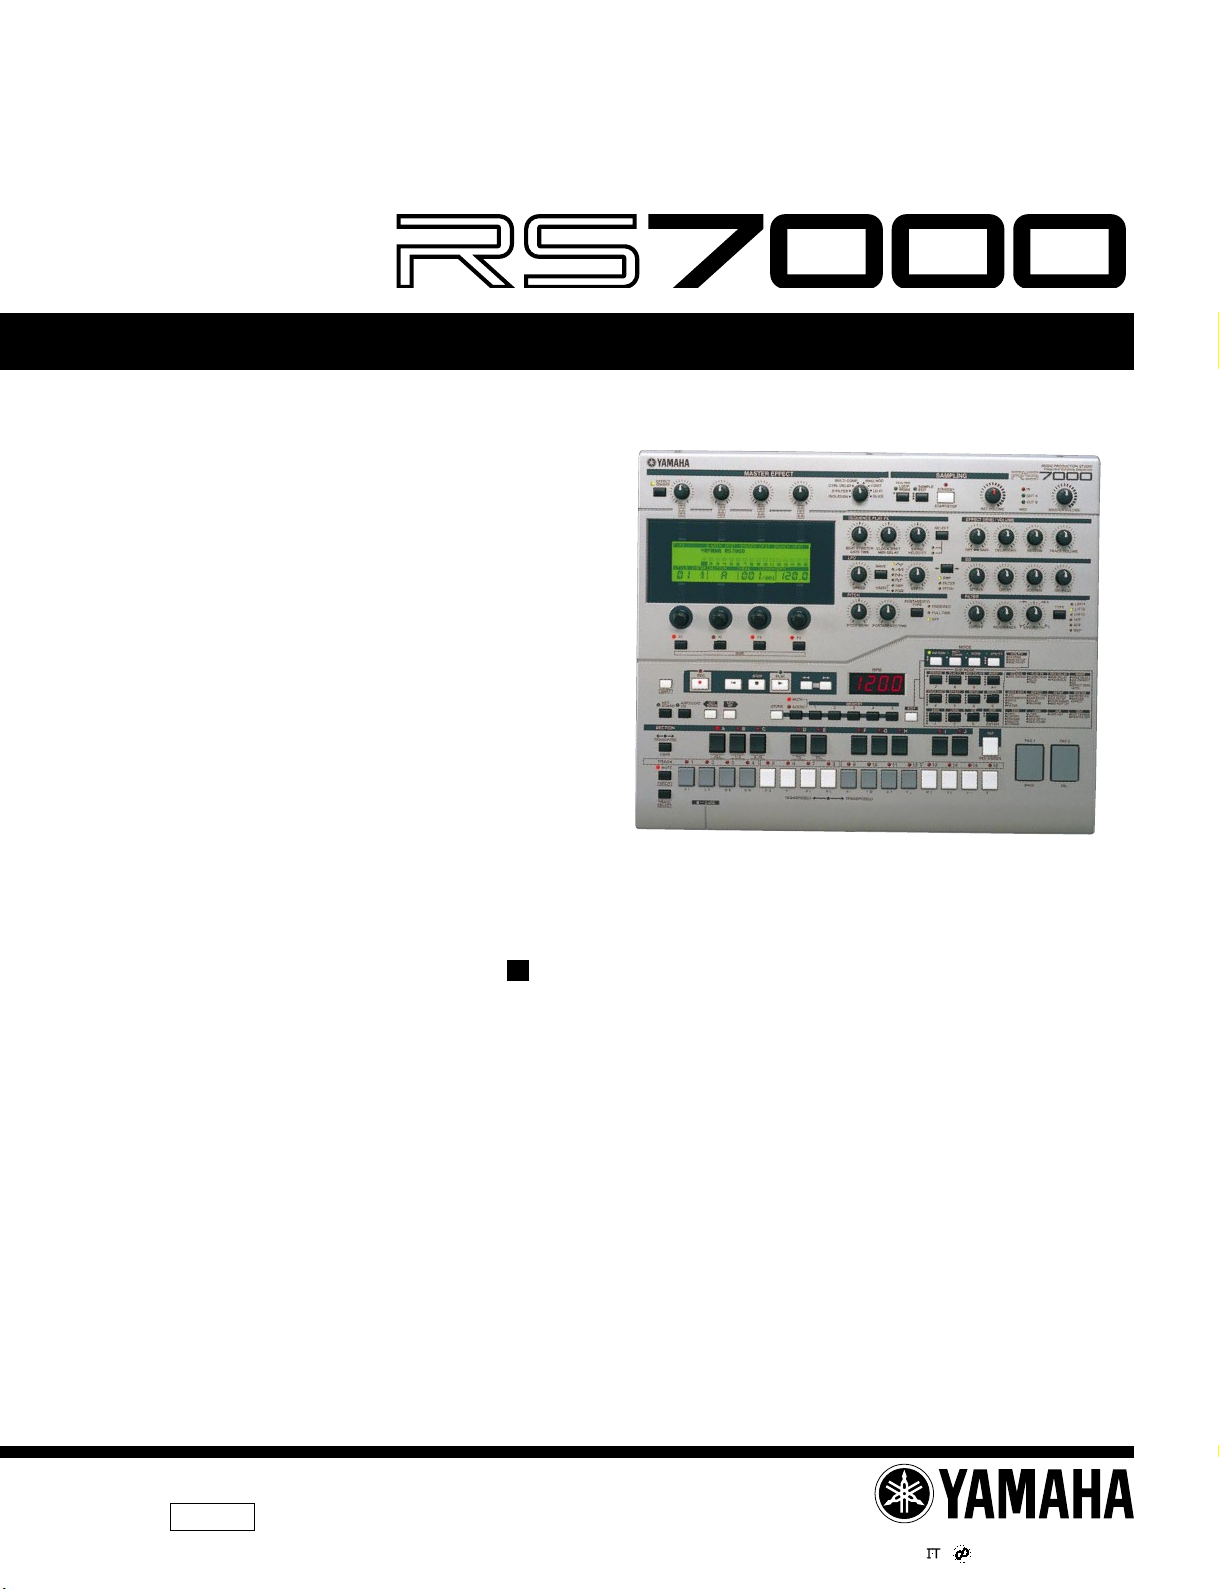
Yamaha RS7000 Ver.1.2 User manual

1.498K-6451 Printed in Japan ’01.07
20010630-175000
SERVICE MANUAL
SY 011572
MUSIC PRODUCTION STUDIO
HAMAMATSU, JAPAN
CONTENTS
DIMENSIONS ............................................................ 3
SPECIFICATIONS .............................................. 4/6
PANEL LAYOUT ...................................... 8
CIRCUIT BOARD LAYOUT ............... 11
WIRING ............................................................. 13
BLOCK DIAGRAM ......................... 14
DISASSEMBLY PROCEDURE ............................ 15
INSTALLING OPTIONAL EQUIPMENT
...... 19
LSI PIN DESCRIPTION .............................. 27
IC BLOCK DIAGRAM ................................... 32
CIRCUIT BOARDS ......................................... 34
TEST PROGRAM ............................. 46/56
ERROR MESSAGE ........................... 66/69
MIDI IMPLEMENTATION CHART......................................... 72
OS UPDATE .................................... 74/75
PARTS LIST
OVERALL CIRCUIT DAIGRAM
This document is printed on chlorine free (ECF) paper with soy ink.

RS7000
2
WARNING
Components having special characteristics are marked and must be replaced with parts having specification equal to those
originally installed.
IMPOR TANT NOTICE
This manual has been provided for the use of authorized Yamaha Retailers and their service personnel. It has been assumed
that basic service procedures inherent to the industry, and more specifically Yamaha Products, are already known and under-
stood by the users, and have therefore not been restated.
WARNING : Failure to follow appropriate service and safety procedures when servicing this product may result in per-
sonal injury, destruction of expensive components and failure of the product to perform as specified. For
these reasons, we advise all Yamaha product owners that all service required should be performed by an
authorized Yamaha Retailer or the appointed service representative.
IMPORTANT : This presentation or sale of this manual to any individual or firm does not constitute authorization certifi-
cation, recognition of any applicable technical capabilities, or establish a principal-agent relationship of
any form.
The data provided is belived to be accurate and applicable to the unit(s) indicated on the cover. The research engineering, and
service departments of Yamaha are continually striving to improve Yamaha products. Modifications are, therefore, inevitable
and changes in specification are subject to change without notice or obligation to retrofit. Should any discrepancy appear to
exist, please contact the distributor’s Service Division.
WARNING : Static discharges can destroy expensive components. Discharge any static electricity your body may have
accumulated by grounding yourself to the ground bus in the unit (heavy gauge black wires connect to
this bus.)
IMPORTANT : Turn the unit OFF during disassembly and parts replacement. Recheck all work before you apply power
to the unit.
WARNING: CHEMICAL CONTENT NOTICE!
The solder used in the production of this product contains LEAD. In addition, other electrical/electronic and/or plastic (Where
applicable) components may also contain traces of chemicals found by the California Health and Welfare Agency (and possibly
other entities) to cause cancer and/or birth defects or other reproductive harm.
DO NOT PLACE SOLDER, ELECTRICAL/ELECTRONIC OR PLASTIC COMPONENTS IN YOUR MOUTH FOR ANY REASON WHAT
SO EVER!
Avoid prolonged, unprotected contact between solder and your skin! When soldering, do not inhale solder fumes or expose
eyes to solder/flux vapor!
If you come in contact with solder or components located inside the enclosure of this product, wash your hands before handling
food.
LITHIUM BA TTERY HANDLING
This product uses a lithium battery for memory back-up.
WARNING : Lithium batteries are dangerous because they can be exploded by improper handling. Observe the following pre-
cautions when handling or replacing lithium batteries.
Leave lithium battery replacement to qualified service personnel.
Always replace with batteries of the same type.
When installing on the PC board by soldering, solder using the connection terminals provided on the battery cells.
Never solder directly to the cells. Perform the soldering as quickly as possible.
Never reverse the battery polarities when installing.
Do not short the batteries.
Do not attempt to recharge these batteries.
Do not disasemble the batteries.
Never heat batteries or throw them into fire.
ADVARSEL!
Lithiumbatteri-Eksplosionsfare ved fejlagtig handtering. Udskiftning ma kun ske med batteri af samme fabrikat og type. lever det brugte
batteri tilbage til leverandren.
VARNING
Explosionsfara vid felaktigt batteribyte.
Anvand samma batterityp eller en ekvivalent typ som rekommenderas av apparattillverkaren.
Kassera anvant batteri enligt fabrikantens instruktion.
VAROITUS
Paristo voi rajahtaa, jos se on virheellisesti asennettu.
Vaihda paristo ainoastaan laitevalmistajan suosittelemaan tyyppiiin.
Havita kaytetty paristo valmistajan ohjeiden mukaisesti.
The following information complies with Dutch official Gazette 1995. 45; ESSENTIALS OF ORDER ON THE COLLECTION OF BATTERIES.
• Please refer to the diassembly procedure for the removal of Back-up Battery.
• Leest u voor het verwijderen van de backup batterij deze beschrijving.

RS7000
3
DIMENSIONS
367
133
440
Units: mm
IMPOR TANT NOTICE FOR THE UNITED KINGDOM
Connecting the Plug and CoConnecting the Plug and Co
Connecting the Plug and Corr
rr
rdd
dd
d
IMPORTANT. The wires in this main lead are coloured in
accordance with the following code:
BLUE: NEUTRAL
BROWN: LIVE
As the colours of the wires in the main lead of this apparatus may not
correspond with the coloured markings identifying the terminals in
your plug, proceed as follows:
The BLUE wire must be connected to the terminal that is marked with
the letter N (or coloured BLACK).
The BROWN wire must be connected to the terminal that is marked
with the letter L (or coloured RED).
Be certain that neither core is connected to the earth terminal of the
three pin plug.

RS7000
4
SPECIFICATIONS
Sequencer Section Maximum Note Capacity Approx.259,000 notes
Note Resolution Quarter note/480
Maximum Polyphony 124 notes
BPM (Tempo) 1.0 - 300.0
Record Modes Real time replace
Real time overdub (Pattern and Song modes only)
Real time punch (Song mode only)
Step (Pattern and Song modes only)
Grid Step (Pattern and Song Modes only)
Tracks Pattern Mode : 16 phrase tracks
Pattern Chain Mode : Pattern track
: BPM track
: Scene/Mute track
Song Mode : 16 sequence tracks
: BPM track
: Scene/Mute track
Patterns Patterns : 1024 (64 styles x 16 sections)
Measures : 256 maximum
Phrases Preset Phrases : 5980
User Phrases : 256 per style
Pattern Chains 20 chains
Songs 20 songs
Edit Phrase edit
Pattern Chain edit
Song edit
Jobs Pattern Jobs : 37
Pattern Chain Jobs :9
Song Jobs : 30
Grid Groove Note Offset, Clock Shift, Gate Time Offset, Velocity Offset
Play Effects Harmonize (Unison, Octaver, Harmonize 1 & 2)
Note (Note Offset, Gate Time, Velocity Offset)
Timing (Beat Stretch, Clock Shift, Swing)
MIDI Delay MIDI Delay Edit, Feedback Edit
Arpeggio Type (Up, Down, Alternate 1 & 2, Random), Sort, Hold, Octave Range
Real Time Loop Remix
Sequence Format RS7000 original sequence format
SMF format 0, 1 (Format 1 load only)
RM1x format (PATT, SONG) (load only)
Tone generator block Type AWM2 tone generator
Maximum polyphony 62 notes
Multi-timbral capability 16 timbres (with DVA)
Preset voices Normal voices 1054 (except GM voices)
Drum voices 63 kits (except GM kits)
Effects 4 systems
Reverb : 12 types
Delay Chorus : 25 types
Variation : 100 types
Master : 8 types
Equalizer Master equalizer 4 Band parameteric equalizer
Track equalizer 5 types
Tone Generator Section Sample Voice Types Pitched Voice, Sample Kit Voice
Maximum Samples 256
Sampling Source Analog inputs L/R
Stereo outputs L/R
Digital I/O (When optional AIEB2 I/O Expansion Board installed)
Optical I/O (When optional AIEB2 I/O Expansion Board installed)
A/D Conversion 20-bit, 64 x oversampling
D/A Conversion 24-bit, 128 x oversampling
Sampling Types Slice + Sequence, Kit, Kit + Note, Pitch, Pitch + Note
Sample Data Bits 16
Sampling Frequency : 44.1 kHz (MONO/STEREO), 22.05 kHz, 11.025 kHz, 5.5125 kHz
(LO-FI mode, MONO/STEREO)
Digital Inputs (When optional AIEB1 I/O Expansion Board installed)
: 48 kHz, 44.1 kHz, 32 kHz (STEREO only)
Internal Sample Memory Standard : 4 megabytes (onboard)
Maximum : 64 megabytes (32 megabyte SIMMs x 2)
* 4 onboard megabytes unavailable after
maximum expansion.
Sampling Time Max. Sample Length : 32 megabytes mono
: 64 megabytes stereo
Max. Sample Time (Mono or Stereo)
: Approx.6 min.20 sec.(44.1 kHz)
Sample Format Original format
AIFF (load only), WAV (save and load)
A3000/4000/5000, SU700, (load only)
Sampling Jobs 13

RS7000
5
Controls Power Switch (ON/OFF)
Master Volume Control (MASTER VOLUME)
Recording Level Control (REC VOLUME)
Master Effect Selector Knob
Master Effect Parameter Knobs (4)
Multi-function knobs (4)
Assignable Knobs (18)
Contrast Control
Mode Buttons [PATTERN], [PATT CHAIN], [SONG], [UTILITY]
Sub Mode Buttons [GROOVE], [PLAY FX], [MIDI DELAY], [MIXER], [VOICE EDIT],
[EFFECT], [SETUP], [MASTER], [SAVE], [LOAD], [JOB], [EDIT]
Function Buttons [F1] - [F4]
Master Effect Button [EFFECT ON/OFF]
Sampling Buttons [REALTIME LOOP REMIX], [SAMPLE EDIT], [STANDBY/START/STOP]
Play Effect Button [SELECT]
Voice Edit Buttons [WAVE] (LFO), [AMP/FILTER/PITCH], [PORTAMENTO TYPE], [TYPE] (FILTER)
Exit Button [EXIT]
Sequencer Buttons [REC], [ ], [STOP], [PLAY], [ ], [ ]
Shift Button [SHIFT]
Arpeggio Button [ARPEGGIO ON]
Mute/Scene Buttons [STORE], [MUTE/SCENE], [MEMORY 1] – [MEMORY 5]
Octave Buttons [OCT DOWN], [OCT UP]
Keyboard Mode Buttons [KEYBOARD], [TRANSPOSE], [MUTE], [TRACK SELECT]
Keyboard Pads (x 26)
Tap Button [TAP]
Velocity Pads (x 2) [PAD 1], [PAD 2]
Display (LCD) 64 x 240 dot graphic LCD with backlighting and contrast control
LEDs MODE (x 4) (green)
EFFECT ON/OFF (green)
SAMPLING (REALTIME LOOP REMIX (green), SAMPLE EDIT
(green), STANDBY/START/STOP (red))
SEQUENCE PLAY FX SELECT (x 2) (yellow)
VOICE EDIT (x 18) (yellow)
REC (red)
PLAY (green)
SECTION (x 10) (red)
MUTE/SCENE (x 2) (red)
TRACK (x 16) (red)
KEYBOARD mode (KEYBOARD (green), MUTE (red))
ARPEGGIO ON (red)
Function Buttons (x 4) (red)
MIDI IN (red), MIDI OUT A (green), MIDI OUT B (green)
7-segment LED (4-digit)
Connectors PHONES (Standard stereo phone jack)
OUTPUT (Standard phone jack x 2) (L/MONO, R)
INPUT (Standard phone jack x 2) (L, R)
FOOT SWITCH
MIDI IN, MIDI OUT (2, A & B)
CARD SLOT (3.3 V SmartMedia)
SCSI (50-pin half-pitch)
AC INLET (AC power)
Output Impedance OUTPUT (L/MONO, R) : 1.1kΩ
PHONES : 50Ω
Power Consumption (U, E, B) 27W
Dimensions 440 mm x 363 mm x 134 mm
(W x D x H)
Weight 7 kg
Supplied Accessories Power cord
CD-ROM (x 2)
SmartMedia (8 MB x 1) : Sound & Sequence data
AS Angle
Owner’s Manual Set
Options I/O Expansion Board : AIEB2
Expansion Memory (use a pair of Identical SIMMS conforming to the specifications below):
Type : 72-pin SIMM (Fast page or EDO, JEDEC standard)
Access Time : 70 ns or faster
Parity : Parity or non-parity
Capacity : 4/8/16/32 megabytes

RS7000
6

RS7000
7

RS7000
8
Top Panel (Upper Section)
qMASTER EFFECT
([EFFECT ON/OFF] Button, Control Knob 1 ~ 4, Effect
Type Selector)
wSAMPLING
([REAL TIME LOOP REMIX, SAMPLE EDIT, STANDBY/
START/STOP] Buttons, [REC VOLUME] Control)
e[MIDI IN/OUT] Indicator
r[MASTER VOLUME] Control
tDisplay
yKnob 1 ~ 4
u[F1] ~ [F4] Function Buttons
iSEQUENCE PLAY FX Controls
([BEAT STRETCH/GATE TIME, CLOCK SHIFT/MIDI
DELAY, SWING/VELOCITY] Knobs, [SELECT] Button)
oEFFECT SEND/VOLUME
([DRY VARI, DELAY/CHO, REVERB,TRACK
VOLUME] Knobs)
!0 LFO
([SPEED, DEPTH] Knobs, [WAVE] Button)
!1 EG
([ATTACK, DECAY, SUSTAIN, RELEASE] Knobs)
!2 [AMP/FILTER/PITCH] Button
!3 PITCH
([PITCH BEND, PORTAMENTO TIME] Knobs,
[PORTAMENTO TYPE] Button)
!4 FILTER
([CUTOFF, RESONANCE, ENV. DEPTH] Knobs,
[TYPE] Button)
-
+
MASTERVOLUME
SAMPLINGMASTER EFFECT
REALTIME
RECVOLUME
STANDBY
START/STOP
MULTI COMP RING MOD
V-DIST
LO-FI
SLICE
CTRL DELAY
D-FILTER
ISOLATION
BEAT STRETCH
GATE TIME CLOCK SHIFT
MIDI DELAY SWING
VELOCITY
SPEED
WAVE
F1 F2 F3
NUM
F4
PITCH BEND PORTAMENTOTIME
PORTAMENTO
TYPE
DEPTH
SELECT
EFFECT
ON/OFF LOOP
REMIX SAMPLE
EDIT IN
OUT A
OUT B
DRY VARI DELAY/CHO REVERB TRACK VOLUME
ATTACK DECAY SUSTAIN
CUTOFF RESONANCE ENV.DEPTH
TYPE LPF24
LPF18
LPF12
HPF
BPF
BEF
RELEASE
S&H
PGM
USER
AMP
FILTER
PITCH
FINGERED
FULLTIME
OFF
SYSTEM
MIDI SETUP
MIDI FILTER
MODE
SEQUENCE PLAY FX
LFO
PITCH
EFFECT SEND / VOLUME
EG
FILTER
PATTERN
SONG UTILITY UTILITY
PATT
CHAIN
MIDI
Integrated Sampling Sequencer
MUSIC PRODUCTION STUDIO
q
w
e
r
t
y
i
!0
!3
o
!1
!2
!4
u
PANEL LAYOUT

RS7000
9
Top Panel (Lower Section)
!5 [SHIFT] Button
!6 Sequencer Buttons
([ ](REC), [ ](Top), [ ](STOP), [ ](PLAY),
[](Fast Reverse), [ ](Fast Forward))
!7 LED Display
!8 MODE
([PATTERN], [PATT CHAIN], [SONG], [UTILITY]
Buttons)
!9 SUB MODE
([GROOVE], [PLAY FX], [MIDI DELAY], [MIXER],
[VOICE EDIT], [EFFECT], [SETUP], [MASTER], [SAVE],
[LOAD], [JOB], [EDIT] Buttons)
@0 [EXIT] Button
@1 SCENE/MUTE
([STORE], [SCENE/MUTE], [MEMORY 1] ~ [MEMORY 5]
Buttons)
@2 [KEYBOARD] Button
@3 [ARPEGGIO ON] Button
@4 [OCT DOWN] and [OCT UP] Buttons
@5 [TRANSPOSE] Button
@6 [MUTE] Button
@7 [TRACK SELECT] Button
@8 Keyboard
@9 [TAP] Button
#0 [PAD 1] and [PAD 2]
#1 CARD Slot
F1 F2 F3
NUM
F4
TRACK
1 2 3 4 5 6 7 8 9 10 11 12 13 14 15 16
SYSTEM
MIDI SETUP
MIDI FILTER
SAVE
EXPORT
RENAME
DELETE
FORMAT
GRID GROOVE
LFO
PORTAMENTO
PITCH
EG
FILTER
ARPEGGIO
A/D SETUP
KNOB ASSIGN
MIDI OUT CH
LOAD
IMPORT
SCSI SETUP
SCSI COMM
HARMONIZE
NOTE
EFFECTTYPE
VARIATION
DELAY
REVERB
VOICE SELECT
VOL/PAN/OUT
EQ
EFFECT SEND
LEVEL
JOB LIST
MIDI DELAY
FEEDBACK
MASTER EQ
MASTER
EFFECT
EDIT CHANGE
VIEW FILTER
TIME
SHIFT
CAPS
SOLO
K ! L # M $ N % O & P ' Q ( R ) S - T @ U ^ V _ W { X } Y ~ Z
MUTE
REC
KEY-
BOARD
TRACK
SELECT
ARPEGGIO
ON
PLAY
TRANSPOSE
ALL TR- TR+
789
+
/
-
4560
1 2 3 ENTER
PAD ASSIGN
PAD 1 PAD 2
SPACE DEL
1~8 9~16
TRANSPOSE(-) TRANSPOSE(+)
STORE
MUTE
SCENE 12345
BPM
MODE
SUB MODE
STOP
SECTION
ABC DE FGH I J
OCT
DOWN OCT
UP
TAP
GROOVE PLAY FX MIDI DELAY MIXER
VOICE EDIT EFFECT SETUP MASTER
SAVE LOAD JOB EDIT
GROOVE PLAY FX MIDI DELAY MIXER
VOICE EDIT EFFECT SETUP MASTER
SAVE LOAD JOB EDIT
PATTERN
SONG UTILITY UTILITY
PATT
CHAIN
MEMORY EXIT
3.3V
CARD
!5 @3
@2 @4
#1
@1
@5
@6
@7
@8 @9 #0
@0!6 !7 !8 !9

RS7000
10
POWER
MIDI
IN
SCSI
THIS CLASS B DIGITAL APPARATUS COMPLIES WITH CANADIAN ICES-003.
MUSICAL INSTRUMENT
US LISTED
CAUTION
RISK OF ELECTRIC SHOCK
DO NOT OPEN
ATTENTION
: RISQUE DE CHOC ÉLECTRIQUE NE PAS OUVRIR.
WARNING
379U
THIS DEVICE COMPLIESWITH PART 15 OFTHE FCC RULES. OPERATION IS SUBJECT TO THE
FOLLWWING TWO CONDITIONS:
(1)THIS DEVICE MAY NOT CAUSE HARMFUL INTERFERENCE,AND
(2)THIS DEVICE MUST ACCEPT ANY INTERFERENCE RECIVED,INCLUDING INTERFERENCE
THAT MAY CAUSE UNDESIRED OPERATION.
CET APPAREIL NUMÉRIQUE DE LA CLASSE B EST CONFORME À LA NORME NMB-003
DU CANADA.
FOOT SW CONTRAST R R
INPUT OUTPUT
L L/MONO PHONES
OUT A
OUT B
MODEL SER.NO.
MADE IN JAPAN
ON
/
AC INLET
OFF
TO REDUCETHE RISK OF FIRE OR ELECTRIC SHOCK,
DO NOT EXPOSETHIS PRODUCT TO RAIN OR MOISTURE.
q
r
t
y
u
i
o
w
e
POWER
MIDI
IN
SCSI
THIS CLASS B DIGITAL APPARATUS COMPLIES WITH CANADIAN ICES-003.
MUSICAL INSTRUMENT
US LISTED
CAUTION
RISK OF ELECTRIC SHOCK
DO NOT OPEN
ATTENTION
: RISQUE DE CHOC ÉLECTRIQUE NE PAS OUVRIR.
WARNING
379U
THIS DEVICE COMPLIESWITH PART 15 OFTHE FCC RULES. OPERATION IS SUBJECT TO THE
FOLLWWING TWO CONDITIONS:
(1)THIS DEVICE MAY NOT CAUSE HARMFUL INTERFERENCE,AND
(2)THIS DEVICE MUST ACCEPT ANY INTERFERENCE RECIVED,INCLUDING INTERFERENCE
THAT MAY CAUSE UNDESIRED OPERATION.
CET APPAREIL NUMÉRIQUE DE LA CLASSE B EST CONFORME À LA NORME NMB-003
DU CANADA.
FOOT SW CONTRAST R R
INPUT
ASSIGNABLE OUTDIGITALOPTICAL AS1AS2AS3AS4AS5AS6OUT
OUTIN
OUTPUT
L L/MONO PHONES
OUT A
OUT B
MODEL SER.NO.
MADE IN JAPAN
ON
/
AC INLET
OFF
TO REDUCETHE RISK OF FIRE OR ELECTRIC SHOCK,
DO NOT EXPOSETHIS PRODUCT TO RAIN OR MOISTURE.
IN
q
w
e
q[POWER] Switch
w[AC INLET]
e[MIDI IN], [MIDI OUT A], and [MIDI OUT B]
Connectors
r[SCSI] Connector
t[FOOT SW] Jack
y[CONTRAST] Control
u[INPUT L] and [INPUT R] Jacks
i[OUTPUT L/MONO] and [OUTPUT R] Jacks
o[PHONES] Jack
q[OPTICAL IN], [OPTICAL OUT] Connectors
w[DIGITAL IN], [DIGITAL OUT] Connectors
e[ASSIGNABLE OUT 1 ~ 6] Jacks
Rear Panel
Rear Panel with Optional AIEB2 I/O

RS7000
11
CIRCUIT BOARD LAYOUT
PS Cover Assembly
Power Supply Unit
<Rear View>
<Bottom View>
Insulation
Cover
DM
MIDI
SM
DM

RS7000
12
Power Supply Unit
LCD Assembly
<Bottom View>
<Bottom View>
Insulation
Cover
DM
MIDI
PNVR2
PNSW
PNVR1
PAD

RS7000
13
WIRING
q
w
e
r
t
y
u
i
o
!0
!1
!2
!3
!4
!5
!6
!7
!8
!9
@3
Location
@0
@1
@2
Location Parts List
Ref No.
490
470
650
660
180
170
190
680
590
100
250
120
200
280
130
70
210
110
40a
665
Parts List
Ref No.
Connector
Assembly Remarks Availability
Remarks Availability
PSW
ACIN
D-POWER
A-POWER
MVR
RVR
CARD
CARD
KRD-KRD
KRD-KRD
KRD-KRD
KRD-KRD
KRD-KRD
KRD-KRD
KRD-KRD
KRD-KRD
KRD-KRD
KRD-KRD
B LIGHT
LED-POWER
3P
4P
4P
4P
8P
9P
26P-250L
26P-60L
7P-100L
8P-250L
9P-300L
9P-100L
10P-350L
11P-200L
11P-100L
12P-400L
13P-350L
16P-300L
2P
2P
40P
3P
4P
Destination
POWER Switch
Power Supply Unit-CN8
AC INLET
Power Supply Unit-CN9
Power Supply Unit-CN4
DM-CN18
Power Supply Unit-CN6
DM-CN19
PNVR2-CN5 DM-CN21
PNVR2-CN3 DM-CN20
PNVR2-CN6 DM-CN2
SM-CN1 DM-CN11
MIDI-CN22 DM-CN3
PNSW-CN1 DM-CN4
PAD-CN1 DM-CN24
PNSW-CN4 DM-CN7
PNVR2-CN2 DM-CN6
PNVR1-CN1 DM-CN1
PNSW-CN3 DM-CN5
LCD DM-CN10
PNVR2-CN4 DM-CN9
PNSW-CN2 DM-CN8
Back Light Assembly DM-CN17
Power Supply Unit-CN5
DM-CN25
Destination
AIEB2-CN2 DM-CN16
AIEB2-CN1
Power Supply Unit-CN7
AIEB2-CN3
Power Supply Unit-CN2
Part No.
(V701080)
(V701090)
(V701100)
(V701110)
(V712080)
(V712090)
MFA26250
MFA26060
(VK09820)
(VJ98180)
VK106000
VK098500
(VK10840)
VK102900
(VK09870)
(VK11010)
(VK10890)
(VK10670)
VT287000
(V765570)
Part No.
VV336500
VV336700
VV336600
Connector
Assembly
OPTION (AIEB2)
CN1
LCD
POWER
ON/OFF
AC INLET
Power Supply Unit
9P
CN1
CN2
CN4
CN3
(8P)
(16P)
(11P) (9P)
CN8
CN9
(3P)
(4P)
CN7
CN6
CN3
CN2
CN1
CN4
CN10 CN5
(3P)
(4P)
(2P)
(5P)
(3P) (4P)
(4P)
(4P)
CN6
CN4 CN2
CN5 CN3
(8P) (9P)
(26P)
(13P) (10P)
CN22
(7P)
CN1 (26P)
(26P)
CN 11
CN1
(11P)
CN20
CN21
CN19
CN16
CN 3
CN4
CN2
CN1
CN24
CN18
CN8 CN5 CN7 CN10 CN17
CN6
CN9
(2P)
(12P)
(16P) (11P) (9P)
(10P)
(12P)
(8P)(9P)
(40P)
2
4
56
8
9
10
11
12
15
13
16
17
18
19
7
1
56
7
16
15 12
13
17
10
11
19
9
(3P)
(4P) CN2 CN1
CN3 (40P)
SIMM
SIMM
20
2122
20
21
14
14
(7P)
(8P)
(26P)
(11P)
(4P)
(9P)
(4P)
(13P) (2P)
4
3
3
CN25
(2P)
23
23
22
PNVR2 PNVR1
AIEB2
SM
PNSW
MIDI
Back Light Assembly
Option
PAD
DM
28C99-8818689 1

RS7000
14
28CA1-8818690
BLOCK DIAGRAM
ROM
16Mbit
X2
(FLASH)
PROGRAM
ROM
16Mbit
PATTERN
MAIN-CPU
80MHz
(Clock X 8)
SCSI
INTERFACE
LCDC SRAM
256K
bit
MUTING
CONT.VR
SWITCH
INTERFACE
LED
DRIVE
MIDI OUT A
MIDI IN
FOOT SW
OUTPUT
L/MONO
OUTPUT
R
PHONES
-12V
SWP30B
EFFECT
DRAM
4Mbit
WAVE
DRAM
16Mbit X 2
33.8688MHz
MIDI OUT B
AMP
AMP
MASTER
VOLUME
Buffer
Buffer
AMP
AMP
ADC
20bit
SDRAM
64Mbit
INPUT L
INPUT R
WAVE
ROM
64Mbit X 2
SRAM
1Mbit
SMART
MEDIA
INTERFACE
SW LED
LCD Assembly
240 X 64 Dots
+5D
Rotary Encoder
ROTARY
ENCODER
INTERFACE
BACKUP
BATTERY
AMP
AMP
Power Supply Unit
AC
INLET
SSI DAC
24bit
MULTIPLEXER
Buffer
Buffer
3.3V 5V
INTERFACE
GAINSEL
SIMM
INTERFACE
72Pin SIMM Socket X 2
AIEB2
INTERFACE
Assignable Out1~ 6
Digital I/O
OPTION
SCSI
CONNECTOR
POWER ON/OFF
REC
VOLUME
PNVR1-CN1 (11P)
PNVR2-CN6 (26P)
CN1 (11P),
CN2 (26P)
CN1 (9P)
CN1 (8P)
PNSW-CN3 (11P),
CN4(9P)
PNVR2-CN2 (10P) PNSW-CN2 (16P)
PNVR2-CN4 (13P)
CN5 (11P),
CN6 (10P),
CN7 (9P)
CN8 (16P),
CN9 (13P) CN10
(12P) CN17 (2P)
IC50 (28P)
IC54 (60P)
CN4 (8P)
IC37,79
(48P) IC43
(48P) IC34
(32P)
CN24(9P)
PNVR1 ,PNVR2
PNSW ,PNVR2 SM
PAD
DM
PNSW
VR1-22
Back Light Assembly
CN11 (26P)
CN1 (26P)
CN12 (50P)
4MHz
X4 17 XG
JK4
JK5
JK6
-12V
PNVR2
PNVR2
MIDI
CN5
(8P)
CN2 (40P)
CN1 (3P),
CN3 (4P) CN7 (3P),
CN2 (4P)
CN18 (4P), CN19 (4P),
CN25 (2P) CN4 (4P),
CN6 (4P),
CN5 (2P)
CN16 (40P)
IC85
(28P)
IC57
(208P)
IC59
(240P)
IC58
(40P)
IC23 (86P)
IC29~33,38~41,92
IC4 (208P)
IC6-9
(16P)
IC84
(24P)
IC89 (8P)
IC89 (8P)
CN3 (9P)
CN20 (9P)
IC65,68
(48P)
IC74,77
(42P)
IC90
(8P)
IC90
(8P)
CN13
CN3 (7P)
JK2
JK1
JK7
JK3
CN22 (7P)
CN14
7
5
3
1
21
23
AOUTL+
AOUTR+
5
5
3
3
7
1
1
7
CN21
(8P)
3,5-7
3
X5
191-
194
72
228
MCLK
MCLKI
AIEB2
IC91 (8P)
TR6,7,14-17
CN8 (3P)
CN9 (4P)
IC91 (8P)
IC88 (8P)
IC88 (8P)IC87 (8P)
IC87 (8P)
MELI0AD-IN 77
DOUT
VINL
VINR
1
7
1
7
3
5
3
5
1
5
15
RE1-F~4-F, RE1-D~4-D
IRQ3, IRQ4
AN0-7
199-204,206,207
166,168,172 188 133,135
156 11,12 136-143
EXTAL1
10MHz
X2
+5V , +/-12V, +15V

RS7000
15
DISASSEMBLY PROCEDURE
1. Bottom Assembly (Time required: About 5 minutes)
1-1 Remove the twelve (12) screws marked [720]. The bottom
assembly can then be removed. (Fig.1)
Fig.1
[720]: Bonding Tapping Screw-B 3.0X10 MFZN2BL (VQ049800)
2. DM Circuit Board (Time required: About 10 minutes)
2-1 Remove the bottom assembly. (See procedure 1.)
2-2 Remove the nine (9) screws marked [440A], the three (3) screws
marked [440B] and the two (2) screws marked [450]. The
insulation cover and the DM circuit board can then be removed.
(Fig.2)
3. Replacing the Lithium Battery
(Time required: About 5 minutes)
3-1 Remove the bottom assembly. (See procedure 1.)
3-2 You can replace the lithium battery from the DM circuit board.
(Fig.2)
* The lithium battery is not part of the DM circuit board. When
you replace the DM circuit board, you should remove the lithium
battery from the board, and install in the holder on the new circuit
board.
4. SM Circuit Board Assembly (Time required: About 10 min.)
4-1 Remove the bottom assembly. (See procedure 1.)
4-2 Remove the two (2) screws marked [690] and the two (2) screws
marked [700]. The SM circuit board assembly can then be
removed. (Fig.2)
4-3 Remove the two (2) screws marked [670d]. The SM escutcheon
and the SM angle bracket can then be removed from the SM
circuit board. (Fig.3)
5. MIDI Circuit Board (Time required: About 8 minutes)
5-1 Remove the bottom assembly. (See procedure 1.)
5-2 Remove the two (2) screws marked [600]. The MIDI circuit board
can then be removed. (Fig.2)
[720]
[720] [720]
[720]
Bottom Assembly

RS7000
16
<Rear View>
<Bottom View>
<Front View>
DM
SM
SM
MIDI
SM Circuit Board
Assembly
SM Escutcheon SM Angle Bracket
Insulation Cover
Insulation Cover
PS Cover Assembly
[440A]
PS Cover Assembly [670d]
[440A]
[440A][640A]
[640B]
[690]
[440A]
[620]
[600]
[600]
[700]
Insulation Cover
[450] [440B]
Battery VN103500
VN103600(Battery holder for VN103500)
Notice for back-up battery removal
Push the battery as shown in figure,
then the battery will pop up.
Druk de batterij naar beneden zoals
aangeven in de tekening de batterij
springt dan naar voren.
Battery
Battery holder
Lithium Battery
SM Circuit Board Assembly
[440]: Bind HeadTapping Screw-B 3.0X6 MFZN2BL (EP600230)
[450]: Pan Head Screw 2.5X6 MFZN2BL (VS206600)
[600]: Bind HeadTapping Screw-B 3.0X8 MFZN2BL (EP600190)
[620]: Bind HeadTapping Screw-B 3.0X6 MFZN2BL (EP600230)
[640]: Bind HeadTapping Screw-B 3.0X6 MFZN2BL (EP600230)
[690]: Bind HeadTapping Screw-B 3.0X6 MFZN2BL (EP600230)
[700]: Bind HeadTapping Screw-B 3.0X8 MFZN2BL (EP600190)
Fig.2
[670d]:Bind HeadTapping Screw-B
3.0X8 MFZN2BL (EP600190)
Fig.3
6. Power Supply Unit (Time required: About 20 minutes)
6-1 Remove the bottom assembly. (See procedure 1.)
6-2 Remove the four (4) screws marked [620], the two (2) screws
marked [640A] and the screw marked [640B]. The insulation
cover and the PS cover assembly can then be removed. (Fig.2)
6-3 Remove the seven (7) screws marked [560]. (Fig.4)
6-4 Remove the cord holder marked [A], and then remove the ferrite
core of the AC-IN connector assembly. The power supply unit
can then be removed. (Fig.4)
7. Power Switch Assembly (Time required: About 15 minutes)
7-1 Remove the bottom assembly. (See procedure 1.)
7-2 Remove the PS cover assembly. (See procedure 6-2.)
7-3 Remove the two (2) screws marked [505]. The power switch
assembly can then be removed from the PS holder. (Fig.5)

RS7000
17
8. Shield Plate Assembly (Time required: About 25 minutes)
* You don’t need to remove the DM circuit board, the power
supply unit and the MIDI circuit board to remove the shield
plate assembly.
8-1 Remove the bottom assembly. (See procedure 1.)
8-2 Remove the SM circuit board assembly. (See procedure 4-2.)
8-3 Remove the PS cover assembly. (See procedure 6-2.)
8-4 Remove the nine (9) screws marked [340], the three (3) screws
marked [350] and the three (3) screws marked [380]. The shield
plate assembly can then be removed with the DM circuit board,
the power supply unit, the MIDI circuit board and the rear panel.
(Fig.4)
<Rear View>
<Bottom View>
<Bottom View>
DM
DM
Shield Plate Assembly
Power Supply Unit
[340]
AC-IN Connector Power Switch Assembly
PS Holder
Rear Panel
[350]
[560]
[560]
[340]
[380] [380] [505]
[340]
AC-IN Connector
Assembly
Ferrite Core
[A]
9. PNSW, PNVR1, PNVR2 and PAD Circuit Boards, LCD
Assembly, Back-lit Assembly
(Time required: About 30 minutes each)
9-1 Remove the bottom assembly. (See procedure 1.)
9-2 Remove the SM circuit board assembly. (See procedure 4-2.)
9-3 Remove the PS cover assembly. (See procedure 6-2.)
9-4 Remove the shield plate assembly with the DM circuit board,
the power supply unit, the MIDI circuit board and the rear panel.
(See procedure 8.)
[340]: Bind Head Tapping Screw-B 3.0X6 MFZN2BL (EP600230)
[350]: Bind Head Tapping Screw-B 3.0X8 MFZN2BL (EP600190)
[380]: Bind Head Tapping Screw-B 3.0X8 MFZN2BL (EP600190)
[560]: Bind Head Tapping Screw-B 3.0X6 MFZN2BL (EP600230)
Fig.4
[505]: Bind Head Screw
3.0X6 MFZN2BL (EG330360)
Fig.5

RS7000
18
<Bottom View>
<Top View>
PNSW
PAD
PNVR2
PNVR1
LCD Assembly
Spacer Assembly
Back Light Assembly
LCD Angle Assembly
LCD Assembly
[60]
[60] [60]
[220]
[220]
[300]
[60]
[60]
[150]
[150]
[260]
[C] [D]
[B]
[D]
[D]
[D]
9-5 PNSW Circuit Board:
Pull out the four (4) encoder knobs marked [B] and remove the
twelve (12) screws marked [150]. The Panel SW-Button
assembly can then be removed. (Fig.6, 7)
Pull out the thirty (30) buttons from the PNSW circuit board.
9-6 PNVR1 Circuit Board:
Pull out the four (4) knobs marked [C] and remove the three (3)
screws marked [300]. The PNVR1 circuit board can then be
removed. (Fig.6, 7)
Pull out the function button from the PNVR1 circuit board.
9-7 PNVR2 Circuit Board:
Pull out the twenty-one (21) knobs marked [D] and remove the
ten (10) screws marked [220]. The PNVR2 circuit board can
then be removed. (Fig.6, 7)
Pull out the eight (8) buttons from the PNVR2 circuit board.
9-8 PAD Circuit Board:
Remove the three (3) screws marked [260]. The PAD circuit
board can then be removed. (Fig.6)
9-9 LCD Assembly, Back Light Assembly:
Remove the six (6) screws marked [60]. The LCD assembly, the
back light assembly, the spacer assembly and the LCD angle
assembly can then be removed. (Fig.6, 8)
* When the LCD assembly is installed, be careful that a position
to install it doesn’t deviate.
[60]: Bind HeadTapping Screw-B
3.0X6 MFZN2BL (EP600230)
[150]: Bind HeadTapping Screw-B
3.0X6 MFZN2BL (EP600230)
[220]: Bind HeadTapping Screw-B
3.0X6 MFZN2BL (EP600230)
[260]: Bind HeadTapping Screw-B
3.0X6 MFZN2BL (EP600230)
[300]: Bind HeadTapping Screw-B
3.0X6 MFZN2BL (EP600230)
Fig.6
Fig.7
Fig.8
[60]: Bind Head Tapping Screw-B
3.0X6 MFZN2BL (EP600230)

RS7000
19
The RS7000 provides slots, connectors, and installation space
that can accommodate a variety of options for enhancing its
performance and functionality, such as SIMM expansion memory
and I/O expansion boards.
Procedure
1. Be sure you have the following at hand before starting the
installation.
•Phillips screwdriver: Magnetic-tipped screwdriver is
recommended.
•Workbench: Please carry out all work on a stable
workbench or table.Spreading a cloth over the work surface
will prevent scratching.
•Gloves: Be sure to wear gloves so that your hands are not
scratched by the metal cover or other metal parts.
2. Switch off the RS7000 power, and unplug the power cord
from the wall outlet.
3. Remove the screws holding the bottom cover in place.
• Set the RS7000 upside down on the workbench and use a
Phillips screwdriver to unscrew the 12 screws from the
bottom (see illus-tration below).
INSTALLING OPTIONAL EQUIPMENT
4. Holding both sides of the bottom cover with both hands, lift
the bottom cover straight up to remove it.
A
B
Do not remove the screw marked A in the illustration below.
This screw is not relevant to removing the bot-tom cover.
Holes B in the diagram below have no connection with
removing the bottom cover.
CAUTION
Removing the Bottom Cover

RS7000
20
Replacind the Bottom Cover
When replacing the bottom cover, be sure that you do not
get cables caught or pulled between the cover and main unit.
This could cause broken connections or malfunctions.
IMPORTANT
Procedure
1. Holding both sides of the bottom cover with both hands, lower
the cover straight down from above to its original position.
2. Use the original screws to re-attach the bottom cover.
• Replace the twelve screws to fasten the bottom cover.
3. Carefully turn the unit right side up.
B
Do not use screws other than those removed in step 3.Other
screws can damage the unit.
Holes B in the diagram below are not screw holes.Be careful
not to insert screws into these holes.
CAUTION
Other manuals for RS7000 Ver.1.2
3
Table of contents
Other Yamaha Recording Equipment manuals

Yamaha
Yamaha TX-802 User manual

Yamaha
Yamaha POCKETRAK 2G - 2 GB Digital Player User manual

Yamaha
Yamaha SPX90 User manual

Yamaha
Yamaha CDR-D651 User manual

Yamaha
Yamaha QY20 User manual

Yamaha
Yamaha O2R User manual

Yamaha
Yamaha REV-5 User manual

Yamaha
Yamaha TX-81Z User manual

Yamaha
Yamaha MD4S User manual

Yamaha
Yamaha REV7 User manual