Yamaha YAS-201 User manual

LVH
Front Surround System
(YAS-CU201+NS-WSW40)
Owner's Manual
Manual de Instrucciones
English
Español

Do not use this unit within 22 cm (9 inches) of persons with a
heart pacemaker implant or debrillator implant.
WARNING
TO REDUCE THE RISK OF FIRE OR ELECTRIC SHOCK,
DO NOT EXPOSE THIS UNIT TO RAIN OR MOISTURE.
As long as this unit is connected to the AC wall outlet, it is not
disconnected from the AC power source even if you turn off
this unit by . In this state, this unit is designed to consume a
very small quantity of power.
(Power key)
Turns on the power of this unit or sets it to the standby mode.
FOR YAS-CU201
• To assure the nest performance, please read this manual
carefully. Keep it in a safe place for future reference.
• Install this unit in a well ventilated, cool, dry, clean place
- away from direct sunlight, heat sources, vibration, dust,
moisture, and/or cold. For proper ventilation, allow the
following minimum clearances.
Top: 5 cm (2 in), Rear: 5 cm (2 in), Sides: 1 cm (3/8 in)
• Locate this unit away from other electrical appliances, motors,
or transformers to avoid humming sounds.
• Do not expose this unit to sudden temperature changes from
cold to hot, and do not locate this unit in an environment
with high humidity (i.e. a room with a humidier) to prevent
condensation inside this unit, which may cause an electrical
shock, re, damage to this unit, and/or personal injury.
• Avoid installing this unit where foreign objects may fall onto
this unit and/or this unit may be exposed to liquid dripping or
splashing. On the top of this unit, do not place:
– Other components, as they may cause damage and/or
discoloration on the surface of this unit.
– Burning objects (i.e. candles), as they may cause re,
damage to this unit, and/or personal injury.
– Containers with liquid in them, as they may fall and liquid
may cause electrical shock to the user and/or damage to this
unit.
• Do not cover this unit with a newspaper, tablecloth, curtain,
etc. in order not to obstruct heat radiation. If the temperature
inside this unit rises, it may cause re, damage to this unit,
and/or personal injury.
• Do not plug in this unit to a wall outlet until all connections
are complete.
• Do not operate this unit upside-down. It may overheat,
possibly causing damage.
• Do not use force on switches, knobs and/or cords.
• When disconnecting the power cable from the wall outlet,
grasp the plug; do not pull the cable.
• Do not clean this unit with chemical solvents; this might
damage the nish. Use a clean, dry cloth.
• Only voltage specied on this unit must be used. Using this
unit with a higher voltage than specied is dangerous and may
cause re, damage to this unit, and/or personal injury. Yamaha
will not be held responsible for any damage resulting from use
of this unit with a voltage other than specied.
• To prevent damage by lightning, keep the power cable and
outdoor antennas disconnected from a wall outlet or the unit
during a lightning storm.
• Do not attempt to modify or x this unit. Contact qualied
Yamaha service personnel when any service is needed. The
cabinet should never be opened for any reasons.
• When not planning to use this unit for long periods of time (i.e.
vacation), disconnect the AC power plug from the wall outlet.
• Be sure to read the “Troubleshooting” section on common
operating errors before concluding that this unit is faulty.
• Before moving this unit, press to set this unit in standby
mode, and disconnect the power supply cable from the wall
outlet.
• Condensation will form when the surrounding temperature
changes suddenly. Disconnect the power supply cable from the
outlet, then leave the unit alone.
• Install this unit near the wall outlet and where the AC power
plug can be reached easily.
• The batteries shall not be exposed to excessive heat such as
sunshine, re or like.
• Secure placement or installation is the owner’s responsibility.
Yamaha shall not be liable for any accident caused by
improper placement or installation of speakers.
FOR NS-WSW40
• To assure the nest performance, please read this manual
carefully. Keep it in a safe place for future reference.
• Install this unit in a cool, dry, clean place - away from
windows, heat sources, sources of excessive vibration, dust,
moisture and cold. Avoid sources of humming (transformers,
motors). To prevent re or electrical shock, do not expose this
unit to rain or water.
• The voltage to be used must be the same as that specied
on the rear panel. Using this unit with a higher voltage than
specied is dangerous and may cause a re and/or electric
shock.
• Do not use force on switches, controls or connection wires.
When moving the unit, rst disconnect the power plug and
the wires connected to other equipment. Never pull the wires
themselves.
• When not planning to use this unit for a long period (ie.,
vacation, etc.), disconnect the AC power plug from the wall
outlet.
• To prevent lightning damage, disconnect the AC power plug
when there is an electric storm.
• Since this unit has a built-in power amplier, heat will radiate
from the rear panel. Place the unit apart from the walls,
allowing at least 20 cm of space above, behind and on both
sides of the unit to prevent re or damage.
Furthermore, do not position with the rear panel facing down
on the oor or other surfaces.
• Do not cover the rear panel of this unit with a newspaper,
a tablecloth, a curtain, etc., in order not to obstruct heat
radiation. If the temperature inside the unit rises, it may cause
re, damage to the unit and/or personal injury.
• Do not place the following objects on this unit:
– Glass, china, small metallic, etc.
If glass, etc., falls as a result of vibrations and breaks, it may
cause bodily injury.
– A burning candle etc.
If the candle falls as a result of vibration, it may cause re
and bodily injury.
– A vessel containing water
If the vessel falls as a result of vibration and water spills,
it may cause damage to the speaker, and/or you may get an
electric shock.
• Do not place this unit where foreign material, such as dripping
water. It might cause re, damage to this unit, and/or personal
injury.
• Never put a hand or a foreign object into the YST port located
on the right side of this unit. When moving this unit, do not
hold the port, as it might cause personal injury and/or damage
to this unit.
• Never place a fragile object near the YST port of this unit. If
the object falls or drops as a result of the air pressure, it may
cause damage to the unit and/or personal injury.
• Never open the cabinet. It might cause an electric shock, since
this unit uses a high voltage. It might also cause personal
injury and/or damage to this unit. If something drops into the
set, contact your dealer.
• When using a humidier, be sure to avoid condensation inside
this unit by allowing enough space around this unit or avoiding
excess humidication. Condensation might cause re, damage
to this unit, and/or electric shock.
• Super-bass frequencies reproduced by this unit may cause a
turntable to generate a howling sound. In such a case, move
this unit away from the turntable.
• This unit may be damaged if certain sounds are continuously
output at high volume level. For example, if 20 Hz-50 Hz
sine waves from a test disc, bass sounds from electronic
instruments, etc., are continuously output, or when the stylus
of a turntable touches the surface of a disc, reduce the volume
level to prevent this unit from being damaged.
• If you hear distortion (i.e., unnatural, intermittent “rapping”
or “hammering” sounds) coming from this unit, reduce the
volume level. Extremely loud playing of a movie soundtrack’s
low frequency, bass-heavy sounds or similarly loud popular
music passages can damage this speaker system.
• Vibration generated by super-bass frequencies may distort
images on a TV. In such a case, move this unit away from the
TV set.
• Do not attempt to clean this unit with chemical solvents as this
might damage the nish. Use a clean, dry cloth.
• Be sure to read the “TROUBLESHOOTING” section
regarding common operating errors before concluding that the
unit is faulty.
• Install this unit near the wall outlet and where the AC power
plug can be reached easily.
Notes on remote controls and batteries
• Do not spill water or other liquids on the remote control.
• Do not drop the remote control.
• Do not leave or store the remote control in the following
places:
– places of high humidity, such as near a bath
– places of high temperatures, such as near a heater or a stove
– places of extremely low temperatures
– dusty places
• Do not expose the remote control sensor of this unit to direct
sunlight or lighting such as inverted uorescent lamps.
• If the batteries grow old, the effective operation range of the
remote control decreases considerably. If this happens, replace
the batteries with two new ones as soon as possible.
• Do not use old batteries together with new ones.
• Do not use different types of batteries (such as alkaline and
manganese batteries) together. Read the packaging carefully as
these different types of batteries may have the same shape and
color.
• Exhausted batteries may leak. If the batteries have leaked,
dispose of them immediately. Avoid touching the leaked
material or letting it come into contact with clothing, etc.
Clean the battery compartment thoroughly before installing
new batteries.
• Do not throw away batteries with general house waste.
Dispose of them correctly in accordance with your local
regulations.
• Keep batteries away from children. If a battery is accidentally
swallowed, contact your doctor immediately.
• When not planning to use the remote control for long periods
of time, remove the batteries from the remote control.
• Do not charge or disassemble the supplied batteries.
Radio waves may affect electro-medical devices.
Do not use this unit near medical devices or inside medical
facilities.
Yamaha Music (Asia) Private Limited
Blk 202 Hougang St 21 #02-00, Singapore 530202
Tel: 65-6747-4374
Yamaha Music (Malaysia) Sdn. Bhd.
No.8 Jalan Perbandaran, Kelana Jaya, 47301 Petaling Jaya,
Selangor, Malaysia
Tel: 60-3-7803-0900
P.T. Yamaha Musik Indonesia (Distributor)
Yamaha Music Center Bldg., Jl. Jend. Gatoto Subroto Kav. 4,
Jakarta 12930, Indonesia
Tel: 62-21-520-2579
Yamaha Music India Pvt. Ltd.
Spazedge Building, Ground Floor, Tower-A, Sector-47,
Gurgaon-Sohna Road, Gurgaon -122002, Haryana, India
Tel: 91-124-4853300
Siam Music Yamaha Co., Ltd.
Siam Motors Building, 891/1 Rama 1 Rd., Wangmai,
Pathumwan, Bangkok, 10330 Thailand
Tel: 66-2-215-2626-39
Yamaha de México, S.A. de C.V.
Eje 5 Ote. Javier Rojo Gomez 1149, Iztapalapa, D.F., México
Tel: 52-55-5804-0600
Yamaha Music Latin America, S.A.
Torre Banco General Piso 7, Marbella Calle 47 y Aquilino de
la Guardia, Ciudad de Panamá, Panamá
Tel: 507-269-5311
CAUTION: READ THIS BEFORE OPERATING YOUR UNIT.
iEn
English
1
En
Contents
Supplied items .........................................................................................2
Features ....................................................................................................2
Part names and functions (sound bar/subwoofer) ................................3
Installations .............................................................................................4
Connections .............................................................................................5
Operations ...............................................................................................6
Settings ....................................................................................................8
Controlling the sound bar with TV remote control
(TV remote control learning function) .....................................................................................8
Controlling the TV via the sound bar
(when the TV’s remote control sensor is blocked) ..............................................................9
Changing the group ID ..................................................................................................................9
Initializing the settings of the sound bar ................................................................................9
Troubleshooting ....................................................................................10
Specications .........................................................................................12
About this manual
• This manual explains operations using the supplied remote control.
• This manual describes all the “iPod”, “iPhone” and “iPad” as the “iPod”. “iPod” refers to “iPod”, “iPhone” and “iPad”,
unless otherwise specied.
• Marks used in this manual
NOTE
This indicates precautions for use of the product and its feature limitations.
HINT
This indicates supplementary explanations for better use.
Front Surround System
(YAS-CU201+NS-WSW40)
Owner’s Manual
PDF versions of this manual can be downloaded from the following website.
http://download.yamaha.com/

2En
Supplied items
Make sure you have received all of the following items.
INPUT
–
VOLUME
+
TV BD/DVD YIT SURROUND CLEAR VOICE UNIVOLUME DTS
DSUBWOOFER
PL
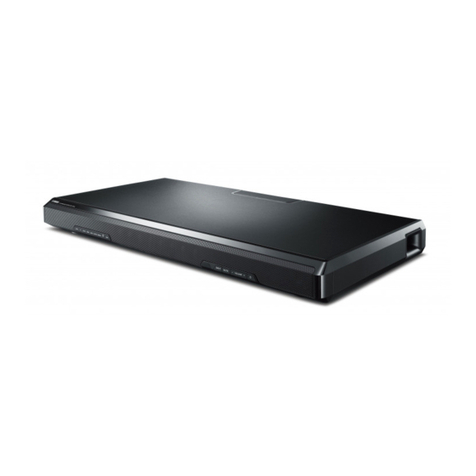
Sound bar (YAS-CU201)
Wireless subwoofer (NS-WSW40)
Mounting template
* Using when attaching the sound bar to a wall
Battery x 2
(AAA, R03, UM4)
Optical cable (1.5 m [4.9 ft])
Remote control
Features
• AIR SURROUND XTREME
Enjoy high-quality surround sound with a realistic sound effect (p.7).
• AirWired
The sound bar and subwoofer can be connected wirelessly without any user setup. In addition,
you can play back iPod or PC music on the unit via a wireless connection by using a Yamaha
Wireless Transmitter for iPod (sold separately).
• Clear voice function
Make voice sound (such as dialogues and narrations) clear with just one touch (p.7).
• UniVolume function
Maintain a consistent volume between different channels, programs, commercials (p.7).
• TV remote control learning function
Operate the sound bar with the TV’s remote control (p.8)
• TV Remote Repeater function
Enable the transmission of TV remote control signals via the sound bar when you cannot
operate your TV from the remote control because the remote control sensor of the TV is
blocked by the sound bar (p.9).

3
En
Part names and functions (sound bar/subwoofer)
Sound bar (rear panel)
BD/DVDTV
TV BD/DVD
1 2
3
1 TV input jack
For connecting to a TV with an optical cable.
2 BD/DVD input jack
For connecting to a playback device (such as a BD player) with an optical cable.
3 TV Remote Repeater
Transmits TV remote control signals received at the TV remote control sensor to the TV (p.9).
Subwoofer (rear panel)
1 LINK indicator
Indicates the status of the wireless connection
(lights up: connection established, ashes:
preparing).
2 Group ID switches
Set the group ID that is used for the wireless
connection (p.9).
HINT
• The subwoofer automatically turns on/off when the sound bar is turned on or off (standby). The LINK indicator lights up
when the subwoofer is turned on.
ALINK C 1 2
① ②
Sound bar (front panel)
INPUT
–
VOLUME
+
TV BD/DVD YIT SURROUND CLEAR VOICE UNIVOLUME DTS
DSUBWOOFER
PL
2 3
INPUT
–
VOLUME
+
TV BD/DVD YIT SURROUND CLEAR VOICE UNIVOLUME DTS
DSUBWOOFER
PL
164 5
1 Indicators
Indicate the status of the sound bar.
The indicators will dim automatically if no operations are performed for 5 seconds.
2 Remote control sensor
Receives infrared signals from the remote control of the unit (p.6).
3 TV remote control sensor
Receives infrared signals from the TV remote control when the TV Remote Repeater function is
enabled (p.9).
4 INPUT key
Selects an input source to be played back (p.6).
5 VOLUME keys
Adjust the volume (p.6).
6 (power) key
Turns on or off (standby) the sound bar (p.7).

4En
Installations
Place the sound bar on a at surface such as on top of a TV
cabinet.
Place the subwoofer to the outside of the sound bar. To reduce
echoes from the wall, face the front side of the subwoofer slightly
inward.
Cautions
• Do not place the sound bar on/under any other devices such as BD player
in a pile. Doing so may cause a malfunction due to vibrations.
• Do not touch the grille on the front and bottom of the sound bar.
• Place the sound bar away from your TV more than 50 mm (2”) so as not to
damage your TV with rear panel of the sound bar.
• Depending on your installation environment, it may be better to connect
the sound bar and external devices (such as a TV) before installing the
sound bar.
Removing the stands
When the sound bar blocks the view of the lower part of the TV
screen or the remote control sensor of the TV, remove the stands
(18 mm [3/4”]) of the sound bar to adjust its height.
HINT
• Use the TV Remote Repeater function (p.9) to transmit TV remote control
signals via the sound bar.
NOTE
• Keep the stands and screws in a safe place for future use.
Attaching the sound bar to a wall
Cautions
• When installing the sound bar on a wall, all installation work must
be performed by a qualied contractor or dealer. The customer must
never attempt to perform this installation work. Improper or inadequate
installation could cause the sound bar to fall, resulting in personal injury.
• Do not attach the sound bar to a wall that is made of weak materials such
as plaster or veneered woods. Doing so may cause the sound bar to fall.
• Make sure you use commercially available screws that can support the
weight of the installation (specied in Step 2). Using clamps other than
specied screws, such as short screws, nails, and two-sided tape, may
cause the sound bar to fall.
1 Attach the mounting template on a wall and mark for the
screw holes.
Tapes or thumbtacks
Mounting template (supplied)
Screw holes
2 Remove the mounting template from the wall and install
the commercially available screws at the marks on the
wall.
4 mm (#8)
7 to 8.5 mm
(1/4” to 3/8”)
20 mm (3/4”) or
more
2 to 4 mm (1/16” to 3/16”)
3 Hang the sound bar on the screws.
INPUT
–
VOLUME
+
TV BD/DVD YIT SURROUND CLEAR VOICEUNIVOLUME DTS
DSUBWOOFER
PL
Mounting holes
on rear of sound bar
Cautions
• Fix the cables in place where they will not become loose. If your foot or
hand accidentally gets caught on a loose cable, the sound bar may fall.
• Check that the sound bar is xed securely after the installation. Yamaha
will bear no responsibility for any accidents caused by improper
installations.

5
En
Connections
NOTE
• Remove the power cables of the sound bar and subwoofer from AC wall outlets before making connections.
• Do not use excessive force when inserting the cable plug. Doing so may damage the cable plug or terminal.
BD/DVDTV
TV BD/DVD
3
1
22
Sound bar (rear)
TV
Playback device (such as a BD player)
OPTICAL OUTPUT
Subwoofer (rear)
To AC wall outletTo AC wall outlet
OPTICAL OUTPUT
Optical cable Optical cable
Power cable Power cable
1 Connect the TV and sound bar with the optical cable (supplied).
Remove the cap of the optical cable and check the direction of the plug.
2 Connect the power cables of the sound bar and subwoofer to AC wall outlets.
3 Set the TV as follows.
• Set the TV volume to minimum.
• Disable the TV built-in speaker output (if available).
HINT
• If a setting to disable the speaker output is not available on your TV, you may disable it by connecting headphones
to the headphone jack on the TV. For details, refer to the manuals of the TV.
HINT
• The unit plays the audio output from your TV. If the sound output from a playback device (such as a BD player) cannot be output
from your TV or if your TV does not have any audio input jacks to connect a playback device, connect the playback device and
sound bar directly with a commercially available optical cable.

6En
Operations
Installing the batteries
2
1
3
Operating range of the remote control
Point the remote control at the remote control sensor on the
sound bar and remain within the operating range shown below.
INPUT
–
VOLUME
+
TV BD/DVD YIT SURROUNDCLEAR VOICE UNIVOLUME DTS
DSUBWOOFER
PL
TV BD/DVD YIT SURROUND CLEAR VOICE UNIVOLUME DTS
DSUBWOOFER
PL
Within 6 m (20 ft)
HINT
• You can check the status of the sound bar (such as wireless connection
and volume) by the indicators on the front panel of the sound bar during
operations.
Remote control signal transmitter
Transmits infrared signals.
Input keys
Select an input source to be played back.
TV key ................... TV audio
BD/DVD key .......... Audio from the playback device
connected to the BD/DVD input jack
YIT key .................. Audio from the iPod or PC connected to
the transmitter (sold separately)
(Example: when TV is selected)
TV BD/DVD YIT
HINT
• To play audio of the playback device connected to the TV or to watch
videos of the playback device, set the TV’s input source to the playback
device.
• For details on playback operations using a transmitter (sold separately),
refer to the manuals of the transmitter.
Supported Yamaha Wireless Transmitter for iPod (as of June 2012)
• YIT-W10
• YIT-W12
SUBWOOFER keys
Adjust the volume of the subwoofer.
Volume down (–) Volume up (+)
VOLUME keys
Adjust the volume of the sound bar.
Volume up (+)Volume down (–)
REPEATER key
Enables/disables the TV Remote Repeater function (p.9).
LEARN key
Sets the sound bar to the TV remote control learning mode (p.8).

7
En
Decoder indication
The sound bar supports the following audio signals. You can
check the type of the input audio signal by the color of the
indicator.
DTS
D
DTS
D
Green (Dolby Digital), Red (DTS Digital Surround)
Off (PCM)
Auto-sleep function
The sound bar will be automatically turned off when one of the
following conditions is met.
• No operations for 12 hours
• No audio input and no operations for 1 hour
• No operations for 10 seconds after a wireless connection
(AirWired) to a transmitter (sold separately) is terminated
(power) key
Turns on or off (standby) the sound bar.
HINT
• If you turn on the sound bar, the sound bar and subwoofer will be
connected wirelessly and the SUBWOOFER indicator on the front panel
of the sound bar will light up. If the indicator does not light up (or remains
ashing), change the group ID (p.9).
SUBWOOFER
SUBWOOFER
Flashes (preparing)
Lights up (connection established)
CLEAR VOICE key
Enables/disables the clear voice function. When this function
is enabled, you can enjoy clear voice sounds while watching
movies, TV dramas, news programs or sports programs.
CLEAR VOICE Lights up (clear voice is enabled)
UNI VOLUME key
Enables/disables the UniVolume function. When this function
is enabled, the sound bar automatically adjusts its volume so
that different TV channels, programs and commercials will
be played at the same volume.
UNI VOLUME Lights up (UniVolume is enabled)
HINT
• The UniVolume function is automatically disabled when “YIT” is selected
as the input source.
AUDIO DELAY key
Adjusts the audio delay to synchronize the sound with the
video when the video image on the TV may seem delayed
with respect to the sound.
Follow the procedure below to adjust the audio delay.
1 Hold down AUDIO DELAY for more than 3 seconds.
The left most indicator ashes.
2 Press SUBWOOFER to adjust the audio delay.
Smaller delay (–) Larger delay (+)
3 To nish the adjustment, press AUDIO DELAY.
HINT
• The adjustment will be nished automatically if no operations are
performed for 20 seconds.
• The audio delay setting does not work when “YIT” is selected as the
input source.
MUTE key
Mutes the audio output. Press the key again to unmute.
Flashes (on mute)
SURROUND and STEREO keys
Switch between surround and stereo (2 channel) playback.
When surround playback is selected, you can enjoy a realistic
sound effect using Yamaha’s exclusive AIR SURROUND
XTREME.
SURROUND
SURROUND
Lights up (surround playback)
Off (stereo playback)
HINT
• When 2-channel stereo signals are played in surround, the PLII
indicator lights up.
PL Lights up (Dolby Pro Logic II)

8En
Learning has
failed Twice Flashes
* Repeat from Step 3-1.
4 Make the sound bar learn the volume (+) operation.
4-1 Press VOLUME (+) on the front panel of the sound bar.
INPUT
–
VOLUME
+
4-2 While pointing your TV remote control at the remote control sensor, hold down the
volume (+) key for more than 1 second twice or three times.
Result Bleep/buzzer Indicators
Successfully
learned Once Lights up
Learning has
failed Twice Flashes
* Repeat from Step 4-1.
5 Make the sound bar learn the power operation.
5-1 Press (power) on the front panel of the sound bar.
INPUT
–
VOLUME
+
5-2 While pointing your TV remote control at the remote control sensor, hold down the
power key for more than 1 second twice or three times.
Result Bleep/buzzer Indicators
Successfully
learned Once Lights up
Learning has
failed Twice Flashes
* Repeat from Step 5-1.
6 To nish the learning mode, press LEARN or (power) on the supplied remote
control.
This completes the necessary settings. Now you can operate the sound bar with the TV remote
control’s power key or volume keys.
HINT
• The learning mode will be nished automatically if no operations are performed for 5 minutes.
• Set the TV volume to minimum. When you turn up the volume of the sound bar with the TV remote control, the
volume of the TV may be turned up at the same time. In this case, follow Step 3 in “Connections” (p.5) to change the
TV setting.
Settings
Controlling the sound bar with TV remote control
(TV remote control learning function)
You can use the TV remote control to turn on/off the sound bar or adjust its volume by having the
sound bar learn the TV remote control signals.
NOTE
• This function is available only when your TV remote control uses infrared signals.
• Depending on the installation conditions or settings of the sound bar, both the sound bar and TV will receive the TV
remote control signals and operate simultaneously.
1 Turn off the TV and sound bar.
2 Hold down LEARN on the supplied remote control for more than 3 seconds to
set the sound bar to the learning mode.
When the sound bar is in the learning mode, the indicators on the front panel ash as shown
below.
3 Make the sound bar learn the volume (–) operation.
3-1 Press VOLUME (–) on the front panel of the sound bar.
INPUT
–
VOLUME
+
3-2 While pointing your TV remote control at the remote control sensor, hold down the
volume (–) key for more than 1 second twice or three times.
INPUT
–
VOLUME
+
TV BD/DVD YIT SURROUND CLEAR VOICE UNIVOLUME DTS
DSUBWOOFER
PL
VOLVOL VOLVOLVOLVOL VOLVOL
Approx. 30 cm (1 ft)
TV remote control
Hold down
(more than 1 second) Release
(more than 1 second) Hold down
(more than 1 second) Release
(more than 1 second)
Result Bleep/buzzer Indicators
Successfully
learned Once Lights up

9
En
HINT
• The TV Remote Repeater function is disabled by default.
• If you have made the sound bar learn the volume (+) operation (p.8), the volume of the TV may be turned up when
you turn up the volume of the sound bar with the TV remote control. In this case, follow Step 3 in “Connections” (p.5)
to change the TV setting.
• You can check the status of the TV Remote Repeater function by the center indicator when turning on the sound bar.
Off (enabled), lights up (disabled)
Changing the group ID
To establish a wireless connection (AirWired) between Yamaha products, you need to set both the
products to the same group.
You can change the group ID of the sound bar and subwoofer by the group ID switches on the
subwoofer. If you change the group ID on the subwoofer, it will be reected to the sound bar when the
sound bar is turned on the next time.
A C 1 2
A1*A C 1 2
A2
A C 1 2
C1 A C 1 2
C2
Group ID switches (rear panel of the subwoofer)
* Default setting
NOTE
• If a wireless connection between the sound bar and
subwoofer cannot be established, see “No sound is coming
from the subwoofer.” in “Troubleshooting” (p.10).
• To establish a wireless connection (AirWired) to another
Yamaha product (such as a transmitter), set the sound bar
(subwoofer) and your Yamaha product to the same group.
• When using another Yamaha product (such as a
transmitter), terminate a wireless connection between your
Yamaha product and the sound bar (subwoofer) before
changing the group ID. Reestablish a wireless connection
between them after conrming that the sound bar and
subwoofer are properly connected with a new group ID.
• Use set C1 or C2 when playing music stored on a computer
via the transmitter. Refer to the transmitter's Owner's
Manual for details.
In all other cases, select a group ID from set A1, A2, C1 or
C2 to achieve a stable wireless connection.
Initializing the settings of the sound bar
Follow the procedure below to initialize the sound bar. When the sound bar does not operate properly
for any reason, initialization may solve the problem.
1 Turn off the sound bar.
2 Hold down (power) on the front panel of the sound bar for more than 3
seconds.
INPUT
–
VOLUME
+
Flashes (initialized)
Clearing all learned operations
1 Hold down LEARN on the supplied remote control for more than 3 seconds to
set the sound bar to the learning mode.
When the sound bar is in the learning mode, the indicators on the front panel ash as shown
below.
2 Hold down INPUT on the front panel of the sound bar for more than 3 seconds.
INPUT
–
VOLUME
+
Flashes in red (cleared)
If the clearing is completed, you will hear the bleep sound three times.
3 Press LEARN or (power) on the supplied remote control.
Controlling the TV via the sound bar
(when the TV’s remote control sensor is blocked)
When the TV Remote Repeater function is enabled, the sound bar receives TV remote control signals
at the TV remote control sensor (on front) and transmits the signals from the TV Remote Repeater (on
rear). This function is useful when you cannot operate your TV from the remote control because the
remote control sensor of the TV is blocked by the sound bar.
NOTE
• This function is available only when your TV remote control uses infrared signals.
TV’s remote control sensor
TV Remote Repeater
TV remote control
1 Turn on the sound bar.
2 Hold down REPEATER on the supplied remote control for more than 3 seconds
to enable/disable the TV Remote Repeater function.
Flashes three times (enabled), Flashes once (disabled)
This completes the necessary settings. When the TV Remote Repeater function is enabled, you
can operate your TV from the TV remote control via the sound bar.

10 En
Troubleshooting
Refer to the table below when the unit does not function properly. If the problem you are experiencing
is not listed below or if the instructions below do not help, turn off the unit, disconnect the power cable,
and contact the nearest authorized Yamaha dealer or service center.
First, check the following:
1 The power cables of the sound bar, subwoofer, TV and playback devices (such as BD
players) are connected to AC wall outlets securely.
2 The sound bar, TV and playback devices (such as BD players) are turned on.
3 The connectors of each cable are securely inserted in to jacks on each device.
Power and system
Problem Cause Remedy
The power turns off
immediately.
The auto-sleep function worked.
The sound bar will be automatically
turned off when one of the following
conditions is met.
- No operations for 12 hours
- No audio input and no operations for
1 hour
- No operations for 10 seconds after a
wireless connection (AirWired) to a
transmitter is terminated
--
The internal microcomputer is frozen,
due to an external electric shock
(such as lightning or excessive static
electricity) or to a drop
in the power supply voltage.
Hold down (power) on the front panel of the
sound bar for more than 10 seconds to reboot
it. (If the problem persists, disconnect the
power cable from the AC wall outlet and plug it
again.)
The protection circuitry has been
activated.
(In this case, one of the front panel
indicators [TV, BD/DVD or YIT] ashes
until the power turns off.)
Contact the nearest authorized Yamaha dealer
or service center.
The sound bar is not
reacting.
The internal microcomputer is frozen,
due to an external electric shock
(such as lightning or excessive static
electricity) or to a drop
in the power supply voltage.
Hold down (power) on the front panel of the
sound bar for more than 10 seconds to reboot
it. (If the problem persists, disconnect the
power cable from the AC wall outlet and plug it
again.)
The sound bar
operates by itself.
Another Yamaha AirWired-compatible
product is being used near your place.
Change the group ID (p.9).
TV's 3D glasses do
not work.
The sound bar is blocking the 3D
glasses transmitter of your TV.
Check the position of the 3D glasses
transmitter of your TV and adjust the position
of the sound bar. If necessary, remove the
stands of the sound bar (p.4).
Audio
Problem Cause Remedy
No sound. The volume is too low. Turn up the volume (p.6).
The mute function is activated. Cancel the mute function (p.7).
Another input source is selected. Select an appropriate input source (p.6).
No sound is coming
from the subwoofer.
The volume of the subwoofer is too
low.
Turn up the volume of the subwoofer (p.6).
The playback source does not contain
low-frequency signals.
--
A wireless connection between the
sound bar and subwoofer is not
established.
(The SUBWOOFER indicator on the
front panel of the sound bar does not
light up.)
Adjust the position of the subwoofer. If there is
a device using 2.4-GHz band range (such as
microwave ovens, cordless phones and Wi-
Fi devices) nearby, move those devices away
from the sound bar and subwoofer.
Change the group ID (p.9).
A wireless connection between the
sound bar and subwoofer is not
established because their group IDs
are not same.
(The LINK indicator on the
subwoofer does not light up while the
SUBWOOFER indicator on the front
panel of the sound bar lights up.)
Hold down INPUT on the front panel of the
sound bar until the TV indicator start ashing
to match the group IDs of the sound bar and
subwoofer.
Sound is heard from
the subwoofer when
the sound bar is not
used.
Another Yamaha AirWired-compatible
product is being used near your place.
Change the group ID (p.9).
The volume
decreases when the
sound bar is turned
on.
The automatic volume adjustment
function worked.
To prevent excessive loudness, the
sound bar automatically controls its
volume within a certain level when the
sound bar is turned on.
If necessary, turn up the volume (p.6).
No surround effect. Stereo playback is selected. Select surround playback (p.7).
The volume is too low. Turn up the volume (p.6).
The TV or playback device is set to
output 2-channel audio (such as PCM)
only.
Change the digital audio output setting on the
TV or playback device.
Noise is heard. The sound bar is too close to another
digital or high-frequency device.
Move those devices away from the sound bar.

11
En
Remote control
Problem Cause Remedy
The sound bar cannot
be controlled using
the remote control.
The sound bar is out of the operating
range.
Use the remote control within the operating
range (p.6).
The batteries are weak. Replace with new batteries (p.6).
The remote control sensor of the
sound bar is exposed to direct sunlight
or strong lighting.
Adjust the lighting angle, or reposition the
sound bar.
The TV cannot be
controlled using the
TV remote control.
The remote control sensor of the TV is
blocked by the sound bar.
Use the TV Remote Repeater function (p.9) or
remove the stands of the sound bar so that the
TV remote control sensor is not blocked (p.4).
There may be any problem with the
TV or TV remote control.
Refer to the manuals of the TV.
The TV cannot be
controlled by using
the TV Remote
Repeater function.
The TV Remote Repeater function is
disabled.
Enable the TV Remote Repeater function (p.9).
The TV remote control does not
use infrared signals. (Some remote
controls may not work even if it uses
infrared signals.)
The TV Remote Repeater function cannot be
used in this case. Adjust the position of the
sound bar so that the remote control sensor
of the TV is not blocked by the sound bar and
use the TV remote control to operate the TV.
The sound bar and TV are too close
or too far from one another.
Move the sound bar to adjust the distance
between the TV Remote Repeater and TV
(remote control sensor) (p.9).
If necessary, remove or attach the stands of
the sound bar (p.4).
There is any obstacle (such as cables)
between the sound bar and TV.
Remove the obstacle between the sound bar
and TV.
The sound bar does
not learn TV remote
control operations.
The TV remote control key was not
held down long enough.
Hold down the key for more than 1 second
twice or three times (p.8).
The TV remote control does not
use infrared signals. (Some remote
controls may not work even if it uses
infrared signals.)
The TV remote control learning function
cannot be used in this case. Use the supplied
remote control to operate the sound bar.
The position where you operated the
TV remote control is not appropriate
Operate the TV remote control at the
appropriate position (p.8).
The batteries of the TV remote control
are weak.
Replace with new batteries.
The remote control sensor of the
sound bar is exposed to direct sunlight
or strong lighting.
Adjust the lighting angle, or reposition the
sound bar.
The transmission of the remote control
signal was disturbed by the TV screen
light.
Turn off the TV and perform the learning
operation again (p.8).
Sound is coming
from the TV when the
sound bar volume is
turned up with the TV
remote control.
(when TV remote
control learning
function is used)
Audio output is enabled on the TV. Change the TV setting to disable the TV
speaker output. If a setting to disable the
speaker output is not available on your TV, try
the following methods.
- Connect headphones to the headphone jack
on the TV.
- Set the TV volume to minimum.
The power of the
sound bar and of
the TV switch in the
opposite direction.
(For example, the TV
is turned off if the
sound bar is turned
on.)
(when TV remote
control learning
function is used)
The power of the TV was on when you
performed the learning operation.
Press the power key on the TV and (power)
on the front panel of the sound bar to turn on
them and then press the power key on the TV
remote control to turn off them.

12 En
Specications
Item Sound Bar
(YAS-CU201)
Subwoofer
(NS-WSW40)
Amplier Section Maximum Rated
Output Power 30 W + 30 W 50 W, 100 W (Dynamic power)
Speaker Section
Type Acoustic suspension type/
Non-magnetic shielding type
Advanced Yamaha Active
Servo Technology/
Magnetic shielding type
Driver 5.5 cm (2-1/8”) cone x 2 16 cm (6-1/4”) cone x 1
Frequency
Response 150 Hz to 20 kHz 35 Hz to 150 Hz
Input Jacks Optical 2 (TV, BD/DVD) --
Wireless Section
Frequency Band 2.4 GHz
Transmission
Range Approx. 20 m (66 ft) [without interference]
General
Power Supply
U.S.A. and Canada models: AC 120 V, 60Hz
Taiwan model: AC 110 V, 60Hz
Other models: AC 220—240 V, 50/60Hz
Power
Consumption 17 W 45 W
Standby Power
Consumption
U.S.A., Canada and Taiwan
models: 2.0 W or less
Other models: 2.2 W or less
--
Dimensions
(W x H x D)
886 x 98 x 121 mm
(34-8/7" x 3-7/8" x 4-3/4")
290 x 292 x 316 mm
(11-3/8" x 11-1/2" x 12-1/2")
Weight 3.1 kg (6.8 lbs) 8.3 kg (18.3 lbs)
* Specications are subject to change without notice.
This system employs new technologies and algorithms that make it possible to achieve 7-channel surround sound with only
front speakers, and without using wall reections.
“UniVolume” is a trademark of Yamaha Corporation.
The “ ” and “AirWired” are trademarks of Yamaha Corporation.
Manufactured under license from Dolby Laboratories. Dolby, Pro Logic and the double-D symbol are trademarks of Dolby
Laboratories.
“DTS” and “DTS Digital Surround” are registered trademarks of DTS, Inc.

i
Es
No utilice la unidad a menos de 22 cm de personas que tengan
implantado un marcapasos o un desfribiliador.
ADVERTENCIA
PARA REDUCIR EL RIESGO DE INCENDIO O DESCARGA
ELÉCTRICA, NO EXPONGA ESTE APARATO A LA LLUVIA
NI A LA HUMEDAD.
Aunque usted apague esta unidad con , esta unidad no se
desconectará de la fuente de alimentación de CA mientras
esté conectada a la toma de CA. En este estado, esta unidad
ha sido diseñada para que consuma una cantidad de corriente
muy pequeña.
(Tecla de encendido)
Enciende la unidad o la ajusta en modo de espera.
YAS-CU201
• Para asegurar el mejor rendimiento de este aparato, lea
atentamente este manual. Y luego guárdelo en un lugar seguro
para poder consultarlo en el futuro en caso de ser necesario.
• Instale este sistema de sonido en un lugar bien ventilado,
fresco, seco y limpio, alejado de la luz solar directa, fuentes
de calor, vibraciones, polvo, humedad y/o frío. Para conseguir
una ventilación adecuada, deje libres los siguientes espacios,
como mínimo:
Arriba: 5 cm, Atrás: 5 cm, A los lados: 1 cm
• Coloque este aparato lejos de otros aparatos eléctricos,
motores o transformadores, para evitar así los ruidos de
zumbido.
• No exponga este aparato a cambios bruscos de temperaturas,
del frío al calor, ni lo coloque en lugares muy húmedos (una
habitación con deshumidicador, por ejemplo), para impedir
así que se forme condensación en su interior, lo que podría
causar una descarga eléctrica, un incendio, daños en el aparato
y/o lesiones a las personas.
• Evite instalar este aparato en un lugar donde puedan caerle
encima objetos extraños y/o donde quede expuesto al goteo
o a la salpicadura de líquidos. Encima de este aparato no ponga:
– Otros componentes, porque pueden causar daños y/o
decoloración en la supercie de este aparato.
– Objetos con fuego (velas, por ejemplo), porque pueden
causar un incendio, daños en el aparato y/o lesiones a las
personas.
– Recipientes con líquidos, porque pueden caerse y derramar
el líquido, causando descargas eléctricas al usuario y/o
dañando el aparato.
• No tape este aparato con un periódico, mantel, cortina, etc.
para no impedir el escape del calor. Si aumenta la temperatura
en el interior del aparato, esto puede causar un incendio, daños
en el aparato y/o lesiones a las personas.
• No enchufe este aparato a una toma de corriente hasta después
de haber terminado todas las conexiones.
• No ponga el aparato al revés. Podría recalentarse y
posiblemente causar daños.
• No utilice una fuerza excesiva con los conmutadores, los
controles y/o los cables.
• Cuando desconecte el cable de alimentación de la toma de
corriente, sujete la clavija y tire de ella; no tire del propio cable.
• No limpie este aparato con disolventes químicos porque podría
estropear el acabado. Utilice un paño limpio y seco para limpiar
el aparato.
• Utilice solamente la tensión especicada en este aparato.
Utilizar el aparato con una tensión superior a la especicada
resulta peligroso y puede producir un incendio, daños en
el aparato y/o lesiones a las personas. Yamaha no se hará
responsable de ningún daño debido al uso de este aparato con
una tensión diferente de la especicada.
• Para impedir daños debidos a relámpagos, desconecte el cable
de alimentación y antenas externas de la toma de corriente
durante una tormenta eléctrica.
• No intente modicar ni arreglar este aparato. Póngase en
contacto con el personal de servicio Yamaha cualicado
cuando necesite realizar alguna reparación. La caja no deberá
abrirse nunca por ninguna razón.
• Cuando no piense utilizar este aparato durante mucho tiempo
(cuando se ausente de casa por vacaciones, por ejemplo)
desconecte el cable de alimentación de la toma de corriente.
• Asegúrese de leer la sección “Solución de problemas” antes de
dar por concluido que su aparato está averiado.
• Antes de trasladar este aparato, pulse para ponerlo en el
modo de espera, y luego desconecte el cable de alimentación
de CA de la toma de corriente.
• La condensación se formará cuando cambie de repente la
temperatura ambiental. Desconecte en este caso el cable de
alimentación de la toma de corriente y no utilice el aparato.
• Instale este aparato cerca de la toma de CA y donde se pueda
alcanzar fácilmente la clavija de alimentación.
• Las baterías no deberán exponerse a un calor excesivo como, por
ejemplo, el que producen los rayos del sol, el fuego y similares.
• La colocación o la instalación seguras de la unidad es
responsabilidad del propietario. Yamaha no se responsabilizará
de ningún accidente provocado por la colocación o instalación
incorrecta de los altavoces.
NS-WSW40
• Lea cuidadosamente este manual para obtener el mejor
rendimiento posible. Manténgalo en un lugar seguro para
utilizarlo como referencia en el futuro.
• Instale la unidad en un lugar fresco, seco y limpio, alejado de
ventanas, aparatos que produzcan calor, lugares con muchas
vibraciones, polvo, humedad o frío. Evite aparatos que causen
ruidos de zumbido (transformadores y motores). Para evitar
incendios o descargas eléctricas, no exponga el altavoz a la
lluvia o al agua.
• El voltaje que se debe utilizar ha de ser el mismo que el
especicado en el panel trasero. Si utiliza esta unidad con un
voltaje superior al especicado podría provocar un incendio
o descargas eléctricas.
• No fuerce los interruptores, controles o cables de conexión.
Cuando mueva esta unidad, desconecte primero el cable de
alimentación y los cables conectados con otros equipos.
No tire nunca de los cables.
• Si no va a utilizar el aparato durante un período de tiempo
prolongado (por ejemplo, durante las vacaciones, etc.)
desconecte el enchufe de alimentación de CA de la toma de
corriente.
• Para evitar daños debidos a los relámpagos, desenchufe el cable
de alimentación de CA durante las tormentas eléctricas.
• Este sistema irradia calor por el panel trasero porque tiene
un amplicador de potencia incorporado. Coloque la unidad
separada de las paredes dejando al menos 20 cm de espacio
encima, detrás y a ambos lados de la unidad para evitar un
incendio o cualquier otro tipo de daño. Tampoco se debe colocar
con el panel trasero contra el suelo o apoyado sobre otras
supercies.
• No cubra el panel trasero de la unidad con papeles de periódicos,
manteles, cortinas y otros para no obstruir la radiación de calor.
Si aumenta la temperatura en el interior de la unidad, podría
provocar incendios, averías en la unidad o lesiones personales.
• No coloque los siguientes objetos sobre esta unidad:
– Cristal, porcelana, pequeños objetos metálicos, etc.
Se podrían producir lesiones personales si el cristal
u otros objetos se caen y se rompen como resultado de
las vibraciones.
– Velas encendidas, etc.
Si la vela se cae por las vibraciones, se puede provocar
incendios y lesiones personales.
– Recipientes con agua
Si el recipiente se cae por las vibraciones y se derrama
el agua, se podrían provocar daños en el altavoz o recibir
descargas eléctricas.
• No coloque la unidad en un lugar en donde puedan caer objetos
extraños como gotas de agua. Podría provocar un incendio,
dañar el altavoz o sufrir lesiones personales.
• No ponga nunca ponga las manos o un objeto extraño en el
puerto YST situado a la derecha de esta unidad. Cuando mueva
la unidad, no toque el puerto, ya que podría causar lesiones
personales o la unidad podría averiarse.
• Nunca coloque un objeto frágil cerca del puerto YST de esta
unidad. Si el objeto se cae o se vuelca debido a la presión del
aire, podría provocar averías en la unidad o lesiones personales.
• No abra nunca la carcasa. Podría provocar una descarga
eléctrica, ya que esta unidad es de alto voltaje. También podría
provocar lesiones personales o averiar la unidad. Si algo cae en
el equipo, póngase en contacto con su distribuidor.
• Si utiliza un humidicador, es muy importante evitar la
condensación dentro esta unidad. Para ello, deje siempre
suciente espacio alrededor de esta unidad y evite el exceso
de humidicación. La condensación podría causar un incendio,
averiar la unidad o producir una descarga eléctrica.
• Las frecuencias de ultragraves generadas por esta unidad
pueden hacer que el tocadiscos emita un sonido de aullido.
En este caso, aleje la unidad del tocadiscos.
• La unidad podría averiarse si se escucharan continuamente
ciertos sonidos en el nivel máximo de volumen. Por ejemplo,
si se escuchan ondas sinusoidales de 20 Hz-50 Hz con el disco
de prueba, sonidos graves de instrumentos electrónicos, etc.;
o cuando la aguja del tocadiscos toque la supercie de un disco,
reduzca el nivel de volumen para evitar que se dañe el equipo.
• Si se escuchan sonidos distorsionados (por ejemplo, sonidos
raros, “golpeteos” o “martilleos” intermitentes) provenientes
de la unidad, baje el nivel del volumen. Este sistema de
altavoces se puede averiar si se reproducen a un volumen
extremadamente elevado las bajas frecuencias de las
películas, los sonidos con graves fuertes o música de similares
características.
• La vibración generada por las frecuencias ultragraves puede
distorsionar las imágenes de un televisor. En este caso,
aleje el sistema del televisor.
• No limpie la unidad con disolventes químicos: podría dañar
el acabado. Utilice un paño limpio y seco para la limpieza.
• No se olvide de consultar la sección “RESOLUCIÓN DE
AVERÍAS” antes de dar por concluido que su aparato está
averiado.
• Instale esta unidad cerca de la toma de CA y donde se pueda
alcanzar fácilmente la clavija de alimentación.
Observaciones sobre los mandos a distancia
y las pilas
• No derrame agua u otros líquidos en el mando a distancia.
• No deje caer el mando a distancia.
• No deje ni guarde el mando a distancia en uno de los
siguientes lugares:
– lugares de humedad alta como, por ejemplo, cerca de un baño
– lugares con temperaturas elevadas, por ejemplo, cerca de una
calefacción o estufa
– lugares con temperaturas demasiado bajas
– lugares polvorientos
• Inserte la batería respetando las marcas de polaridad (+ y –).
• Cambie todas las pilas si observa alguna de las siguientes
condiciones:
– el alcance operativo del mando a distancia se reduce o el
indicador
– el indicador de trasmisión no parpadea ni está atenuado
• Para impedir explosiones o pérdidas de ácido, retire
inmediatamente las pilas del mando a distancia cuando
se hayan gastado.
• Si encuentra pilas con fugas, deséchelas inmediatamente,
procurando no tocar el material que sale de las pilas. Si el
material que sale de las pilas entra en contacto con la piel
o entra en los ojos o boca, lávese inmediatamente y acuda
a un médico. Limpie a fondo el compartimiento de las pilas
antes de instalar otras nuevas.
• No utilice pilas viejas y nuevas juntas. Esto puede acortar
la vida de las pilas nuevas o hacer que las pilas viejas
tengan fugas.
• No utilice juntas pilas de tipos diferentes (alcalinas y de
manganeso, por ejemplo). La especicación de las pilas puede
ser diferente aunque parezca la misma.
• Limpie el compartimiento de las pilas antes de introducir las
nuevas.
• Si el mando a distancia se queda sin pilas durante más de
2 minutos, o si las pilas agotadas se quedan en su interior,
se podría borrar el contenido de la memoria. En ese caso, instale
pilas nuevas y establezca el código del mando a distancia.
• Siga la reglamentación local para deshacerse de las pilas.
• Mantenga las pilas fuera del alcance los niños. Si se tragase
una pila accidentalmente, póngase inmediatamente en contacto
con el médico.
• Si no prevé utilizar el mando a distancia durante un periodo
prolongado de tiempo, saque las pilas del mando a distancia.
• No cargue ni desmonte las pilas que se suministran.
PRECAUCIÓN: LEER ESTAS INDICACIONES ANTES DE UTILIZAR EL PRODUCTO.
Español

ii Es
Las ondas de radio pueden afectar a los dispositivos médicos
electrónicos.
No utilice esta unidad cerca de dispositivos médicos o en el
interior de instalaciones médicas.
Yamaha Music (Asia) Private Limited
Blk 202 Hougang St 21 #02-00, Singapore 530202
Tel: 65-6747-4374
Yamaha Music (Malaysia) Sdn. Bhd.
No.8 Jalan Perbandaran, Kelana Jaya, 47301 Petaling Jaya,
Selangor, Malaysia
Tel: 60-3-7803-0900
P.T. Yamaha Musik Indonesia (Distributor)
Yamaha Music Center Bldg., Jl. Jend. Gatoto Subroto Kav. 4,
Jakarta 12930, Indonesia
Tel: 62-21-520-2579
Yamaha Music India Pvt. Ltd.
Spazedge Building, Ground Floor, Tower-A, Sector-47,
Gurgaon-Sohna Road, Gurgaon -122002, Haryana, India
Tel: 91-124-4853300
Siam Music Yamaha Co., Ltd.
Siam Motors Building, 891/1 Rama 1 Rd., Wangmai,
Pathumwan, Bangkok, 10330 Thailand
Tel: 66-2-215-2626-39
Yamaha de México, S.A. de C.V.
Eje 5 Ote. Javier Rojo Gomez 1149, Iztapalapa, D.F., México
Tel: 52-55-5804-0600
Yamaha Music Latin America, S.A.
Torre Banco General Piso 7, Marbella Calle 47 y Aquilino de
la Guardia, Ciudad de Panamá, Panamá
Tel: 507-269-5311

1
Es
Índice
Elementos suministrados ........................................................................2
Funciones .................................................................................................2
Nombres de piezas y funciones
(barra de sonido/altavoz de ultragraves) ...............................................3
Instalaciones ............................................................................................4
Conexiones ...............................................................................................5
Funcionamiento .......................................................................................6
Ajustes ......................................................................................................8
Controlar la barra de sonido con el mando a distancia del televisor
(función de memorización de mando a distancia de TV) .................................................8
Controlar el televisor a través de la barra de sonido
(cuando el sensor de mando a distancia del televisor está bloqueado) .....................9
Cambiar el identicador de grupo ............................................................................................9
Inicializar los ajustes de la barra de sonido ............................................................................9
Resolución de problemas ......................................................................10
Especicaciones .....................................................................................12
Acerca de este manual
• Este manual explica las operaciones con el mando a distancia suministrado.
• En este manual se hace referencia a todos los “iPod”, “iPhone” e “iPad” como “iPod”. “iPod” se refiere a “iPod”, “iPhone”
e “iPad”, a menos que se especifique lo contrario.
• Indicaciones utilizadas en este manual
NOTA
Indica precauciones de uso del producto y sus limitaciones.
SUGERENCIA
Indica explicaciones complementarias para mejorar el uso.
Sistema surround delantero
(YAS-CU201+NS-WSW40)
Manual de Instrucciones
Se pueden descargar versiones PDF de este manual desde el siguiente sitio web.
http://download.yamaha.com/

2Es
Elementos suministrados
Compruebe que ha recibido todos los elementos siguientes.
INPUT
–
VOLUME
+
TV BD/DVD YIT SURROUND CLEAR VOICE UNIVOLUME DTS
DSUBWOOFER
PL
Barra de sonido (YAS-CU201)
Altavoz de ultragraves inalámbrico (NS-WSW40)
Plantilla de montaje
* Se utiliza para montar la barra de sonido en la pared
2 pilas
(AAA, R03, UM4)
Cable óptico (1,5 m)
Mando a distancia
Funciones
• AIR SURROUND XTREME
Difrute de sonido envolvente de alta calidad con un realista efecto de sonido (p.7).
• AirWired
La barra de sonido y el altavoz de ultragraves se pueden conectar de forma inalámbrica sin
que el usuario tenga que configurarlos. Además, puede reproducir en el aparato la música
de un iPod o PC mediante una conexión inalámbrica utilizando un transmisor inalámbrico
de Yamaha para iPod (se vende por separado).
• Función Clear voice
Con solo un toque, el sonido de las voces, por ejemplo de diálogos y narraciones, suena más
claro (p.7).
• Función UniVolume
Se puede mantener el mismo volumen en distintos canales, programas y anuncios (p.7).
• Función de memorización de mando a distancia de TV
La barra de sonido se puede manejar con el mando a distancia del televisor (p.8)
• Función de repetidor de mando a distancia de TV
Habilite la transmisión de señales del mando a distancia del televisor a través de la barra
de sonido cuando no pueda manejar el televidor con el mando a distancia porque la barra
de sonido bloquea el sensor de dicho mando (p.9).

3
Es
Nombres de piezas y funciones (barra de sonido/altavoz de ultragraves)
Barra de sonido (panel trasero)
BD/DVDTV
TV BD/DVD
1 2
3
1 Toma de entrada de TV
Para conectar el aparato al televisor con un cable óptico digital.
2 Toma de entrada BD/DVD
Para conectar el aparato a un dispositivo de reproducción (como un reproductor de Blu-ray) con
un cable óptico.
3 Repetidor de mando a distancia de TV
Transmite al televisor las señales de mando a distancia de TV recibidas en el sensor del mando
a distancia de TV (p.9).
Altavoz de ultragraves (panel trasero)
1 Indicador LINK
Indica el estado de la conexión inalámbrica
(encendido: conexión establecida; parpadeando:
en preparación).
2 Interruptores de identicación de grupo
Defina el identificador de grupo que se use para
la conexión inalámbrica (p.9).
SUGERENCIA
• El altavoz de ultragraves se enciende y apaga automáticamente cuando se enciende o se apaga (espera) la barra
de sonido. El indicador LINK se ilumina cuando se enciende el altavoz de ultragraves.
ALINK C 1 2
① ②
Barra de sonido (panel delantero)
INPUT
–
VOLUME
+
TV BD/DVD YIT SURROUND CLEAR VOICE UNIVOLUME DTS
DSUBWOOFER
PL
2 3
INPUT
–
VOLUME
+
TV BD/DVD YIT SURROUND CLEAR VOICE UNIVOLUME DTS
DSUBWOOFER
PL
164 5
1 Indicadores
Indican el estado de la barra de sonido.
Los indicadores se atenúan automáticamente si no se realiza ninguna operación en 5 segundos.
2 Sensor del mando a distancia
Recibe señales de infrarrojos del mando a distancia del aparato (p.6).
3 Sensor del mando a distancia del televisor
Recibe señales de infrarrojos del mando a distancia del televisor cuando está habilitada la función
de repetidor de mando a distancia de TV (p.9).
4 Tecla INPUT
Selecciona una fuente de entrada para su reproducción (p.6).
5 Teclas VOLUME
Ajustan el volumen (p.6).
6 Tecla de encendido
Enciende o apaga (espera) la barra de sonido (p.7).

4Es
Instalaciones
Ponga la barra de sonido sobre una superficie plana, por ejemplo
sobre la parte superior del armario de un televisor.
Ponga el altavoz de ultragraves hacia el exterior de la barra de
sonido. Para reducir el eco procedente de la pared, oriente la parte
delantera del altavoz de ultragraves ligeramente hacia el interior.
Precauciones
• No coloque la barra de sonido ni encima ni debajo de otros dispositivos
como reproductores de Blu-ray. Si lo hace, las vibraciones podrían dar
lugar a un mal funcionamiento.
• No toque la rejilla de las partes delantera e inferior de la barra de sonido.
• Separe la barra de sonido del televisor en más de 50 mm para no dañar
el televisor con el panel trasero de la barra de sonido.
• En función del lugar de instalación, podría ser mejor conectar la barra
de sonido a los dispositivos externos, como un televisor, antes de instalar
la barra de sonido.
Quitar los soportes
Si la barra de sonido impide ver la parte inferior de la pantalla
o bloquea el sensor del mando a distancia del televisor, quítele
los soportes (18 mm) para ajustar su altura.
SUGERENCIA
• Use la función de repetidor de mando a distancia de TV (p.9) para transmitir
señales del mando a distancia del televisor a través de la barra de sonido.
NOTA
• Conserve los soportes y los tornillos para usarlos en el futuro.
Montaje de la barra de sonido en la pared
Precauciones
• Si la barra de sonido se instala en una pared, todo el trabajo de instalación
debe realizarlo un contratista o distribuidor cualificado. El cliente nunca
debe intentar realizar este trabajo de instalación. Una instalación
inadecuada o incorrecta podría provocar la caída de la barra de sonido,
lo que podría causar a su vez daños personales.
• No fije la barra de sonido a una pared que esté fabricada con materiales
débiles, tales como yeso o tableros chapados. Si lo hace, la barra de
sonido podría caerse.
• Utilice tornillos disponibles en el mercado que puedan soportar el peso de
la instalación, como se indica en el paso 2. Si utiliza sistemas de sujeción
que no sean los tornillos especificados, tales como tornillos cortos, clavos
o cinta de dos caras, la barra de sonido podría caerse.
1 Fije a la pared la plantilla de montaje suministrada
y marque los oricios para los tornillos.
Cintas o chinchetas
Plantilla de montaje (suministrada)
Orificios
para
tornillos
2 Quite la plantilla de montaje de la pared y coloque los
tornillos adecuados en las marcas de la pared.
4 mm (núm. 8)
De 7 a 8,5 mm
20 mm como
mínimo
De 2 a 4 mm
3 Cuelgue la barra de sonido en los tornillos.
INPUT
–
VOLUME
+
TV BD/DVD YIT SURROUND CLEAR VOICEUNIVOLUME DTS
DSUBWOOFER
PL
Orificios de montaje
en la parte trasera
de la barra de sonido
Precauciones
• Sujete los cables en un lugar en el que no puedan aflojarse. Si se le
engancha el pie o la mano de forma accidental en un cable que esté
suelto, la barra de sonido podría caerse.
• Después de instalar la barra de sonido, compruebe que está instalada
firmemente y con seguridad. Yamaha no será responsable de los
accidentes debidos a una instalación incorrecta.
Other manuals for YAS-201
3
Table of contents
Languages:
Other Yamaha Speakers System manuals

Yamaha
Yamaha S0112T User manual

Yamaha
Yamaha C112V User manual

Yamaha
Yamaha DBR15 User manual

Yamaha
Yamaha VC8NB User manual

Yamaha
Yamaha YHT-24 Assembly instructions

Yamaha
Yamaha NS-10MM User manual

Yamaha
Yamaha YSP-1400 User manual

Yamaha
Yamaha ESB-1080 User manual

Yamaha
Yamaha YAS-107 User manual

Yamaha
Yamaha NS-E50 User manual

Yamaha
Yamaha DSP-E390 User manual

Yamaha
Yamaha NS-125FPN User manual

Yamaha
Yamaha CHR Series User manual

Yamaha
Yamaha CBR series User manual

Yamaha
Yamaha VC Series User manual

Yamaha
Yamaha Waveforce WF112 User manual

Yamaha
Yamaha NS-325F User manual

Yamaha
Yamaha NS-6HX User manual

Yamaha
Yamaha AX-10 User manual

Yamaha
Yamaha NS-PA40 User manual