Chapter 3 Calibration and Adjustment
3.1 Turning on the power, and connecting the loadcell correctly, the indicator will perform
self-checking, then turns into working mode (After turning on the indicator for more than 10 minutes,
you can make the calibration).
3.2 Turning on the calibration switch on the back of the indicator, the indicator will go into the
calibration mode, and display [n,****](**** is the previously set number), then you can set the
calibration coefficients.
Step 1: choose the counts: displaying [n, ****]
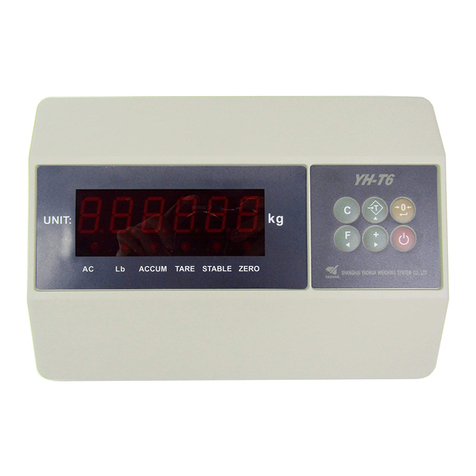
Pushing [CH] key, **** will be 2000, 2500, 3000, 4000, 5000, 6000, 7500 optional, choosing
one of them, confirming by [Tare] key, then it will go to the next step. If you need not to change
the counts, you can push [ C ] key to go to the next step.
Step 2: choose the intervals: displaying [E, *]
Pushing [CH] key, * will be 1, 2, 5, 10, 20, 50, choosing one of them, confirming by [Tare] key,
then it will go to the next step. If you need not to change it, you can push [ C ] key to go to the
next step.
Step 3: choose decimal position: displaying [d, 0.0]
Pushing [CH ] key, the display after the letter d will be 0, 0.0, 0.00, 0.000. 0.0000, choosing one
of them, confirming by [Tare] key, then it will go to the next step. If you need not to change it,
you can push [ C ] key to go to the next step.
Step 4: F.S. display: [***.**]
F.S. =counts ×interval, for example: 3000 ×5 =15000, setting the decimal position, 150.00: you
will get the Full Scale.
Pushing [ C ] key to go to the next step.
Step 5: confirm the zero-tracking range: displaying [02 *.*]
Pushing [CH ] key, *.* will be 0.5, 1.0, 2.0: representing respectively the range: 0.5e, 1.0e, 2.0e,
choosing one of them, confirming by [Tare] key, then it will go to the next step. If you need not to
change it, you can push [ C ] key to go to the next step.
Step 6: zero range at turning on: displaying [02, ***]
Pushing [CH ] key, *** will be 0.10, 0.20, 1.00. It means that the loaded weight at turning on is
within 10%FS, 20%FS, 100%FS, the indicator can set zero respectively. Otherwise it will take
the previously stored zero position as the zero position at turning on. choosing one of them,
confirming by [Tare] key, then it will go to the next step. If you need not to change it, you can
push [ C ] key to go to the next step.
Step 7: Select zero adjusting rate: displaying [03 *.*]
Push [CH] key, *.* will be 0.1, 0.2, 0.3: representing respectively the zero adjusting rate 0.1e,
0.2e, 0.3e. Choosing one of them, confirming by [Tare] key, then it will go to the next step. If you
need not to change it, you can push [ C ] key to go to the next step.
Step 8: Keeping the zero position or not: displaying [04 *]
Push [CH] key, * will be 0 or 1: 0 means not storing zero position, 1 means storing the zero
position. If the difference between the loaded weight at turning on and the stored zero position
is within 10e, the indicator will set zero at turning on, otherwise it will take the stored zero
position as the turning on zero position. Choosing one of them, confirming by [Tare] key, then it
5
