YBIKE Extreme User manual

Extreme
OWNER’S MANUAL

IMPORTANT SAFETY NOTICE
WARNING
SAFETY PRECAUTIONS:
Riding YBIKE can be a hazardous activity and precautions should be taken to avoid dangerous
situations. Be sure to read the entire manual before riding. Please pay close attention to the
following notices in particular:
WARNING! This bike is intended to be assembled by an adult.
Children riding YBIKE should have constant adult supervision. A responsible adult must inspect
the YBIKE prior to use, to ensure that all parts are fully assembled and tightened to prevent
accidents.
Always wear proper protective gear such as a helmet, elbow and kneepads as well as
appropriate clothing such as a long sleeve shirt, gloves, long pants and trainers or closed
footwear. Do not ride barefoot or in sandals.
DO NOT use the YBIKE on slippery, wet or uneven ground with gravel.
DO NOT ride the YBIKE with one or no hands. Hold the handlebars tightly with two hands.
DO NOT ride at dusk or in the dark. Only ride in good lighting to avoid accidents.
1

Ride the balance bike only on flat and level ground. DO NOT ride the balance bike on slopes.
DO NOT go down a long descending slope or hill. Please be careful when passing these
areas.
Ensure that the handlebar is securely fixed and that it moves smoothly by turning it left and
right before riding the YBIKE.
DO NOT use attachments not included in packaging or attempt to do any modifications your
self as this may compromise the safety of the YBIKE.
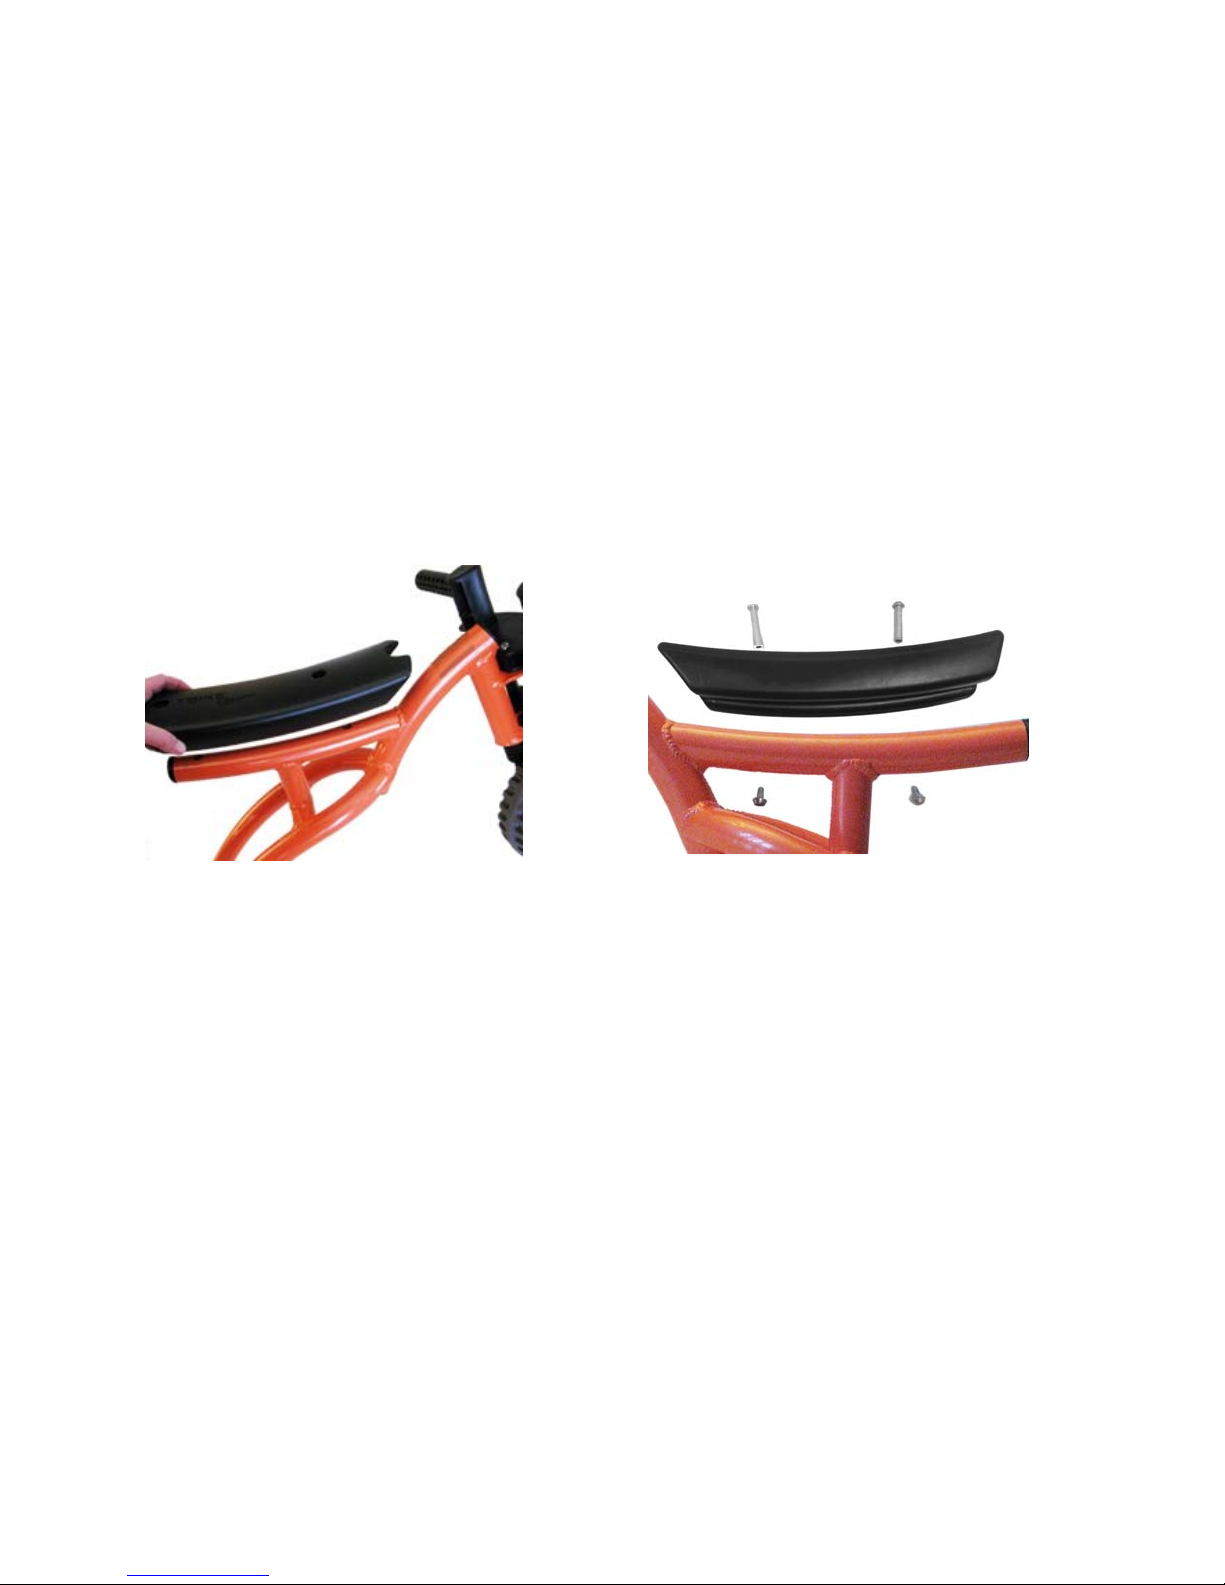
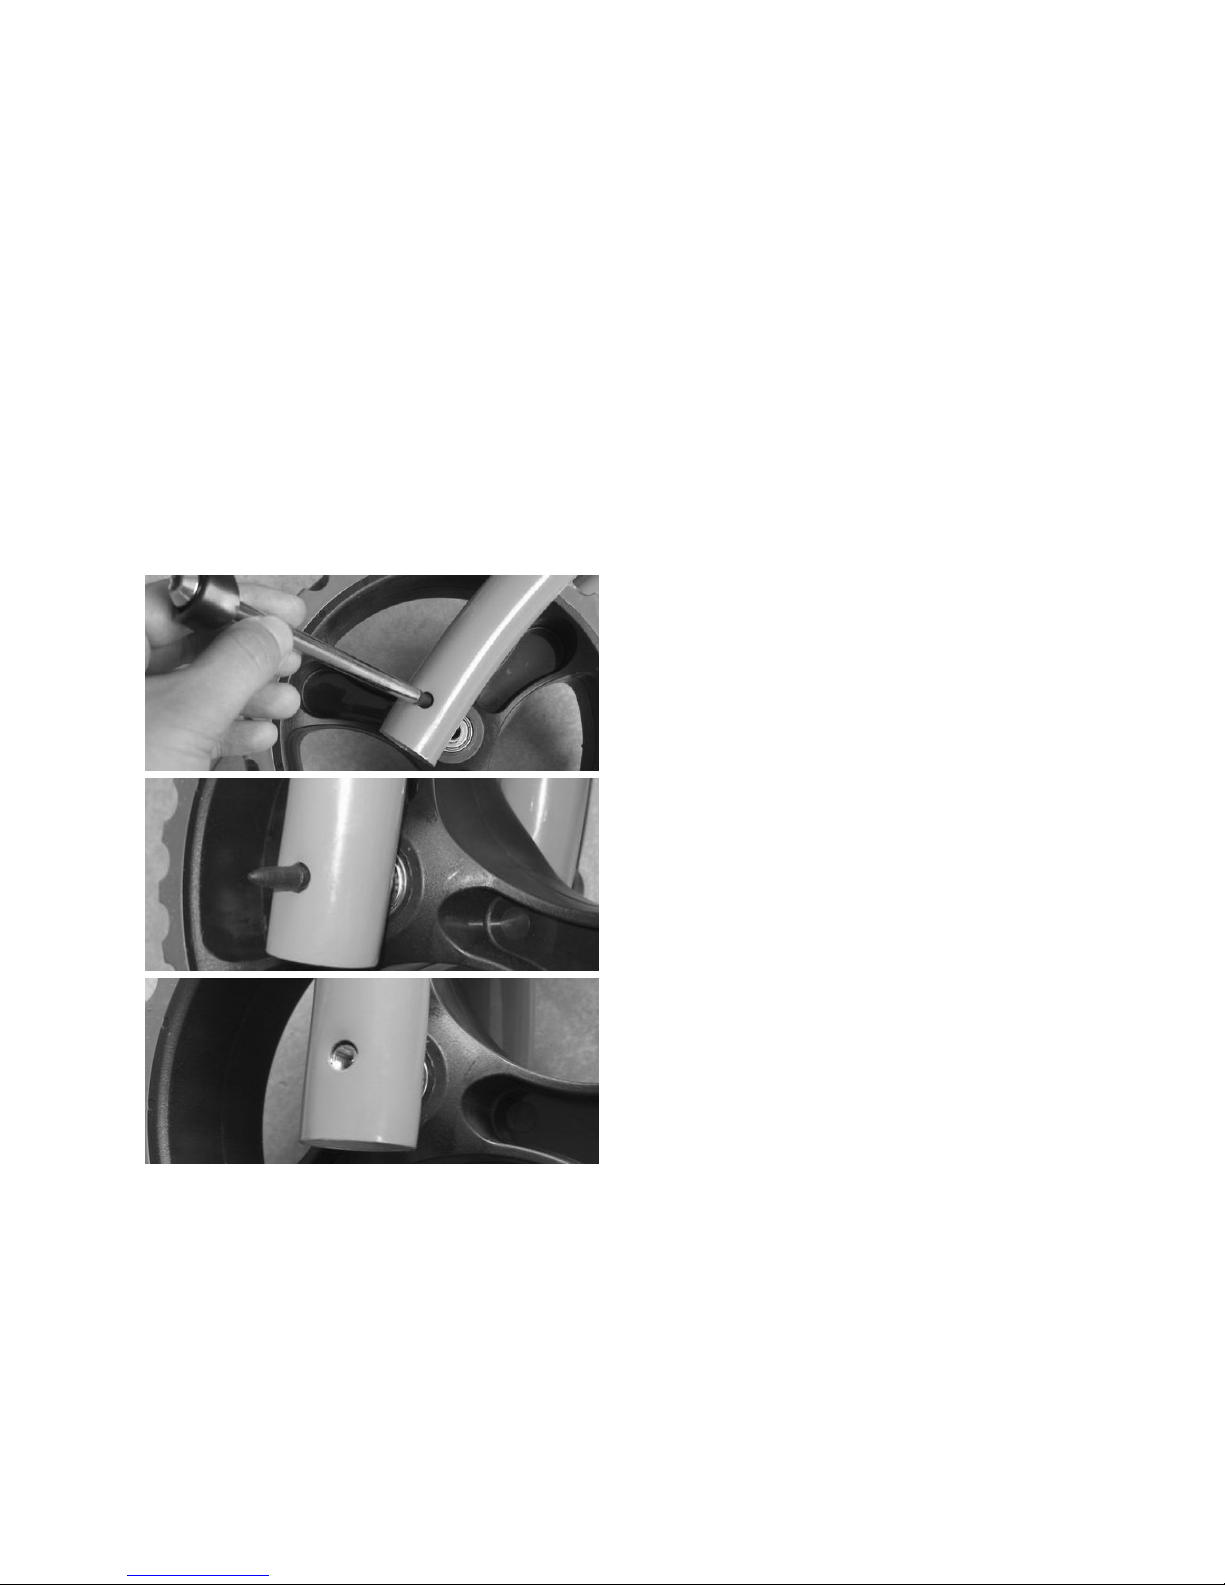
Make sure all components are assembled correctly and secured properly before riding.
ALWAYS follow and obey the local traffic laws for a safe ride.
Never allow more than one child to ride on Extreme at any time. CHOKING HAZARD: Small parts
Not to be used by children younger than 3 years.
WARNING
Injury may occur if these precautions are not observed.
NOTE: Any photos of the YBIKE Extreme or decals in the owner’s manual
are intended to be used as a reference only,
and there may be some differences to the unit you purchased.
2

YBIKE EXTREME PARTS LIST & COMPONENTS
Open the box, and take out the balance bike frame, two wheels, fork and handlebar,
seat, bolts, and toolkit. Please check whether all parts and components are included:
No. NAME
1 MAIN FRAME
2 TWO WHEELS
3 FORK /HANDLEBAR
4 SEAT
5 2 X SHORTEST BOLTS for Front Fork
6 BOLT NUTS for SETS No. 5, 7, 8, 9
7 2 X SHORT BOLTS for Seat
8 1 X LONG BOLT for Rear wheel axle
9 1 X LONGEST BOLT for Front wheel axle
10 2 X STEERING HANDLE CAPS
11 2 X REAR FORK SAFETY CAPS
12 2 SETS OF ALLEN KEYS
13 PLASTIC PART
1
2
3
5
6
12
7
4
8
11 10
9 13
3

ASSEMBLY INSTRUCTION
1. Fork Assembly A
Assemble the fork/handlebar (No.3) onto the main frame (No. 1) as in picture (A). Insert the
two steering handle caps (No.10) into position to cover the metal frame on the fork as in
picture (B).
A B
4

2. Fork Assembly B
Insert the two shortest bolt sets (No.6). With the small set of Allen keys (No. 12), securely
fasten the handle onto the frame with both bolt sets through the plastic caps.
(WARNING: Make sure bolt set is tightened and not loose)
5

3. Seat Assembly
Place the seat (No. 4) on the main frame (No. 1). Insert the Short Bolts (No.7) into the holes
on the seat. Use the two Allen keys to screw the hex nut into the bolts.
(WARNING: Make sure bolt set is tightened but not loose)
6

4. Wheel Assembly A
IMPORTANT: Inside the wheel hub is a metal tube between the bearings on either side of the
wheel. This tube moves around in the hole and could make assembly difficult if one is not
aware of this. Follow the instruction below to allow the bolt to insert through the fork and wheel
with ease.
1. Use this small plastic part supplied (No. 13)
2. Insert the part into the bolt as shown below
Section of Wheel
Bearing
Loose tube
in wheel
7

4. Wheel Assembly B
Align the holes of the wheel and fork
perfectly.
Turn the bike and wheel on its side
and insert the bolt with sharp plastic
part into the hole.
If the tube inside the hub is not
aligned with the hole in the bearing
then use the sharp point to align it.
3. Use the sharp end of the plastic part to locate the tube inside the hub. This tube is loose
and can move off the centre line.
8

5. Front Wheel Assembly
Take the fork/handlebar (No.3) with one hand and assemble a wheel onto the fork. Insert the
longest bolt (No.9) through one hole on the fork then through the wheel with bearings
(BEWARE OF LOOSE TUBE, SEE “4. WHEEL ASSEMBLY”) and through the opposite hole in the
fork. Use the big set of Allen keys to tightly screw in the hex nut.
(WARNING: Make sure bolt set is tightened and not loose. IMPORTANT: DO NOT over tighten
the bolt as this may cause damage to the wheel)
9

6. Rear Wheel Assembly
Insert the long bolt (No.8) through one of the rear fork safety caps (No.11) as in picture (C).
Place the second wheel in-between the rear fork as in picture (D). Now insert the bolt (No. 6)
through the fork and wheel and into fork on the other side
(BEWARE OF LOOSE TUBE, SEE “4. WHEEL ASSEMBLY”)
Finally insert the hex nut for the rear axle into the second rear fork safety cap (No.11) and then
using the Allen keys tighten the assembly.
(WARNING: Make sure bolt set is tightened and not loose. IMPORTANT: DO NOT over tighten
the bolt as this may cause damage to the wheel)
D
C
10

CHECK BEFORE RIDING
1. Check that all the bolts are tightened.
2. Check that the handlebar is securely fastened and that it
moves smoothly.
3. Check that the wheels can spin smoothly and each part
is securely fixed.
4. Finally after checking the above points, you can now start
to ride.
WARNING! This product must be assembled by an adult. Read the
manufacturer’s instructions before using. Keep the instructions safe
for future reference.
ENJOY YOUR YBIKE EXTREME!
WWW.YBIKEWORLD.COM
11
Table of contents
Other YBIKE Bicycle manuals