SPECIFICATIONS BEFORE USING
Model
No.
Max.
Torq ue
Square
Drive
(inches)
Length
60648 62.7 ft. lb.
85 N-m
3/8 3.1-62.7 ft. lb.
4.2~85 N-m
10.6 in.
270 mm
Accuracy *1 CW:±2%
CCW:±3%
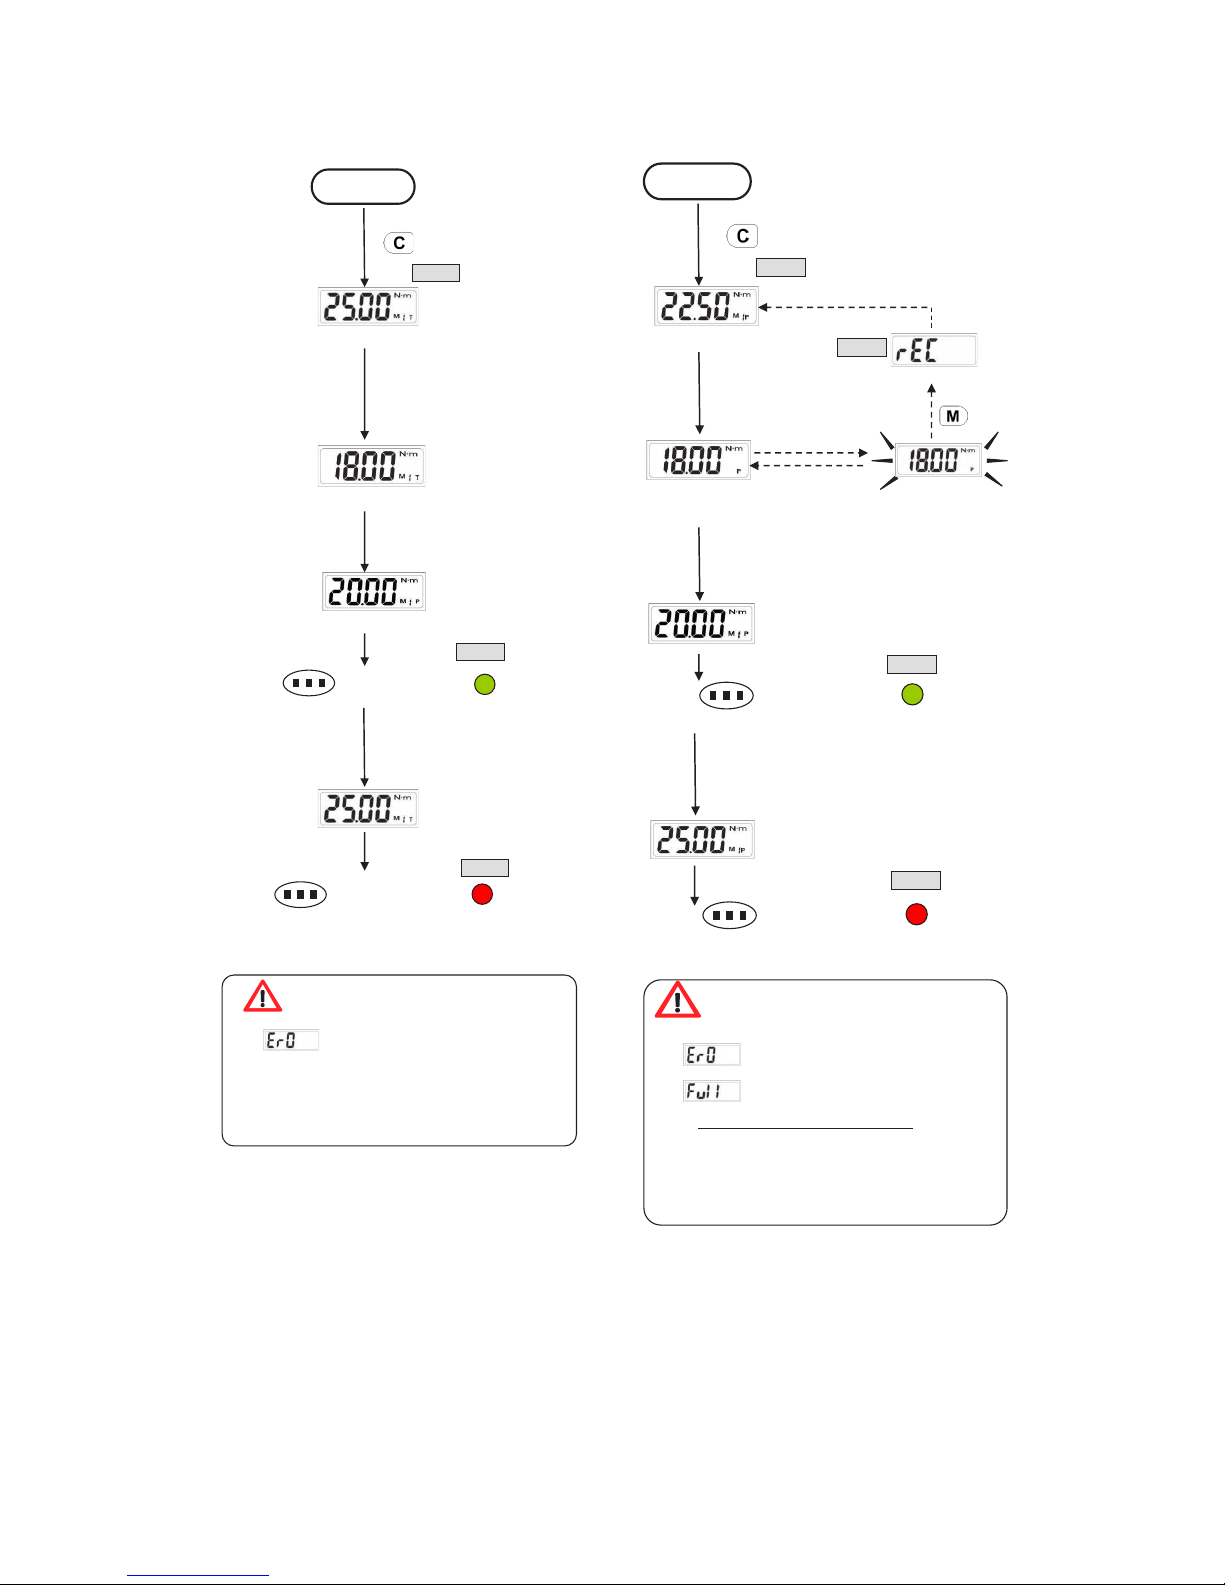
Data memory test
Pre-Sets
Bright LED 6LEDs
(1 Red+5 Green)
Operation Mode Peak hold/Track
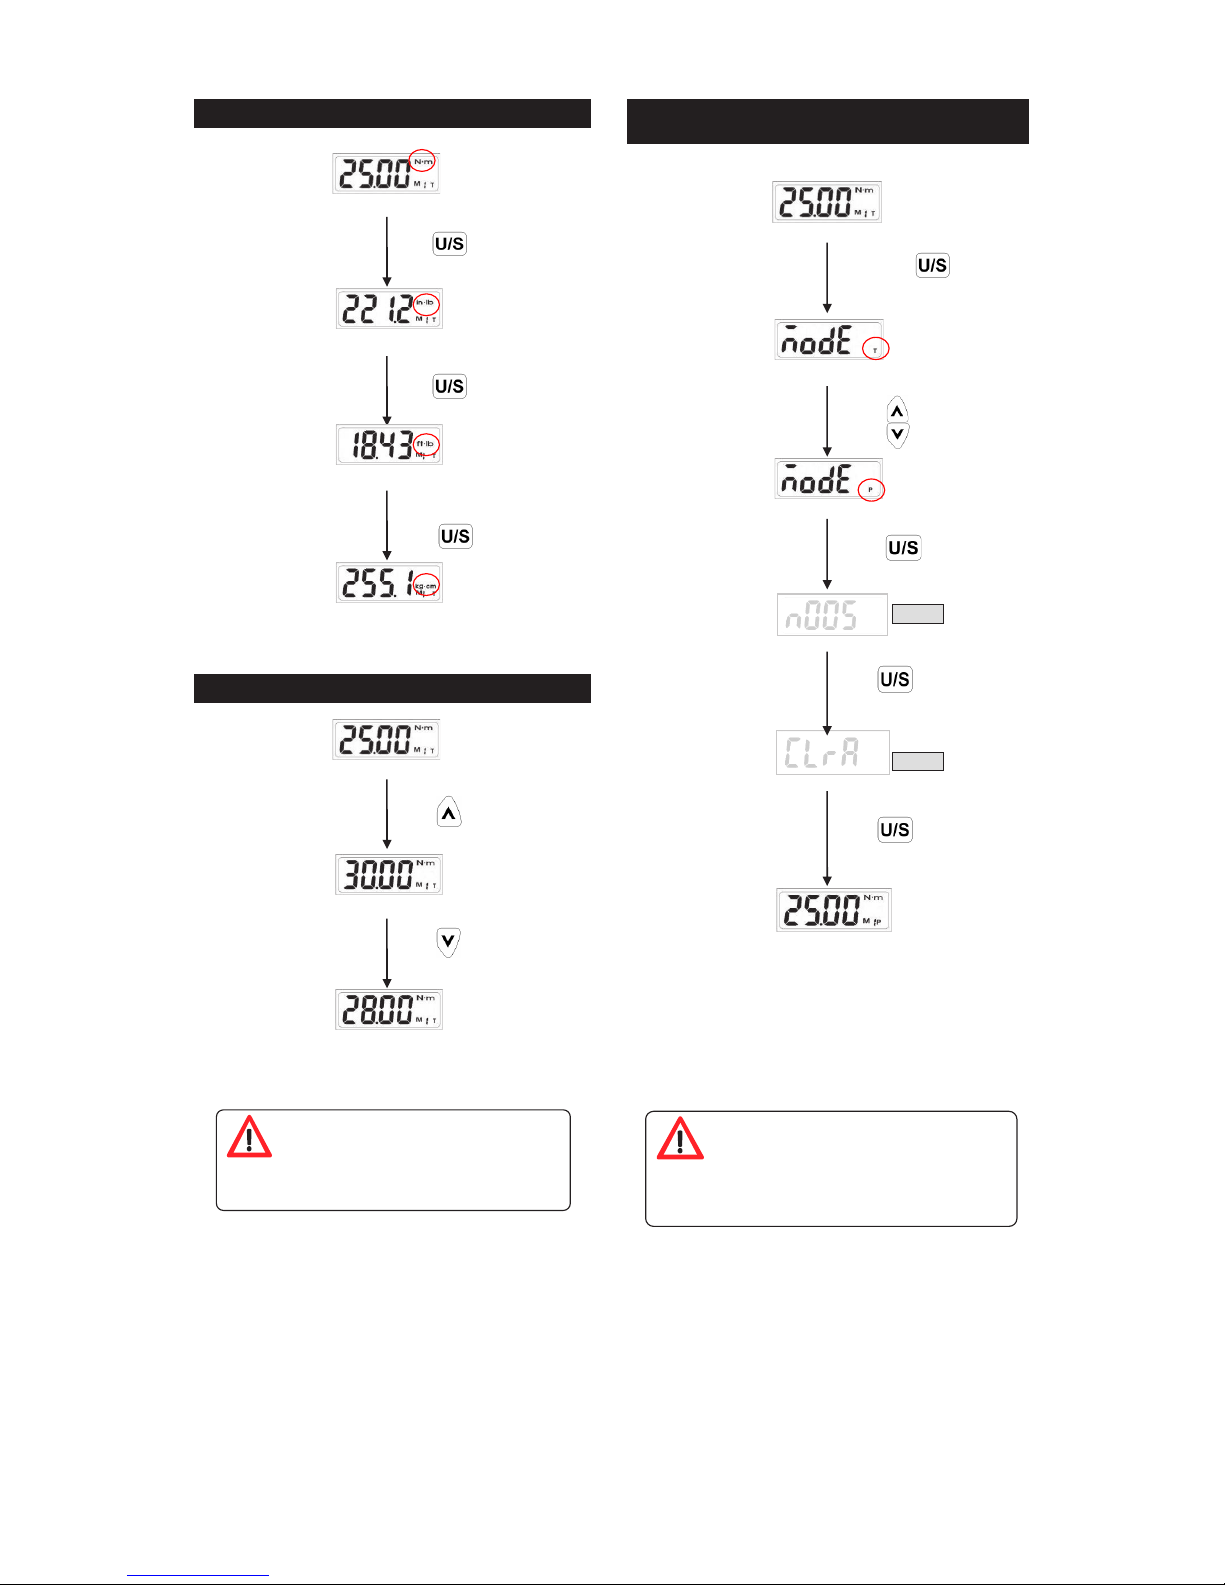
Unit Selection ft-lb, in-lb (N-m, kg-cm)
Gear Teeth 52
Button 5
Battery AAA x 2 (included)
Operating Temperature
Storage Temperature 4οF ~ 158οF (-20℃ ~ 70℃)
Humidity Up to 90% non-condensing
Drop Test 1 m
Vibration Test *210G
Environmental Test *3Pass
Environmental Test *4Pass
50
All Models
Torq ue
Measuring
Range
9
14οF ~ 140οF (-10℃ ~ 60℃)
[Type here]
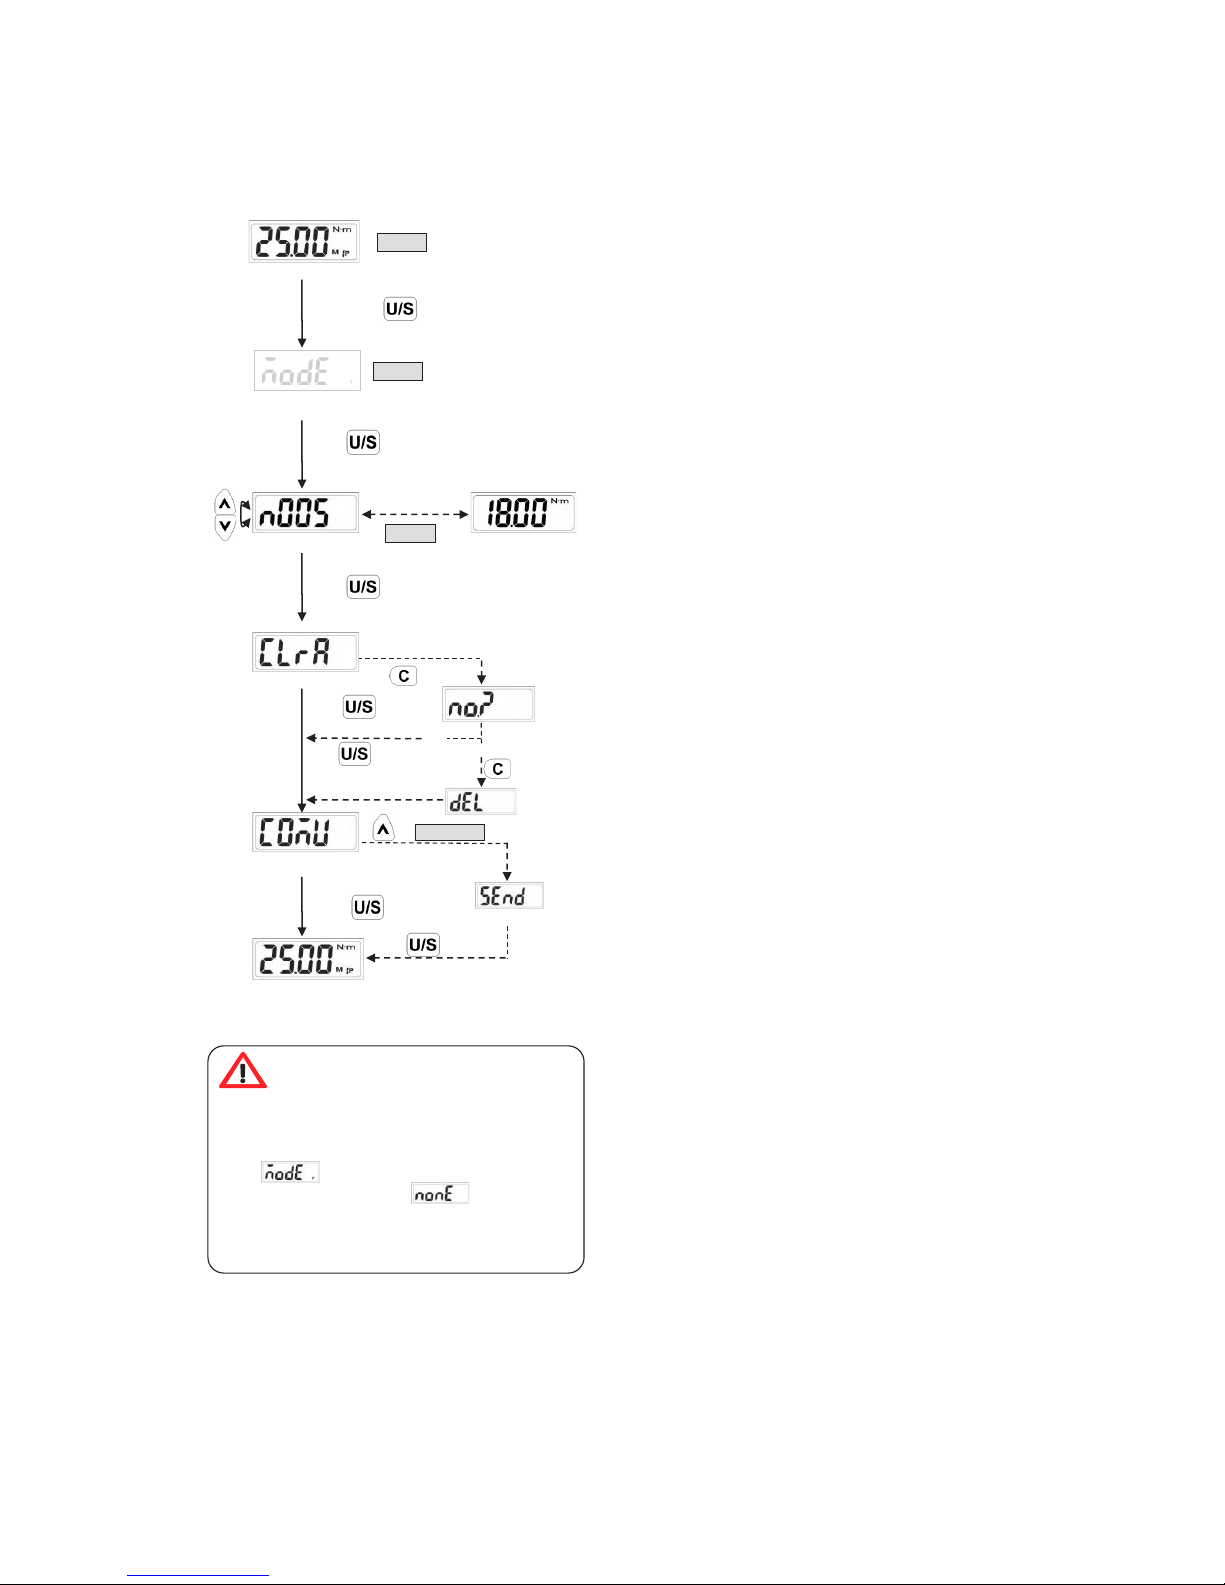
ACTIVATION DURING SLEEP MODE
CAUTIONS:
During communication period (Send appears),
the sleep function is disabled.
RESETTING THE WRENCH
Press together will reset the wrench.
If the wrench does not function normally,
press together to reset the wrench.
LOW BATTERY VOLTAGE PROTECTION
If the battery serial voltage is in low voltage
status, the wrench will display a battery symbol
and then turn off after a while.
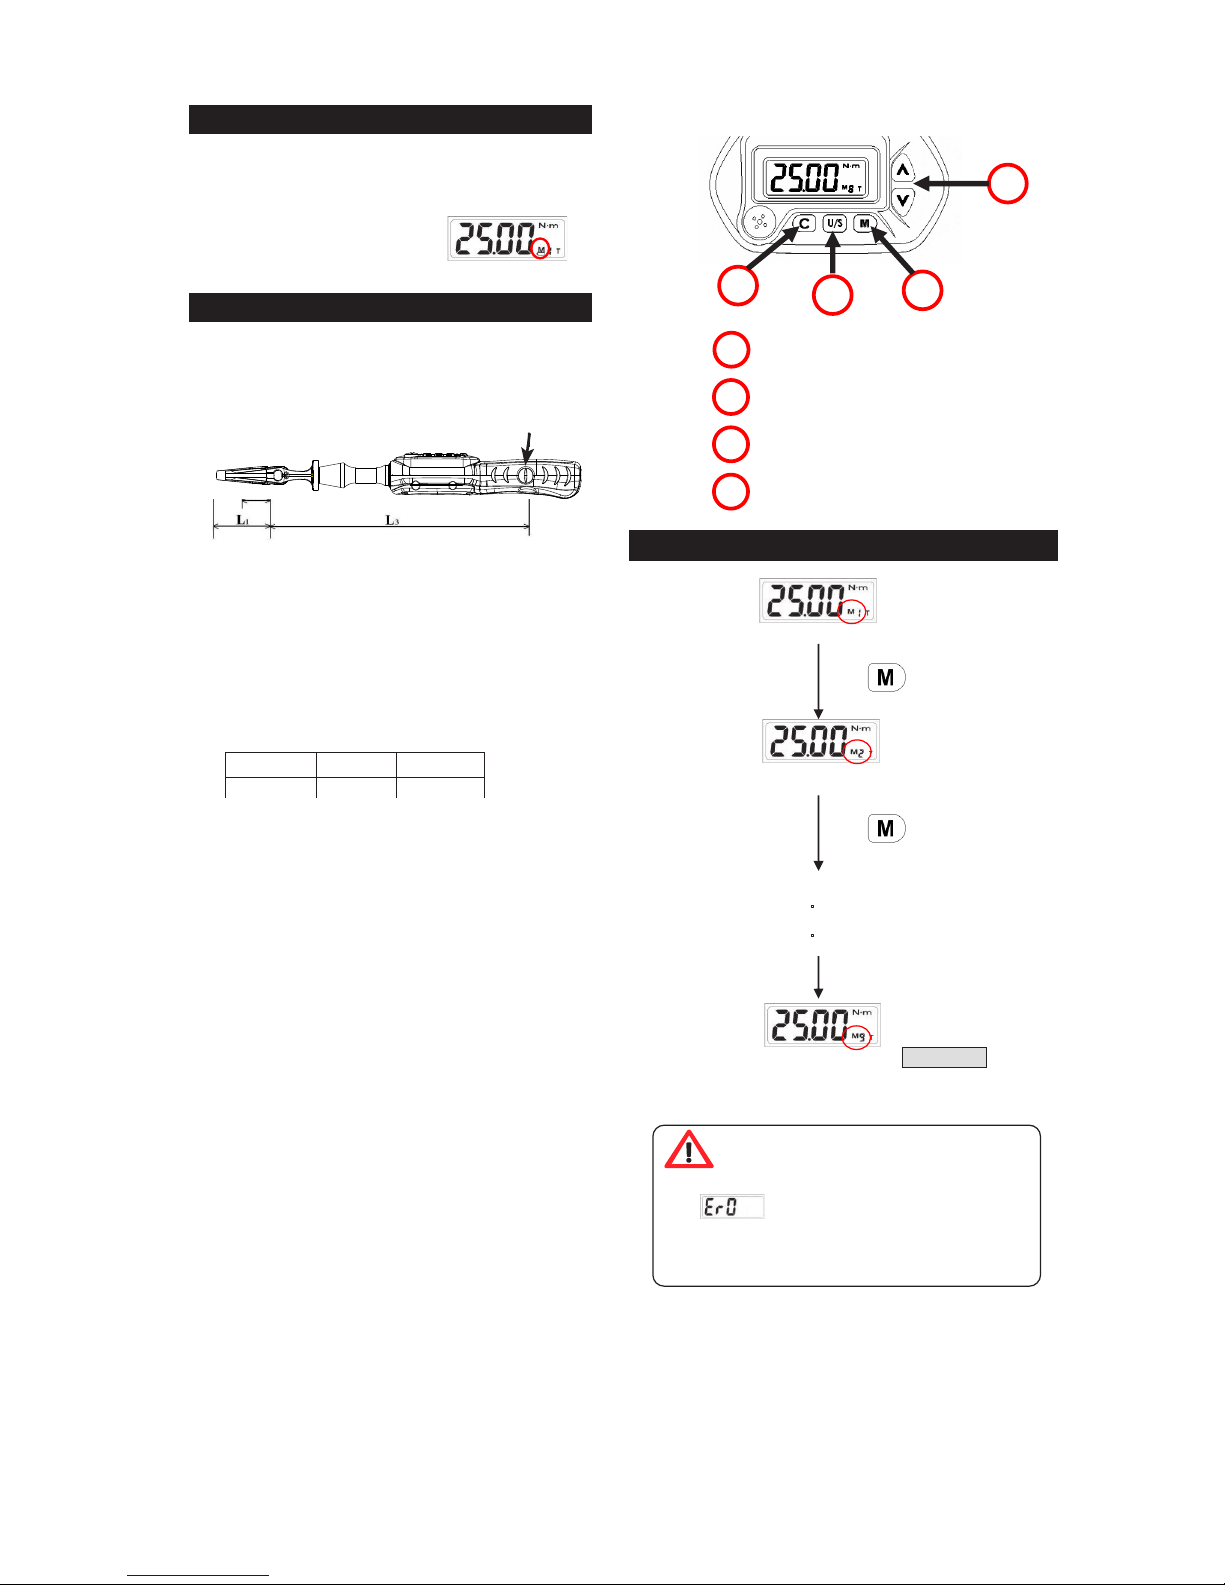
WHEN CHANGING THE TYPE OF HEAD
If you use adifferent head with the wrench, the
reading on the display will be different for the
different length of the head. Please refer to the
following explanation.
Reference dimension for each model:
The wrench will auto sleep after about 5 minutes
of being idle for power saving. Press to
wake up the wrench from sleep mode.
D: The set torque
D1: The actual torque applied to the nut.
L1: The extended length
L2: The normal length
L3: The length from the fitting pin to the
calibration point.
D = D1 * (L3+L1) / (L3+L2)
*1: The accuracy of the readout is guaranteed
from 20% to 100% of maximum range + /- 1 in-
crement. The torque accuracy is a typical value.
Calibration point is at the middle line of the
black circle area on the rubber grip. To maintain
accuracy, calibrate the wrench for a constant
time period (one year).
*2: Horizontal and vertical test.
*3: Environmental test:
a. Dry heat
b. Cold
c. Damp heat
d. Change of temperature
e. Impact (shock)
f. Vibration
g. Drop
*4: Electromagnetic compatibility test:
a. Electrostatic discharge
immunity (ESD)
b. Radiated susceptibility
c. Radiated emission
[Type here]
BEFORE USING THE WRENCH
BATTERY INSTALLATION
Remove the battery cover.
Insert two AAA batteries matching the
-/+ polarities of the battery to the battery
compartment.
Replace the battery cover and fasten it tightly
according to the following figures.
ATTENTION:
When opening the battery cover of your wrench,
you can see a viewing window for the water
contact indicator.Through this viewing
window, you can check if thewrench is
damaged by water penetration (the water
contact indicator turns red).
POWER ON AND RESETTING THE WRENCH
Press to power on the digital torque wrench.
You can press to reset the digital torque
wrench before using it.
ATTENTION:
If an external force is applied to the torque
wrench during the power-on/reset or wake up
period, an initial torque offset will exist in
the memory.
[Type here]
BEFORE USING THE WRENCH
BATTERY INSTALLATION
Remove the battery cover.
Insert two AAA batteries matching the
-/+ polarities of the battery to the battery
compartment.
Replace the battery cover and fasten it tightly
according to the following figures.
ATTENTION:
When opening the battery cover of your wrench,
you can see a viewing window for the water
contact indicator.Through this viewing
window, you can check if thewrench is
damaged by water penetration (the water
contact indicator turns red).
POWER ON AND RESETTING THE WRENCH
Press to power on the digital torque wrench.
You can press
to reset the digital torque
wrench before using it.
ATTENTION:
If an external force is applied to the torque
wrench during the power-on/reset or wake up
period, an initial torque offset will exist in
the memory.
ACTIVATION DURING SLEEP MODE
CAUTIONS:
During communication period (Send appears),
the sleep function is disabled.
RESETTING THE WRENCH
Press together will reset the wrench.
If the wrench does not function normally,
press together to reset the wrench.
LOW BATTERY VOLTAGE PROTECTION
If the battery serial voltage is in low voltage
status, the wrench will display a battery symbol
and then turn off after a while.
WHEN CHANGING THE TYPE OF HEAD
If you use adifferent head with the wrench, the
reading on the display will be different for the
different length of the head. Please refer to the
following explanation.
Reference dimension for each model:
The wrench will auto sleep after about 5 minutes
of being idle for power saving. Press to
wake up the wrench from sleep mode.
D: The set torque
D1: The actual torque applied to the nut.
L1: The extended length
L2: The normal length
L3: The length from the fitting pin to the
calibration point.
D = D1 * (L3+L1) / (L3+L2)