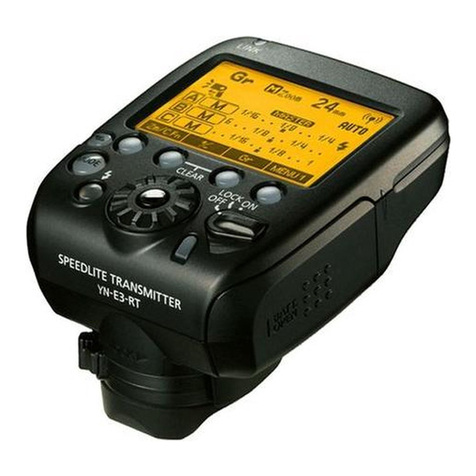
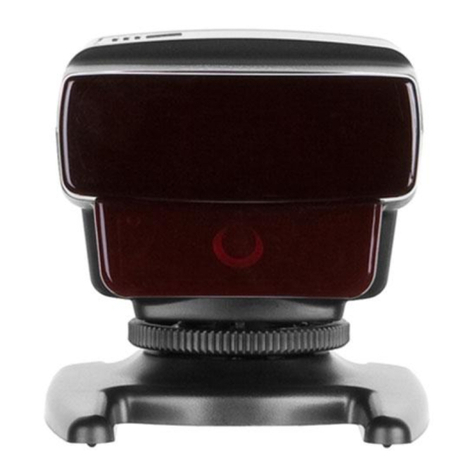
Yongnuo YN560-TX PRO User manual

User Manual用户手册YN560-TX PRO闪光灯信号发射器For NSpeedlite Transmitter

ContentsIntroduction....................1Nomenclature..................2-3Preparation Before Use..............4-5Wireless Setting..................6Wireless Flash Shooting..............7-8C.Fn: Setting Custom Functions..........9-10Reference...................11-12Troubleshooting Guide...............13Specifications..................14Read this instruction manual while also referring to the instruction manuals of your camera and Speedlite.Before using the transmitter, read this instruction manual and the instruction manuals of your camera and Speedlite to familiarize yourself with the operations.

Introduction1YONGNUO YN560-TX PRO(For N) speedlite transmitter is a upgrade version based on YN560TX II, with TTL/ high speed sync functions, its radio protocol achieves cross-brand compatibilityYN560-TX PRO (For N) can control, trigger YN200/YN862 series and the models which have been upgraded to the latest firmware such as YN968N(II)/YN968C(in 560 slave mode) to realize i-TTL/M flash, high speed sync, focal length control functionsCompatible with radio flash and flash trigger models such as YN560III/IV/YN660/YN720/YN860Li/RF603 series /RF605 series directly, realize manual flash functions16 channels, up to 10,000 customizable photographer ID, A/B/C/D/E/F 6 flash groupsSupports front-curtain sync, rear-curtain sync, auto fp high speed sync2.4G radio maximum communication distance is over 100mSupports remote control focal settings of slave unit flash (only for YONGNUO compatible flashes)Firmware can be upgraded via USB(Micro-USB)High resolution dot-matrix LCD, backlight for keysFast lock mechanismBuilt-in AF assist beam emitter

※The protective flim can be torn out.LCD panelFunction button 1AF-assist beamemitter buttonSelect/Set buttonSelect dialDust- and water-resistant adapterMounting footlock leverLock-releasebutton ON:Power onLOCK: Button/dial lock (Power on)OFF: Power offBattery compartment cover Radio transmission status lamp Terminal coverMounting footLocking pinContactsUSB upgrade (Micro USB)/Remote release terminalterminalAF assist lamp :Test flash buttonFunction button 2Function button4Function button3Flash mode button2Nomenclature

3GR/ PRE
A.TTL C. MB. TTL
0.0
ZOOM
A.50 MM
D. OFF
0.0
CH/ I D AF lamp enableThe display will show only the settings currently applied.The functions displayed above function buttons 1 to 4, change according to the setting’s status.When a button or dial is operated, the LCD panel illuminates.Gr : Group flashBatteryChannel Custom functions enableZOOM(Slave unit)Flash modeFiring groupFlash exposure or flash outputMeaning of Radio transmission status lamp MeaningLamp statuesGreen lightRed lightRadio transmissingFlash TriggingLCD Display Nomenclature

1.Install two AA/LR6 batteries.1.Open the cover:Slide the cover down as shown and open the battery compartment cover.2.Install two AA batteries: Install two AA batteries according to the + and - marks, rechargeable batteries of 1.2V can be used.3.Close the battery: Close the battery Compartment cover and slide it up.Remove the batteries when the product is not used for long time. Please replace the both two batteries at the same time.When < > is displayed, replace the batteries with new ones.Preparation Before Use42.Attaching and Detaching the Transmitter1.Attach the transmitter.Slip the transmitter’s mounting foot all the way into the camera’s hot shoe.2.Secure the transmitter.On the mounting foot, slide the lock lever to the right. When the lock lever clicks in place, it will be locked.3.Detach the transmitter.While pressing the lock-release button, slide the lock lever to the left and detach the transmitter.Before attaching or detaching the transmitter, be sure to turn the transmitter power off.

The LCD panel illuminates.During wireless shooting, press the transmitter’s test flash button to fire a test flash.About the Lock FunctionBy setting the power switch to <LOCK>, you can disable flash’s button and dial operations. Use this to prevent the transmitter function settings from being accidentally changed after you set them.If you operate a button or dial, 3.Turning on the Power:Set the power switch to <ON>.Preparation Before Use5Long press [ ]AF assist beam emitter button for quick turn on/off AF assist beam emitter.It needs using single autofocus for the lens.Enable or disable the AF assist Beam Emitter function through the speedlite transmitter custom function.AF Assist Beam EmitterWhen using AF under low-light, the built-in AF-assist beam emitter of the speedlite transmitter will be emitted automatically to make it easier to autofocus.

CABMASTERSLAVESLAVESLAVEPositioning and Operation Range(Example of wireless flash shooting)Transmission distanceApprox. 100 mUsing a transmitter and a Speedlite compatible with radio transmission wireless shooting makes it easy to shoot with advanced wireless multiple flash lighting, in the same way as normal TTL autoflash shooting.Before shooting, perform a test flash and test shooting. The transmission distance may be shorter depending on the conditions such as the positioning of slave units, the surrounding environment and weather conditions.6Set the same channel/ID for both the master unit and slave unit.Set a flash that is compatible with radio transmission wireless flash shooting as the slave unit. For the slave unit settings, see the flash’s instruction manual.Short press function button <CH/ID>,turn < > to select channel from Ch1 to 16.Long press function button <CH/ID>, press < > and rotate < > to set ID, you can set 0000-9999,totally 10,000 ID, if the slave unit does not support ID setting, please set the ID to default 0000.Wireless Setting

1.Flash Group SettingWhen <MENU1> is displayed, short press function button <GR/PRE> to select next flash group, long press this button to select previous flash group. Supports 6 groups(A/B/C/D/E/F).2.Flash Mode SettingPress <MODE> button to set to <TTL>or <M> flash mode,<OFF> to turn off the flash of selected group.3.Set the flash output or flash exposure compensation amount. When using the < TTL> mode, Turn < > set the flash exposure compensation amount as required.When using the <M> mode, turn < > to set the flash output.74.Test flash & Take the picture.Press the master unit’s test flash button. The slave unit flashes. Then take the picture.Wireless Flash Shooting

8
s menu screen.camera
s instruction manual.For the camera operations, see the camera
About the (For N)compatiability listYN560-TX PROReceiver(Speedlite)ChannelGroupTTL FlashManual FlashZOOMCH1-CH16YN200YN862CRF605 Series CH1-CH16CH1-CH7YN622N II(603-RX mode)CH1-CH16CH1-CH16CH1-CH16YN685 Series(603 Slave mode)CH1-CH16*Need to upgrade the latest firmware from YONGNUO wedsite.Do not support SupportRF603(II) SeriesRF602-RXSettingYN560III/IVYN860LiYN720/YN660CH1-CH16YN968C(560 Slave mode)YN968N (II)FunctionSupportSupportSupportSupportSupportSupportSupport*SupportSupportSupportSupportDo not support Do not support Do not support Do not support Do not support (Group A/B/C)Supportsupport(Flash out put can be adjusted from YN560-TX PRO)support (all can fire)group support(Flash out put can be adjusted from YN560-TX PRO)support(Flash out put can be adjusted from YN560-TX PRO)support(Flash out put can be adjusted from YN560-TX PRO)support(Flash out put can be adjusted from YN560-TX PRO)support(Need to set the flash out put on the speedlite)support(Need to set the flash out put on the speedlite)Wireless Flash ShootingDo not support support(Need to set the flash out put on the speedlite)Do not support Do not support Support*Support*

C.Fn: Setting Custom Functions9Press the function button <C.FN> under MENU2 to enter the custom function. Turn < >or press the < >< > button to select the item to be set, and press < > to enter the setting. Press <SET> button to make a quick setting. Press the < > button to return to the main menu.When the transmitter is not operated, the power turns off automatically to save energy. You can disable this function.0: OFF (Disabled)1:30Min2:45Min3:60Min(Auto off)C.Fn-00: You can change the flash output when firing the TTL test flash.0: 1/32 (1/32);1: 1/1 (Full output)C.Fn-01: output

C.Fn: Setting Custom Functions10C.Fn-03: (Backlit)When a button or dial is operated, the LCD panel illuminates. You can change this illumination setting.0: 12sec1: OFF2: ON (Illumination always on)C.Fn-04: (LCD Contrast)0-9: Select LCD contrastC.Fn-05: (RF Compat) 0:RF602(when YN560-TX PRO is used with RF602-RX receiver).1:RF603(default)Please set to this mode C.Fn-02: (AF Lamp)0:ON (Enabled)1:OFF(Disabled) The AF-assist beam is not fired from the speedlite transmitter.

11Gr
ZOOM
A. 24mm B. 28mm
C. 24mm D. 24mm
E. 24mm
2.Focal length (Zoom)settingSupports for remotely setting compatible radio slave flash* focal lengths.Press the function button <ZOOM> to enter the focus length setting interface.Press the function button <GR> button to switch the group, turn < > or press the <+><-> button to set the focal lengths , and the slave flash group focus will be changed. Press the < > button to return to the shooting interface.1.Shutter sync settingYou can use front-curtain sync, rear-curtain sync or auto FP high speed sync. Refer to the camera’s setting. Using high-speed sync need to set the camera to“AUTO FP”. The relevant icons will be displayed on the LCD(FP). The maximum sync speed is 1/8000s or 1/4000s (depends on the camera).Some models of camera does not support auto FP, the shutter speed will be limited to 1/250s or less when using this kind of camera.*Please refer to the compatibility list(Page 8)ReferenceF. 105mm

12Reference4.Firmware Update1.Log in the YONGNUO official website (www.hkyongnuo.com) to download the firmware update software and the latest firmware. 2.Power off, use USB-Micro cable (do not include)connect to PC. 3.Press the <MODE> button and set the power switch to <ON>, the screen will enter into firmware upgrade interface.4.Complete the firmware upgrade operation according to the prompt of software.3.Clearing Transmitter SettingsPress function buttons 2 and 3 simultaneously for 2 seconds or longer, the transmitter settings are cleared.

Troubleshooting Guide13Power does not turn on.Make sure that the batteries are installed in the correct orientation.Insert the mounting foot into the camera’s hot shoe all the way, slide the lock lever to the right, and secure the transmitter to the camera .If the electrical contacts of the transmitter and camera are dirty, clean the contacts.The power turns off by itself.The transmitter’s auto power off function has activated. Press the shutter button halfway, or press the test flash button .The slave unit does not fire.Check that the slave unit supports radio transmission wireless flash shooting.Set the transmission channels and wireless radio IDs of the master unit and slave unit to the same numbers.Check that the slave unit is within the transmission range of the master unit.Unable to use the AF assist beam emitter.Check the custom function C.Fn02.Firmware update failed or the screen display the firmware upgrade interface all along.Disconnect, restart the equipment and try again.

14SpecificationsThe functions of this user manual are based on test conditions of our company.Further notice will not be given if the design and specifications change.The YONGNUO logo in this manual includes the registered trademark or trademark of Shenzhen Yongnuo Photography Eq uipme nt Co., Ltd in Ch ina or/ and othe r countries(regions).All other trademarks are the property of their respective owners.Type: Flash mode:Channel: ID: Slave unit control: Transmission distance:High-speed sync: Manual flash: AF assist Beam Emitter:Firmware update:Power source:Dimensions:Weight:2.4G On-camera Speedlite transmitterGr flashCh1 - 160000-9999Up to 6 groups (A/B/C/D/E/F)Approx. 100 m Provided1/1 - 1/128 power (1/3-stop increments)ProvidedProvided2 AA/LR6 alkaline batteries Ni-MH batteries Approx. 67.7x 66.7x 81.3mmApprox. 110 g (transmitter only, excluding batteries)(TTL/M)
Table of contents
Other Yongnuo Transmitter manuals