1.The difference between opening and closing time can not be less than 32 minutes. Otherwise, an error message will
appear on the display.
2. Changes in opening and closing time are made in automatic or random mode.
3. Longer than 60 seconds pause between successive presses of the button will automatically exit the change mode.
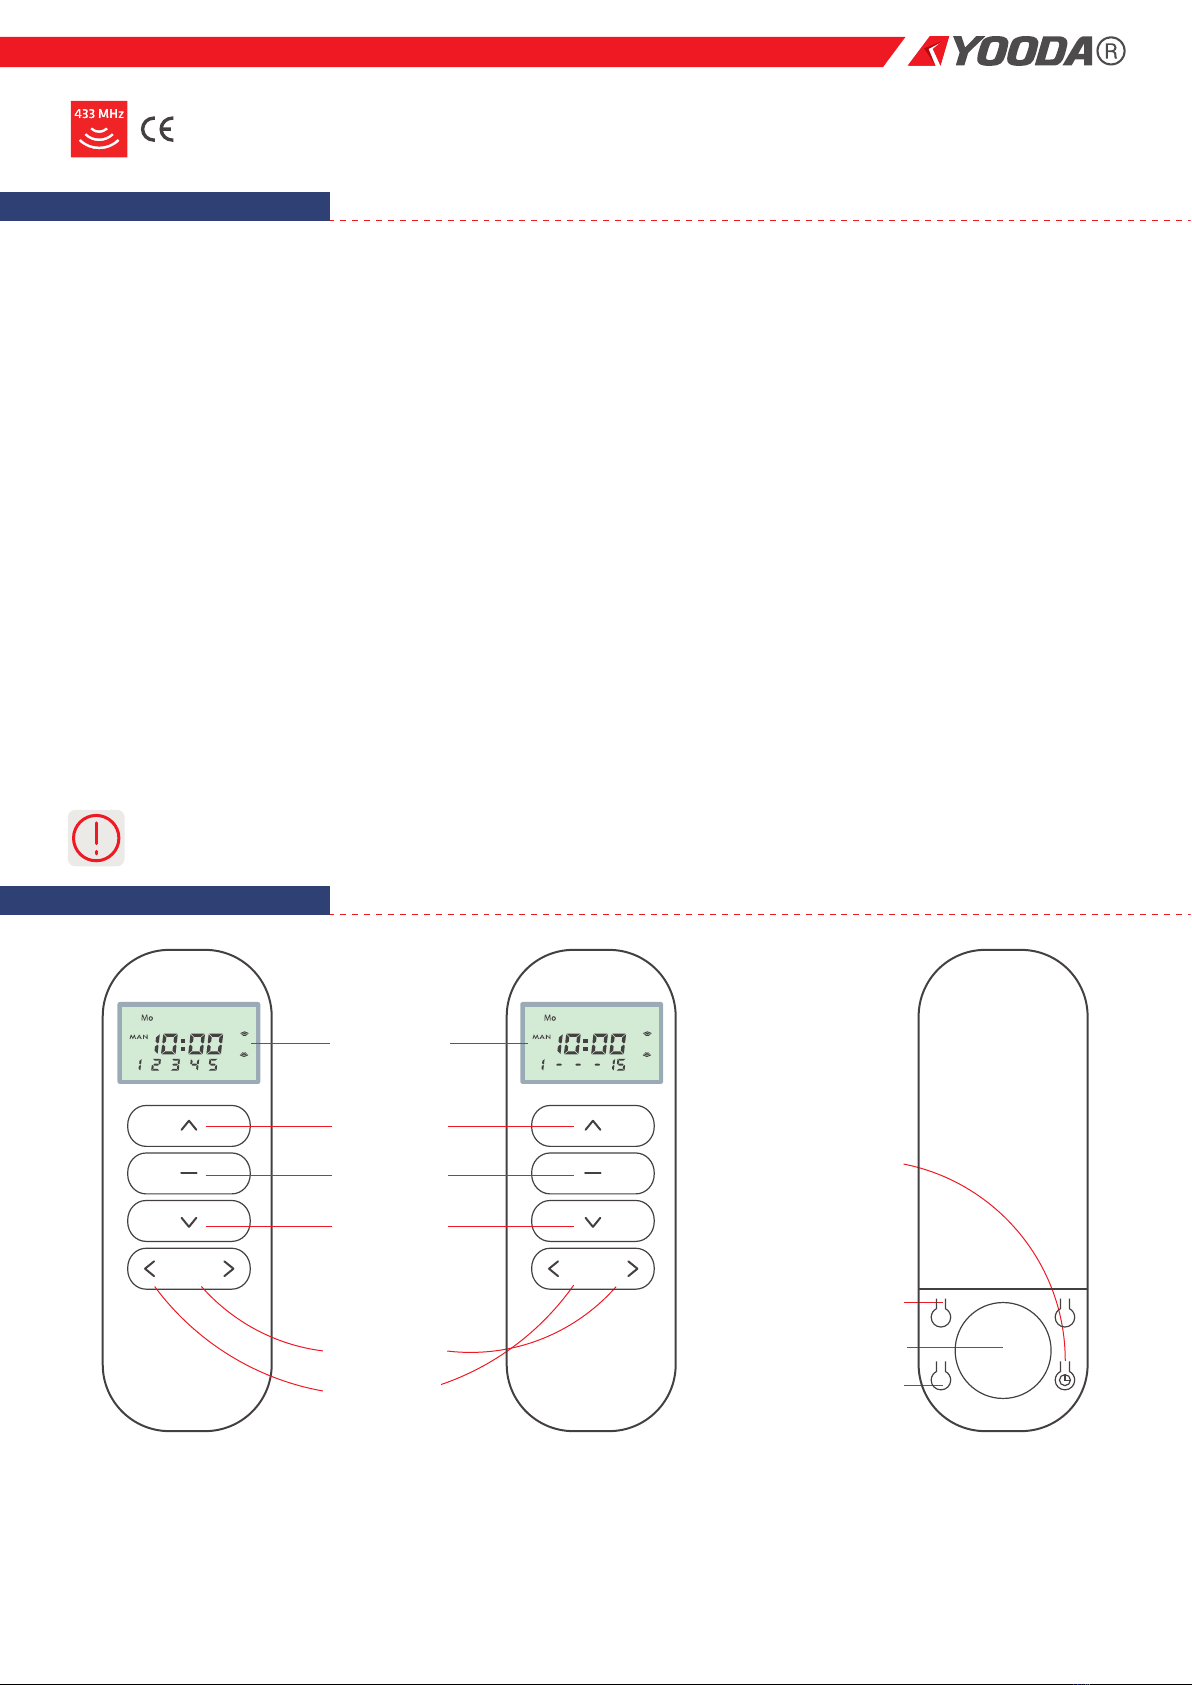
4. The transmitter has the option of programming 9 opening times and 9 closing times.
5. Each programmed time automatic opening or closing time can work:
A) one day of the week
B) from Monday to Friday
C) from Monday to Saturday
D) from Monday to Sunday
6. Each programmed time automatic opening or closing time can handle one channel or group of channels. In the case of
a 5RT transmitter this is one group (channels 1 to 5), and 15RT are four groups:
A) channels from 1 to 5
B) channels from 6 to 10
C) channels from 11 to 15
D) channels from 1 to 15
7. The symbol "- -: - -" means that the time is not active in automatic mode.
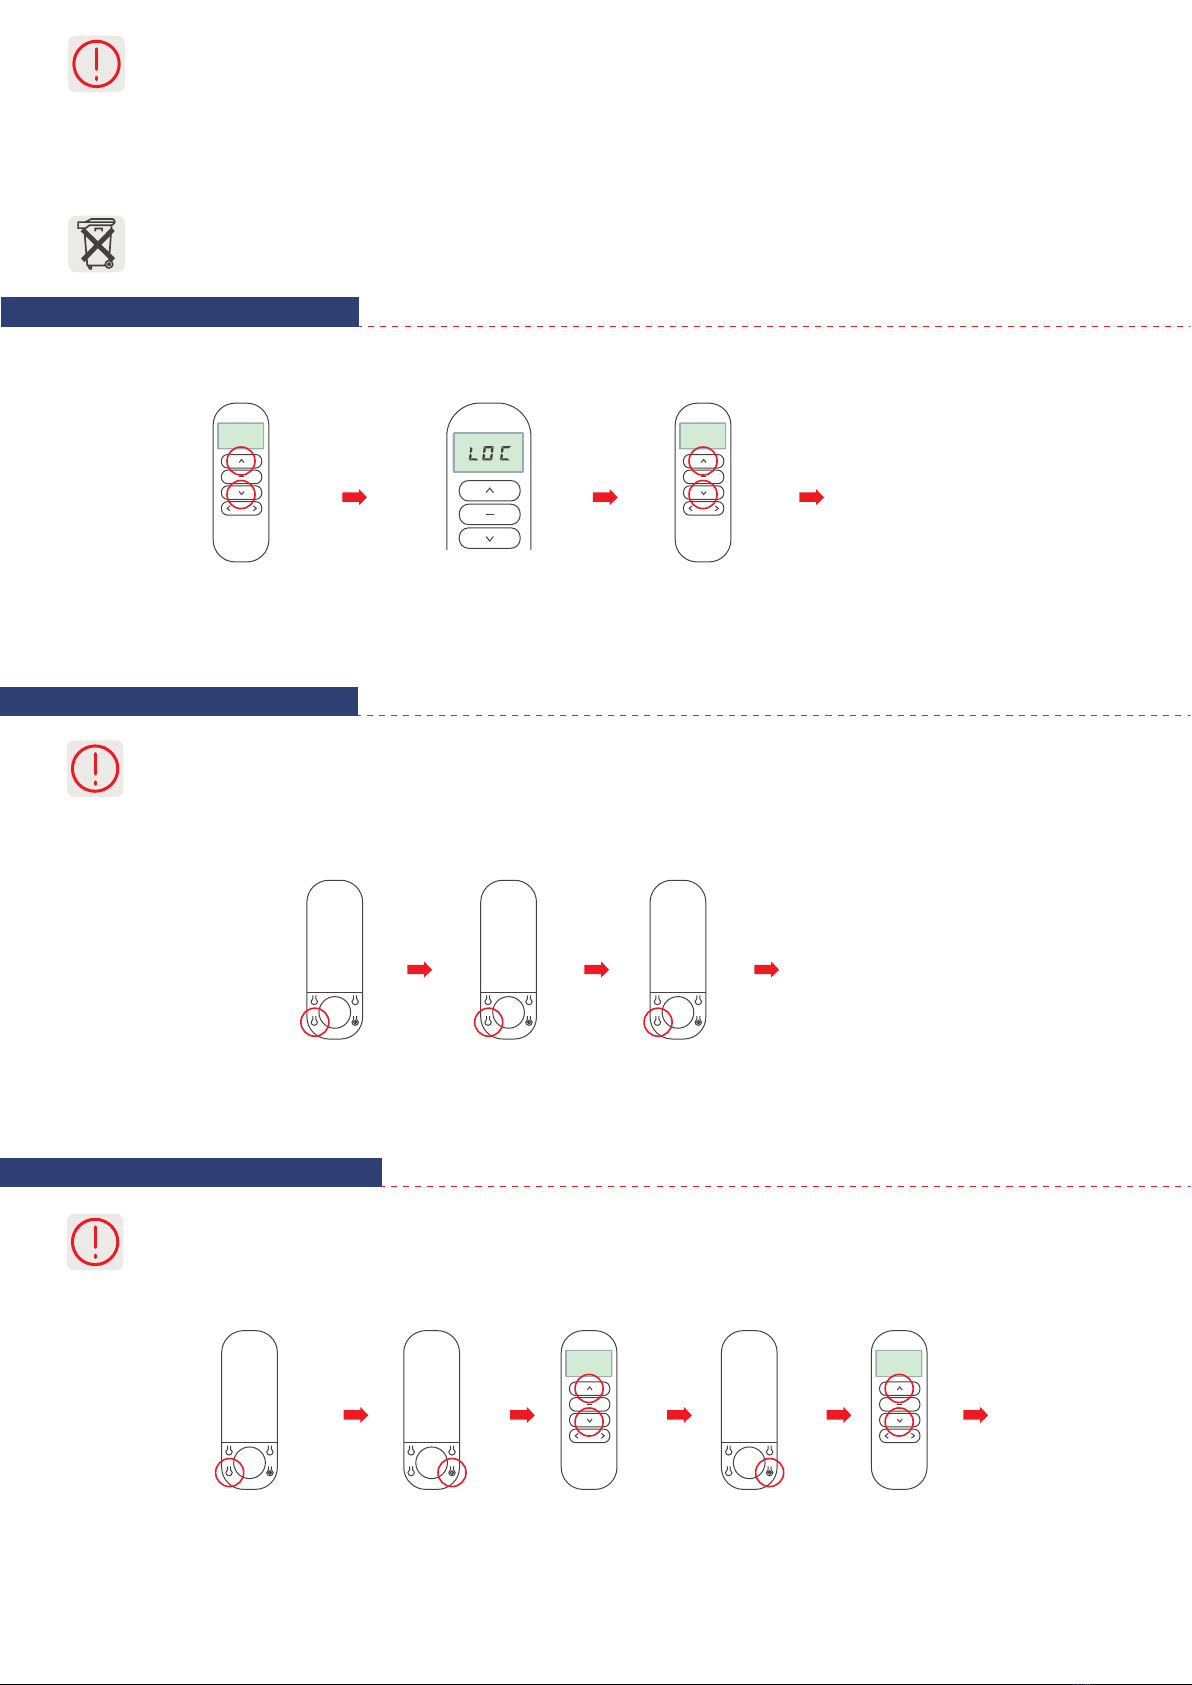
8. To exit the time change mode without saving changes, press the STOP button.
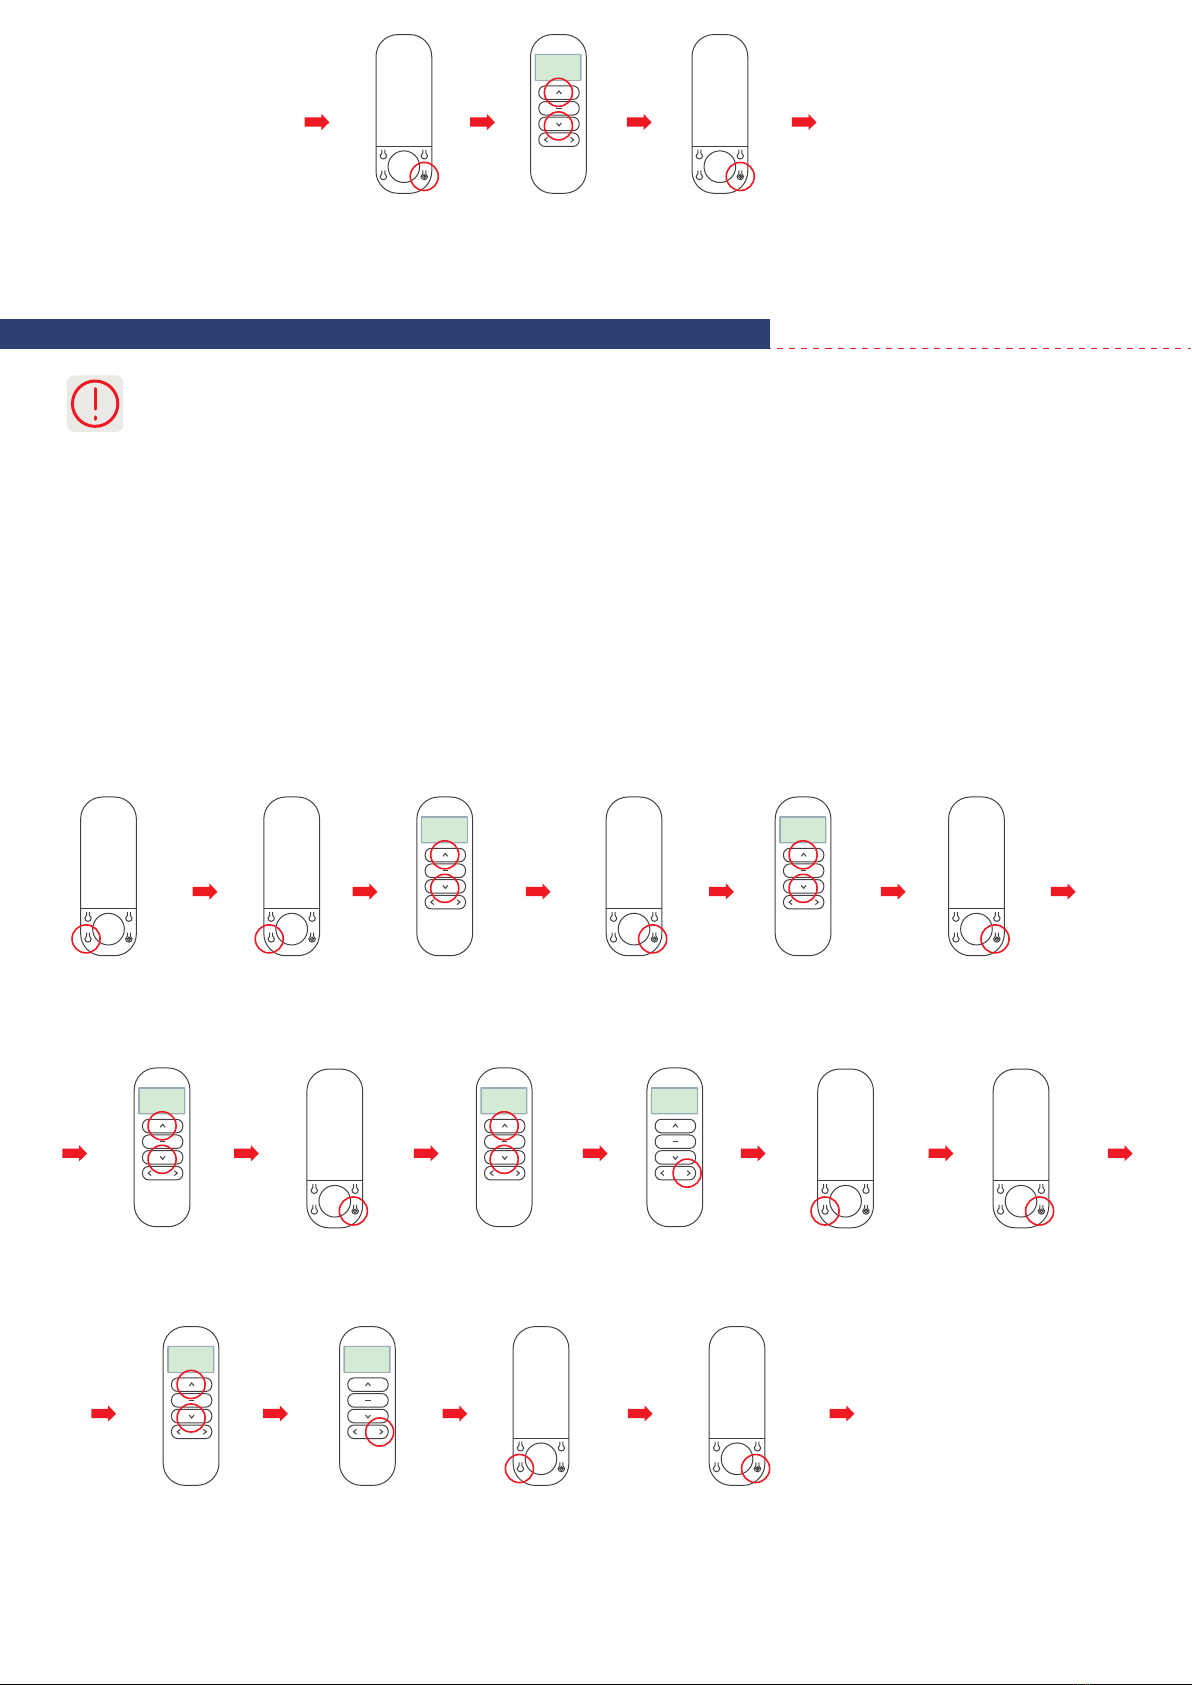
6. Change of the automatic opening and closing time settings
3
Use the WORK MODE
button to set the automatic
or random mode.
Press
WORK MODE button.
Using UP or DOWN
buttons to set the
opening hour.
Use the UP or DOWN
buttons to set the minutes.
Using UP or DOWN
buttons set
appropriate time.
Pressing the CHANNEL +
button selects the channel
number or the group of
channels.
Use the WORK MODE
button to set the next time.
Press and hold
TIME CHANGE button
for about 3 seconds to
confirm the changes.
The setting of the automatic opening
and closing time has been changed.
Use the UP or DOWN
buttons to set the days
of week.
Pressing the CHANNEL +
button selects the channel
number or the group of
channels.
By pressing WORK MODE
button go to closing hour
settings.
Pressing the CHANGE TIME
button changes between
the hours, minutes and
days of the week.
By pressing
TIME CHANGE button go
to days of weeks settings.
By pressing TIME CHANGE
button go to minutes
setting.
Simultaneously press the
UP and DOWN buttons to
activate an hour in
automatic mode.
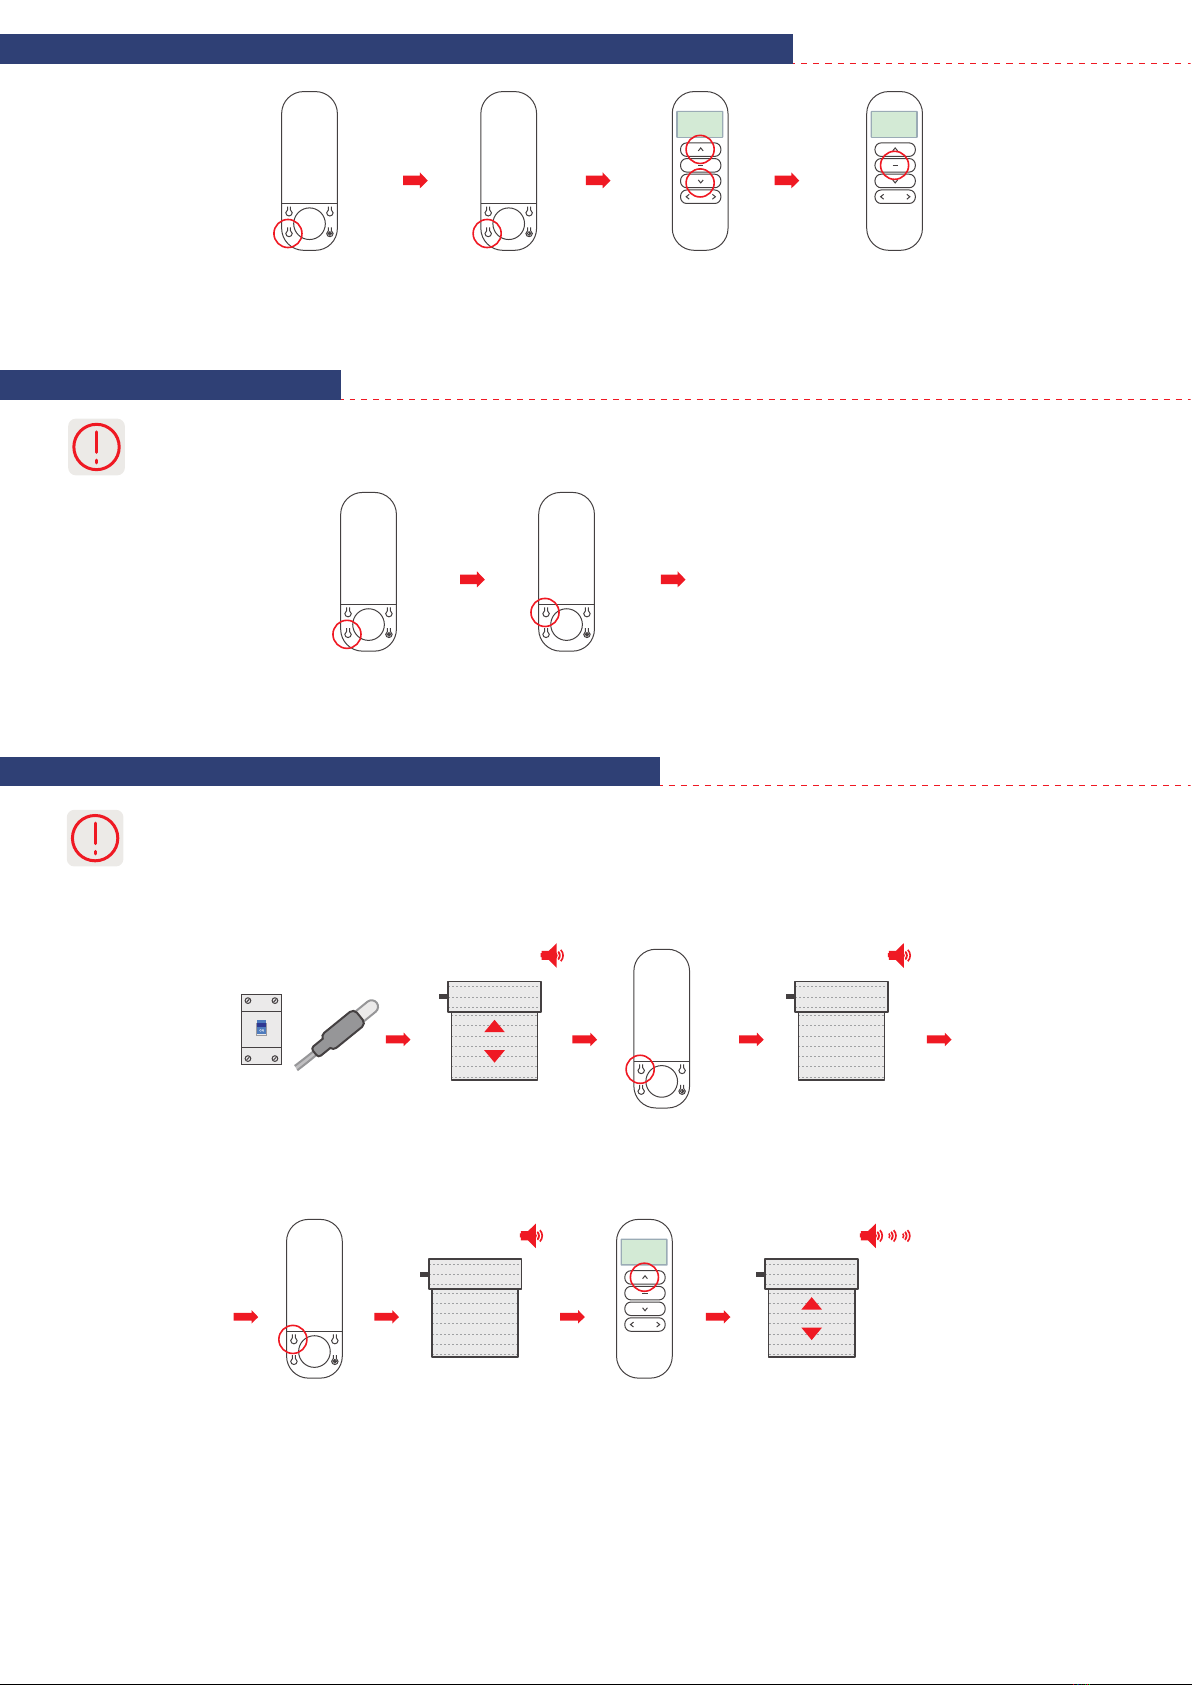
Press and hold
TIME CHANGE button
for about 3 seconds. The
current hour setting flashes
in the display.
By pressing TIME CHANGE
button go to days of weeks
settings.
Press and hold
TIME CHANGE button
for about 3 seconds to confirm
the changes.
The current time
has been set.
Use the UP or
DOWN buttons to
set the days of
week.
P2
M
P2 P2
M
P2
P2
M
P2 P2
M
P2 P2
M
P2
P2
M
P2
P2
M
P2 P2
M
P2
P2
M
P2P2
M
P2
P2
M
P2