6. Programming first transmitter
7. Changing motors direction
3
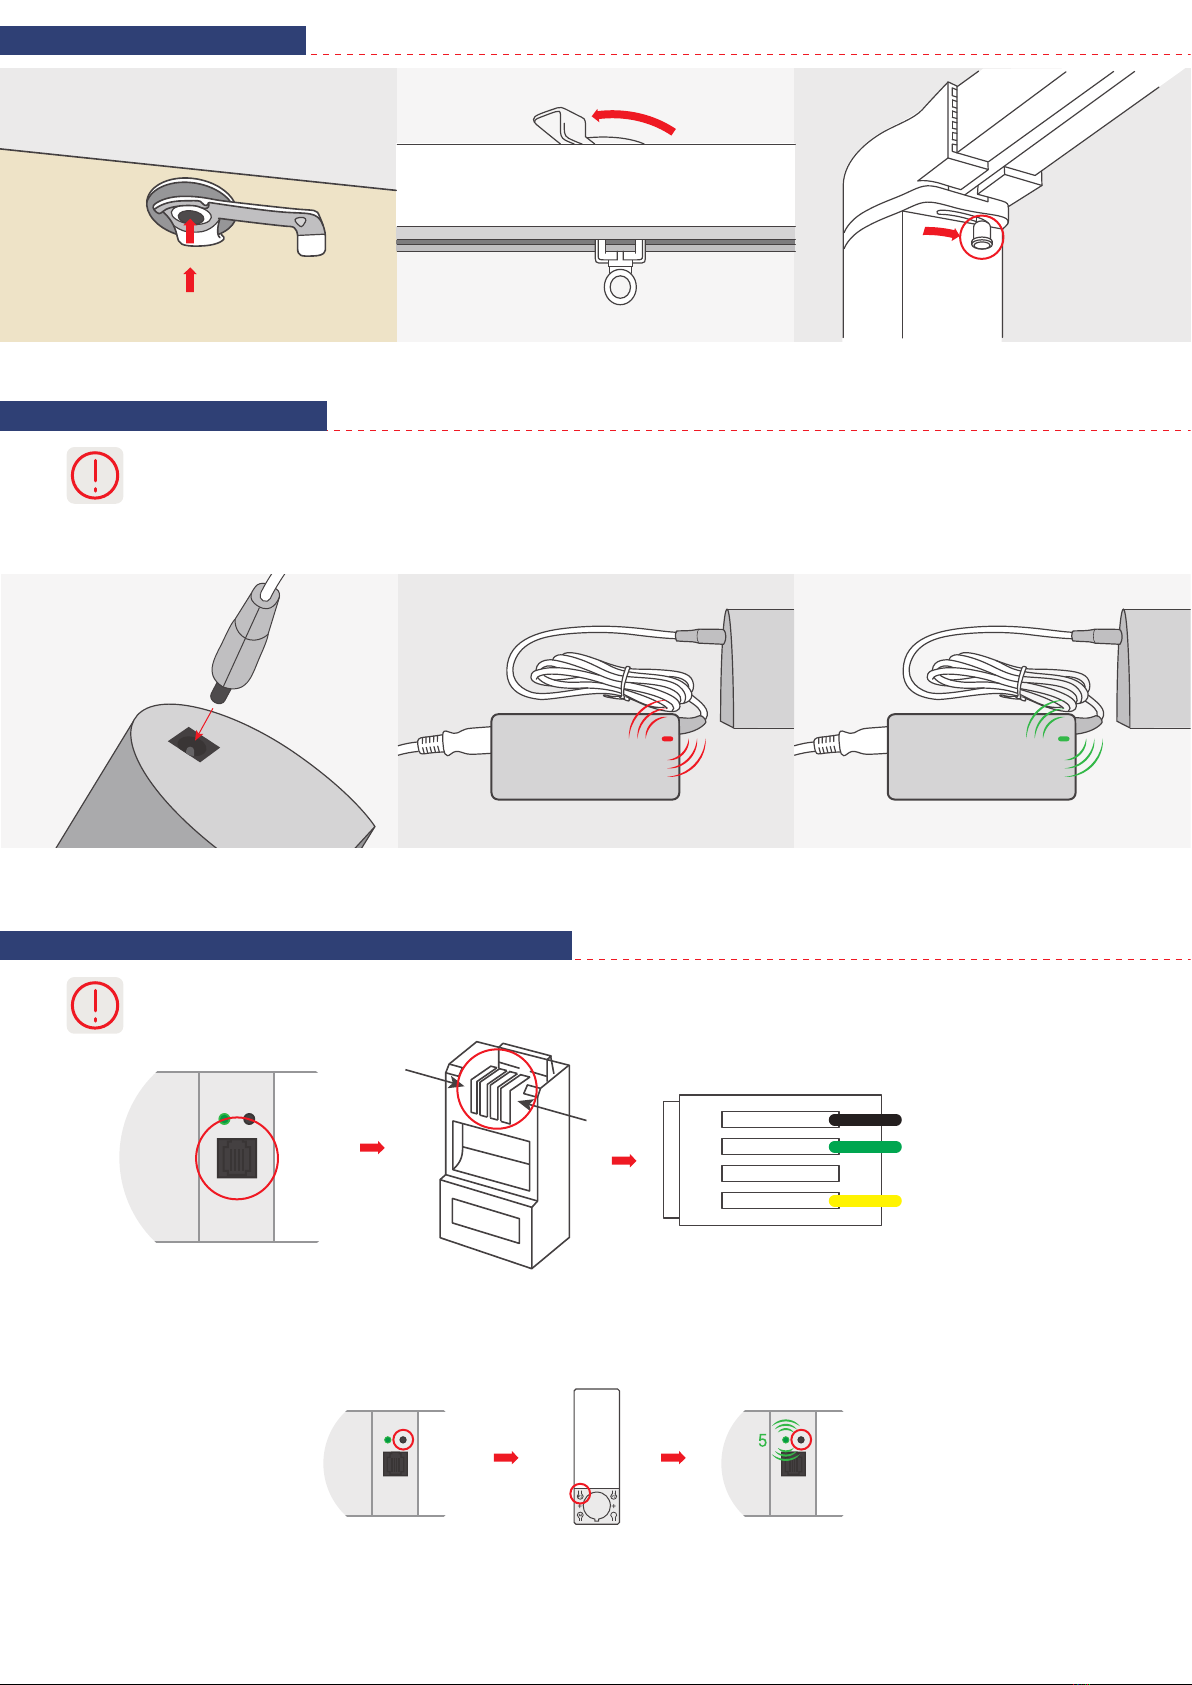
1. Longer than 5 seconds pause between series of button clicks during programming will cause device to switch off from
programming mode without saving any changes.
METHOD 1:
METHOD 2:
II MODE - ASTABLE SWITCH
a) A short circuit between wires 1 and 3 causes open the curtain.
b) A short circuit between wires 1 and 4 closes the curtain.
c) A short circuit between wires 1,3 and 4 stops the curtain.
III MODE - IMPULSE SWITCH
a) A short circuit between wires 1 and 3 causes to move the curtain in step-by-step mode.
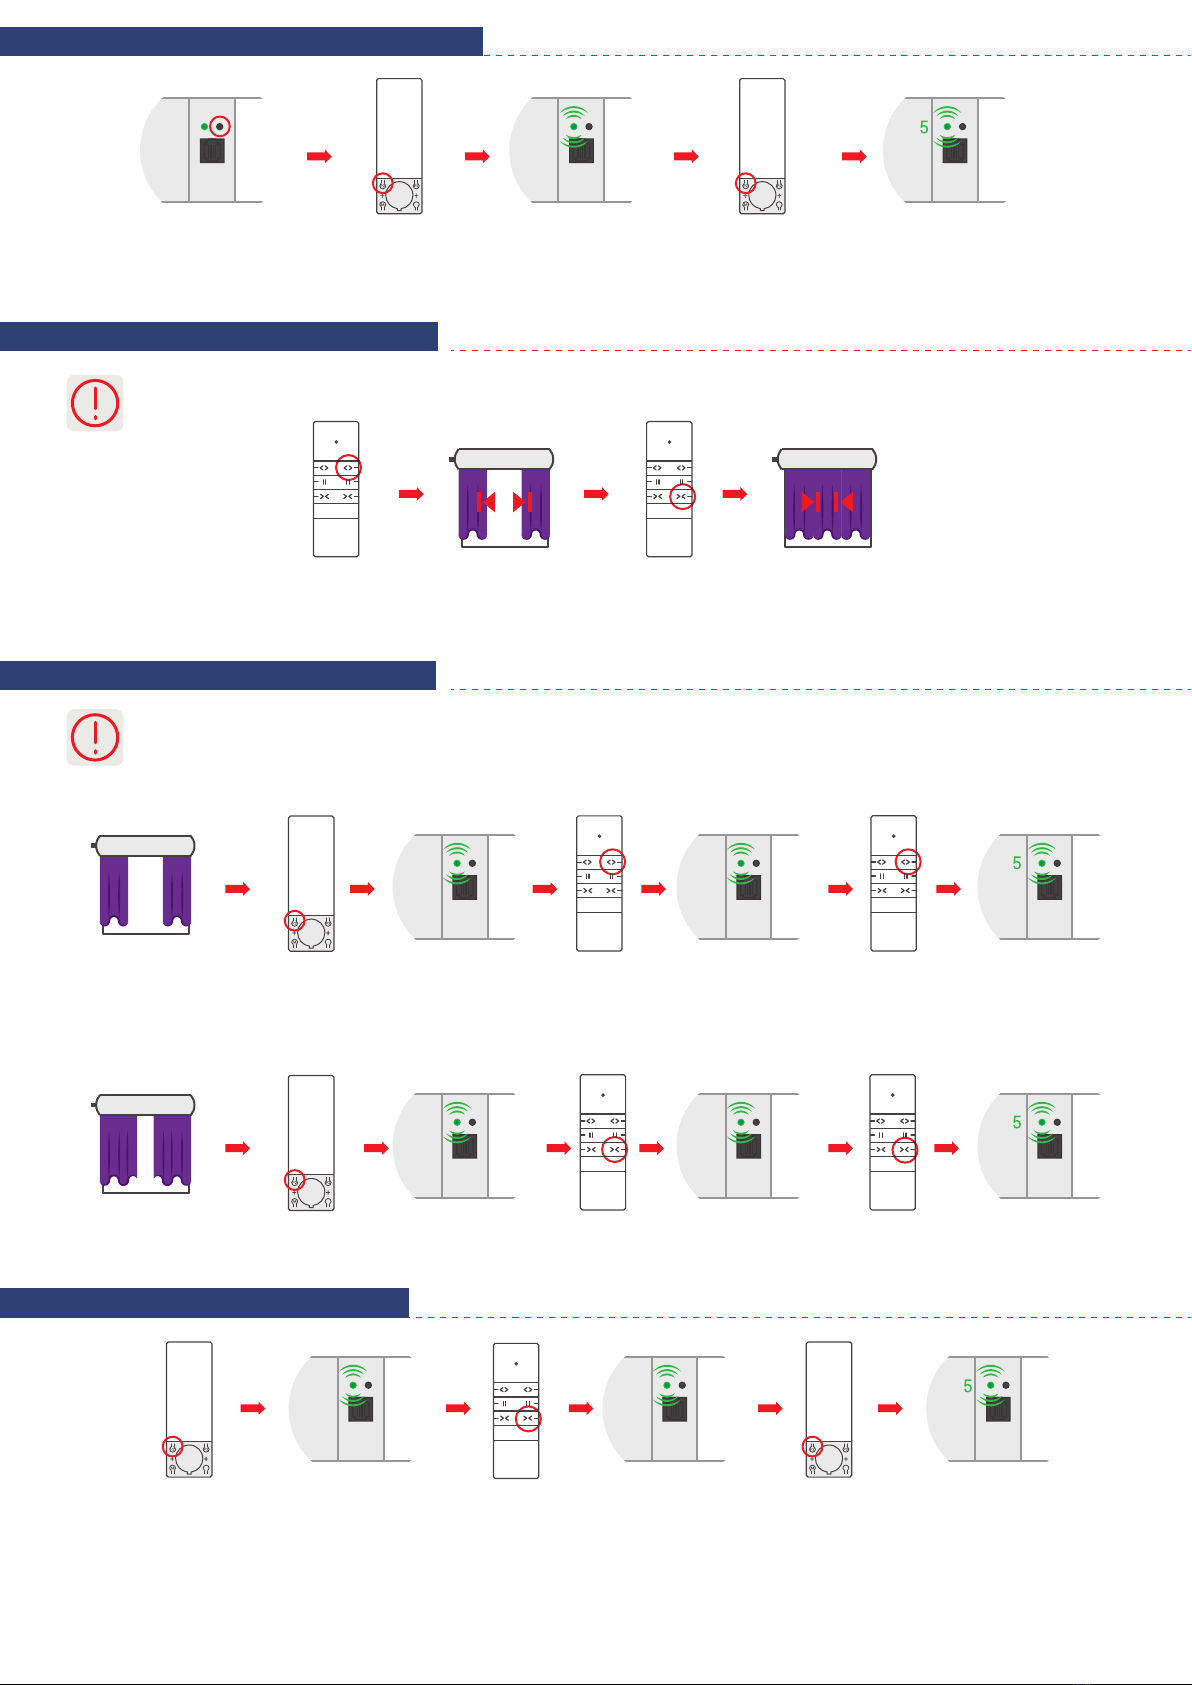
Press and hold the programming
button on the motor for
5 seconds. Release programming
button after the second flash
of the diode.
Press two times programming
button P2 on the remote control.
Press and hold the programming
button on the motor
for 5 seconds. The LED diode
flashes 5 times - settings have
been saved.
Press and hold the programming
button on the motor for 5
seconds. Release programming
button after the second flash
of the diode.
Press three times programming
button P2 on the remote control.
Press and hold the programming
button on the motor
for 5 seconds. The LED diode
flashes 5 times - settings have
been saved.
Turn on the power
by inserting battery
into the motor.
Press
programming button
P2 on the remote control.
Press
programming button
P2 on the remote control.
The led diode
will flash once.
The led diode
will flash once.
Press OPEN button
on the remote control.
The LED diode
flashes 5 times -
transmitter has been
programmed.
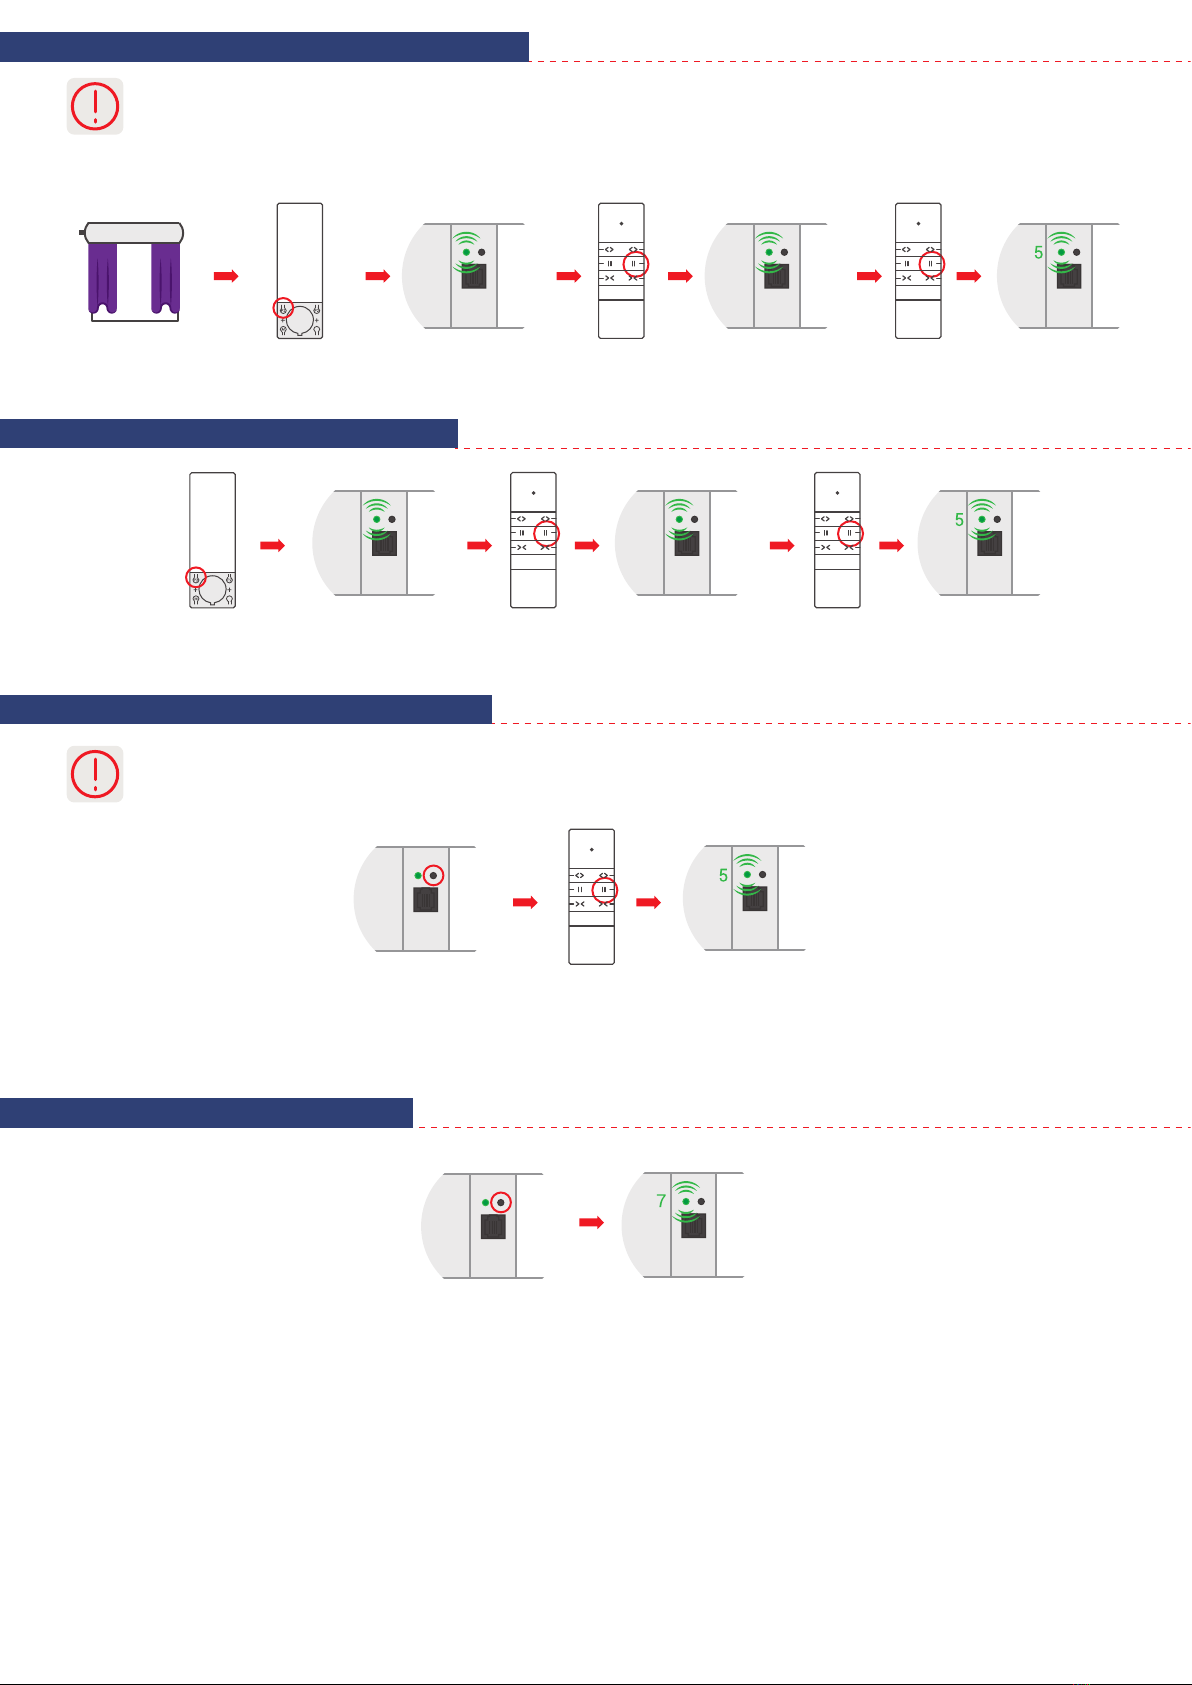
Press and hold the programming
button on the motor for
5 seconds. Release programming
button after the second flash
of the diode.
Press CLOSE button
on the remote control.
The LED diode
flashes 5 times - settings have
been saved.
Press and hold the programming
button on the motor for 2
seconds. LED diode flash once.
Press
programming button P2
on the remote control.
LED diode flashes. Press
programming button P2
on the remote control.
The LED diode flashes 5 times -
transmitter has been
programmed.