©York Survey Supply Centre 2018Ref:.. \operat98\instructions 18\263040.qxp 05-01-18
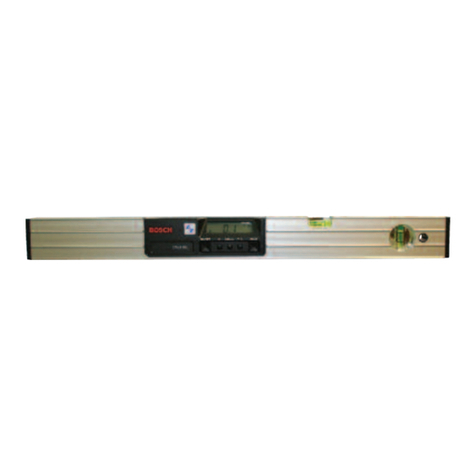
S-Digit Mini+ Inclinometer
SUPPLIED WITH
• Electronic inclinometer S-Digit Mini+
• Padded bag
• Batteries
• User Manual
FUNCTIONS
Electronic slope measurer for measuring inclinations, slopes
and plane surfaces.
Te hni al Data
Working range: 4 x 90°
Resolution: 0.1°/0.1%
Accuracy: 0° + 90° = ±0.1°; 1° - 89° = ±0.2°
Power supply: 3x AAA alkaline batteries
Operating time: 600hrs
Size: 156 x 56 x 31mm
Weight: 0.3kg incl batteries
POWER SUPPLY
Replace the batteries: Open
the battery compartment cover
and insert the batteries
(ensure correct polarity). When
replacing the batteries always
power off the instrument.
When the batteries have been replaced,
the instrument will power on
automatically.
Display indication: “GOOD”, then “-0-”.
Now a calibration must be made - see
“Check and Calibration”.
Important: If the battery symbol flashes,
the batteries need to be replaced.
FEATURES
1) Power
Power the instrument ON/OFF.
2) Hold/Illumination
Press the button short to freeze the current reading.
Press the button long to switch on/off the illumination.
3) Mode
Press the button short to select 5 different display modes
(see “Additional Functions”).
4) Cal/Sound
Press the button short to switch on/off the signal tone.
Press the button long to switch on the calibration mode (see
“Check of Calibration”)
5)Direction symbol (approaching the 0°/90° position)
6) Symbol sound on/off
7) Battery status indicator
8) Unit symbol N/FT
9) Unit symbol °/%
10) Unit symbol mm/m
IMPORTANT
Calibration of inclinometer
- before first use
- before important measurements
- after a hit or drop
- after a large fluctuation in temperature
CHEC OF CALIBRATION
Set the instrument down on a flat and even surface and
switch it on. Wait 3 seconds and note down the measured
value (A). Turn the unit by 180° and set it down on the same
position as before. Wait 3 seconds and note down the
measured value (B). If the deviation between the two values,
A and B, is more than 0.2° the unit has to be calibrated.
CALIBRATION
Set the instrument down on the same
flat and even surface, switch it on and
keep the button CAL/SOUND pressed
until the display shows “-0-”. Wait
approximately 3 seconds and press
the button CAL/SOUND again until
the display shows “-1-”. Turn the unit
by 180° and set it down on the same
position as before. Wait approximately
3 seconds and press the button CAL/SOUND again until the
display shows “-2-”. Now the calibration is completed.
MEASUREMENT OF INCLINATION
The two arrows in the display indicate in
which direction the instrument has to be
moved in order to reach the 0° or 90°
position.
The exact 0° or 90° position is shown by
double arrows.
The display has an automatic digit
inversion for overhead
measurements.
ADDITIONAL FUNCTIONS
Automatic shut-off
If no button is used for 20min the instrument will power off
automatically.
Sound
Switch the sound function on. The instrument will now
show by a sound signal if the horizontal or vertical position
approaches. The closer the position is, the denser the sound
signal will be. If the instrument is in correct vertical or
horizontal position, the sound will be continuous.
Mode functions[(1) - (5)]
1) Slope indication in ° (14.5°)
2) Slope indication in % (25.9%)
3) Indication IN/FT (3 1/8 IN/FT)
4) Indication IN/FT (3.10 IN/FT)
5) Indication mm/m (258.9mm/m)
eep the mode button pressed to have all mode functions
switch fast. The display will not show any values. Release
the mode button to return to the standard indication.
CONNECTION TO CAMERA TRIPOD
With 1/4” thread (at the bottom side) S-Digit Mini+ can be
connected to a camera tripod.
SPECIAL FEATURE WITHIN THE RANGE OF 0° - 90°
0-setting in any position required:
In the range between 0° and 90° the ZERO layer can be
defined in any position.
Start the calibration function in the position required (press
CAL/SOUND longer than 3 seconds) - wait 3 seconds - press
CAL/SOUND again - wait 3 seconds - press CAL/SOUND
again - finalised.
Do not turn the S-Digit Mini+ during this process.
Now the ZERO layer is defined in the new position and the
application required can be started.
ATTENTION:
We recommend to define the ZERO layer in the horizontal
position again when you have finished your application.
Otherwise it may happen that for the following
measurements the results can be completely wrong (e.g.
when you work the next day or if another user is working
with the unit).
SAFETY NOTES
CARE AND CLEANING
Handle measuring instruments with care. Clean with soft
cloth only after any use. If necessary, damp the cloth with
some water. If the instrument is wet, clean and dry it
carefully. Pack it up only if it is perfectly dry. Transport in
original container/case only.
SAFETY INSTRUCTIONS
- Follow the instructions given in the user manual.
- Use the instrument for measuring jobs only.
- Do not open the instrument housing. Repairs should be
carried out by authorised workshops only.
- Please contact York Survey Supply Centre.
- Do not remove warning labels or safety instructions.
- eep the instrument away from children.
- Do not use the instrument in explosive environments.
- The user manual must always be kept with the instrument.
SPECIFIC REASONS FOR ERRONEOUS MEASURING
RESULTS
Measurements through glass or plastic windows; dirty laser
emitting windows; after the instrument has been dropped or
hit, please check the accuracy.
Large fluctuation of temperature: If the instrument will be
used in cold areas after being stored in warm areas (and
vice versa) please wait some minutes before carrying out
measurements.
ELECTROMAGNETIC ACCEPTABILITY (EMC)
It cannot be completely excluded that this instrument will
disturb other instruments (e.g. navigation systems); will be
disturbed by other instruments (e.g. intensive
electromagnetic radiation, nearby industrial facilities or radio
transmitters).
CE CONFORMITY
Instrument has the CE-mark according to EN 61326:1997,
EN 55022, EN 61000-4-2/-3.
WARRANTY
• The product is warranted by the manufacturer to the original
purchaser to be free from defects in material and
workmanship under normal use for a period of two (2) years
from the date of purchase.
• During the warranty period, and upon proof of purchase,
the product will be repaired or replaced (with the same or
similar model at manufacturer’s option), without charge for
either parts or labour.
• In case of a defect please contact the dealer where you
originally purchased this product. The warranty will not
apply to this product if it has been misused, abused or
altered. Without limiting the foregoing, leakage of the
battery, bending or dropping the unit are presumed to be
defects resulting from misuse or abuse.
EXCEPTIONS FROM RESPONSIBILITY
• The user of this product is expected to follow the
instructions given in operator’s manual. Although all
instruments left our warehouse in perfect condition and
adjustment the user is expected to carry out periodic checks
of the products accuracy and general performance.
• The manufacturer or its representatives assumes no
responsibility of results of a faulty or intentional usage or
misuse including any direct, indirect, consequential damage
and loss of profits.
• The manufacturer or its representatives assumes no
responsibility for consequential damage and loss of profits
by any disaster (earthquake, storm, flood, etc.), fire,
accident or an act of a third party and/or a usage in other
than usual conditions.
• The manufacturer or its representatives assumes no
responsibility for any damage and loss of profits due to a
change of data, loss of data and interruption of business
etc. caused by using the product or an unusable product.
• The manufacturer or its representatives assumes no
responsibility for any damage and loss of profits caused by
usage other than explained in the user’s manual.
• The manufacturer or its representatives assumes no
responsibility for damage caused by wrong movement or
action due to connecting with other products.


