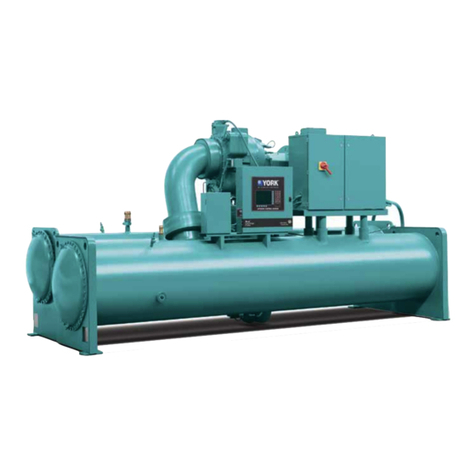
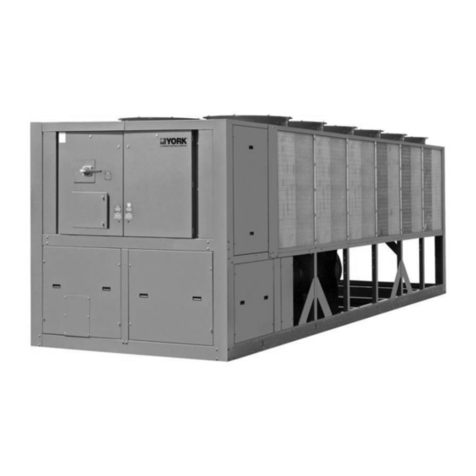
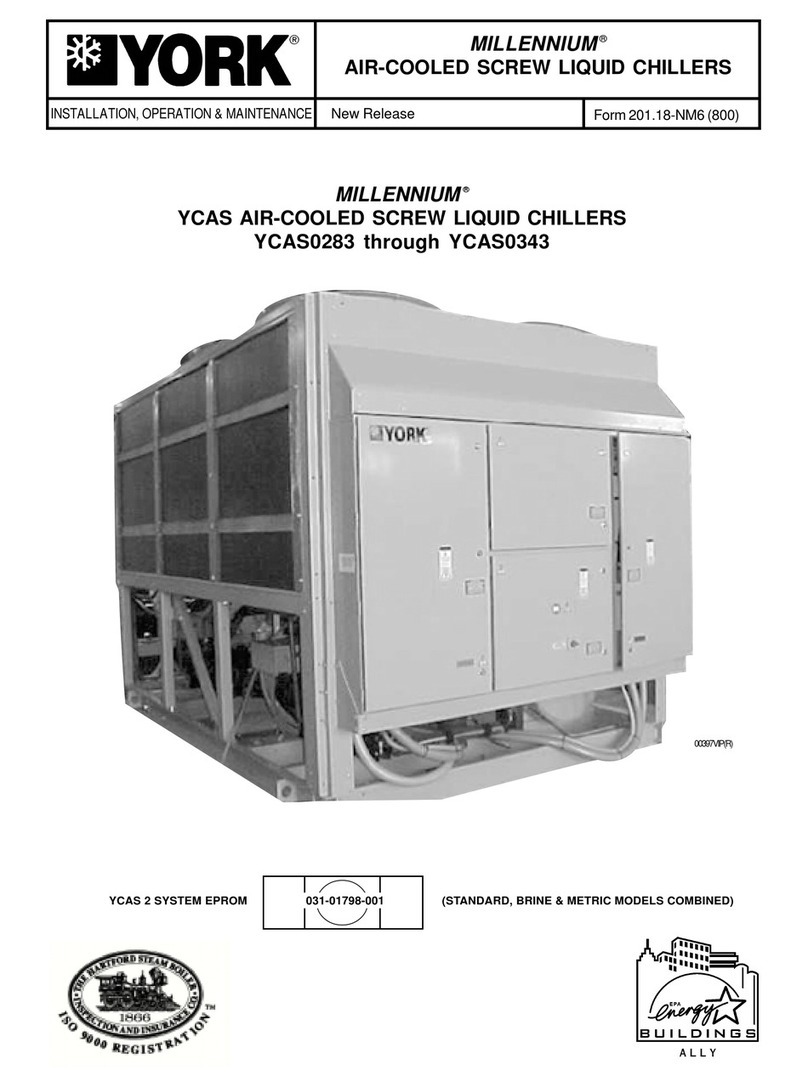
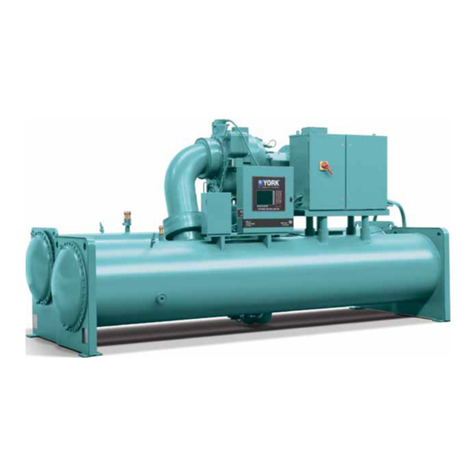
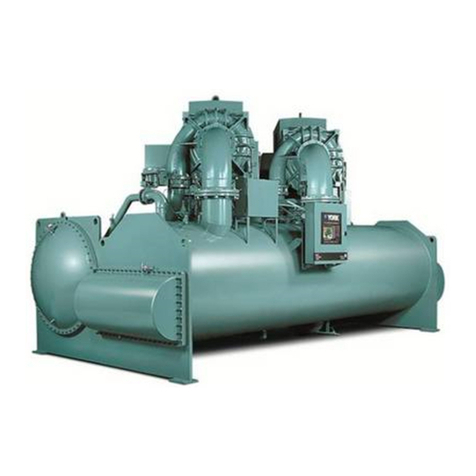
York YCAV0157 Owner's manual

R134a
YCAV STYLE A
MODELS YCAV0157 to YCAV0267, 60 HZ
(150 TON to 260 TON)
E/V HIGH EFFICIENCY and S/P STANDARD EFFICIENCY
AIR-COOLED SCREW
LIQUID CHILLERS
Installation, Operation, Maintenance Supersedes 201.21-NM1 (122) Form 201.21-NM1 (1223)
Issue Date:
December 19, 2023
035-20552-000

2JOHNSON CONTROLS
FORM 201.21-NM1 (1223)
This equipment is a relatively complicated apparatus.
During rigging, installation, operation, maintenance,
or service, individuals may be exposed to certain com-
ponents or conditions including, but not limited to:
heavy objects, refrigerants, materials under pressure,
rotating components, and both high and low voltage.
Each of these items has the potential, if misused or
handled improperly, to cause bodily injury or death. It
is the obligation and responsibility of rigging, instal-
lation, and operating/service personnel to identify and
recognize these inherent hazards, protect themselves,
and proceed safely in completing their tasks. Failure
to comply with any of these requirements could result
in serious damage to the equipment and the property in
IMPORTANT!
READ BEFORE PROCEEDING!
GENERAL SAFETY GUIDELINES
which it is situated, as well as severe personal injury or
death to themselves and people at the site.
This document is intended for use by owner-authorized
rigging, installation, and operating/service personnel. It
is expected that these individuals possess independent
training that will enable them to perform their assigned
tasks properly and safely. It is essential that, prior to
performing any task on this equipment, this individual
shall have read and understood the on-product labels,
this document and any referenced materials. This in-
dividual shall also be familiar with and comply with
all applicable industry and governmental standards and
regulations pertaining to the task in question.
SAFETY SYMBOLS
The following symbols are used in this document to alert the reader to specific situations:
Indicates a possible hazardous situation
which will result in death or serious injury
if proper care is not taken.
Indicates a potentially hazardous situa-
tion which will result in possible injuries
or damage to equipment if proper care is
not taken.
Identies a hazard which could lead to
damage to the machine, damage to other
equipment and/or environmental pollu-
tion if proper care is not taken or instruc-
tions and are not followed.
Highlights additional information useful
to the technician in completing the work
being performed properly.
External wiring, unless specied as an optional connection in the manufacturer’s product line, is not
to be connected inside the control cabinet. Devices such as relays, switches, transducers and controls
and any external wiring must not be installed inside the micro panel. All wiring must be in accor-
dance with Johnson Controls’ published specications and must be performed only by a qualied
electrician. Johnson Controls will NOT be responsible for damage/problems resulting from improper
connections to the controls or application of improper control signals. Failure to follow this warn-
ing will void the manufacturer’s warranty and cause serious damage to property or personal injury.

3
JOHNSON CONTROLS
FORM 201.21-NM1 (1223)
CHANGEABILITY OF THIS DOCUMENT
In complying with Johnson Controls’ policy for con-
tinuous product improvement, the information con-
tained in this document is subject to change without
notice. Johnson Controls makes no commitment to
update or provide current information automatically
to the manual or product owner. Updated manuals, if
applicable, can be obtained by contacting the nearest
Johnson Controls Service office or accessing the John-
son Controls Knowledge Exchange website at https://
docs.johnsoncontrols.com/chillers/.
It is the responsibility of rigging, lifting, and operating/
service personnel to verify the applicability of these
documents to the equipment. If there is any question
regarding the applicability of these documents, rig-
ging, lifting, and operating/service personnel should
verify whether the equipment has been modified and
if current literature is available from the owner of the
equipment prior to performing any work on the chiller.
CONDITIONED BASED MAINTENANCE
Traditional chiller maintenance is based upon assumed
and generalized conditions. In lieu of the traditional
maintenance program, a Johnson Controls YORK
Conditioned Based Maintenance (CBM) program can
be substituted. This CBM service plan is built around
the specific needs for the chiller, operating conditions,
and annualized impact realized by the chiller. Your lo-
cal Johnson Controls Branch can propose a customized
Planned Service Agreement that leverages real time
and historical data, delivering performance reporting,
corrective actions required and data enabled guidance
for optimal operation and lifecycle assurance. The pro-
gram will include fault detection diagnostics, operation
code statistics, performance based algorithms and ad-
vance rules based rationale delivered by the Johnson
Controls Connected Equipment Portal.
AFFECTED PAGES DESCRIPTION
3 Refrigerant warning added to General safety guidelines
REVISION NOTES
Revisions made to this document are indicated in the following table. These revisions are to technical information,
and any other changes in spelling, grammar, or formatting are not included.
Working with chiller vessels which are designed to contain contents under pressure must only be
conducted by fully qualied technicians who have been certied in accordance with EPA Section 608
of the Clean Air Act requirements for the US or equivalently the Federal Halocarbon Regulations
and the Refrigerant Code of Practice for Canada. This equipment is only intended for installation
in locations that are not accessible to the general public. Further, this equipment is not intended for
use by persons (including children) with reduced physical, sensory or mental capabilities, or lack
of experience and knowledge. Failure to meet this requirement can result in damage to equipment,
release of refrigerant into the environment, contamination of the operating space for the equipment
and pose a risk of personal injury or death. It is the responsibility of any service technician or opera-
tor to adhere to these requirements.

4JOHNSON CONTROLS
FORM 201.21-NM1 (1223)
The Control/VSD Cabinet contains lethal High AC and DC voltages. Before
performing service inside the cabinet, remove the AC supply feeding the chiller
and verify using a non-contact voltage sensor.
The DC Voltage on the VSD DC Bus will take 5 minutes to bleed o, after AC
power is removed. Always check the DC Bus Voltage with a Voltmeter to assure
the capacitor charge has bled o before working on the system.
• NEVER short out the DC Bus to discharge the lter capacitors.
• NEVER place loose tools, debris, or any objects inside the Control Panel/VSD
Cabinet.
• NEVER allow the Control Panel VSD Cabinet doors to remain open if there is
a potential for rain to enter the panel. Keep doors closed and assure all latches
are engaged on each door unless the unit is being serviced.
• ALWAYS lockout the disconnect supplying AC to the chiller.
• The 1L Line Inductor will reach operating temperatures of over 300° F. DO
NOT open panel doors during operation. Assure the inductor is cool whenever
working near the inductor with power o.

5
JOHNSON CONTROLS
FORM 201.21-NM1 (1223)
TABLE OF CONTENTS
SECTION 1 - GENERAL CHILLER
INFORMATION & SAFETY
INTRODUCTION.....................................................9
WARRANTY.............................................................9
SAFETY.....................................................................9
Standards for Safety................................................9
RESPONSIBILITY FOR SAFETY.......................10
ABOUT THIS MANUAL ......................................10
MISUSE OF EQUIPMENT ...................................10
Suitability for Application ....................................10
Structural Support.................................................10
Mechanical Strength.............................................10
General Access .....................................................10
Pressure Systems ..................................................11
Electrical............................................................... 11
Rotating Parts .......................................................11
Sharp Edges ..........................................................11
Refrigerant & Oils ................................................11
High Temperature & Pressure Cleaning ...............11
Emergency Shutdown...........................................11
SECTION 2 - PRODUCT DESCRIPTION
INTRODUCTION...................................................12
General System Description .................................12
Compressor...........................................................13
Evaporator ............................................................14
Condensor.............................................................14
Flash Tank Feed / Drain Valve..............................15
Oil Separator / Oil System....................................15
Relief Valves.........................................................15
Oil Cooling ...........................................................16
Capacity Controls .................................................16
Power and Control Panel ......................................16
Microprocessor & VSD Controls .........................16
Display..................................................................17
Keypad..................................................................17
Unit Switch...........................................................17
Variable Speed Drive (VSD) ................................18
ACCESSORIES & OPTIONS ...............................19
Single Point Circuit Breaker.................................19
Building Automation System (BAS) Interface.....19
Condensor Coil Protection....................................19
DX COOLER OPTIONS........................................20
SERVICE VALVE OPTION ..................................20
UNIT ENCLOSURES ............................................20
FANS ........................................................................20
SOUND REDUCTION OPTIONS........................20
VIBRATION ISOLATION.....................................20
UNIT NOMENCLATURE .....................................21
PRODUCT IDENTIFICATION NUMBER .........22
SECTION 3 - RIGGING, HANDLING & STORAGE
DELIVERY AND STORAGE.................................26
INSPECTION...........................................................26
MOVING THE CHILLER ...................................... 26
Lifting Weights ......................................................26
UNIT RIGGING....................................................... 27
SECTION 4 - INSTALLATION
LOCATION REQUIREMENTS............................. 29
OUTDOOR INSTALLATION................................29
INDOOR INSTALLATION ....................................29
LOCATION CLEARANCES..................................30
VIBRATION ISOLATORS..................................... 30
Installation .............................................................30
SHIPPING BRACES............................................... 30
CHILLED LIQUID PIPING ...................................30
General Requirements ...........................................30
WATER TREATMENT............................................32
CONNECTION TYPES & SIZES..........................32
COOLER CONNECTIONS.................................... 32
Option Flanges.......................................................32
REFRIGERANT RELIEF VALVE PIPING ..........33
DUCTWORK CONNECTION............................... 33
General Requirements ...........................................33
ELECTRICAL CONNECTION .............................33
POWER WIRING .................................................... 34
115 VAC CONTROL SUPPLY TRANSFORMER34
CONTROL PANEL WIRING ................................. 34
VOLTS FREE CONTACTS ....................................35
Chilled Liquid Pump Starter..................................35
Run Contact ...........................................................35
Alarm Contact........................................................35
SYSTEM INPUTS ................................................... 35
Flow Switch...........................................................35
Remote Run/Stop...................................................35
Optional Remote Setpoint Oset Temp.................35
Optional Remote Setpoint Oset Sound Limit......35
SECTION 5 - COMMISSIONING
PREPARATION ....................................................... 36
PREPARATION - POWER OFF ............................36
Inspection...............................................................36
Refrigerant Charge ................................................36
Service and Oil Line Valves ..................................36
Compressor Oil......................................................36
Fans........................................................................36
Isolation / Protection..............................................36
Control Panel .........................................................36
Power Connections................................................37

6JOHNSON CONTROLS
FORM 201.21-NM1 (1223)
TABLE OF CONTENTS (CONT’D)
Grounding.............................................................37
Water System ........................................................37
Flow Switch..........................................................37
Temperature Sensor(s)..........................................37
Programmed Options............................................38
Programmed Settings............................................38
Date & Time .........................................................38
Start / Stop ............................................................38
Setpoint & Remote Oset.....................................38
FIRST TIME STARTUP.........................................38
Interlocks ..............................................................38
Unit Switch...........................................................38
Start-Up ................................................................38
Oil Pressure...........................................................38
Refrigerant Flow...................................................39
Loading.................................................................39
Condensor & Fan Rotation...................................39
Suction Super Heat ...............................................39
Sub-Cooling..........................................................39
General Operation.................................................39
SECTION 6 - TECHNICAL DATA
WATER PRESSURE DROP CHARTS .................40
GLYCOL CORRECTION FACTORS ..................41
WATER TEMP. AND FLOWS...............................42
PHYSICAL DATA ..................................................44
OPERATING LIMITATIONS AND SOUND POWER
48
ELECTRICAL DATA.............................................49
ELECTRICAL NOTES ..........................................54
ELEMENTARY WIRING DIAGRAM.................56
CONNECTION DIAGRAM..................................60
LOCATION LABEL...............................................64
DIMENSIONS ........................................................66
TECHNICAL DATA (CLEARANCES)..............122
WEIGHT DIST. & ISOLATOR MOUNTING ...124
ISOLATOR MOUNTING POSITIONS..............125
SEISMIC ISOLATOR INSTALLATION ...........128
NEOPRENE ISOLATOR POSITION.................130
1" DEFLECTION ISOLATOR INSTALLATION131
REFRIGERANT FLOW DIAGRAM..................133
PROCESS & INSTRUMENTATION DIAGRAM
134
COMPONENT LOCATIONS..............................135
EQUIPMENT START-UP CHECK SHEET.......152
Unit Checks (NO power)....................................152
Panel Checks
(Power ON-both system switches OFF).............154
Programmed Values............................................155
Chilled Liquid Setpoint...........................................155
Date/Time, Daily Schedule, & Clock Jumper ....156
Initial Start-Up....................................................156
Check Subcooling & Superheat..........................156
Leak Checking....................................................157
CHILLER ELECTRONIC COMPONENTS......158
Keypad................................................................158
Display................................................................159
Chiller Control Board .........................................160
Relay Output Boards ..........................................161
VSD (Variable Speed Drive) ..............................161
AC to DC Rectier .............................................161
SCR Trigger Board .............................................162
DC Link Filter ....................................................162
1L Line Inductor .................................................163
AC to DC Inverter ..............................................163
Laminated Bus Structure ....................................163
VSD Logic Board ...............................................164
Control Panel to VSD Communications.............164
IBGT Gate Driver Boards...................................165
Current Transformers..........................................165
DV/DT Output Suppression Network ................166
Flash Tank Feed/Drain Valve Controller ............166
DC Bus Voltage Isolation Board.........................167
Chiller Circuit Breaker .......................................167
Autotransformer..................................................167
CHILLER CONFIGURATION JUMPERS........168
Number of Compressors Conguration Jumpers .
168
VSD LOGIC TO CHILLER MICROPROCESSOR
BOARD RS-485 COMMUNICATION
CONFIGURATION JUMPERS...........................168
MAX VSD FREQUENCY ...................................169
SECTION 7 - OPERATION
OPERATING CONTROLS..................................170
BASIC OPERATING SEQUENCE.....................172
NUMBER OF COMPRESSORS TO START.....173
General................................................................173
Standard IPLV.....................................................173
Optional Optimized IPLV...................................173
MINIMUM VSD COMPRESSOR
START/RUN FREQUENCY ...........................174
Minimum VSD Start Frequency.........................174
Minimum VSD Run Frequency..........................174
ACCELERATION/DECELERATION RATE
WHEN STARTING & STOPPING
COMPRESSORS ..................................................175
VSD Acceleration/ Deceleration Rates...............175
STANDARD IPLV CAPACITY CONTROL ....176
Fuzzy Logic Control...........................................177
Hot Water Starts..................................................178
Lag Compressor Operation in Load Limiting ....178
OPTIONAL IPLV CAPACITY CONTROL .......179
Fuzzy Logic ........................................................180
Hot Water Starts..................................................181
LOAD LIMITING CONTROL............................182

7
JOHNSON CONTROLS
FORM 201.21-NM1 (1223)
FLASH TANK DRAIN/FEED VALVE
CONTROLLER.....................................................185
Valve Controller & Control Algorithm ..............185
ECONOMIZER CONTROL................................188
CONDENSER FAN CONTROL .........................189
VSD TEMPERATURE CONTROL/FAN
CONTROL OPERATION ....................................191
REMOTE TEMPERATURE RESET CONTROL192
Local Current Limit Control..............................193
Pulldown Current Limit Setpoint .......................193
REMOTE CURRENT LIMIT RESET ...............194
Sound Limit Controls .........................................196
SECTION 8 - MICROPANEL
VSD OPERATION & CONTROLS ....................198
VSD Cooling and Cooling Loop ........................200
VSD SAFETIES....................................................204
IBGT Gate Driver (Hardware) Fault ..................207
Power Supply (Hardware) Fault.........................209
UNIT WARNINGS ...............................................212
UNIT SAFETIES ..................................................216
SYSTEM SAFETIES............................................218
STATUS KEY........................................................224
UNIT DATA KEY .................................................228
SYSTEM DATA KEY...........................................230
VSD DATA KEY...................................................234
OPERATING HOURS & START KEYS............236
HISTORY KEY .....................................................237
Unit Data.............................................................239
VSD Data............................................................239
System Data........................................................240
Compressor Operating Hours & Starts...............242
Chilled Liquid & Cooling Setpoints..................242
Options................................................................242
Program Values...................................................243
SETPOINTS KEY.................................................245
PROGRAM KEY ..................................................247
OPTIONS KEY.....................................................250
DATE/TIME & SCHEDULE KEY......................254
Date/Time Key....................................................254
Schedule Key......................................................255
Unit Operating Schedule ....................................256
Sound Limit Schedule ........................................257
MANUAL OVERRIDE KEY ..............................258
PRINT KEY...........................................................259
Operating Data Printout......................................260
History Data Printout..........................................261
SERVICE KEY......................................................262
SYSTEM SWITCHES KEY ................................268
SERIAL NUMBER PROGRAMMING..............269
ENABLING OPTIMIZED HIGH IPLV MODE 271
UNIT SETUP MODE ...........................................272
DEFAULT PROGRAMMABLE VALUES.........274
SERIAL PORT CONNECTIONS........................275
ANALOG INPUT CONNECTIONS...................276
DIGITAL INPUT CONNECTIONS....................278
ANALOG OUTPUT CONNECTIONS ..............280
DIGITAL OUTPUT CONNECTIONS ...............282
ISN COMMUNICATIONS & TRANSMITTED DATA
284
SECTION 9 - MAINTENANCE
R-134A CONVERSION TABLES.......................291
MAINTENANCE..................................................291
General Requirements ........................................291
MAINTENANCE REQUIREMENTS ................292
TROUBLESHOOTING GUIDE .........................294
EVACUATING A SYSTEM.................................296
WARRANTY POLICY.........................................297
New Equipment ..................................................297
Reconditioned or Replacement Materials...........297
All Warranties are VIOD if.................................297
CHILLED LIQUID & SUCTION TEMP
SENSOR INPUT VOLTAGE TABLE.................298
OUTSIDE AIR TEMP SENSOR INPUT
VOLTAGE TABLE ...............................................299
PRESSURE TRANSDUCER OUTPUT
VOLTAGE TABLE ...............................................300
MOTOR TEMPERATURE SENSOR
RESISTANCE TABLE.........................................301
COMPRESSOR MOTOR OVERLOAD SETTINGS
& MAXIMUM VSD FREQUENCY ...................302
PRINTER WIRING ..............................................303
Okidata 184.........................................................304
Weigh-Tronix IMP Model 2600 .........................304
Seiko ...................................................................304
OPERATING LOG ...............................................305
Site and Chiller Info ...........................................305
Programmed Values............................................305
Unit Operating Temperature, Pressures,
& Currents ..........................................................306
System Operating Conditions.............................307
Water System Conditions ...................................308
Condensor Conditions ........................................308
RECOMMENDED SPARE PARTS ....................309
TABLE OF CONTENTS (CONT’D)

8JOHNSON CONTROLS
FORM 201.21-NM1 (1223)
General Chiller Information & Safety
TABLES & FIGURES
Table 1 - Compressors and the Appropriate Jumper
Positions..................................................................168
Table 2 - VSD Logic Board Address Jumper..........168
Table 3 - Maximum Frequency Jumper ..................169
Table 4 - Fuzzy Logic Loading/Unloading
vs. Error...................................................................178
Table 5 - Fuzzy Logic Loading/Unloading
vs. Error...................................................................181
Table 6 - Current Load Limiting/Unloading...........182
Table 7 - Discharge Pressure Load Limiting/
Unloading................................................................182
Table 8 - Suction Pressure Load Limiting/
Unloading................................................................183
Table 9 - VSD Internal Ambient Load Limiting/
Unloading................................................................183
Table 10 - VSD Baseplate Temperature Load
Limiting/Unloading.................................................184
Table 11 - Fan Stages & Corresponding Outputs....189
Table 12 - VSD Operating Display Parameters ......203
Table 13 - Low Dierential Oil Pressure Cutout ...220
Table 14 - Start Inhibit Sensor Thresholds..............222
Table 15 - Sensor Min./Max. Outputs.....................232
Table 16 - Setpoint Limits.......................................246
Table 17 - Programmable Operating Parameters ....249
Table 18 - Printout Types ........................................259
Table 19 - Unit Setup Programmable Values..........272
Table 20 - Serial Port Connections .........................274
Table 21 - Analog Input Connections .....................276
Table 22 - Digital Input Connections......................278
Table 23 - Analog Output Connections...................280
Table 24 - Digital Output Connections ...................281
Table 25 - Mustang Chiller YORK Talk
Control Data............................................................284
Table 26 - DXST/ISN Transmitted Data.................285
Table 27 - Fault Inhibit Codes ................................287
Table 28 - Operational Status Codes.......................289
Table 29 - R-134a Pressure to Saturated
Temperature Conversion.........................................290
Table 30 - Temperature Input Voltage Sensor.........298
Table 31 - Outside Air Temperature Input Voltage .299
Table 32 - Pressure Transducer Input Voltage.........300
Table 33 - Motor Temperature Sensor Resistance ..301
Table 34 - Compressor Motor Overload Settings
& Max. VSD Frequency .........................................302
Fig 1 - PWM Current Waveform ..............................18
Fig 2 - PWM Voltage Waveform...............................18
Fig 3 - Pipework Arrangement..................................32
Fig 4 - Victaulic Groove............................................32
Fig 5 - Flange Attachment.........................................32
Fig 6 - Single Point Power Supply Connection W/
Field Supplied Circuit Protection..............................49
Fig 7 - Single Point Power Supply Connection W/
Optional Factory Circuit Breaker..............................49
Fig 8 - Sample Printout Supplied in the Isolator
Package & Chiller Panel Literature Packet.............124
Fig 9 - Refrigerant Flow Diagram ..........................133
Fig 10 - Processes and Instrumentation ..................134
Fig 11 - Component Locations................................135
Fig 12 - Control and VSD Cabinet Locations.........136
Fig 13 - Chiller Control Board, Relay Boards,
Microgateway, and Optional Circuit Breaker .........137
Fig 14 - Chiller Control Board, Relay Boards, and
Microgateway .........................................................138
Fig 15 - VSD Logic Board......................................139
Fig 16 - VSD Logic Board......................................140
Fig 17 - Power Components ...................................141
Fig 18 - Fan Contactors & 3T Transformers...........142
Fig 19 - VSD Components......................................143
Fig 20 - VSD Components......................................144
Fig 21 - VSD Components......................................145
Fig 22 - Inverter Power Components......................146
Fig 23 - Inverter Power Components......................147
Fig 24 - Inverter Power Components......................148
Fig 24A - Inverter Power Components ...................148
Fig 25 - Glycol Pump & Fill Tube Locations .........149
Fig 26 - Glycol Piping & Fill Tube Locations ........150
Fig 27 - Compressor Components ..........................151
Fig 28 - Chiller Control (Cooling) Range...............172
Fig 29 - Number of Compressors to Start...............173
Fig 30 - Minimum VSD Start Frequency ...............174
Fig 31 - Minimum VSD Run ..................................174
Fig 32 - LED Locations ..........................................186
Fig 33 - Power, Comms LED's ...............................187
Fig 34 - Power, Comms & System Open/Close
LED's ......................................................................187
Fig 35 - Standard IPLV Fan Control.......................190
Fig 36 - High IPLV Fan Control .............................190
Fig 37 - Print Cable Chiller to Serial Printer ..........303

9
JOHNSON CONTROLS
FORM 201.21-NM1 (1223)
1
SECTION 1 - GENERAL CHILLER INFORMATION & SAFETY
INTRODUCTION
YORK YCAV0157-0267 chillers are manufactured to
the highest design and construction standards to ensure
high performance, reliability and adaptability to all types
of air conditioning installations.
The unit is intended for cooling water or glycol solu-
tions and is not suitable for purposes other than those
specied in this manual.
Rigging and lifting should only be done by a profes-
sional rigger in accordance with a written rigging and
lifting plan. The most appropriate rigging and lifting
method will depend on job specific factors, such as the
rigging equipment available and site needs. Therefore,
a professional rigger must determine the rigging and
lifting method to be used, and it is beyond the scope of
this manual to specify rigging and lifting details.
This manual contains all the information required for
correct installation and commissioning of the unit, to-
gether with operating and maintenance instructions. The
manuals should be read thoroughly before attempting
to operate or service the unit.
All procedures detailed in the manuals, including in-
stallation, commissioning and maintenance tasks must
only be performed by suitably trained and qualied
personnel.
The manufacturer will not be liable for any injury or
damage caused by incorrect installation, commission-
ing, operation or maintenance resulting from a failure
to follow the procedures and instructions detailed in
the manuals.
WARRANTY
YORK International warrants all equipment and materi-
als against defects in workmanship and materials for a
period of eighteen months from date of shipment, unless
labor or extended warranty has been purchased as part
of the contract.
The warranty is limited to parts only replacement and
shipping of any faulty part, or sub-assembly, which has
failed due to poor quality or manufacturing errors. All
claims must be supported by evidence that the failure
has occurred within the warranty period, and that the
unit has been operated within the designed parameters
specied.
All warranty claims must specify the unit model, serial
number, order number and run hours/starts. Model and
serial number information is printed on the unit identi-
cation plate.
The unit warranty will be void if any modication to the
unit is carried out without prior written approval from
YORK International.
For warranty purposes, the following conditions must
be satised:
• The initial start of the unit must be carried out by
trained personnel from an Authorized YORK Ser-
vice Center. See Commissioning (Page 36).
• Only genuine YORK approved spare parts, oils,
coolants, and refrigerants must be used. Recom-
mendations on spare parts stocking can be found
on Page 307.
• All the scheduled maintenance operations detailed
in this manual must be performed at the specied
times by suitably trained and qualied personnel.
See Maintenance Section, Page 288-307.
• Failure to satisfy any of these conditions will auto-
matically void the warranty. See Warranty Policy
(Page 295).
SAFETY
Standards for Safety
YCAV chillers are designed and built within an ISO
9002 accredited design and manufacturing organization.
The chillers comply with the applicable sections of the
following Standards and Codes:
• ANSI/ASHRAE Standard 15, Safety Code for Me-
chanical Refrigeration.
• ANSI/NFPA Standard 70, National Electrical Code
(N.E.C.).
• ASME Boiler and Pressure Vessel Code, Section
VIII Division 1.
• ARI Standard 550/590-98, Water Chilling Packages
Using the Vapor Compression Cycle.
• ASHRAE 90.1 Energy Standard for Building Except
Low-Rise Residential Buildings.
• ARI 370 Sound Rating of Large Outdoor Refrigera-
tion and Air Conditioning Equipment.
In addition, the chillers conform to Underwriters Labo-
ratories (U.L.) for construction of chillers and provide
U.L./cU.L. Listing Label.

10 JOHNSON CONTROLS
FORM 201.21-NM1 (1223)
GENERAL CHILLER INFORMATION & SAFETY
RESPONSIBILITY FOR SAFETY
Every care has been taken in the design and manufac-
ture of the unit to ensure compliance with the safety
requirements listed above. However, the individual
rigging, lifting, maintaining, operating or working on
any machinery is primarily responsible for:
• Personal safety, safety of other personnel, and
the machinery.
• Correct utilization of the machinery in ac-
cordance with the procedures detailed in the
manuals.
ABOUT THIS MANUAL
The following terms are used in this document to alert
the reader to areas of potential hazard.
A WARNING is given in this document to identify a
hazard, which could lead to personal injury. Usually an
instruction will be given, together with a brief explana-
tion and the possible result of ignoring the instruction.
A CAUTION identies a hazard which could lead to
damage to the machine, damage to other equipment
and/or environmental pollution. Usually an instruction
will be given, together with a brief explanation and the
possible result of ignoring the instruction.
A NOTE is used to highlight additional information,
which may be helpful to you but where there are no
special safety implications.
The contents of this manual include suggested best
working practices and procedures. These are issued for
guidance only, and they do not take precedence over
the above stated individual responsibility and/or local
safety regulations.
This manual and any other document supplied with the
unit are the property of YORK which reserves all rights.
They may not be reproduced, in whole or in part, without
prior written authorization from an authorized YORK
representative.
MISUSE OF EQUIPMENT
Suitability for Application
The unit is intended for cooling water or glycol solu-
tions and is not suitable for purposes other than those
specied in these instructions. Any use of the equipment
other than its intended use, or operation of the equipment
contrary to the relevant procedures may result in injury
to the operator, or damage to the equipment.
The unit must not be operated outside the design param-
eters specied in this manual.
Structural Support
Structural support of the unit must be provided as in-
dicated in these instructions. Failure to provide proper
support may result in injury to the operator, or damage
to the equipment and/or building.
Mechanical Strength
The unit is not designed to withstand loads or stresses
from adjacent equipment, pipework or structures. Ad-
ditional components must not be mounted on the unit.
Any such extraneous loads may cause structural failure
and may result in injury to the operator, or damage to
the equipment.
General Access
There are a number of areas and features, which may
be a hazard and potentially cause injury when working
on the unit unless suitable safety precautions are taken.
It is important to ensure access to the unit is restricted
to suitably qualied persons who are familiar with the
potential hazards and precautions necessary for safe
operation and maintenance of equipment containing
high temperatures, pressures and voltages.

11
JOHNSON CONTROLS
FORM 201.21-NM1 (1223)
1
Pressure Systems
The unit contains refrigerant vapor and liquid under
pressure, release of which can be a danger and cause
injury. The user should ensure that care is taken during
installation, operation and maintenance to avoid dam-
age to the pressure system. No attempt should be made
to gain access to the component parts of the pressure
system other than by suitably trained and qualied
personnel.
Electrical
The unit must be grounded. No installation or mainte-
nance work must be attempted on the electrical equip-
ment without rst switching power OFF, isolating and
locking-o the power supply. Servicing and mainte-
nance on live equipment must not be attempted. No
attempt should be made to gain access to the control
panel or electrical enclosures during normal operation
of the unit.
Rotating Parts
Fan guards must be tted at all times and not removed
unless the power supply has been isolated. If ductwork is
to be tted, requiring the wire fan guards to be removed,
alternative safety measures must be taken to protect
against the risk of injury from rotating fans.
Sharp Edges
The ns on the air-cooled condenser coils have sharp
metal edges. Reasonable care should be taken when
working in contact with the coils to avoid the risk of
minor abrasions and lacerations. The use of gloves is
recommended.
Frame rails, brakes, and other components may also
have sharp edges. Reasonable care should be taken when
working in contact with any components to avoid risk
of minor abrasions and lacerations.
Refrigerants and Oils
Refrigerants and oils used in the unit are generally non-
toxic, non-ammable and non-corrosive, and pose no
special safety hazards. Use of gloves and safety glasses
is, however, recommended when working on the unit.
The build up of refrigerant vapor, from a leak for ex-
ample, does pose a risk of asphyxiation in conned or
enclosed spaces and attention should be given to good
ventilation.
Use only the refrigerant specifically designated for the
unit. Any other type of refrigerant may cause damage
to the equipment and will void the warranty.
High Temperature and Pressure Cleaning
High temperature and pressure cleaning methods (e.g.
steam cleaning) should not be used on any part of the
pressure system as this may cause operation of the pres-
sure relief device(s). Detergents and solvents, which may
cause corrosion, should also be avoided.
Emergency Shutdown
In case of emergency, the control panel is tted with
a Unit Switch to stop the unit in an emergency. When
operated, it removes the low voltage 120 VAC electri-
cal supply from the inverter system, thus shutting down
the unit.
Generator Operation
The variable speed drive can operate on a generator,
provided that the generator's output voltage can be main-
tained within the voltage specications for the drive.
When switching from utility power to generator power,
a minimum of a 10 second delay must be provided. This
same delay is required when switching power back from
generator power to utility power, unless a synchronized
transfer system is used.

12 JOHNSON CONTROLS
FORM 201.21-NM1 (1223)
Product Description
SECTION 2 - PRODUCT DESCRIPTION
INTRODUCTION
YORK YCAV R134a chillers are designed for water
or glycol cooling. All units are designed to be located
outside on the roof of a building or at ground level.
The units are completely assembled with all intercon-
necting refrigerant piping and internal wiring, ready for
eld installation.
Prior to delivery, the unit is pressure tested, evacuated,
and fully charged with refrigerant and oil in each of the
two independent refrigerant circuits. After assembly,
an operational test is performed with water owing
through the cooler to ensure that each refrigerant circuit
operates correctly.
The unit structure is manufactured from heavy gauge,
galvanized steel. Many external structural parts are
coated with “Champagne” baked-on enamel powder
paint. This provides a nish which, when subjected
to ASTM B117, 1000 hour, 5% salt spray conditions,
shows breakdown of less than 1/8 in. either side of a
scribed line (equivalent to ASTM D1654 rating of “6”).
All exposed power wiring is routed through liquid-tight,
non-metallic conduit.
General System Description
The Latitude (YCAV) Air Cooled Chiller line combines
the best of modern screw compressor design with the
latest technology in variable speed drives. The result is
superior control and eciency in real world conditions.
The VSD enables slowing the speed of the compressor to
match the load on the system resulting in precise chilled
liquid control, minimized sound, maximum energy ef-
ciency, and reduced cost of ownership. The VSD also
provides soft starts with no electrical inrush. The lack
of heat build-up on start also enables required o time
between starts to be reduced to a period of 2 minutes.
The YCAV Air-Cooled Screw Chiller utilizes many
components, which are the same or nearly the same as
a standard screw chiller of a similar size. This includes
modular frame rails, condenser, fans, compressors and
evaporator.
The chiller consists of 2 screw compressors in a corre-
sponding number of separate refrigerant circuits, a single
shell and tube DX evaporator, an air-cooled condenser,
ash tanks, drain/feed valves, oil separators, and com-
pressor muers. Oil separators utilize no moving parts
and are rated for a 405 PSIG design working pressure.
Oil cooling is accomplished by routing oil from the oil
separator through several rows of tubes in the air cooled
condenser.
LD10477

13
JOHNSON CONTROLS
FORM 201.21-NM1 (1223)
2
An integral liquid cooled, transistorized, PWM, Variable
Speed Drive (VSD) is controlled by the chiller micro-
processor control panel to start/stop, select compressors
to run, and select compressor speed. Power Factor is
95% at part or full load.
The chiller microprocessor communicates with the VSD
Logic Board via a 3-wire RS-485 opto coupled data link.
The VSD Logic Board runs the number of compressors
required to meet the load and the compressors to the
speed requested by the chiller microprocessor.
The basic system control architecture is shown in the
diagram below:
The chiller is designed to operate in ambient tempera-
tures of 0°F to 125°F (-18°C to 52°C). Capacity control
is capable of reducing chiller capacity to 10% of full
load without the need for hot gas bypass.
Compressor
The direct drive semi-hermetic rotary twin-screw MTS
compressor is designed for industrial refrigeration ap-
plications and ensures high operational eciencies and
reliable performance. Capacity control is achieved by
stepless VSD speed changes. No slide valve is required.
Smooth capacity control is achieved between 10%
and 100% of chiller capacity in most operating condi-
tions. The compressor is a positive displacement type
characterized by two helically grooved rotors, which
are manufactured from forged steel. The 4 pole motor
operates at speeds up to 6000 RPM to direct drive the
male rotor, which in turn drives the female rotor on a
light lm of oil.
CHILLER CONTROL SYSTEM
INPUTS
COMMUNICATIONS
OUTPUTS
VSD
MOTOR
CONTROL
PANEL
Pressure Transducers
Temperature Sensors
Level Sensor
Switches
Liquid Flow
High Pressure
Start/Stop
Customer Supplied
Contacts
(Chiller Control
Board)
Microprocessor
User Interface
Display
&
Keypad
Building Automation
Printer
Modem
VSD Logic Board
SCR Trigger Board
Power Components
PWM (Speed Control)
(Relay Output
Board)
Solenoids
Contactors
Alarm
Pump
Compressor Heater
Run Status
Evap Heater
Refrigerant gas is injected into the void created by the
un-meshing of the ve lobed male and seven lobed fe-
male rotor. Further meshing of the rotors closes the rotor
threads to the suction port and progressively compresses
the gas in an axial direction to the discharge port. The
gas is compressed in volume and increased in pressure
before exiting at a designed volume at the discharge end
of the rotor casing. Since the intake and discharge cycles
overlap, a resulting smooth ow of gas is maintained.
The rotors are housed in a cast iron compressor hous-
ing precision machined to provide optimal clearances
for the rotors. Contact between the male and female
rotor is primarily rolling on a contact band on each of
the rotor’s pitch circle. This results in virtually no rotor
wear and increased reliability, a trademark of the screw
compressor.
The MTS compressor incorporates a complete anti-
friction bearing design for reduced power input and
increased reliability. Separated, cylindrical, roller bear-
ings handle radial loads. Angular-contact ball bearings
handle axial loads. Together they maintain accurate rotor
positioning at all pressure ratios, thereby minimizing
leakage and maintaining eciency.
LD10478
LD10481
LD10482

14 JOHNSON CONTROLS
FORM 201.21-NM1 (1223)
Product Description
Motor cooling is provided by suction gas from the
evaporator owing across the motor. Redundant over-
load protection is provided using both internal thermistor
and current overload protection on all three phases.
The MTS compressor is lubricated by removing oil from
the refrigerant using an external oil separator. The pres-
surized oil is then cooled in the condenser coils and piped
back to the compressor through a removable 0.005”
mesh screen oil lter to provide compressor lubrication.
The cast iron compressor housing design working pres-
sure is 450 PSIG (31 bar). Each chiller receives a 300
PSIG (21 bar) low side and a 450 PSIG (31 bar) high side
factory test. A 350 Watt (115-1-60 Hz) cartridge heater
is located in the compressor. The heater is temperature
activated to prevent refrigerant condensation.
The following items are also included:
• Acoustically tuned, external discharge muer to
minimize noise, while optimizing ow for maxi-
mum performance.
• Discharge shuto valve.
• Rain-tight terminal box.
• Suction gas screen within the compressor hous-
ing.
Evaporator
The system uses a high-eciency Shell and Tube type
Direct Expansion Evaporator. Each of the two (2) refrig-
erant circuits consists of two (2) passes with the chilled
liquid circulating back and forth across the tubes from
one end to the other.
The design working pressure of the cooler on the shell
side is 150 PSIG (10 bar), and 235 PSIG (16 bar) for
the tube (refrigerant) side. The evaporator is constructed
and tested in accordance with applicable sections of the
ASME Pressure Vessel Code, Section VII, Division (1).
Waterside exempt per paragraph U-1, c, (6).
The water baes are fabricated from galvanized steel
to resist corrosion. Removable heads are provided for
access to internally enhanced, seamless, copper tubes.
Water vent and drain connections are included.
The cooler is equipped with a thermostatically controlled
heater for protection to -20°F (-29°C) ambient and insu-
lated with 3/4” (19 mm) exible closed-cell insulation.
The water nozzles are provided with grooves for
mechanical couplings and should be insulated by the
contractor after pipe installation.
A 300 PSIG (20.7 bar) waterside design working pres-
sure option is available.
2 compressor chillers utilize a typical 2-pass “E” type
evaporator with liquid inlets and suction outlets at the
same end. Entering chilled liquid enters the refrigerant
liquid inlet end of the cooler and leaving chilled liquid
exits at the opposite end.
3 and 4 compressor chillers utilize a single pass “J”
type evaporator with liquid inlets at one end and suction
outlets at the opposite end. Entering chilled liquid is
split and half ow enters at each end of the evaporator
with leaving chilled liquid exiting in the center of the
evaporator. “J” type evaporators have fewer, longer
tubes than a comparable “E” type. This results in a
smaller diameter, longer shell. Water ow rate internally
in the evaporator is ½ of the total loop ow rate since
the ow is split between two inlets. This results in a
low evaporator water pressure drop.
Condenser
The n and tube condenser coils are manufactured
from seamless, internally enhanced, high-condensing
coecient, corrosion-resistant copper tubes arranged
in staggered rows and mechanically expanded into cor-
rosion resistant aluminum alloy ns with full height n
collars. The condensor has a design working pressure
of 450 PSIG (31 bar).
Multiple, standard low sound, high eciency, TEAO
motor driven fans move air through the coils. They are
dynamically and statically balanced, direct drive with
corrosion-resistant glass ber reinforced composite
blades molded into low-noise, full airfoil cross sec-
tions, providing vertical air discharge from extended
orices for eciency and low sound. Fans or pairs of
fans are located in a separate compartments separated
by "V" panels to prevent cross ow during fan cycling.
Guards of heavy-gauge, PVC-coated galvanized steel
are provided.
The standard fan motors are high-eciency, direct drive,
6-pole, 3-phase, Class- “F,” current overload protected,
totally enclosed (TEAO) type with double-sealed, per-
manently lubricated ball bearings.

15
JOHNSON CONTROLS
FORM 201.21-NM1 (1223)
2
Flash Tank Feed Valve/Drain Valves
A Flash Tank is tted to both refrigerant circuits. The
Flash Tank is a shell type refrigerant reservoir designed
to sustain 2 phase refrigerant. The purpose of the Flash
Tank is to increase the eciency of the system. A
portion of the liquid fed into the Flash Tank gases o,
cooling the remaining liquid in the tank another 25-35°F.
Both liquid and gas exist in the ash tank. The refriger-
ant gas in the ash tank is fed to the economizer port on
the compressor at a point on the rotors approximately
1.7X suction when the economizer solenoid is activated.
The liquid in the tank is fed to the evaporator.
The vapor feed to the economizer port of the compres-
sor is at an intermediate pressure between discharge
and suction (1.7 x suction) and therefore little energy
is required to pump it back through the compressor to
condenser pressure. This results in a very small loss to
system eciency.
The design working pressure of the ash tank is 450
PSIG (31 bar). The Drain and Feed Valves on the ash
tank are activated on start-up. The Feed Valve on the
Flash Tank acts like a liquid line solenoid, but also func-
tions to control the liquid level in the ash tank. The
Drain Valve functions similar to an electronic expan-
sion valve (EEV). The Drain Valve controls refriger-
ant ow to the evaporator based on suction superheat.
Both valves are stepper motor valves. An economizer
solenoid is placed between the ashtank and the econo-
mizer port of the compressor. The economizer solenoid
valve is generally activated at speeds above 90-120 Hz,
depending upon a number of other factors.
Both valves are controlled by 2 phase drive signals from
a stand-alone controller in the Control Cabinet. Signals
from sensors such as suction pressure and temperature
are sent to the Chiller Control Board, which in turn sends
control signals to the Drain and Feed Valve Controller.
The control algorithm in the Chiller Control Board will
attempt to control the liquid level in the ash tank to
35% on the level sensor and the system will fault if the
ash tank level exceeds 87.5%.
During operation, it will be noted the ash tank level
will typically remain between 30-40% level when the
economizer solenoid is ON. The economizer solenoid
valve will typically be on most of the time. When the
economizer solenoid is OFF, the liquid level will vary
greatly as the Drain and Feed Valves directly aect the
level as they open and close.
Oil Separator/Oil System
The external oil separators, with no moving parts and
designed for minimum oil carry-over, are mounted in
the discharge line of the compressor. The high pressure
discharge gas is forced around a 90 degree bend. Oil is
forced to the outside of the separator through centrifugal
action and captured on wire mesh where it drains to the
bottom of the oil separator and is then forced into the
condensor.
The oil (YORK “L” oil – a POE oil used for all refriger-
ant applications), ows from the oil separator, through
the condenser where it is cooled, and back into the com-
pressor through a replaceable 0.5 micron oil lter at high
pressure. This high pressure “oil injection” forces the oil
into the compressor, where it is fed to the bearings and
rotors for lubrication. After lubricating the bearings, it is
injected through orices on a closed thread near the suc-
tion end of the rotors. The oil is automatically injected
because of the pressure dierence between the discharge
pressure and the reduced pressure at the suction end of
the rotors. This lubricates the rotors as well as provides
an oil seal against leakage around the rotors to ensure
refrigerant compression eciency.
The oil also provides cooling by transferring much of
the heat of compression from the gas to the oil, keeping
discharge temperatures down and reducing the chance
for oil breakdown. Oil injected into the rotor cage
ows into the rotors at a point about 1.2x suction. This
ensures that a required minimum dierential of at least
30 PSID exists between discharge and 1.2x suction, to
force oil into the rotor case. A minimum of 10 PSID
(0.6 bar) is all that is required to ensure protection of
the compressor. The oil pressure safety is monitored as
the dierence between suction pressure and the pressure
of the oil entering the rotor case.
Maximum working pressure of the oil separator is 450
PSIG (31 bar). Oil level should be above the midpoint
of the “lower” oil sight glass when the compressor is
running. Oil level should not be above the top of the
“upper” sight glass.
Relief Valves
Two relief valves are installed in each refrigerant circuit.
A 325 PSIG relief valve is located on each Flash Tank
and a 250 PSIG relief valve is located on the suction
line of the compressor near the evaporator.

16 JOHNSON CONTROLS
FORM 201.21-NM1 (1223)
Product Description
Oil Cooling
Oil cooling is provided by routing oil from the oil sepa-
rator through several of the top rows of the condenser
coils and back to the compressor.
Capacity Control
When cooling is needed, one or more compressors,
as determined by the system microprocessor based on
deviation from setpoint, will start at minimum speed
with low inrush current. Variable speed operation of
the compressor reduces the capacity and allows smooth
balancing of the compressor capacity with the cooling
load.
Capacity control is accomplished by varying the number
of compressors and the speed of the compressors with
the VSD to promote stable, smooth, and precise load-
ing/unloading.
Hot Gas Bypass is not required with VSD control of
the compressors.
The chiller is available with Standard IPLV or High IPLV
software (EPROM). High IPLV software optimizes the
performance of the chiller capacity and fan controls.
High IPLV chillers also require additional factory
programming.
Power and Control Panel
All controls and the VSD are factory-wired and function
tested. The panel enclosures are designed to NEMA 3R
(IP65) rating and are manufactured from powder-painted
steel with hinged, latched, and gasket sealed outer doors
with wind struts for safer servicing.
The Power and Micro Control Panels are combined into
a single control/power cabinet and include Compressor
VSD Controls, Chiller Microprocessor Controls, Fan
Controls, and all other chiller controls.
The Display and Keypad are accessible through an
access door without opening the main doors to the
electrical cabinet.
Each Power Compartment Contains
Incoming single point power is standard utilizing either
a lockable circuit breaker or terminal block, 115VAC
control transformer, VSD, fan contactors, ON/OFF
unit switch, microcomputer keypad and display, Chiller
Control and VSD Logic boards, and relay boards.
Current transformers sense each phase of motor current,
and send corresponding signals to the Chiller Logic
Board. Current monitoring protects the compressor
motors from damage due to: low motor current, high
motor current, short circuit current, single phasing, and
compressor overload.
Short Circuit Withstand Rating of the chiller electrical
enclosure is 30,000 Amps for standard terminal block
connection. Ratings are in accordance with UL508C.
A Circuit Breaker Option can be added to increase the
Short Circuit Withstand Rating to 200/230V = 100,000
Amps, 380/460 V = 65,000 Amps, and 575V = 42,000
Amps.
Microprocessor and VSD Controls
Microprocessors on the Chiller Control Board and
VSD Logic Board control starting, stopping, loading,
unloading, safeties, and chilled liquid temperature
control. Chilled liquid control decisions are a function
of temperature deviation from setpoint and the rate of
change of temperature.
The standard controls include: brine chilling, thermal
storage, run signal contacts, unit alarm contacts, chilled
liquid pump control, automatic reset after power fail-
ure, automatic system optimization to match operating
conditions.
Remote cycling, optional current limiting, optional
temperature setpoint reset, and optional remote sound
limit can be accomplished by connecting user-supplied
signals to the microprocessor.
Unit operating software is stored in non-volatile
memory. Field programmed setpoints are retained in
lithium battery backed real time clock (RTC) memory
for 10 years.

17
JOHNSON CONTROLS
FORM 201.21-NM1 (1223)
2
Display
The display consists of a liquid crystal 2 line by 40
characters per line display, with backlighting for outdoor
viewing of operating parameters and program points.
Parameters are displayed in 5 languages in either Eng-
lish (°F and PSIG) or Metric (°C and Bars) units, and for
each circuit, the following items can be displayed:
• Entering and leaving chilled liquid, and ambient
temperature.
• Day, date and time. Daily start/stop times. Holiday
and Manual Override status.
• Compressor operating hours and starts. Automatic or
manual lead/lag. Lead compressor identication.
• Run permissive status. Compressor run status.
• Anti-recycle timers.
• System suction (and suction superheat), discharge
(and discharge superheat), and oil pressures and
temperatures.
• Percent full load compressor motor current and
average motor current. Compressor motor speed
(frequency).
• Cutout status and setpoints for: supply chilled liquid
temperature, low suction pressure, high discharge
pressure and temperature, high oil temperature, low
ambient, and low leaving liquid temperature.
• Unloading limit setpoints for high discharge pres-
sure and compressor motor current.
• Status of: evaporator heater, condenser fans, load/
unload timers, and chilled water pump.
• “Out of range” message.
• Up to 10 fault shutdown histories.
Keypad
An operator keypad allows complete control of the
system from a central location. The keypad utilizes
an overlay to allow use in 5 languages. The keypad is
a color-coded, 36 button, sealed keypad with keys for
Display, Entry, Setpoints, Clock, Print, Program, Unit
ON/OFF and other functions. Details on a few of the
keys follow.
Status – Allows viewing present unit or system status
displayed by the microprocessor.
Entry – Numeric keypad and supporting keys used to
conrm Setpoint changes, cancel inputs, advance day,
and change AM/PM.
Setpoints – For setting chilled liquid temperature,
chilled liquid range, remote reset temperature range.
Date/Time – Used to set time, daily or holiday start/stop
schedule, manual override for servicing, and sound
limiting schedule.
Print – Used to display or print operating data or sys-
tem fault shutdown history for last ten faults. Printouts
are generated through an RS-232 port via a separate
printer.
Program – For setting low leaving liquid temperature
cutout, average motor current limit, and pulldown de-
mand limit.
Displays are also provided for programming low am-
bient cutout, low suction pressure cutout, superheat
setpoint, etc., under the PROGRAM key.
Unit Switch
A master unit switch allows activation or de-activation
of the chiller system. Separate system switches for con-
trolling each system are provided as part of the chiller
control panel keypad.

18 JOHNSON CONTROLS
FORM 201.21-NM1 (1223)
PRODUCT DESCRIPTION
The power section of the drive is composed of four
major blocks consisting of an AC to DC rectier section
with accompanying pre-charge circuit, a DC link lter
section, a three phase DC to AC inverter section, and
an output suppression network.
The AC to DC rectier utilizes a semi-converter formed
by the connection of three SCR/diode modules (1SCR-
3SCR) in a three phase bridge conguration. The mod-
ules are mounted on a liquid cooled heatsink. Use of the
semi-converter conguration permits implementation
of a separate pre-charge circuit to limit the ow of cur-
rent into the DC link lter capacitors when the drive is
switched on and it also provides a fast disconnect from
the power mains when the drive is switched o. When
the drive is turned o, the SCRs in the semiconverter
remain in a non-conducting mode and the DC link lter
capacitors remain uncharged. When the drive is com-
manded to run, the DC link lter capacitors are slowly
charged via the semi-converter. The SCR’s are then
gated fully on.
Three power fuses (1FU - 3FU), an optional circuit
breaker (1SW) and a standard 5% impedance minimum
3 phase line reactor connect the AC to DC converter to
the incoming power. Very fast semiconductor power
fuses are utilized to ensure that the SCR/diode module
packages do not rupture if a catastrophic failure were to
occur on the DC link. The SCR Trigger board provides
the gating pulses for the SCR’s as commanded by the
VSD Logic board.
The DC Link lter section of the drive consists of a
group of electrolytic lter capacitors (C1-C6). This ca-
pacitor bank eectively smooths the ripple voltage from
the AC to DC rectier while simultaneously providing a
large energy reservoir for use by the DC to AC inverter
section of the drive. In order to achieve the required
voltage capability for the capacitor portion of the lter,
lter capacitor “banks” are formed by connecting two
groups of parallel capacitors in series to form a capaci-
tor “bank”. In order to assure an equal sharing of the
voltage between the series connected capacitors and to
provide a discharge means for the capacitor bank when
the VSD is powered o, “bleeder” resistors (1RES and
2RES) are connected across the capacitor banks.
The DC to AC inverter section of the VSD serves to
convert the rectied and ltered DC back to AC at the
magnitude and frequency commanded by the VSD Logic
board. The inverter section is actually composed of two
to four identical inverter output phase assemblies. These
assemblies are in turn composed of 3 pairs of Insulated
FIG. 2 - PWM VOLTAGE WAVEFORM LD10480
Variable Speed Drive (VSD)
The VSD (variable speed drive) is a liquid cooled, tran-
sistorized, PWM inverter, which provides speed control
to vary the speed of 2, 3 or 4 compressor motors. The
VSD changes the duration of the voltage pulses supplied
to the motor to enable control of compressor speed to
match the system load. A PWM generator, on the VSD
Logic Board, with a switching frequency of 3125 Hz
modulates the voltage signal to provide a relatively
pulses constant V/F ratio. In some cases, the V/F ratio
is slightly modied to provide additional torque to the
motor. Sample 3 phase current waveforms are shown
in FIG. 1 to show the sinusoidal characteristics of the
current drawn by the compressor motors.
C1 Freq
128.30 Hz
Unstable
histogram
C1 Max
41.2mV
C1 Min
-42.0mV
C1 CycRMS
24.80mV
Unstable
histogram
10 Aug 2004
09:58:18
FIG. 1 - PWM CURRENT WAVEFORM
LD10479
A Sample PWM voltage waveforms is shown in FIG.
2. The pulses near the sides of the rectangular groups
of waves are notably narrower, representing the lower
voltage of a sinusoidal waveform as it rises or falls from
the “0” crossing.

19
JOHNSON CONTROLS
FORM 201.21-NM1 (1223)
2
Gate Bipolar Transistor (IGBT) modules mounted to a
liquid cooled heatsink, and a IGBT Gate Driver Board,
which provides the On and O gating pulses to the
IGBT’s as determined by the VSD Logic board. In
order to minimize the parasitic inductance between the
IGBT’s and the capacitor banks, copper plates, which
electrically connect the capacitors to one another and to
the IGBT’s are connected together using a “laminated
bus” structure.
This “laminated bus” structure is a actually composed of
a pair of copper bus plates with a thin sheet of insulating
material acting as the separator/insulator. The “lami-
nated bus” structure forms a parasitic capacitor, which
acts as a small valued capacitor, eectively canceling
the parasitic inductance of the bus bars themselves. To
further cancel the parasitic inductances, a series of small
lm capacitors are connected between the positive and
negative plates of the DC link.
The VSD output suppression network is composed of
a series of capacitors and resistors connected in a three
phase delta conguration. The parameters of the sup-
pression network components are chosen to work in
unison with the parasitic inductance of the DC to AC
inverter sections in order to simultaneously limit both the
rate of change of voltage and the peak voltage applied to
the motor windings. By limiting the peak voltage to the
motor windings, as well as the rate-of-change of motor
voltage, we can avoid problems commonly associated
with PWM motor drives, such as stator-winding end-turn
failures and electrical uting of motor bearings.
The VSD is cooled by a propylene glycol cooling
loop. The loop utilizes a glycol pump, which pumps
glycol through the VSD heatsinks to cool the power
components. The glycol is then circulated through the
condenser to reject the heat from the VSD. The cooled
glycol is then circulated back through the loop.
Various ancillary sensors and boards are used to send
information back to the VSD Logic board. Each IGBT
Power Module within the DC to AC inverter section con-
tains a thermistor heatsink temperature sensor to provide
temperature information to the VSD logic board. The
Bus Isolator board utilizes three resistors on the board
to provide a “safe” impedance (resistance) between the
DC link lter capacitors located on the output phase
bank assemblies and the VSD logic board. It provides
the means to sense the positive, midpoint and negative
connection points of the VSD’s DC link without apply-
ing high voltage to the VSD Logic Board. A Current
Transformer is included on each output phase assembly
to provide motor current information to the VSD logic
board.
ACCESSORIES AND OPTIONS
Single Point Circuit Breaker
A single-point supply circuit with factory provided
circuit breaker protection with lockable external handle
located in the panel.
Building Automation System (BAS) Interface
Provides a means to reset the leaving chilled liquid
temperature or percent full load amps (current limiting)
from a BAS Interface.
The chiller microprocessor board will accept a 4 to
20mA or 0 to 10VDC input from an ISN or BAS.
The chiller is also capable of accepting an RS-485 com-
munications link through the Microgateway.
Condenser Coil Protection
The standard condenser coils have aluminum ns, cop-
per tubes, and galvanized steel supports for generally
adequate corrosion resistance. However, these materials
are not adequate for all environments.
The following options provide added protection:
Black n condenser coils – Condenser coils con-
structed using black epoxy-coated aluminum n stock
for corrosion-resistance for typical seashore locations
(not directly exposed to salt spray).
Copper n condenser coils – Coils constructed with
corrosion-resistant copper ns. Not recommended in
areas where units may be exposed to acid rain.
Epoxy Coated Condenser Coils – Completed
condenser coil assemblies are covered with a cured
epoxy coating. Probably the most suitable selection
for seashore locations where salt spray may come into
contact with the ns, and other corrosive applications
except: strong alkalis, oxidizers, and wet bromine,
chlorine, and uorine in concentrations greater than
100 PPM.

20 JOHNSON CONTROLS
FORM 201.21-NM1 (1223)
PRODUCT DESCRIPTION
DX COOLER OPTIONS
300 PSIG (21 bar) Waterside Design Working Pressure
– The DX cooler waterside is designed and constructed
for 300 PSIG (21 bar) working pressure.
(Factory-mounted)
1-1/2” (38 mm) Insulation – Double-thickness insulation
provided for enhanced eciency.
Flange Accessory – Consists of raised face anges to
convert grooved water nozzles to anged cooler connec-
tions. Includes companion anges for eld mounting.
Remote DX Cooler – Includes the main condensing unit
less the cooler, refrigerant and liquid line devices. The
insulated cooler and eld accessory kits per refrigerant
circuit are supplied separately. The condensing unit is
shipped with a dry nitrogen holding charge and the cooler
is shipped with a dry nitrogen holding charge.
Flow Switch Accessory – Johnson Controls model
F61MG-1C Vapor-proof SPDT, NEMA 4X switch, 150
PSIG (10 bar) DWP, -20°F to 250°F (-29°C to 121°C),
with 1” NPT (IPS) connection for upright mounting in
horizontal pipe or equivalent. A ow switch must be eld-
installed with each unit. A 300PSIG (20.7 bar) optional
ow switch is available.
SERVICE VALVE OPTION
Suction Service Valve – Provides a suction and econo-
mizer service valve on each refrigerant circuit.
UNIT ENCLOSURES
Wire Enclosure – Heavy-gauge welded wire mesh
guards mounted on the exterior of the unit (Factory- or
eld-mounted).
Louvered Panels and Wired Guards – Louvered pan-
els mounted over the exterior condenser coil faces, and
heavy-gauge welded wire mesh guards mounted around
the bottom of the unit (Factory- or eld-mounted).
Louvered Panels (Condenser Coils Only) – Louvered
panels are mounted over the exterior condenser coil faces
on the sides of the unit to visually screen and protect the
coils (Factory- or eld-mounted).
Louvered Panels (Full Unit) enclosure – Louvered
panels over condenser coils and around the bottom of
the unit (Factory- or eld-mounted).
FANS
High Static Fans: Fans and motors suitable for High
External Static conditions to 100 Pa.
SOUND REDUCTION OPTIONS
Silent Night – This option allows speed limiting of the
compressors remotely or locally to reduce acoustic
noise. As speed is limited, fewer condenser fans are needed
for cooling, reducing noise.
Ultra Quiet Fans – Reduced RPM fan motors and
alternative fan selection for low noise applications.
Compressor Blankets – Acoustic compressor sound
blankets are optional to reduce compressor noise.
Acoustic Perimeter Enclosures (field mounted)
– Perimeter enclosure option provides acoustically
tuned panels around the bottom of the chiller to reduce
noise.
VIBRATION ISOLATION
Neoprene Pad Isolation – Recommended for normal
installations (Field-mounted).
1” (25 mm) Spring Isolators – Level adjustable,
spring and cage type isolators for mounting under the
unit base rails (Field-mounted).
2” (51 mm) Seismic Spring Isolators – Restrained
Spring-Flex Mountings incorporate welded steel hous-
ing with vertical and horizontal limit stops. Housings
designed to withstand a minimum 1.0 g accelerated
force in all directions to 2” (51 mm). Level adjustable,
deection may vary slightly by application (Field-
mounted).
This manual suits for next models
7
Table of contents
Other York Chiller manuals

York
York YB User manual

York
York YLAA0041 User manual

York
York Millenium YK D Series User manual

York
York Millennium YCAS 316 Owner's manual

York
York YVAA Style A Owner's manual

York
York YMC2 Installation guide

York
York YK User manual

York
York YD Quick start guide

York
York HFC-134A User manual

York
York YMC2 User manual
Popular Chiller manuals by other brands

Dunham-Bush
Dunham-Bush WCFX-E Series manual

Trane
Trane CenTraVac CDHH Installation, operation and maintenance

Remco
Remco KWE Eco Series Assembly and operating instructions

AERMEC
AERMEC NRW Series Technical and Installation Booklet

EVEREST REFRIGERATION
EVEREST REFRIGERATION EGC65 owner's manual

Polar Electro
Polar Electro U-Serie instruction manual