MeridianSystems 9
Zoning Design Guide
036-21478-001 Rev. A (0802)
General
Even though there are some similarities between zone
control systems and Variable Air Volume (VAV) sys-
tems, there are some major differences. In many cases
systems will be called VAV when in fact they are really
a zoning system or are referred to as a zoning system
when they are really a VAV system. Always make sure
that you do not try to adapt a zoning system to a VAV
design system. Understanding the differences will help
you to prevent misapplication of the Meridianzoning
system. In the paragraphs that follow we will try to ex-
plain the differences, advantages and disadvantages of
each and explain their operation.
VAV Systems
These systems consist of an HVAC unit that is gener-
ally a cooling only unit and VAV terminal units located
in the downstream ductwork that are used to control
the amount of constant temperature air delivered to the
various building zones. Sometimes the HVAC unit may
have gas or electric heat, but it is typically sized and
appliedformorning warm-uppurposes.The HVAC unit
is designed to vary the volume of air that is supplied to
the duct system by using either inlet vanes or an elec-
tronic variable frequency drive. These devices modu-
late to control the air flow through the supply fan in
response to the static pressure in the duct system. VAV
systems typically use high velocity VAV terminal units
to distribute the air to the zones. As the various VAV
terminal units in the different zones open and close to
supply the constant temperature air to the spaces, the
HVAC unit varies the volume of constant temperature
air based on the static pressure in the ductwork. The
HVAC unit is designed to maintain a constant cold sup-
ply air temperature regardless of the air flow volume in
the system. The HVAC unit cycles it’s cooling stages to
maintain a constant predetermined supply air tempera-
ture. It typically runs continuously based on a sched-
ule. For perimeter zones requiring heat, reheat coils
(electric or hot water) located in the terminal units are
used to supply heated air to the space. Many times fan
powered terminal boxes are used and in many cases
also incorporate electric or hot water heating coils to
provide perimeter zone heating. In summary a true VAV
system uses a variable volume fan supplying constant
temperature air to the system with variable volume ter-
minal units used to control the volume of constant tem-
perature air delivered to the space. Generally these sys-
tems use pressure independent damper control.
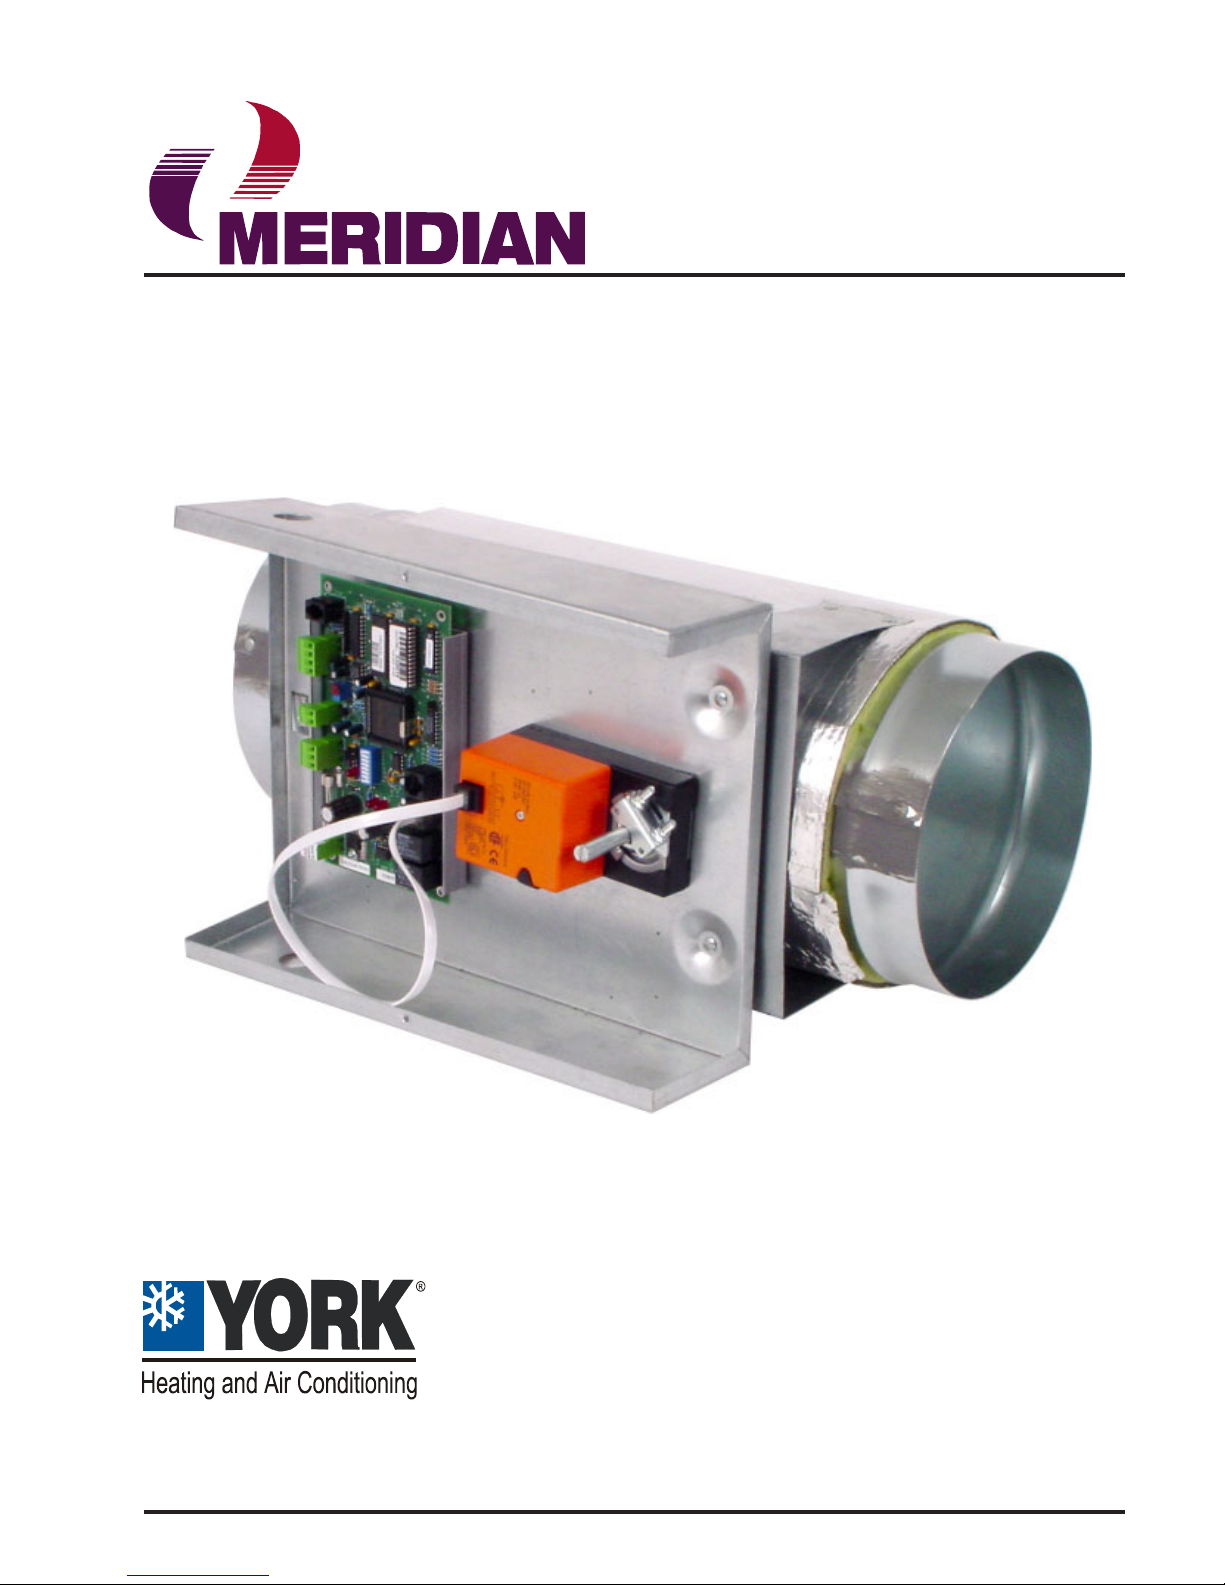
Zoning Systems Versus True VAV Systems
Meridian
Systems
The Meridianzoning system is completely different
in operation and design from the VAV system previ-
ously discussed. One of the major differences between
the zoning system and a true VAV system is that the
HVAC unit used on a zoning system utilizes a constant
volume fan.Air volume control of the zoning system is
achieved by bypassing air from the HVAC unit supply
duct back into the HVAC unit return air duct on the unit
inlet. This bypass air is controlled based on a static pres-
sure sensor located in the supply air duct downstream
of the unit supply air discharge. The bypass damper
modulates open and closed based on the static pressure
in the duct. The temperature at the HVAC unit discharge
varies in relation to the demand from the zones. Typi-
cally the HVAC units used for the zoning system will
have both heating and cooling capabilities. The fan sup-
plies a constant volume of cold or hot air to the duct
system which is then fed to the individual zones by
modulating zone dampers. Each zone controller relays
its heating or cooling demand to the HVAC unit con-
troller. The HVAC unit controller determines its mode
of operation (heating, cooling or vent mode) depend-
ing on the demand from the zone controllers. The unit
controller utilizes a voting system to determine the cor-
rectmodeof operation.Each zonecontrollerdetermines
(based on its heating and cooling setpoints) whether or
not to use the air being supplied by the HVAC unit. For
example, one of the zones is calling for cooling when
the temperature in the duct is above the zones cooling
setpoint. This zone will move to its minimum cooling
position to prevent warm air being introduced into the
space. With the zoning system the zone dampers are
generally pressure dependent. Pressure independent
operation is available but is not very common. Reheat
and/or fan powered terminal units can be used but aren’t
commonly part of the typical zoning system.
Conclusion
In many cases VAV systems go over budget because of
the increased cost of a VAV, HVAC unit and the expen-
sive VAV controls associated with the system. Many
times the system can be redesigned to a zoning system
using Meridiancontrols with a significant cost sav-
ings and equal or better performance and comfort than
the VAV system would provide. Be sure to follow the
instructions in this design guide for your zoning sys-
tem.