manuals.online logo
Brands
  1. Home
  2. •
  3. Brands
  4. •
  5. Yudian
  6. •
  7. Temperature Controllers
  8. •
  9. Yudian AI-508 Technical manual

Yudian AI-508 Technical manual

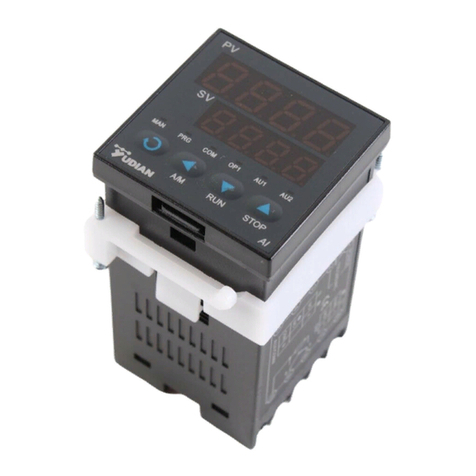
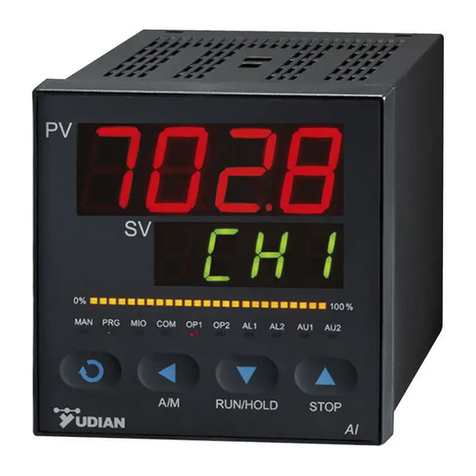
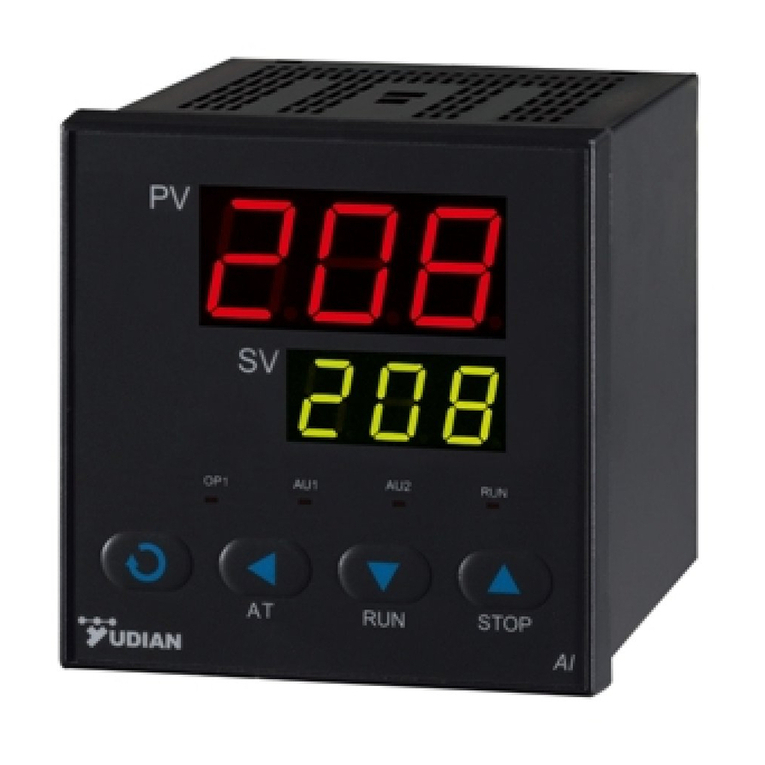
AI-508 ARTIFICIAL INTELLIGENCE TEMPERATURE CONTROLLER
Operation Instruction Version 7.0
GENERAL
AI-508, an economical and easy operated model of Yudian artificial intelligent industry controller, is specially designed for use in the industries of plastic
machinery, food machinery, packaging machinery, baking machinery and environmental testing equipment. It features:
● Application of artificial intelligence control algorithm with auto tuning function, avoiding the overshoot problem of standard PID algorithm and
achieving precise control.
● Multiple thermocouples and RTDs are selectable. Integrated non-linear graduation tables, digital calibration and auto zero technology, and
achieving accurate and stable measurement.
● Advanced modular structure, conveniently providing various outputs options, and making quick delivery and easy maintenance.
● universal 100~240VAC power supply.
● ISO9001, ISO14001 and CE certified, achieving world class level of quality, anti-interference ability and safety.
MODEL CODE SYMBOL
The type of AI-508T is made up of 5 parts, for example:
AI-508
A G L2 L2
①②③④⑤
①shows the basal function of instrument
AI-508 economical artificial intelligence temperature controller
②shows the front panel dimension :
A Front panel 96×96mm(width×height), cut out 92×92mm, depth behind mounting surface 100mm
D Front panel 72×72mm(width×height), cut out 68×68mm, depth behind mounting surface 95mm
D2 Front panel 48×48mm(width×height), cut out 45×45mm, depth behind mounting surface 95mm
E Front panel 48×96mm(width×height), cut out 45×92mm, depth behind mounting surface 100mm
F Front panel 96×48mm(width×height), cut out 92×45mm, depth behind mounting surface 100mm
③shows the module types of main output. Selectable modules are as follows:
L1 Relay output module (Capacity: 2A/250VAC, normally open terminal can absorb electrical spark)
L4 Relay output module (Capacity: 2A/250VAC, small volume, normally open terminal can absorb electrical spark)
G SSR voltage output module (30mA/12VDC)
W1 TRIAC no contact normally open discrete output module, suitable for AC contactors up to 80A, and has low interference and long life.
K1 Single phase thyristor zero crossing trigger output module. (can trigger three-phase of TRIAC, a pair of inversely parallel connected SCRs or
TRIAC power module of current 5-500A)
K3 Three phases Thyristor zero crossing trigger output module. (can trigger three-phase of TRIAC, a pair of inversely parallel connected SCRs
or TRIAC power module of current 5-500A)
④ shows the module type of alarm output. Selectable modules are as follows:
N (or none) no module installed
L1 Relay contact output module (Capacity: 2A/250VAC, normal open terminal can absorb spark, support AL1 alarm output)
L2 Relay contact output module (Capacity: 1A/250VAC, small volume, support AL1 alarm output)
L5 Output module of dual normal open relay output (Capacity: 2A/250VAC, support AL1 and AL2 alarm output)
⑤shows the module type of Auxiliary output (AUX). Selectable modules are as follows:
N (or none) no module installed
L1 Relay contact output module (Capacity: 2A/250VAC, normal open terminal can absorb spark, support AU1 alarm output)
L2 Relay contact output module (Capacity: 1A/250VAC, small volume, support AU1 alarm output)
L5 Output module of dual normal open relay outputs(Capacity: 2A/250VAC, support AU1 and AU2 alarm output)
Note1: For instrument of dimension D2, because of its limited volume, when L1 or L5 module is installed in the ALM socket, L1 can’t be installed in the
OUPT socket, but L4, which is smaller, can be installed instead.
Note2: K3 can’t be installed in instruments with dimension D or D2. There is no ALM socket in D2 instruments. L5 module can’t be installed in the
ALM socket of instrument with dimension D.
2
TECHNICAL SPECIFICATION
●Input type : K, S, R, E, J, N, Pt100
● Measurement range : K(0~1300℃), S(0~1700℃), R(0~1650℃), E(0~800℃), J(0~1000℃), N(0~1300℃), Pt100(-200~600℃)
●Measurement accuracy : 0.3%FS±1℃
●Temperature display resolution : 1℃
● Control mode : On-off control mode or Artificial Intelligence control with auto tuning.
●Output mode (modularized) : L1, G, W1, K1, K3 modules are selectable
●Alarm function : High limit and deviation high alarm.
●Power supply voltage rating : 100-240VAC, -15%, +10% ; 50-60Hz.
●Power consumption : ≤3W.
● Ambient : Temperature of -10~60℃, humidity of 0~90RH%
FRONT PANEL AND OPERATION
① Upper display window, displays PV, or code of a parameter
② Lower display window, displays SV, alarming code, or value of a parameter
③ Setup key, for accessing parameter table, and confirming change.
④ Data shift key, also for activating auto turning
⑤ Data decrease key
⑥ Date increase key
⑦Indicator lamps (MIO, OP1, OP2, AL1, AL2, AU1and AU2 indicate the I/O actions
of the corresponding modules. MAN and PRG are non-applicable for AI-508.)
Basal display status : When power on, the upper display window of the instrument
shows the process value (PV), and the lower window shows the setpoint (SV). This
status is called basal display status. When the input signal is out of the measurable
range (for example, the thermocouple or RTD circuit is break, or input specification sets
wrong), the upper display window will alternately display “orAL” and the high limit or the
low limit of PV, and the instrument will automatically stop output.
OPERATION DESCRIPTION
● Set Value Setting:
In basal display status, if the parameter lock “Loc” isn't locked, we can set setpoint (SV) by pressing 、or . Press to
decrease the value, to increase the value, and to move to the digit expected to modify. Keep pressing or , the speed of
decreasing or inscreasing value gets quick. The maximum value of the setpoint is HIAL.
●Parameter Setting:
In basal display status, press and hold for about 2 seconds can access Field Parameter Table. Pressing can go to the next parameter;
pressing 、or can modify a parameter. Press and hold can return to the preceding parameter. Press (don't release)
and then press simultaneously can escape from the parameter table. The instrument will escape auomatically from the parameter table if no
key is pressed within 30 seconds.
●Artificial Intelligence control and auto tuning
When AI control method is chosen, the control parameters can be obtained by running auto-tuning. At the first time of running auto-tuning, in
basic display status, press for 2 seconds, “At” will flash at lower display window and the instrument executes on-off control. After 2 to 3
cycles of on-off action, the instrument will obtain the values of PID control parameters. If you want to escape from auto tuning status, press and
hold for about 2 seconds until the "At" flash stops. Depending on the system, the time of auto tuning can be several seconds to several
hours. After the auto tuning finishes, the parameter “Ctrl” automatically changes to 3 (the initial value is 1) or 4, and then user can’t active auto
tuning by pressing for 2 seconds. If user wants to run auto tuning again, setting parameter “CtrL” to 2. (Refer to the description of
parameter “CtrL”)
Note 1: Before running auto-tuning, setpoint should be set to an often-used value or middle value first, and then start auto-tuning. Generally, for
application with 10%~80% time on heating can obtain satisfying auto-tuning result. If the heating time is not in the range of 10~80%, the
auto-tuning will run for a long time and can’t get satisfying result. Raising setpoint for heating time less than 10% or decreasing setpoint for
heating time greater than 80% can improve auto-tuning result.
Note 2: Don’t modify the setpoint during auto-tuning. It may affect the precision of auto-tuning.
Note 3: The temperature fluctuation caused by interference may affect the precision of auto-tuning. Besides checking the wiring, increasing the
parameter dL (input digital filter) can also reduce interference.
Note 4: After auto-tuning finishes, generally, the temperature rising has a little over-shoot (about 1~3℃). It is because considering that the
transducer is often placed between the heater and heated material, and a little over-shoot can shorten the time of rising to setpoint and save
power. (Generally, the temperature of transducer can be raised quick than that of heated material)
A/M
RUN/HOLD
AI
STOP
①
②
③
④⑤
⑥
⑦
PV
SV
AI
3
PARAMETER AND SETTING
●Press and hold for 2 seconds to access
Code Name Description Setting
Range Default
HIAL High limit alarm Alarm on when PV (Process Value) >HIAL; alarm off when PV<HIAL-dF
Setting HIAL=9999 can disable high limit alarm.
-1999~
3000℃9999
HdAL Deviation high
alarm
Alarm on when PV-SV>HdAL; alarm off when PV-SV<HdAL-dF
Setting dHAL=999.9℃can disable deviation high alarm.
0~
999.9℃999.9
dF deadband
(hysteresis)
Avoid frequent on-off action of alarm or control output because of the fluctuation of PV.
“dF” can affect alarm. For example, provided upper alarm parameter "HIAL" is set as 800℃, dF
parameter is set as 2.0℃, then:
 Instrument is in normal status at the beginning, when process value is greater than 800℃
(HIAL), the upper limit alarm can be triggered.
 Instrument is in upper alarm status at the beginning, when process value is less than 798℃
(HIAL-dF), then alarm can be cleared.
“dF” also affect on-off control and auto tuning. For example, provided SV is set as 700℃, dF
parameter is set to 2℃, control is reverse action (heat control).
 when process value is greater than 700℃(SV), then output turn off.
 when process value is less than 698℃(SV-dF), output trun on again to start heating.
As for on-off control, the larger for dF parameter value, the longer for CtI (output period time) and
the worse for control accuracy. Conversely, the smaller for dF parameter, the shorter for CtI, then
the better for control accuracy, but error action will occur easily due to input fluctuation and
shorten the service life of mechanical contactors of relay.
0~
200.0℃20℃
CtrL Control mode
0: on-off control. For situation not requiring high precision;
1: AI control. Allowed to active auto-tuning in basic display status.
2: Run auto-tuning. After auto-tuning finishes, it will automatically change to 3 or 4.
3: AI control, this configuration is automatically set after auto tuning is done. At this setting,
starting auto tuning at basic display status is inhibited and it can prevent from running auto tuning
by mistake.
4: Similar to CtrL=3, but parameter P is defined as 10 times as its original value, suitable for
rapidly changed temperature (changes by more than 100℃/second). Auto tuning function can
automatically set CtrL to 3 or 4.
0~4 1
CtI Control period
Small value can improve control accuracy.
For SSR or TRIAC output, generally 0.5 to 3 seconds.
For Relay output, generally 15 to 45 seconds, because small value will cause the frequent On-Off
of mechanical switch and shorten its service life. CtI is recommended to be 1/4 – 1/10 of
derivative time. (It should be integer times of 0.5 second.)
0.5~
125
seconds
2
seconds
Sn Input
specification
Sn Input spec. Sn Input spec.
0 K 1 S
2 R 3 Spare
4 E 5 J
6 Spare 7 N
8-20 Spare 21 Pt100
0~21 0
Sc Input offset
Sc is used to shift input to compensate the error caused by transducer, input signal, or auto cold
junction compensation of thermocouple.
PV_after_compensation=PV_before_compensation + Scb
-199.9~
+400.0
℃
0.0
dL input digital filter
If measurement input fluctuates due to noise, then digital filter can be used to smooth the input.
Parameter “dL” may be configured in the range of 0 to 20, among which, 0 means no filter, 1
means intermediate-value filter, and 2—20 means that intermediate-value filter and second order
integral filter working simultaneously.
The bigger dL, the more stable the measurement input but the slower the response. Generally if
great interference exist, then you can increase parameter “dL” gradually to make momentary
fluctuation of measurement input less than 2 to 5 values. If the instrument is being tested at
laboratory, then parameter “dL” should be set to 0 or 1 to improve response speed.
0~40 1
Loc Parameter Lock
Loc=0, allowed to modify parameters and setpoint.
Loc=1, allowed to view parameters, but can’t modify them. And allowed to set setpoint.
Loc=2, allowed to view parameters, but not allowed to modify parameters or setpoint (except
parameter Loc itself).
0~9999 111
Note : Generally, before shipping, the HIAL (high limit alarm) is set to output to AL1, and dHAL (deviation high limt alarm) outputs to AU1 (ALP=5533).
However, D2 dimension instruments only have AUX slot. If single relay output module L1 or L2 is installed, HIAL and dHAL should be set to share an
alarm output AU1 (ALP=5555); if dual relay output module L5 is installed, HIAL and dHAL should separately output to AU2 and AU1 (ALP-5566). Expert
users can change alarm outputs, add low limit or deviation low limit alarm, or hide some parameters by setting internal ALP and EP parameters. You can
call your provider for details.
4
INSTRUMENT INSTALLATION AND WIRING
Wiring graph for instruments with dimension A, E or F
Wiring graph for D dimension(72mmX72mm)instruments Wiring graph for D2 dimension(48X48mm)instruments
Wiring Graph for Thyristor Trigger Output
Note: It is recommended to use the power module, which includes 2 pair of SCRs and diodes. Compared to TRIAC, it is more reliable and consumes
less trigger current.
Note: The compensation
wires for different kinds o
f
thermocouple are different,
and should be directly
connect to the terminals.
Connecting the common
wire between the
compensation wire and the
terminals will cause
measurement error.
Note: The graph suits for upright
intruments with dimension A or E
For instruments with dimension
F, just clockwise rotate the graph
90 degree and the terminal
numbers keep the same.
AU1
AUX
ALM
AL2
1
2
3
4
5
6
7
8
9
10
11
12
15
16
17
18
19
20
13
14
AL1
AU2
COM
N/C
N/O
+
100-240VAC~
+
+
OUTP
COM
COM
N/O
N/C
N/O
N/O
COM
COM
N/O
N/O
N/O
N/C
+
+
+
0-5V
1-5V
G1
G2
G1
G2
G1
G2
Thyristor trigger output(K1/K3)
Thyristor trigger output(K3)
Thyristor trigger outptut(K3)
+
AU1
AUX
AL1
1
2
3
4
5
6
7
8
9
11
12
13
14
10
AU2
COM
N/C
N/O
+
100-240VAC~
+
+
OUTP
COM
COM
N/O
N/C
N/O
N/O
+
G1
G2
Thyristor trigger output(K1
)
+
COM
N/O
1
2
3
4
5
6
7
9
10
8
COM
N/O
+
100-240VAC~
AU1
AUX
AU2
COM
COM
N/O
N/C
N/O
N/O
+
G1
G2
Thyristor trigger output(K1
)
OUTP
Load
Thyrisotr Trigger Output 100~380VAC
IN4001
1N4001
Load
Thyristor Trigger Output
SCR X2
5~500A
BX
BX
Resistor Capacitor Absorption Circuit
Varistor
G1
G2
G1
G2
ZNR
ZNR
V
V
100~380VA
C
TRIAC
5~500A
Resistor Capacitor Absorption Circuit
Varistor
Power Module

Other manuals for AI-508

2

Other Yudian Temperature Controllers manuals

Yudian AI-218 User manual

Yudian

Yudian AI-218 User manual

Yudian AI-710JM User manual

Yudian

Yudian AI-710JM User manual

Yudian AI-218 User manual

Yudian

Yudian AI-218 User manual

Yudian AI-508 User manual

Yudian

Yudian AI-508 User manual

Yudian AI-508 User manual

Yudian

Yudian AI-508 User manual

Yudian AI-208 User manual

Yudian

Yudian AI-208 User manual

Yudian AI Series User manual

Yudian

Yudian AI Series User manual

Popular Temperature Controllers manuals by other brands

Brainchild BTC-9300 user manual

Brainchild

Brainchild BTC-9300 user manual

Gira 0389 Series operating instructions

Gira

Gira 0389 Series operating instructions

Johnson Controls TE-6800 Series installation guide

Johnson Controls

Johnson Controls TE-6800 Series installation guide

JUMO 902428/30 operating manual

JUMO

JUMO 902428/30 operating manual

HIRED-HAND System 2000 AUTO TEMP manual

HIRED-HAND

HIRED-HAND System 2000 AUTO TEMP manual

dixell XW360K Installing and operating insructions

dixell

dixell XW360K Installing and operating insructions

Ascon tecnologic e33 operating instructions

Ascon tecnologic

Ascon tecnologic e33 operating instructions

Cole Parmer IC-300 Series instruction manual

Cole Parmer

Cole Parmer IC-300 Series instruction manual

Elko RFTC-50/G manual

Elko

Elko RFTC-50/G manual

Chromalox 1603 user manual

Chromalox

Chromalox 1603 user manual

Ropex RESISTRON RES-406 operating instructions

Ropex

Ropex RESISTRON RES-406 operating instructions

E+E Elektronik EE150 user manual

E+E Elektronik

E+E Elektronik EE150 user manual

LK Systems ICS.2 Assembly instructions

LK Systems

LK Systems ICS.2 Assembly instructions

Magnum M9-RTS3 quick start guide

Magnum

Magnum M9-RTS3 quick start guide

Omron E5ZN-DRT Operation manual

Omron

Omron E5ZN-DRT Operation manual

LP-RESEARCH LPMS-B2 manual

LP-RESEARCH

LP-RESEARCH LPMS-B2 manual

ISG INFRASYS E380 operating manual

ISG INFRASYS

ISG INFRASYS E380 operating manual

Trane TCONT402AN32DA owner's manual

Trane

Trane TCONT402AN32DA owner's manual

manuals.online logo
manuals.online logoBrands
  • About & Mission
  • Contact us
  • Privacy Policy
  • Terms and Conditions

Copyright 2025 Manuals.Online. All Rights Reserved.