Yukon 27041 User manual

Instructions Yukon Mobile Player / Recorder
WARNING
To prevent fire or shock hazard, do not expose the unit to rain or moisture.
Attention
The electromagnetic fields at the specific frequencies may influence the picture of the recorder.
Be sure to read the following before using the recorder rial recording
Before you record one-time events, you may want to make a trial recording to make sure
that the recorder is working correctly. Notes on image data compati ility
Play ack of moving images recorded with your recorder on other equipment and play ack
of moving images recorded or edited with other equipment on your recorded are not guaranteed.
Do not shake or strike the recorder
In addition to malfunctions and ina ility to record moving images, this may render the SD
card unusa le of image data reakdown, damage or loss may occur.
LCD screen
Be careful when placing the camera near a window or outdoors. Exposing the LCD screen to
direct sunlight for long period may cause malfunctions.
Back up recommendation
To avoid the potential risk of data loss always copy data to a disk.
able of Contents
Getting Started
Identifying the parts of the
recorder............................................. ........................ 4
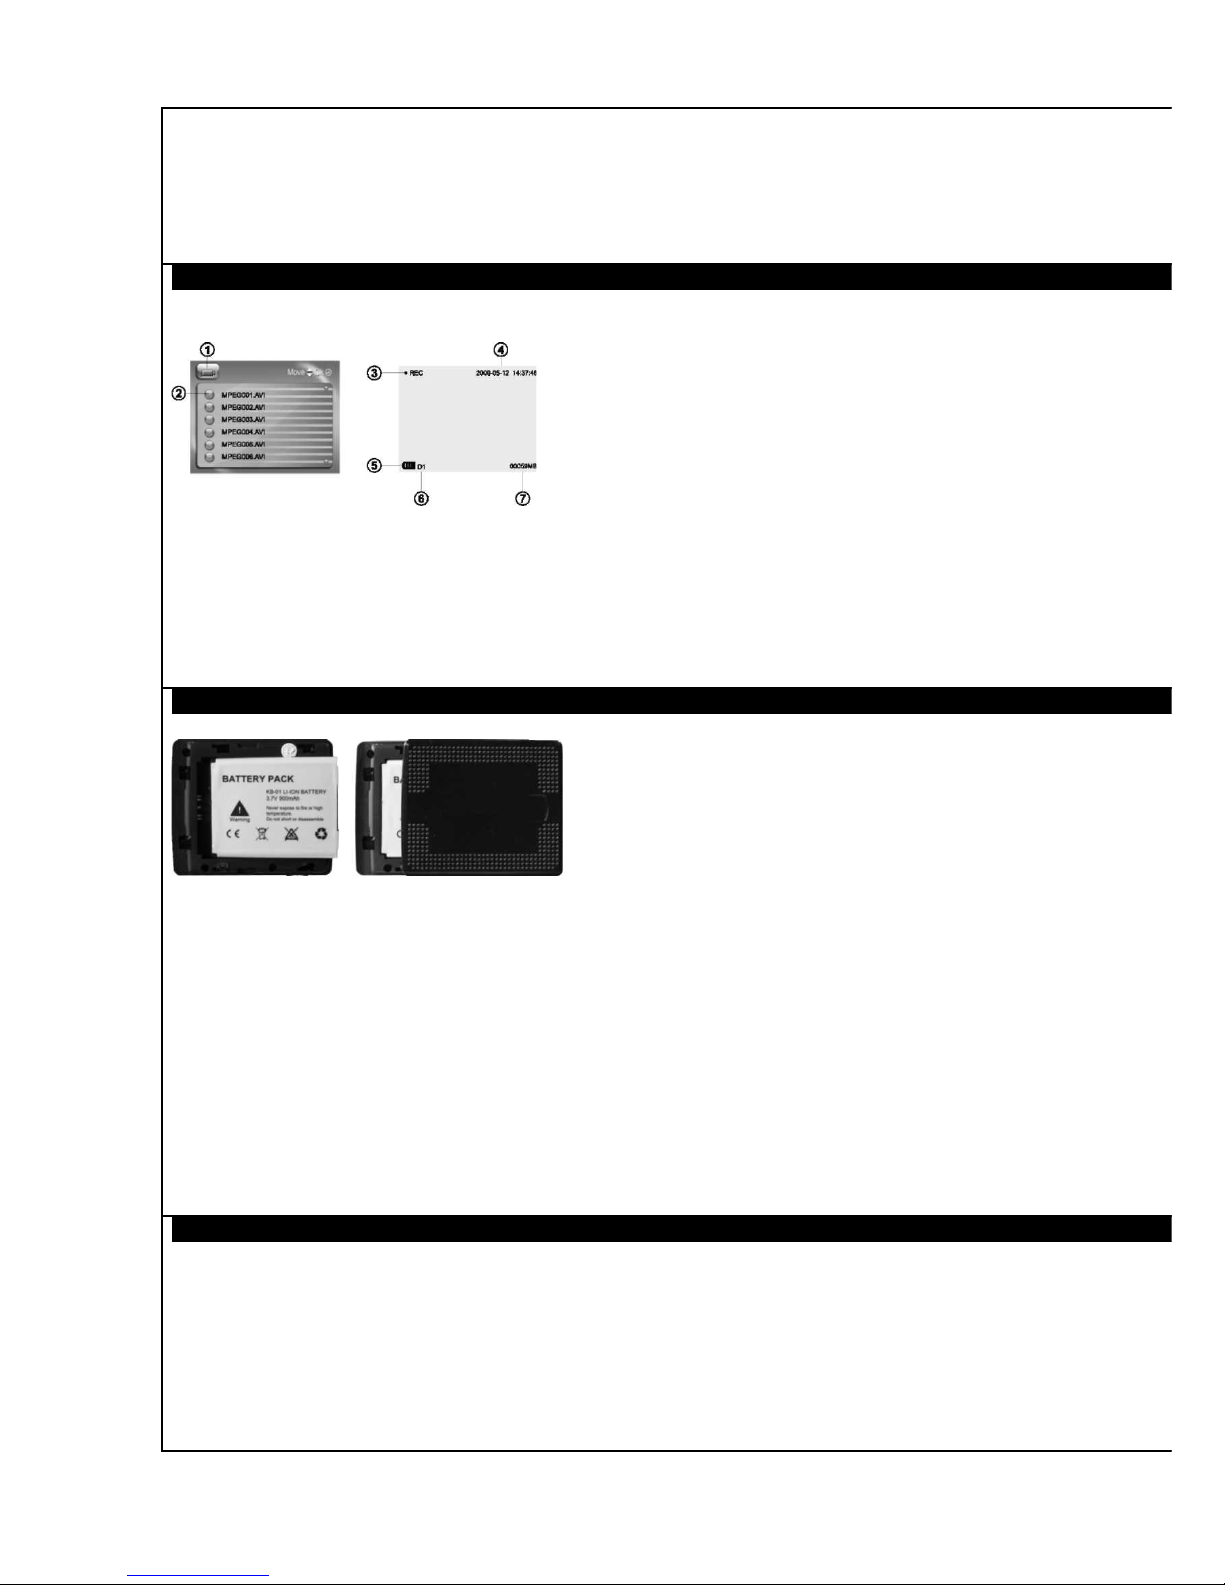
LCD screen
indicators................................................................. ......................... 5
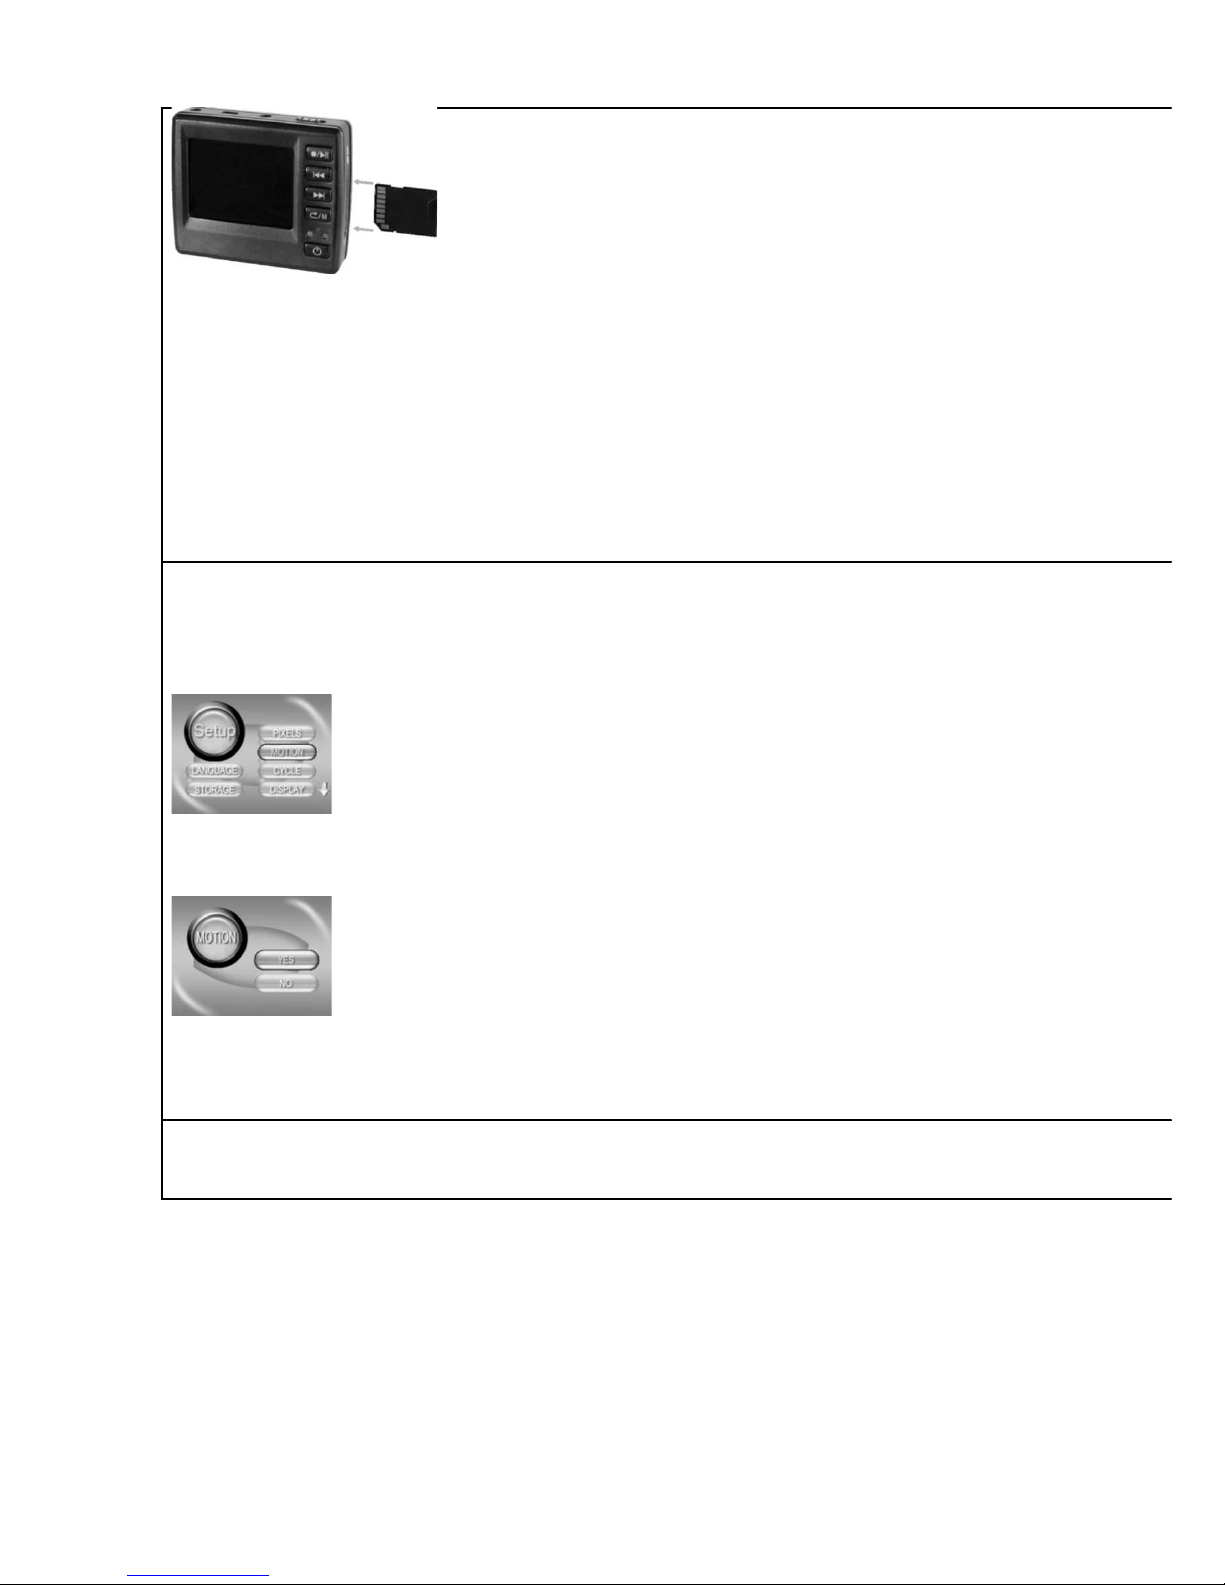
Preparing the power
supply........................................................... ......................... 6
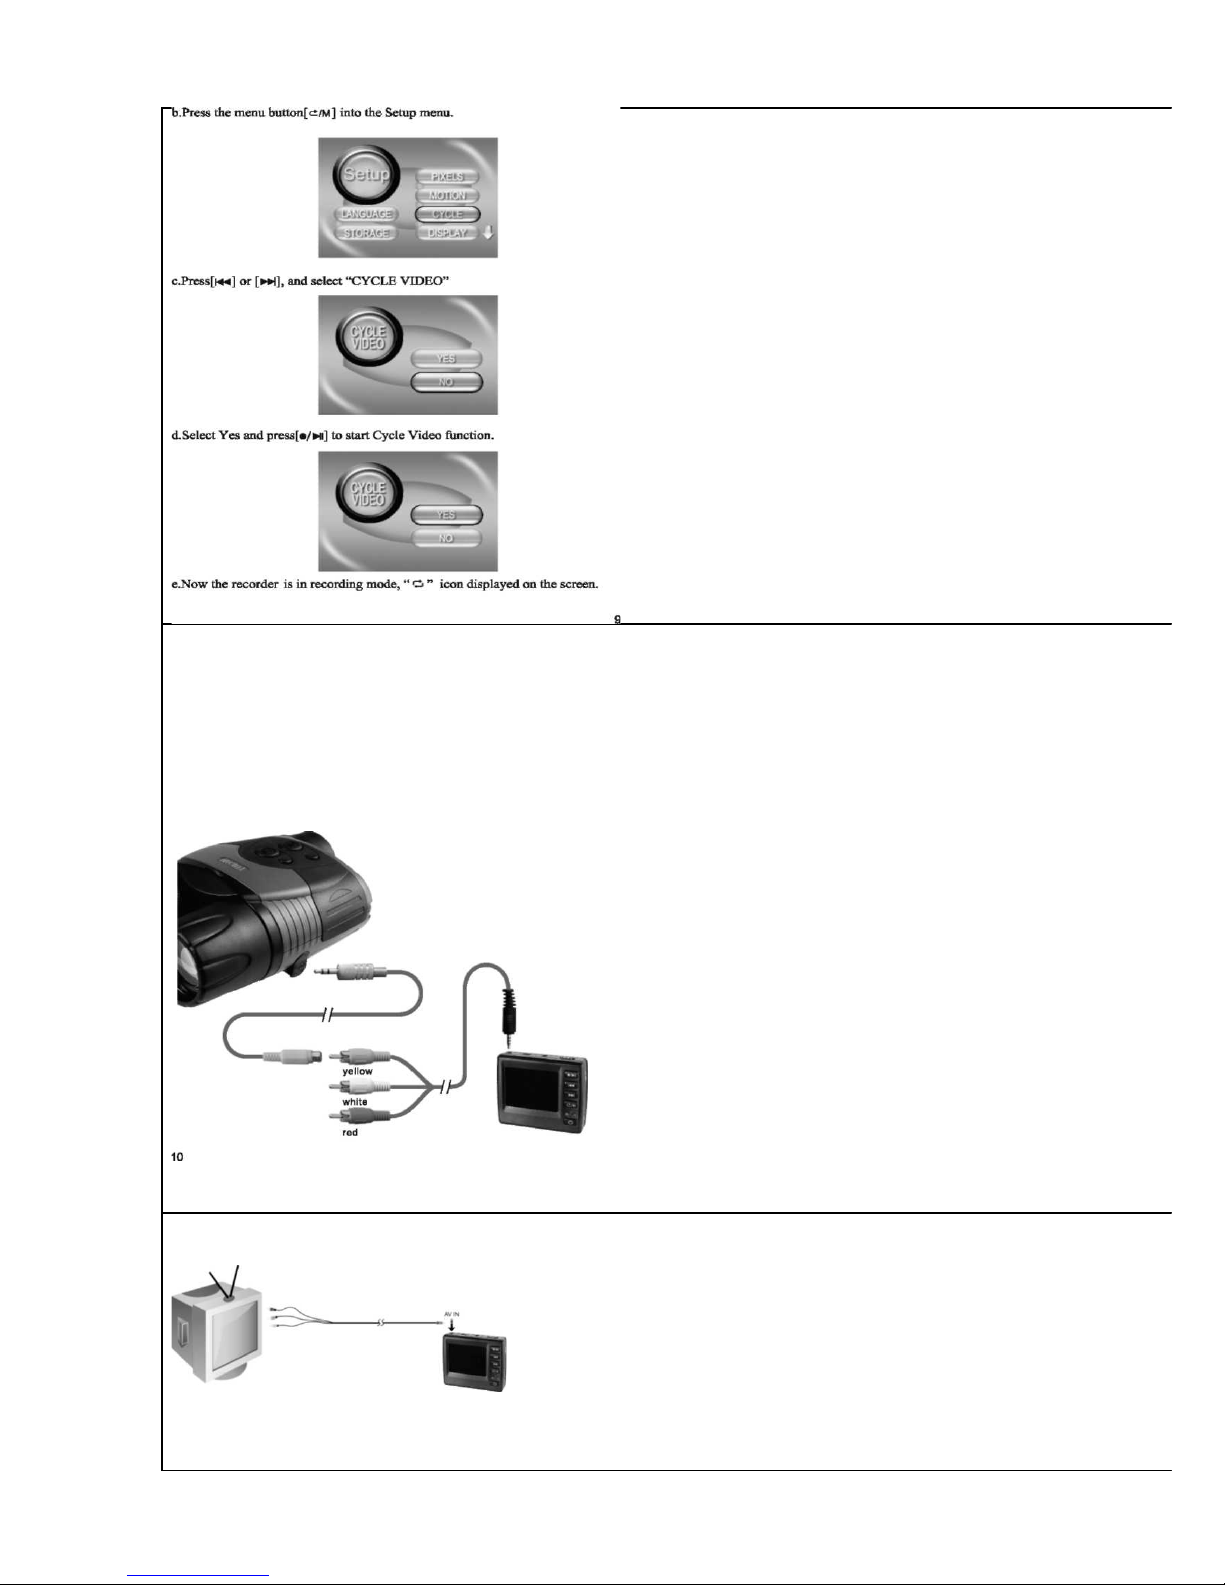
Inserting the SD
card...................................................................... ........................ 7
Basic Operations
Motion Detection
Recording............................................................ ….....................8
Cycle Video........................................................ …......................9
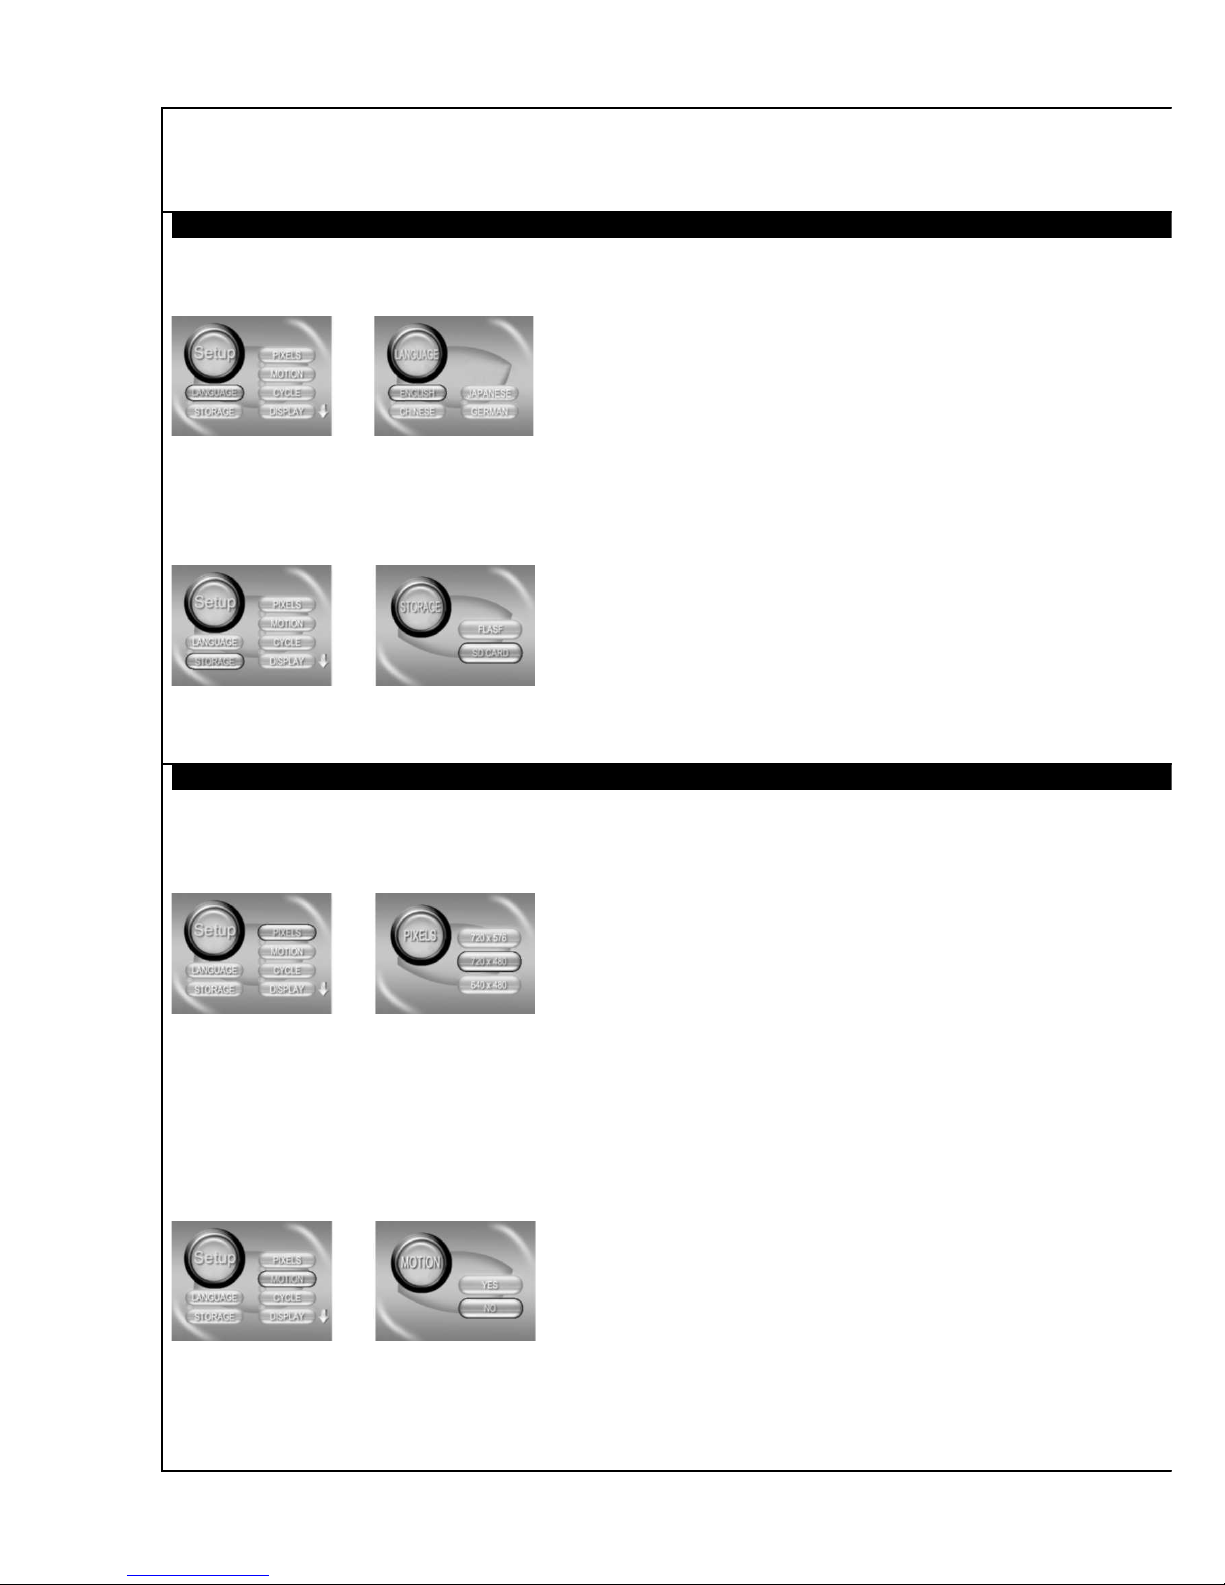
Recording with the digital NV Ranger
5x42.................................
......................... 10
Recording moving images from TV
set......................................... ....................... 11
Play ack moving images.........................................
....................... 11
Play ack moving images on personal
computer......................... ......................... 11
Play ack moving images on TV
screen........................................ ......................... 13
Delete recorded
files.................................................................... ........................ 13
Setting Operations
Setting the
language............................................................ ....................... 14

Setting the
storage.......................................................... ...................... 14
Setting the
pixels................................................................. ........................ 15
Setting the motion
detection............................................................ ....................... 15
Setting the cycle
recording........................................................... .......................16
Setting the
display...............................................................
....................... 16
Setting the date and
time................................................................. ........................17
Setting the LCD
off...................................................................... ....................... 18
Setting the power
off...................................................................... ....................... 19
Setting the video
time.................................................................... ......................... 19
Setting the
format................................................................ ......................... 20
Specifications.................................................... ........................ 21
Warranty............................................................ ........................ 22
Getting Started
Identifying the parts of the recorder
® © © ©
1. 2 " TFT LCD Screen
2. AV In jack to connect Digital NV Ranger/Ranger Pro
3. USB jack to connect with PC
4. AV Out jack to connect with TV
5. [R/P] Record / Play ack switch
6. [ / ►||] Play/Stop key
7. [ ] FRW/ Select key
8. [ ] REV / Select key
9. SD Card Slot
10. [ / M] Return / Menu key
11. LED Indicators
12. [] Power key
Package contents
• Yukon Mo ile Player/Recorder
• AV Ca le
• AV IN ca le
• USB ca le

• Rechargea le attery
• AC Charger
• SD card
• User Manual
For improvement purposes, design of this product is su ject to change.
Getting Started
LCD screen indicators
Playback Mode Recording Mode
(1) Play ack icon
(2) Recorded Files
(3) Recording sym ol
(4) Date/Time indicator
(5) Battery indicator
(6) Pixels Logo D1: 720x576 720x480 VGA: 640x480
(7) Remained flash memory or SD card capacity.
Getting Started
Preparing the power supply
Installing the battery pack
Open the cover y slightly pushing and pulling it ack.
Insert the attery pack with the corner of " " facing toward the attery
compartment as illustrated.
Close the attery cover.
Charging the battery pack
Connect the AC adapter with the recorder using the USB ca le.
The red indicator turns on when charging egins, off when completes.
Charging time
Battery pack capacity Fully charging time
900 mAh 180 min.
Getting Started
Battery life
Recording mode
Battery pack capacity 900 mAh
Continuous recording time 150 min. (fully charged attery)
Playback mode
Battery pack capacity 900 mAh
Continuous playing ack 180 min. (fully charged attery)
Inserting the SD card

Insert SD card with the "" mark facing the SD slot as illustrated.
Recording time of memory capacity
SD card
capacit
y
720 X 576 720 X 480 640 X 480
2GB Approx. 45 mins Approx. 55 mins Approx. 65 mins
4GB Approx. 90 mins Approx. 110 mins Approx. 130 mins
8GB Approx. 180 mins Approx. 220 mins Approx. 260 mins
16GB Approx. 360 mins Approx. 440 mins Approx. 520 mins
32GB Approx. 720 mins Approx. 880 mins Approx. 1040 mins
Motion Detection Recording
a. When the main unit power off, connect the mini camera, press and hold the power utton[ ]
for 3 seconds into a state of preview.
. Press the menu utton[/M ] into the Setup menu.
c. Shortly Press [] or [], and select "MOTION"
d. Select Yes and press[/ ] to start Motion Detektion function. As illustrated
e. Now the recorder is in recording mode, "Press Enter to start Motion Detect" displayed on
the screen.
Cycle Video (Overwrite automatically when storage is full)
a. Press and hold the power utton for 3 seconds into a state of preview.

Recording with the digital night vision monoculars Ranger 5x42 and Ranger Pro 5x42
a. Connect the plug of the Ranger's AV ca le to the Ranger's "AV out" port (see connection
scheme elow).
. Connect the yellow plug of the recorder's AV ca le to the yellow jack of the Ranger's AV ca le.
c. Connect the min plug of the recorder's AV ca le to the "AV in" port of the recorder.
d. Start the recorder, turn on the NV Ranger 5x42 (or Ranger Pro 5x42).
e. Adjust the image according to the instructions efore recording.
Recording moving images from V set
Start recording
a. Slide [ R/P ] key toward the position of [ R ] and connect the recorder as illustrated.
. Connect the recorder with TV set or other devices y AV-in ca le.

Yellow: video Red: Left channel audio White: Right channel audio
Playback moving images
а. Slide [ R/P ] key toward the position of [P]
. Turn on the recorder.
c. Select the desired moving image with the [ ] or [ ] key.
d. Press [ /►|| ] key to play ack the selected moving image.
e. Press [ /►||] key to stop playing.
f. Press [/ M] key to return to the recorded file list.
Playback moving images on personal computer
a. Turn on PC.
. Insert SD card into the recorder and switch it on.
c. Connect DVR with PC;
d. Dou le click the remova le disk in "My computer", the recorded videos are in the list;
e. Select and dou le click the video to play ack.
Image file storage destinations and image files
For Windows XP users (the drive recognizing the recorder is "D")
Desktop
My computer
Windows XP (C:)
NO_NAME ( D:)
DCIM
100MOVIE
-MPEG0001.AVI
MPEG0002.AVI
MPEG0003.AVI
MPEG0004.AVI
Image files recorded with your recorder are listed in folder of "l00Video". The meaning
of the file names are as follows. 0000 stands for any num er within the range from 0001 to 9999.
Playback moving images on V screen
AV OU
a. Connect the AV connecting ca le to the AV output jack of your recorder
and to the AV input jack of the TV.
. Turn on the TV, then start play ack on your recorder (refer to Setting display). The
recorded files appear on the TV screen.
Delete recorded file
a. Slide [R/P ] key toward the position of [ P], turn on your recorder, and then y long
press [/ M] key until "Delete" appear on the screen showed as elow:

DELE E
YES
NO
. Select " YES " to delete the current file or select " NO " to cancel the operation
Setting Operations
Setting the language
a. In the state of preview, press the [/ M] utton to enter "Setup"
. Press [ ] or [ ] to select "Language", and press [ /►||] to enter setup
c. Select the required language and press [ /►||]
Setting the storage
a. In the state of preview, press the [/ M] utton to enter "Setup"
. Press [ ] or [ ] to select "STORAGE", and press [ /►||] to enter setup
c. Select "FLASH" or "SD CARD" and press [ /►||] (as illustrated)
Setting Operations
Setting the pixels
a. In the state of preview, press the [/ M] utton to enter "Setup"
. Press [ ] or [ ] to select "PIXELS", and press [ /►||] to enter setup
c. Select"720x576 " '720x480" "640x480" and press [ /►||] (as illustrated)
Setting the motion detection
a.In the state of preview, press the [с/м] utton to enter "Setup"
.Press [ ] or [ ] to select "MOTION", and press [ /►||] to enter setup
c.Select YES " or "NO" and press (as illustrated)

setting Operations
Setting the cycle recording
a.In the state of preview, press the [/ M] utton to enter "Setup"
.Press [ ] or [ ] to select "CYCLE", and press [ /►||] to enter setup
c.Select YES " or "NO" and press [ /►||] (as illustrated)
Setting the display
a. In the state of preview, press the [с/м] utton to enter "Setup"
. Press [ ] or [ ] to select "DISPLAY", and press[ /►||]to enter setup
c. Select"LCD" "PAL" or "NTSC" and press [ /►||](as illustrated)
Setting the date and time
a. In the state of preview, press the [/ M] utton to enter "Setup"

. Press [ ] or [ ] to select "DATE TIME", and press [ /►||]to enter setup
c. select "Date Format", and press [ /►||] to enter setup (as illustrated)
d. select Y/M/D" or "D/M/Y" and press [ /►||] (as illustrated)
e. select" Date Stamp " and press [ /►||] to enter setup (as illustrated)
f. Select YES " or "NO" and press[ /►||] (as illustrated)
g. select" Time Setting "and press[ /►||]to enter setup (as illustrated!)
h. Press [ ] or [ ] to adjust, press [ /►||] to enter (as illustrated)
Setting the LCD off
a. In the state of preview, press the [ /►||] utton to enter "Setup"
. Press [ ] or [ ] to select "LCD OFF", and press [ /►||] to enter setup
c. Select "l MINUTE" or "5 MINUTES" or "NEVER" and press [ /►||] (as illustrated)

Setting Operations
Setting the power off (Available under no operation)
a. In the state of preview, press the [/ M] utton to enter "Setup"
. Press [ ] or [ ] to select "POWER OFF", and press [ /►||] to enter setup
c. Select "l MINUTE" "5 MINUTES" or "NEVER" and press [ /►||] (as illustrated)
Setting the video time
a. in the state of preview, press the [/ M] utton to enter "Setup"
. Press[ ] or [ ] to select "VIDEO TIME", and press [ /►||] to enter setup
c. Select"10 MINUTES" "30 MINUTES" or "60 MINUTES" and press [ /►||] (as illustrated )
Setting the format
a. In the state of preview, press the [/ M] utton to enter "Setup"
. Press [ ] or [ ] to select "FORMAT", and press [ /►||] to enter setup
c. Select "FLASH" or "SD CARD" and press [ /►||] (as illustrated )
d. Select "YES " or "NO" and press [ /►||] (as illustrated)
Attention: Format will delete all the data and non-recovera le.
Specifications
Model# 27041
Digital Screen 2.0° TFT LCD
Color System PAL/NTSC (Auto)
LCD Resolution 960 X 240
Recording Format AVI
Recording Resolution 720 X 576 ( 25FPS) / 720 X 480 (30FPS)

Motion Activated 640 X 480 (30FPS)
Cycle Recording Yes
Real-time Stamp Yes
Video Time Yes
LCD Off 10/30/60Mins
Auto Power Off 1/5Mins/Never 1/5Mins/Never
Storage SD
Play ack Video (YES) | Audio (YES)
Frame Rate 30fps/25fps
Built-in Flash Memory 70MB
USB jack High-speed USB2.0
DC Input DC 5V1A
Power Supply 5V150mAh
Battery pack capacity 3.7V 900mAh
SD card 1GB-32GB
AV Input jack 3 rings with 02.5
AV Output jack 3 rings with 02.5
Interface language English/Chinese/German/Japanese/French
Spanish/ltalian/Swedish/Russian/Czech
Warranty
The Manufacturer warrants its products against defects in materials and workmanship for a period
of three years from the moment of purchase or from the manufacturing date if there is no receipt to
prove purchase.
To avoid any pro lems, we recommend ecoming familiar with the device's user manual.
The warranty does not cover any external damage to the device, its casing or adjusta le
parts' movements (i.e. smooth movement or rough movement).
The manufacturer has the right to render the warranty null and void in the following cases:
• if thedevicehas eenmodifiedortamperedwith,
• if the device has een dropped or has marks of mechanical or chemical damage,
• if the device has een tampered with y unauthorized repair,
• if the device has een damaged as a result of fire or natural disasters,
• if the device has een damaged as a result of liquids or other su stances getting inside.
En the event of activating the warranty repair service, please contact the distri utor where the
device was purchased or contact the national distri utor in your country.
Any product returned under this warranty should e packaged in a sturdy, outsideshipping
carton, to prevent damage in transit.
En addition, it must e accompanied with the following items:
• letter explaining the unit's pro lem.
• Copy of the original receipt showing when and where the product was purchased.
• Return Shipping Information, including return address and contact person.
Please contact our service centre with any questions you might have at e-mail:
euservice@yukonopticsglo al.com

Other manuals for 27041
2
Table of contents
Other Yukon MP3 Player manuals