manuals.online logo
Brands
  1. Home
  2. •
  3. Brands
  4. •
  5. Zadro
  6. •
  7. Indoor Furnishing
  8. •
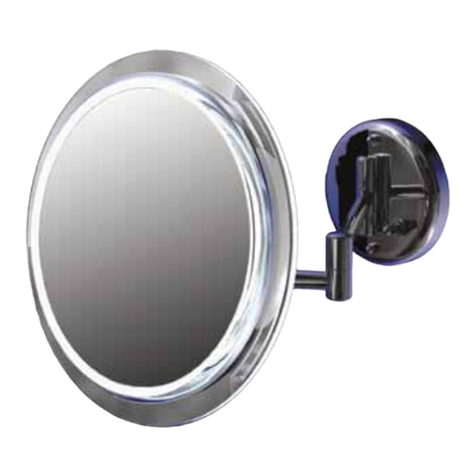
  9. Zadro Surround Light SLVT710 User manual

Zadro Surround Light SLVT710 User manual

• Donotuseanextensioncordwiththismirror.
• Withanyorescentlightbulbproductcontainingglass
andchemicals,reasonablecareshouldbeobserved
whenburnedoutlampsarediscarded.Unbrokenlamps
shouldneverbeputintore,domesticincinerators,or
trashcompactors.
This product is provided with a polarized plug. As a safety
feature, this plug will t in a polarized outlet only one way. If
the plug does not t, reverse the plug. If it still does not t,
contact a qualied electrician. Never use
an extension cord. Do not attempt to
defeat this safety feature.
CARE AND MAINTENANCE
• Alwaysunplugthemirrorbefore
cleaning.
• Useonlyasoftdampclothornon-
abrasivecleanertoclean.
• Allowmirrorto“cool”beforestoring.
Instructions for tightening and
loosening mirror hinge
Ifmirrorhingerequiresadjustment:
1. Holdontomirrorheadwithonehand
whileplacingaatheadscrewdriver
orcoinintoscrewonthesideofmirror
hingelocatedontherightside.(Fig. I)
2. Useaatheadscrewdriverorcoinas
shown.(Fig. II)
3. Turnthescrewdriverorcoin
clockwisetotightenthehinge.
4. Turnthescrewdriverorcoincounter
clockwisetoloosenthehinge.
Light bulb replacement
Toreplacethelightbulb,placethemirrorface
downonaatsurfaceandfollowthesesteps:
1. Unplugthepowercordfromtheoutlet.
2. Removefourlenslockingscrews.(see
Fig.A)
3. Removefrontlenscover(seeFig.1)by
pullingfrontlenscoverout.
4. Useasmallthinobject(likeapaperclip)
toprythebulbloosefromtheclipatthe
top.(Fig.2)
5. Holdlightbulbattopand
gentlyrollittowardsyouand
disengagefromsocket.(seeFig.3)
6. Lineupnewbulbwithsocketandroll
intoplace.
7. Reinstalllensandfourscrews.
ADDITIONAL AND REPLACEMENT PARTS
90 Day Limited Warranty
90daylimitedwarrantyfromdateofpurchase
againstdefectsinmaterialsandworkmanship.This
warrantydoesnotincludedamagetotheproductas
aresultofmisuseoraccident.
Shouldyourproductbecomedefectiveduringthewarranty
period,packagetheitemsecurelyandreturnit,prepaid/
insured,alongwithproofofpurchaseto:ZadroProducts,Inc.
Attn:CustomerService.
Toinsurepromptrepair,besurethatyouprovidecomplete
legibleinformationandanoteindicatingthenatureof
theproductdefect.Wewillrepairorreplace(atoursole
discretion)yourproductatnocharge.Pleaseincludea$10
(checkormoneyorder)tocoverreturnpostageandhandling
charges.ZadroProductsInc.shallnotbeliableforany
incidentalorconsequentialdamagesarisingoutofdefectsin
thisproduct,whetherornotcausedbyitsnegligence.
Somestatesdonotallowtheexclusionorlimitationof
incidentalorconsequentialdamagesorallowlimitationson
howlonganimpliedwarrantylasts,sotheabovelimitations
orexclusionsmaynotapplytoyou.Thiswarrantygivesyou
speciclegalrightsandyoumayalsohaveotherrights,
whichvaryfromstatetostate.
Thank you for choosing Zadro Products, Inc.
© Zadro Products, Inc.
5422 Argosy Ave.
Huntington Beach, CA 92649
 (800)468-4348•(714)892-9200
 Fax:(714)892-7477
Email: [email protected]
www.zadroinc.com
Model Description
FB581 T-5ReplacementbulbforSLVT710
Toorder,visitourwebsiteatwww.ZADROINC.com
or callcustomerserviceat(800)468-4348
SLVT710
Dimmable Sunlight
Vanity Mirror
Surround Light™
Dimmable Sunlight Vanity Mirror
Surround Light™
ModelNo.SLVT710
READ ALL INSTRUCTIONS BEFORE USE
*SAVE THESE INSTRUCTIONS*
FEATURES
YourZADRO™LightedMirrorisdesignedtoreproducethe
effectsofnaturalsunlightandprovidesmaximumillumination.
Ifproperlyusedandcaredfor,thisvanitymirrorwillassist
withyourbeautyroutineforyearstocome.
• TheMostTechnologicallyAdvancedMirrorOnTheMarket
• NaturalDimmableSunlightEquivalentTo110Watts
• Tri-FoldMirroredDoorsAllowViewingFromAllSides
• ClosedDoorsProtectMirrorAndKeepsSurfaceClean
• Built-InPowerOutlet
• Stands18”Tallorcanbefoldeddownto8½”
OPERATING INSTRUCTIONS
1. Toturnonlights,simplyturntheswitchatthebaseofthe
mirror.
2. AfterusealwaysswitchtoOFFposition.
3. Yourdimmablesunlightvanitymirrorisangleadjustable
DANGER/WARNING
Toreducetheriskofburns,re,electric
shock, or injury to persons:
• Alwaysunplugthisappliancefromtheelectricaloutletbefore
cleaning.
• Unplugfromoutletbeforeputtingonortakingoffparts.
• Besurethemirrorisnotinapositionwhereitcanreect
sunlight.Reectedlightcancausere.
• Unplugfromoutletbeforeputtingonortakingoffparts.
• Closesupervisionisnecessarywhenthisapplianceis
usedby,ornearchildren,ordisabledpersons.
• Usethismirroronlyforitsintendeduseasdescribedin
thismanual.Donotuseattachmentsnotrecommended
bythemanufacturer.
• Neveroperatethismirrorifithasadamagedcordor
plug,ifitisnotworkingproperly,ifithasbeendropped
ordamaged,ordroppedintowater.Returnunitto
manufacturerforexaminationandrepair.
• Keepthecordawayfromheatedsurfaces.
• Neverdroporinsertanyobjectintoanyopening.
• Donotuseoutdoors.
• Neveroperatewhereaerosol(spray)productsarebeing
used,orwhereoxygenisadministered.
• Todisconnect,turnallcontrolstotheoffposition,then
removeplugfromoutlet. Important Safety Instructions
Rev.12232013
Important Safety Instructions
Fig.1
Fig.2
Fig.3
Zadro
Zadro
administré.
• Pourdébrancher,mettretouteslescommandesàla
positionhorstension,puisretirerlachedesortie.
• Nepasutiliserunerallongeaveccemiroir.
• Avecunproduituorescentampouledeverrecontenant
etlesproduitschimiques,lessoinsraisonnablesdoivent
êtreobservéeslorsqu’ilestbrûléparleslampessontjetés.
Unbrokenlampesnedoiventjamaisêtremisenfeu,les
incinérateursdomestiques,oucompacteursdedéchets
ménagers..
Este producto está equipado con un enchufe polarizado.
Como medida de seguridad, este enchufe calzará en un
tomacorriente polarizado de una sola manera. Si el enchufe
no encaja, invierta el enchufe. Si aún así no encaja, póngase
en contacto con un electricista calicado. Nunca utilice un
cable de extensión. No intente anular esta característica de
seguridad.
CUIDADO Y MANTENIMIENTO
• Desenchufesiempreelespejoantesdelimpiarlo.
• Usesólounpañosuaveyhúmedoonoabrasivopara
limpiar.
• Permitirespejopara“cool”antesdeguardar.
Instruccionesparaapretaryaojarlabisagra
espejo
Silabisagraespejonecesitaunajuste:
1. Mantenerseencabezadelespejoconunamano
mientrasquelacolocacióndeundestornilladorde
puntaplanaounamonedaeneltornilloenelladodela
bisagraespejosituadoenelladoderecho.(Fig.I)
2. Conundestornilladorplanoounamoneda,comose
muestra.(Fig.II)
3. Gireeldestornilladorounamonedalasagujasdelreloj
paraapretarlabisagra.
4. Gireeldestornilladorounamonedacontralasagujasdel
relojparaaojarlabisagra.
Sustitución de la bombilla de luz
Parareemplazarlabombilla,coloqueelespejosobreuna
supercieplanaysigaestospasos:
1. Desconecteelcabledealimentacióndelatoma.
2. Retireloscuatrotornillosdejacióndelobjetivo.(verFig.
A)
3. Retirelatapadelalentefrontal(verFig.1.)Tirandodela
lentefrontaldelacubierta.
4. Utiliceunobjetopequeñoydelgado(comounclip)para
extraerlabombillasueltadelclipenlapartesuperior.
(Fig.2)
5. Sostengalabombillaenlapartesuperiorysuavemente
rodarhaciaustedydesconectardelatoma.(verFig.3).
6. Alineelanuevabombillaconcasquilloyrodilloensu
lugar.
7. Vuelvaacolocarlentesycuatrotornillos.
La luz del sol regulable Espejos
Light ™ Surround
Númerodemodelo:SLVT710
LEA TODAS LAS INSTRUCCIONES ANTES DE USAR
*GUARDE ESTAS INSTRUCCIONES*
CARACTERÍSTICAS
SuZadro™iluminadoespejoestádiseñadoparareproducir
losefectosdelaluznaturalyofrecelamáximailuminación.
Siseutilizanadecuadamenteycuidados,esteespejode
vanidadleayudaráconsurutinadebellezaenlosaños
venideros.
• Elespejoconlatecnologíamásavanzadadelmercado
• Laluzdelsolequivalentenaturalregulablea110Watts
• Trípticopuertasdeespejopermitenlavisualizaciónde
todosloslados
• PuertascerradasProteccióndeEspejoymantienela
supercielimpia
• Built-Intomadecorriente
• Standsde18“Altoosepuedeplegara8½”
INSTRUCCIONES DE USO
1. Paraencenderlasluces,bastacongirarelinterruptorenla
basedelespejo.
2. Despuésdeutilizarsiempreelinterruptorenlaposición
OFF.
3. Suespejoregulableluzdelsolesvanidadánguloajustable
PELIGRO / ADVERTENCIA
Para reducir el riesgo de quemaduras, incendio,
descargas eléctricas o lesiones a personas:
• Asegúresedequeelespejonoseencuentraenuna
posiciónenlaquepuedereejarlaluzsolar.Laluz
reejadapuedecausarunincendio.
• Desenchufeelaparatoantesdecolocaroquitarpiezas.
• Esnecesarialasupervisión,cuandoesteaparato
estáutilizadoporocercadeniños,opersonascon
discapacidad.
• Usarestaréplicasóloparasuusoprevistocomose
describeenestemanual.Noutiliceaccesoriosno
recomendadosporelfabricante.
• Nuncaopereesteespejositieneuncableoenchufe
dañado,sinofuncionacorrectamente,sisehacaído
odañado,ohacaídoalagua.Devolverlaunidadal
fabricanteparasurevisiónyreparación.
• Mantengaelcablelejosdesuperciescalientes.
• Nuncadejecaerniinserteningúnobjetoenninguna
abertura.
• Nousealairelibre.
• Nefaitesjamaisfonctionner,oùdesaérosols
(vaporisateurs)sontutilisés,oulorsquel’oxygèneest
Instrucciones importantes de seguridad
ouverture.
• Nefaitesjamaisfonctionner,oùdesaérosols
(vaporisateurs)sontutilisés,oulorsquel’oxygèneest
administré.
• Pourdébrancher,mettretouteslescommandesàla
positionhorstension,puisretirerlachedesortie.
• Nepasutiliserunerallongeaveccemiroir.
• Avecunproduituorescentampouledeverrecontenant
etlesproduitschimiques,lessoinsraisonnablesdoivent
êtreobservéeslorsqu’ilestbrûléparleslampessontjetés.
Unbrokenlampesnedoiventjamaisêtremisenfeu,les
incinérateursdomestiques,oucompacteursdedéchets
ménagers.
Ce produit est fourni avec une che polarisée. Par mesure
de sécurité, cette che ne rentre dans une prise polarisée
que dans un sens. Si la che ne rentre pas, inversez la che.
Si elle ne convient toujours pas, contactez un électricien
qualié. N’utilisez jamais une rallonge électrique. Ne pas
essayer de contourner ce dispositif de sécurité.
ENTRETIEN ET MAINTENANCE
• Toujoursdébrancherlemiroiravantdelenettoyer.
• Utilisezuniquementunchiffondouxhumideounettoyant
nonabrasifpournettoyer.
• Autorisermiroirpour“cool”avantdelesranger.
Instructions pour serrer et desserrer la charnière
miroir
Silacharnièremiroirnécessiteunajustement:
1. Tenezlatêtemiroiravecunemaintoutenplaçantun
tournevisàtêteplateouunepiècedanslavissurle
côtédelacharnièremiroirsituésurlecôtédroit.(Fig.I)
2. Utilisezuntournevisplatouunepiècecommeindiqué.
(Fig.II)
3. Tournerletournevisouunepièceaiguillesd’unemontre
pourresserrerlacharnière.
4. Tournezletournevisdanslesenshoraireouanti
monnaiepourdesserrerlacharnière.
Remplacement des ampoules
Pourremplacerl’ampoule,placezlemiroirverslebassur
unesurfaceplaneetsuivezcesétapes:
1. Débranchezlecordond’alimentationdelaprise.
2. Retirerlesquatrevisdeverrouillagedel’objectif.(voir
Fig.A)
3. Retirerlecouverclelentillefrontale(voirg.1)entirant
lacouverturesurlentillefrontale.
4. Utilisezunpetitobjetléger(commeuntrombone)
pourfairelevierdel’ampouledétacherdelapinceau
sommet.(Fig.2)
5. Tenezampouleau-dessusetleroulerdélicatementvers
vousetsedésengagerdeladouille.(voirgure3).
6. Lineupnouvelleampouleavecpriseetroulerenplace.
7. Réinstallerlalentilleetquatrevis.
Dimmable miroir de courtoisie soleil
Surround Light ™
Numérodemodèle:SLVT710
LIRE TOUTES LES INSTRUCTIONS AVANT D’UTILISER
* CONSERVER CES INSTRUCTIONS*
CARACTÉRISTIQUES
VotreZADRO™LightedMirrorestconçupourreproduireles
effetsdelalumièrenaturelleetoffreunéclairagemaximum.
S’ilestcorrectementutiliséetentretenu,cemiroirde
courtoisieaideraavecvotreroutinebeautépourlesannées
àvenir.
• Lemiroirleplustechnologiquementavancéssurlemarché
• NaturelleséquivalentessoleilDimmableà110watts
• Tri-Foldportesenmiroirpermettrelavisualisationdetous
côtés
• ClosedDoorsProtégermiroiretconserveunesurface
propre
• Built-InPowerOutlet
• Stands18“grandoupeutêtrerabattuà8½”
INSTRUCTIONS DE FONCTIONNEMENT
1. Pourallumerleslumières,ilsuftdetournerl’interrupteurà
labasedumiroir.
2. Aprèsusage,l’interrupteurenpositionOFF.
3. Votremiroirgradableslumièredusoleilestvanitéangle
réglable
DANGER / AVERTISSEMENT
Pour réduire le risque de brûlures, d’incendie,
d’électrocution ou de blessures:
• Soyezsûrlemiroirn’estpasdansunepositionoùilpeut
rééchirlalumièresolaire.Lalumièrerééchiepeut
provoquerunincendie.
• Débranchezl’appareilavantdemettreoud’enleverdes
pièces.
• Unesurveillanceétroiteestnécessairelorsquecet
appareilestutiliséparouprèsd’enfantsoudepersonnes
handicapées.
• Utilisezcemiroiruniquementpoursonusageprévucomme
décritdanscemanuel.Nepasutiliserd’accessoiresnon
recommandésparlefabricant.
• Nejamaisfairefonctionnercemiroirsielleauncordon
ouunepriseendommagée,siellenefonctionnepas
correctement,s’ilaétééchappéouendommagéoutombé
dansl’eau.
• Retournerl’appareilaufabricantpourexamenet
réparation.
• Gardezlecordonloindessurfaceschauffées.
• Nejamaislaissertomberouinsérerunobjetdansaucune
Consignes de sécurité importantes

Other Zadro Indoor Furnishing manuals

Zadro Power Zoom PZV01 User manual

Zadro

Zadro Power Zoom PZV01 User manual

Zadro LEDBTV2001 User manual

Zadro

Zadro LEDBTV2001 User manual

Zadro SURROUND LIGHT 2000 User manual

Zadro

Zadro SURROUND LIGHT 2000 User manual

Zadro FG50 User manual

Zadro

Zadro FG50 User manual

Zadro Z'Fogless ZW20TSBT User manual

Zadro

Zadro Z'Fogless ZW20TSBT User manual

Popular Indoor Furnishing manuals by other brands

Gami H76-MOKA Assembly instructions

Gami

Gami H76-MOKA Assembly instructions

Mainstays MSS129900298079 Assembly and Care Guide

Mainstays

Mainstays MSS129900298079 Assembly and Care Guide

Studymate DYSON TRESTILE SMDYSONOB Assembly instructions

Studymate

Studymate DYSON TRESTILE SMDYSONOB Assembly instructions

OAKWORKS Spa Halo Slimline SL user manual

OAKWORKS Spa

OAKWORKS Spa Halo Slimline SL user manual

Pragma Sunny Dual Top Table user manual

Pragma

Pragma Sunny Dual Top Table user manual

King Living Zaza Assembly instructions

King Living

King Living Zaza Assembly instructions

dobue MOVELARIA 200200 quick start guide

dobue MOVELARIA

dobue MOVELARIA 200200 quick start guide

Monarch I 2568 Assembly instructions

Monarch

Monarch I 2568 Assembly instructions

Glacier bay 1342VA-30-201 Assembly instructions

Glacier bay

Glacier bay 1342VA-30-201 Assembly instructions

NOVIGAMI OTOTO 1059133 Assembly & user instructions

NOVIGAMI

NOVIGAMI OTOTO 1059133 Assembly & user instructions

Mayline 1003 Assembly instructions

Mayline

Mayline 1003 Assembly instructions

PAIDI VARIETTA 141 8329 Instructions for use

PAIDI

PAIDI VARIETTA 141 8329 Instructions for use

Progressive T365-05 Assembly instructions

Progressive

Progressive T365-05 Assembly instructions

KING Aura Assembly & user's guide

KING

KING Aura Assembly & user's guide

YORKSHIRE CARE equipment LENTO user manual

YORKSHIRE CARE equipment

YORKSHIRE CARE equipment LENTO user manual

FAB GLASS AND MIRROR BC155 manual

FAB GLASS AND MIRROR

FAB GLASS AND MIRROR BC155 manual

Rosdorf Park LIM1176 Assembly instruction

Rosdorf Park

Rosdorf Park LIM1176 Assembly instruction

Forte TXCT111 Assembling Instruction

Forte

Forte TXCT111 Assembling Instruction

manuals.online logo
manuals.online logoBrands
  • About & Mission
  • Contact us
  • Privacy Policy
  • Terms and Conditions

Copyright 2025 Manuals.Online. All Rights Reserved.