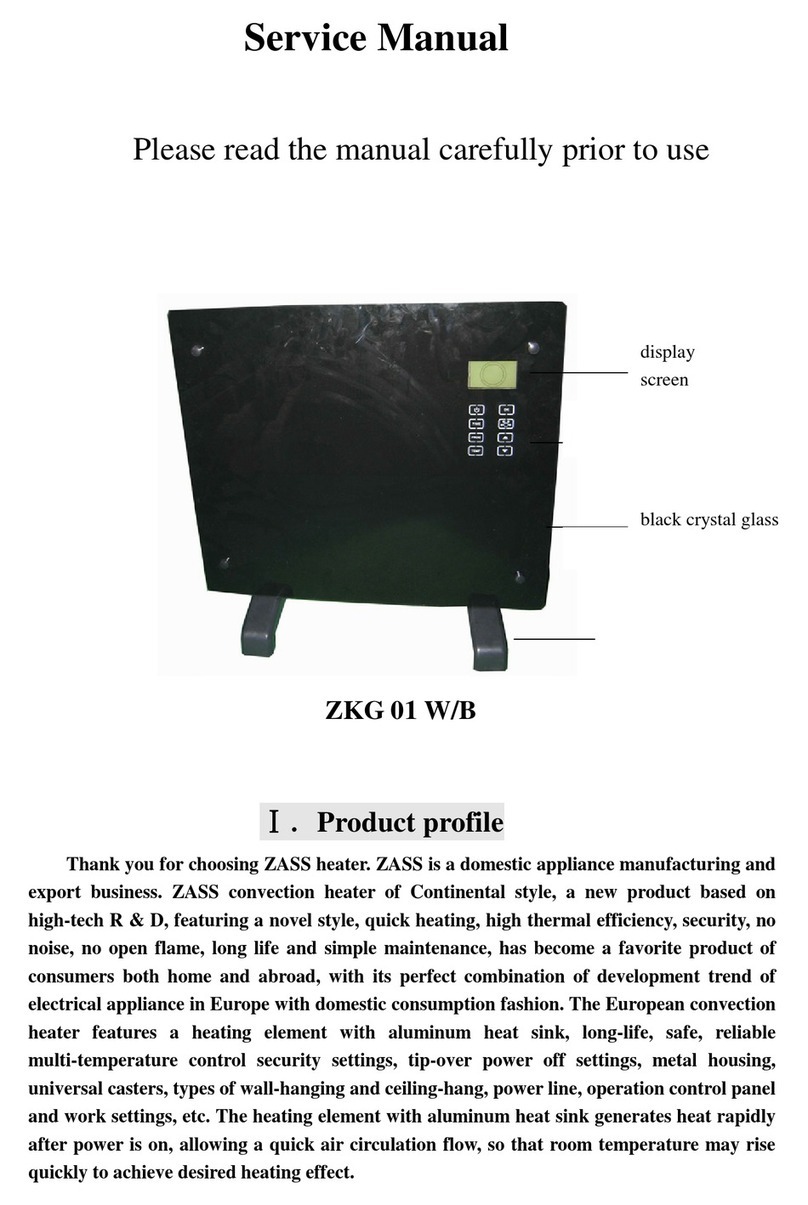
Zass ZR 11N User manual

MODELS/MODELE/MODELLEK:
ZR 11N, ZR 13N, ZRL 13N
Magyar Română English
INSTRUCŢIUNI DE UTILIZARE
HASZNÁLATI UTASÍTÁS
OPERATING INSTRUCTIONS
READ THESE INSTRUCTIONS CAREFULLY BEFORE USING THE MACHINE
CITIŢI CU ATENŢIE ACESTE INSTRUCŢIUNI DE FOLOSIRE ÎNAINTE DE A UTILIZA APARATUL
A GÉP HASZNÁLATA ELŐTT ALAPOSAN OLVASSA EL EZT A HASZNÁLATI UTASÍTÁST
ZASS Romania SRL (CUI RO15328988)
Ungheni nr. 40 A, cod 547605, Mureş
Telefon: 0265-262870, 0265-269209, Fax: 0265-307670
www.zassromania.ro, e-mail: o[email protected]
Unic importator în România:
Egyetlen importőr Romániában:
Sole importer in Romania:
A
A B C
BC

1
1
2
3 2
3
4
7
4
5 5
6 6
A / B C

English
3
Congratulations on purchasing this ZASS product. Like all ZASS products, this product was
designed on the basis of the latest technical knowledge and was manufactured using the most
reliable and modern electrical / electronic components.
Before putting the appliance into operation, please allow yourself a few minutes to read the
following instructions for use.
Thank you !
Carefully read the precautions
in this manual before operating
the unit!
WARNING: This appliance is
intended to use only indoor!
1. GENERAL INFORMATION and SAFETY PRECAUTIONS
Do not place this heater near ammable materials, surfaces or
substances, as there may be a risk of re.
CAUTION!
• This appliance is not intended for use by persons (including children) with reduced physical, sensory
or mental capabilities, or lack of experience and knowledge, unless they have been given supervision or
instruction concerning use of the appliance by a person responsible for their safety.
• Children should be supervised to ensure that they do not play with the appliance. The product is for
household use only.
• Connect the appliance to single phase AC supply of the voltage specied on the rating plate. In order to
avoid overheating, do not cover the heater.
• Never leave the heater unattended while it is in use. Always turn the product to the OFF position and
unplug it from the electrical outlet when not in use.
• Extreme caution is necessary when any heater is used by or near children, invalids or elderly person and
whenever the heater is theft operating and unattended.
• The heater must not be located immediately below an electrical socket-outlet.
• Do not run cord under carpeting and do not cover cord with throw rugs, runners or the like. Arrange cord
away from trac area and where it will not be tripped over.
• Do not operate the heater with a damaged cord or plug, or after the heater malfunctions, has been dropped,
or damaged in any manner.
If the supply cord is damaged, it must bare placed by the manufacturer or its service agent or a similarly
qualied person to avoid a hazard.
• Avoid the use of an extension cord as this may overheat and cause a risk of re.
• Use the heater in a well-ventilated area. Do not insert or allow objects to enter any ventilation or exhaust
opening. To prevent a possible re, do not block air intakes or exhaust openings in any manner. Do not use
on soft surfaces, like abed, where openings may become blocked. Use the heater on at, dry surfaces only.
• Do not place this heater near ammable materials, surfaces or substances, as there may be a risk of re.
• Keep the above ammable materials, surfaces or substances at least m from the front of the product and
keep them away from the sides and rear. 15. Do not use the heater in any areas where petrol, paint or other
ammable liquids are stored e.g. Garages or workshops as hot, arcing or spark imparts inside the head ter.
• Don’t use this heater in the immediate surroundings of a bath, a shower or a swimming pool. Never locate
the heater where it may fall into bathtub or other water container.
• This heater is hot when in use. To avoid bums and personal injury, do not let bare skin touch hot surfaces.
If provided, use handles when moving the product.
• Be sure that no other appliances are in use on the same electrical circuit as your product as an overload
can occur.
• This heater is lled with a precise quantity of special oil.
• Repair requiring opening of the oil container are only to be made by the manufacturer or his service a sent
who should be contacted if there is a no leakage.
Regulations concerning the disposal of oil when scrapping the appliance have to be followed. The heater
should not be used in a room, of which the oor area Is less than S M2.
The cord shouldn’t be placed nearby the hot surface of the appliance. Do not immerse the heater in water.
Do not use any cleaning chemicals such as detergents and abrasives.
Do not allow the interior to get wet as this could create a hazard.

3. INSTALLATION
4
The heater is packaged with the feet unattached. You must attach them before
operating the heater.
WARNING: Do not operate without feet attached. Do operate the heater only in upright
position (feet on the bottom, controls on the top), any other position could create a
hazardous situation.
1. Place the radiator body upside-down on a scratch free location, make sure it is
stable and will not fall.
2. Screw o the wins nuts from the U-shaped bolt provided, attach the U-shaped bolt
to the U facing ange between rst and second ns (near the front cover).
3. To attach the castor mounting plate to the radiator body, you should insert the
threaded ends of the U bolt in the holes on the castor mounting plate.
4. Screw the wing nuts back to the U bolt and fasten the wing nut properly.
Note: do not over tighten, which may cause the damage of radiator ange.
5. Screw o spherical nut from the castor, align the shaft to the hole of the castor
mounting plate, inserting, and screw on the spherical nut.
6. Repeat 2, 3, 4 and 5 on the rear of radiator for mounting of the rear castors.
Note: the rear castors must be mounted between the end two ns.
2. KEY TO MACHINE PARTS (Page 2)
1A/B/C
A/B/C
A/B/C
A/B/C
A/B/C
A/B/C
C
2
3
4
5
6
7
- Thermostat knob;
- Power switch;
- Power indicator;
- Cord storage;
- Castor;
- Radiant ns;
- Fan heater;

5. MAINTENANCE, CLEANING
6. TECHNICAL DATA
4. OPERATION
1. Always remove the plug from the socket-outlet and allow the radiator to cool down
before clean It.
2. Wipe radiator with a soft damp (not wet) cloth.
3. Tostoreawaytheheater,wind thecableroundbobbin and storetheheaterina cleandry
place.
4. In case of malfunction or doubt, do not try to repair the radiator yourself, it may result
in a rehazardor electricshock.
1. Before using the heater, make sure that it is on a at and stable surface, damage
may occur if it is placed on an incline or decline.
2. Set all the controls to OFF position and insert the plug into a socket-outlet with well
grounded. Be sure that plug ts rmly.
- on the ZRL 13N model, you can also use the air heater, turning the knob to position
I for minimum power, position II for medium power and position III for maximum
power.
3. Rotate the thermostat knob clockwise to MAX position and switch the heater on as
follow: the switch I for low heat, the switch II for medium heat and both switches on
for high heat.
4. When your room reaches the desired temperature, now slowly rotate the thermostat
knob counter clockwise until the pilot light goes out. The thermostat can now be left at
this setting. As soon as the room temperature has dropped below the set temperature,
the unit will switch itselfonautomaticallyuntilthesettemperaturehasbeenreachedagain.
lnthisway the room temperature remains constant with the most economical use of
electricity.
5. If you want to change the room temperature setting, rotate the thermostat knob
clockwise to raise the temperature, or counter clockwise to lower it.
6. This heater includes an overheat protection system that shuts o the heater when
parts of the heater are getting excessively hot.
7. To completely shut the heater o, turn all the controls to OFF, and remove plug from
the socket-outlet.
5
English
Model
ZR 11 N
ZR 13 N
ZRL 13 N
I / I II / II III / III
1000W / - 1500W / - 2500W / -
1100W / -
1000W / 1400W
1500W / -
1200W / 1600W
2600W / -
2200W / 2600W

Felicitări pentru cumpărarea acestui produs ZASS. Ca toate produsele ZASS, şi acest produs
a fost conceput pe baza cunoştinţelor tehnice cele mai noi şi s-a fabricat prin utilizarea
componentelor electrice/electronice cele mai abile şi moderne.
Înainte de a pune aparatul în funcţiune, vă rugăm să vă acordaţi câteva minute ca să citiţi
instrucţiunile de utilizare care urmează.
Vă mulţumim !
Vă rugăm citiţi cu atenţie aceste intrucţiuni
de utilizare înainte de utilizarea aparatului!
1. INFORMAȚII GENERALE şi MĂSURI DE PRECAUŢIE
Nu așezați acest încălzitor lângă materiale, suprafețe sau substanțe
inamabile, deoarece poate exista riscul de incendiu.
ATENŢIE !
ATENȚIE: Aparatul este destinat doar
uzului în locații acoperite!
6
• Despachetaţi produsul şi vericaţi dacă acesta este intact. În cazul în care pare a nu intact, nu asamblaţi
aparatul şi apelaţi la un service autorizat. Nu lăsaţi materialele din ambalaj (în special pungi PE) la îndemâna
copiilor.
• Înainte de a porni aparatul vercaţi dacă tensiunea şi frecvenţa sursei de alimentare corespund cu cele
înscrise pe aparat.
• În timpul folosirii aparatul este erbinte, iar pentru a evita arsurile este recomandat să nu atingeţi aparatul.
Folosiţi mânerul dacă doriţi să mutaţi radiatorul.
• Evitaţi folosirea unui prelungitor deoarece poate cauza supraîncălzirea acestuia.
• Se recomandă luarea unor măsuri speciale dacă aparatul este folosit în apropierea copiilor sau este lăsat
nesupravegheat.
• Aparatul nu trebuie plasat foarte aproape de prize sau alte surse de energie. Aparatul nu se va utiliza în
afara încăperilor.
• Nu se va utiliza aparatul în băi, uscătorii sau alte încăperi similare. Nu puneţi aparatul în locuri de unde ar
putea cădea în apă sau în alte lichide.
• Nu introduceţi obiecte în aparat, prin fantele de răcire sau prin alte deschideri, deoarece puteţi cauza
şocuri electrice, incendii sau puteţi strica aparatul.
• Aparatul nu se va acoperi cu nimic. Nu lăsaţi aparatul în funcţiune nesupravegheat.
• Asiguraţi aparatului o zonă de siguranţă, la distanţă de mobilă sau de alte obiecte, la cel puţin 90 cm pe
părţile laterale şi partea superioară şi 50 cm frontal.
• Folosiţi întotdeauna aparatul în poziţie vertical! Nu folosiţi aparatul culcat!
• Dacă aparatul s-a răsturnat, deconectaţi-l şi lăsaţi-l să se răcească, doar după aceea puneţi-l din nou în
picioare.
• Nu folosiţi aparatul în încăperi în care se găsesc gaze explozive sau în timp ce folosiţi solvenţi sau adezivi
inamabili (ex. lacul de parchet, PVC).
• Păstraţi cordonul de alimentare la distanţă de corpul aparatului sau de alte obiecte erbinţi. Nu aşezaţi
cablul de alimentare pe aparat sau în faţa lui, atâta timp cât acesta este în funcţiune sau mai este cald.
• Dacă cordonul de alimentare sau ştecherul sunt stricate, acestea trebuie înlocuite de către persoana de la
service sau de către o persoană calicată.
• Acest aparat conţine o cantitate precisă de ulei special. Reparaţiile care necesită deschiderea radiatorului
(de ex. scurgerea de ulei sau înlocuirea rezistenţei) vor efectuate doar de către un service autorizat.
• Aparatul conţine componente care nu se pot repara în caz de lovituri sau spargeri, acesta necesitând
returnarea la furnizor.
• Utilizaţi aparatul pe o suprafaţă netedă şi stabilă.
• Nu loviţi şi nu stricaţi cordonul de alimentare. Dacă cordonul de alimentare este deteriorat duceţi aparatul
imediat la un service autorizat
• Înainte de curăţire opriţi aparatul şi deconectaţi-l de la priza de alimentare.
• Acest aparat nu este destinat a folosit de persoane (inclusiv copii) cu dizabilităţi zice, senzoriale sau
mentale. Utilizatorii fără experienţă şi care nu cunosc aparatul, sau cei cărora nu li s-au dat instrucţiunile
pentru utilizator, trebuie să e supravegheaţi de o persoană care răspunde de siguranţa lor.
• Folosiţi aparatul conform destinaţiei sale, adică încălzire pentru uz casnic. Nu folosiţi aparatul în alte
scopuri deoarece poate periculos.
• Producătorul nu este responsabil pentru pagubele cauzate de folosirea incorectă a aparatului.

Română
3. ASAMBLARE
2. PREZENTARE (Pagina 2)
7
Încălzitorul este ambalat cu picioarele neatașate. Trebuie să le atașați înainte de a
folosi încălzitorul.
ATENȚIE: Nu utilizați aparatul fără picioarele atașate. Folosiți încălzitorul doar în
poziție verticală (picioare în jos, partea de comenzi în partea de sus), orice altă poziție
poate crea o situație periculoasă.
1. Întoarceţi aparatul. La întoarcerea aparatului în poziţie inversă se vor evita
suprafeţele dure.
2. Înșurubați piulițele tip uture de pe șurubul în formă de U furnizat, atașați șurubul în
formă de U la anșa orientată U între prima și al doilea element (lângă capacul frontal).
3. Pentru a xa placa de xare a roților la corpul radiatorului, ar trebui să introduceți
capetele letate ale șurubului U în oriciile de pe placa de xare a roților.
4. Înșurubați piulițele uture înapoi în șurubul U și xați piulița uture în mod corespunzător.
Notă: nu strângeți excesiv, poate provoca deteriorarea anșei radiatorului.
5. Înșurubați piulița sferică de pe roți, aliniați axul cu oriciul plăcii de montare a roților,
introducând și înșurubați piulița sferică.
6. Repetați pașii 2, 3, 4 și 5 pentru montarea roților din spate.
Notă: roțile din spate trebuie să e montate între ultimii doi elemenți.
1A/B/C
A/B/C
A/B/C
A/B/C
A/B/C
A/B/C
C
2
3
4
5
6
7
- Butonul termostat;
- Întrerupător;
- Indicator luminos;
- Suport cablu;
- Roți;
- Elemenți de încălzire;
- Aerotermă;

8
5. CURĂŢIREA ȘI DEPOZITAREA
6. DATE TEHNICE
4. UTILIZARE
1. Deconectaţi întotdeauna aparatul de la reţea şi lăsaţi-l să se răcească, înainte de
curăţire.
2. Nu folosiţi detergenţi, praf de curăţat abraziv sau orice altă substanţă abrazivă,
deoarece acestea pot deteriora aparatul şi vopseaua de pe corpul radiatorului.
3. Ştergeţi aparatul cu o cârpă uscată pentru a îndepărta praful şi o cârpă puţin umezită
(nu udă) pentru a şterge petele.
4. Demontaţi roţile si introduceţi radiatorul şi roţile în cutia originală, depozitaţi într-un
loc uscat şi rece.
Aşezaţi aparatul e o suprafaţă plană, tinând cont de sfaturile din capitolul
‘ATENŢIONĂRI’. Având butonul termostat în poziţia minim şi întrerupătorul în poziţia
‘OPRIT’ (0), introduceţi ştecherul cordonului de alimentare în priză. După introducerea
în priză ledul de control se aprinde.
ATENȚIE! Dacă aparatul s-a răsturnat, deconectaţi-l şi lăsaţi-l să se răcească,
doar după aceea puneţi-l din nou în picioare.
1. Temperatura camerei poate reglată cu ajutorul termostatului. Rotiţi butonul
termostat în sensul acelor de ceasornic, pentru creşterea temperaturii şi în sens invers
acelor de ceasornic pentru a scădea temperatura, până ajungeţi la temperatura dorită.
2. Pentru setarea puterii:
- rotiţi întrerupătorul pe poziţia (I) pentru putere minimă, pe poziţia (II) pentru putere
medie şi pe poziţia (III) pentru putere maximă.
- la modelul ZRL 13N, puteţi folosi şi aeroterma, rotind butonul pe poziţia I pentru
putere minimă, pe poziţia II pentru putere medie şi pe poziţia III pentru putere
maximă.
NOTĂ: acest tip de radiator este umplut cu ulei, din această cauză se va răci încet
după oprire. Aşteptaţi răcirea completă înainte de a manevra aparatul. Pentru mutarea
lui folosiţi mânerul integrat.
3. Rotirea butonului termostat în sensul acelor de ceasornic va creşte temperatura
‘pre-setată’ (rotirea spre HIGH).
4. Rotirea butonului termostat în sens invers acelor de ceasornic va scădea temperatura
‘pre-setată’ (rotirea spre LOW).
5. Nu acoperiţi aparatul în timpul utilizării, existând riscul unui incendiu.
6. După terminarea utilizării aparatului, aduceţi întrerupătoarele în poziţia ‘OPRIT’ (0)
şi butonul termostat în poziţia 0 (LOW-minim), după care scoateţi ştecherul din priză.
Model
ZR 11 N
ZR 13 N
ZRL 13 N
I / I II / II III / III
1000W / - 1500W / - 2500W / -
1100W / -
1000W / 1400W
1500W / -
1200W / 1600W
2600W / -
2200W / 2600W

Gratulálunk a ZASS termék megvásárlásához. Mint minden ZASS termék, ez a termék a legújabb
műszaki ismeretek alapján készült, és a legmegbízhatóbb és legmodernebb elektromos /
elektronikus alkatrészek felhasználásával készült.
Mielőtt üzembe helyezné a készüléket, kérjük, hagyja magát néhány percig, hogy elolvassa az
alábbi használati utasításokat.
Köszönjük!
Kérjük, olvassa el gyelmesen ezeket az
utasításokat használat előtt.
1. ÁLTALÁNOS TUDNIVALÓK és BIZTONSÁGI ELŐÍRÁSOK
Ne tegye a melegítőt gyúlékony anyagok, felületek vagy anyagok
közelében, mivel tűzveszély állhat fenn.
FIGYELEM !
VIGYÁZAT: Ezt a készüléket csak
beltéri használatra tervezték!
9
Magyar
• Ezt a készüléket nem szabad csökkent zikai, érzékszervi vagy mentális képességekkel rendelkező, vagy
tapasztalat és ismeretekkel nem rendelkező személyek (beleértve a gyermekeket) számára használni,
kivéve, ha felügyelet vagy utasítások adják a készülék használatáért a biztonságáért felelős személyek
számára.
• A gyermekeket felügyelni kell annak biztosítása érdekében, hogy ne játsszanak a készülékkel. A termék
csak háztartási használatra készült.
• Csatlakoztassa a készüléket az adattáblán megadott feszültség egyfázisú váltakozó áramú tápegységéhez.
A túlmelegedés elkerülése érdekében ne takarja le a melegítőt.
• Soha ne hagyja a fűtést felügyelet nélkül használat közben. Mindig fordítsa a terméket KI állásba, és
húzza ki a konnektorból, ha nem használja.
• Különös óvatosság szükséges, ha bármilyen fűtőkészüléket gyermekek, rokkantsági vagy idős emberek
használnak vagy azok közelében használnak, valamint amikor a fűtőkészüléket lopásként működtetik és
felügyelet nélkül tartják.
• A fűtőkészüléket nem szabad közvetlenül az elektromos aljzat alján elhelyezni.
• Ne futtassa a kábelt szőnyeg alatt, és ne takarja le a kábelt szőnyegekkel, futókkal vagy hasonlókkal. A
kábelt helyezze el a forgalomtól távol, ahol nem szabad megbotlik.
• Ne működtesse a fűtőkészüléket sérült kábellel vagy dugóval, illetve a fűtőberendezés hibás működése
vagy leesése vagy bármilyen megsérülése után.
Ha a tápkábel sérült, akkor a veszély elkerülése érdekében a gyártót vagy annak szervizképviselőjét vagy
hasonló képzettséggel rendelkező személyt szabadon kell elhelyezni.
• Kerülje a hosszabbító kábel használatát, mivel az túlmelegedhet, és tüzet okozhat.
• A fűtőberendezést jól szellőző helyen használja. Ne helyezzen tárgyakat a szellőzőnyílásba vagy a
kipufogónyílásba. A lehetséges tűz elkerülése érdekében semmilyen módon ne akadályozza meg a
légbeömlőket vagy a kipufogónyílásokat. Ne használja olyan lágy felületeken, mint a mélyedés, ahol a
nyílások eltömődhetnek. A melegítőt csak sima, száraz felületeken használja.
• Ne tegye a melegítőt gyúlékony anyagok, felületek vagy anyagok közelében, mivel tűzveszély állhat fenn.
• A fenti gyúlékony anyagokat, felületeket vagy anyagokat tartsa legalább a termék elejétől m-re, és oldalaitól
és hátuljától távol tartsa őket. 15. Ne használja a fűtőberendezést olyan helyen, ahol benzin, festék vagy
más gyúlékony folyadék tárolható, pl. Garázsok vagy műhelyek, amikor forró, íves vagy szikra jelenik meg
a fej belsejében.
• Ne használja ezt a melegítőt kád, zuhanyzó vagy úszómedence közvetlen közelében. Soha ne keresse
meg a melegítőt, ahol a fürdőkádba vagy más víztartályba eshet.
• A fűtőelem használat közben forró. Az ütések és a személyi sérülések elkerülése érdekében ne engedje,
hogy a csupasz bőr érintkezzen a forró felülettel. Ha van, használjon fogantyúkat a termék mozgatásához.
• Ügyeljen arra, hogy ne használjon más készüléket ugyanazon az áramkörön, mint a termék, mert
túlterhelés léphet fel.
• A melegítő pontos mennyiségű speciális olajjal van feltöltve.
• Az olajtartály kinyitását igénylő javításokat csak a gyártó vagy a szervizben végezheti el, akihez
szivárgásmentesen kell fordulni.
A készülék leselejtezésekor az olaj ártalmatlanítására vonatkozó szabályokat be kell tartani. A fűtőkészüléket
nem szabad olyan helyiségben használni, amelynek padlófelülete kisebb, mint S M2.
A kábelt nem szabad a készülék forró felülete közelében elhelyezni. Ne merítse a melegítőt vízbe.
Ne használjon tisztítószereket, például tisztítószereket és csiszolóanyagokat.
Ne engedje, hogy a belső tér megnedvesedjön, mivel ez veszélyt jelenthet.

2. A GÉP ALKOTÓELEMEI (2 Oldal)
10
3. TELEPÍTÉS
A fűtőkészüléket nem rögzített lábakkal csomagolják. A fűtőberendezés működtetése
előtt rögzítenie kell azokat.
FIGYELMEZTETÉS: Ne működtesse, ha nincs lába. A fűtőkészüléket csak függőleges
helyzetben működtesse (lábak az alján, a kezelőpult a tetején), minden más helyzet
veszélyes helyzetet okozhat.
1. Helyezze a radiátort fejjel lefelé a karcolásmentes helyre, ellenőrizze, hogy stabil
és nem esik-e le.
2. Csavarja le a nyomaték anyákat a mellékelt U alakú csavarról, rögzítse az U
alakú csavart az U oldalsó karimához az első és a második uszony között (az előlap
közelében).
3. A görgő szerelőlemezének a radiátor testéhez történő rögzítéséhez az U csavar
menetes végeit be kell helyezni a görgő rögzítő lemezén lévő lyukakba.
4. Csavarja vissza a szárnyas anyákat az U csavarra és rögzítse megfelelően a
szárnyas anyát.
Megjegyzés: Ne húzza meg túlzottan, mert ez károsíthatja a fűtőkarima karimát.
5. Csavarja le a gömbös anyát a görgőről, igazítsa a tengelyt a görgő rögzítőlemezének
furatához, illessze be, és csavarja rá a gömbös anyát.
6. A hátsó görgők felszereléséhez ismételje meg a 2, 3, 4 és 5 számot a fűtő hátulján.
Megjegyzés: a hátsó görgőket a két utolsó radiátor között kell felszerelni.
1A/B/C
A/B/C
A/B/C
A/B/C
A/B/C
A/B/C
C
2
3
4
5
6
7
- Termosztát gomb;
- Hálózati kapcsoló;
- Jelzőfény;
- Kábel tárolása;
- Görgő;
- Sugárzó uszonyok;
- Ventilátor fűtés;

Magyar
11
5. KARBANTARTÁS, TISZTÍTÁS
6. MŰSZAKI ADATOK
4. MŰKÖDÉS
1. Tisztítás előtt mindig húzza ki a dugaszt a konnektorból, és hagyja lehűlni a radiátort.
2. Törölje le a radiátort puha, nedves (nem vizes) ruhával.
3. Tostoreareagáltassa a melegítőt, a széláramú kábelmezőt és a hőszigetelő helyet.
4. Meghibásodás vagy kétség esetén ne próbálja meg saját maga megjavítani a
radiátort, mert tűzveszélyes áramütést okozhat.
1. A radiátor használata előtt ellenőrizze, hogy egy sima és stabil felületen van-e;
sérülések jelentkezhetnek, ha lejtőn helyezik el.
2. Állítsa az összes vezérlőt OFF állásba, és dugja be a dugaszt egy földelt aljzatba.
Ügyeljen arra, hogy a dugó jól illeszkedjen.
- a ZRL 13N modellnél a légfűtést is használhatja, fordicsa el a gombot az I állásba a
minimális teljesítményhez, a II állásba a közepes teljesítményhez és a III állásba
a maximális teljesítményhez.
3. Forgassa el a termosztát gombot az óramutató járásával megegyező irányba MAX
helyzetbe és kapcsolja be a fűtőberendezést az alábbiak szerint: I kapcsoló alacsony
hő esetén, II kapcsoló közepes hő esetén és III kapcsoló magas hő esetén.
4. Amikor szobája eléri a kívánt hőmérsékletet, forgassa el lassan a termosztát gombot
az óramutató járásával megegyező irányba, amíg a jelzőfény kialszik. A termosztát
ebben a beállításban hagyható. Amint a helyiség hőmérséklete a beállított hőmérséklet
alá esik, az egység automatikusan átkapcsol a hőmérsékletre, amíg a hőmérsékletet
nem reagálja. Ekkor a szobahőmérséklet állandó marad a leggazdaságosabb
villamosenergia-felhasználás mellett.
5. Ha meg akarja változtatni a szobahőmérsékleti beállítást, forgassa el a termosztát
gombját az óramutató járásával megegyező irányba a hőmérséklet emeléséhez, vagy
az óramutató járásával ellentétes irányba, hogy csökkentse.
6. Ez a fűtőelem tartalmaz egy túlmelegedés elleni védelmi rendszert, amely kikapcsolja
a fűtőkészüléket, amikor a fűtőelem egyes részei túl melegsznek.
7. A fűtés teljes leállításához fordítsa az összes kapcsolót KI állásba, és húzza ki a
dugaszt az aljzatból.
Modell
ZR 11 N
ZR 13 N
ZRL 13 N
I / I II / II III / III
1000W / - 1500W / - 2500W / -
1100W / -
1000W / 1400W
1500W / -
1200W / 1600W
2600W / -
2200W / 2600W

IMPORTANT INFORMATION CONCERNING THE CORRECT DEFECTS OF THE PRODUCT IN ACCORDANCE
WITH EC DIRECTIVE 2012/19 / EU
Worn electrical appliances are valuable materials, which is why their place is not in household waste! For this reason,
please support and participate in the protection of natural resources and the environment by handing this appliance
to their take-over centers or to the importer whose address you can nd in this manual or in the warranty certicate.
By removing home appliances separately, you will avoid the potential negative consequences that your environment
and health may have on the wrong removal, and you will be able to capitalize on the constituent materials for saving
energy and resources. Further details may be requested from your local government or your nearest collection point.
Inappropriate waste disposal may, in accordance with national regulations, be amended. The separate decommis-
sioning of an electrical appliance is specied by marking the product with the image of a cut bay.
INFORMAŢII IMPORTANTE CU PRIVIRE LA DEZAFECTAREA CORECTĂ A PRODUSULUI ÎN CONFORMITATE
CU DIRECTIVA CE 2012/19/UE
Aparatele electrice uzate sunt materiale valoroase, motiv pentru care locul lor nu este la gunoiul menajer! Din
această cauză, vă rugăm să ne sprijiniţi şi să participaţi la protejarea resurselor naturale şi a mediului înconjurător,
prin predarea acestui aparat la centrele de preluare a acestora sau la importatorul a cărui adresă o puteţi găsi în
acest manual sau în certicatul de garanţie. Înlăturând separat dispozitivele electrocasnice, veţi evita eventualele
consecinţe negative pe care le-ar putea avea asupra mediului şi sănătăţii înlăturarea incorectă, şi veţi permite valo-
ricarea materialelor constituente pentru economisirea energiei şi a resurselor. Detalii suplimentare se pot solicita la
administraţia locală sau la cel mai apropiat punct de colectare. Îndepărtarea necorespunzătoare a deşeurilor poate
, în conformitate cu reglementările naţionale, amendată. Dezafectarea separată a unui dispozitiv electrocasnic este
specicată prin marcarea produsului cu imaginea unei pubele tăiate.
FONTOS INFORMÁCIÓK A TERMÉK MEGFELELŐ HATÁSÁRA VONATKOZÓAN A
2012/19 / EU IRÁNYELVEKEN
Ez a szimbólum azt jelöli, hogy a terméket nem szabad a háztartási szeméttel együtt kidobni, ahogy azt a WEEE
direktíva (2002/96/EC) és a nemzeti törvények előírják. A terméket a kijelölt gyűjtőhelyeken, vagy egy hasonló új ter-
mék esetében egy-azegyben csere formájában, vagy egy arra felhatalmazott gyűjtőponton le kell adni, ahol gondo-
skodnak az elektronikai és elektromos berendezések megfelelő újrafeldolgozásáról (EEE). Ilyen hulladék nem meg-
felelő kezelése negatív hatással lehet a környezetre és az emberi egészségre a potenciálisan veszélyes anyagok
miatt, melyeket általában az EEE-kben használnak (elektronikai és elektromos berendezések). Ugyanakkor az Ön
együttműködése a termék megfelelő újrafeldolgozásában segít a természeti erőforrások hatékony kihasználásában
is. További információkat a használt készülékek megsemmisítésével kapcsolatban a helyi önkormányzatnál, hul-
ladékkezelő szervezetnél, vagy arra feljogosított WEEE vagy háztartási hulladékfeldolgozónál kaphat.
This appliance complies with European electromagnetic safety and compliance standards.
Acest aparat este conform cu standardele Europene de securitate şi conformitate electromagnetică.
Ez a készülék megfelel az európai elektromágneses biztonsági és megfelelőségi előírásoknak.
This product does not contain hazardous materials for the environment (lead, mercury, cadmium, hexavalent
chromium and brominated ammable agents: PBB and PBDE).
Acest produs nu conţine materiale periculoase pentru mediul înconjurator (plumb, mercur, cadmiu, crom hexava-
lent şi agenţi inamabili bromuraţi: PBB şi PBDE).
Ez a termék nem tartalmaz veszélyes anyagokat a környezet számára (ólom, higany, kadmium, hatértékű króm és
brómozott gyúlékony anyagok: PBB és PBDE).
www.zassromania.ro
We assume the right to make changes to these provisions without further notice.
SC ZASS ROMANIA S.R.L. is not responsible for any printing errors, images or product features.
Ne asumăm dreptul de a face modicări ale acestor prevederi fără o altă noticare.
S.C. ZASS ROMANIA S.R.L. nu răspunde pentru eventualele greşeli de tipar, imagini sau caracteristici ale produselor.
Feltételezzük a jogot, hogy ezeket a rendelkezéseket további értesítés nélkül megváltoztassuk.
SC ZASS ROMANIA S.R.L. nem vállal felelősséget a nyomtatási hibákért, a képekért vagy a termékjellemzőkért.
Rev.01 13102020
This manual suits for next models
2
Table of contents
Languages:
Other Zass Heater manuals
Popular Heater manuals by other brands

Elnur Gabarron
Elnur Gabarron ECOMBI PROSSH User operating instructions

Blumfeldt
Blumfeldt 10032458 manual

Geko
Geko PH-ET07E Translation of the original operating instructions

Haverland
Haverland RCWave+ ANTHRACITE Instruction & installation manual

Qlima
Qlima DFA 1650 Premium operating manual

Newmac
Newmac NMC80 manual

Roberts Gorden
Roberts Gorden Combat CTU 22 to Combat 115 Installation, commissioning, operation & service manual

Orbegozo
Orbegozo CR 5113 instruction manual

infrasave
infrasave SchwankAir 3000 Series installation manual

Saxon
Saxon Mahogany Mk II owner's manual

Frico
Frico IHS20B24 quick start guide

BIEMMEDUE
BIEMMEDUE EK 3 A instruction manual