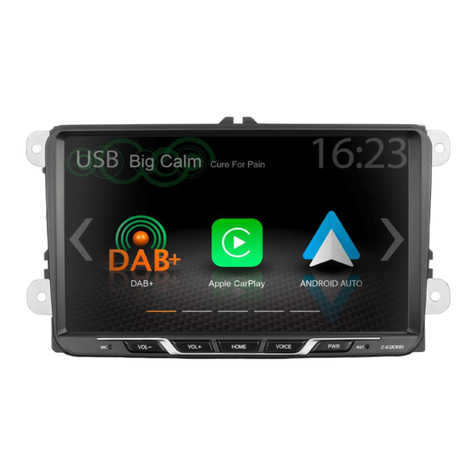
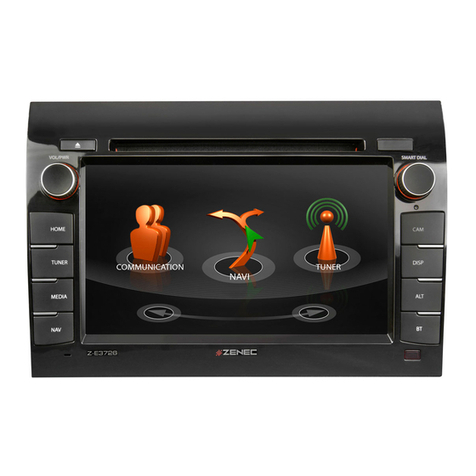
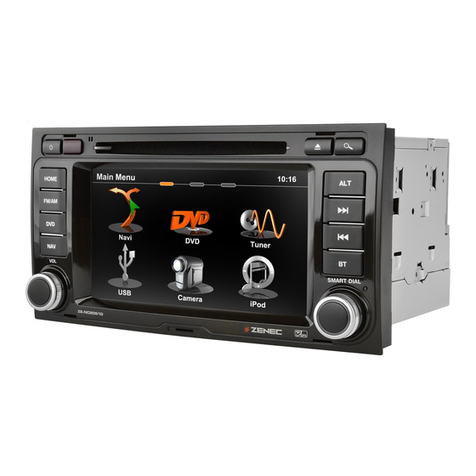
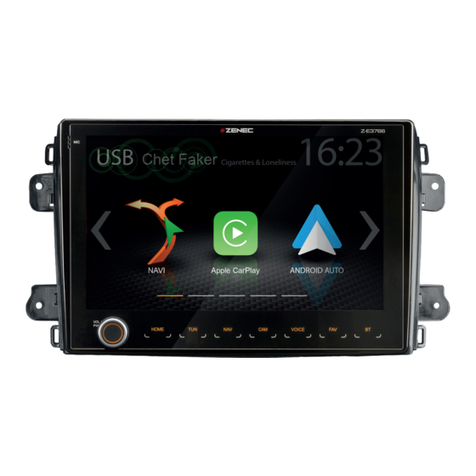
ZENEC Z-E3776 User manual

EN
Z-E3776
INFOTAINER
OPERATING INSTRUCTIONS

2 Rev.A
ZENEC welcomes you.
Operating instructions.
Thank you for choosing a ZENEC Multimedia System. The more familiar you are with the ZENEC
system, the better and easier you can operate it.
Our request is therefore:
Please read the operating instructions before starting to use your new ZENEC system. These
operating instructions contain important instructions and information for safe operation of the
ZENEC system and making full use of the technical advantages of this system. They also contain
various items of general information which will give you a better understanding.
At the point in time of production in the factory, the operating instructions which have been printed
beforehand are the most up to date medium, and do not only apply to the ZENEC system in
the original condition. Because of possible updates to the device software, deviations from the
descriptions or functions of your ZENEC system and these operating instructions are possible. No
claims can be derived from differing specifications, illustrations or descriptions.
Additional new information can be found in other brochures or in updated operating instructions
directly on the ZENEC web site at www.zenec.com under the respective model.
If you sell your vehicle with the installed ZENEC system, please ensure that these operating
instructions are in the vehicle, and that personal information such as a phone book stored in the
device is deleted.
We wish you an enjoyable and safe journey.

3 Rev.A
Validity of document
This document describes the functions which were available at the point in time of printing. The
functions which were introduced in follow-up versions with new software are not described in this
document. You can find up to date information about the latest features via the release notes in the
software installation instructions.
ILLUSTRATIONS
The illustrations in this document are exclusively for demonstration purposes and to provide a better
understanding. Depending on the device model, the software version and the market region, slightly
different information may be displayed or also shown on the touch screen of the respective ZENEC
model.
TECHNICAL DATA OF THE PRODUCT
All technical data and descriptions contained within this document have been checked and are
applicable at the time of printing. However, since continuous improvement is one of the main goals
of ZENEC, we also reserve the right to make change to the hardware and software of the products at
any time.
ORIENTATION
Certain topics are quickest to find using the table of contents. The first chapter is recommended to
obtain an initial overview of the device.
ADDITIONAL INFORMATION SOURCES
Our Support would be pleased to reply to questions.
INTERNET
Device information and general information about ZENEC, e.g. regarding technology, features
etc. can be found on the Internet: www.zenec.com. Wherever possible, only functions have been
described which are actually present in the device.

4 Rev.A
ZENEC WELCOMES YOU. ...................................................................................................................................................................... 2
VALIDITY OF DOCUMENT...................................................................................................................................................................... 3
Illustrations ............................................................................................................................................................................................. 3
Technical data of the product................................................................................................................................................................. 3
Orientation.............................................................................................................................................................................................. 3
Additional information sources .............................................................................................................................................................. 3
Internet.................................................................................................................................................................................................... 3
TABLE OF CONTENTS ............................................................................................................................................................................ 4
SAFETY INSTRUCTIONS........................................................................................................................................................................ 6
SWITCHING ON AND OFF ...................................................................................................................................................................... 7
THEFT PROTECTION ............................................................................................................................................................................. 7
AROUND THE FRONT OF THE DEVICE............................................................................................................................................... 8
REMOTE CONTROL............................................................................................................................................................................... 10
CONNECTION TO STEERING WHEEL REMOTE CONTROL ......................................................................................................... 11
Multifunction steering wheel (with LIN-BUS + analogue LFBs adapter / IR Stalk Interface use) .........................................11
Steering wheel remote control teach-in mode 1 – mode 1 ................................................................................................................. 12
Steering wheel remote control teach-in mode 2 – mode 2 ................................................................................................................. 13
MAIN MENU ............................................................................................................................................................................................ 16
Main menu structure............................................................................................................................................................................. 17
Operating concept ............................................................................................................................................................................... 18
Widget assignment and sources.......................................................................................................................................................... 18
Change source of a widget .................................................................................................................................................................. 19
APP OVERVIEW LIST ............................................................................................................................................................................ 21
SEARCH AND BASIC ENTRY FUNCTION ......................................................................................................................................... 21
CONNECTIONS.......................................................................................................................................................................................22
BLUETOOTH HANDSFREE DEVICE...................................................................................................................................................23
Control bar/toolbar (right)..................................................................................................................................................................... 23
Status information ................................................................................................................................................................................ 24
Coupling - connect mobile phone via Bluetooth.................................................................................................................................. 24
Set up Bluetooth connection (coupling)............................................................................................................................................... 25
Auto Connect / Automatic connection .................................................................................................................................................25
Device Manager ................................................................................................................................................................................... 25
General Bluetooth settings .................................................................................................................................................................. 26
Call up Bluetooth settings. ................................................................................................................................................................... 27
Accept and terminate calls................................................................................................................................................................... 27
Setting up a call via the phone book.................................................................................................................................................... 28
Call set-up via the numeric keypad......................................................................................................................................................28
“Incoming call” connection view .......................................................................................................................................................... 28
“Outgoing call” connection view ..........................................................................................................................................................29
Phone book...........................................................................................................................................................................................29
Contact search .....................................................................................................................................................................................30
Favourites ............................................................................................................................................................................................. 30
Call lists................................................................................................................................................................................................. 31
BT MUSIC – A2DP .................................................................................................................................................................................. 31
STARTS BT MUSIC (A2DP) AUDIO PLAYBACK............................................................................................................................... 32
MEDIA PLAYER - USB / SD / IPOD / BT MUSIC A2DP AUDIO ....................................................................................................... 32
MEDIAPLAYER, GENERAL.................................................................................................................................................................. 32
Select USB audio source .................................................................................................................................................................... 32
Choose between two USB sticks ........................................................................................................................................................33
Start USB audio playback .................................................................................................................................................................... 33
Pause and continue audio playback ....................................................................................................................................................34
Change track and fast forward / rewind...............................................................................................................................................34
Search audio folder and file structure .................................................................................................................................................34
Search for an audio file, e.g. track.......................................................................................................................................................35
Shuffle...................................................................................................................................................................................................35
Playback / repeat..................................................................................................................................................................................35
Favourite list .........................................................................................................................................................................................36
Smart Playlist (audio playback list)...................................................................................................................................................... 37
VIDEO .......................................................................................................................................................................................................38
Select video source..............................................................................................................................................................................39
Start USB video playback and search file structure ...........................................................................................................................39
Pause and continue video playback ....................................................................................................................................................39
Change video and fast forward / rewind..............................................................................................................................................39
Shuffle................................................................................................................................................................................................... 40
Playback / repeat..................................................................................................................................................................................40
APPLE CARPLAY ................................................................................................................................................................................... 40
Wired connection via USB ................................................................................................................................................................... 41
Wireless connection via WLAN and Bluetooth ................................................................................................................................... 41
Wireless CarPlay Autostart.................................................................................................................................................................. 42
Operating CarPlay................................................................................................................................................................................ 42
APPLE IPOD AUDIO (MADE FOR IPOD/IPHONE)............................................................................................................................42
Connecting iPod via USB..................................................................................................................................................................... 42
GOOGLE ANDROID AUTO ................................................................................................................................................................... 42
Wired connection via USB ................................................................................................................................................................... 43
Wireless connection via WLAN and Bluetooth ...................................................................................................................................43
Wireless Android Auto Autostart .........................................................................................................................................................44
Operating Android Auto........................................................................................................................................................................44
Table of contents

5 Rev.A
REMOTE CONTROL APP FOR SMARTPHONES (REMOTE CONTROL VIA SMARTPHONE) .................................................44
AV IN / HDMI ............................................................................................................................................................................................45
NAVIGATION ...........................................................................................................................................................................................45
Navigation update ................................................................................................................................................................................ 46
Maps .....................................................................................................................................................................................................46
Start-up of the navigation software ..................................................................................................................................................... 47
Navi initial start-up (Sat Fix creation) ..................................................................................................................................................49
NAVIGATION SPLIT SCREEN.............................................................................................................................................................. 49
FM TUNER................................................................................................................................................................................................ 51
Call up FM Radio source...................................................................................................................................................................... 51
Call up station information ................................................................................................................................................................... 52
Change station (search, presets)......................................................................................................................................................... 52
Manual station selection ...................................................................................................................................................................... 52
FM settings ........................................................................................................................................................................................... 52
Save station ..........................................................................................................................................................................................53
TA TRAFFIC ANNOUNCEMENTS........................................................................................................................................................53
Activate / deactivate .............................................................................................................................................................................53
Interrupt ................................................................................................................................................................................................54
Set TA volume.......................................................................................................................................................................................54
DIGITAL RADIO DAB+...........................................................................................................................................................................54
Call up DAB+ source ............................................................................................................................................................................54
Call up station information ................................................................................................................................................................... 55
Change station ....................................................................................................................................................................................55
DAB station preview list ....................................................................................................................................................................... 55
Switch ensemble .................................................................................................................................................................................56
DAB settings.........................................................................................................................................................................................56
Save station .......................................................................................................................................................................................... 57
KAMERA ..................................................................................................................................................................................................58
Call up camera source .........................................................................................................................................................................58
Switch over camera inputs ...................................................................................................................................................................58
Set and configure camera park assist lines ........................................................................................................................................58
MULTIVIEW CAMERA IMAGE MODE .................................................................................................................................................59
Call up multiview source ......................................................................................................................................................................60
Switch over viewing angle / image section ......................................................................................................................................... 60
VARIOUS (GENERAL) SETTINGS.......................................................................................................................................................60
AUDIO SETTINGS .................................................................................................................................................................................. 62
Call up audio settings ........................................................................................................................................................................... 62
Make quick audio settings....................................................................................................................................................................63
Set EQ presets / predef. audio profile in the quick audio settings......................................................................................................63
Call up and set equalizer / sound settings...........................................................................................................................................64
Ser EQ presets / predefined audio profiles ......................................................................................................................................... 64
Set the start and source volume ..........................................................................................................................................................64
Fine adjustment of source volumes (Gain).......................................................................................................................................... 65
Set balance and fader ..........................................................................................................................................................................66
X-Over audio crossover, general .........................................................................................................................................................66
Set X-Over audio crossover.................................................................................................................................................................66
Set subwoofer....................................................................................................................................................................................... 67
Run-time correction, general ............................................................................................................................................................... 67
Set run-time correction ........................................................................................................................................................................67
Activate or deactivate Navi-Mixer media muting.................................................................................................................................68
WIRELESS CONNECTION SETTINGS ............................................................................................................................................... 69
Call up wireless connection settings ................................................................................................................................................... 69
Set up Wifi connection with the mobile phone (couple)......................................................................................................................69
Set up Wifi connection with the Home WLAN (couple)....................................................................................................................... 70
VEHICLE ASSISTANT SETTINGS (ASSIST)..................................................................................................................................... 70
Call up driver assistant settings........................................................................................................................................................... 70
CAMERA INPUT SETTINGS................................................................................................................................................................. 71
Call up camera input settings............................................................................................................................................................... 71
SYSTEM AND DEVICE SETTINGS ..................................................................................................................................................... 72
Call up system and device settings .....................................................................................................................................................72
TFT DISPLAY SCREEN SETTINGS .................................................................................................................................................... 73
Call up TFT display screen settings ....................................................................................................................................................73
TIME AND DATE SETTING ................................................................................................................................................................... 74
Call up time and date setting:............................................................................................................................................................... 74
VEHICLE DISPLAY OPTIONS (NAVI WIDGET)................................................................................................................................. 75
Call up vehicle display options............................................................................................................................................................. 76
SOFTWARE VERSION........................................................................................................................................................................... 76
Call up detailed version information .................................................................................................................................................... 76
PASSWORD PROTECTION .................................................................................................................................................................. 77
Create and activate password protection ...........................................................................................................................................77
NOTES CONCERNING INSTALLATION ............................................................................................................................................. 77
DISASSEMBLY AND PREPARATION................................................................................................................................................. 78
OVERVIEW OF INSTALLATION AND CONNECTION ACCESSORIES......................................................................................... 79
Z-E3776 CONNECTION DIAGRAM ......................................................................................................................................................80
ABBREVIATIONS................................................................................................................................................................................... 82
WARRANTY.............................................................................................................................................................................................84
CERTIFICATION / MANUFACTURER ................................................................................................................................................. 86
6 Rev.A
Safety instructions
CAUTION:
Distracting the driver can lead to accidents and injuries. Operating the ZENEC system may
distract the driver’s attention from the prevailing traffic conditions! Connecting, changing or
inserting data media may also distract the driver’s attention from the prevailing traffic conditions.
CAUTION:
Always ensure that the volume setting allows acoustic signals from outside the vehicle to be
heard at all times (e.g. signal horns or sirens).
CAUTION:
Incorrect assembly or start-up of the ZENEC system may result in damage to the ZENEC system
or the vehicle electronics. The device should only be installed by qualified personnel who have
been authorized by ZENEC.
CAUTION:
This ZENEC system is exclusively intended for operation with an on-board voltage of 12 V DC.
Operating the ZENEC system with any other on-board voltage may result in damage to the
ZENEC system or to the vehicle electrical system.
CAUTION:
Dismantling or modifying the ZENEC system may result in damage to the device or the vehicle.
Opening or modifying the device by personnel who have not been authorized by ZENEC will
invalidate the warranty.
In the event of a malfunction or fault, please contact an authorized ZENEC dealer. Repairs
carried out by unauthorized personnel will invalidate the warranty.
CAUTION:
Driving recommendations and traffic signs which are displayed on the ZEBENEC system
may differ from reality. Traffic signs and traffic regulations take precedence over the driving
recommendations and displays of the ZENEC system.
Please adapt your driving behaviour and speed to the respective visibility, weather, road and
traffic conditions.
CAUTION:
Charging and connecting cables for external mobile devices may obstruct the driver. These
should be routed so that the driver’s freedom of movement is not impeded.

7 Rev.A
Switching on and off
The ZENEC system is equipped with a theft protection function. If this is active, when the ZENEC
system is switched on again after disconnecting the power supply, you are asked to enter a
password.
To change the password:
Operating instructions → Setting → Password (Page 77)
Z-E3726 5
GERÄTEBEDIENUNG –Z-E3726
GRUNDSÄTZLICHE BEDIENUNG
EIN-/AUSSCHALTEN
Manuelle Ein-/Ausschaltung
Drehregler links gedrückt halten, bis sich das ZENEC-System ein- oder ausschaltet
(Abb. S/01 )
Automatische Ein-/Ausschaltung
Fahrzeuge mit CAN-Bus Anbindung: Bei Einschalten der Zündung wird das ZENEC-System
aktiviert. Der Bootvorgang kann max. 1,5 Minuten in Anspruch nehmen. Dies kann zur Folge
haben, dass das System nur mit Verzögerung einsatzbereit ist. Das Ausschalten des ZENEC-
Systems wird durch das Ausschalten der Zündung oder Abziehen des Zündschlüssels aktiviert.
HINWEIS
Für eine Nutzung des Multifunktionslenkrads sowie weiterer Fahrzeugfunktionen wird ein
fahrzeugspezifisches CAN/Stalk Interface benötigt. Weitere Informationen erhalten Sie bei einem
autorisierten ZENEC-Fachhändler.
DIEBSTAHLSICHERUNG
Das ZENEC-System ist mit einer Diebstahlschutzfunktion ausgestattet. Ist diese aktiv, werden Sie nach
Trennung der Stromversorgung bei erneutem Einschalten des ZENEC-Systems aufgefordert, das von
Ihnen hinterlegte Password einzugeben.
Um das Passwort zu ändern:
Bedienungsanleitung
Einstellungen
Geräte Konfiguration
Help
Passwort
HINWEIS
Bewahren Sie das
Passwort sorgfältig auf.
Bei einem Verlust des
Passworts muss das
ZENEC-System ausgebaut
und zur Freischaltung des
Diebstahlschutzes an den
ZENEC-Service
eingesendet werden.
Dieser Dienst ist
kostenpflichtig!
THEFT PROTECTION
NOTE:
Keep the password in a safe place.
If the password is lost, the ZENEC system
must be removed and sent in to ZENEC
service to have the theft protection unlocked.
This service is billable!
Switching on and off manually Z-E3776
Pressing the Power button (Fig. S/8 ), to switch the ZENEC system on and keep it pressed
to switch it off again.
Automatic on/off switching
Vehicles without CAN/stalk interface:
The device switches on and off automatically via the ignition.
Vehicles with SWC or CAN/Stalk interface connection:
The ZENEC system is activated when the vehicle ignition is switched on. The ZENEC system is
switched off by turning off the ignition or removing the ignition key.
See detailed information on page 77
*Standard password
*12345

8 Rev.A
Around the front of the device
The main components of the front of the device are shown and explained here. The front of the
device contains various controls, including several sensor buttons for manually opening the source,
a volume / power button for regulating the volume of the device and switching it on and off, an IR
receiver for the remote control, and an opening in the frame for the internal microphone or speaker
phone.
1
bm
2 3 4 5 6 7 8 9
bn
bl
Number Symbol Function
1
Turn the knob to increase / reduce the volume.
Turn the knob to turn off the sound (mute).
Press again to restore the previous volume.
Hold down the knob to switch the device on and off.
NOTE: The playing of audio recordings is paused while the device is
muted.
2HOME Tap to jump back to the main menu or hold down to jump to the audio
settings.
3TUN Tap to activate the radio.
4NAV Tap to jump to the navigation and press again to call up the media info
control bar within the navigation.
5CAM
Tap to call up the camera source.
Press again to switch to camera 1 / multiview, camera 2 and camera 3.

9 Rev.A
Number Symbol Function
6VOICE
Tap to start the Android Auto or CarPlay voice control, and press again to
stop the voice control.
Hold down to restart the voice input.
7FAV Tap to select favourite content or a favourite function.
Hold down to jump to the audio settings.
8BT Tap to call up the Bluetooth handsfree facility.
9IR receiver for remote control.
10 Opening for the internal microphone of the handsfree facility.
11 Contact-sensitive screen (touch screen).
12 SD slot on right-hand side for micro SD card with navigation software.
Safety instruction
WARNING:
Loud sound output volumes can damage hearing. Risk of injury. Do not turn up the volume too
high.

10 Rev.A
Remote control
Number Function
Change playback source.
Playback/Pause.
Acknowledge LED.
Switch ZENEC device on/off.
Radio source Press to jump forward a radio station.
Media source Press to skip forward a track
Hold down to start fast forwarding of the track.
Increase volume.
Switch mute on/off.
Reduce volume.
Radio source Press to jump back a radio station.
Media source Press to jump back a track.
Hold down to start fast rewinding of the track.
Switch remote control on/off.

11 Rev.A
Connection to steering wheel remote control
The ZENEC system has direct support for the Fiat Ducato III Series 8 / 9 steering wheel remote
control functions for the front and (if present) rear telephone buttons, with deviating manual
assignment of several functions if required. The steering wheel buttons of the older Ducato
generations are also fully supported.
MULTIFUNCTION STEERING WHEEL (WITH LIN-BUS + ANALOGUE LFBS ADAPTER / IR STALK
INTERFACE USE)
(
(
Up to model year 2020/21
CAM /
voice
OK LIM RES
SET-
SET+
CANC
From model year 2021
* *
*The rear steering wheel buttons (if present) must be directly connected via analogue LFB connection adapter cables
Number Function
Reduce volume.
Increase volume.
Mute / take and terminate additional call.
CAM/Voice Press to call up the camera source.
Hold down to start the Android Auto or CarPlay voice control.
Radio source Press to jump forward a radio station.
Media source Press to jump forward a track.
Hold down to start fast forwarding of the track.
Radio source Press to jump back a radio station.
Media source Press to jump back a track.
Hold down to start fast rewinding of the track.
Accept a call.
Reject/terminate a call.
Voice Fiat Ducato III Series 8 and 9: Press to start the Android Auto or
CarPlay voice control, and press again to stop the voice control.
Voice/CAM Fiat Ducato III Series 7: Press to call up the camera source.

12 Rev.A
NOTE: These functions are only usable if a multifunction steering wheel is present in the
vehicle and the ZENEC system is connected via an analogue LFB adapter cable + LIN bus or a
vehicle-specific CAN/Stalk interface.
STEERING WHEEL REMOTE CONTROL TEACH-IN MODE 1 – MODE 1
Fiat Ducato III Series 7 (old platform)
8
A1 10 11
7
6
5
4
3
2
1 1
9
A2
The ZENEC system is also preconfigured with a CAN-IR Stalk interfaces for vehicles in the Fiat
Ducato III Series 7 platform, see compatibility list www.zenec.com, but the LFB connection must be
changed from “Mode 2” to “Mode 1”, since Mode 2 is preset as standard in the factory settings, for
direct use of new vehicles based on the Fiat Ducato III Series 8 & 9.
Number Description / function
Mode changeover
buttons: Tap to change the analogue mode.
Possible
settings:
Mode 1 = Fiat Ducato III Series 7;
Mode 2 = Fiat Ducato III Series 8 and 9.
Radio source Press to jump forward a radio station.
Media source Press to jump forward a track.
Hold down to start fast forwarding of the track.
Radio source Press to jump back a radio station.
Media source Press to jump back a track.
Hold down to start fast rewinding of the track.
with LFB (Key1/Key2 - mini-ISO) use: Press to call up the camera
source.
CAM Press again to switch between camera 1, camera 2 and camera 3.
Hold down to start the Android Auto or CarPlay voice control.
Press to increase the volume.
Press to reduce the volume.

13 Rev.A
Number Description / function
Press to mute all audio sources. Press again to cancel the muting of all audio sources.
Press during an incoming call (ringing) to accept the call.
Press during an active telephone call to terminate the call.
Tap to reassign the buttons. The system deletes the current button assignments on the
steering wheel.
Tap to restore the default assignments.
A1 Alternative function: Press to switch between the individual sources.
Hold down to start the Android Auto or CarPlay voice control.
A2
Alternative function: Press to jump to the navigation and press again to call up the media
info control bar within the navigation.
Hold down to start the Android Auto or CarPlay voice control.
STEERING WHEEL REMOTE CONTROL TEACH-IN MODE 2 – MODE 2
Fiat Ducato III Series 8 and 9
2
5
1
3A1 8 9
4
A2
7
1
6
The ZENEC system is for vehicles which are already preconfigured with the CAN IR Stalk
interface, see compatibility list www.zenec.com. If your vehicle is equipped with a resistance-based
multifunction steering wheel, you must also connect the analogue LFB adapter cable included in
the scope of delivery (Page 79 - No. 10) with the main connecting cable to Key 1 / Key 2 / GND
and the vehicle-side 20-pin connector. The connects the buttons on the back of the steering wheel
preconfigured.
The rear LFB button functions (volume, camera, skip, BT etc.) are displayed to you visually in the
system setup of the ZENEC under [Settings] ➔[Other] ➔[LFB Assignment (Analogue) ] under Mode
2. Analogue mode 2 is already preset for Series 8 and 9 in the factory. The BT handsfree telephone
is connected via multiple assignment, as shown graphically in Mode 2.

14 Rev.A
Number Description / function
Mode changeover
buttons:
Possible settings:
Tap to change the analogue mode.
Mode 1 = Fiat Ducato III Series 7;
Mode 2 = Fiat Ducato III Series 8 and 9.
Radio source Press to jump forward a radio station.
Media source Press to jump forward a track.
Hold down to start fast forwarding of the track.
Radio source Press to jump back a radio station.
Media source Press to jump back a track.
Hold down to start fast rewinding of the track.
CAM/Voice
with LFB (Key1/Key2 - mini-ISO) use: Press to call up the
camera source.
Press again to switch to camera 1 / multiview, camera 2 and
camera 3.
Hold down to start the Android Auto or CarPlay voice control.
Press to increase the volume.
Press to reduce the volume.
Mute/Accept/Hang up: Press to mute all audio sources if no call is active. Press again to
cancel the muting of all audio sources.
Press during an incoming call (ringing) to accept the call.
Press during an active telephone call to terminate the call.
Tap to reassign the buttons. The system deletes the current button assignments on the
steering wheel.
Tap to restore the default assignments.
A1 Alternative function: Press to switch between the individual sources.
A2 Alternative function: Press to jump to the navigation and press again to call up the media
info control bar within the navigation.
New assignment or teach-in of the rear buttons
1. Call up device settings.
2. Tap on [Various] to open the settings.
3. Display second page of the Various settings .
4. Tap on [LFB Assignment (Analogue)] to call up steering wheel operation teach-in mode 2 (Mode 2).
5. Tap [Change] to reassign the buttons. The system deletes the current button assignments on
the steering wheel. The reassignment can then be started. It is advisable to assign the deleted
buttons from top to bottom on the left-hand side, then repeat the procedure on the right-hand side.

15 Rev.A
Example of reassignment:
a. In the first step, the required function must be selected, in this case Camera (CAM). Tap on the
[CAM] function symbol in the middle of the function symbol field, which has a light blue border.
b. Press the relevant LFB button on the rear of the steering wheel (top left in this example). The
system sets the camera (CAM) function to the top left LFB button and also in the virtual LFB
display on your ZENEC. The camera source can be called up later by pressing the top left LFB
button instead of the default setting “Skip forwards” [>>I].
c. Continue reassigning the remaining LFB buttons. Once all buttons on the LFB have been
assigned, the LFB assignment can be completed. The reassignment is saved automatically,
and the new configuration can be used from now on. In order to restore the defaults, tap on
the “Factory setting” button. The button functions are then reset to the default values and
assignments.
NOTE: The front telephone and voice buttons are only connected via a LIN Bus adapter cable
or an optionally available CAN-IR Stalk interface “N-XFDUC8-SWC1”, and cannot be changed.
Whereas the rear buttons can be connected to the ZENEC via an analogue LFB cable.
NOTE: The LFB buttons for driving, on-board computer and cruise control operation are direct-
ly assigned to the respective vehicle functions, i.e. the function of these buttons on the steering
wheel is completely independent of the device installed in the vehicle.
NOTE: A correct function can only take place if the LFB connection is set to Mode 2. [Settings]
➔ [Various] ➔[LFB Assignment] ➔“Mode 2”.
NOTE: Fault-free operation of the steering wheel remote control can only be guaranteed if
you use the original ZENEC accessories included in the scope of delivery. The ZENEC system
and the original accessories must never be modied or altered in any way. Incorrect handling can
damage the vehicle and the ZENEC system.

16 Rev.A
Main menu
The main menu is subdivided into five sub-areas via which several functions and sources can
be called up directly. In the left-hand area there is the standard Zenec control bar with the ALT
(alternative button which can be assigned with a function), App List (overview of all apps) and device
settings buttons, plus the BT A2DP SRC Mode (Audio Streaming to an external Bluetooth speaker
on / off) und TA traffic news (on / off).
The three widgets “Navigation”, “Bluetooth” and “Media/Radio” can be found right next to the control
bar, in which the required source information and displays are shown, and provide quick access to
certain functions.
The status bar with the associated date and time display above the widgets shows the status
symbols and shortcuts to the Tuner TA message, volume (switch sound on/off), GPS and DR, and
Bluetooth®options. The status symbols show the current TA messages, the status of the volume
(Mute), the strength of the mobile radio network, the Bluetooth status of the Smartphone and
connected/not connected, plus the GPS and DR status.
NOTE: The date and time are updated automatically via the DAB module as standard.
The synchronisation source can be changed if required, and other settings are RTC or native
navigation. To change the synchronisation source, the date, and the hour display (12 or 24 hours),
press [Setting] ➔ [Date & Time settings].
2
3
4
5
6
7
8 9 10
11
1
12 13 14 15 16 17
Important general controls and symbols:
Number Symbol Meaning/Function
1 Tap to call up the home page.
2
Back (general main back function).
Tap to terminate or abort a function or a visual display window, e.g. close
Search function / Keyboard / Pop-ups / Lists etc. or access previously opened
pages step by step.

17 Rev.A
Number Symbol Meaning/Function
3
Traffic Announcement.
Tap to enable or disable automatic changeover to (FM Radio) with traffic
announcements.
4Alternative button.
Tap to select favourite content or a favourite function.
5BT SRC Mode (Bluetooth Speaker Streaming).
Tap to switch BT SRC Mode on or off or start/stop Bluetooth Streaming.
6Overview list app.
Tap to call up the overview list app with all of the available sources.
7Zenec device settings.
Tap to call up Zenec device and system settings.
8Navigation widget.
9Bluetooth widget.
10 Media / Radio widget.
11 Volume status.
12
No GPS available.
GPS available.
13
No DR available.
DR available.
14 TA traffic announcements active / inactive.
15
No mobile phone connected.
Mobile phone connected.
16 Current battery status of mobile phone.
17 Roaming active.
MAIN MENU STRUCTURE
The new Zenec main menu structure contains a new type of graphical user interface with
simultaneous display of the three sources Navigation / Smartphone + Bluetooth / Media + Radio
in a type of widget display on the large touch screen. This gives you an overview of the internal
and external sources at all times, which can therefore be operated in as simple a way as possible
at the same time in the main menu of the device display. The widgets provide quick access to the
frequently used functions. The defined widgets display dynamic content such as route information
and navigation parameters, and act as buttons for calling up the respective source at the same time,
among other things.

18 Rev.A
OPERATING CONCEPT
The Zenec operating concept includes numerous functions. These functions can be operated via the
touch screen, some via the CarPlay and Android Auto voice function or the various sensor buttons
and, depending on the configuration, via steering wheel operation.
Contact-sensitive operation
Function Display Operation
Slide
Navigate by wiping to the left or right within the Media Album
Cover- or the DAB MOT Slideshow area in the respective
source,and within the Media Widget (Widget 3), to change the
track or the station, for example.
Scroll Wipe (scroll) downwards or upwards within the USB playback
list, for example, to display the next or previous list contents.
Select The required operating functions or also the source can be
called up by tapping the buttons, icons or symbols.
Safety instruction
WARNING:
The operation of integrated information systems and communication devices while driving can
distract you from the traffic conditions. You may lose control of the vehicle. Risk of accidents. Only
operate the systems or devices if the traffic situation permits it. If necessary, stop and operate the
systems or devices with the vehicle stationary.
WIDGET ASSIGNMENT AND SOURCES
Widget 1 Navigation
Icon Available navigation sources
Native iGO Navigation

19 Rev.A
CarPlay Navigation
Android Auto Navigation
Widget 2 Bluetooth handsfree device
Icon Available Bluetooth sources
ZENEC Bluetooth
CarPlay Bluetooth
Android Auto Bluetooth
Widget 3 Media & Tuner
Icon Available audio sources
DAB+
FM Tuner
USB
SD
NOTE: Only with models which use the SD cards as an A/V source.
CarPlay Media Player
Android Auto Media Player
HDMI Audio
AV IN Audio
iPod
Schaudt
NOTE: Only possible with vehicles with Schaudt Feature equipment and
connection.
CHANGE SOURCE OF A WIDGET
The widgets can be adapted in the main menu. when doing so, it is possible to change the source
or also the display of the respective widget. The adaptations should only be made with the vehicle
stationary.
• A source change takes place by tapping the left/right arrow keys arrow keys < >.
SOURCE CALL-UP VIA THE WIDGETS
Each source can be called up directly via the widget.
1. Set required source using the arrow keys < > .
2. Tap main widget field to access the source.

20 Rev.A
SOURCE CALL-UP VIA THE APP OVERVIEW LIST
Each source can be called up directly via the App List.
1. Tap on the App Lists icon in the standard Zenec toolbar to display the App Overview List.
2. Tap required source to call up the source.
Widget controls and displays
each widget contains standard controls which make simplified quick operation possible.
3
4
1
2
7125 96 1110
13
8
List of controls and displays within the widgets:
Number Function Operation
1Source change Tap to change the source or the display.
2Extended route
information
Tap to call up the extended information such as tilt and incline
display, speed limits etc.
3Navigation
“Turn information”
Detailed navigation view with Navi turn information display.
Tap to switch to zoomed-in Navi turn information display.
4Navigation
Information area Navigation display and information area.
5Accept & terminate
call Tap to accept a call or terminate a call.
6Contact search Tap to open the contact search function.
7Telephone
information field
Display field of telephone type / name of mobile radio network
provider.
8Call display field Visual Bluetooth display of incoming and outgoing calls.
Other manuals for Z-E3776
1
Table of contents
Other ZENEC Car Navigation System manuals

ZENEC
ZENEC Z-E3726 Instruction sheet

ZENEC
ZENEC ZE-NC2051D User manual

ZENEC
ZENEC Z-N326 User manual

ZENEC
ZENEC Z-N326 User manual

ZENEC
ZENEC ZE-NA150 User manual

ZENEC
ZENEC Z-E4626 User manual

ZENEC
ZENEC Z-EMAP76 Series User manual

ZENEC
ZENEC Z-E3726 User manual

ZENEC
ZENEC ZE-NC2041D User manual

ZENEC
ZENEC Z-E2026 User manual

ZENEC
ZENEC ZE-NE2010 User manual

ZENEC
ZENEC ZE-NC4110 - MOUNTING INSTRUCTIONS FOR SANTA... User manual

ZENEC
ZENEC ZE-NC5010 User manual

ZENEC
ZENEC ZE-NC2010 User manual

ZENEC
ZENEC Z-E3766 User manual

ZENEC
ZENEC Prime Z-EMAP66 Series User manual

ZENEC
ZENEC Z-E5514M User manual

ZENEC
ZENEC ZE-NC5010 User manual

ZENEC
ZENEC ZE-NC5010 User manual