ZENEC Z-N326 User manual

2DIN DEVICE
NAVIGATION QUICK START GUIDE
EN
Z-N326
Z-N426

1
Initial set-up
1. Select your preferred language, then tap to confirm your
selection. Later you can change it in Regional settings.
2. Read the End User Licence Agreement, and tap if you agree with
the terms of use.
3. The Configuration wizard starts. Tap to continue.
4. Select the language and speaker used for voice guidance messages and tap
. Later you can change it in Regional settings. Tap any item in the
list for a short voice sample. Tap to confirm your selection.
5. Set your preferred units and time formats, and tap .
6. Set your route preferences, and tap .
7. The initial set-up is now complete, tap to enter the map screen.

2
Navigation view
The navigation view is the main screen of Z-N326 / Z-N426 that shows the planned route on a
map. Z-N326 / Z-N426 works with digital maps which are not simply the computerised
versions of traditional paper maps. Similarly to paper road maps, the 2D mode of digital maps
shows you streets and roads. Elevation is also illustrated in colour.
The navigation view displays the following screen buttons, data fields, and route information
on the map during navigation:
Note!
Some buttons, fields, or icons may not be available in your product version.
Number
Name
Description
1
Current
position
marker
The current position is displayed as a blue arrow by default.
When there is no GPS position, the current position marker is
transparent and it shows your last known position.
2
GPS position
The dot near the arrow shows the GPS position as perceived
by the GPS receiver.

3
3
Planned route
The planned route is displayed as an orange line.
4
Data fields
Three data fields show the following information:
•The estimated time of the arrival at the destination.
•The remaining time of the trip.
•The remaining distance to the destination.
Tap this area to access the Trip Computer screen with
additional information about the current trip on a dashboard
and in the Trip Summary.
You can change the default values in Settings or by tapping
and holding the area where the data fields appear.
If you have not selected a destination, you can see your
heading instead of the three data fields.
5
Next turn
preview
It shows the type of the next manoeuvre and its distance.
6
Second next
turn preview
It shows the type of the second next manoeuvre if it is near the
first one.
7
Next street
It displays the name of the next street.
If you have not selected a route destination, you can see
nearby house numbers, if they are available.
8
Parking
around
destination
It appears near the destination. By tapping it, you can check
the available parking facilities around your destination.
9
Destination
menu
It appears near the destination. By tapping it, you can check
the trip summary, find Places around your final destination,
save the current location, or suspend the navigation.
10
Lane
information
On multi-lane roads, it shows the lanes ahead and their
directions. The highlighted arrows represent the lanes and
direction you need to take.
11
Alert point
warning
It shows the type of the alert points when approaching a road
safety camera or other Alert Points like school zones or
railroad crossings. You must make sure that using this feature
is legal in the country where you intend to use it.
12
Speed limit
warning
It shows the current speed limit of the road.
13
Signpost
It shows the available destinations and the road numbers.
14
Motorway
services
By tapping it, you can check the details of the next few service
stations (petrol stations, restaurants) when travelling on a
motorway.

4
15
Traffic
It shows traffic-related information.
The TMC function is only available on the Z-N426 device
model.
16
Navigation
menu
By tapping it, you can open the Navigation menu, where you
can reach other parts of Z-N326 / Z-N426.
17
3D objects
They display hills, mountains, roads, landmarks, and buildings
in 3D.
18
Street name
It shows the current street name. By tapping it, you can open
the Where Am I screen. .
If you are approaching a motorway exit or a complex intersection and the needed information
exists, the map is replaced with a 3D view of the junction.
When entering a tunnel, the map is replaced with a generic tunnel image.

5
Navigation menu
On the Map screen, tap to open the Navigation menu.
You can see the following menu options when you are navigating without a planned route:
Button
Instruction
Select your destination by entering an address or its coordinates, or by selecting a
Place, a Saved Location, or a Saved Route. You can also look up your recent
destinations from the Smart History.
Build your route from one or more route points. You can also plan a route
independently of your current GPS position by setting a new starting point.
Check the traffic events affecting your route.
The TMC function is only available on the Z-N426 device model.
Access additional options and to check some useful information, for example traffic
information, and so on.
Customise the way the navigation software works.
See information about the navigation software.
When you are navigating with a planned route, the following menu options are also available:
Button
Instruction
Add an intermediate destination to your route.

6
See route alternatives to avoid parts of the route, or to avoid a specific road from
your planned route.
View the route in its full length on the map and to display route parameters and
route alternatives. Tap to access additional options, like Simulation or Route
Preferences.
Delete your route.
Delete the next waypoint or the whole route.
In the navigation menu, you have the following additional options:
Button
Instruction
Open the Saved Locations screen where you can save a location as a favourite
destination or edit a saved location.
Set the volume or mute the navigation.
Switch to 3D mode.
Switch to 2D mode.
Switch to 2D North up view mode.
Suspend navigation.
Resume navigation.
Access the User profiles menu where you can create new profiles or edit the
existing profiles. If more drivers are using the navigation system, they can create
their own profiles with their own settings.

7
Button
Instruction
Check those notifications that contain important information but do not require
immediate action from the users.
Open additional options within the menu options on certain screens.
Return to the map from any menu screen.

8
New Route menu
In the Navigation menu, tap to specify an address as your destination.
The New Route to... menu provides the following options:
Button
Instruction
Find your destination regardless of its type in Combined Search.
Specify an address as your destination.
Select a place of interest as your destination.
Choose from the list of your saved locations.
Choose from the list of all recent destinations.
Select a saved route as your destination or intermediate destination.
Select a destination by entering its coordinates.
Two of your recent destinations are listed in the New Route to... menu for easy access. Tap
any of the smart history items to set the location as your destination.

9
Navigating to an address
Tap on the Navigation view to access the Navigation menu.
In the Navigation menu, tap and . By default, the screen proposes the city or
town where you are located.
1. To change the country, perform the following steps:
a. Tap .
b. Use the keyboard to enter the name of the country.
c. After entering a couple of characters, the list of countries that match the
entered string appears.
d. Tap to open the list of results and select the country of
your choice.
2. To change the city, perform the following steps:
a. Tap and use the keyboard to enter a part of its name.
b. As you enter letters, the names that match the string appear in a list. Tap
to open the list of results.
c. Select a city/town from the list.
3. To enter the street name, perform the following steps:
a. Tap .
b. Start entering the street name on the keyboard, the names that match the string
appear in a list.
c. Tap to open the list of results. Select a street from the list.
4. To enter the house number, perform the following steps:

10
a. Tap .
b. Enter the house number on the keyboard. (To enter letters, tap .)
c. Tap to finish entering the address.
7. The map appears with the selected destination in the middle. If necessary, tap the map
somewhere else to modify the destination. The Cursor ( ) appears at the new
location.
(optional) To change some of the route setting parameters, perform the following
steps:
a. Tap to avoid motorways, tap to avoid Period Charge or Per-use
Toll roads, tap to avoid ferry, or tap to avoid carpool roads.
b. Tap to confirm the destination, or tap to select a
different destination.
c. After a short summary of the route parameters, the map appears showing the
entire route. Wait for a few seconds or tap .

11
Using combined search
You can initiate a separate search for addresses, Places, saved locations, or recent
destinations, but the fastest way to search for any of these is to use combined search.
1. On the Map screen, tap to access the Navigation menu and then .
2. Tap and the combined search screen appears. Right next to the
input field, you can see the search area, the city/town around which the search is
carried out. The default search area is the area where you are located. If needed
change the search area.
3.
4. With the proper search area displayed, you can start entering the name, address, or
category of the destination you are looking for.
5. Tap to see the search results. You can see all results in the list,
regardless of their type. Addresses, Places, Place categories, Saved Locations and
recent destinations are mixed within one list.
6. If needed, tap the corresponding button to narrow the list of search results by types
(the number on the related icon shows the number of matching results):
•Tap to see the list of recent destinations with a matching name or
address.
•Tap to see the list of your saved location (Favourite) destinations with a
matching name.
•Tap to see the list of matching addresses.
•Tap to see the list of Place categories. Scroll the list and select one of the
categories. You get the list of Places in that category ordered by their distance
from your current position.
•Tap to see the list of matching Places ordered by their distance from your
current location.
7. The map appears with the selected destination in the middle. If necessary, tap the map
somewhere else to modify the destination. The Cursor ( ) appears at the new
location.
8. (optional) If needed, change some of the route setting parameters.

12
9. Tap to confirm the destination, or tap to select a different
destination.
10. After a short summary of the route parameters, the map appears showing the entire
route. Wait for a few seconds or tap .

13
Navigating to a place of interest
1. On the Map screen, tap to access the Navigation menu. In the Navigation menu,
tap , then tap . You are offered the following pre-set search
categories:
•Tap to get a list of petrol stations along the route or if it is
not available, around your current position or your last known position.
•Tap to get a list of accommodation near the destination,
around your current position or your last known position.
•Tap to get a list of restaurants along the route, around your
current position or your last known position.
•Tap to get a list of parking lots near the destination or if it is
not available, around your current position or your last known position.
2. Tap to open the Search By Category window. Here, you can
search for Places of Interest by their name, categories and subcategories at the
following locations:
•Tap to search around the current position or if it is not
available, around the last known position.
•Tap to search along the active route, and not around a
given point. This is useful when you search for a later stopover that results in a
minimal detour only, such as searching for upcoming petrol stations or
restaurants.
•Tap to search for a place within a selected city.
•Tap to search for a place around the destination of the
active route.

14
An example of navigating to a place of interest
For example, to find a park around your destination, perform the following steps:
1. On the Map screen, tap to access the Navigation menu. In the Navigation menu,
tap , then tap .
2. Tap to open the Search By Category window.
3. Select the area around which the Place should be searched for. Tap the
button and select .
4.
5. Browse the list of place categories, and tap one of them.
6. Tap any of the list items.
7. (optional) If needed, change some of the route setting parameters.
8. Tap to confirm the destination, or tap to select a different
destination.
9. After a short summary of the route parameters, the map appears showing the entire
route. Wait for a few seconds or tap .

15
Useful Information menu
The Useful Information menu provides various additional functions. In the Navigation menu,
tap .
Button
Description
Shows information on the current position (latitude, longitude, nearest town, next
crossing street, and so on) or the last known position if GPS reception is not
available.
Offers assistance near your current position.
Offers a list of countries with useful driving information about the selected country
(for example speed limits, maximum blood alcohol level).
Shows the exact sunrise and sunset times for all your route points.
Shows the GPS Information screen with satellite position and signal strength
information.

16
Settings menu
You can configure the program settings, and modify the behaviour of Z-N326 / Z-N426. Tap
, and .
Tap the arrows to view the content of other pages.
The Settings menu provides the following options:
Button
Instruction
Select the type of vehicle you are driving, the road types used in route planning,
and the route planning method.
Adjust the different sound volumes.
Enable and set up warnings for speed limit, alert points (such as speed cameras),
and road signs.
Fine-tune the appearance of the map screen or adjust how the software helps you
navigate with different kinds of route-related information on the map screen.
Change the voice guidance language, set the time zone, the measurement units,
the time and date, and formats, and customise the application for your local
language.
Enable or disable menu animations.
The recommended route is not always the same between two points. Whenever
suitable data exists, traffic information can be taken into account in the route
calculation. Set your preferences for this service.
The TMC function is only available on the Z-N426 device model.
Modify the basic software parameters set during the initial set-up process.

© Copyright 2017
RevA / copy deadline: Q2-2017
Other manuals for Z-N326
3
This manual suits for next models
1
Table of contents
Other ZENEC Car Navigation System manuals
ZENEC
ZENEC ZE-NE2010 User manual

ZENEC
ZENEC ZE-NC5010 User manual
ZENEC
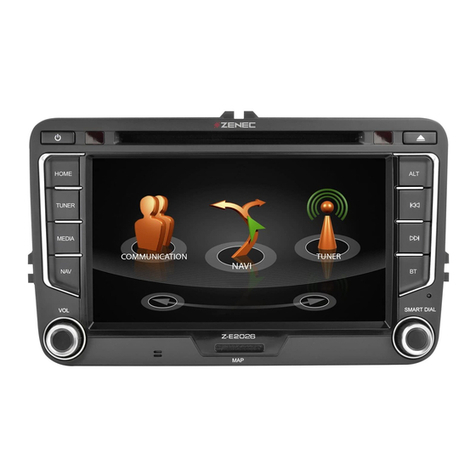
ZENEC Z-N326 User manual

ZENEC
ZENEC ZE-NC4110 - MOUNTING INSTRUCTIONS FOR SANTA... User manual

ZENEC
ZENEC ZE-NA150 User manual
ZENEC
ZENEC Z-EMAP76 Series User manual

ZENEC
ZENEC ZE-NC2010 User manual
ZENEC
ZENEC Z-E5514M User manual

ZENEC
ZENEC Z-E3726 User manual

ZENEC
ZENEC ZE-NC2051D User manual