zilink HD Series User manual

SMART W-LAN IP VIDEO DOORBELL
HD/SERIES
USER MANUAL
V1.0

Important Safety Instructions .................................................................................. 4
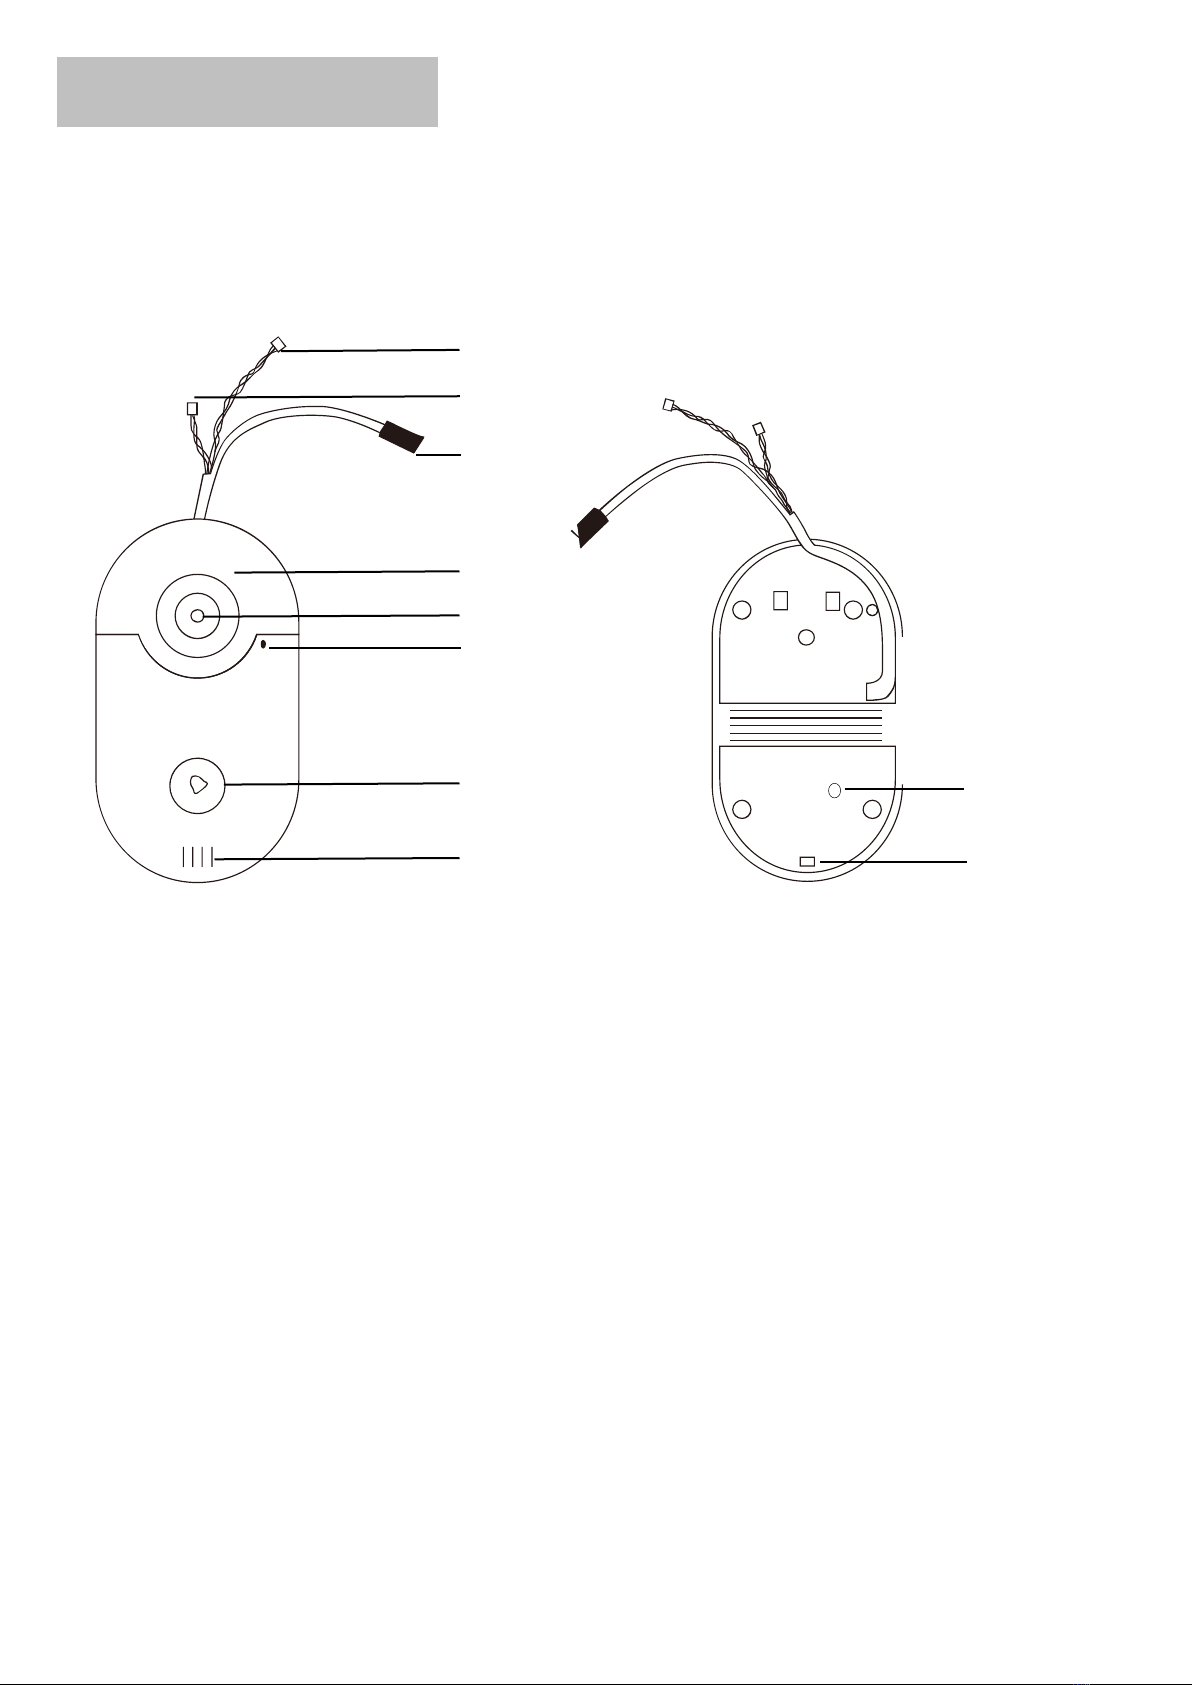
Product Introduction ............................................................................................... 5
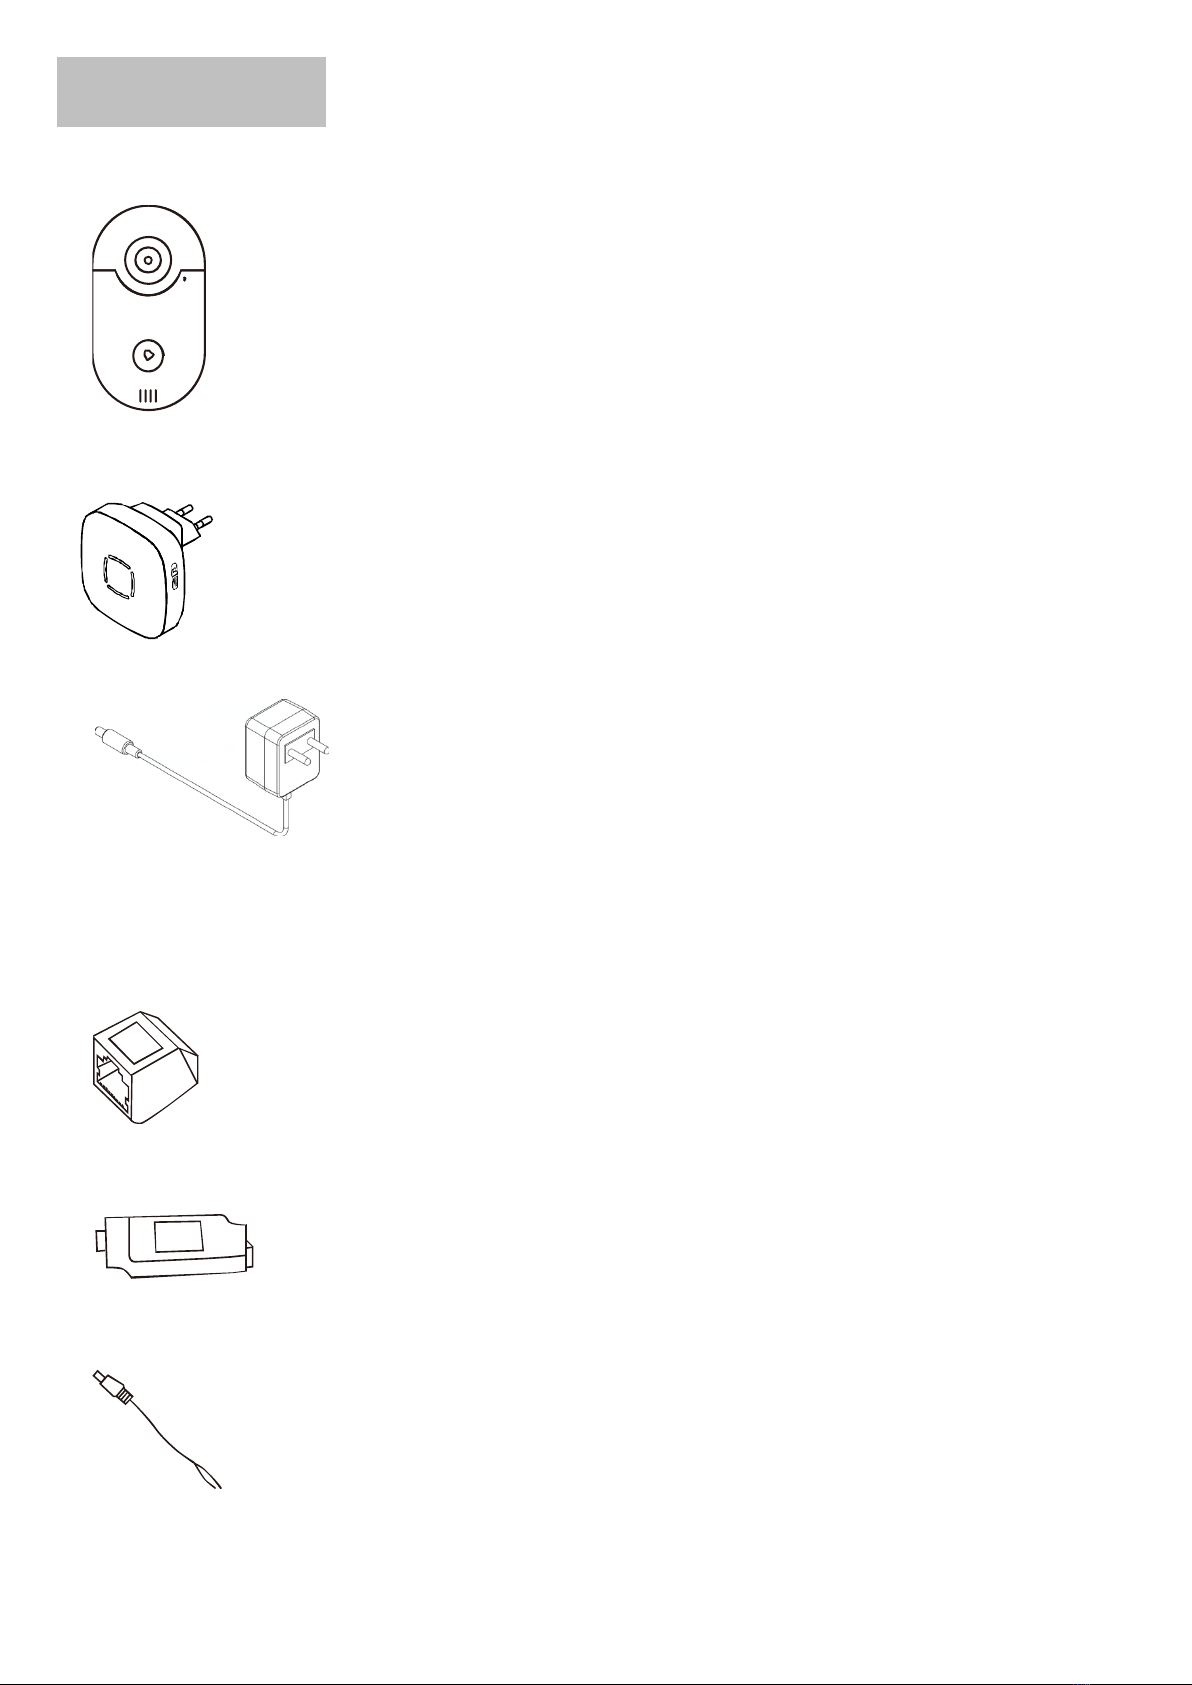
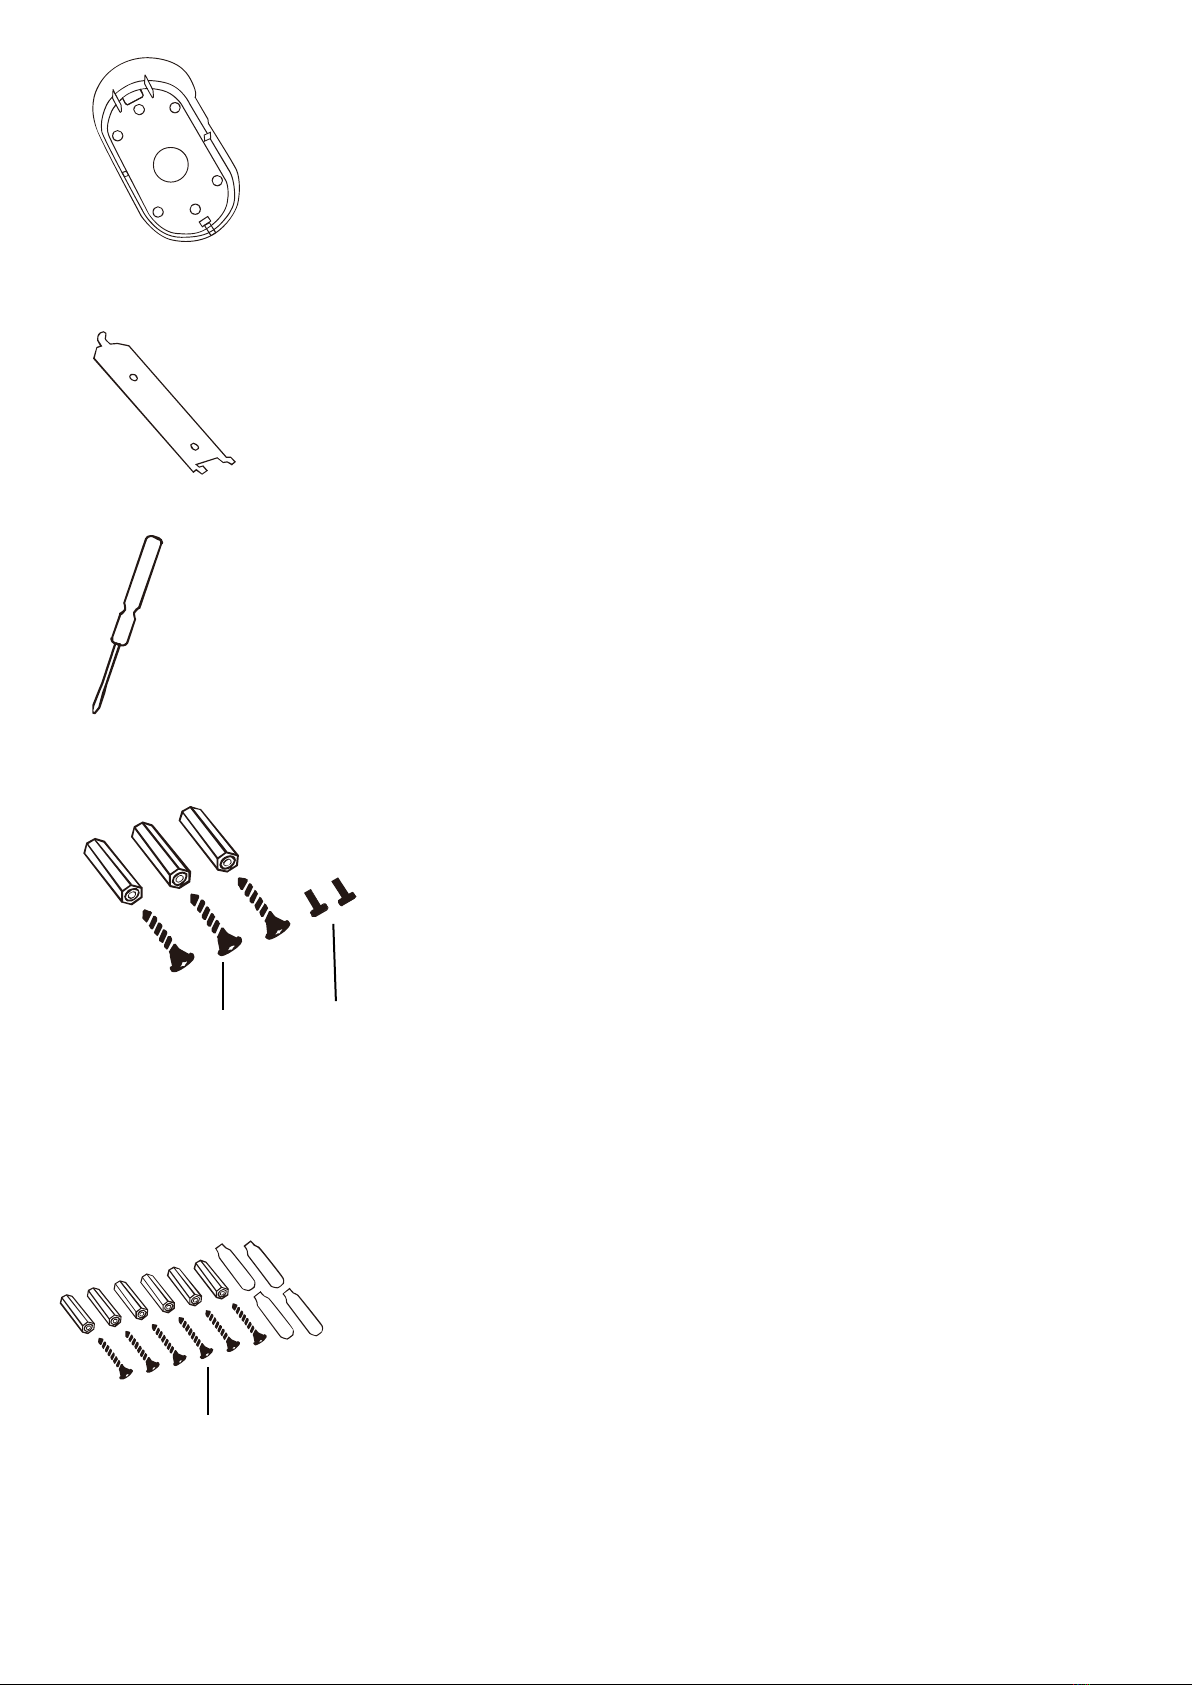
Items Included ......................................................................................................... 7
Before Installation ................................................................................................... 9
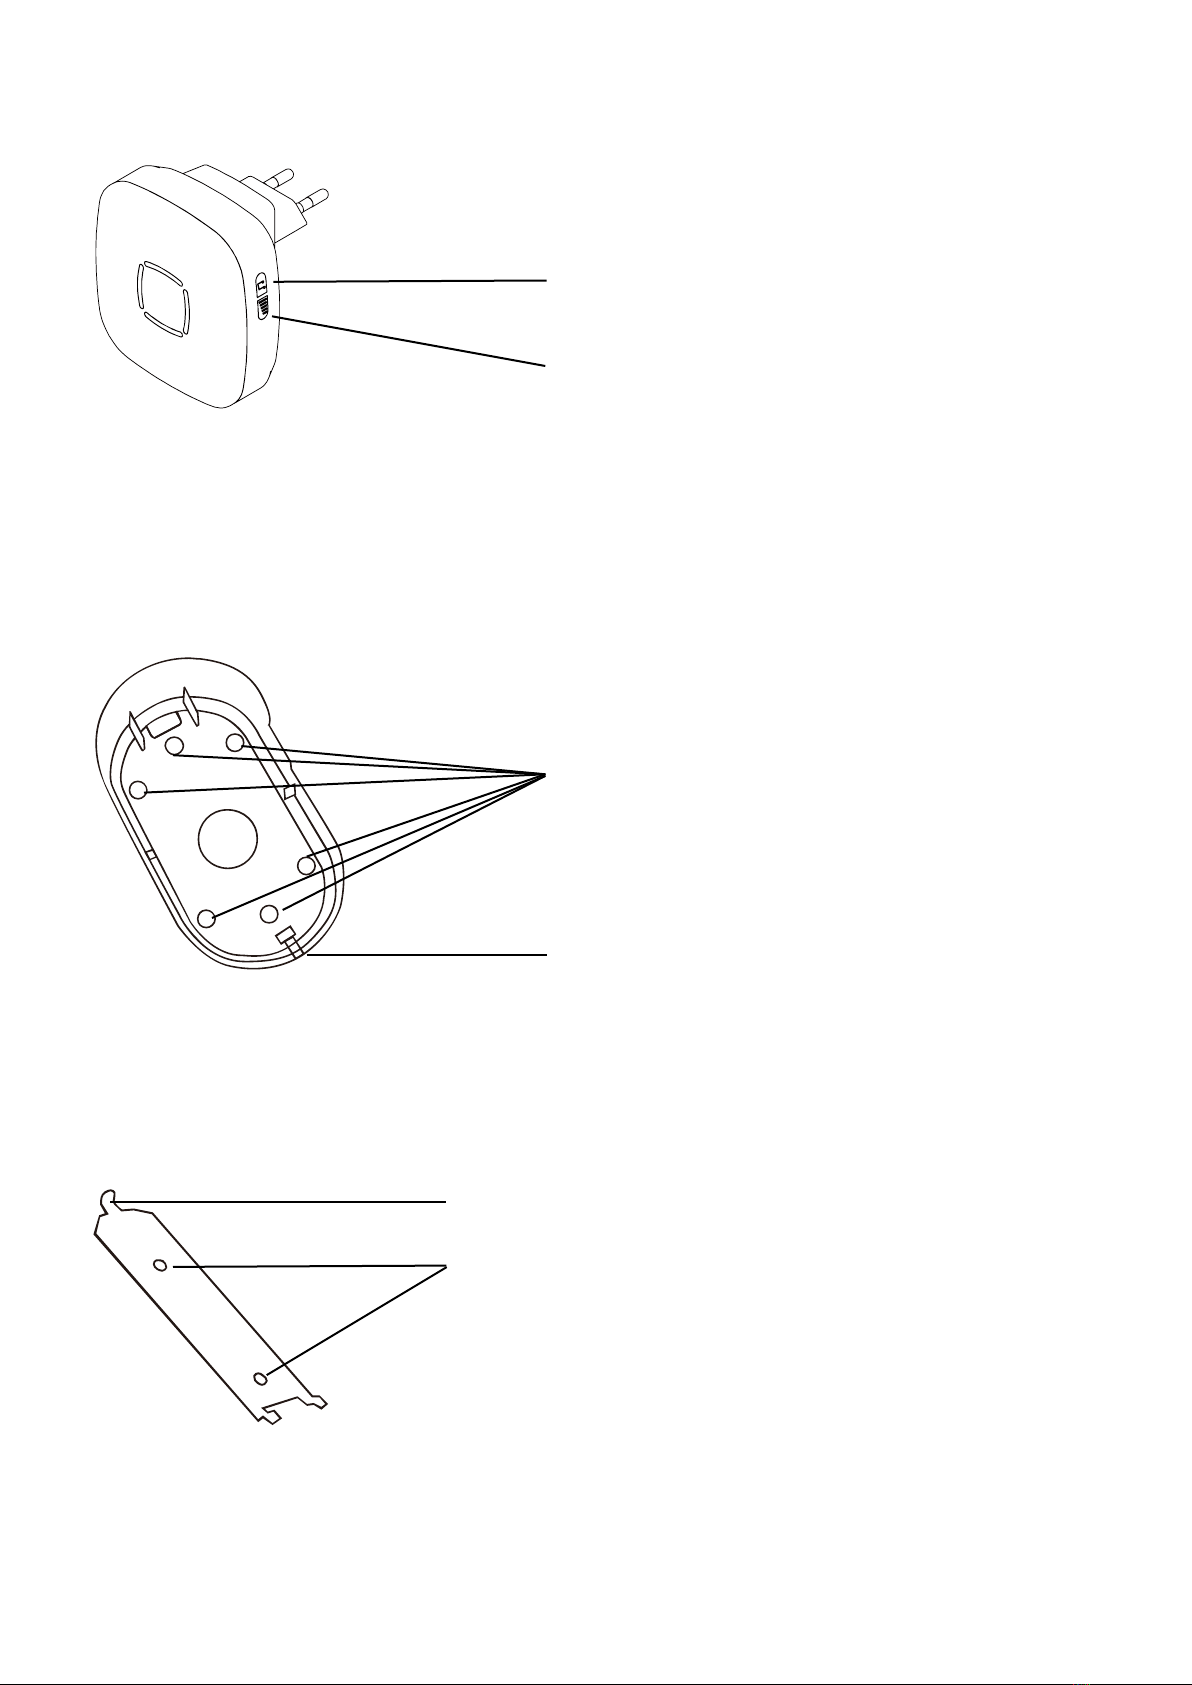
Installation of Mounting Bracket ........................................................................... 12
Connection To Old Chime AC Power Source .......................................................... 13
Connection To DC Power Source............................................................................ 15
Connection Between Wireless Doorbell & Indoor RF Bell...................................... 16
Introduction Of Android/iOS App Interface ........................................................... 17
1.Additional Options........................................................................................ 18
2.Edit................................................................................................................ 19
3.Add Device.................................................................................................... 20
3.1 SmartLink Mode..................................................................................... 20
3.2 Networked Devices Mode...................................................................... 20
3.2.1 Input the doorbell information manually...................................... 21
3.2.2 Scan QR Code ................................................................................ 21
3.2.3 Local Search .................................................................................. 22
4.Refresh.......................................................................................................... 23
5.Doorbell ........................................................................................................ 23
6.Log ................................................................................................................ 23
7.Snapshot....................................................................................................... 24

8.Record........................................................................................................... 24
9.Settings ......................................................................................................... 25
9.1 System Setting.................................................................................. 25
9.2 User Setting ..................................................................................... 26
9.3 Alarm Setting ................................................................................. 26
9.4 Lock Setting...................................................................................... 27
9.5 Device Time Setting ......................................................................... 27
9.6 Wi-Fi Setting..................................................................................... 28
9.7 Push Setting..................................................................................... 28
Answer the Call...................................................................................................... 32
Tech Support.......................................................................................................... 34
Care and Maintenance........................................................................................... 34
Limitation of Liability & Privacy Policy ................................................................... 34
Warranty................................................................................................................ 34
Specifications......................................................................................................... 35

Important Safety Instructions
Please read through all the instructions before using this wireless doorbell.
This is an electronic device and care should be taken when using this low voltage electronic device. The
following basic safety precautions should be taken into consideration when operating and installing this
doorbell,
1. DO NOT install the wireless doorbell in wet conditions.
2. DO NOT cover or block any openings on the wireless doorbell.
3. DO NOT submerge the wireless doorbell under water.
4. DO NOT operate the wireless doorbell if it is damaged.
5. DO NOT attempt to open the wireless doorbell by yourself.
6. DO NOT give hit or strike on the wireless doorbell with force.
7. Keep the wireless doorbell away from heat sources.
8. The wireless doorbell can only be connected to low voltage transformer (12~24V AC) or an AC/DC
adaptor (12V DC / 1.0A). DO NOT connect it to high voltage power sources.
Please keep this manual for future use, if you need to print Large Size Font, please contact us.

Product Introduction
Wireless Doorbell
1. Camera
2. Built-in microphone
3. Call button with indicator light
4. Built-in speaker
5. IR LEDs (for night vision)
6. Relay connector (for electrical door lock)
7. Power connector
8. LAN connector
9. Reset (use pin to press and hold for approx. 10 seconds)
10. Screw hole for screw (A)
1
2
3
4
5
6
7
8
9
10

Indoor RF Bell
The drawing based on EU type, US/UK plug is optional, please refer to the final product.
11. Volume button (press repeatedly to adjust the sound volume)
12. Music button (press repeatedly for totally 36 melody options)
Mounting Bracket
13. Screw holes for screw (B)
14. Screw hole for screw (A)
Simple Mounting Bracket
15. Screw holes for screw (C)
16. Screw hole for screw (A)
12
11
14
13
15
16
15

Items Included
Wireless doorbell x 1 pc
Indoor RF bell x 1 pc
DC Power adaptor x 1pc
(The drawing based on EU type, US/UK plug is optional, please refer to the final product.)
LAN interface connector (RJ45) x 1 pc
Relay interface connector x 1 pc (for electrical door lock)
AC power input join cable x 1 pc

Mounting bracket x 1 pc
Simple mounting bracket x 1 pc
Screw driver x 1 pc
Screw (C) x Screw (A)
Screws set for screws (A) & (C)
--Screw (A) x 2 pcs (1 pc is as spare)
--Screw (C) x 3 pcs (1 pc is as spare)
--Plug for screw (C) x 3 pcs (1 pc is as spare)
Screws (B)
Screws set for screws (B)
--Screw (B) x 6 pcs
--Plug for screw (B) x 6 pcs
--Wire crimp x 4 pcs (2 pcs are as spare)

Before Installation
IT IS STRONGLY SUGGESTED TO PERFORM A TEST BEFORE THE WIRELESS DOORBELL IS INSTALLED.
Note: Download the “WiFi Doorbell HD”app from Google Play Store or App Store to your android or iOS
device. Make sure your android or iOS device connected to the local Wi-Fi successfully.
Step 1: Power-on the wireless doorbell with an external 12V DC adaptor.
Step 2: Wait about 40 seconds until hear the voice: “Welcome to smart home”.
Step 3: Then the doorbell will be under the SmartLink Config Mode: The indicator light keeps flashing.
If the doorbell is not under the SmartLink Config Mode, please RESET it to the config mode.
How: Hold the RESET button at least 10 seconds, the device will be restarted and reset.
Where: Reset button on the backside of the doorbell which is under the “Reset”sticker.
Step 4: Run the App and click “Add Device”.
Android iOS
Step 5: Click “SmartLink”, check the SSID, input the correct password, click “Start”, and then the doorbell
will start to connect to your local Wi-Fi.
Note:
1. Please choose SmartLink mode for setting the Wi-Fi at the first time.
2. Please make sure your android or iOS device connected to the local Wi-Fi successfully.
3. Networked Devices mode is only suitable for setting the Wi-Fi when the doorbell connected with a
network cable(RJ45), or for adding a doorbell which has been connected to the Wi-Fi already.

Step 6: Once hear the voice prompt “Successful”means the Wi-Fi SmartLink setup successfully. “Refresh”
and click the UDID of the doorbell to add it to the device list automatically, “Refresh”and it will be online.
If the wireless doorbell performs as described, please proceed to do the installation. If not, please double
check and repeat the step 1 to step 6. Make sure the Wi-Fi password is correct.
SmartLink Config mode will be ended when,
1. Wi-Fi SmartLink setup successfully,
2. Or when the doorbell is under the SmartLink mode more than 60 seconds, and then power-off,
If less than 60 seconds, the doorbell power-off, it will be still under SmartLink mode once power-on.

Step 7: When the doorbell is online, press the call button of the doorbell, the App will pop-up as follow,
Reject: Click the red hang up icon to reject the call, the doorbell will keep calling until somebody else to
answer it, or until a call action is completed. The call waiting time can be set in system setting.
Answer: Click the blue pickup icon to answer the call. Then will go to the live feed video interface.
Record: Click it to record video. Snapshot: Click it to take snapshot.
Audio: Click it to mute. Hangup: Click it to stop and exit the live feed video.
Unlock: Click to unlock the electronic door lock. Delay: Click to prolong the monitoring time.
Mic: Press and hold Mic icon to talk, loosen to hear the visitor’s voice.
Note: When the doorbell is online, you can also tap the doorbell name to view the live feed video.
Pickup icon
Hangup icon
Record
Snapshot
Hangup
Delay
Audio
Unlock
Press and Hold Mic to Talk

Installation of Mounting Bracket
Free choose to install the wireless doorbell with either the mounting bracket or the simple mounting
bracket.
Installation with the mounting bracket
Please refer to the “Connection To Old Chime AC Power Source”.
Installation with the simple mounting bracket (It is recommended to use the mounting bracket instead
of the simple mounting bracket)
Step 1: Fix the simple mounting bracket with two screws (C) to the wall.
Step 2: Fix the doorbell on the simple mounting bracket.
Step 3: Complete the installation by tightening screw (A).

Connection To Old Chime AC Power Source
Step 1: Remove the existing doorbell.
Step 2: Check the voltage of the power by using a multimeter.
Make sure the power voltage/current is 12~24V AC / 1.0A before proceeding to step 3.
Step 3: Connect the power cables of the old doorbell to the wireless doorbell (via the power input join
cable, screws (B), plugs & wire crimps).

Step 4: Complete the installation by tightening screw (A).
Note:
When hooking up the new doorbell to an existing doorbell transformer be sure to test the connection first
before installing the unit. Some older doorbell transformers may be dead or the wrong voltage.
Do not exceed 24 Volts AC to the doorbell or damage may occur and void warranty.
Minimum 12 Volts 1A is required to operate doorbell.
Screw (A)

Connection To DC Power Source
If there is no old chime with AC Power Source, please use the 12V DC power adaptor to connect with the
wireless doorbell.
To extend the power cable, use 2 conductor 18 AWG cable. Do not extend beyond 100ft.
The AC/DC adaptor: input 100 to 240VAC, output 12VDC, 1A.

Connection Between Wireless Doorbell & Indoor RF Bell
The wireless doorbell and indoor RF bell are already paired.
After power-on, press the call button, the RF bell should ring.
If they lost connection, please do the follow steps to pair the wireless doorbell with indoor RF bell:
Step 1: Connect the wireless doorbell and the indoor RF bell to power source. Wait until you hear
“Welcome to smart home”from the wireless doorbell.
Step 2: Press and hold the Volume button of indoor RF bell.
Step 3: Press the Call button of the wireless doorbell 3~4 times.
Step 4: Let go of the Volume button of the indoor RF bell.
Step 5: Press the Call button of the wireless doorbell again. If the melody of the indoor RF bell is heard,
the connection (pairing) is successful. If not, please repeat step 1 to step 4.
Step 6: Press the Volume button or Music button of the indoor RF bell to adjust the sound volume and
select the preferred bell melody.
Note: The wireless doorbell supports to be connected with max. 4 indoor RF bells.
Call button
Volume button
Music button

Introduction Of Android/iOS App Interface
Only the “admin”user has the authority to make adjustment or change to most of the settings.
1. : Additional options. 2. : Delete/Edit the listed doorbell information.
3. : Add new doorbells. 4. : Refresh the doorbell connection status.
5. : Main interface of doorbell list. 6. : Call Log or Alarm Log.
7. : Snapshots. 8. : Recorded video.
9. :Settings

1.Additional Options:
: Show the Ring Setting, Local Setting and About.
Ring Setting:Set the App Ringtone, choose “None”will be in silent mode.
Local Setting: To show or not show “HD / Smooth”text on the online video.
About: Show the App information.

2.Edit:
:Delete/Edit the listed doorbell information.
Can change the doorbell name/password here.
After setting the changes, click “Done”to enable it.

3.Add Device:
: Two options to add device, SmartLink / Networked Devices.
3.1 SmartLink Mode
SmartLink mode is only for setting the Wi-Fi of the doorbell at the first time.
The default factory settings is the doorbell will be under SmartLink Mode when power-on at the first time.
Check the details of SmartLink Mode on chapter “Before Installation”.
SmartLink Config mode will be active when,
1. The doorbell is reset,
2. Or when the doorbell is under the SmartLink mode less than 60 seconds, and then power-off, it will be
still under SmartLink mode once power-on.
SmartLink Config mode will be ended when,
1. Wi-Fi SmartLink setup successfully,
2. Or when the doorbell is under the SmartLink mode more than 60 seconds, and then power-off, it won’t
be under SmartLink mode once power-on again.
3.2 Networked Devices Mode
Note: if the doorbell already connected with a network cable(RJ45), or you want to add a doorbell which has
been connected to the Wi-Fi already. You can select the Networked Devices.
Click “Networked Devices”to add a doorbell, the following interface will be shown.
Table of contents
Other zilink Accessories manuals
Popular Accessories manuals by other brands

RME Audio
RME Audio Hammerfall HDSPe MADIface user guide

Intelbras
Intelbras IVP 3000 MW user manual

Apogee Instruments
Apogee Instruments SQ-421 owner's manual

Playcraft
Playcraft Saybrook 12' Assembly instructions

netvox
netvox R718IJK user manual

A&E Systems
A&E Systems WeatherPro Oasis Elite Diagnostic service manual