9652-0243-30 2 Rev. A
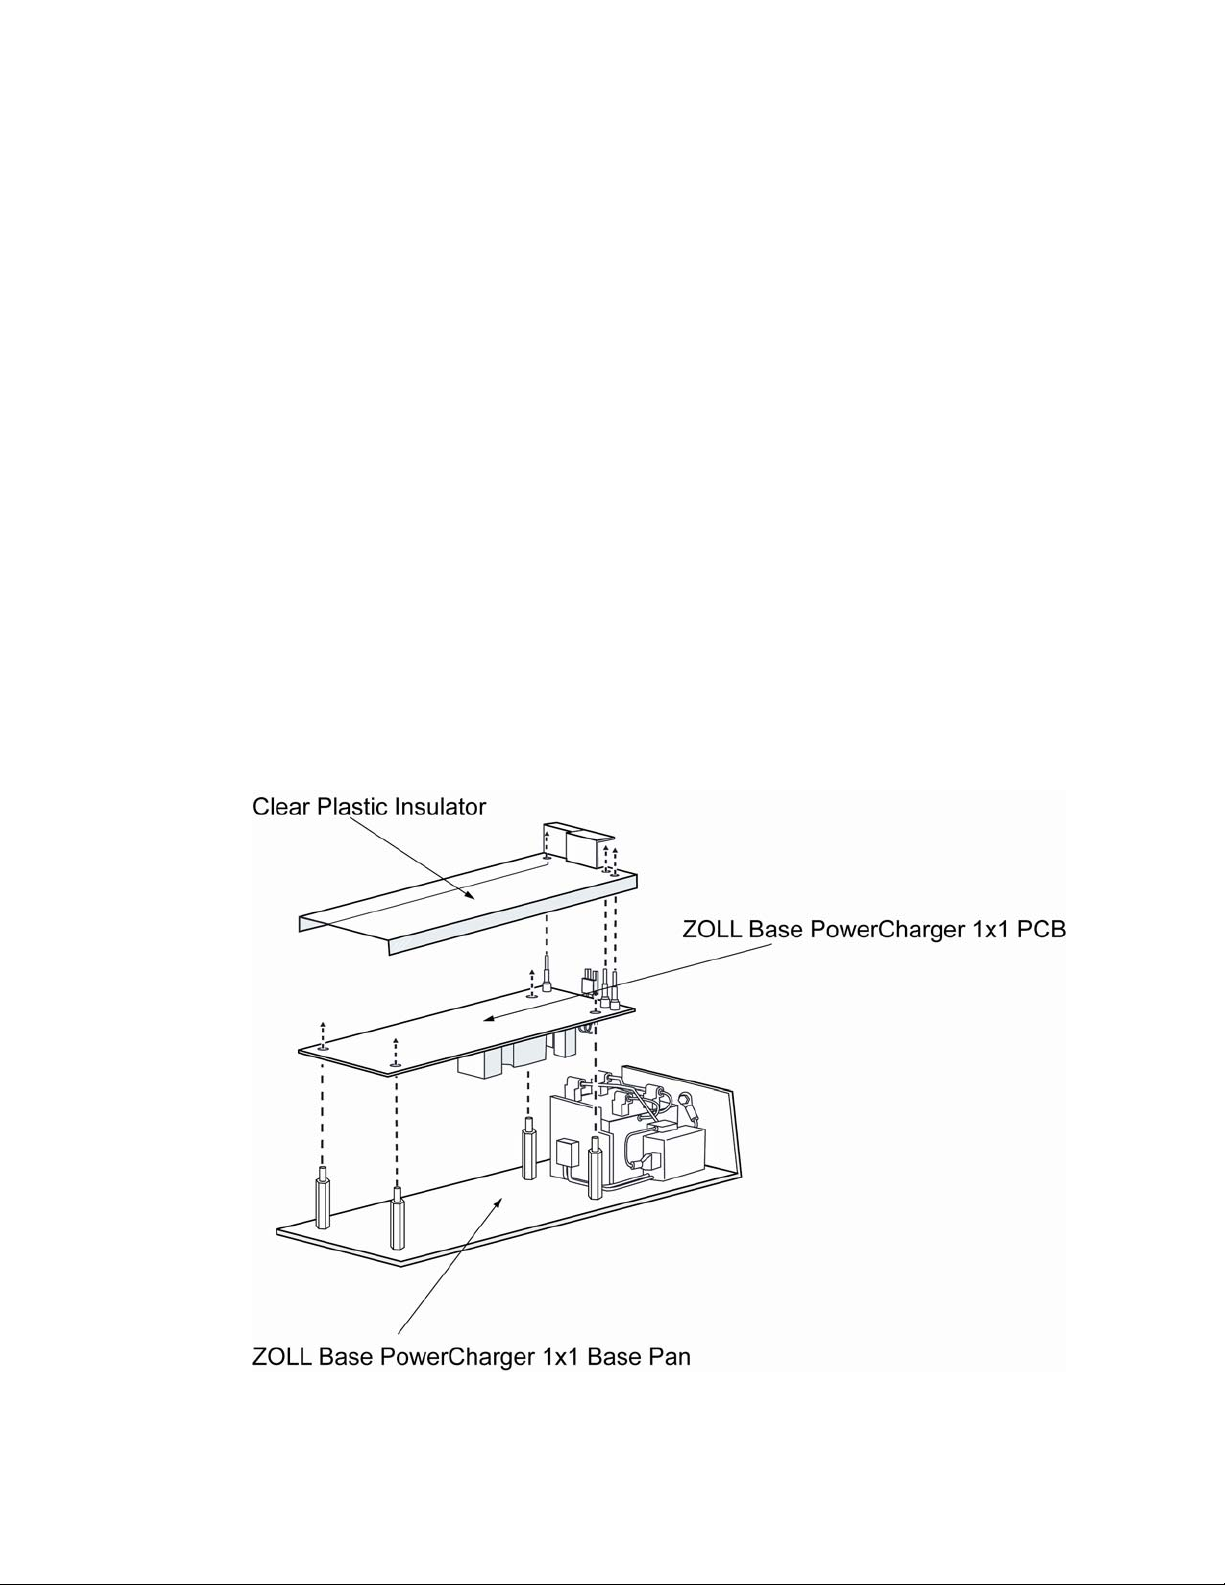
Removing the Airworthiness-Certified ZOLL Base
PowerCharger 1x1 PCB Assembly
Before removing the PCB as described in the ZOLL Base PowerCharger 1x1
Service Manual (9650-0400-01), you must remove the clear plastic insulator that
lies on top of the PCB in the Airworthiness-Certified ZOLL Base
PowerCharger 1x1 unit.
There are three posts on the back of the PCB. On each of these posts is a ferrite
bead and a section of rubber tubing. The rubber tubing holds the ferrite beads and
the plastic insulator in place. Remove the rubber tubing and ferrite beads from
the posts – the plastic insulator will now lift easily from the PCB.
To complete removal of the PCB, remove the four screws that secure the PCB to
the base pan, and then remove the jumper wires that connect the resistor (R3) to
the PCB.
The following illustration shows the Airworthiness-Certified ZOLL Base
PowerCharger 1x1 base pan, PCB, and plastic insulator.