Table of Contents
Safety Precautions.................................................................................................................................................3
Package Contents...................................................................................................................................................3
Section 1 Introduction to HDIP-8000..............................................................................................................4
Product Description.........................................................................................................................................................................4
Specifications......................................................................................................................................................................................5
Installation...........................................................................................................................................................................................6
Unpacking and Inspection.............................................................................................................................................................6
Hardware Installations and Connections................................................................................................................................6
Section 2 Device Progra ing and Setup...................................................................................................7
Connecting to the GUI Interface .................................................................................................................................................7
Factory Default IP 192.168.1.9...................................................................................................................................................7
Encoder Progra ing and Setup via GUI Interface:.................................................................................7
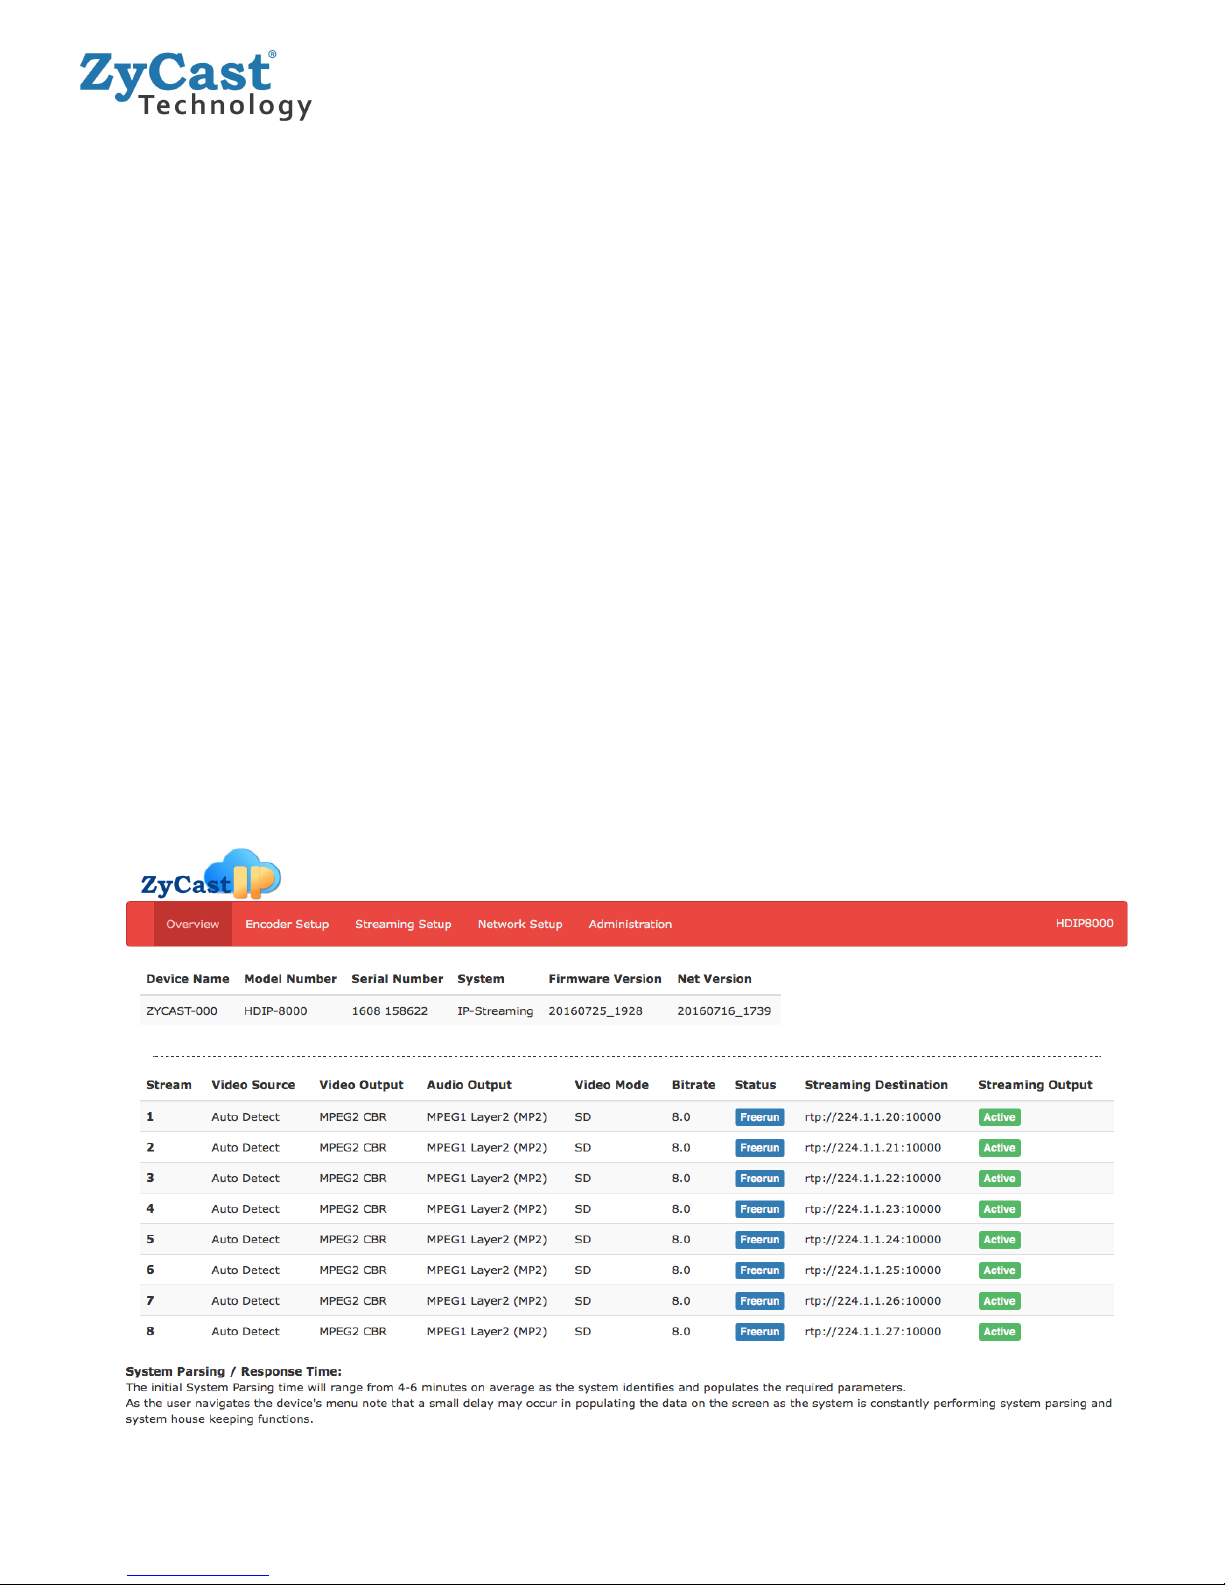
Overview Page of HDIP-8000.......................................................................................................................................................7
Overview Page of HDIP-8000.............................................................................................................................8
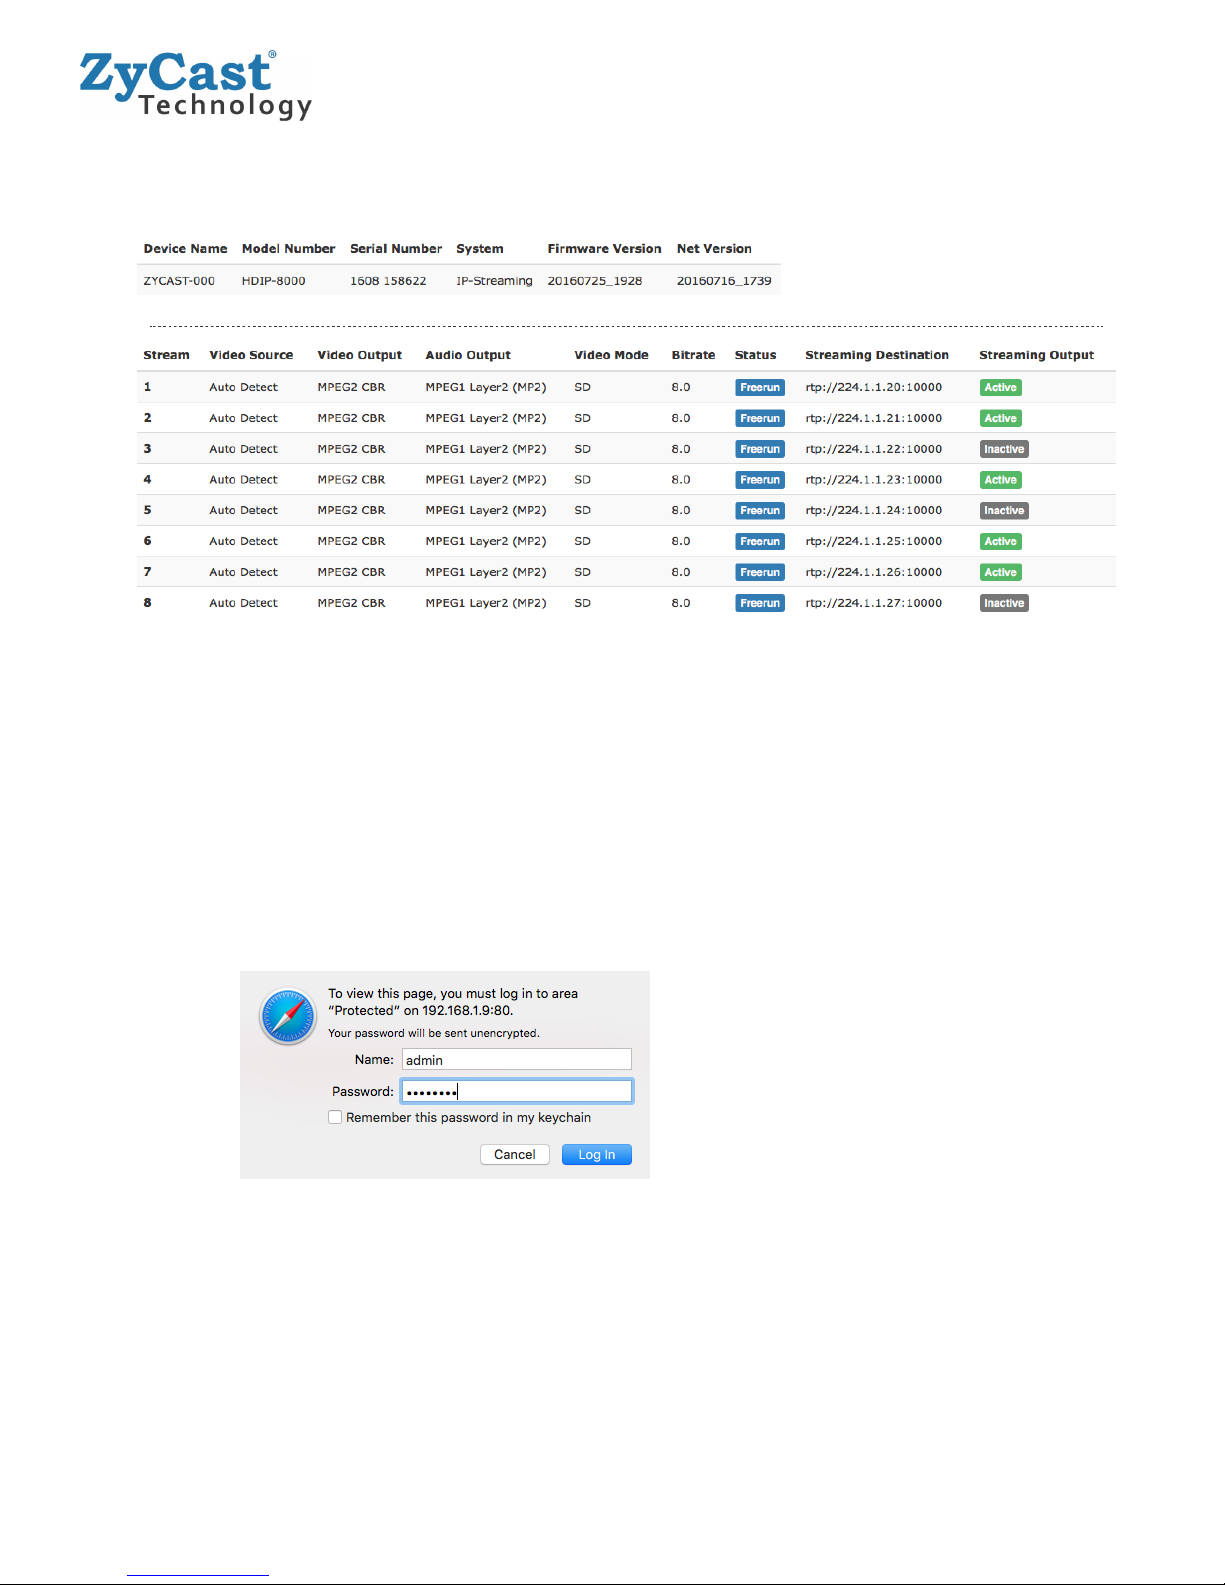
GUI Login Password ........................................................................................................................................................................8
Encoder Setup....................................................................................................................................................................................9
Section 3 IP Strea ing Setup...........................................................................................................................10
Disabling IP Strea s:.........................................................................................................................................10
Section 4: Network Configuration.................................................................................................................11
Management IP Setup ..................................................................................................................................................................11
Streaming IP Setup .......................................................................................................................................................................11
Section 5: Ad inistration.................................................................................................................................12
Reboot ...............................................................................................................................................................................................12
Reset to Default .............................................................................................................................................................................12
Backup ...............................................................................................................................................................................................12
Restore/Upload saved file configurations ..........................................................................................................................12
Change Password .........................................................................................................................................................................13
EAS.......................................................................................................................................................................................................13
Private Address Ranges, IPv4....................................................................................................................................................14
Product Notes:......................................................................................................................................................14
2 HDIP-8000 Manual V1.0