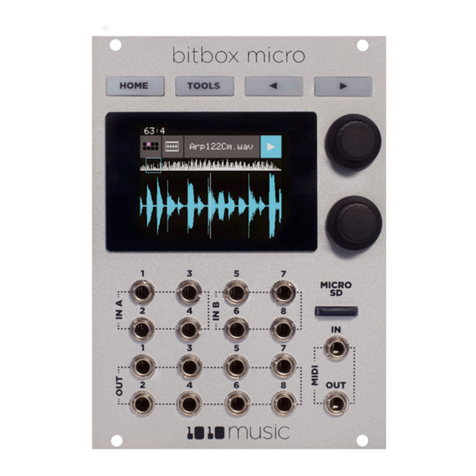
1010music Laserbox User manual

12/12/18 5:16 PM Laserbox User Guide p. 1 Copyright 1010music LLC 2018
Laserbox User Guide
Laserbox is firmware for the toolbox synthesizer module by 1010music. You
can learn how to install new firmware on our forum here:
https://forum.1010music.com/forum/products/firmware-downloads/511-how-
to-install-firmware-on-toolbox
You can find the download link for laserbox on our forum after you have
registered for the forum and clicked the email link to validate your account:
https://forum.1010music.com/forum/products/firmware-downloads
With laserbox, you can drive a laser by generating patterns, using premade
image wave files, or via CV signals received from other Eurorack modules.
You can also use external CV signals to modulate the signals sent to the laser.
You can use modulation to control the shape of the wave signal, the colors, the
position of the projection, and the rotation of the projection. Laserbox lets
you see the impact of your tweaks on the image by displaying a preview on screen. This allows you to design your laser show while the
laser is disconnected, and save the settings you like as presets.
What You Need
You can try out laserbox by installing the laserbox firmware on a toolbox Eurorack module and watching the preview. When you are
ready to send the signal to a laser, you will need the following:
•Cyclops module by LZX Industries
•Laser that supports ILDA input
•5 mini TS cables (patch cords)
Alternatively, Laserbox could be used to drive any device that accepts +/-5 Volt CV signals for X and Y Coordinates, along with R,G,
and B color signals.
Laserbox Outputs
Laserbox sends X, Y, R, G and B signals through the control voltage
outputs on the front panel of toolbox. Connect the following outputs
of Control Box to the indicated inputs of the Cyclops module:
Toolbox Output Cyclops Input
CV Output 3 X
CV Output 4 Y
CV Output 6 R
CV Output 7 G
CV Output 8 B
Presets
Toolbox comes with a number of presets that demonstrate some of the capabilities of laserbox. The preset name is displayed at the
top of the screen. You can advance through the presets by touching the “-“ and “+” buttons on either side of the preset name. You
can select from a list of presets by touching the name of the preset. This will display the Preset management screen where you can use
the control knobs to scroll through the list of available presets, and then touch LOAD to open the selected preset. You can work use
the Preset management screen to save changes to your preset, rename a preset, or create a new preset. Note: laserbox does not
automatically save your changes as you work. You must manually save your work before switching presets or turning of the module or
else your work will be lost.

12/12/18 5:16 PM Laserbox User Guide p. 2 Copyright 1010music LLC 2018
Laserbox Modes
Laserbox supports several different modes for generating laser projection signals:
PATXYZ Oscillators generate values for Cartesian coordinates (X and Y) to drive a pattern. You can choose different waveforms to
control the X and the Y position of the laser over time. You can then modulate the frequency, amplitude and phase of each
waveform.
PATRAZ Oscillators generate values for Polar coordinates (radius and angle) to drive a pattern. You can choose independent
waveforms to control the radius and the angle of the laser over time. You can then modulate the frequency, amplitude and
phase of each waveform
WAVE Laserbox gets the signal for the coordinates from a WAV file. You will have to use a third party tool to create the WAV file.
LIVE Laserbox takes in CV signals for X, Y, R, G and B and uses these to generate the output signal.
In all of these modes, laserbox also lets you control the color, position, scale and rotation of the signal. You can use external Control
Voltage signals and internal LFOs to modulate the parameters for each of these, or manually dial in the values using the control knobs.
Laserbox displays a preview of the projection on the home screen and on all of the parameter screens, so you can immediately see the
impact of the changes you are making.
Waveforms for PATXYZ and PATRAZ Modes
When you are using PATXYZ or PATRAZ mode, the home screen will display an either a PATXYZ or PATRAZ button, to match the
selected mode. Touch this button to display the first Oscillator parameters screen. Press the INFO button to cycle through the
oscillators for the selected mode. In PATXYZ mode, there will be oscillators for the X and the Y coordinates. In PATRAZ mode, there
will be oscillators for the Radius and the Angle. You can configure the following parameters for each oscillator:
•Waveform
•Frequency (can be modulated)
•Amplitude (can be modulated)
•Phase (can be modulated)
Press HOME when you are ready to return to the Main screen.
WAV File Selection
When you are using WAVE mode, the home screen displays a WAVE button. Touch this button on the main screen to choose the
wave file to be used. Touch the name of the wave file in the top of the screen to display the file selection window. Choose a WAV file
from the microSD card by scrolling through the choices with the control knobs and then touching Load. Press HOME to return to the
main screen.
Live Mode Inputs
When you are using LIVE mode, you will need to connect two CV signals into toolbox. Use mini TS cables to connect the signals as
follows:
Toolbox Input Laser Signal
CV1 X
CV2 Y
Laserbox takes a +/- 5 Volt control voltage signal as input. The X and Y values input through these signals provide a starting point for
the calculations used to control the outputs to the laser. The Color, Position, Scale and Rotation parameters of laserbox are combined
with the input signals to generate the output to the laser.

12/12/18 5:16 PM Laserbox User Guide p. 3 Copyright 1010music LLC 2018
Color
All preset modes allow you to control the color of the signal. Touch the COL button on the Main screen to display the color
parameters screen. Press INFO to cycle through the parameters pages for the color parameters. You can configure the following
parameters on this screen:
•Hue (can be modulated)
•Saturation (can be modulated)
•Rate
•Amount
•Waveform
The waveform parameter allows you to select a signal that will vary the color over time. Use this together with Rate and Amount to
control the waveform.
Position and Scale
Touch the POS button on the Main screen to control the position and scale of the projection. Press the INFO button to cycle through
the position and scale parameters pages.
The X Scale and Y Scale parameters adjust the size of the projection by stretching it along the X or Y axis. The Z Scale parameter
makes it look like the image is zooming in or out along the Z axis by scaling the image along both the X and Y axes simultaneously.
The position parameters, X Pos and Y Pos, allow you to move the image around within the range of the laser. When the position
puts the signal too close to the edge of the laser’s range, the pattern will compress against the edge and become distorted.
All of the scale and position parameters can be modulated.
Rotation
Touch the ROT button on the main screen to control the rotation of the image along the Z axis. Imagine a pole going through the
center of the laser projection area coming straight out of the wall towards you. Z Axis rotation causes the image to spin around that
pole. You can control the Z rotation directly by the Z Axis value. You can use a waveform to control the rotation by setting the Z
Oscillator Amount and Z Oscillator Rate parameters.
All of the rotation parameters can be modulated.
Modulation
Laserbox supports modulation using external control voltage signals. Plug a +/- 5V CV signal into the CV MOD IN TS jacks to control
the ExtX modulation signals as follows:
Toolbox Input Jack Modulation Source
CV MOD IN 1 Ext1
CV MOD IN 2 Ext2
CV MOD IN 3 Ext3
CV MOD IN 4 Ext4
You can apply modulation to any parameter that has three black boxes above parameters in the top row or below parameters in the
bottom row. Touch one of these modulation boxes and laserbox displays the Modulation Source parameters. Select a modulation
Source (Ext1 through Ext4) and then specify the Amount of impact the source will have on the parameter. Configure an external source
to drive a signal to the corresponding CV MOD IN jack, and the parameter value will vary with the CV input signal. For example, you
can make the size of the projection pulse in and out over time by using a sinusoidal input to modulate the Z Scale parameter.
Learn More
Check for updates to this manual at https://1010music.com/laserbox-documentation-and-software.
Find community support, wish lists, firmware updates, and alternate firmware on our forum at https://forum.1010music.com.
Table of contents
Other 1010music Control Unit manuals
Popular Control Unit manuals by other brands

Nexans
Nexans XPLORER 144 - 3X48 Notice Instructions

VAT
VAT 650 Series Installation, operating, & maintenance instructions

Broadcom
Broadcom CVPM02 Getting started guide

Allen-Bradley
Allen-Bradley PowerFlex 20-HIM-A3 Re)Programming Guide

EnOcean
EnOcean PTM 210 user manual

Bticino
Bticino AM4890 Installation