9/12/18 2:26 PM Copyright 1010music LLC 2018
Mute Effects
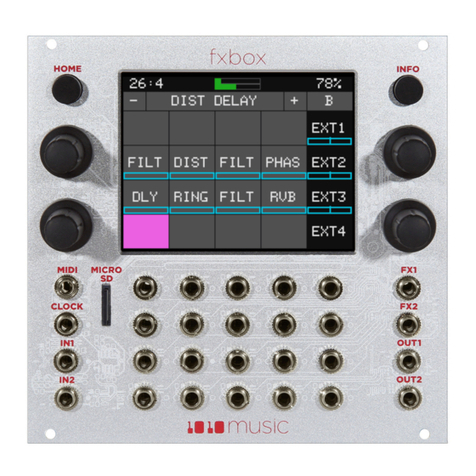
1. While on the Main screen, push the HOME button to enter mute editing mode. The grid cells will be green.
2. Touch a cell to mute that effect. The cell will turn red. Touch it again to remove the mute.
3. Push the HOME button to leave mute editing mode. A red bar appears over the names of muted effects.
Start and Configure the Step Sequencer
1. Push the HOME button to return to the Main screen if needed.
2. On the Main screen, touch the Play button to start and stop the Step Sequencer as needed.
3. With the Play button selected, push the INFO button to see the step sequencer parameters, including Step Count and
Step Duration.
4. Adjust a parameter by turning the control knob next to it.
5. To run the sequencer constantly, set the Sequencer parameter to ON.
Sequence an Effect
1. Push the HOME button to return to the Main screen if needed.
2. Select an effect to sequence by touching the grid cell.
3. Push the INFO button twice or thrice until the Step Sequencer screen is displayed. A box
outline moves across the grid to represent the currently playing step of the sequencer. The
number of boxes the sequencer moves through is controlled by the Step Count parameter.
The time spent in each box is controlled by the Step Duration parameter.
4. Touch the grid boxes on the touch screen to enable and disable the gate for the effect on
each step. The effect is enabled for the step when the grid box is highlighted blue.
Visually Monitor the Effects
The grid on the Main screen shows when the effects are active via a bar that is displayed below the name of the effect. If the bar is
filled, the Step Sequencer or a CV Trigger input triggered the effect. If the bar is unfilled, the effect is active because the
Trigger Mode parameter for the effect is set to ON.
Modulate Effect Parameters
Some of the effects have parameters that can be modulated using the External CV Inputs EXT1 through EXT8.
1. Plug an external CV signal into one of the top three CV Modulator jacks. A bar graph appears along the bottom of the
corresponding MOD button that represents the value of the CV input.
Note:
•The right most column of CV Modulator jacks map to EXT1 through EXT4. Ext5 through EXT8 are in the column to the left
of that. EXT5 through EXT8 also control the trigger for the corresponding effects grid cells. EXT4 also controls playback.
2. Touch an effect cell and press INFO to see the parameters screen for this effect.
3. Touch one of the three black boxes below a parameter to display the Modulation Parameters screen.
4. Use the Control Knobs to select a value for the Source parameter. This parameter specifies which signal will be used to control
this parameter.
5. For example, choose a FILT effect cell, then choose one of the modulation squares below the Cutoff parameter. Then set
EXT1 as the Source of modulation to use CV voltage to adjust the cutoff value of the FILT effect.
6. Turn the Control Knob next to the Amount parameter to adjust how much impact the CV signal will have on the effect.
7. The destination effect must be active to hear the impact of the modulator changes. Follow the steps under Apply Effects
above to activate the effect.
Learn More
Download the user manual from 1010music.com/fxbox-support to learn about multiple effects chains, activating the XY Pad,
swapping firmware and other advanced features.
Be sure to check for any firmware updates and join the community by registering at forum.1010music.com.
This guide was written for fxbox 2.0.3.


