3B G3 Series User manual

User Manual
G3 B25A
Luna G3 BPAP 25A

Luna G3 BPAP 25A (G3 B25A) User Manual MID-97/v1.0
Table of Contents
1. Introduction ································································································ 1
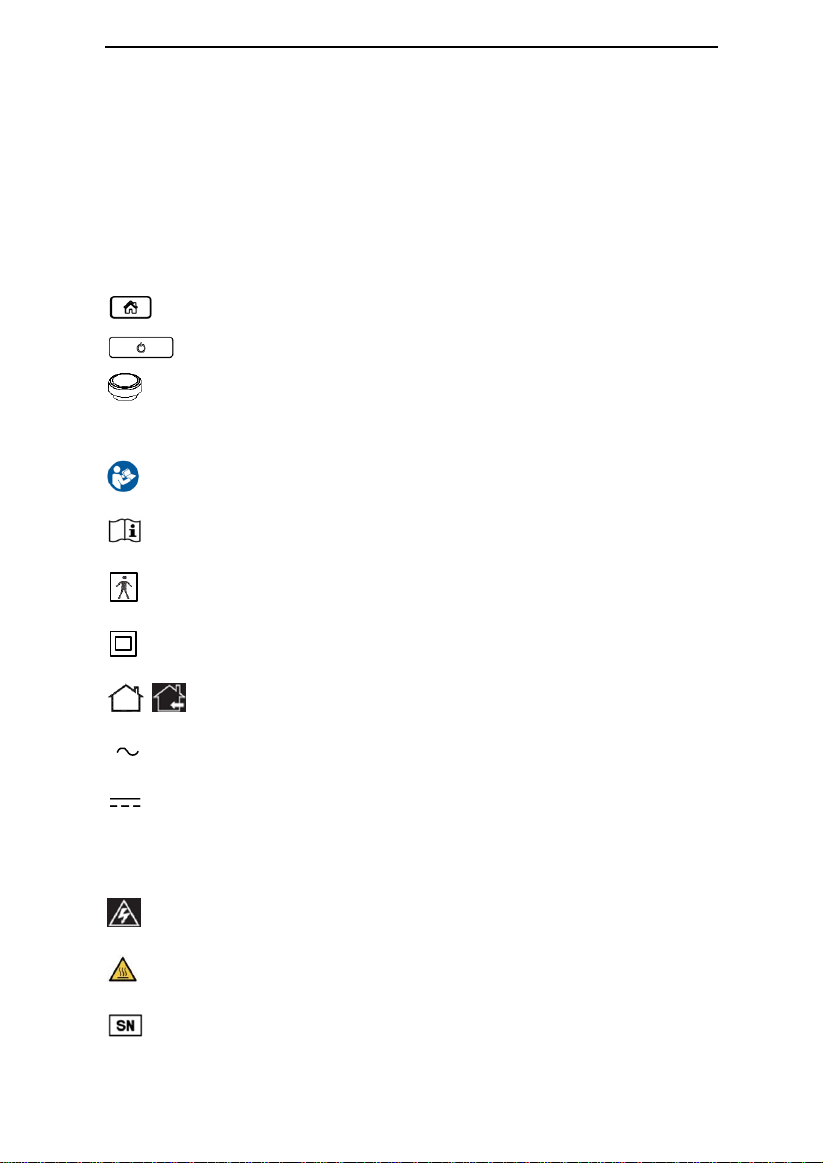
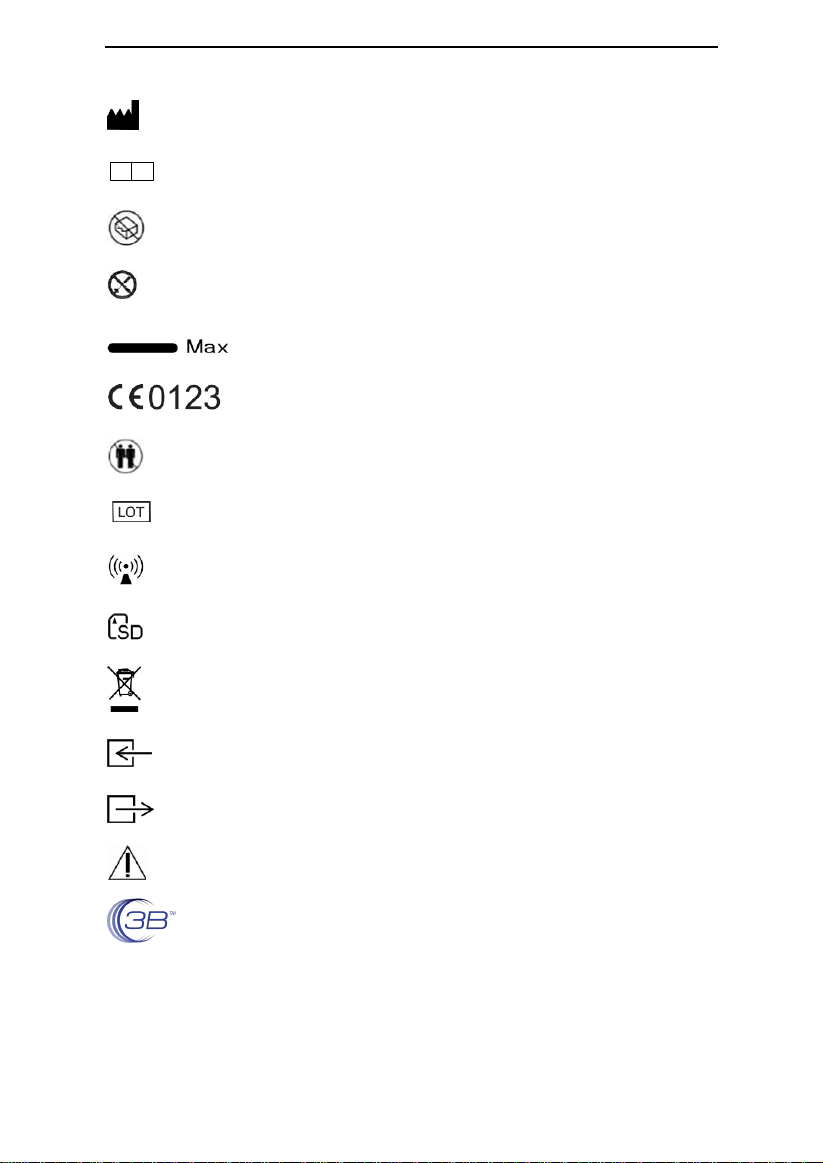
2. Symbols ······································································································ 1
2.1 Control Buttons ·················································································· 1
2.2 Device Symbols ················································································· 1
3. Warning, Caution and Important Tip ······························································ 3
4. Intended Use······························································································· 3
5. Contraindications ························································································ 4
6. Specifications······························································································ 5
7. Available Therapies······················································································ 8
8. Glossary······································································································ 9
9. Model········································································································10
10. Package Contents ····················································································11
11. System Features ························································································12
12. First Time Setup··························································································14
12.1 Placing the Device··········································································14
12.2 Installing the Air Filter and Filter Cap / PM2.5 Filter ·······························14
12.3 Connecting to Power ······································································15
12.4 Connecting to Power Cord Locker····················································16
12.5 Assembling the Tubing / Heated Tubing and Mask······························17
12.6 Using Oxygen with the Device ··························································18
12.7 Inserting the SD Card (Only for the device that equipped with SD card)19
12.8 Starting Treatment···········································································20
13. Routine Use ······························································································20
13.1 Connecting the Tubing ····································································20
13.2 Adjusting the Tubing ········································································20
13.3 Turning on the Airflow ······································································20
13.4 Heating the Water···········································································20
13.5 Using the Ramp Feature···································································21
13.6 Accessing the iCode ······································································· 21
13.7 Turning the Device Off ·····································································21
14. Heated Humidifier ·····················································································22
14.1 Filling the Water Chamber································································22
14.1.1 Removing the Water Chamber ··············································22
14.1.2 Filling Water ·········································································22
14.1.3 Returning the Water Chamber···············································23
14.2 Emptying the Water Chamber··························································24
14.3 Setting the Humidity Level ································································24

Luna G3 BPAP 25A (G3 B25A) User Manual MID-97/v1.0
15. Using the Cellular Module···········································································25
16. Navigating the Patient Menu······································································26
16.1 Steps to Navigating the Patient Menu ···············································26
16.1.1 Accessing the Main Interface ················································26
16.1.2 Bringing up the Initial Setup Interface ·····································28
16.1.3 Selecting Options ·································································28
16.1.4 Adjusting Options ·································································29
16.1.5 Confirming Adjustments ························································29
16.1.6 Turning Pages ······································································29
16.1.7 Exiting the Patient Menu························································ 30
16.2 Options of the Patient Menu and Corresponding Descriptions··············30
17. Alert·········································································································32
18. Cleaning ·································································································· 33
18.1 Cleaning the Mask and Headgear····················································33
18.2 Cleaning the Water Chamber ··························································33
18.3 Cleaning the Transfer Box·································································34
18.4 Cleaning the Enclosure····································································35
18.5 Cleaning the Tubing ········································································35
18.6 Replacing the Air Filter / PM2.5 Filter ··················································35
19. Traveling with the Device ···········································································36
20. Transferring the Device to Another Patient ··················································· 37
21. Reordering ·······························································································37
22. Technical Support ·····················································································37
23. Disposal ···································································································37
24. Troubleshooting ························································································ 38
24.1 Common Problems in Patients and Corresponding Solutions················38
24.2 Common Problems in the Device and Corresponding Solutions ···········40
25. Information of QoS ····················································································41
26. EMC Requirements····················································································42
27. Limited Warranty······················································································· 48

Luna G3 BPAP 25A (G3 B25A) User Manual MID-97/v1.0
1 / 48
1. Introduction
Thank you for your purchase of the Luna BPAP. This User Manual will introduce you to
your device. Please read it carefully. If you experience any difficulties or problems
during use, please contact your homecare provider or physician.
2. Symbols
2.1 Control Buttons
Home Button
Start / Stop Button
Knob
2.2 Device Symbols
Follow Instructions for Use
Operating Instructions
Type BF Applied Part (mask)
Class II (Double Insulated)
/
For indoor use only
AC Power
DC Power
IP22
≥ 12.5 mm Diameter, Dripping (15º tilted)
Electric shock hazard
Hot Surface
Product Serial Number

Luna G3 BPAP 25A (G3 B25A) User Manual MID-97/v1.0
2 / 48
Manufacturer
EC REP
Authorized Representative in the European Community
Do not use the product if the package is damaged
Disassembly is prohibited
Maximum water level
European CE Declaration of Conformity
Product is intended for use by a single patient only
Lot number
Non-Ionizing Radiation
SD Card
WEEE Marking
Air Inlet
Air Outlet
Indicates the possibility of injury to the user or operator
Company logo

Luna G3 BPAP 25A (G3 B25A) User Manual MID-97/v1.0
3 / 48
3. Warning, Caution and Important Tip
WARNING!
Indicates the possibility of injury to the user or operator.
CAUTION!
Indicates the possibility of damage to the device.
IMPORTANT TIP!
Places emphasis on an operating characteristic.
Warnings, Cautions, and Important Tips appear throughout this manual as they
apply.
4. Intended Use
The Luna G3 BPAP 25A is a Bi-level PAP (Bi-level Positive Airway Pressure) device
designed for the treatment of adult Obstructive Sleep Apnea (OSA). The integrated
humidifier is indicated for the humidification and warming of air from the flow
generator device. These devices are intended for single-patient use by prescription
in the home or hospital/institutional environment on adult patients. It is to be used on
patients >66 lbs./30 kg for whom CPAP therapy has been prescribed. The system
can deliver bi-level therapy or auto bi-level therapy.
WARNINGS!
• This device is intended for adult use only.
• This device is not intended for life support.
• The instructions in this manual are not intended to supersede established medical
protocols.
• To ensure that you receive the safe, effective therapy prescribed for you, use only
3B MEDICAL accessories.
• Do not bring the device or accessories into a Magnetic Resonance (MR)
environment as it may cause unacceptable risk to the patient or damage to the
device or MR medical devices. The device and accessories have not been
evaluated for safety in an MR environment.
• Do not use the device or accessories in an environment with electromagnetic
equipment such as CT scanners, Diathermy, RFID and electromagnetic security
systems (metal detectors) as it may cause unacceptable risk to the patient or
damage to the device. Some electromagnetic sources may not be apparent, if you
notice any unexplained changes in the performance of this device, if it is making
unusual or harsh sounds, disconnect the power cord and discontinue use. Contact
your home care provider.

Luna G3 BPAP 25A (G3 B25A) User Manual MID-97/v1.0
4 / 48
CAUTIONS!
•U. S. federal law restricts this device to sale by or on the order of a physician.
• The patient is the intended operator.
• The device is intended for use by operators trained or experienced in similar
equipment.
• Cleaning and disinfection can be performed by the patient.
IMPORTANT TIP!
• Read and understand the entire user manual before operating this system. If you have any
questions concerning the use of this system, contact your home care provider or health
care professional.
5. Contraindications
If you have any of the following conditions, tell your doctor before using this device:
• Insufficient respiratory drive to endure brief interruptions in non-invasive ventilation
therapy
• Acute sinusitis or otitis media
• Epistaxis causing a risk of pulmonary aspiration
• Conditions predisposing to a risk of aspiration of gastric contents
• Impaired ability to clear secretions
• Hypotension or significant intravascular volume depletion
• Pneumothorax or pneumomediastinum
• Recent cranial trauma, cerebrospinal fluid leak or surgery
• Obviously uncooperative or extremely tense
The following side effects may occur during treatment:
- Dryness of the mouth, nose and throat
- Abdominal bloating
- Ear or sinus discomfort
- Eye irritation
- Skin irritation due to the use of a mask
- Chest discomfort
CAUTION!
• Contact your health care professional if symptoms of sleep apnea recur. Contact
your health care professional if you have any questions concerning your therapy.
IMPORTANT TIPS!
• An irregular sleep schedule, alcohol consumption, obesity, sleeping pills, or
sedatives may aggravate your symptoms.
• Please use a mask which meets ISO 17510: 2015.

Luna G3 BPAP 25A (G3 B25A) User Manual MID-97/v1.0
5 / 48
6. Specifications
Device Size
Dimensions (L x W x H): 265 mm × 145 mm × 114 mm
Weight: 1.7 kg
Water capacity: To maximum fill line 360 mL
Product Use, Transport and Storage
Operation Transport and Storage
Temperature: 5°C to 35°C (41˚F to 95˚F) -25°C to 70°C (-13˚F to 158˚F)
Humidity: 15% to 93% Non-condensing 15% to 93% Non-condensing
Atmospheric Pressure: 760 ~1060 hPa 760 ~1060 hPa
Heated Humidifier
Humidifier Settings: off, Auto, 1 to 5 (95˚F to 154.4˚F / 35°C to 68°C)
Humidifier Output: No less than 15 mg H2O/L
Environmental Conditions: Maximum airflow, 35°C, 15% relative humidity
Maximum Operating Pressure: 40 cmH2O
Pressure Drop with Humidifier: < 0.4 cmH2O at 60 LPM flow
Maximum Delivered Gas Temperature: ≤ 43°C
Mode of Operation
Continuous
Work Mode
CPAP, AutoCPAP, S, AutoS
SD Card
The SD card can record patient data and fault information
AC Power Consumption
100V - 240 V ~, 50Hz / 60 Hz, 2 A
Device offer to Heated Tubing Communications Port
24 V 18 W
Type of Protection Against Electric Shock
Class II Equipment
Degree of Protection Against Electric Shock
Type BF Applied Part
Degree of Protection Against Ingress of Water
IP22
Pressure Range
4 to 25 cmH2O (in 0.5 cmH2O increments)
Under single fault conditions, ≤30 cmH2O for CPAP and AutoCPAP mode, ≤40 cm
for the rest of the modes.

Luna G3 BPAP 25A (G3 B25A) User Manual MID-97/v1.0
6 / 48
Pressure Display Accuracy
±(0.8 cmH2O+4%)
Static Pressure Stability at 10 cmH2O
±0.5 cmH2O
Dynamic Pressure Stability
Pressures (cmH2O)
10BPM
15BPM
20BPM
6.5
±0.5
±0.5
±0.5
10
±1
±1
±1
20
±1
±1
±1
Device with humidification and 22mm Tube or Heated Tubing.
Ramp
The ramp time ranges from 0 to 60 minutes.
Sound Pressure Level
< 26 dB, when the device is working at the pressure of 10 cmH2O.
Sound Power Level
< 34 dB, when the device is working at the pressure of 10 cmH2O.
Maximum Flow
Test Pressures (cmH2O)
4
10
15
20
Measured Pressure at the
Patient Connection Port
(cmH2O)
3
9
14
19
Average Flow at the
Patient Connection Port
(L/min)
90
150
150
150
Air Tubing
Air tubing
Length
Inner diameter
Tubing
6 ft.(1.83m)
19mm
Heated Tubing
6 ft.(1.83m)
19mm
The Form and the Dimensions of the Patient Connection Port
The 22 mm conical air outlet complies with ISO 5356-1.
PM2.5 Filter
Efficiency: >90% for 2.5 micron dust

Luna G3 BPAP 25A (G3 B25A) User Manual MID-97/v1.0
7 / 48
Cellular Module
Transportation
Requirements
Shock, severe vibration, and moisture should be avoided
in transportation
Frequency Bands
Bands12, 3, 4, 5, 8, 12, 13, 20, 28
Communication
Mode
LTE Cat M1/ NB1
FCC ID
XPY2AGQN4NNN
Security Measures
Authentication
Enforced on all data channels
(outgoing and incoming)
Encryption
Base 128 encoding
1The LTE bands supported by Cellular Module are defined in above, while the
following Table 1 describes the Transmitting and Receiving frequencies.
Table 1 Transmitting and Receiving frequencies
Parameter
Min.
Max.
Unit
Remarks
Frequency
range FDD
Band 12
(700 MHz)
Uplink
699
716
MHz
Module transmit
Downlink
729
746
MHz
Module receive
Frequency
range FDD
Band 28
(700 MHz)
Uplink
703
748
MHz
Module transmit
Downlink
758
803
MHz
Module receive
Frequency
range FDD
Band 13
(700 MHz)
Uplink
777
787
MHz
Module transmit
Downlink
746
756
MHz
Module receive
Frequency
range FDD
Band 20
(800 MHz)
Uplink
832
862
MHz
Module transmit
Downlink
791
821
MHz
Module receive
Frequency
range FDD
Band 5
(850 MHz)
Uplink
824
849
MHz
Module transmit
Downlink
869
894
MHz
Module receive
Frequency
range FDD
Band 8
(900 MHz)
Uplink
880
915
MHz
Module transmit
Downlink
925
960
MHz
Module receive

Luna G3 BPAP 25A (G3 B25A) User Manual MID-97/v1.0
8 / 48
Parameter
Min.
Max.
Unit
Remarks
Frequency
range FDD
Band 4
(1700 MHz)
Uplink
1710
1755
MHz
Module transmit
Downlink
2110
2155
MHz
Module receive
Frequency
range FDD
Band 3
(1800 MHz)
Uplink
1710
1785
MHz
Module transmit
Downlink
1805
1880
MHz
Module receive
Frequency
range FDD
Band 2
(1900 MHz)
Uplink
1850
1910
MHz
Module transmit
Downlink
1930
1990
MHz
Module receive
WARNING!
• All other wireless technology emitters must be kept at least 2 meters from the
Cellular Module.
7. Available Therapies
The device delivers the following therapies:
CPAP –Delivers Continuous Positive Airway Pressure; CPAP maintains a constant
level of pressure throughout the breathing cycle.
AutoCPAP –Delivers CPAP therapy and provides an air pressure no less than the
prescribed pressure based on the patient’s needs.
S –A bi-level mode which responds to both inhalation and exhalation by increasing
pressure when you start to inhale and decreasing pressure when you start to exhale.
There is no automatic delivery of a breath you do not inhale. IPAP (Inspiratory
Positive Airway Pressure) and EPAP (Expiratory Positive Airway Pressure) are preset by
home care provider.
AutoS –A bi-level mode which responds to both your inhalation and exhalation. The
differential pressure of IPAP and EPAP are presetted by home care provider. While
working in auto feature, the device will automatically adjust the IPAP and EPAP if it
detects an apnea.

Luna G3 BPAP 25A (G3 B25A) User Manual MID-97/v1.0
9 / 48
8. Glossary
Apnea
A condition marked by the cessation of spontaneous breathing.
AutoCPAP
Adjust CPAP pressure automatically to improve patient comfort based on
monitoring of sleep events, such as apnea, hypopnea etc.
Auto Off
When this feature is enabled, the device automatically discontinues therapy
whenever the mask is removed.
Auto On
With this feature, the device automatically initiates therapy when you breathe into
the mask.
SmartC
With this feature, the device adjusts Treat P according to the patient's respiratory
events during a certain time period.
SmartA
With this feature, the device adjusts Ramp P and Min APAP according to the
patient's respiratory events during a certain time period.
SmartB
With this feature, the device adjusts Ramp P and Min APAP according to the
patient's respiratory event during a certain time.
CPAP
Continuous Positive Airway Pressure.
EPAP
Expiratory Positive Airway Pressure.
IPAP
Inspiratory Positive Airway Pressure.
iCode
A feature that is intended to give access to compliance and therapy management
information. The “iCode” consists of six separate codes displayed in the Patient
Menu, each code is a sequence of numbers. The “iCode QR” and “iCode QR+”
display two-dimensional codes.
LPM
Liters Per Minute.

Luna G3 BPAP 25A (G3 B25A) User Manual MID-97/v1.0
10 / 48
OSA
Obstructive Sleep Apnea.
Patient Menu
The display mode in which you can change patient-adjustable device settings,
such as the starting pressure for the Ramp feature.
Ramp
A feature that may increase patient comfort when therapy is started. It can reduce
pressure and then gradually increase the pressure to the prescription setting so the
patient can fall asleep more comfortably.
Rise Time
The time it takes for the device to change from EPAP to IPAP. You can adjust this
time for your comfort.
Res Rate
Respiratory Rate. Number of breaths per minute.
Reslex
A therapy feature that is enabled by your home care provider to provide pressure
relief during exhalation.
Standby State
The state of the device when power is applied but the airflow is turned off.
min
Means the time unit “minute”.
h
Means the time unit “hour”.
yy mm dd / mm dd yy / dd mm yy
Denotes date.
9. Model
Model
Product Contents
Work
Mode
Maximu
m Work
Pressure
(cmH2O)
Main Device
Accessory
B25A
Main device
(3.5-inch TFT)
Adapter,
Power Cord,
Tubing,
Cellular Module (optional),
Heated Tubing (optional),
PM2.5 Filter (optional)
CPAP,
AutoCPAP
, S, AutoS
25

Luna G3 BPAP 25A (G3 B25A) User Manual MID-97/v1.0
11 / 48
10. Package Contents
After unpacking the system, make sure you have everything shown here (Different
models of the product may contain different components):
No.
Articles
Qty.
Notes
1
Device
1
2
Air Filter
2
3
Power Adapter
1
4
Power Cord
1
5
PM2.5 Filter
1
Optional
6
Cellular Module
1
Optional
7
Tubing
1
8
Heated Tubing
1
Optional
9
SD Card
1
10
Carrying Case
1
11
Accompanying Documents
1
parts and accessories contain no natural rubber latex.
The product’s service life is five years if the use, maintenance, cleaning and
disinfection are in strict accordance with the User Manual.
The Heated Tubing service life is six months. The Cellular Module service life is one
year.
WARNINGS!
• This device should only be used with the mask and accessories manufactured or
recommended by 3B MEDICAL or with those recommended by your prescribing
physician. The use of inappropriate masks and accessories may affect the
performance of the device and impair the effectiveness of therapy.
• The use of accessories other than those specified, with the exception of cables
sold by the manufacturer of the equipment or system as replacement parts for
internal components, may result in increased emissions or decreased immunity of
the equipment or system.
• Do not pile up the long tubing at the head of the bed, as it may be a strangulation
hazard.
•Do not connect any equipment to the device unless recommended by 3B
MEDICAL or your health care provider.
IMPORTANT TIPS!
• If any of the above parts are missing, contact your home care provider.
• Contact your home care provider for additional information on the available
accessories of this device. When using optional accessories, always follow the
instructions enclosed with the accessories.

Luna G3 BPAP 25A (G3 B25A) User Manual MID-97/v1.0
12 / 48
11. System Features
Knob
Display Screen
Home Button
Start / Stop Button
Fig. 11-1
Name
Function
Start / Stop Button
Start / Stop delivering air
Display Screen
Display menus for operation, messages, monitoring
data, etc.
Home Button
Return to the previous menu or main interface
Knob
Adjust device settings

Luna G3 BPAP 25A (G3 B25A) User Manual MID-97/v1.0
13 / 48
Fig. 11-2
Name
Function
Air Outlet
Deliver pressurized air; connect to the tubing
Heated Tubing Port
Connected to the plug of the heated tubing
DC Inlet
An inlet for the DC power supply
Filter Cap (Air Inlet)
Cover and secure the air filter, which is used to filter dust
and pollen in the air entering the device
Transfer Box
SD Card Slot
Fig. 11-3
Name
Function
Transfer Box
Connects the device to the water chamber
SD Card Slot
Insert the SD card into this slot

Luna G3 BPAP 25A (G3 B25A) User Manual MID-97/v1.0
14 / 48
12. First Time Setup
12.1 Placing the Device
Place the device on a firm, flat surface.
WARNINGS!
• If the device has been dropped or mishandled, if the enclosure is broken, or if
water has entered the enclosure, disconnect the power cord and discontinue use.
Contact your home care provider immediately.
• If the room temperature is warmer than 95°F (35°C), the airflow produced by the
device may exceed 109.4°F (43°C). The room temperature must be kept below 95°F
(35°C) while the patient uses the device.
CAUTIONS!
• Always ensure that the device is placed in an area where the screen and
indicators are clearly visible.
• If the device has been exposed to either very hot or very cold temperatures, allow
it to adjust to room temperature (approximately 2 hours) before beginning setup.
• Make sure the device is away from any heating or cooling equipment (e.g.,
forced air vents, radiators, air conditioners).
• The device is not suitable for use in high humidity environments. Make sure that no
water enters the device.
• Make sure that bedding, curtains, or other items are not blocking the filter or vents
of the device.
• Keep pets, pests or children away from the device to avoid small objects being
inhaled or swallowed.
• To avoid explosion, this device must not be used in the presence of flammable
gases (e.g. anesthetics).
• Tobacco smoke may cause tar build-up within the device, leading to the malfunctioning of
the device.
• Air must flow freely around the device for it to work properly.
12.2 Installing the Air Filter and Filter Cap / PM2.5 Filter
(1) Attach the air filter to the filter cap, as shown in Fig. 12-1.
Filter Cap
Air Filter
Fig. 12-1

Luna G3 BPAP 25A (G3 B25A) User Manual MID-97/v1.0
15 / 48
(2) Install the filter cap containing the air filter to the device, as shown in Fig. 12-2.
Fig. 12-2
(3) Change the air filter and filter cap to the PM2.5 filter, as shown in Fig. 12-3.
PM2.5 Filter
Fig. 12-3
CAUTIONS!
• The air filter or the PM2.5 filter must be in place when the device is operating.
• Device must be unplugged when installing the air filter and filter cap or PM2.5
filter.
12.3 Connecting to Power
(1) Insert the plug of the power adapter into the DC Inlet on the back of the device
(2) Connect the power cord to the power adapter
(3) Plug the other end of the power cord into the power outlet.
Power Adapter
Power Cord
DC Inlet
Fig. 12-4
Note: The length of the power cord and power adapter is 1.5 m and 1.8 m
respectively without the function of preventing electromagnetic interference.

Luna G3 BPAP 25A (G3 B25A) User Manual MID-97/v1.0
16 / 48
WARNINGS!
• The device is powered on for use when the power cord and power adapter is
connected. The Knob turns the blower On / Off.
• Use of the device at an AC voltage beyond the stated range (see Section 5 “AC
Power Consumption”) may damage the device or cause device failure.
• Connect to appropriate power for proper operation of the device.
• Inspect the power cord often for any signs of damage. Replace a damaged cord
immediately.
IMPORTANT TIPS!
• After interruption and restoration of the power supply, the device will restore its
pre-interruption working status automatically.
• To remove AC power, disconnect the power cord from the power outlet.
12.4 Connecting to Power Cord Locker
(1) Insert the power cord locker into the device, as shown in Fig. 12-5, and then
rotated to the left for assembly to the device.
DC Inlet
Power Cord Locker
Fig. 12-5
(2) Open the power cord locker, plug the power cord to the power supply, and
press the locker downward to fix the power cord into the power port.
Power Adapter
Power Cord
DC Inlet
Power Cord Locker
Fig. 12-6
The function of the locker is to prevent the power cord being displaced from the
power port.

Luna G3 BPAP 25A (G3 B25A) User Manual MID-97/v1.0
17 / 48
12.5 Assembling the Tubing / Heated Tubing and Mask
(1) Connect one end of the tubing to the air outlet of the device, as shown in Fig.
12-7.
Air Outlet
Tubing
Fig. 12-7
(2) Connect the heated tubing joint to the air outlet of the device, and then insert
the power plug into the heated tubing port on the back of the device, as shown in
Fig. 12-8.
Power Plug
Heated Tubing
Air Outlet Heated Tubing
Heated Tubing Joint
Fig. 12-8
If the heated tubing is connected correctly, the line next to the icon will
become a number in the Main Interface on the screen of the device, as shown in
Fig. 12-9.
Fig. 12-9
This manual suits for next models
2
Table of contents
Other 3B Respiratory Product manuals