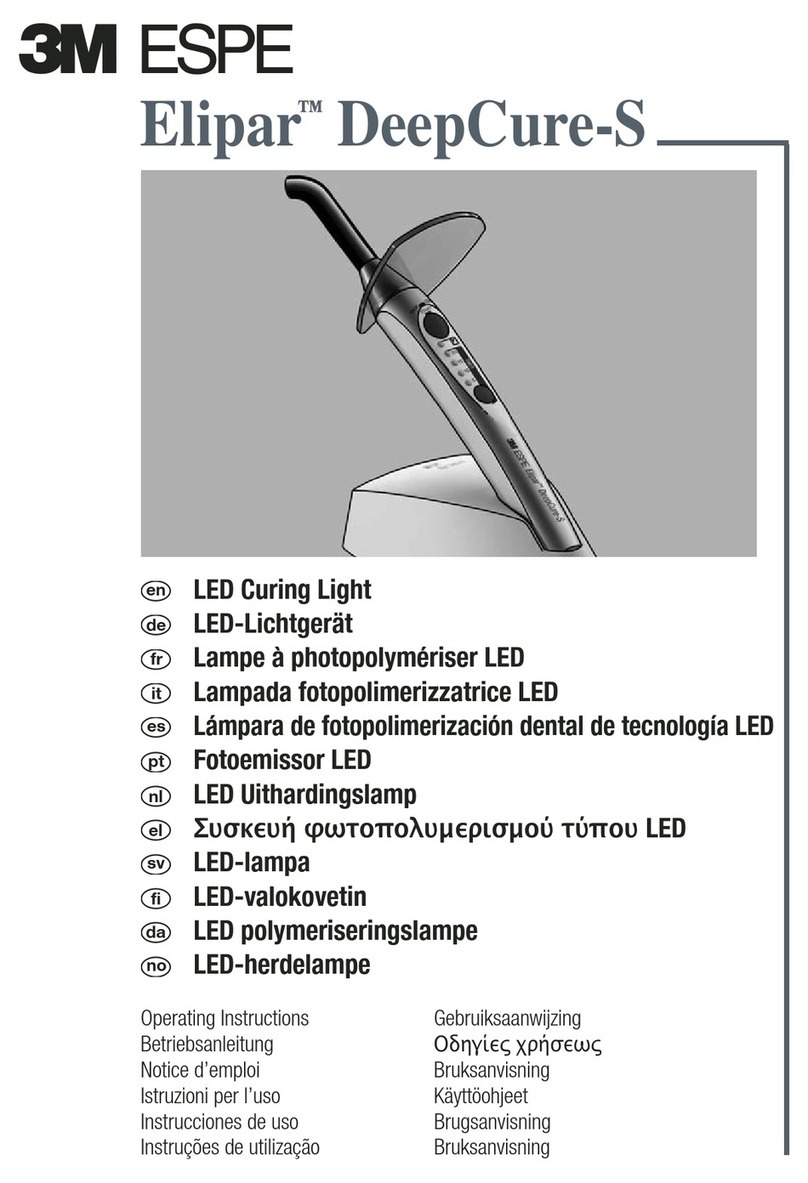
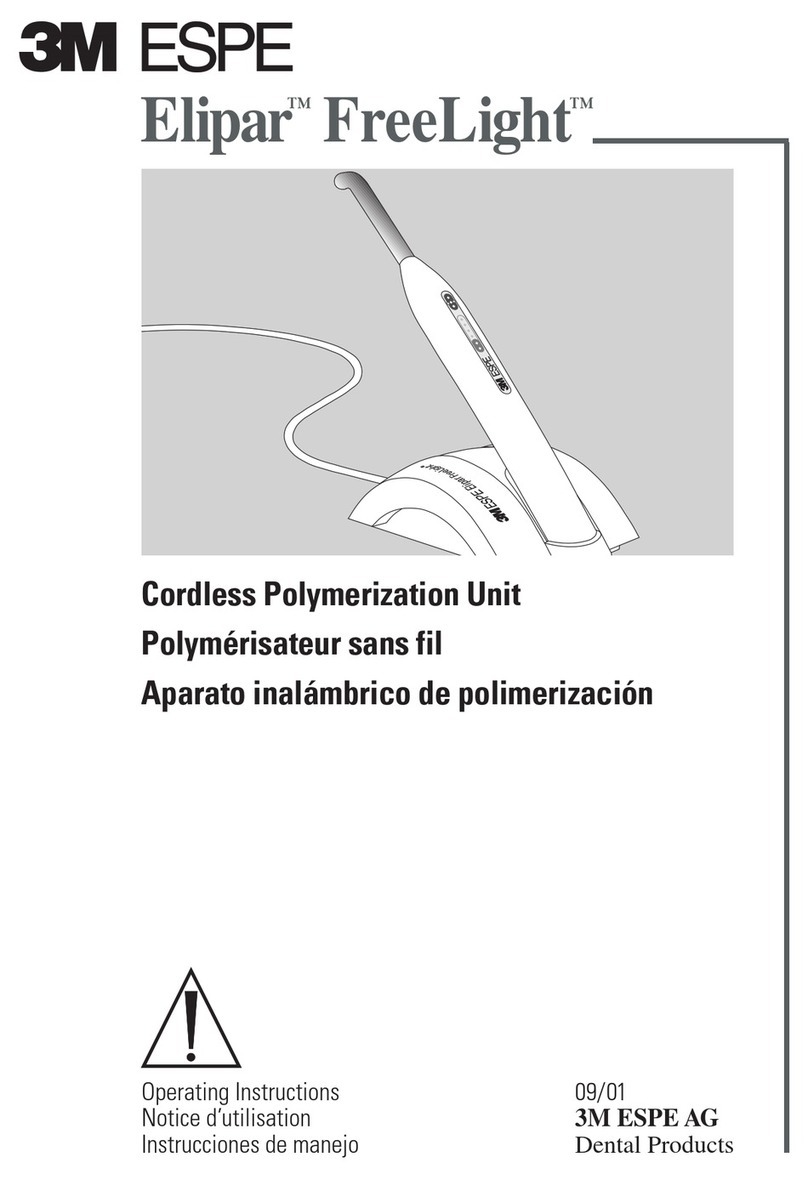
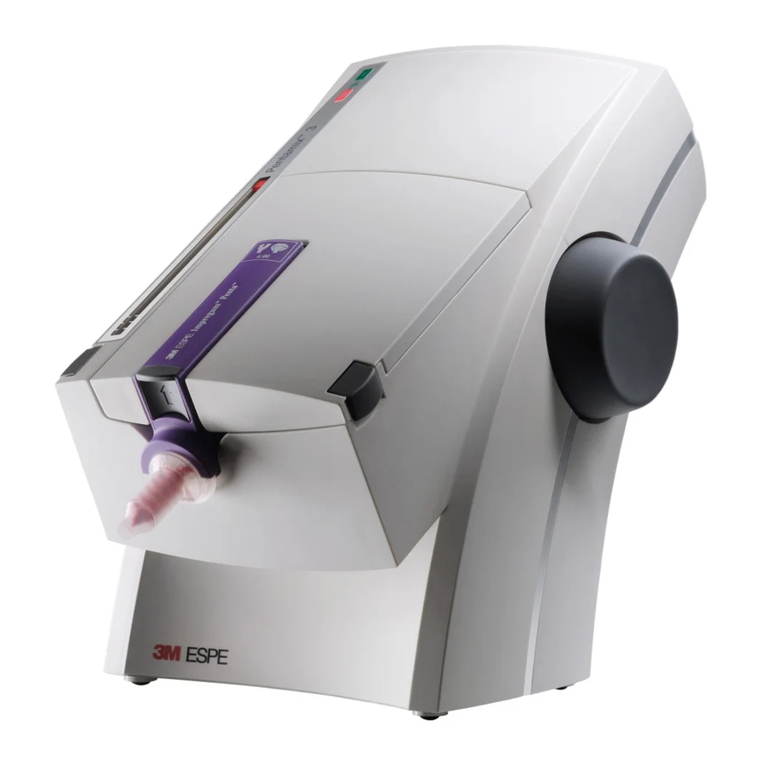
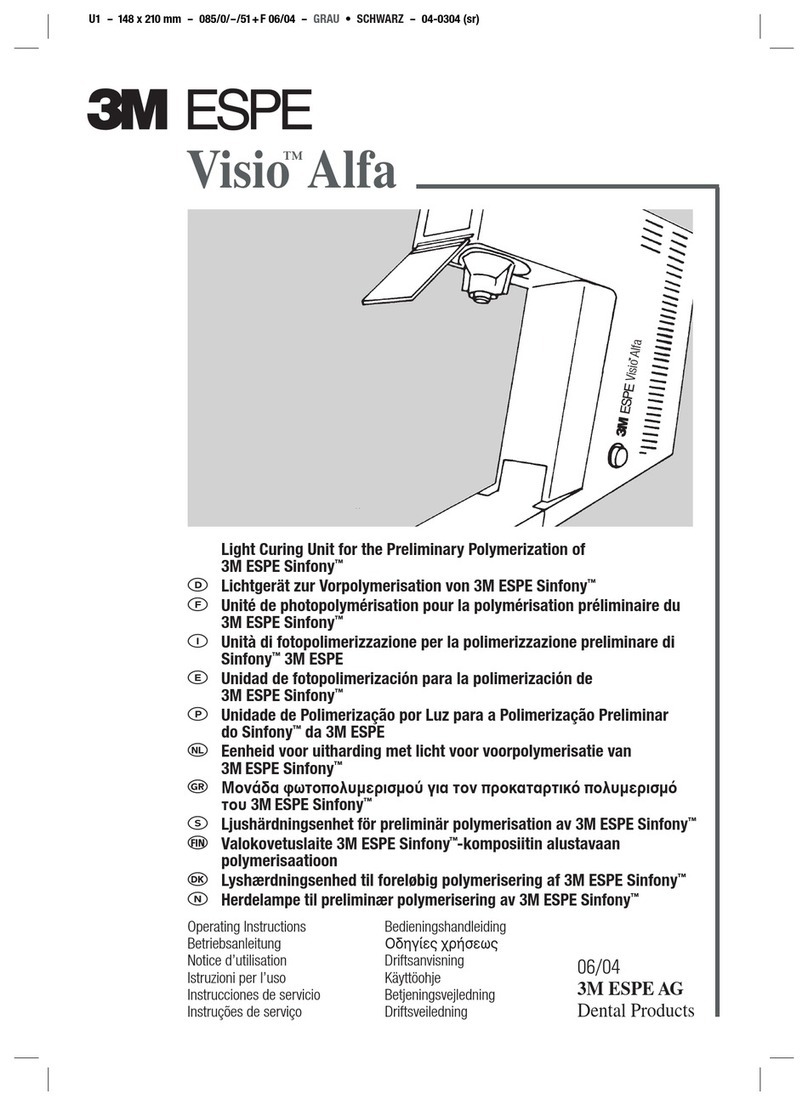
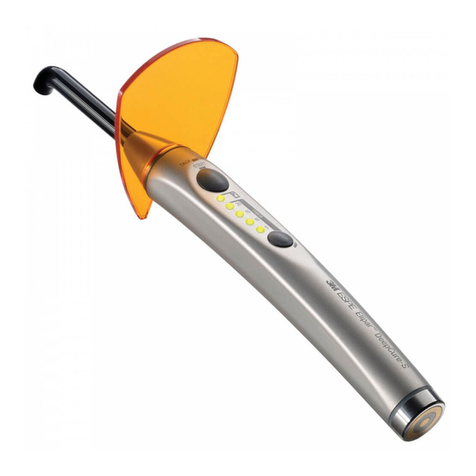
3M ESPE Elipar DeepCure-S User manual

SEITE U1
-
148 x 210 mm
-
3100021789/01
-
SCHWARZ
-
20-053 (kn)
Operating Instructions Gebruiksaanwijzing
Betriebsanleitung
Οδηγίες χρήσεως
Notice d’emploi Bruksanvisning
Istruzioni per l’uso Käyttöohjeet
Instrucciones de uso Brugsanvisning
Instruções de utilização Bruksanvisning
LED Curing Light
LED-Lichtgerät
Lampe à photopolymériser LED
Lampada fotopolimerizzatrice LED
Lámpara de fotopolimerización dental de tecnología LED
Fotoemissor LED
LED Uithardingslamp
Συσκευή φωτοπολυµερισµού τύπου
LED
LED-lampa
LED-valokovetin
LED polymeriseringslampe
LED-herdelampe
no
da
fi
sv
el
nl
pt
es
it
fr
de
en
Elipar™
DeepCure-S

SEITE U2
-
148 x 210 mm
-
3100021789/01
-
SCHWARZ
-
20-053 (kn)

1
SEITE 1
-
148 x 210 mm
-
3100021789/01
-
SCHWARZ
-
20-053 (kn)
ENGLISH
Elipar™DeepCure-S
LED Curing Light
en
Table of Contents Page
Safety 1
Product Description 3
Fields of Application 3
Technical Data 3
Charger 3
Handpiece 3
Charger and Handpiece 4
Transport and Storage Conditions 4
Installation of the Unit 4
Factory Settings 4
Initial Steps 4
Charger 4
Light Guide/Handpiece 4
Inserting the Battery 4
Battery Charging 5
Operating Status Display of the Charger 5
Power Level Display of the Handpiece 5
Operation 5
Selection of Exposure Time 5
Activating and Deactivating the Light 6
Positioning the Light Guide 6
Removing and Inserting the Light Guide
from/into the Handpiece 6
Measurement of Light Intensity 6
Recommended Cure Techniques with
3M Adhesives 6
Sleep Mode 7
Acoustical Signals
-
Handpiece 7
Troubleshooting 8
Maintenance and Care 9
Inserting/Removing the Battery 9
Handpiece/Battery Care 9
Reprocessing the Light Guide 9
Clean Charger, Handpiece,and Glare Shield 11
Storage of the Handpiece during
Extended Periods of Non-Use 12
Return of Old Electric and
Electronic Equipment for Disposal 12
Collection 12
Return and Collection Systems 12
Customer Information 12
Warranty 12
Limitation of Liability 12
Symbol Glossary 13
Safety
PLEASE NOTE!
Prior to installation and start-up of the unit, please read
these instructions carefully!
As with all technical devices, the proper function and
safe operation of this unit depend on the user’s
compliance with the standard safety procedures as well
as the specific safety recommendations presented in
these Operating Instructions.
1. Use of the device is restricted to trained personnel in
accordance with the instructions below.The manu-
facturer assumes no liability for any damage resulting
from the use of this unit for any other purpose.
2. Prior to start-up of the unit make sure that the
operating voltage stated on the rating plate is
compatible with the available mains voltage. Operation
of the unit at a different voltage may damage the unit.
3. Position the unit so that the power plug is accessible
at all times. The power plug is used to turn the charger
on and off. To disconnect the charger from the mains,
remove the power plug from the electrical outlet.
4. Use only the 3M charger which is provided with the
unit. The use of any other charger can result in da-
mage to the battery.
5. CAUTION! Elipar DeepCure-S may be operated only
with the supplied battery or original 3M Elipar Deep-
Cure-S replacement batteries. The use of other bat-
teries can impair performance or cause damage to
the device.
6. CAUTION! Avoid using this device in close proximity
to other equipment or with other equipment in
stacked form, as this may result in improper function.
If use in the manner described before is necessary,
this device and the other equipment should be ob-
served carefully in order to ensure that they work
properly.
7. CAUTION. Do not stare at source. May be harmful
to the eyes. Restrict exposure to the area of the
oral cavity in which clinical treatment is intended.
Protect patient and user from reflection and intensive
scattered light by taking the appropriate precautions,
e.g., glare shields, goggles, or coverings.
8. CAUTION! As is the case for all high-intensity light-
curing devices, the high light intensity is accompanied
by heat generation on the exposed surface. This heat
can result in irreversible damage if there is longer
exposure in the proximity of the pulp or soft tissue.
The exposure times given in the manufacturer’s
instructions must be observed exactly to avoid any
such damage.
Uninterrupted exposure times of the same tooth
surface in excess of 20 seconds and direct contact
ENGLISH
en

2
SEITE 2
-
148 x 210 mm
-
3100021789/01
-
SCHWARZ
-
20-053 (kn)
been advised to be cautious with regard to their
exposure to small electrical devices.
20. Do not use Elipar DeepCure-S in patients with a his-
tory of photobiological reactions (including
individuals with urticaria solaris or erythropoetic
protoporphyria) or who are currently on photo-
sensitizing medication (including 8-methoxypsoralen
or dimethylchlorotetracycline).
21. Individuals with a history of cataract surgery may be
particularly sensitive to the exposure to light and
should be discouraged from Elipar DeepCure-S
treatment unless adequate safety measures, such
as the use of protective goggles to remove blue
light, are undertaken.
22. Individuals with a history of retinal disease should
seek advice from their ophthalmologist prior to
operating the unit. In operating the Elipar DeepCure-S
unit, this group of individuals must take extreme
care and comply with any and all safety precautions
(including the use of suitable light-filtering safety
goggles).
23. This unit has been developed and tested in
accordance with the relevant EMC regulations and
standards. It is in conformity with legal requirements.
Since various factors such as power supply, wiring,
and the ambient conditions at the place of operation
can affect the EMC properties of the unit, the possi-
bility that, under unfavorable conditions, there will
be EMC disruptions cannot be completely excluded.
If you should notice problems in the operation of this
or other units, move the unit to a different location.
The EMC manufacturer’s declaration and the recom-
mended separation distances between portable
and mobile RF communications equipment and the
Elipar DeepCure-S unit are listed in the appendix.
24. CAUTION! Portable high-frequency communication
devices including their accessories should keep a
minimum distance of 30 cm to Elipar DeepCure-S.
Otherwise, the performance characteristics of the
device may be reduced.
25. Prior to each use of the unit ensure that the emitted
light intensity is sufficient to safely guarantee poly-
merization. Use the light testing area integrated into
the charger for this purpose.
Please report a serious incident occurring in relation to
the device to 3M and the local competent authority (EU)
or local regulatory authority.
with oral mucosa or skin must be strictly avoided.
Scientists working in this field are in agreement
that the irritation caused by heat generated during
light curing can be minimized by taking two simple
precautions:
•
Polymerization with external cooling from an air flow
• Polymerization at intermittent intervals
(e.g., 2 exposures lasting 10 seconds each ins-
tead of 1 exposure lasting 20 seconds).
9. Elipar DeepCure-S may be operated only with the
supplied light guide or original 3M Elipar
DeepCure-S replacement light guide. The light
guide has to be seen as an applied part. The use of
other light guides may result in a reduction or in-
crease in the light intensity. The product’s warranty
does not cover any damage resulting from the use
of third-party light guides.
10. Condensation resulting from the unit being trans-
ferred from a cold to a warm environment may be
a potential risk. Hence, the unit should be turned on
only after it is completely equilibrated to ambient
temperature.
11. In order to avoid electric shock do not introduce any
objects into the unit with the exception of replace-
ment parts handled in accordance with the Operating
Instructions.
12. Use only genuine 3M parts when replacing
defective
components as directed in these Operating
Instructi-
ons. The product’s warranty does not cover any da-
mage resulting from the use of third-party replace-
ment parts.
13. Should you have any reason to suspect the safety of
the unit to be compromised, the unit must be taken
out of operation and labeled accordingly to prevent
third parties from inadvertently using a
possibly
defective unit. Safety may be compromised,
e.g.,
if the unit malfunctions or is noticeably damaged.
14. Keep solvents, flammable liquids, and sources of
intense heat away from the unit as they may damage
the plastic housing of the charger, the seals, or the
cover on the operating buttons.
15.
Do not operate the unit in the proximity of flammable
mixtures.
16. Do not allow cleaning agents to enter the unit as
this may short-circuit the unit or cause potentially
dangerous malfunction.
17. Only service centers authorized by 3M Deutsch-
land GmbH may open the unit housing and repair
the device.
18. WARNING: this device must not be modified without
the manufacturer’s permission.
19. Elipar DeepCure-S must not be used in patients, or
by users, with heart pacemaker implants who have

3
SEITE 3
-
148 x 210 mm
-
3100021789/01
-
SCHWARZ
-
20-053 (kn)
Settable exposure times:
• 5,10,15, 20 sec
• Continuous mode (120 sec)
• Tack-cure mode (1 sec)
The charger is equipped with an integrated light intensity
meter for the Elipar DeepCure-S.
The unit is shipped with a light guide with 10 mm
diameter. It is not permissible to use the light guides of
other units.
The handpiece is equipped with a sleep mode to mini-
mize the unit’s energy consumption. The handpiece
switches to sleep mode once it is placed in the charger or
if left unused for approx. 5 minutes outside the charger.
+These Instructions for Use should be kept for the
duration of product use. The product may only be
used when the product labeling is clearly readable.
For details on all additionally mentioned products
please refer to the corresponding Instructions for
Use.
Intended Purpose
Intended users: educated dental professionals, e.g.
general dentists, dental assistants, dental hygienists,
who have theoretical and practical knowledge on usage
of dental products.
Fields of Application
• Polymerization of light-curing dental materials with
photo initiator for the wavelength range 430
-
480 nm.
-
Though the majority of light-curing dental materials
are responsive in this range of wavelengths,
you may wish to contact the manufacturer of the
material in question.
Technical Data
Charger
Operating voltage: 100
-
127 V 50/60 Hz
230 V 50/60 Hz (see rating
plate for factory-set voltage)
Power input: 0.08 A (230 V)
0.16 A (100
-
127 V)
Dimensions: Length: 170 mm
Width: 95 mm
Height: 50 mm
Weight: 650 g
Classification: Protection class II,
Handpiece
Power supply: lithium-ion battery, nominal
voltage 3.7 V
Utilizable wavelength
range: 430
-
480 nm
Wavelength peak: 444
-
452 nm
ENGLISH
en
Light guide
Handpiece
Charger
Power cord
Glare Shield
Product Description
Elipar DeepCure-S is a high-performance LED light
source for polymerization of dental materials. It consists
of a charger and a wireless handpiece powered by a
rechargeable battery. The device is a medical electrical
device in accordance with IEC 60601-1 and is available
as a tabletop device. Wall mounting is not possible.
In comparison with conventional light-curing devices,
Elipar DeepCure-S features excellent beam collimation
and a uniform beam profile, directing more of the light
energy to the restoration being polymerized and
producing a deep, uniform, and complete curing of the
restoration.
The light source is a high-performance light diode (LED).
The beam emerging from the device covers the light
wavelength range of 430 to 480 nm relevant, for
instance, for camphor quinone products and is suitable
for use with the majority of light-curing dental materials,
including materials for fillings, liners, core build-ups,
fissure sealings, temporary restorations, and cements
for indirect restorations.
See the manufacturer’s information for the exposure
time required for the specific dental material.

4
SEITE 4
-
148 x 210 mm
-
3100021789/01
-
SCHWARZ
-
20-053 (kn)
Light intensity (between
400 and 515 nm): 1470 mW/cm2
-
10%/+20%
(independent of battery power
level)
Light emission area: 60
-
65 mm2(optically active)
Intermittent operation: The device has been designed
solely for short-term operation.
Typical operating time at room
temperature (23°C): 7 min,
at 40°C ambient temperature:
1min on,15 min off (cooling-off
period)
Total exposure time with new,
fully charged battery: typically 120 min
Dimensions: Diameter: 28 mm
Length: 270 mm
Weight: 250 g (incl. light guide)
Charger and Handpiece
Time to charge empty battery: approx.1.5 h
Operating temperature:
10° C up to 40°C /
59°F up to 104°F
Relative humidity: 30% up to 75%
Atmospheric pressure: 700 hPa up to1060 hPa
Total height with handpiece
inserted in the charger: 180 mm
Year of manufacture: see rating plate
Transport and Storage Conditions:
Ambient temperature:
-
20°C up to +40° C /
-
4°F up to +104° F
Relative humidity: 30% up to 75%
Atmospheric pressure: 700 hPa up to 1060 hPa
Subject to technical modification without prior notice.
hPa
1060
700
max.
75%
30%
+40°C
+104°F
–20°C
–4°F
Typ B
Installation of the Unit
Factory Settings
The factory settings of the unit are as follows:
• 10 sec exposure time
Initial Steps
Charger
왘Please ensure first that the voltage stated on the
rating plate corresponds to the existing main supply
voltage. The rating plate is attached to the bottom
of the unit.
왘Place the charger on a level surface.
왘Connect the power cable of the charger to the power
supply.
-
The green LED on the charger showing that the
unit
is ready for operation comes on.This shows
that the unit is ready for operation; please refer
to the section “Operating Status Display of the
Charger”.
Light Guide/Handpiece
왘Never place the handpiece in the charger without the
battery inserted in the handpiece!
왘Place the glare shield on the front of the unit.
왘Autoclave the light guide prior to first use.
왘Then attach the light guide firmly to the handpiece.
Inserting the Battery
왘Remove the protective cap from the battery and keep
with the unit packaging.
왘Slowly insert the battery with the thread side towards
the metal housing into the handpiece until it stops.
Screw the battery clockwise by hand until the seal is
pressed firmly against the metal housing. The unit
will not function properly if the battery is not screwed
in completely!

5
SEITE 5
-
148 x 210 mm
-
3100021789/01
-
SCHWARZ
-
20-053 (kn)
ENGLISH
en
왘If the unit does not function properly, remove the
battery and reinsert it as described above.
Battery Charging
왘The unit contains a powerful lithium-ion recharge-
able battery. The battery does not have any
memory effect and can therefore be recharged
at any time by placing it in the charger (see the
section describing the battery power level display
on the handpiece).
왘The battery can also be charged in the charger
independently of the handpiece.
왘Place the handpiece on the charger for approx.
1.5 hours before the first use, in order to charge the
new battery completely for the first time.
-
The status LED showing the operating status of
the charger flashes green during the charging
operation; see below “Operating Status Display of
the Charger”.
Operating Status Display of the Charger
Power Level Display of the Handpiece
Operation
Selection of Exposure Time
Sealing
Status LED showing
operating status
Status LED Operating status
Handpiece/battery Handpiece/battery
outside the charger in the charger
Steady green light Charger ready for Charging has been
operation completed
Flashes green –– Battery is being
charged
Steady red light Charge contact Charge contact
pins are wet pins are wet
Flashes alternately Malfunction in the Problem during
red and green charger charging
Power level LED
Power level LED Operating status
Handpiece outside Handpiece in the
the charger charger
Steady green light Battery is charged, Not possible,
handpiece ready handpiece is in
for operation sleep mode
Steady red light Warning for low Not possible,
battery capacity, handpiece is in
remaining capacity sleep mode
adequate typically
for 5 10-sec cycles
Flashes red Battery fully Problem in
discharged, charging, battery
exposure cycle is defective or
will be completed cannot be charged
or, if in continuous
mode, stopped
LED showing
exposure times
{
START button
TIME button

6
SEITE 6
-
148 x 210 mm
-
3100021789/01
-
SCHWARZ
-
20-053 (kn)
Exposure time options: 5,10,15, 20 sec, continuous
mode (120 sec), tack-cure mode.
왘See the instructions for use for the specific dental
material when selecting the exposure time.
왘The indicated exposure times assume that the light
guide is held at the exact position over the material
being polymerized.
왘If the distance between the light guide and the
restoration is increased, the exposure time must be
adjusted accordingly because the light intensity
weakens (see graph).
Select the exposure time by pressing the TIME button.
-
The selected exposure time is indicated by the
4 green LEDs.
-
Each time the button is briefly pressed, the setting
advances to the next (higher) value. All 4 green
LEDs will be turned on for a setting of 20 sec.
Pressing the button again will turn off all of the
LEDs and enable the continuous mode.
-
The display advances through the available
settings, if the button is kept depressed.
-
While exposure is ongoing, the button for selection
of the exposure time is inactive.
Activating and Deactivating the Light
왘Briefly press the START button; the light will turn on.
-
The LEDs first indicate the set exposure time; all
4 LEDs light up for 20 sec. Every 5 sec, as the
time runs down, the LEDs will turn off one at a
time; at 15 sec remaining time, 3 LEDs will still be
on, at 10 sec remaining time 2 LEDs, etc.
-
The LEDs do not come on at all in continuous
mode; an acoustical signal is emitted every
10 seconds.
왘If desired, the light can be turned off by pressing the
START button again before the exposure time is over.
왘Holding down the START button activates the tack-
cure mode: the unit emits a single short light pulse
which enables the defined curing of Protemp Crown
temporary restorations or a light-curing cement
excess (e.g., RelyX Unicem) to enable easy removal.
Positioning the Light Guide
왘Rotate the light guide into the desired position for
polymerization.
왘To make full use of the light intensity provided, place
the light guide as close to the filling as possible.
Avoid directly contacting the filling material!
-
Keep the light guide clean at all times to obtain full
light intensity.
-
Damaged light guides substantially reduce
the light intensity and must be replaced
immediately, sharp edges may cause serious
injury!
Removing and Inserting the Light Guide from/into
the Handpiece
왘The light guide has a magnetic holder. Remove the
light guide from the handpiece by pulling it towards
the front.
왘Attach the light guide to the handpiece until it is
firmly in place.
Measurement of Light Intensity
012345678910
Distance (mm)
Light intensity (%)
100
90
80
70
60
50
Testing area
LEDs showing light
intensity
}
The light intensity of the Elipar DeepCure-S handpiece
can only be reliably determined using the Elipar Deep-
Cure-S charger! The circular testing area is located
below the scale for the light intensity on the charger.
Measurements carried out using the Elipar FreeLight,
FreeLight 2 or Elipar S10 charger (predecessors of Elipar
DeepCure-S), or another unit will produce incorrect
results due to the different light sources and the varying
arrangement of the components of the units.
Caution!
왘Clean the testing area with a wet cloth.
왘Without applying pressure, place the light guide on
the testing area such that the light-emitting opening
of the rod is level with the testing area.
왘Activate the lamp by pressing the START button.
-
The number of illuminated LEDs is indicative of
the measured light intensity: 5 LEDs =100%,

7
SEITE 7
-
148 x 210 mm
-
3100021789/01
-
SCHWARZ
-
20-053 (kn)
ENGLISH
en
4 LEDs = 90%, 3 LEDs = 80%, 2 LEDs = 70%,
1LED = 60%.
왘
If the light intensity is below 100% (fewer than 5 LEDs
are ON), check the light guide for contamination or
defects.
왘Either: clean the light guide of any contamination.
Or: clean the glare shield on the handpiece; see
“Care” for instructions about both procedures.
Or: replace the defective light guide with a new light
guide. Or: if the measures described above do not
result in any improvement, call 3M Customer Service
or the appropriate dealer.
Recommended Cure Techniques with 3M Adhesi-
ves
• Rotate the light guide into the desired position for
polymerization.
• A barrier sleeve may be used. Note that sleeve can
impact power and irradiance of a curing light. It is
critical to ensure the sleeve is powder free and the
seam is not over the tip of the light guide and that the
sleeve fits well. Intermediate level disinfection (ma-
nual disinfection with ready-to-use disinfectant wipes)
is indicated when a sleeve is used, otherwise the light
guide should undergo high level disinfection (manual
disinfection using disinfectant bath, see “Reproces-
sing the Light Guide”).
The following sleeves have been tested:
Sleep Mode
Once the handpiece is placed in the charger, all internal
functions and LEDs are automatically turned off as the
handpiece switches to sleep mode. This reduces the
power consumption of the battery to a minimal level.
Outside the charger, the handpiece is also switched to
sleep mode, if it is not used for approx. 5 min.
왘To terminate the sleep mode press the START button.
-
The sleep mode termination signal (two short
audible signals) is emitted indicating that the
handpiece is ready for operation; the handpiece
displays the latest selected exposure mode and
time settings.
Acoustical Signals
-
Handpiece
An acoustical signal is emitted
• every time a button is pressed,
• every time the light is turned ON,
• 1 time after 5 sec exposure time, 2 times after 10 sec,
3 times after 15 sec.
Exception: in continuous mode; an acoustical signal
is emitted every 10 seconds.
Two acoustical signals are emitted
• every time the sleep mode is terminated by pressing
the START button,
• every time the light is turned OFF.
A 2-sec error signal is emitted, if
• the handpiece over-heats,
• the battery lacks sufficient charge.
The acoustical signals from the handpiece can be turned
off (except for the 2-sec error signal). Follow these
instructions to turn them off. Put the handpiece in sleep
mode, e.g., by setting it in the charger. Take the device
from the charger; press first the TIME button, then the
START button. This changes the sleep mode of the
handpiece back to active and the status “Acoustical
signals activated” to “Acoustical signals deactivated”.
The acoustical signals can be reactivated by following
the same procedure.
Sleeve Impacts
Power or
Irradiance
Cure Sleeve®Tip Covers (short) – Kerr No
Complete Curing Light Sleeves-Demi –
Kerr No
TIDIShield™ Custom Fit Curing Light
Sleeves – TIDI Products No
SmartLite®Max Lens Cover Sleeve –
Dentsply No
Curelastic™ Cure-Light Sleeve
(Steri-Shield) Yes

8
SEITE 8
-
148 x 210 mm
-
3100021789/01
-
SCHWARZ
-
20-053 (kn)
Troubleshooting Error Cause
왘Solution
During light emission
in continuous mode,
an error signal sounds
for 2 sec, the emission
is stopped, and the
handpiece changes to
sleep mode.
The LED showing the
operating status in
the charger glows red
steadily.
The LED showing the
operating status in the
charger flashes alter-
nately red and green.
The handpiece is not
in the charger.
The LED showing the
operating status in the
charger flashes alter-
nately red and green.
The handpiece is in
the charger.
The LED showing the
operating status in the
charger does not come
on although the plug
has been connected to
an electrical outlet.
The light intensity is
too low.
The information about inter-
mittent operation under the
header “Technical Data
-
Handpiece” has not been
observed.
The handpiece has become
overheated in the course
of use. The handpiece can
be used again once it has
cooled down.
왘Allow the handpiece to
cool for 3 minutes, then
start the next exposure by
pressing the START button.
The charge contact pins in
the handpiece or the charger
are wet.
왘Dry the charge contact
pins. Be careful not to
bend the flexible charge
contact pins in the charger.
Charger is defective.
왘Have the charger repaired.
Malfunction during charging.
왘The battery is damaged.
왘Replace the battery.
Power outlet carries no
voltage.
왘Use a different power
outlet.
Charger is defective.
왘Have the charger repaired.
왘Clean the light guide and
the protecting glass in the
light guide mounting hole
(please refer to “Cleaning
the Light Guide”).
Error Cause
왘Solution
The charge level
display on the hand-
piece glows red
steadily.
The power level
display of the hand-
piece flashes red.
The ongoing exposure
is interrupted (light off
signal is emitted) fol-
lowed by a 2-sec error
signal; the handpiece
switches to “sleep”
mode and resists
further activation.
The remaining battery charge
is adequate only for typical 5
10-sec exposure cycles.
왘Place the handpiece in the
charger and re-charge the
battery.
The battery lacks sufficient
charge.
왘Place the handpiece in the
charger and re-charge the
battery.
The power level
display of the hand-
piece flashes red
while the handpiece
is in the charger.
The handpiece has not
been used for a long
time and now it cannot
be turned on.
The light emission
does not start when
the START button is
pressed; an error
signal sounds for
2 sec.
Charging problem.
The battery is defective or at
the end of its useful life.
왘Replace the battery.
There is not enough charge
in the battery to turn on the
handpiece.
왘Place the handpiece in the
charger and re-charge the
battery.
The information about inter-
mittent operation under the
header “Technical Data
-
Handpiece” has not been
observed.
The handpiece has become
overheated in the course
of use. The handpiece can
be used again once it has
cooled down.
왘Allow the handpiece to
cool for 3 minutes, then
start the next exposure
by
pressing the START
button.

9
SEITE 9
-
148 x 210 mm
-
3100021789/01
-
SCHWARZ
-
20-053 (kn)
ENGLISH
en
Maintenance and Care
The Elipar DeepCure-S unit is maintenance-free.
No periodic maintenance is required. See the information
contained in this chapter to secure problem-free opera-
tion.
Inserting/Removing the Battery
Never place the handpiece in the charger without the
battery inserted in the handpiece!
Use 3M batteries only! The use of other manufacturer
batteries or non-rechargeable batteries/primary
batteries
is a potential hazard and may damage the unit.
왘Remove the battery from the handpiece by turning
it counter-clockwise as shown by the direction of the
arrow on the underside of the handpiece.
왘Insert the (new) battery into the handpiece and turn it
clockwise until the seal is firmly pressed against the
metal housing.
왘Place the handpiece in the charger for 1.5 hours
in order to fully charge the new battery for the first time.
-
The LED showing the operating status on the char-
ger flashes green; see also “Operating Status Dis-
play of the Charger”.
Handpiece/Battery Care
왘Use only the 3M charger which is provided with the
unit; failure to do so could lead to damage to the bat-
tery!
왘Do not immerse the battery in water or incinerate!
Please also observe the chapter on “Safety”.
Reprocessing the Light Guide
The light guide is not sterile when delivered and must be
reprocessed before being used for the first time and after
each patient use.
Follow manufacturer’s instructions for preparation, tem-
peratures, contact time and rinsing off the cleaning1and
disinfecting solution2exactly.
An enzymatic detergent should be used as the cleaning
solution.
Material Resistance
Make sure that the cleaning and disinfectant agents you
have chosen do not contain any of the following materials:
– Organic, mineral, and oxidizing acids (minimum ac-
ceptable pH value 5.5)
– The pH value of the cleaning and disinfecting solution
should be between pH 7 and 11
– Oxidation agents (e.g., hydrogen peroxide)
– Halogens (chlorine, iodine, bromide)
– Aromatic/halogenized hydrocarbons
Observe the manufacturer’s information about the clean-
ing and disinfecting agents.
The light guide must not be exposed to temperatures
higher than 135 °C (275 °F).
The light guide has been tested for up to 500 sterilization
cycles.
Limitations on Reprocessing
This medical device is safe to use if it is reprocessed
according to these instructions and no visible damage is
seen.
Inspect the device carefully before each use and discard
if there is any damage.
Point of use / Pre-Treatment
The contaminated light guide must be placed in an
approved, sealed container during transport from the
point of use to the reprocessing area.
The pre-treatment must be carried out before either
automatic or manual cleaning and disinfecting. Immedi-
ately after using (within a maximum of 2 hours), remove
gross contaminations from the light guide.
For this, rinse the light guide thoroughly under running
water (drinking water quality as a minimum) for at least
10 seconds.
Use a soft brush or a soft cloth to manually remove
any remaining contamination. Remove polymerized com-
posite with alcohol; a plastic spatula may help in remov-
ing the material. Do not use any sharp or pointed tools to
protect the surface of the light guide from scratching.
Cleaning and Thermal Disinfecting (Automated
Washer-Disinfectors / CDD (Cleaning and Disinfec-
tion Device))
왘After the light guide has been pre-treated, place it in
the wire or sieve basket of the washer-disinfector.
Make sure that the devices do not touch one another
in the washer-disinfector.
Error Cause
왘Solution
The dental material
does not cure
completely.
The light guide cannot
be attached to the
handpiece.
왘Clean the light guide and
the protecting glass in the
light guide mounting hole
(please refer to “Cleaning
the Light Guide”).
왘Check to see that the
correct light guide has
been attached.
왘The light guide is not
designed for use with the
Elipar DeepCure-S.

10
SEITE 10
-
148 x 210 mm
-
3100021789/01
-
SCHWARZ
-
20-053 (kn)
왘Remove the light guide from the washer-disinfector
unit at the end of the drying cycle and store it under
low germ count conditions.
왘Examine the light guide for visible impurities. If any
impurities are visible, repeat the cycle in the washer-
disinfector.
Automated washer-disinfectors that meet the fol-
lowing requirements are suitable for use:
• The device generally has a certified effectiveness in
accordance with ISO 15883. The washer-disinfector
is regularly serviced and tested.
• If available, use a tested cycle for thermal disinfection
(A0 value > 600 or, for older devices, at least 5 min
at 90 °C/194 °F).
• The water used for rinsing is minimum drinking water
quality. Use low-germ and low-endotoxin water for
final rinsing.
• The air used for drying should be filtered (oil-free, with
low microbiological and particulate contamination).
Note: The evidence of suitability for automatic cleaning
and disinfection took place using the Miele G7336 CD
washer-disinfector (Gütersloh) and the cleaning agent
Thermosept RKN-zym (Schülke & Mayr). The program
D-V-THERMO0905, without drying time was used under
worst case conditions.
CaviWipes™ based on the active substances alco-
hols and quaternary compounds (QAV)) or equivalent
cleaning agents.
왘Follow the cleaning agent manufacturer’s directions
for use.
왘Clean with the wipes until no contamination is visible.
왘Then rinse with water (drinking water quality as a
minimum) and dry with a soft, lint-free cloth.
Manual Disinfection (Intermediate Level Disinfection)
왘An intermediate level disinfection is possible only if
the light guide is covered with a protective sleeve
during use.
왘Disinfect the light guide with ready-to-use disinfec-
tant wipes (e.g., CaviWipes™ based on the active
substances alcohols and quaternary compounds
(QAV)) or equivalent disinfection agents. Follow the
disinfection agent manufacturer’s directions for use,
observing in particular the contact times.
왘Then rinse with water (drinking water quality as a
minimum) and dry with a soft, lint-free cloth.
Manual Cleaning and Disinfection the Light Guide
by Immersion Bath
Manual Cleaning
왘A neutral enzymatic cleaning agent is recommended
(e.g., Cidezyme/Enzol from Johnson & Johnson).
왘Place the light guide for the specified application time
into the solution, making sure that it is completely
covered.
왘Cleaning takes place in the immersion bath with a
soft brush for at least 5 minutes.
왘Then remove the light guide from the solution, thor-
oughly rinse with low-germ-count water (drinking
water quality as a minimum), and dry with a lint-free
cloth.
Manual Disinfection (High Level Disinfection)
왘A disinfecting agent containing o-Phthalaldehyde
(e.g., Cidex OPA by Johnson & Johnson) is recom-
mended. It is compatible with the light-curing device.
왘To disinfect, place the cleaned light guide for the
specified application time (≥12 min) into the solu-
tion, making sure that it is completely covered.
왘The instruments in the disinfection bath must not
touch each other during this process.
왘Then remove the light guide from the solution, thor-
oughly rinse with low-germ-count water (drinking
water quality as a minimum) for at least 3 minutes,
and dry with a lint-free cloth.
왘Then check the light guide (see “Check”).
1Cleaning agent Thermosept RKN-zym (Schülke &
Mayr) for the washer-disinfector and Cidezyme®/
Cleaning
steps Parameters
Pre-rinse Temperature: 10 ° ± 2 °C
Time: 1 min
Cleaning
Cleaning temperature: 45 ° ± 2 °C
Time: 5 min
Cleaning solution: Thermosept
RKN-zym
Concentration: 0.3% (3 ml/l)
Final rinse Temperature: 10 ° ± 2 °C
Time: 2 min
Thermal
disinfection
Temperature 90 ° ± 2 °C
Time: 5 min
Cleaning and disinfection of the light guide by
wiping is only permitted in combination with a
corresponding protective sleeve
Manual Cleaning
왘Clean the light guide after every application for 30
seconds with ready-to-use disinfectant wipes (e.g.,

11
SEITE 11
-
148 x 210 mm
-
3100021789/01
-
SCHWARZ
-
20-053 (kn)
ENGLISH
en
Enzol®and CaviWipes™ were used for manual clean-
ing.
2Cidex OPA, ready-for-use solution, was used for vali-
dation of the high level disinfection and CaviWipes™
for validation of intermediate level disinfection.
Packaging for Sterilization
Package the light guide in single wrapped sterilization
pouches (one-way packaging or double packaging).
Sterilization
Effective cleaning and disinfection are absolutely essen-
tial requirements for effective sterilization.
A fractionated vacuum procedure (at least 3 vacuum
stages) or a gravity procedure (with adequate product
drying) must be used for the sterilization. The use of the
less effective gravity procedure is permissible solely if
the fractionated vacuum procedure is unavailable. The
user is solely responsible for selection of the parame-
ters required for the gravity procedure; the user must
therefore calculate or validate these parameters in ac-
cordance with the loading configuration. The drying time
actually required is also directly dependent on parame-
ters that are in the sole responsibility of the user (load-
ing configuration and density, sterilizer condition, etc.)
and must consequently be determined by the user.
• Steam sterilizer in conformity with DIN EN 13060/DIN
EN 285 or ANSI AAMI ST79 (for USA: FDA clearance)
• Maximum sterilization temperature 135 °C (275 °F)
• The following cycles were validated for the light
guide:
• Wipe the surfaces with ready-to-use disinfectant
wipes3 (e.g., CaviWipes™ based on the active sub-
stances alcohols and quaternary compounds (QAV) or
equivalent disinfection agents). Subsequently inspect
the surfaces for visible impurities. If any impurities
are visible, repeat the cleaning procedure.
• Solvents or abrasive cleaners may not be used as
they can damage the components.
• Wipe the device surfaces with a tuberculocidal disin-
fectant wipe3 for disinfection and keep it wet accord-
ing to the disinfection agent manufacturer’s direc-
tions for use, particularly observing the contact time.
• Disinfectants must not be sprayed directly onto the
device surface.
• Wipe the device surfaces with a soft cloth moistened
with water (drinking water quality as a minimum) and
dry with a soft, lint-free cloth. If you do not rinse well
with water, the components will be damaged.
Additional notes: Ensure that the charge contact pins
stay dry and are not touched by any metallic or greasy
parts. Do not bend the charge contact pins while they
dry. Wet charge contact pins cause an operating error
(malfunction message: the LED showing the operating
status of the charger flashes red).
3CaviWipes™ were used for validation of the cleaning
and disinfection procedure.
Clean Charger, Handpiece, and Glare Shield
Clean all components with a soft cloth and, if necessary,
a mild cleaning agent (e.g., dish-washing detergent).
Solvents or abrasive cleaners may not be used in any
case, as they can damage the plastic components!
-
Cleaning agents must not enter the unit!
To disinfect all components, spray the disinfectant on a
towel and use it to disinfect the unit. Do not spray the
disinfectant directly on the device.
-
Disinfectant agents must not enter the unit!
-
Dry residual disinfectants on the device with a soft
and fluff-free cloth, as they damage the plastic
components.
If necessary, ask the manufacturer of the disinfectant if
its constant use will damage plastic surfaces.
Clean the protection glass with a soft and fluff-free
cloth. Beware of scratches!
-
Make sure that charge contact pins remain dry
and are not contacted by metallic or greasy parts.
Do not bend the charge contact pins during drying.
Wet charge contact pins will cause an operating
error (malfunction message: the LED showing the
operating status in the charger glows red.
Fractional prevacuum Gravity dis-
placement
Temperature 132 °C
(270 °F) 134 °C
(273 °F) 121 °C
(250 °F)
Sterilization
time 4 min 3 min 20 min
Drying time 30 min 30 min 30 min
Check
Before using the light guide again, check it for damaged
surfaces, discoloration, and contamination; do not use
damaged light guides. If the light guide is still contami-
nated, repeat all reprocessing steps.
Clean and Disinfect Handpiece and Glare Shield
• Cleaning and disinfecting solutions must not enter the
unit.

12
SEITE 12
-
148 x 210 mm
-
3100021789/01
-
SCHWARZ
-
20-053 (kn)
Storage of the Handpiece during Extended Periods
of Non-Use
왘If the handpiece is not to be used for an extended
period of time
-
e.g., during vacation
-
fully charge
the battery prior to departure or keep the handpiece
inserted in the operational charger. A safety switch
within the battery prevents a total discharge.
왘Discharged or nearly discharged batteries must be
recharged as soon as possible.
Return of Old Electric and
Electronic Equipment for Disposal
Collection
Users of electric and electronic equipment are required
to collect their old equipment separately from other
waste in accordance with the regulations of the specific
country. Old electric and electronic equipment must not
be disposed of with unsorted household waste. This
separate collection is a prerequisite for recycling and
reprocessing as an important method for preserving
environmental resources.
Return and Collection Systems
When your Elipar DeepCure-S is no longer usable,
do not dispose of the device with household waste.
3M Deutschland GmbH has set up special disposal
facilities to handle the equipment. Details about the
procedure for the specific country can be obtained
from the pertinent 3M subsidiary.
Customer Information
No person is authorized to provide any information that
deviates from the information provided in this instruction
sheet.
Warranty
3M Deutschland GmbH warrants this product will
be free from defects in material and manufacture.
3M Deutschland GmbH MAKES NO OTHER
WARRANTIES INCLUDING ANY IMPLIED WARRANTY OF
MERCHANTABILITY OR FITNESS FOR A PARTICULAR
PURPOSE. User is responsible for determining the
suitability of the product for user’s application. If this
product is defective within the warranty period, your
exclusive remedy and 3M Deutschland GmbH’s sole
obligation shall be repair or replacement of the
3M Deutschland GmbH product.
Limitation of Liability
Except where prohibited by law, 3M Deutschland GmbH
will not be liable for any loss or damage arising from
this product, whether direct, indirect, special, incidental
or consequential, regardless of the theory asserted,
including warranty, contract, negligence, or strict liability.

13
SEITE 13
-
148 x 210 mm
-
3100021789/01
-
SCHWARZ
-
20-053 (kn)
ENGLISH
en
Symbol Glossary
Information valid as of January 2020
Reference Num-
ber and Symbol
Title
Symbol Description of Symbol
ISO 15223-1
5.1.1
Manufacturer
Indicates the medical device
manufacturer as defined in EU
Directives 90/385/EEC,
93/42/EEC and 98/79/EC.
ISO 15223-1
5.1.3
Date of Manufacture
Indicates the date when the
medical device was manufac-
tured.
ISO 15223-1
5.1.5
Batch code
Indicates the manufacturer's
batch code so that the batch or
lot can be identified.
ISO 15223-1
5.1.6
Catalogue number
Indicates the manufacturer's
catalogue number so that the
medical device can be identified.
ISO 15223-1
5.1.7
Serial number
Indicates the manufacturer's se-
rial number so that a specific
medical device can be identified.
ISO 15223-1
5.3.7
Temperature limit
Indicates the temperature limits
to which the medical device can
be safely exposed.
ISO 15223-1
5.3.8
Humidity limitation
Indicates the range of humidity
to which the medical device can
be safely exposed.
ISO 15223-1
5.3.9
Atmospheric
pressure limitation
Indicates the range of atmos-
pheric pressure to which the
medical device can be safely
exposed.
ISO 15223-1
5.4.4
Caution
Indicates the need for the user to
consult the instructions for use
for important cautionary informa-
tion such as warnings and pre-
cautions that cannot, for a variety
of reasons, be presented on the
medical device itself.
CE Mark Indicates conformity to European
Union Medical Device Regulation
or Directive.
Medical Device Indicates the item is a medical
device.
Follow instructions
for use
To signify that the instructions
for use must be followed.
Rx Only Indicates that U.S. Federal Law
restricts this device to sale by or
on the order of a dental profes-
sional. 21 Code of Federal Regu-
lations (CFR) sec. 801.109(b)(1).
Reference Num-
ber and Symbol
Title
Symbol Description of Symbol
Type B applied part To identify a type B applied part
complying with IEC 60601-1.
Class II equipment To identify equipment meeting
the safety requirements for Class
II equipment per IEC 61140.
Use Indoors Indicates medical device be used
indoors
Regulatory
Compliance Mark
Indicates product complies with
applicable Australian regulatory
requirements.
Battery Battery power level
PAP 20/21 Indicates paper material is
recyclable.
Recycle electronic
equipment
DO NOT throw this unit into a
municipal trash bin when this
unit has reached the end of its
lifetime. Please recycle.
Green Dot Indicates a financial contribution
to national packaging recovery
company per European Directive
No. 94/62 and corresponding
national law. Packaging Recov-
ery Organization Europe.

14
SEITE 14
-
148 x 210 mm
-
3100021789/01
-
SCHWARZ
-
20-053 (kn)

15
SEITE 15
-
148 x 210 mm
-
3100021789/01
-
SCHWARZ
-
20-053 (kn)
DEUTSCH
Elipar™DeepCure-S
LED-Lichtgerät
de
DEUTSCH
de
Sicherheit
ACHTUNG!
Lesen Sie diese Seiten vor dem Anschließen und der
Inbetriebnahme des Gerätes sorgfältig durch!
Wie bei allen technischen Geräten sind auch bei diesem
Gerät einwandfreie Funktion und Betriebssicherheit nur
dann gewährleistet, wenn bei der Bedienung sowohl die
allgemein üblichen Sicherheitsvorkehrungen, als auch die
speziellen Sicherheitshinweise in dieser Betriebsanleitung
beachtet werden.
1. Das Gerät darf nur von fachlich geschultem Personal
gemäß der folgenden Anleitung verwendet werden.
Für Schäden, die durch Gebrauch dieses Gerätes für
andere Anwendungen entstehen, schließen wir jede
Haftung aus.
2. Vor Inbetriebnahme des Gerätes sicherstellen, dass
die auf dem Typenschild angegebene Netzspannung
mit der vorhandenen Netzspannung übereinstimmt.
Eine falsche Netzspannung kann das Gerät zerstören.
3. Das Gerät so aufstellen, dass der Netzstecker jederzeit
zugänglich ist. Der Netzstecker ist zum Ein- und Aus-
schalten der Ladestation zu verwenden. Zur Trennung
der Ladestation vom Versorgungsnetz ist der Netz-
stecker aus der Netzsteckdose zu ziehen.
4. Nur das im Lieferumfang enthaltene Ladegerät von
3M verwenden. Die Verwendung eines anderen Lade-
gerätes könnte eine Beschädigung der Akkuzelle zur
Folge haben.
5. ACHTUNG: Elipar DeepCure-S darf nur mit der mitge-
lieferten Akkuzelle oder original 3M Elipar DeepCure-S
Ersatzakkuzellen betrieben werden. Die Verwendung
anderer Akkuzellen kann die Leistung beeinträchtigen
oder auch zur Beschädigung des Geräts führen.
6. ACHTUNG: Die Verwendung dieses Geräts unmittelbar
neben anderen Geräten oder mit anderen Geräten in
gestapelter Form sollte vermieden werden, da dies
eine fehlerhafte Betriebsweise zur Folge haben könnte.
Wenn eine Verwendung in der vorbeschriebenen Art
dennoch notwendig ist, sollten dieses Gerät und die
anderen Geräte beobachtet werden, um sich davon zu
überzeugen, dass sie ordnungsgemäß arbeiten.
7. ACHTUNG! Nicht direkt in die Lichtquelle blicken.
Es besteht Verletzungsgefahr für die Augen. Die Licht-
einwirkung in der Mundhöhle auf den klinisch zu
behandelnden Bereich beschränken. Patient und
Anwender durch geeignete Maßnahmen, z.B. Blend-
schutzschild, Blendschutzbrille oder Abdecken, vor
Reflektionen und intensivem Streulicht schützen.
8. Wie bei allen leistungsstarken Lichtgeräten ist die
hohe Lichtintensität mit entsprechender Wärmeent-
wicklung an der belichteten Oberfläche verbunden.
Inhalt Seite
Sicherheit 15
Produktbeschreibung 17
Anwendungsgebiete 17
Technische Daten 18
Ladestation 18
Handteil 18
Ladestation und Handteil 18
Transport- und Lagerbedingungen 18
Inbetriebnahme 18
Einstellungen bei Lieferung 18
Erste Schritte 18
Ladestation 18
Lichtleiter/Handteil 18
Den Akku einschrauben 19
Den Akku laden 19
Betriebszustandsanzeige an der Ladestation 19
Ladezustandsanzeige am Handteil 19
Betrieb 20
Wahl der Belichtungszeit 20
Ein- und Ausschalten des Lichts 20
Positionierung des Lichtleiters 20
Den Lichtleiter abnehmen/aufstecken 20
Messung der Lichtintensität 20
Empfohlene Lichthärte-Techniken mit
3M Adhäsiven 20
Sleep-Modus 20
Akustische Signale
-
Handteil 20
Störungen 22
Wartung und Pflege 23
Akku ein-/ausschrauben 23
Handteil-/Akkupflege 23
Wiederaufbereitung Lichtleiter 23
Ladestation, Handteil und
Blendschutzschild reinigen 26
Aufbewahrung des Handteils bei
längerer Nichtbenutzung 26
Rückgabe Elektro- und
Elektronik-Altgeräte zur Entsorgung 26
Sammlung 26
Rückgabe- und Sammelsysteme 26
Kundeninformation 26
Garantie 26
Haftungsbeschränkung 27
Symbol Glossar 27

16
SEITE 16
-
148 x 210 mm
-
3100021789/01
-
SCHWARZ
-
20-053 (kn)
Bei längerer Bestrahlung im pulpennahen Bereich
oder von Weich
gewebe können dadurch irreversible
Schäden auftreten.
Deshalb sind die vorgeschriebe-
nen Belichtungszeiten des Herstellers zu beachten.
Ununterbrochene Belichtungszeiten von mehr als
20 Sekunden an derselben Zahnoberfläche sowie
ein direkter Kontakt mit Mundschleimhaut oder
Haut sind dringend zu vermeiden. Es besteht Einig-
keit in der wis
senschaftlichen Fachwelt, dass die bei
der Lichthärtung
durch Wärme erzeugten Irritatio-
nen mit Hilfe von zwei einfachen Maßnahmen mini-
miert werden können:
•
Polymerisation mit externer Kühlung mittels Luft-
strom
• Polymerisation in intermittierenden Intervallen (z.B.
2 x10 sec Belichtung statt 1 x 20 sec Belichtung)
9. Elipar DeepCure-S darf nur mit dem mitgelieferten
Lichtleiter oder original 3M Elipar DeepCure-S Er-
satzlichtleiter betrieben werden. Der Lichtleiter ist
dabei als Anwendungsteil zu betrachten. Die Verwen-
dung anderer Lichtleiter kann zu einer Verringerung
oder Erhöhung der Lichtintensität führen. Für Schä-
den, die durch den Einsatz von anderen Lichtleitern
verursacht werden, wird keine Haftung übernommen.
10. Wird das Gerät von einer kalten in eine warme Um-
gebung gebracht, kann durch Kondenswasser ein
gefährlicher Zustand entstehen. Deshalb das Gerät
erst in Betrieb nehmen, wenn es die Umgebungs-
temperatur angenommen hat.
11. Zur Vermeidung eines elektrischen Schlages keine
Gegenstände in das Gerät einführen; ausgenommen
ist der bestimmungsgemäße Austausch von Teilen
gemäß dieser Betriebsanleitung.
12. Bei Austausch von defekten Teilen gemäß dieser
Betriebsanleitung nur Original-3M -Teile verwenden.
Für Schäden, die durch Einsatz von fremden Teilen
verursacht werden, wird keine Haftung übernom-
men.
13.
Wenn aus irgendeinem Grund angenommen werden
kann, dass die Sicherheit beeinträchtigt ist, muss das
Gerät außer Betrieb gesetzt und so gekennzeichnet
werden, dass es nicht aus Versehen von Dritten
wie
der in Betrieb genommen wird. Die Sicherheit
kann z.B. beeinträchtigt sein, wenn das Gerät nicht
wie
vorgeschrieben arbeitet oder sichtbar beschä-
digt ist.
14. Lösungsmittel, entflammbare Flüssigkeiten und
starke Wärmequellen vom Gerät fernhalten, da
diese das Kunststoffgehäuse der Ladestation, die
Dichtungen und die Abdeckung der Bedientaster
beschädigen können.
15. Der Betrieb des Gerätes darf nicht in der Umgebung
von entflammbaren Gemischen erfolgen.
16. Beim Reinigen des Gerätes darf kein Reinigungs-
mittel in das Gerät gelangen, da hierdurch ein
elektrischer Kurzschluss oder eine gefährliche Fehl-
funktion ausgelöst werden kann.
17. Das Öffnen des Gerätegehäuses und Reparaturen
am Gerät dürfen nur von einer durch 3M Deutsch-
land GmbH autorisierten Servicestelle durchgeführt
werden.
18. ACHTUNG: Dieses Gerät darf ohne Erlaubnis der
Herstellers nicht modifiziert werden.
19. Elipar DeepCure-S darf nicht bei einem Patienten
oder von einem Behandler verwendet werden, der
einen Herzschrittmacher trägt und dem Vorsicht
gegenüber der Verwendung von Elektrokleingeräten
angeraten wurde.
20. Elipar DeepCure-S nicht bei Personen verwenden,
deren Krankengeschichte photobiologische Reaktio-
nen aufweist, (einschließlich Personen mit Urticaria
solaris oder erythropoetischer Protoporphyrie) oder
die zum gegenwärtigen Zeitpunkt mit photosensibili-
sierenden Medikamenten (inklusive 8-Methoxypsora
-
len oder Dimethylchlortetracyclin) behandelt werden.
21. Personen, bei denen eine Kataraktoperation durch-
geführt worden ist, können gegenüber Lichteinfall
besonders empfindlich sein, und es sollte ihnen von
der Behandlung mit Elipar DeepCure-S abgeraten
werden, sofern nicht entsprechende Sicherheits-
vorkehrungen, wie z.B. Verwendung von Schutz-
brillen, die blaues Licht ausfiltern, getroffen wurden.
22. Personen, deren Krankengeschichte Netzhaut-
erkrankungen aufweist, sollten mit ihrem Augenarzt
Rücksprache halten, bevor sie das Gerät bedienen.
Dabei sollten sie äußerst vorsichtig zu Werke gehen
und alle notwendigen Sicherheitsvorkehrungen
(einschließlich dem Tragen einer geeigneten, licht-
filternden Schutzbrille) bei der Verwendung von
Elipar DeepCure-S treffen.
23.
Die Entwicklung und Prüfung dieses Gerätes erfolgte
nach den einschlägigen EMV-Richtlinien und -Nor-
men. Es entspricht den gesetzlichen Bestimmungen.
Da sich verschiedene Faktoren, wie z.B. Spannungs-
versorgung, Verkabelung und Einsatzumgebung auf
die EMV-Eigenschaften des Gerätes auswirken kön-
nen, sind EMV-Störungen unter ungünstigen Bedin-
gungen nicht vollständig auszuschließen. Sollten Sie
Störungen dieses oder anderer Geräte bemerken,
wählen Sie bitte einen anderen Aufstellort. Angaben
zu den EMV-Eigenschaften und die empfohlene
Entfernung zwischen tragbaren, mit Radiofrequenz
betriebenen Kommunikationsgeräten und dem Elipar
DeepCure-S Lichtgerät sind im Anhang aufgeführt.
24. ACHTUNG: Tragbare HF-Kommunikationsgeräte,
einschließlich deren Zubehör, sollten nicht in einem
geringeren Abstand als 30 cm zu Elipar Deep-

17
SEITE 17
-
148 x 210 mm
-
3100021789/01
-
SCHWARZ
-
20-053 (kn)
DEUTSCH
de
Cure-S verwendet werden. Eine Nichtbeachtung
kann zu einer Minderung der Leistungsmerkmale
des Geräts führen.
25. Vor jeder Anwendung sicherstellen, dass die abge-
gebene Lichtintensität eine sichere Polymerisation
gewährleistet. Dazu die in der Ladestation eingebaute
Lichtmessfläche verwenden.
Bitte melden Sie ein schwerwiegendes Vorkommnis, das
im Zusammenhang mit dem Produkt aufgetreten ist, an
3M und die lokale zuständige Behörde (EU) oder der
lokalen Regulierungsbehörde.
mehr Lichtenergie in die zu polymerisierende Restaura-
tion eingebracht und damit eine tiefe, gleichmäßige und
vollständige Aushärtung erreicht.
Als Lichtquelle dient eine Hochleistungs-Leuchtdiode
(LED). Das austretende Licht deckt den Lichtwellen-
längenbereich von 430 bis 480 nm ab, der z.B. für
campherchinonhaltige Produkte relevant ist, und eignet
sich damit für die Mehrheit aller lichthärtenden Dental-
materialien. Hierzu zählen Materialien für Füllungen,
Unterfüllungen, Stumpfaufbaumaterialien, Fissuren-
versiegelungen, Provisorien und Befestigungszemente
für indirekte Restaurationen.
Die Belichtungszeit ist der Herstellerangabe des jeweili-
gen Dentalmaterials zu entnehmen.
Einstellbare Belichtungszeiten:
• 5,10,15, 20 sec
• Kontinuierlicher Modus (120 sec)
• Puls-Anhärtefunktion (Tack Cure,1 sec)
Die Ladestation verfügt über eine integrierte Lichtmess-
fläche, mit der die Lichtintensität des Elipar DeepCure-S
überprüft werden kann.
Das Gerät wird mit einem Lichtleiter mit 10 mm Durch-
messer geliefert. Lichtleiter von anderen Geräten dürfen
nicht verwendet werden.
Das Handteil verfügt über einen Sleep-Modus, welcher
den Stromverbrauch des Akkus auf ein Minimum redu-
ziert. Das Handteil geht in den Sleep-Modus, sobald es
in die Ladestation gestellt wird oder wenn es sich außer-
halb der Ladestation befindet und ca. 5 Minuten lang
nicht benutzt wurde.
+Diese Gebrauchsinformation ist für die Dauer der
Verwendung des Produktes aufzubewahren. Das
Produkt darf nur angewendet werden, wenn die
Produktkennzeichnung eindeutig lesbar ist. Für De-
tails zu allen zusätzlich erwähnten Produkten siehe
jeweilige Gebrauchsinformation.
Zweckbestimmung
Vorgesehene Anwender: Ausgebildetes Fachpersonal,
z.B. Zahnärzte/innen, Zahnarzthelfer/innen, Dental-Hy-
gieniker/innen, die über theoretische und praktische
Kenntnisse im Umgang mit Dentalprodukten verfügen.
Anwendungsgebiete
• Polymerisation von lichthärtenden Dentalmaterialien
mit Photoinitiator im Lichtwellenlängenbereich von
430
-
480 nm.
-
Die meisten lichthärtenden Dentalmaterialien
sprechen auf diesen Lichtwellenlängenbereich an,
in Zweifelsfällen bitte an den jeweiligen Hersteller
wenden.
Lichtleiter
Handteil
Ladestation
Netzkabel
Blendschutzschild
Produktbeschreibung
Elipar DeepCure-S ist ein Hochleistungs-LED-Lichtgerät
für die Polymerisation von Dentalmaterialien. Es besteht
aus einer Ladestation und einem kabellosen Handteil mit
Akku. Das Gerät ist ein medizinisches elektrisches Gerät
gemäß IEC 60601-1 und wird als Tischgerät geliefert.
Eine Wandmontage ist nicht möglich.
Im Vergleich zu herkömmlichen Lichtgeräten bietet Elipar
DeepCure-S eine äußerst homogene Lichtverteilung und
einen optimal gebündelten Lichtstrahl. Resultierend wird

18
SEITE 18
-
148 x 210 mm
-
3100021789/01
-
SCHWARZ
-
20-053 (kn)
Technische Daten
Ladestation
Betriebsspannung: 100
-
127 V 50/60 Hz
230 V 50/60 Hz (eingestellte
Spannung siehe Typenschild)
Nennaufnahme: 0,08 A (230 V)
0,16 A (100
-
127 V)
Abmessungen: Länge 170 mm
Breite 95 mm
Höhe 50 mm
Gewicht: 650 g
Klassifikation: Schutzklasse II,
Handteil
Stromversorgung: Lithium-Ionen-Akku,
Nennspannung 3,7 V
Nutzbarer Lichtwellen-
längenbereich: 430
-
480 nm
Wellenlängenspitze: 444
-
452 nm
Lichtintensität (zwischen
400 und 515 nm): 1470 mW/cm2
-
10%/+20%
(unabhängig vom Ladezustand
des Akkus)
Lichtaustrittsfläche: 60
-
65 mm2(optisch aktiv)
Intermittierender Betrieb:
Das Gerät ist nur für Kurzzeit-
betrieb ausgelegt.
Intermittierender Betrieb:
Typische Betriebszeit bei
Raumtemperatur (23 °C): 7 min,
bei 40°C Umgebungstempe-
ratur: 1 min ein,15 min aus
(Abkühlzeit)
Gesamte Belichtungs-
zeit bei neuem, voll
geladenen Akku: typ.120 min
Abmessungen: Durchmesser 28 mm
Länge 270 mm
Gewicht: 250 g (inkl. Lichtleiter)
Ladestation und Handteil
Ladezeit bei leerem Akku:
ca.1,5 h
Betriebstemperatur: 10 °C bis 40 °C /
59°F bis 104°F
Rel. Luftfeuchtigkeit: 30% bis 75%
Atmosphärischer Druck: 700 hPa bis1060 hPa
Gesamthöhe bei
eingestelltem Handteil: 180 mm
Baujahr: siehe Typenschild
Typ B
Transport- und Lagerbedingungen:
Umgebungstemperatur:
-
20°C bis +40 °C /
-
4°F bis +104 °F
Rel. Luftfeuchtigkeit: 30% bis 75%
Atmosphärischer Druck: 700 hPa bis 1060 hPa
Technische Änderungen vorbehalten.
Inbetriebnahme
Einstellungen bei Lieferung
Das Gerät wird mit folgender Einstellung geliefert:
• Belichtungszeit 10 sec
Erste Schritte
Ladestation
왘Zunächst überprüfen, ob die auf dem Typenschild
angegebene Spannung mit der vorhandenen Netz-
spannung übereinstimmt. Das Typenschild befindet
sich an der Unterseite der Ladestation.
왘Die Ladestation auf einer ebenen Fläche aufstellen.
왘Die Ladestation mit dem Stecker an das Netz
anschließen.
-
Die LED zur Anzeige des Betriebszustands der
Ladestation leuchtet grün. Damit ist die Lade-
station betriebsbereit, siehe auch unter „Betriebs-
zustandsanzeige der Ladestation“.
Lichtleiter/Handteil
왘Das Handteil niemals ohne Akku in die Ladestation
stellen!
왘Das beiliegende Blendschutzschild an der Geräte-
vorderseite anbringen.
왘
Vor dem ersten Gebrauch den Lichtleiter autoklavieren.
왘Danach den Lichtleiter auf das Handteil stecken, bis
er aufsitzt.
hPa
1060
700
max.
75%
30%
+40°C
+104°F
–20°C
–4°F
Other manuals for Elipar DeepCure-S
1
Table of contents
Languages:
Other 3M ESPE Dental Equipment manuals

3M ESPE
3M ESPE RotoMix User manual

3M ESPE
3M ESPE RotoMix User manual

3M ESPE
3M ESPE Elipar DeepCure-L User manual

3M ESPE
3M ESPE Pentamix Lite User manual

3M ESPE
3M ESPE Elipar User manual

3M ESPE
3M ESPE CapMix User manual

3M ESPE
3M ESPE RelyX Luting Plus User manual

3M ESPE
3M ESPE Elipar S10 User manual

3M ESPE
3M ESPE Elipar DeepCure-S User manual

3M ESPE
3M ESPE Visio Alfa Sinfony User manual