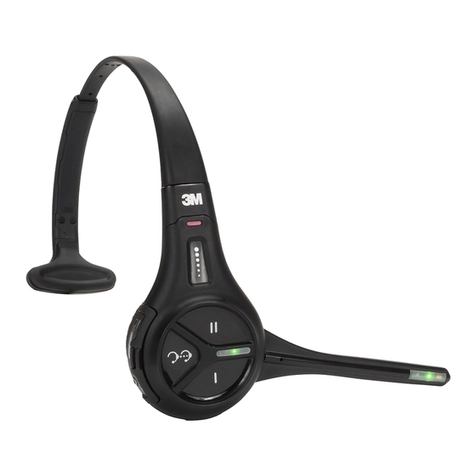
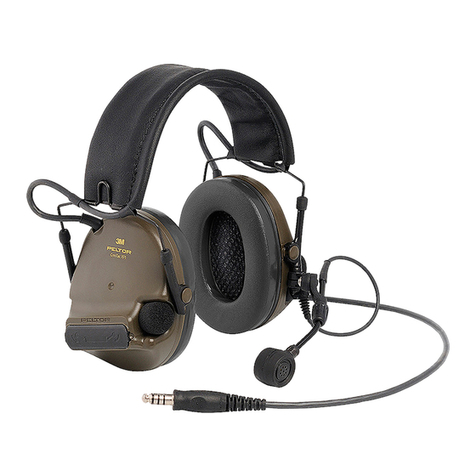
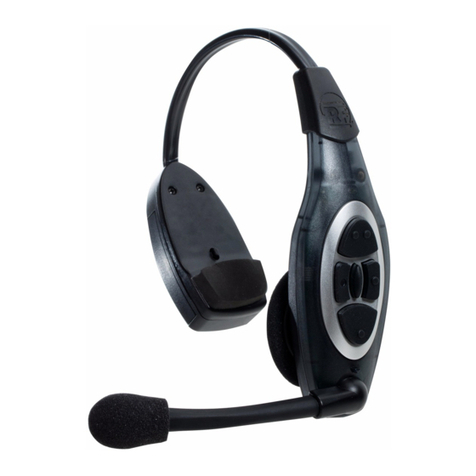
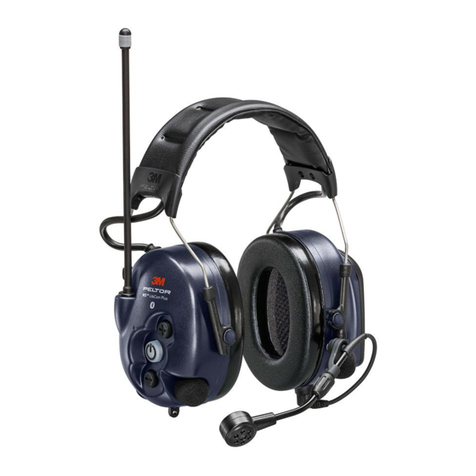
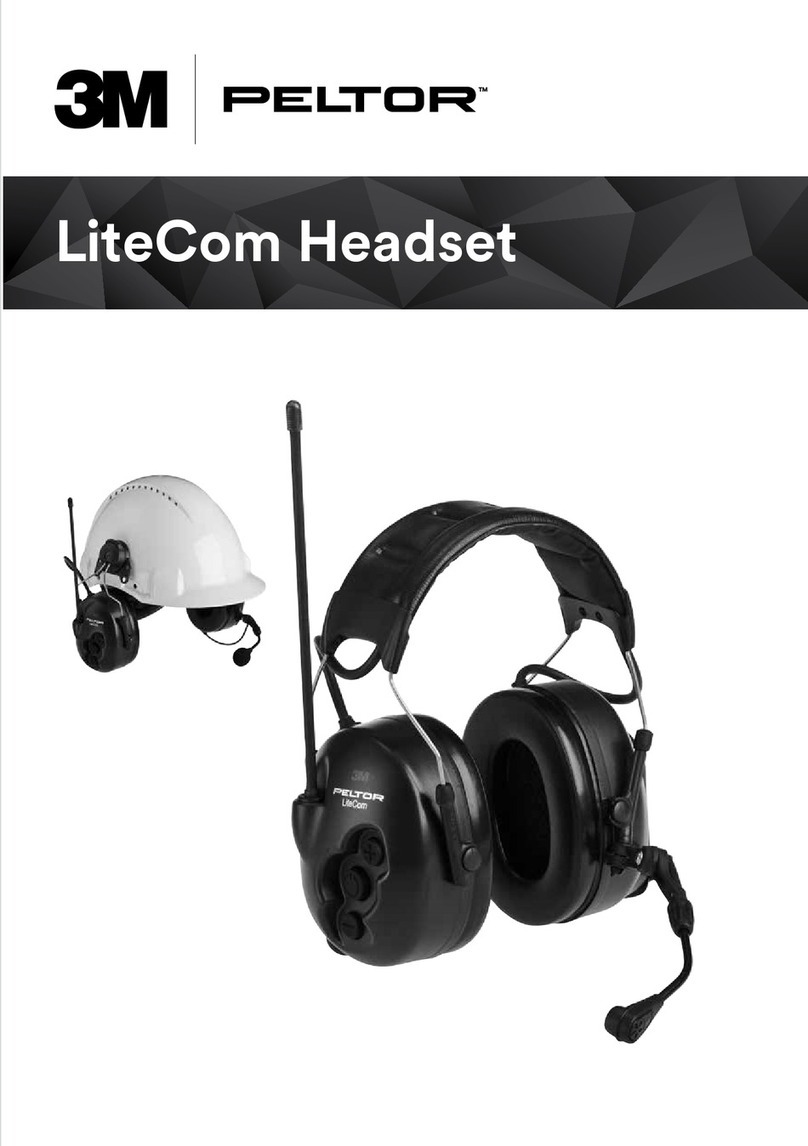
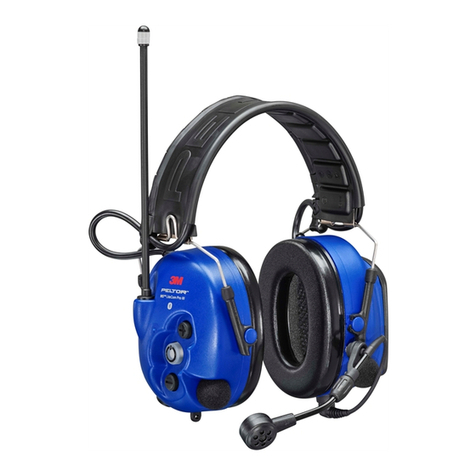
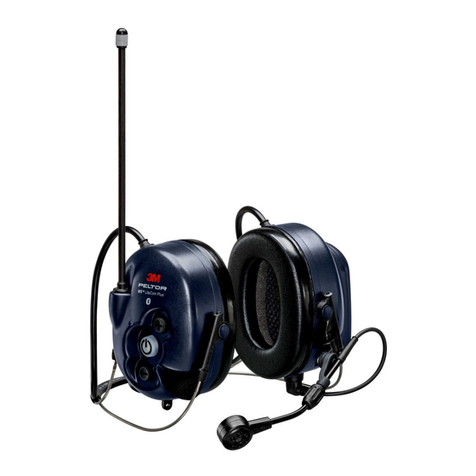
3M PELTOR WS MT73H74610WS6NA Series User manual

TM
WS™LiteCom Plus
Headset
MT73H7*4610WS6NA

TECHNICAL DATA
POWER
TPowered by a rechargeable Li-ion battery pack (ACK081).
3.7 V, 1800 mAh
OPERATING TIME
Expected operating time (according to
standardized measurement) in room temperature
with ACK081
Approximately 18 hours
EXTERNAL INPUT
3M™ PELTOR™ Type J111-A 4-pole connector for external equipment
RADIO
Frequency range 462- 467 MHz
Operation mode Half-duplex
Antenna ¼ wave, integrated whip antenna
Fixed to the headset
Omni directional
Gain: 0 dBi
Channels 22 channels
Channel raster 12.5 kHz
Channel spacing 12.5 kHz
Modulation Analog: Max narrow 2.5 kHz (FM),
Receiver sensitivity Typical -120 dBm
Output power 100 mW e.r.p
EXTERNAL INTERFACE PIN OUT
Pin 1 EXTERNAL PTT
Activated when shorted to Pin 2 (ground)
Pin 2 GROUND
Pin 3 INPUT
The input signal is mixed with the WS™ WS LiteCom Plus Headset audio
output level (speaker output).
120.5 mV = Input signal level for which the mean plus one standard
deviation equals 82 dB(A) in cup.
Pin 4 BOOM MICROPHONE OUTPUT
Applied signal at the boom microphone input comes out on pin 4
2.25 mV Microphone input = 30 mV output

WS™LiteCom Plus
Headset
B:1 B:2 B:3
B:4 B:5 B:6
B:11
B:10
C:1
B:8 B:9
D:3D:2D:1
E:1 E:2
C:2
3mm
B:7

(F)
(F:15)
(F:10)
(F:11)
(F:12)
(F:3)
(F:2)
(F:9)
(F:8)
(F:5)
(F:4)
(F:6)
(F:7)
(F:1)
(F:17)
(F:18)
Headband MT73H7A4610WS6NA
(F:21)
(F:19)
(F:20)
(F:16)
(F:14)
Neckband MT73H7B4610WS6NA
Helmet attachment/Hardhat
MT73H7P3E4610WS6NA
(F:13)

12
1
2
“Channel”
“Radio volume”
“Ambient listening”
“Phone volume”
“Streaming volume”
“Bluetooth®radio volume”
OR
OR
“Bluetooth®paring on”
2 s ~0.5 s
~0.5 s x 2
~0.5 s ~0.5 s
“Pairing complete”
“Connected”
“Power on”
“Power off”.
2x
Fig.1
Fig.2 Fig.3 Fig.4
Fig.6 Fig.7
Fig.5
Fig.8

A) ANSI S3.19-1974
Headband with foam cushion
Art nr MT73H7A4610WS6NA
A:1 Frequency (Hz) (ƒ) 125 250 500 1000 2000 3150 4000 6300 8000 NRR CSA
Class
Weight
A:2 Mean attenuation (dB) (Mf) 19.5 24.8 35.2 36.6 38.2 38.0 38.0 38.7 39.1 27
A:3 Standard deviation (dB) (sf) 2.4 3.1 3.0 3.3 2.9 3.2 3.4 2.1 2.4 A 449 g
Backband with foam cushion
Art nr MT73H7B4610WS6NA
A:1 Frequency (Hz) (ƒ) 125 250 500 1000 2000 3150 4000 6300 8000 NRR CSA
Class
Weight
A:2 Mean attenuation (dB) (Mf) 18.0 25.8 33.7 35.8 37.5 38.7 41.0 40.4 40.5 27
A:3 Standard deviation (dB) (sf) 3.2 3.0 3.2 2.2 2.2 2.4 3.6 3.5 2.1 A 434 g
Helmet attachment with foam cushion
Art nr MT73H7P3E4610WS6NA
A:1 Frequency (Hz) (ƒ) 125 250 500 1000 2000 3150 4000 6300 8000 NRR CSA
Class
Weight
A:2 Mean attenuation (dB) (Mf) 19.1 21.9 33.5 36.7 36.4 37.6 39.2 38.2 36.7 25
A:3 Standard deviation (dB) (sf) 3.2 3.0 3.3 3.3 2.9 2.8 3.4 2.7 3.8 A 472 g
Headband with gel cushion
Art nr MT73H7A4610WS6NA
A:1 Frequency (Hz) (ƒ) 125 250 500 1000 2000 3150 4000 6300 8000 NRR CSA
Class
Weight
A:2 Mean attenuation (dB) (Mf) 19.7 23.1 33.4 41.0 39.3 41.1 41.2 40.9 39.0 27
A:3 Standard deviation (dB) (sf) 2.5 2.6 2.7 3.0 3.9 3.8 3.7 2.0 2.1 A 509 g
Backband with gel cushion
Art nr MT73H7B4610WS6NA
A:1 Frequency (Hz) (ƒ) 125 250 500 1000 2000 3150 4000 6300 8000 NRR CSA
Class
Weight
A:2 Mean attenuation (dB) (Mf) 17.7 22.4 33.1 39.1 37.6 38.8 40.5 40.5 41.8 27
A:3 Standard deviation (dB) (sf) 3.0 2.2 3.1 2.5 2.3 2.6 2.3 3.1 3.5 493 g
Helmet attachment with gel cushion
Art nr MT73H7P3E4610WS6NA
A:1 Frequency (Hz) (ƒ) 125 250 500 1000 2000 3150 4000 6300 8000 NRR CSA
Class
Weight
A:2 Mean attenuation (dB) (Mf) 19.1 21.9 33.5 36.7 36.4 37.6 39.2 38.2 36.7 25
A:3 Standard deviation (dB) (sf) 3.2 3.0 3.3 3.3 2.9 2.8 3.4 2.7 3.8 A 532 g
*3M strongly recommends individual t testing of hearing protectors. If the NRR or SNR is used to estimate typical workplace
protection, 3M recommends that the noise reduction value be reduced by 50% or in accordance with applicable regulations.
L:1) Radio Channel Frequencies
FRS/GMRS US/Canada
Channel Radio Service
Type, Canada
Radio Service
type, US
Frequency
(MHz)
1 FRS 1/GMRS 2 FRS 1 462.56250
2 FRS 2/GMRS 4 FRS 2 462.58750
3 FRS 3/GMRS 6 FRS 3 462.61250
4 FRS 4/GMRS 8 FRS 4 462.63750
5 FRS 5/GMRS 10 FRS 5 462.66250
6 FRS 6/GMRS 12 FRS 6 462.68750
ANSI S3.19-1974
ANSI S3.19-1974
ANSI S3.19-1974
ANSI S3.19-1974
ANSI S3.19-1974
ANSI S3.19-1974

7 FRS 7/GMRS 14 FRS 7 462.71250
8 FRS 8 FRS 8 467.56250
9 FRS 9 FRS 9 467.58750
10 FRS 10 FRS 10 467.61250
11 FRS 11 FRS 11 467.63750
12 FRS 12 FRS 12 467.66250
13 FRS 13 FRS 13 467.68750
14 FRS 14 FRS 14 467.71250
15 GMRS 1 FRS 15 462.55000
16 GMRS 3 FRS 16 462.57500
17 GMRS 5 FRS 17 462.60000
18 GMRS 7 FRS 18 462.62500
19 GMRS 9 FRS 19 462.65000
20 GMRS 11 FRS 20 462.67500
21 GMRS 13 FRS 21 462.70000
22 GMRS 15 FRS 22 462.72500
(N) CTCSS (Continuous Tone Coded Squelch System)
# 1 2 3 4 5 6 7 8 9 10 11 12 13 14
Tone
(Hz) 67.0 71.9 74.4 77.0 79.7 82.5 85.4 88.5 91.5 94.8 97.4 100.0 103.5 107.2
# 15 16 17 18 19. 20 21 22 23 24 25 26 27 28
Tone
(Hz) 110.9 114.8 118.8 123.0 127.3 131.8 136.5 141.3 146.2 151.4 156.7 162.2 167.9 173.8
#29 30 31 32 33 34 35 36 37 38
Tone
(Hz) 179.9 186.2 192.8 203.5 210.7 218.1 225.7 233.6 241.8 250.3
(O) DCS (Digital Coded Squelch)
# 39 40 41 42 43 44 45 46 47 48 49 50 51 52
DCS 023 025 026 031 032 043 047 051 054 065 071 072 073 074
# 53 54 55 56 57 58 59 60 61 62 63 64 65 66
DCS 114 115 116 125 123 132 134 143 152 155 156 162 165 172
# 67 68 69 70 71 72 73 74 75 76 77 78 79 80
DCS 174 205 233 226 243 244 245 251 261 263 265 271 306 311
# 81 82 83 84 85 86 87 88 89 90 91 92 93 94
DCS 315 331 343 346 351 364 365 371 411 412 413 423 431 432
# 95 96 97 98 99 100 101 102 103 104 105 106 107 108
DCS 445 464 465 466 503 506 516 532 546 565 606 612 624 627
# 109 110 11 112 113 114 115 116 117 118 119 120 121
DCS 631 632 654 662 664 703 712 723 731 732 734 743 754
ANSI S3.19-1974
ANSI S3.19-1974
ANSI S3.19-1974
ANSI S3.19-1974
ANSI S3.19-1974
ANSI S3.19-1974

“Sub-Menu” “VOX”
“Sub channel”
“Squelch”
“Power”
“Bluetooth®pairing,
For pairing press plus button”
“English (Language)”
OR
“Sub-Menu”
“Bluetooth®pairing,
for pairing press plus button” “Bluetooth®paring on”
OR
+
“Set-Up Menu”
“B C L O””
“Max transmission time”
“Automatic power off”
“Microphone input”
“External input sensitivity”
“Bluetooth®streaming”
“Bluetooth®phone”
“Bluetooth®Multipoint”
“Reset, for reset hold
PLUS button for two seconds”
“Pairing complete”
“Connected”
1 s ~0.5 s ~0.5 s
2 s
~0.5 s ~0.5 s
1 s ~0.5 s
~0.5 s x 2
2x
Fig.9
Fig.10
Fig.11

3M™ PELTOR™ WS LiteCom Plus Headset
EN 1-7
ES 8-15
FR 16-23

1
EN
3M™ PELTOR™ WS LiteCom Plus Headset
MT73H7A4610WS6NA, MT73H7P3E4610WS6NA,
MT73H7B4610WS6NA.
INTRODUCTION
Congratulations and thank you for choosing 3M™ PELTOR™
communication solutions! Welcome to the next generation of
protective communication.
INTENDED USE
These 3M™ PELTOR™ headsets are intended to provide
workers with protection against hazardous noise levels
while allowing the user to communicate with built-in two-
way radio or Bluetooth®and hear the surroundings via the
ambient microphones. It is expected that all users read and
understand the provided user instructions as well as be
familiar with the use of this device.
IMPORTANT
Please read, understand, and follow all safety information in
these instructions prior to use. Retain these instructions for
future reference. For additional information or any questions,
contact 3M Technical Services (contact information listed on
the last page).
!WARNING
This hearing protector helps reduce exposure to hazardous
noise and other loud sounds. Misuse or failure to wear hearing
protection at all times when exposed to hazardous noise may
result in hearing loss or injury. For correct use, consult
supervisor and User Instructions, or call 3M Technical
Services. If your hearing seems dulled or you hear a ringing or
buzzing during or after any noise exposure (including gunre),
or for any other reason you suspect a hearing problem, leave
the noisy environment immediately and consult a medical
professional and/or your supervisor.
Failure to follow these instructions may result in serious
injury or death:
a. Listening to music or other audio communication may
reduce your situational awareness and ability to hear warning
signals. Stay alert and adjust the audio volume to the lowest
acceptable level.
b. To reduce the risks associated with igniting an explosion,
do not use this product in a potentially explosive atmosphere.
Failure to follow these instructions may reduce the
protection provided by the earmuff/earplug and may
result in hearing loss:
a. 3M strongly recommends individual t testing of hearing
protectors. If the NRR or SNR is used to estimate typical
workplace protection, 3M recommends that the noise
reduction value be reduced by 50% or in accordance with
applicable regulations.
b. Ensure the hearing protector is properly selected, t,
adjusted, and maintained. Improper t of this device will
reduce its effectiveness in attenuating noise. Consult the
enclosed instructions for proper t.
c. Inspect the hearing protector before each use. If damaged,
select an undamaged hearing protector or avoid the noisy
environment.
d. When additional personal protective equipment is
necessary (e.g. safety glasses, respirators, etc.), select
exible, low prole temples or straps to minimize interference
with the earmuff cushion. Remove all other unnecessary
articles (e.g. hair, hats, jewelry, headphones, hygiene covers,
etc.) that could interfere with the seal of the earmuff cushion
and reduce the protection of the earmuff.
e. Do not bend or reshape the headband or neckband, and
ensure there is adequate force to hold the earmuffs rmly in
place.
f.The output of the electrical audio circuit of this hearing
protector may exceed the daily limit sound level. Adjust the
audio volume to the lowest acceptable level.
g. Earmuffs, and in particular cushions, may deteriorate with
use and should be examined at frequent intervals for cracking
and leakage, for example. When used regularly, replace the
ear cushions and foam liners at least twice a year to maintain
consistent protection, hygiene, and comfort.
CAUTION
• Risk of explosion if battery is replaced by an incorrect type.
• Do not charge batteries in temperatures above 45 °C
(113 °F).
• Use only 3M™ PELTOR™ Battery ACK081 charged with
cable 3M™ PELTOR™ AL2AI connected to a 3M™ PELTOR™
Power supply FR08
• With Lithium-ion batteries, there is a risk of re and burns.
Do not open, crush, heat above 55°C (131°F) or incinerate.
• For noise environments dominated by frequencies below
500 Hz the C-weighted environmental noise level should be
used.
• Always use product-specic 3M replacement parts. Use of
unauthorized replacement parts may reduce the protection you
receive from this product.
• Obey the instructions given in this manual. Tampering with
the product may void the IP54 approval of this product.
NOTE
• When worn according to these User Instructions, this
hearing protector helps reduce exposure to both continuous
noises, such as industrial noises and noises from vehicles and
aircraft, as well as very loud impulse noises, such as gunre. It
is difcult to predict the required and/or actual hearing
protection obtained during exposure to impulse noises. For
gunre, the weapon type, number of rounds red, proper
selection, t and use of hearing protection, proper care of
hearing protection, and other variables will impact performance.
To learn more about hearing protection for impulse noise, visit
www.3M.com.
2
EN
• Although hearing protectors can be recommended for
protection against the harmful effects of impulsive noise, the
Noise Reduction Rating (NRR) is based on the attenuation of
continuous noise and may not be an accurate indicator of the
protection attainable against impulse noise, such as gunre.
• In Canada, users of hard hats combined with earmuffs must
refer to CSAStandard Z94.1 on industrial protective headwear.
This portable device with its antenna complies with FCC/IC RF
Exposure limits for general population / uncontrolled exposure.
The antenna used for this device must not be co-located or
operating in conjunction with any other antenna or transmitter.
Changes or modications to the equipment not expressly
approved by the party responsible for compliance could void
the user’s authority to operate the equipment.
• Operating temperature range: –20°C (–4 °F) to 55 °C
(131 °F)
• Storage temperature range: –20 °C (–4 °F) to 55 °C
(131 °F)
• Weight of hearing protector: 435–470 g
LABORATORY ATTENUATION
The attenuation rating NNR was obtained with the device
powered off.
Explanation of attenuation tables:
USA Standard ANSI S3.19-1974
3M strongly recommends individual t testing of hearing
protectors. If the NRR or SNR is used to estimate typical
workplace protection, 3M recommends that the noise reduction
value be reduced by 50% or in accordance with applicable
regulations.
A:1 Frequency (Hz)
A:2 Mean Attenuation (dB)
A:3 Standard Deviation (dB)
The level of noise entering a person’s ear, when hearing
protector is worn as directed, is closely approximated by the
difference between the A-weighted environmental noise level
and the NRR.
Example
1. The environmental noise level as measured at the ear is
92 dBA.
2. The NRR is 27 decibels (dB).
3. The level of noise entering the ear is approximately equal
to 65 dB(A).
When selecting accessories to respiratory personal protective
equipment, such as hard hat mounted hearing protection,
please consult the NIOSH approval label or consult 3M
Technical Services for approved congurations.
COMPONENTS
Headband
MT73H7A4610WS6NA
(F:1) Headband
(F:2) Headband padding (PVC foil)
(F:3) Headband wire (stainless steel)
(F:4) Two-point fastener (POM)
(F:5) Cushion (PVC foil and PUR foam)
(F:6) Foam liner (PUR foam)
(F:7) Cup
(F:8) Microphone for level-dependent function for ambient
listening
(F:9) Speech microphone (dynamic microphone)
(F:10) On/Off/Mode button
(F:11) + button
(F:12) – button
(F:13) Antenna
(F:14) Speech microphone input (J22)
(F:15) Bluetooth®button
(F:16) PTT (Push-To-Talk button) for built-in communication
radio
(F:17) External input/output (e.g. for external communication
radio, external telephone)
(F:18) Lithium-ion battery (rechargeable)
Neckband
MT73H7B4610WS6NA
(F:19) Neckband wire (stainless steel)
(F:20) Neckband cover (PO)
Helmet attachment
MT73H7P3E4610WS6NA
(F:21) Cup supporting arm (stainless steel)
FITTING INSTRUCTIONS
Headband
B:1 Slide out the cups and tilt the top of the shell out, as the
cable must be on the outside of the headband.
B:2 Adjust the height of the cups by sliding them up or down
while holding the headband in place.
B:3 The headband should be positioned across the top of the
head as shown and should support the weight of the headset.
Neckband
B:4 Place the cups in position over the ears.
B:5 Keep the cups in position, place the head strap on the top
of your head and lock it tight in position.
B:6 The head strap should be positioned across the top of
your head and should support the weight of the headset.
Helmet Attachment
B:7 Insert the helmet attachment in the slot on the helmet and
snap it into place (B:8).
B:9 Work mode: Press the headband wires inwards until you
hear a click on both sides. Make sure that the cups and the
headband wires do not press on the edge of the helmet when
in work mode as this could reduce the noise attenuation of

3
EN
the earmuff.
B:10 Ventilation mode: To switch the unit from work mode to
ventilation mode, pull outward on the ear cups until you hear
a click. Avoid placing the cups against the helmet (B:11) as
this prevents ventilation.
Microphone
(C:1) (C:2) To maximize the performance of the speech
microphone in noisy areas, position the microphone very
close to your mouth (less than 3 mm or 1/8 inch).
Replacing the helmet attachment plate
For proper tting on different industrial safety helmets, the
helmet attachment plate may need to be replaced. Find the
recommended attachment in Table L. Other plates can be
obtained from your dealer. A screwdriver is needed.
(E:1) Loosen the screw holding the plate.
(E:2) Replace the plate, ensure the plate is turned the right way
and tighten the screw.
1. OPERATING INSTRUCTIONS
1:1 Replacing/charging the batteries (g. 1)
Insert the rechargeable battery (ACK081) in the battery
compartment. Push down the clamp.
Low battery level is indicated by a voice message, “battery
low”, repeated every ve minutes. If the batteries are not
replaced, a “battery empty” warning will eventually be heard.
The unit will then switch off automatically.
NOTE: Use the following battery in this product: 3M™
PELTOR™ACK081 charged with cable 3M™ PELTOR™
AL2AI connected to a 3M™ PELTOR™ FR08 (power supply).
NOTE: Performance may deteriorate as the batteries get low.
Recharging batteries
Turn off the headset. Insert a blunt tool under the edge of the
clamp and pull outwards/upwards. Remove the battery and
charge it separately or leave the battery in place and charge it
in the hearing protector.
1:2 Operation Time
Approximate operation time with fully charged ACK081 battery
(1800 mAh):
- 18 h
NOTE:
Depending on the environment, temperature, and battery, the
operation time may vary.
1:3 Switching the headset on and off (g. 2)
Press and hold the on/off/mode button (F:10) for 2 seconds to
switch the headset on or off. A voice message will conrm
that the unit has been switched on or off with the voice
message “power on” or “power off”.
NOTE: The headset is automatically powered off after four hours
of inactivity. This is indicated by the voice message “automatic
power off”.
NOTE: The last setting is always saved when the headset is
switched off.
1:4 Adjusting the volume level (g. 3)
Use the [+] and [–] buttons to adjust the volume. By default, the
[+] and [–] buttons will control the volume of the active sound
source, which could be any one of the following: two-way radio,
Bluetooth®communication, or ambient listening. When receiving
or transmitting with the two way-radio, the [+] and [–] buttons will
control the two-way radio volume. If a Bluetooth®device is active,
the [+] and [–] buttons will control the Bluetooth®audio playback.
In all other cases, the [+] and [–] buttons will control the ambient
listening volume level. The respective volume levels can also be
adjusted in the menu.
1:5 Radio transmission
VOX (Voice-Operated Transmission)
Enables automatic transmission when the sound level at the
microphone is above the VOX level.
1:6 PTT (PUSH-TO-TALK Transmission) (g. 5)
Press and hold the PTT button (F:16) to transmit manually
using the radio. When the radio is transmitting or receiving,
the On/Off/Mode button (F:10) will ash rapidly. PTT
transmission works at all times, regardless of the BCLO and
settings.
NOTE: In order to receive transmission, the channel must not be
blocked by transmission via PTT or VOX.
NOTE: Press (~0.5 seconds) the PTT button (F:16) (g. 5) two
times to activate VOX or to deactivate VOX. A voice message
conrms, “VOX on” or “VOX off”.
1:7 Communication face to face
PTL (PUSH-TO-LISTEN) (g. 6)
The Push-To-Listen feature enables you to instantly listen to
your environment by muting the Bluetooth®audio volume and
activating the level-dependent microphones. Short press (~0.5
seconds) the On/Off/Mode button (F:10) two times to activate
Push-To-Listen. Short press any button to deactivate Push-To-
Listen.
1:8 Bluetooth®Multipoint technology
This headset supports Bluetooth®Multipoint technology. Use
Bluetooth®Multipoint technology to connect your headset to two
Bluetooth®devices at the same time. Depending on the type of
Bluetooth®devices connected and their current activities, the
headset controls the Bluetooth®devices in different ways. The
headset prioritizes and coordinates activities from the connected
Bluetooth®devices.
NOTE: The default setting is Bluetooth®Multipoint. You have to
activate Bluetooth®single in the setup mode of the headset.

4
EN
1:9 Pairing a Bluetooth®device (g. 7)
Press the Bluetooth®button (g. 4) to start the Bluetooth®pairing
the rst time the headset is powered on or after reset to factory
default. A voice message conrms, “Bluetooth®pairing on”.
You can also start the Bluetooth®pairing by long pressing and
holding (10 seconds) the On/Off/Mode button (F:10) from off
mode.
A voice message conrms, “power on, battery status, Bluetooth®
pairing on”.
Pairing mode can also be entered from the sub menu (g. 11).
See “conguring your headset”. This could be used for pairing
a second device.
Make sure that Bluetooth®communication is activated on your
Bluetooth®device. Search and select “WS LiteCom Plus” on your
Bluetooth® device. A voice message conrms when the pairing is
complete, “pairing complete” and “connected”.
NOTE: You can always stop the pairing process by a long press
(2 s) on the Bluetooth®button (g. 4).
NOTE: Only one of the two paired devices can be a two-way
radio. The headset only supports PTT over Bluetooth®if the two-
way radio support 3M™ PELTOR™ Push-To-Talk protocol. If you
have any questions, please contact your local distributor.
NOTE: When a third Bluetooth®device is successfully paired,
one of the previously paired devices is removed from the
headset. If one of the devices is connected, the unconnected
device is removed. Otherwise, the rst paired device is removed.
NOTE: By default, the radio VOX functionality is disabled when
taking a phone call via a Bluetooth®connection. Once the call
has ended, VOX is automatically activated. To transmit on the
two-way radio during a phone call, press the PTT button. If the
PTT button is pressed during a phone call, your voice will only
transmit through the two-way radio and not to the phone call.
1:10 Reconnecting Bluetooth®devices
When the headset is powered on, it tries to reconnect to all
paired device(s) during 5 minutes. A voice message will conrm
the connection, “connected”.
NOTE: If the link is lost, a voice message will conrm with
“Disconnected”.
SMART TIP: If a Bluetooth®device is paired but not connected
and the headset is on:
Press the Bluetooth®button to reconnect to all paired device(s)
in the Bluetooth® range. A voice message will conrm the
connection, “connected”.
1:11 Bluetooth®function
Bluetooth®is the name of a technical standard for short-
range wireless transmission, with a working range of
approximately 10 meters. This headset can be used with
other Bluetooth®-enabled units that support any of the
proles: headset (HSP), hands-free (HFP) or streaming
audio (A2DP).
• If the message “no paired devices” is heard, no Bluetooth®
device is linked to the headset.
• If the message “connecting Bluetooth®, connected”
is heard, a Bluetooth®-enabled device is linked to the
headset and connected.
• If the message “connecting Bluetooth®, connection failed”
is heard, a Bluetooth®device is linked to the headset, but
not connected.
1:12 Answer a phone call
When the headset is connected to a phone via Bluetooth®
wireless technology and there is an incoming call, answer
by a short press (~0.5 seconds) on the Bluetooth®button
(g. 4).
1:13 Reject a call
Press and hold (~2 seconds) the Bluetooth®button (g. 4) to
reject a phone call.
1:14 Toggle between phone and headset
When a call is active, it is possible to transfer the audio to
the phone, instead of using the headset.
Press (~2 seconds) the Bluetooth®button (g. 4). To return
the call to the headset, press (~2 seconds) the Bluetooth®
button once more.
1:15 End a phone call
To end an ongoing phone call, short press (~0.5 seconds)
the Bluetooth®button (g. 4).
1:16 Voice dial
To enable voice dial, long press (~2 seconds) the Bluetooth®
button (g. 4).
1:17 Answer a phone call from the second paired phone
unit during an ongoing call
When a call is active, it is possible to answer an incoming
call from the second paired phone. Answer by a short press
(~0.5 seconds) on the Bluetooth®button on the right cup
(g. 4).
1:18 Control Bluetooth®streaming audio (A2DP)
Play/pause streaming
Short press (~0.5 seconds) the Bluetooth®button (g. 4).
Skip to next track
Short press (2x~0.5 seconds) the Bluetooth®button rapidly
twice (g. 4).
Skip to previous track
Rapidly triple press (3x~0.5 seconds) the Bluetooth®button
(g. 4).
DID YOU KNOW:Audio playback will be automatically paused
from the audio playback unit when you have a call in progress or
a two-way radio message. After ending the call / message, the
audio playback will automatically start again.

5
EN EN
1:19 Transmitting and receiving messages on a Bluetooth®-
connected two-way radio
Press the Bluetooth®button (g. 4) to transmit and release to
receive messages.
1:20 Adjust Bluetooth®volume (fig. 3)
Short press (~0.5 seconds) the [+] or [–] button to adjust the
volume on an active paired Bluetooth®device.
2. CONFIGURING YOUR HEADSET
2:1 Main menu (g. 8)
To enter the menu, short press (~0.5 seconds) the on/
off/mode button. Use the On/Off/Mode button to navigate
through the menu and the [+] and [–] buttons to adjust the
settings.
After 7 seconds of inactivity, the headset will exit the menu.
These are the options available in the menu:
2:2 Channel
Lists all the programmed channels in the headset, up to 22.
Default: 1
2:3 Radio volume
Adjusts the volume level of the incoming radio sound.
(OFF, 1 – 6) Default: 3
2:4 Ambient listening volume (level-dependent microphones)
Helps protect your hearing from potentially harmful noise levels.
Constant rumbling and other potentially harmful noises are
reduced, but you can still speak normally and make yourself
heard. The ambient listening volume adjusts the level-
dependent function for ambient sound. (OFF, 1 – 6) Default: 3
2:5 Bluetooth® radio, phone or streaming volume
Depending on which sound source is connected, you can
adjust the volume on Bluetooth® radio, phone or streaming
volume. (OFF, 1 – 6) Default: 3
SMART TIP: When browsing long lists, such as channels, press
and hold either the [+] or [–] button to skip ten items at the time.
2:6 Sub menu (g. 9)
To enter the sub menu, press (1 second) on both the [+] and
[–] button at the same time. Use the On/Off/Mode button to
navigate through the menu and the [+] and [–] buttons to
adjust the settings.
These are the options available in the sub menu:
2:7 VOX (Voice-operated transmission)
This allows radio transmission without pressing the PTT
button. You can adjust the sensitivity of voice-operated
transmission. (“VOX off” - “VOX low” - “VOX medium” -
“VOX high”)
Default: VOX Medium
2:8 Sub channel
Sets the sub channel according to lists (F) and (G) if it is enabled.
(OFF, 1 – 121)
Default: OFF
2:9 Squelch (hiss reduction)
Squelch means that background hiss in the earphones is
prevented when the incoming signal is below the set squelch
level. (“Squelch off” - “Squelch low” - “Squelch medium” -
“Squelch high”)
Default: Squelch medium
2:10 TX power level
This feature controls the power level of the radio transmitter.
There are two output power levels: low and high. The low setting
will reduce the communication range but increase the battery life.
(“Power” - “High/low power”) Default: Low power
2:11 Bluetooth®pairing (g. 11)
When you hear the voice message “Bluetooth®pairing”, short
press (~0.5 seconds) the [+] button to start pairing. Short
press (~0.5 seconds) the Bluetooth®button to stop pairing.
A voice message will conrm, “Bluetooth®pairing on”.
Search and select “WS LiteCom Plus” on your Bluetooth®
device. A voice message will conrm when pairing is
complete, “Pairing complete” and “Connected”. Short press
(~0.5 seconds) the [–] button to stop the pairing. A voice
message will conrm, “pairing failed”.
2:12 Language
Adjusts the ghost voice language between all installed
languages. (“English” - “Spanish” - “French” - “German”)
Default: English
After 7 seconds of inactivity, the headset will exit the menu
(you can also leave the menu by pressing both the [+] and [–]
button at the same time).
2:13 Set-up menu (g. 10)
To enter the set-up menu, have the headset in off mode and
press (~1 second) on both the PTT and on/off/mode button
on the right cup at the same time. Use the on/off/mode button
to navigate through the menu and the [+] and [–] buttons to
adjust the settings.
To exit the set-up menu, turn the headset off.
These are the options available in the set-up menu:
2:14 BCLO (Busy channel lock out)
This menu setting lets you change the way the headset
reacts when you try to transmit on a busy channel. There
are two options to choose from: “carrier” and “sub channel”
(code) with or without a warning tone. If you want the headset
to respond to the carrier wave, select the “carrier” option;
if you want it to react to the sub channel, choose the “sub
channel” option. (“BCLO off” - “BCLO carrier” - “BCLO carrier
tone” - “BCLO sub channel” - “BCLO sub channel tone”)
Default: BCLO carrier tone

6
2:15 Max transmission time
This function lets you adjust the maximum transmission time.
You can choose between 30 seconds up to 5 minutes and
off-mode. Each change is conrmed by a voice message.
(“OFF”, “30 s”, “1 min”, “2 min”, “3 min”, “4 min”, “5 min”)
Default: 3 min
2:16 Automatic power off
The automatic power off is the time that elapses before the
headset is automatically powered off if there is no activity
(button presses or VOX activation).
Before the headset powers off you will hear a voice message
and warning beeps. To abort the automatic power off function,
press any button.
(“OFF”, “30 min”, “60 min”, “2 h”, “4 h”, “8 h”)
Default: 4 h
2:17 Microphone input
This product is supplied and calibrated for use with a dynamic
microphone (MT73) as standard.
You can however adjust the microphone gain. The
microphone gain can be changed here. It is also possible
to switch off the microphone and just use the headset for
listening. Each change is conrmed by a voice message.
(“OFF”, “Low”, “Nominal”, “High”)
Default: Nominal
2:18 External jack input sensitivity level control
Level control for incoming signal from external equipment
connected to the external jack.
Each change is conrmed by a voice message.
(“OFF”, “Low”, “Medium”, “High”)
Default: OFF
2:19 Bluetooth®streaming
Enable or disable the streaming function.
Default: Enable
2:20 Bluetooth®phone
Enable or disable the handsfree prole function.
Default: Enable
2:21 Bluetooth®Multipoint
Enable or disable the Multipoint function.
Default: Enable
2:22 Reset to factory default (g. 11)
To conrm a reset to factory default, hold the plus button
for two seconds. This is conrmed by the voice message
“Restored factory defaults”
3. CLEANING AND MAINTENANCE
Use a cloth wetted with soap and warm water to clean the
outer shells, headband and ear cushions.
NOTE: Do NOT immerse the hearing protector in water.
If the hearing protector gets wet from rain or sweat, turn the
earmuffs outwards, remove the ear cushions and foam liners,
and allow to dry before reassembly. The ear cushions and
foam liners may deteriorate with use and should be examined
at regular intervals for cracking or other damage. When used
regularly, 3M recommends replacing the foam liners and ear
cushions at least twice a year to maintain consistent
attenuation, hygiene, and comfort. If an ear cushion is
damaged, it should be replaced. See Spare Parts and
Accessories Section below.
3:1 Removing and replacing the ear cushions
D:1 To remove the ear cushion, slide your ngers under the
inside edge of the ear cushion and rmly pull straight out.
D:2 Remove existing liner(s) and insert new foam liner(s).
D:3 Fit one side of the ear cushion into the groove of the
earcup and then press on the opposite side until the ear
cushion snaps in place.
3:2 Use and storage conditions
Remove the batteries before storing the product. Do not store
the hearing protector at temperatures above 55 °C or 131 °F,
(for example on a dashboard, parcel shelf or window sill), or
at temperatures below –20 °C or –4 °F. Do not use the
hearing protector at temperatures above 55 °C or 131 °F, or
below 0 °C or 32 °F.
3:3 Spare parts and accessories
3M™ PELTOR™ HY83 Hygiene kit
Replaceable hygiene kit consisting of two attenuation
cushions, two foam rings and two snap-in ear cushions.
3M™ PELTOR™ HY80A Gel hygiene kit
Super-soft foam for enhanced comfort.
High-temp adhesive suited for hotter and more demanding
environments.
Replaceable hygiene kit consisting of two attenuation
cushions, two foam rings and two snap-in ear cushions.
Replace at least twice a year to ensure constant attenuation,
hygiene and comfort.
3M™ PELTOR™ HY100A Single-use protectors
A single-use protector that is easy to t to the ear cushions.
Pack of 100 pairs.
3M™ PELTOR™ HYM1000 Microphone protector
Moisture-resistant and wind-resistant hygienic tape that
protects the speech microphone and extends its life at the
same time. Pack of 4.5 meters (14.78 feet) is sufcient for
around 50 replacements.
3M™ PELTOR™ MT73/1 Dynamic microphone
Water-resistant dynamic boom microphone with wind
protection.
Supplied as standard with product.
3M™ PELTOR™ MT90-02 Throat microphone
Dynamic laryngophone.
EN

7
3M™ PELTOR™ M171/2 Wind shield for level-dependent
microphones
Effective against wind noise; enhances life span and protects
the microphones. One pair per pack.
3M™ PELTOR™ ACK081 Battery
Supplied as standard with product.
NOTE: Use the following battery in this product: 3M™
PELTOR™ ACK081 charged with cable 3M™ PELTOR™
AL2AI connected to a 3M™ PELTOR™ FR08 (power supply).
3M™ PELTOR™ AL2AI Charging cable
USB cable connecting to ACK081.
3M™ PELTOR™ FR08 Power supply
Power supply for AL2AI/ACK081.
3M™ PELTOR™ FL5602 External PTT
Push-To-Talk button with connection cable for external control
of transmission with the built-in communication radio.
3M™ PELTOR™ FL6BT Connecting cable
With 3.5 mm mono connector for use with communication radios.
3M™ PELTOR™ FL6BS Connecting cable
With 2.5 mm mono connector for use with communication radios.
3M™ PELTOR™ FL6BR Connecting cable
With Peltor J11 connector (type Nexus TP-120) for use with a
Peltor adapter and an external communication radio. Contact
your 3M Peltor dealer for information.
FCC AND ISED INFORMATION
This device contains licence-exempt transmitter(s)/
receiver(s) that comply with Innovation,Science and Economic
Development Canada’s licence-exempt RSS(s) Operation is
subject to the following two conditions: (1) This device may not
cause harmful interference, and (2) this device must accept any
interference received, including interference that may cause
undesirable operation.
NOTE: This device complies with part 15 of the Rules.
Operation is subject to the following two conditions:(1) This
device may not cause harmful, and (2)this device must accept
any interference received, including interference that may
cause usdesired operation.However, there is no guarantee that
interference will not occur in a particular installation. If this device
does cause harmful interference, which can be determined by
turning the device off and on, the user is encouraged to try to
correct the interferenceby one or more of the following measures:
• Reorient or relocate the receiving antenna.
• Increase the separation distance between the two interfering
devices.
• Consult 3M Technical Services.
CAN ICES-3 (B)/NMB-3(B)
WARRANTY AND LIMITATION OF LIABILITY
NOTE: The following statements do not apply in Australia and
New Zealand. Consumers should rely on their statutory rights.
WARRANTY: In the event any 3M Personal Safety Division
product is found to be defective in material, workmanship, or not
in conformity with any express warranty for a specic purpose,
3M’s only obligation and your exclusive remedy shall be at 3M’s
option, to repair, replace, or refund the purchase price of such
parts or products upon timely notication of the issue by you
and substantation that the product has been stored, maintained,
and used in accordance with 3M’s written instructions.
EXCEPT WHERE PROHIBITED BY LAW, THIS WARRANTY
IS EXCLUSIVE AND IS IN LIEU OF ANY EXPRESS OR
IMPLIED WARRANTY OF MERCHANTABILITY, FITNESS
FOR A PARTICULAR PURPOSE OR OTHER WARRANTY
OF QUALITY, OR THOSE ARISING FROM A COURSE OF
DEALING, CUSTOM, OR USAGE OF TRADE, EXCEPT OF
TITLE AND AGAINST PATENT INFRINGEMENT. 3M has no
obligation under this warranty with respect to any product that
has failed due to inadequate or improper storage, handling, or
maintenance; failure to follow product instructions; or alteration or
damage to the product caused by accident, neglect, or misuse.
LIMITATION OF LIABILITY: EXCEPT WHERE PROHIBITED BY
LAW, IN NO EVENT SHALL 3M BE LIABLE FOR ANY DIRECT,
INDIRECT, SPECIAL, INCIDENTAL OR CONSEQUENTIAL
LOSS OR DAMAGES (INCLUDING LOST PROFITS) ARISING
FROM THIS PRODUCT, REGARDLESS OF THE LEGAL
THEORY ASSERTED. THE REMEDIES SET FORTH HEREIN
ARE EXCLUSIVE.
NO MODIFICATION: Modications to this device shall not be
made without the written consent of 3M Company.
Unauthorized modications may void the warranty and the
user’s authority to operate the device.
To properly dispose of the battery, follow local solid waste
disposal regulations. Many rechargeable batteries are required
to be recycled by local, state/province, and national laws. To
properly recycle/dispose of the battery or battery pack, always
follow local solid waste disposal regulations. Additionally, in
the United States and Canada, 3M Company is partnering
with Call2Recycle (RBRC) to provide recycling service to
you to help ensure that the rechargeable batteries within our
products are recycled properly. To assist you in using this
service call the Call2Recycle battery recycling information
help line at 1-800-8-BATTERY (1-800-822-8837) or consult
Call2Recycle’s battery recycling guidance online at “http://
www.call2recycle.org” www.call2recycle.org.
EN
FCC AND ISED INFORMATION
This device contains licence-exempt transmitter(s)/
receiver(s) that comply with Innovation,Science and Economic
Development Canada’s licence-exempt RSS(s) Operation is

3M™ PELTOR™ WS LiteCom Plus Headset
MT73H7A4610WS6NA, MT73H7P3E4610WS6NA,
MT73H7B4610WS6NA.
INTRODUCCIÓN
¡Felicidades y gracias por elegir soluciones de comunicación
3M™ PELTOR™! ¡Bienvenido a la siguiente generación de
comunicación protectora!
USO PREVISTO
Estos auriculares 3M™ PELTOR™ tienen por objeto
proporcionar a los trabajadores protección contra niveles
de ruido dañinos, al mismo tiempo que permiten al usuario
comunicarse con un radioteléfono integrado o Bluetooth®
y escuchar el entorno con micrófonos ambientales. Todos
los usuarios deben leer y comprender las instrucciones de
empleo proporcionadas y estar familiarizados con el uso de
este dispositivo.
¡IMPORTANTE!
Antes de usar el dispositivo, el usuario debe leer, comprender
y observar toda la información de seguridad de estas
instrucciones. Conservar estas instrucciones para referencia
futura. Para más información y consultas, ponerse en
contacto con el servicio técnico de 3M (los datos de contacto
están en la última página).
!¡ADVERTENCIA!
Este protector auditivo ayuda a reducir la exposición a ruido
peligroso y otros sonidos fuertes. Si los protectores auditivos
se usan incorrectamente o si no se usan siempre que se
está expuesto a ruido peligroso, existe riesgo de pérdida
auditiva o lesiones en el oído. Para el uso correcto,
consultar con el supervisor, el manual de instrucciones, o
llamar al servicio técnico de 3M. Si el oído parece atenuado
o si se oye un pitido o zumbido durante o después de la
exposición al ruido (incluso disparos), o si por cualquier otro
motivo se sospecha la existencia de un problema auditivo,
abandonar inmediatamente el lugar ruidoso y consultar a un
médico o al supervisor.
La inobservancia de estas instrucciones comporta
riesgo de daños personales y peligro de muerte:
a. Escuchar música u otra comunicación por radio puede
reducir la percepción de la situación y la capacidad de
escuchar señales de advertencia. Permanecer alerta y
regular el volumen de audio al nivel más bajo aceptable.
b. Para reducir los riesgos de incendio y explosión, no usar
este producto en atmósferas potencialmente explosivas.
La inobservancia de estas instrucciones puede reducir
la protección proporcionada por los auriculares o los
tapones de oídos y comporta riesgo de pérdida auditiva:
a. 3M recomienda encarecidamente probar el encaje de
los
protectores auditivos. Si se usa el índice de reducción de
ruido (NRR) para estimar una protección típica en lugar
de
trabajo, 3M recomienda bajar el valor de reducción en un
50 % o según la normativa aplicable.
b. Asegurar que el protector auditivo se selecciona,
encaja, ajusta y mantiene correctamente. Un encaje
inadecuado del dispositivo reducirá su ecacia atenuadora
de ruido. Consultar las instrucciones adjuntas para un
encaje adecuado.
c. Inspeccionar el producto cuidadosamente antes de cada
uso. Si el protector auditivo se daña, elegir un protector
auditivo en perfecto estado o evitar el entorno ruidoso.
d. Cuando es necesario usar equipo de protección
individual adicional (p. ej., lentes protectores máscaras
respiratorias, etc.), usar patillas o cintas exibles de perl
bajo para minimizar la interferencia con las almohadillas de
la orejera. Quitar todos los artículos innecesarios (p. ej.,
cabello, sombrero, joyas, auriculares, cubiertas higiénicas,
etc.) que puedan interferir con el sello de las almohadillas de
la orejera y reducir la protección de la misma.
e. No doblar ni cambiar la forma de la diadema o la cinta de
nuca, y asegurar que haya fuerza suciente para que los
auriculares se mantengan en su lugar con rmeza.
f. La salida del circuito de audio eléctrico de este protector
auditivo puede exceder el nivel sonoro límite diario. Regular
el volumen de audio al nivel más bajo aceptable.
g. Por ejemplo, los auriculares, y especialmente las
almohadillas, pueden deteriorarse con el uso y deben
revisarse con frecuencia para ver si tienen grietas y fugas.
Cuando los auriculares se usan con regularidad, cambiar las
almohadillas y los revestimientos de espuma por lo menos
dos veces al año para mantener una atenuación, higiene y
comodidad constantes.
PRECAUCIÓN
• Riesgo de explosión si la batería se sustituye por una de
tipo incorrecto.
• No cargar baterías a más de 45 °C de temperatura.
• Usar únicamente la batería 3M™ PELTOR™ ACK081 y el
cable de carga 3M™ PELTOR™ AL2AI conectado a una
fuente de alimentación 3M™ PELTOR™ FR08.
• Las baterías de ion de litio comportan riesgo de incendio y
quemaduras. No abrir, aplastar ni calentar a más de 55 °C, ni
incinerar.
• Para entornos ruidosos en que predominan frecuencias
de menos de 500 Hz debería usarse el nivel de ruido
ambiental con ponderación C.
• Usar siempre repuestos 3M especícos de producto. El
uso de repuestos no autorizados puede reducir la protección
que proporciona este producto.
• Seguir las instrucciones de este manual. Si se manipula el
producto, podría anularse la homologación IP54 del mismo.
NOTA:
• Este protector auditivo, cuando se usa según el manual
de instrucciones, ayuda a reducir la exposición a ruidos
continuos como ruidos industriales, ruido de vehículos y
aviones, y ruidos impulsivos fuertes como disparos. Es difícil
8
ES

pronosticar la protección auditiva necesaria o real obtenida
durante la exposición a ruidos impulsivos. Para el ruido de
disparo, afectan al rendimiento factores como el tipo de
arma, el número de tiros, la selección correcta, la colocación
y uso de protector auditivo, el cuidado adecuado del protector
auditivo y otras variables. Para más información sobre
protección auditiva contra ruido impulsivo, visitar
www.3M.com.
• Aunque es posible recomendar protectores auditivos para
protección contra los efectos dañinos del ruido impulsivo, el
NRR se basa en la atenuación del ruido continuo y podría no
ser un indicador preciso de la protección posible contra ruido
impulsivo como, por ejemplo, disparos de armas de fuego.
• En Canadá, los usuarios de cascos de seguridad
combinados con auriculares deben consultar la norma CSA
Standard Z94.1 sobre protecciones de cabeza de uso
industrial.
Este dispositivo portátil con antena cumple con los límites de
exposición de FCC/IC RF para la población en general o
exposición descontrolada. La antena usada para este
dispositivo no se debe colocar ni operar junto con ninguna
otra antena o ningún otro transmisor. Cualquier cambio o
modicación que no se apruebe de forma expresa por la
parte responsable del cumplimiento podría anular la
autoridad del usuario para operar el equipo.
• Intervalo de temperaturas de funcionamiento:
entre –20°C y 55 °C
• Intervalo de temperaturas de almacenaje:
entre –20 °C y 55 °C
• Peso del protector auditivo: entre 435 y 470 g
ATENUACIÓN EN LABORATORIO
El NRR se obtuvo con el dispositivo apagado.
Explicación de las tablas de atenuación:
Norma USAANSI S3.19-1974
3M recomienda encarecidamente probar el encaje de los
protectores auditivos. Si se usa el índice de reducción de
ruido (NRR) para estimar una protección típica en lugar de
trabajo, 3M recomienda bajar el valor de reducción en un
50 % o según la normativa aplicable.
A:1 Frecuencia (Hz)
A:2 Atenuación media (dB)
A:3 Desviación normal (dB)
El nivel de ruido que entra en el oído de una persona cuando
se usa un protector auditivo tal como se indica es muy
aproximado a la diferencia entre el nivel de ruido ambiental
con ponderación A y el NRR.
Ejemplo:
1. El nivel de ruido ambiental medido en el oído es de 92 dB(A).
2. El valor NRR es de 27 decibelios (dB).
3. El nivel de ruido que entra en el oído es aproximadamente
igual a 65 dB(A).
Al seleccionar accesorios para equipos respiratorios de
protección individual, como protectores auditivos montados
en casco de seguridad, ver la etiqueta de homologación
NIOSH o consultar con el servicio técnico de 3M para las
conguraciones aprobadas.
COMPONENTES
Diadema
MT73H7A4610WS6NA
(F:1) Diadema
(F:2) Acolchado de diadema (hoja de PVC)
(F:3) Cable de diadema (acero inoxidable)
(F:4) Fijación de dos puntos (POM)
(F:5) Aro de sellado (hoja de PVC y espuma PUR)
(F:6) Revestimiento de espuma (espuma PUR)
(F:7) Copa
(F:8) Micrófono para función dependiente de nivel para
escuchar sonido ambiental
(F:9) Micrófono de habla (micrófono dinámico)
(F:10) Botón On/Off/Mode (de encendido/apagado/modo)
(F:11) Botón +
(F:12) Botón –
(F:13) Antena
(F:14) Entrada de micrófono de habla (J22)
(F:15) Botón de Bluetooth®
(F:16) Botón de pulsar para hablar (PTT) para radioteléfono
integrado
(F:17) Entrada/salida externa (por ejemplo: para radioteléfono
externo o teléfono externo)
(F:18) Batería de ion de litio (recargable)
Cinta de nuca
MT73H7B4610WS6NA
(F:19) Cable de cinta de nuca (acero inoxidable)
(F:20) Cubierta de cinta de nuca (PO)
Fijación de casco de seguridad
MT73H7P3E4610WS6NA
(F:21) Brazo de soporte, copa (acero inoxidable)
INSTRUCCIONES DE COLOCACIÓN
Diadema
B:1 Deslizar las copas e inclinar hacia fuera la parte superior
de la carcasa para que el cable quede en el exterior de la
diadema.
B:2 Ajustar la altura de las copas, moviéndolas hacia arriba o
abajo, manteniendo inmóvil la diadema.
B:3 La diadema debe atravesar la parte superior de la
cabeza, tal como se muestra, y aguantar el peso de los
auriculares.
9
ES

Cinta de nuca
B:4 Colocar las copas sobre las orejas.
B:5 Mantener las copas en posición. Colocar la banda sobre
la cabeza y jarla ceñida en esta posición.
B:6 La banda debe atravesar la parte superior de la cabeza,
tal como se muestra, y aguantar el peso de los auriculares.
Fijación del casco de seguridad
B:7 Insertar la jación del casco en la ranura del casco de
seguridad y jarla a presión (B:8).
B:9 Modo de trabajo: presionar los cables de diadema hacia
dentro, hasta que suene un chasquido en ambos lados.
Comprobar que las copas y los cables de la diadema en
modo de funcionamiento no presionan en el borde del casco
de seguridad, ya que podría reducirse la atenuación de ruido
de los auriculares.
B:10 Modo de ventilación: para cambiar la unidad desde
modo de trabajo a modo de ventilación, tirar de las copas
hacia fuera hasta que suene un chasquido. No colocar las
copas contra el casco de seguridad (B:11) porque impedirían
la ventilación.
Micrófono
(C:1) (C:2) Para maximizar el rendimiento del micrófono de
habla en sitios ruidosos, colocarlo muy cerca de la boca (a
menos de 3 mm).
Cambio de la placa de fijación del casco de seguridad
Para una colocación correcta en diferentes cascos de
seguridad industrial, podría ser necesario cambiar la placa de
jación del casco de seguridad. Ver la jación recomendada
en la tabla L. El distribuidor puede ofrecer otras placas. Para
esta operación se necesita un desarmador.
(E:1) Aojar el tornillo de jación de la placa.
(E:2) Cambiar la placa, comprobar que queda correctamente
orientada y apretar el tornillo.
1. INSTRUCCIONES DE MANEJO
1:1 Cambiar o recargar la batería (g. 1)
Insertar la batería recargable (ACK081) en el compartimento
de batería. Bajar el seguro.
Un nivel de carga bajo se indica por el mensaje de voz “carga
baja Estado de bateria bajo
” que se repite cada 5 minutos. Si no se cambia la batería, se
escuchará nalmente la advertencia “batería descargada”.
Entonces la unidad se apagará automáticamente.
NOTA: Usar la batería siguiente en este producto: 3M™
PELTOR™ ACK081 cargada con cable 3M™ PELTOR™
AL2AI conectado a la fuente de alimentación 3M™
PELTOR™ FR08.
NOTA: El rendimiento puede empeorar cuando la carga de la
batería es baja.
Recargar la batería
Apagar los auriculares. Insertar un objeto sin lo debajo del
borde del seguro y tirar hacia afuera. Sacar la batería y
recargarla por separado o dejarla colocada y recargarla en el
protector auditivo.
1:2 Tiempo de funcionamiento
Tiempo aproximado de funcionamiento con una batería
ACK081 totalmente cargada (1.800 mAh):
- 18 h
NOTA:
El tiempo de funcionamiento puede variar en función del
entorno, la temperatura y la batería.
1:3 Encendido y apagado de los auriculares (g. 2)
Para encender y apagar los auriculares, mantener pulsado el
botón On/Off/Mode (F:10) durante 2 segundos. Un mensaje
de voz conrmará que el dispositivo se encendió o se apagó,
con el mensaje de voz “encendido” o “apagado”.
NOTA: Los auriculares se apagan automáticamente después
de cuatro horas de inactividad. Esto se indica con el mensaje de
voz “apagado automático”.
NOTA: El último ajuste se guarda siempre al apagar los
auriculares.
1:4 Regulación del nivel de volumen (g. 3)
Usar los botones [+] y [–] para regular el volumen. Por defecto,
los botones [+] y [–] regulan el volumen de la fuente de sonido
activa, que puede ser una de las siguientes: radioteléfono,
comunicación por Bluetooth®o escucha ambiental. En la
recepción o transmisión por radioteléfono, los botones [+] y [–]
regulan el volumen del mismo. Si hay un dispositivo Bluetooth®
activo, los botones [+] y [–] regulan la reproducción de audio
del mismo. En los demás casos, los botones [+] y [–] regulan el
nivel de escucha ambiental. Los respectivos niveles de volumen
también se pueden ajustar en el menú.
1:5 Transmisión por radio VOX (transmisión operada por voz)
Habilita la transmisión automática cuando el nivel sonoro en
el micrófono es superior al nivel de VOX.
1:6 PTT (Push-To-Talk [pulsar para hablar]) (g. 5)
Presionar sin soltar el botón PTT (F:16) para transmitir
manualmente en la radio. Cuando la radio está transmitiendo
o recibiendo, el botón On/Off/Mode (F:10) destella
rápidamente. La transmisión con PTT funciona siempre,
independientemente del bloqueo de canal ocupado (BCLO) y
de los ajustes.
NOTA: Para recibir transmisión, el canal no debe estar
bloqueado por transmisión mediante PTT o VOX.
NOTA: Para activar o desactivar VOX, pulsar dos veces
(~0.5 segundos) el botón PTT (F:16) (g. 5). Un mensaje de
voz “VOX activada” o “VOX desactivada” conrma.
10
ES
Un nivel de carga bajo se indica por el mensaje de voz
“carga baja Estado de bateria bajo

1:7 Comunicación cara a cara PTL
(Push-To-Listen [pulsar para escuchar]) (g. 6)
La función PTL permite al usuario escuchar instantáneamente
el entorno al silenciar el audio de Bluetooth®y al activar los
micrófonos dependientes de nivel. Presionar dos veces
brevemente (0.5 segundos) el botón On/Off/Mode (F:10) para
activar la función PTL. Para desactivar la función PTL, presionar
brevemente cualquier botón.
1:8 Tecnología Bluetooth®Multipoint
Estos auriculares son compatibles con la tecnología
Bluetooth®Multipoint. Usar tecnología Bluetooth®Multipoint
para conectar los auriculares a dos dispositivos Bluetooth®
de forma simultánea. Según el tipo de dispositivos Bluetooth®
conectados y de sus actividades actuales, los auriculares
controlan los dispositivos Bluetooth®de diferentes formas.
Los auriculares coordinan y dan prioridad a las actividades
de los dispositivos Bluetooth®conectados.
NOTA: El ajuste predeterminado es Bluetooth®Multipoint. Hay
que activar Bluetooth®único en el modo de preparación de los
auriculares.
1:9 Emparejamiento de un dispositivo Bluetooth®(g. 7).
Presionar el botón de Bluetooth®(g. 4) para iniciar el
emparejamiento de Bluetooth®la primera vez que se
encienden los auriculares o después de restablecer las
conguraciones de fábrica. Un mensaje de voz conrma:
“emparejamiento de Bluetooth®”Emparejamiento bluetooth
activado
.
También se puede activar el emparejamiento de Bluetooth®
manteniendo presionado durante 10 segundos el botón On/Off/
Mode (F:10), en modo apagado.
Un mensaje de voz conrmará con “encendido, estado de batería,
emparejamiento Bluetooth®activado”.
También se puede entrar en el modo de emparejamiento
desde el submenú (g. 11). Ver el apartado “Conguración de
los auriculares”. Puede usarse para emparejar un segundo
dispositivo.
Comprobar que la comunicación Bluetooth®está activada
en el dispositivo Bluetooth®propio. Buscar y seleccionar
“WS LiteCom Plus” en el dispositivo Bluetooth®. Un
mensaje de voz conrma que el emparejamiento nalizó:
“emparejamiento nalizado” y “conectado”.
NOTA: Se puede detener el proceso de emparejamiento, al
presionar sin soltar (2 segundos) el botón de Bluetooth®(g. 4).
NOTA: Solo uno de los dos dispositivos emparejados puede
ser un radioteléfono. Los auriculares solo aceptan PTT
por Bluetooth®si el radioteléfono acepta el protocolo 3M™
PELTOR™ de presionar para hablar. Para consultas, ponerse en
contacto con el distribuidor local.
NOTA: Cuando se empareja correctamente un tercer dispositivo
Bluetooth®, se elimina de los auriculares uno de los dispositivos
emparejados anteriormente.Al conectar uno de los dispositivos,
se elimina el dispositivo desconectado. De lo contrario, se
elimina el primer dispositivo emparejado.
NOTA: Por defecto, la función de radio VOX se desactiva
cuando se contesta una llamada telefónica por conexión
Bluetooth®. Cuando naliza la llamada, VOX se reactiva
automáticamente. Para transmitir por el radioteléfono durante
una llamada telefónica, pulsar el botón PTT. Si se presiona
el botón PTT durante una llamada, la voz del usuario solo se
transmite por el radioteléfono y no a la llamada telefónica.
1:10 Reconexión de dispositivos Bluetooth®
Cuando se encienden los auriculares, durante 5 minutos,
intentan reconectar todos los dispositivos emparejados. Un
mensaje de voz conrma la conexión: “conectado”.
NOTA: Si se pierde la conexión, un mensaje de voz conrma
con “desconectado”.
CONSEJO ÚTIL: Si hay dispositivos Bluetooth®emparejados
pero no conectados y los auriculares están encendidos:
Presionar el botón de Bluetooth®para reconectar con todos los
dispositivos emparejados en el alcance de Bluetooth®.
Un mensaje de voz conrma la conexión: “conectado”.
1:11 Función de Bluetooth®
Bluetooth®es el nombre de una norma técnica para
transmisión inalámbrica de corto alcance, con un alcance
de trabajo máximo de aproximadamente 10 metros. Estos
auriculares se pueden usar con otra unidad Bluetooth®
compatible con cualquiera de los perles: auriculares (HSP),
manos libres (HFP) o ujo acústico (A2DP).
• Si se escucha el mensaje “no hay dispositivos dispositivos
no emparejados
• emparejados”; no hay dispositivos Bluetooth®emparejados
a los auriculares.
• Si se escucha el mensaje “conectando Bluetooth®,
conectado”; hay un dispositivo con Bluetooth®habilitado,
emparejado con los auriculares y conectado.
• Si se escucha el mensaje “conectando Bluetooth®, conexión
fallida”; hay un dispositivo con Bluetooth®emparejado con
los auriculares, pero no conectado.
1:12 Contestar una llamada telefónica
Si entra una llamada cuando los auriculares están
conectados a un teléfono mediante tecnología inalámbrica
Bluetooth®, contestar presionando brevemente
(~0.5 segundos) el botón de Bluetooth®(g. 4).
1:13 Rechazar una llamada
Para rechazar una llamada telefónica, mantener presionado
(~2 segundos) el botón de Bluetooth®(g. 4).
1:14 Cambio entre teléfono y auriculares
Cuando hay una llamada activa, es posible transferir el audio
al teléfono en vez de usar los auriculares. Presionar
(~2 segundos) el botón de Bluetooth®(g. 4). Para regresar
la llamada a los auriculares, presionar de nuevo
(~2 segundos) el botón de Bluetooth®.
1:15 Finalizar una llamada telefónica
11
ES
emparejamiento de Bluetooth®”Emparejamiento bluetooth
activado
Si se escucha el mensaje “no hay dispositivos dispositivos
no emparejados
This manual suits for next models
3
Table of contents
Languages:
Other 3M Headset manuals

3M
3M PELTOR WS LiteCom Pro III User manual

3M
3M PELTOR WS ALERT XP Series User manual

3M
3M PELTOR ProTac III User manual

3M
3M PELTOR ComTac XPI MT20H682FB Series User manual

3M
3M MT13H223A User manual

3M
3M PELTOR WS LiteCom Plus User manual

3M
3M Peltor Comtac V User manual

3M
3M Peltor WS Alert M2RX7*WS4 User manual

3M
3M PELTOR ComTac VI User manual

3M
3M Peltor HTM79 Series User manual