3M Peltor WS Alert M2RX7*WS4 User manual

B:5
13
B)
B:4
B:3
B:2
B:1
B:6
FP3623 rev.b
2
3
4
11
6
1
5
9
10
7
8
12
The Sound Solution
Peltor™ WS Alert™Headset
M2RX7*WS4
3M Svenska AB
Box 2341
SE-331 02 Värnamo, Sweden
t: +46 (0) 370 65 65 65
f: +46 (0) 370 65 65 99
www.3M.com/peltorcomms
A)

SNR
32dB
H
31dB
M
23dB 32dB
L
400
g
/
14.1 Oz.
1
17.6 26.2 34.9 37.7 33.3 35.7 36.8
2.9 1.8 2.5 2.6 3.4 2.1 3.3
14.7 24.4 32.3 35.0 29.9 33.6 33.5
Frequency
2
Mean att.
3
Stand. dev.
4
Peltor ALERT
M2RX7A
APV
Model 125 250 500 1000 2000 4000 8000
NRR
25dB
Peltor ALERT M2RX7A
SNR
30dB
H
27dB
M
19dB 29dB
L
330
g
/
11.6 Oz.
1
16.5 22.0 31.6 33.8 31.1 33.5 35.4
5.5 3.7 4.6 4.0 2.8 1.6 3.3
11.0 18.3 27.0 29.8 28.3 31.9 32.1
Frequency
2
Mean att.
3
Stand. dev.
4
Peltor ALERT
M2RX7P3*
APV
Model 125 250 500 1000 2000 4000 8000
NRR
21dB
Peltor ALERT M2RX7P3E*
C:4)
C:5)
D)
Soundlevel in dB (A) inside the cup, max 85 dB (A)
20
30
40
50
60
70
80
125 250 500 1000 2000 4000 8000 Hz
dB
Weight1M2RX7A: 400 g. Weight1M2RX7A–07: 420 g.
Weight1M2RX7P3*: 430 g. Weight1M2RX7P3*–07: 450 g.
E)
C:2)
E:1
HY79
E:2
HY100A
E:3
HYM1000
E:4
M60/2
Soundlevel in dB (A) outside the cup.
Max input level H-noise: 109 dB(A)
Max input level M-noise: 106 dB(A)
Max input level L-noise: 103 dB(A)
M2RX7P3EWS4
M2RX7AWS4
E:5
1173 SV
C:2B)
F)
(1:1) (1:2)
(1:3)
Usage time, WS Alert headset
operating
time
hours
Mode (average)
Surround+Radio 40
Surround+Radio+Bluetooth standby 33
Bluetooth active 40
(C)
Quick guide for synchronising (pairing) the WS Alert headset
Bluetooth unit with a mobile telephone
1. Turn all WS Alert headset functions OFF. (If necessary, remove
and re-install batteries.)
2. Press and hold the Bluetooth button on the left cup for 6 se-
conds.
3. Search for the new Bluetooth unit, Peltor WS4, according to your
telephone’s directions for use.
4. Press and hold the Bluetooth button for 6 seconds until the LED
glows red.
Activation
5. Activate the Bluetooth function by pressing and holding the
Bluetooth button on the left cup for 2 seconds.
6. Activate the radio or the surround sound function on the right
cup.
Turning off
7. Turn off any of the three functions separately.
C:1)

1
EN 2-6
CZ 7-11
DA 12-16
DE 17-21
ES 22-27
ET 28-32
FI 33-37
FR 38-42
IS 43-47
IT 48-52
LT 53-57
LV 58-62
NL 63-67
NO 68-72
PL 73-77
PT 78-82
RU 83-88
SE 89-93
WS ALERT

2
3
EN
PELTOR WS ALERT – ACTIVE-VOLUME HEARING PROTECTOR RADIO
The Peltor WS ALERT active-volume hearing protector radio, M2RX7*WS4, provides comfortable, effective protection
from harmful noise. The active-volume function enhances safety by attenuating loud noises and amplifying weak ones.
In addition, the WS ALERT has an FM radio receiver and Bluetooth®that supports headset, handsfree and A2DP
proles.
Read these instructions carefully to ensure the best possible benet from your Peltor WS ALERT.
(A) WHAT IS WHAT?
1. Extra broad headband (M2RX7A) with soft padding for ideal comfort throughout the working day. Specially designed
helmet attachments (M2RX7P3E) with slots for attaching a visor and rain shield.
2. Individually sprung headband wires of stainless steel provide an even distribution of pressure around the ears.
Maintains its resilience better than regular plastic headbands through a wide range of temperatures.
3. Low, two-point fasteners and easy height adjustment with no protruding parts.
4. Soft, wide foam/uid-lled ear cushions with built-in pressure-relief channels for low pressure, effective sealing and
individual comfort.
5. Short, exible antenna for stereo reception, with a low attachment point and high receptivity.
6. Battery cover for easy battery replacement.
7. Microphones for active volume capture and amplifying weak sounds up to the specied maximum level.
8. On/off and volume controls.
9. Channel search control. Switches automatically from stereo to mono for the best reception in the event of a weak
signal.
10. Active volume controls. On/Off and volume.
11. Speech microphone allows two-way communication by Bluetooth®or connection to a com radio etc.
12. Bluetooth®controls.
13. LED for Bluetooth®.
BATTERIES
Unscrew and open the battery cover. Insert the two enclosed 1.5-volt AA batteries. Make sure that the + and – poles
are in the correct position. You can also use rechargeable AA batteries.
RADIO FUNCTION
On/off, volume and channel settings
To switch the radio amplication on and off and adjust its volume, turn the volume control knob (8). Use the channel
selector knob (9) to select a channel.
SURROUND
To switch the ambient sound amplication on and off and adjust its volume, turn the volume control knob (10).
BLUETOOTH
Turn or press the Bluetooth®controls (12) to switch the unit on or off, adjust volume and pair with other units. For
instructions, see the user guide for the Bluetooth®function (F). The Bluetooth®link cannot be active while using the
surround sound or radio.
(B) INSTALLING A HEADBAND/HELMET ATTACHMENT
Headband:
(B:1) Slide out the shells. Place them over your ears so that the ear cushions t snugly.
(B:2) Adjust the height of the shells to a snug, comfortable t by pulling the shell up or down while holding the headband
down.
(B:3) The headband should lie across the top of the head.
Helmet attachment:
Insert the helmet attachment in the slot on the helmet and snap it into place (see g. B:4). To switch the unit from
ventilation to working mode, press the headband wires inwards until you hear a click on both sides. Ensure that the
shell and the headband wires in working mode do not press on the edge of the helmet so that noise leakage can
occur.
Note: The shells can be set in two positions: (B:5) working mode and (B:6) ventilation mode.
Important! For the best protection, brush aside hair around the ears so the ear cushions t snugly against the head.
Spectacle frames should be as thin as possible and t close to the head.
IMPORTANT USER INFORMATION
• The hearing protector radio must be put on, adjusted, cleaned and maintained in accordance with the instructions in
this manual.
• Wear the hearing protector radio 100% of the time you spend in noisy environments for full protection.
• Clean the outside of the unit regularly with soap and warm water. Do not immerse in water.
• Do not store the unit in temperatures exceeding +55 °C, for example on a dashboard or windowsill.
• Certain chemical substances may be harmful to this product. Contact the manufacturer for more information.
• When interference increases or the volume becomes too weak, it is time to replace the batteries. Never replace

2
3
batteries with the unit switched on. Ensure that the batteries are positioned correctly before using.
• The hearing protector radio, and particularly the ear cushions, should be inspected regularly to ensure that there are
no cracks or other damage.
Warning! Some Bluetooth®units connected to the WS Alert can produce harmful noise levels.
Note: If these recommendations are not followed, attenuation and other functions can be impaired.
(C) TECHNICAL DATA
(C:1 & C:2) Attenuation values:
The attenuation values for Peltor active-volume hearing-protector radios are tested and approved according to PPE
directive 89/686/EEC and applicable sections of European Standard EN 352-1:2002, EN 352-3:2002, EN 352-4:2001,
EN 352-6 2002, EN 352-8:2008. Certicate issued by FIOH, Topeliuksenkatu 41, FI-00250 Helsinki, Finland ID#0403.
The Peltor Alert meets the requirements of EMC directives 2004/108/EC, EN 55013 and 55020 and is FCC-approved
(FCC Part 15).
Explanation of the attenuation value tables:
1. Weight
2. Frequency in Hz
3. Average attenuation value in dB
4. Standard deviation in dB
The earphone volume for music is measured at no more than 81 dB(A) equivalent noise level according to the PPE
directive.
(C:4) Level relationship: Tested according to ISO 4869-4. Maximum A-weighted sound pressure level outside and
inside the shell.
(C:5) Noise suppression: Frequency response and noise suppression for MT7 speech microphone (headset model
only).
(D) PELTOR WS ALERT MODELS
M2RX7AWS4 With headband
M2RX7P3EWS4 With attachment for Peltor’s and other common helmet brands
(E) SPARE PARTS/ACCESSORIES
Hygiene kit – HY79. Replaceable hygiene kit consisting of two attenuation cushions and two ear cushions. Replace at
least twice a year to ensure constant attenuation, hygiene and comfort.
Clean single-use protectors – HY100A. A single-use protector that is easy to apply to the ear cushions. Packages
of 100 pairs.
Microphone protector – HYM1000. Moisture and wind-tight. Hygienic, effective protector that increases the life span
of the speech microphone.
Packages of 5 metres, approx. 50 replacements.
Wind protection for ambient-noise microphones, M60/2. Effective against wind hiss, protects the microphones and
enhances their life span. One pair per package.
Battery cover – 1173SV
Battery accumulator – ACK03. Rechargeable battery jack
FR03. Charger for the ACK03; also available with a UK contact, FR03-UK
(F) Instructions for using the Bluetooth®function
The Peltor WS Alert Headset lets you communicate wirelessly over a communication radio or phone, even in a noisy
environment, as well as listen to stereo music from a mobile phone, mp3 player or other unit that is compatible with
Bluetooth® and A2DP (advanced audio distribution prole) proles.
The Peltor WS Alert Headset is part of the Peltor Wireless Solutions™ range.
The range also includes other Peltor products that use the worldwide Bluetooth®standard for wireless sound transfer.
The headset has effective noise attenuation to protect your hearing, and an ambient-noise compensated microphone
for reliable communication even at high noise levels.
The Peltor WS Alert Headset is tested and approved according to PPE directive 89/686/EEC and EMC directive
89/336/EEC, which means that it meets the demands for CE marking.
To ensure complete satisfaction with your new Peltor product, please read the entire instruction manual.
You also need the instruction manual for the other unit the headset will communicate with: mobile phone or other
Bluetooth®-compatible equipment.

4
5
Functions
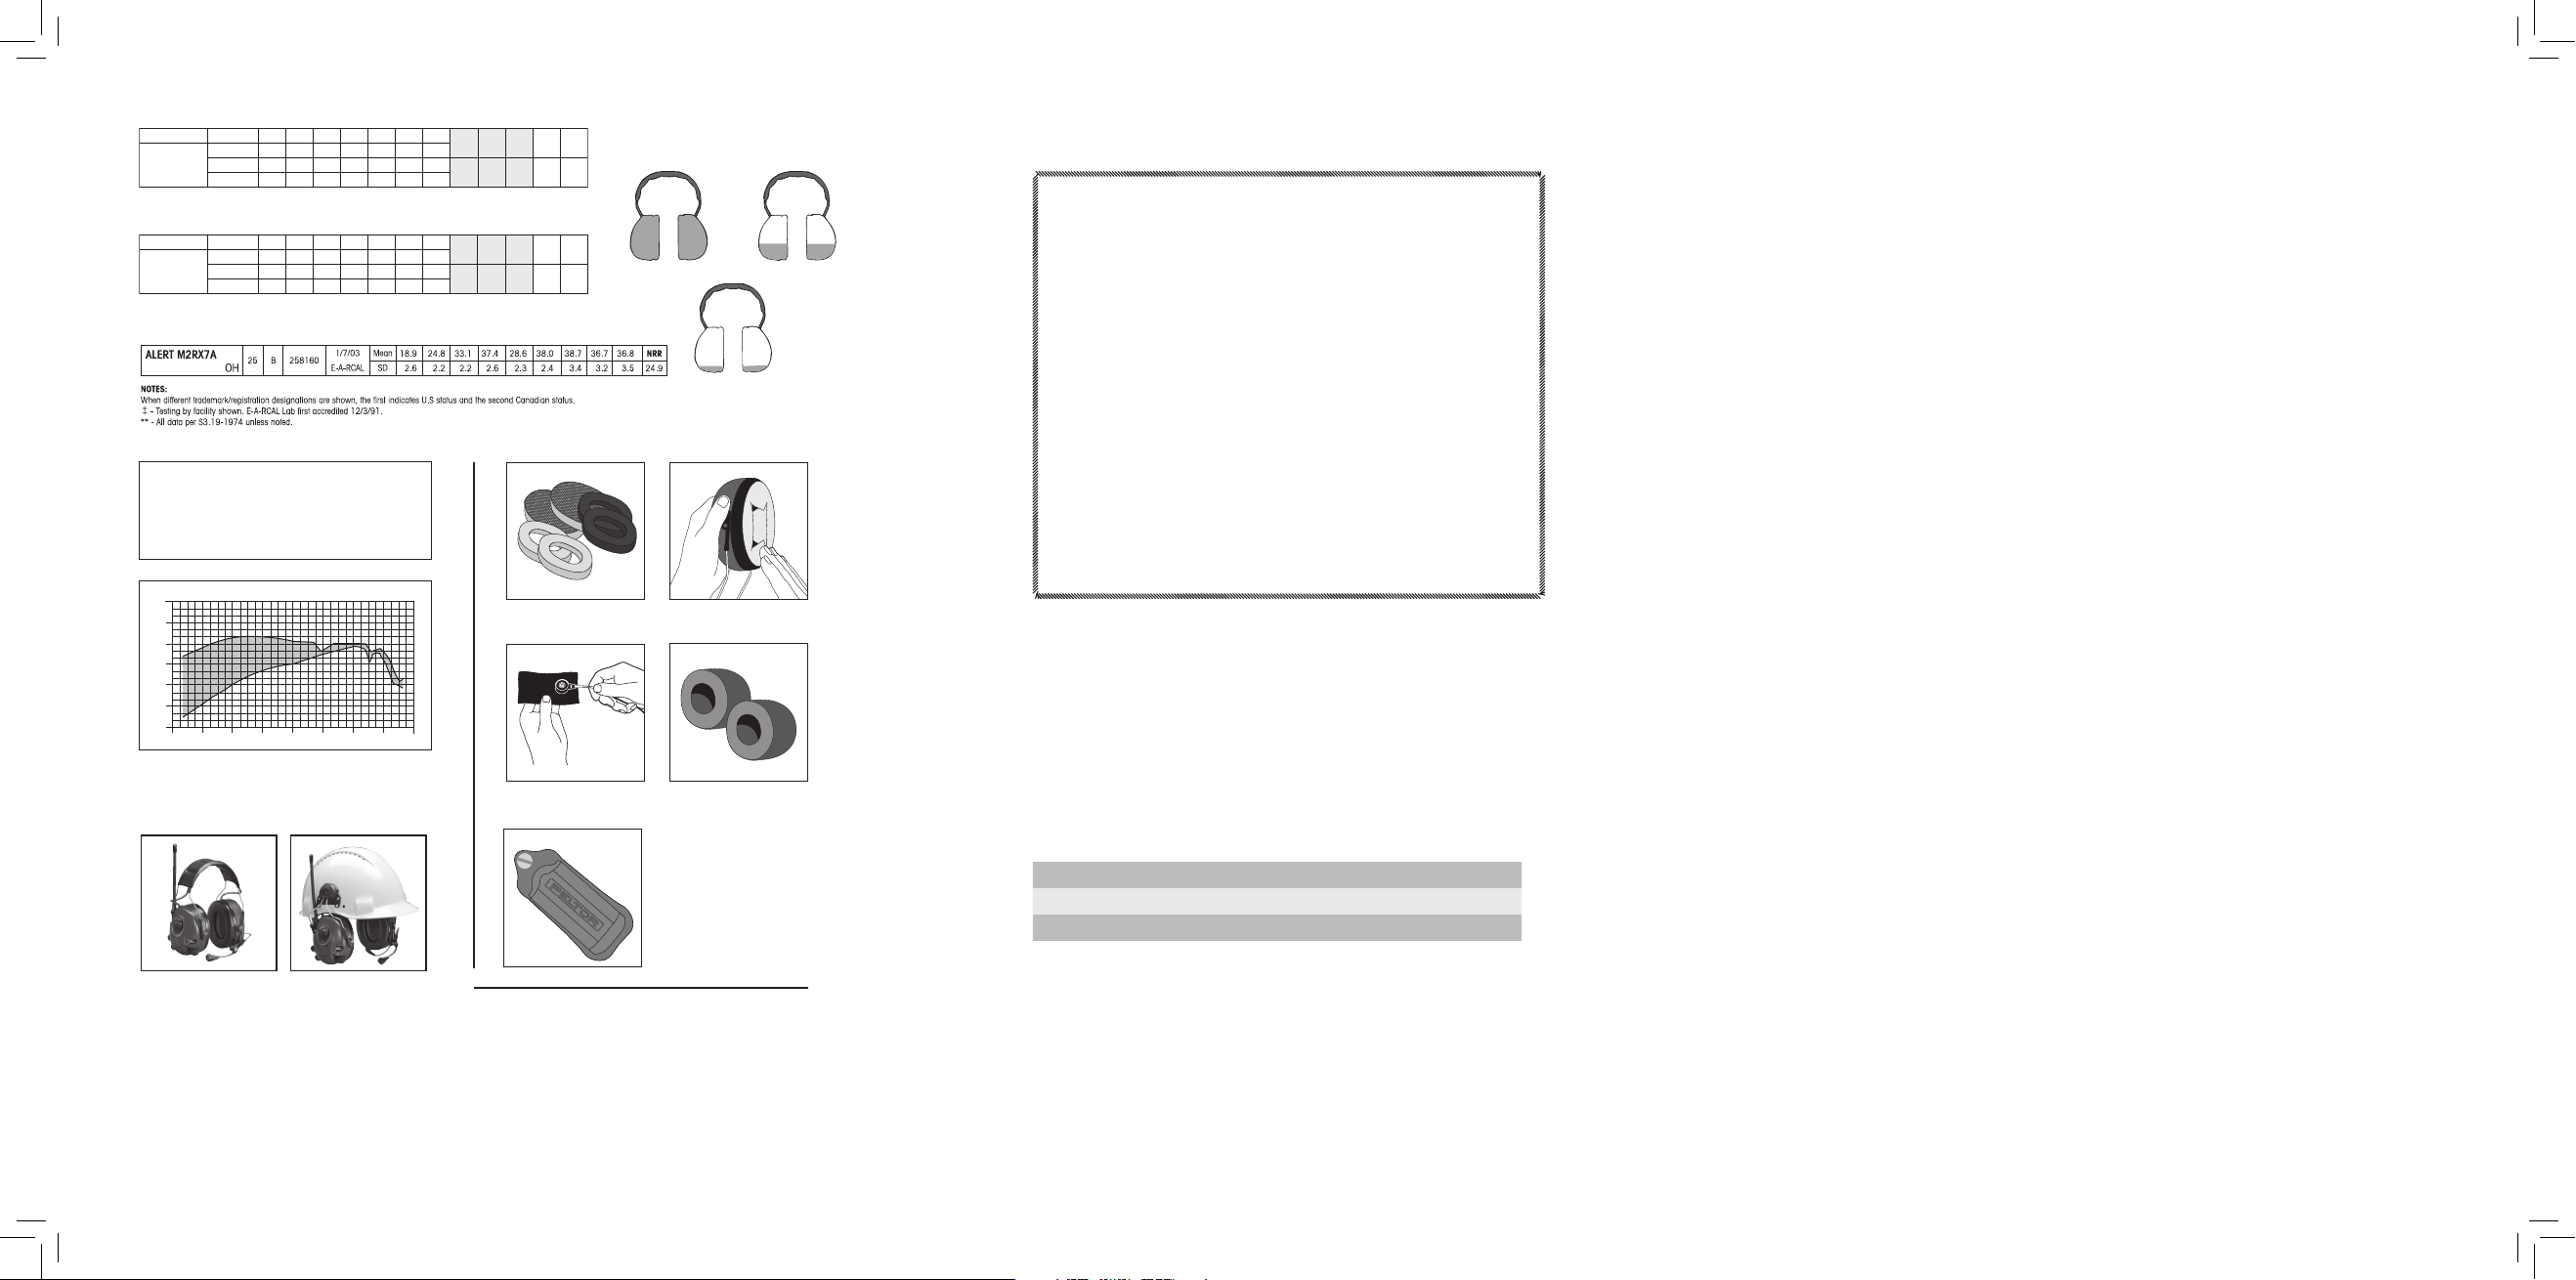
• The headset can communicate wirelessly with another Bluetooth®unit.
• The headset and the other Bluetooth®unit can be 10 metres apart and out of visible range without losing contact.
• The headset supports the following Bluetooth® proles:
Headset/Handsfree for phone calls.
A2DP for stereo music.
• Control buttons for the Bluetooth®functions are positioned on the left shell.
• A “ring” is generated for incoming phone calls.
• If the phone has voice control, you can make calls using the headset microphone.
• Polarity protection prevents damage to circuits if the batteries are inserted incorrectly.
• Warning signal for low battery.
• Tones conrm that the unit has been switched on or off.
• A tone indicates pairing of Bluetooth®units.
1. Pairing with another Bluetooth®unit
To establish a wireless communication link between two Bluetooth®units, you must pair them up. This only needs to
be done once per pair of units.
Start with the headset switched off.
►Press and hold the Bluetooth® button for at least 6 seconds to prepare the headset for the rst pairing with another
Bluetooth®unit. First the LED glows green and four ascending tones are emitted in the headset. Then the LED blinks
ve times briey and then shines steadily green again, and a brief tone is emitted every three seconds.
Now you can pair the headset with the other unit. You must do so within three minutes.
A successful pairing is conrmed with 8 brief blinks of the green LED and 3 brief audio signals in the headset. Now
the units can communicate by Bluetooth®. If the pairing fails, the LED glows red for one second and an audio signal of
descending tones is emitted in the headset.
If the pairing fails, or if the Bluetooth®button is pressed again during synchronisation, the headset automatically
switches off.
The headset can store pairing data for eight Bluetooth®units, which you switch between by deactivating the link to one
unit and activating the link to another.
When pairing with a Bluetooth®phone, you can usually see on the phone’s display what unit or units are linked to it
and in range. A Peltor WS Alert Headset appears as Peltor WS4 in the phone display. Some phone models require a
PIN for the phone to identify the headset; if so, the code is four zeroes (0000). This applies to all Peltor WS Headsets
and cannot be changed by the user.
Disconnecting the Bluetooth®link after pairing
►Press and hold the Bluetooth®button for at least 6 seconds. The LED glows red for one second and you hear four
descending tones in the headset. Then the unit is disconnected.
2. Switching the Bluetooth®function on and off
Switch the Bluetooth®function on by pressing and holding the Bluetooth®button on the left shell for 3 seconds. You
hear four ascending tones and the LED on the headset blinks green every 5 seconds.
The Bluetooth®function switches off automatically 15 hours after Bluetooth®communication ceases.
If you use the WS Alert as a simple headset (with no radio or ambient noise), you need only connect the Bluetooth®
function.
►Press and hold the Bluetooth®button for more than three seconds.
Release the button after hearing the four ascending tones that conrm that the headset is switched on. Shortly
thereafter, you hear two ascending tones indicating that the Bluetooth®link is connected. The LED glows green until
you release the button, then it blinks green every 5 seconds.
(Note: If you press and hold the button for 6 seconds, the headset is ready to be paired with another Bluetooth®unit.
See point 1 above!)
Disconnecting the Bluetooth®link after using the unit as a headset.
►Press and hold the Bluetooth®button for at least 6 seconds.
Ignore the tone you hear after 2 seconds and do not release the button until you hear 4 descending tones, when the
LED blinks red once and the headset is disconnected.
3. Listening to stereo music
Start the music by activating the music player (mobile phone’s music player, MP3 player, computer etc).
►Turn the Bluetooth®button slowly clockwise to increase the volume.
►Turn the Bluetooth®button slowly anti-clockwise to decrease the volume. The volume is adjustable in eight steps.
The last setting is stored when the headset is switched off.
Turn the Bluetooth®button anti-clockwise as far as it will go (lowest volume) to activate the FM radio or surround
sound.
►Turn the Bluetooth®button slowly clockwise to reactivate the stereo music.
4. Answering incoming calls on a connected phone

4
5
The ringer is controlled from the phone. If the phone transmits its own ring signal, you hear this; otherwise you hear the
headset’s signal, four different tones.
►Press the Bluetooth® button briey to connect the phone call to the headset. A tone conrms connection.
► Press and hold the Bluetooth®button for more than two seconds to refuse the call. Note: For maximum ambient-
noise compensation, place the headset microphone no more than a few millimetres from the corner of your mouth!
5. Voice-controlled dialling from the headset via a connected phone
This is a telephone function and is specic to the telephone model.
►Press the Bluetooth® button briey and say your voice dial command.
Some telephones do not send a signal when it is time to say the voice dial command.
6. Redialling with a connected phone
This function is only available with mobile phones that use a Bluetooth® Handsfree Prole.
►Press and hold the Bluetooth®button for more than 2 seconds to redial the last-dialled number via your WS Alert.
7. Transferring calls to/from a phone
This function is only available with mobile phones that use a Bluetooth® Handsfree Prole.
► Press and hold the Bluetooth®button for more than two seconds to transfer the call to the phone. To move the call
back to the WS Alert, press the Bluetooth® button briey.
8. Setting the call volume level
You have four volume levels.
►Turn the Bluetooth®button slowly clockwise to increase the volume.
►Turn the Bluetooth®button slowly anti-clockwise to decrease the volume.
A tone is emitted when the volume reaches the maximum or minimum level.
You can only adjust the volume during a call. The last selected setting is stored when the unit is switched off.
Note: Adjust the volume while working in a noisy environment, as all warning signals are also controlled by the volume
setting!
9. Disconnecting a call via a connected phone
►Press the Bluetooth® button briey to disconnect a call.
This is conrmed with two descending tones.
10. Low-battery warning
When the battery has enough power left for about 5 minutes of usage time, the headset emits three brief tones every
30 seconds to indicate that the battery needs replacing. The LED glows red and the headset switches off automatically
when the battery dies.
11. Range indication
If you have already done the initial pairing, the headset automatically searches for the linked Bluetooth®adapter or
phone the next time you turn it on. Once it has established a Bluetooth®link, you hear two ascending tones. If it cannot
establish a link, you hear two descending tones. (The unit does not automatically try to reconnect.)
If the connected unit is out of range so that the Bluetooth®link is broken, the headset searches for the paired unit for 3
minutes. After that, it conserves energy by only attempting to reconnect every 15 minutes, until the link is re-established
or until the headset automatically switches off (see above). If the link is re-established, you hear two ascending tones; if
no connection is found, the headset remains ready to re-establish the Bluetooth®link with the paired unit.
However, if a connection with a mobile phone is broken while the Bluetooth®link is established, it is not reconnected
automatically. The warning signal (two descending tones) stops automatically when the headset is in range again.
►Press the Bluetooth® button briey to switch off the warning signal.
► Press briey on any of the headset’s buttons to restart the warning signal.
12. Other indicators
GSM connection broken
If the phone loses its connection with the network, you hear a warning in the headset every 10 seconds.
Hands-Free Prole
When communicating with equipment that uses a Bluetooth® Headset Prole, you hear two descending tones when a
call disconnects.

6
7
13. Technical data
Art. no. M2RX7AWS3, M2RX7P3EWS3, M2RX7BWS3, MICROPHONE MT53
Type: Electret differential microphone
Frequency range: 70–10,000 Hz ±6 dB
Sensitivity as a lip microphone: 15 mV / 680 Ω
Impedance: >680 Ω
Noise suppression: 15 dB at 1 kHz
Note: The microphone is polarised. When replacing the microphone, insert the connecter with the wire forward.
FUNCTION BUTTON (Fig. A:12)
The function button can be pressed and turned to adjust settings for Bluetooth®communication.
LED (Fig. A:13)
The LED gives you visual information after you adjust the Bluetooth®communication.
The Peltor WS Alert Headset is designed for Bluetooth® standard 2.0 (headset, handsfree and A2DP proles) and is
certied according to EN 300 328 (radio test), EN 301 489-1/-7-17 (EMC test), EN 60 950 (electric safety, low voltage
directive), FCC part 15.247 (US radio test) and I.C. (Canadian radio test).
Radio specications (Bluetooth®):
Trafc method: Duplex
Frequency: 2.4–2.5 GHz
Output: 1 mW (0 dBm)
Range: approx. 10 m (0 dBm)
Rate of transfer: 1 Mbit/second
Frequency skipping: 1600/second
Peltor WS Alert Headset
Art. no. MT53H7AWS2 WS Alert Headset with headband
MT53H7P3EWS2 WS Alert Headset with helmet attachment
MT53H7BWS2 WS Alert Headset with neckband
(Footnotes)
1 Peltor WS™ and Peltor Wireless Solutions™ are trademarks of Peltor AB.
2 The Bluetooth®wordmark and logotype are the property of Bluetooth®SIG, Inc., and all use of them is subject to
licensing agreements.
3 Bluetooth®standard here means that the product works with units that support a Bluetooth®headset and/or handsfree
and/or A2DP prole.

6
7
CZ
PELTOR WS ALERT – CHRÁNIČE SLUCHU S RÁDIEM A AKTIVNÍ REGULACÍ
HLASITOSTI
Chrániče sluchu s rádiem a aktivní regulací hlasitosti Peltor WS ALERT, model M2RX7*WS4, poskytují pohodlný a
účinný způsob ochrany sluchu před škodlivým hlukem. Funkce aktivní regulace hlasitosti zvyšuje bezpečnost tlumením
hlasitých zvuků a zesilováním slabých.
Kromě toho obsahují chrániče sluchu WS ALERT FM rádiopřijímač a technologii Bluetooth®, která podporuje proly
headsetu, handsfree a A2DP.
Pro zajištění nejlepšího možného využití si před použitím chráničů WS ALERT společnosti Peltor pozorně přečtěte
tyto pokyny.
(A) SOUČÁSTI
1. Zvláště široký náhlavní most (M2RX7A) s měkkým čalouněním zajišťuje dokonalé pohodlí celý pracovní den.
Speciálně zkonstruované uchycení k přilbě (M2RX7P3E) s drážkami pro připevnění hledí a ochrany proti dešti.
2. Jednotlivě odpružené dráty hlavového mostu z nerezové oceli zajišťují rovnoměrné rozložení tlaku okolo uší.
Ocelové dráty si v širokém rozsahu teplot uchovávají svoji pružnost lépe než běžné plastové hlavové mosty.
3. Nízké, dvoubodové přezky a snadné nastavení výšky bez přečnívajících částí.
4. Měkké a široké pěnové či kapalinové čalounění náušníku se zabudovanými přetlakovými kanály pro nízký tlak,
účinné těsnění a individuální pohodlí.
5. Krátká pružná anténa pro stereofonní příjem, s nízkým uchycením a vysokou citlivostí příjmu.
6. Kryt baterie umožňuje snadnou výměnu baterií.
7. Mikrofony umožňují aktivní snímání hlasitosti a zesilování slabých zvuků až na hodnotu specikované maximální
hlasitosti.
8. Ovladač vypínání/zapínání a nastavování hlasitosti.
9. Ovladač vyhledávání kanálů. Automaticky přepíná ze stereofonního do monofonního příjmu a zajišťuje tak nejlepší
kvalitu slabého signálu.
10. Ovladače aktivní regulace hlasitosti. Ovladač vypínání/zapínání a nastavování hlasitosti.
11. Řečový mikrofon umožňuje obousměrnou komunikaci pomocí technologie Bluetooth® nebo připojení ke komunikační
vysílačce atd.
12. Ovladače Bluetooth®.
13. Dioda LED technologie Bluetooth®.
BATERIE
Povolte šroub a otevřete kryt baterií. Vložte dvě přiložené baterie 1,5 V, typu AA. Zkontrolujte, zda jsou póly + a
– správně orientovány. Můžete také použít dobíjecí baterie AA.
FUNKCE RÁDIA
Zapínání/vypínání, nastavení hlasitosti a kanálů.
Chcete-li zapnout/vypnout zesilovač rádia a nastavit hlasitost, otočte ovladačem hlasitosti (8). Kanál navolíte pomocí
volicího ovladače (9).
PROSTOROVÝ ZVUK
Chcete-li zapnout/vypnout zesilovač prostorového zvuku a nastavit hlasitost, otočte ovladačem hlasitosti (10).
BLUETOOTH
Otočením nebo stisknutím ovladačů technologie Bluetooth® (12) lze zapnout nebo vypnout jednotku, nastavit hlasitost
nebo přístroj spárovat s jinými zařízeními. Další pokyny naleznete v uživatelské příručce pro funkci Bluetooth®(F).
Spojení Bluetooth® nemůže být aktivní, pokud používáte funkci prostorového zvuku nebo rádia.
(B) INSTALACE HLAVOVÉHO MOSTU A UCHYCENÍ K PŘILBĚ
Hlavový most:
(B:1) Vysuňte mušle ven. Nasaďte je na uši tak, aby čalounění dobře sedělo.
(B:2) Nastavte výšku mušlí, aby dobře a pohodlně přiléhaly tak, že je posunete nahoru či dolů a hlavový most tlačíte
směrem dolů.
(B:3) Hlavový most by měl vést přes temeno hlavy.
Uchycení přilby:
Vložte uchycení přilby do štěrbiny na přilbě a nasaďte na místo (viz obrázek B:4). Chcete-li jednotku přepnout
z větrací do pracovní polohy, zatlačte dráty hlavového mostu směrem dovnitř, až uslyšíte klapnutí na obou stranách.
Ujistěte se, že mušle ani dráty hlavového mostu v pracovním režimu netlačí na lemování nebo okraj přilby. Mohlo by
dojít k pronikání hluku.
Poznámka: Mušle lze nastavit do dvou poloh: pracovní režim (B:5) a větrací režim (B:6).
Důležité! Nejlepší ochrany docílíte, pokud si dáte vlasy okolo uší na stranu, aby čalounění náušníků dobře přiléhala k
hlavě.
Obruby brýlí by měly být co nejtenčí a těsně přiléhat k hlavě.

8
9
DŮLEŽITÉ INFORMACE PRO UŽIVATELE
• Chránič sluchu s rádiem se musí nasazovat, nastavovat, čistit a udržovat v souladu s pokyny v tomto návodu.
• Pro zajištění plné ochrany je třeba nosit chrániče sluchu s rádiem 100 % času, který strávíte v hlučném prostředí.
• Vnější povrch jednotky pravidelně čistěte mýdlem a teplou vodou. Jednotku nesmíte do vody ponořit.
• Neskladujte jednotku při teplotách vyšších než +55 °C, například na přístrojové desce nebo okenní římse.
• Určité chemické látky mohou být pro tento výrobek škodlivé. Potřebujete-li více informací, obraťte se na výrobce.
• Pokud se zvyšuje rušení nebo slábne hlasitost, je čas vyměnit baterie. Nikdy nevyměňujte baterie, když je přístroj
zapnutý. Před použitím se ujistěte, že baterie jsou vloženy správně.
• Chrániče sluchu s rádiem a obzvláště čalouněné náušníky byste měli pravidelně kontrolovat, aby bylo zajištěno, že
se na nich nevyskytují žádné trhliny nebo jiná poškození.
Varování! Některé přístroje s technologií Bluetooth® připojené k chráničům WS Alert mohou vytvářet škodlivé hladiny
hluku.
Poznámka: Pokud se tato doporučení nedodržují, může dojít ke zhoršení tlumení a dalších funkcí.
(C) TECHNICKÉ ÚDAJE
(C:1 a C:2) Hodnoty útlumu:
Hodnoty útlumu pro chrániče sluchu s rádiem a aktivní regulací hlasitostí Peltor jsou testovány a schváleny podle
směrnice OOP 89/686/EHS a platných částí evropské normy EN 352-1:2002, EN 352-3:2002, EN 352-4:2001, EN
352-6 2002, EN 352-8:2008. Certikát vystaven společností FIOH, Topeliuksenkatu 41, FI-00250 Helsinki, Finsko,
ID#0403. Přístroj Peltor Alert splňuje požadavky směrnic EMK, 2004/108/EC, EN 55013 a 55020 a je schválen podle
standardů FCC (FCC Part 15).
Vysvětlení tabulky hodnot útlumu:
1. Hmotnost
2. Frekvence v Hz
3. Průměrná hodnota útlumu v dB
4. Standardní odchylka v dB
Hlasitost hudby ve sluchátkách je měřena při ekvivalentní hladině hluku maximálně 81 dB(A) podle směrnice OOP.
(C:4) Vztah úrovní: Testováno podle ISO 4869-4. Maximální A-vážená hladina akustického tlaku vně a uvnitř mušle.
(C:5) Potlačení šumu: Frekvenční odezva a potlačení šumu pro řečový mikrofon MT7 (pouze model s headsetem).
(D) MODELY PELTOR WS ALERT
M2RX7AWS4 s hlavovým mostem
M2RX7P3EWS4 s upevněním pro přilby Peltor a dalších běžných značek
(E) NÁHRADNÍ SOUČÁSTI A PŘÍSLUŠENSTVÍ
Hygienická sada – HY79. Výměnná hygienická sada je tvořena dvěma tlumicími náušníky a dvěma krycími náušníky.
Výměnu provádějte alespoň dvakrát za rok pro zajištění stálého tlumení, hygieny a pohodlí.
chrániče na jedno použití – HY100A. Chránič na jedno použití, který se snadno nasazuje na čalounění náušníku.
Balení se 100 páry.
Chránič mikrofonu – HYM1000. Vlhkotěsný a větrotěsný. Hygienický a účinný chránič, který prodlužuje životnost
řečového mikrofonu.
Balení 5 metrů, asi 50 výměnných částí.
Chránič protihlukového mikrofonu před větrem – M60/2. Účinný proti hluku větru; chrání mikrofon a prodlužuje
jeho životnost.
Jeden pár v balení.
Kryt baterie – 1173SV
Akumulátorová baterie – ACK03. Výměnná akumulátorová sada
FR03. Nabíječka pro model ACK03; také k dispozici se zástrčkou pro Velkou Británii, FR03-UK
(F) Pokyny pro použití funkce Bluetooth®
Headset Peltor WS Alert umožňuje komunikovat bezdrátově pomocí krátkovlnné vysílačky nebo telefonu, a to i
v hlučném prostředí; také umožňuje stereofonní poslech hudby z mobilního telefonu, přehrávače mp3 nebo jiného
přístroje, který je kompatibilní s proly Bluetooth® a A2DP (rozšířený prol pro vysílání zvuku).
Headset Peltor WS Alert je součástí modelové řady Peltor Wireless Solutions™.
Modelová řada také zahrnuje další výrobky Peltor, které využívají celosvětový standard Bluetooth® pro bezdrátový

8
9
přenos zvuku. Headset zahrnuje efektivní tlumení hluku, který chrání váš sluch, a mikrofon s korekcí okolního hluku,
který umožňuje spolehlivou komunikaci i při vysoké hlučnosti prostředí.
Headset Peltor WS Alert je testován a schválen podle směrnice OOP 89/686/EHS a směrnice EMK 89/336/EHS; to
znamená, že splňuje požadavky na označení CE.
Chcete-li dosáhnout úplné spokojenosti s novým produktem Peltor, prostudujte si celý návod k obsluze.
Budete také potřebovat návod k obsluze pro další přístroje, se kterými bude headset komunikovat: mobilní telefon
nebo další přístroje kompatibilní se standardem Bluetooth®.
Funkce
• Headset může bezdrátově komunikovat s jiným přístrojem s funkcí Bluetooth®.
• Headset a další přístroj Bluetooth® mohou být od sebe vzdáleny až 10 metrů a mimo viditelný dosah, aniž by došlo
ke ztrátě kontaktu.
• Headset podporuje následující proly Bluetooth®:
Headset/handsfree pro telefonní hovory.
A2DP pro stereofonní hudbu.
• Ovládací tlačítka pro funkce Bluetooth® jsou umístěna na levé mušli.
• V případě příchozího hovoru je generováno vyzvánění.
• Pokud je telefon vybaven hlasovým ovládáním, můžete volat pomocí mikrofonu headsetu.
• Ochrana polarity brání poškození obvodu, pokud jsou baterie vloženy nesprávně.
• Výstražný signál vybití baterie.
• Tón potvrdí, že se jednotka zapnula nebo vypnula.
• Tón označuje spárování jednotek Bluetooth®.
1. Párování s jinou jednotkou Bluetooth®
Chcete-li vytvořit bezdrátové komunikační spojení mezi dvěma jednotkami Bluetooth®, musíte je spárovat. To stačí
provést pouze jednou u každého páru přístrojů.
Začněte s vypnutým headsetem.
► Stiskněte a podržte tlačítko Bluetooth® alespoň 6 sekund, a připravte tak headset na první spárování s dalším
přístrojem Bluetooth®. Nejprve se dioda LED rozsvítí zeleně a v headsetu se ozvou čtyři stoupající tóny. Pak dioda LED
pětkrát krátce blikne a pak se opět trvale rozsvítí zeleně; každé tři sekundy bude vydán krátký tón.
Nyní můžete headset spárovat s dalším přístrojem. Je třeba to udělat během tří minut.
Úspěšné spárování je potvrzeno 8 krátkými probliknutími zelené diody LED a 3 krátkými zvukovými signály v headsetu.
Nyní může jednotka komunikovat pomocí technologie Bluetooth®. Pokud se párování nezdaří, dioda LED se rozsvítí
červeně po dobu jedné sekundy a v headsetu se ozve klesající zvukový signál.
Pokud se párování nezdaří nebo pokud během synchronizace znovu stiskněte tlačítko Bluetooth®, headset se
automaticky vypne.
Headset může uložit data párování pro osm přístrojů Bluetooth®, mezi kterými můžete přepínat vypnutím spojení s
jedním přístrojem a aktivováním spojení s druhým přístrojem.
Při párování s telefonem Bluetooth® můžete obvykle na displeji telefonu vidět, které přístroje se s ním spojují a které
jsou v dosahu. Headset Peltor WS Alert se identikuje na displeji telefonu jako Peltor WS4. Některé modely telefonů
vyžadují kód PIN, kterým se headset telefonu identikuje; pokud tomu tak je, použijte kód tvořený čtyřmi nulami (0000).
To platí pro všechny headsety Peltor WS a uživatel tento parametr nemůže změnit.
Odpojení spojení Bluetooth® po spárování.
► Stiskněte a podržte tlačítko Bluetooth® po dobu 6 sekund. Dioda LED se rozsvítí červeně na jednu sekundu a
v headsetu uslyšíte čtyři klesající tóny. Pak se přístroj odpojí.
2. Zapnutí a vypnutí funkce Bluetooth®
Funkci Bluetooth® zapnete stisknutím a podržením tlačítka Bluetooth® na levé mušli po dobu 3 sekund. V headsetu se
ozvou čtyři stoupající tóny a dioda LED bude blikat zeleně každých 5 sekund.
Funkce Bluetooth® se automaticky vypne po 15 hodinách od posledního přenosu komunikace Bluetooth®.
Pokud použijete headset WS Alert jako jednoduchou náhlavní sadu (bez rádia nebo odrušení okolního hluku), stačí se
připojit pouze funkcí Bluetooth®.
► Stiskněte a podržte tlačítko Bluetooth® po dobu minimálně tří sekund.
Jakmile uslyšíte čtyři stoupající tóny potvrzující zapnutí headsetu, uvolněte tlačítko. Krátce poté uslyšíte dva stoupající
tóny, které indikují, že je vytvořeno spojení Bluetooth®. Kontrolka LED bude svítit zeleně, dokud tlačítko neuvolníte, a
pak bude problikávat každých 5 sekund.
(Poznámka: Pokud stisknete a podržíte tlačítko 6 sekund, headset bude připraven ke spárování s dalším přístrojem
Bluetooth®. Viz bod 1 výše!)
Zrušení spojení Bluetooth® po použití přístroje jako headsetu.
► Stiskněte a podržte tlačítko Bluetooth®po dobu 6 sekund.
Nevšímejte si tónu, který uslyšíte po 2 sekundách, a neuvolňujte tlačítko, dokud neuslyšíte 4 klesající tóny, když jednou
blikne červená dioda LED a headset se odpojí.

10
11
3. Stereofonní poslech hudby
Spusťte přehrávání hudby pomocí přehrávače (přehrávač hudby v mobilním telefonu, přehrávač mp3, počítač atd.).
► Otočte tlačítko Bluetooth® pomalu po směru hodinových ručiček, a zvyšte tak hlasitost.
► Otočte tlačítko Bluetooth® pomalu proti směru hodinových ručiček, a snižte tak hlasitost. Hlasitost lze nastavovat
v osmi krocích. Při vypnutí headsetu se uloží poslední nastavení.
Otočte tlačítko Bluetooth® proti směru hodinových ručiček co nejdále (nejnižší hlasitost) a aktivujte rádio FM nebo
prostorový zvuk.
► Otočte tlačítko Bluetooth® pomalu po směru hodinových ručiček a znovu aktivujte stereofonní přehrávání hudby.
4. Příjem příchozích hovorů na připojeném telefonu
Vyzvánění je řízeno telefonem. Pokud telefon vysílá vlastní vyzvánění, uslyšíte jej; v opačném případě uslyšíte signál
headsetu, tj. čtyři odlišné tóny.
► Stiskněte krátce tlačítko Bluetooth®, a spojte tak telefonní hovor do headsetu. Připojení je potvrzeno tónem.
► Stiskněte a podržte tlačítko Bluetooth® po dobu minimálně dvou sekund, a hovor tak odmítněte. Poznámka: Chcete-
li dosáhnout maximální eliminace okolního hluku, umístěte mikrofon headsetu maximálně několik milimetrů od koutku
úst!
5. Hlasové vytáčení prostřednictvím headsetu a připojeného telefonu
Jde o funkci telefonu, která je specická pro každý model telefonu.
► Stiskněte krátce tlačítko Bluetooth® a vyslovte hlasový příkaz.
Některé telefony nevysílají v okamžiku pro vyslovení hlasového příkazu žádný signál.
6. Opakované vytáčení s připojeným telefonem
Tato funkce je k dispozici pouze u telefonů, které používají prol Bluetooth® Handsfree.
► Stiskněte a podržte tlačítko Bluetooth® minimálně po dobu 2 sekund a vytočte poslední vytáčené číslo prostřednictvím
headsetu WS Alert.
7. Přenos volání z telefonu a do něj
Tato funkce je k dispozici pouze u telefonů, které používají prol Bluetooth® Handsfree.
► Stiskněte a podržte tlačítko Bluetooth® po dobu minimálně dvou sekund, a hovor tak přeneste do telefonu. Chcete-li
hovor později znovu přenést do headsetu WS Alert, stiskněte krátce tlačítko Bluetooth®.
8. Nastavení hlasitosti volání
K dispozici jsou čtyři úrovně hlasitosti.
► Otočte tlačítko Bluetooth® pomalu po směru hodinových ručiček, a zvyšte tak hlasitost.
► Otočte tlačítko Bluetooth® pomalu proti směru hodinových ručiček, a snižte tak hlasitost.
Jakmile hlasitost dosáhne maximální nebo minimálně úrovně, uslyšíte tón.
Hlasitost můžete upravovat pouze během hovoru. Při vypnutí jednotky se uloží poslední vybrané nastavení.
Poznámka: Hlasitost nastavujte během práce v hlučném prostředí, protože všechny výstražné signály se také řídí
podle nastavení hlasitosti.
9. Odpojení hovoru prostřednictvím připojeného telefonu
► Stiskněte krátce tlačítko Bluetooth®, a hovor tak odpojte.
Je to potvrzeno dvěma klesajícími tóny.
10. Výstraha před vybitou baterií
Když v baterii zbývá energie asi na 5 minut použití, vydá headset tři krátké tóny každých 30 sekund a indikuje tak, že
baterii je nutné vyměnit. Dioda LED svítí červeně a headset se automaticky vypne, jakmile je baterie zcela vybitá.
11. Indikace dosahu
Pokud jste již provedli počáteční párování, headset při následujícím zapnutí automaticky vyhledá připojený
adaptér Bluetooth® nebo telefon. Jakmile bude spojení Bluetooth® vytvořeno, uslyšíte dva stoupající tóny. Pokud
spojení Bluetooth® nelze vytvořit, uslyšíte dva klesající tóny. (Jednotka se nebude pokoušet o opakované připojení
automaticky.)
Pokud se připojená jednotka dostane mimo dosah, takže vytvořené spojení Bluetooth® je přerušeno, headset bude
hledat spárovaný přístroj po dobu 3 minut. Poté šetří energii a pokouší se o vytvoření spojení pouze každých 15 minut,
dokud není spojení znovu vytvořeno nebo dokud se headset automaticky nevypne (viz výše). Pokud bude spojení
znovu vytvořeno, uslyšíte dva klesající tóny; pokud nebude nalezeno žádné spojení, headset zůstane připraven k
vytvoření spojení Bluetooth®se spárovanou jednotkou.
Pokud však bude spojení s mobilním telefonem přerušeno během spojení Bluetooth®, nevytvoří se spojení znovu
automaticky. Výstražný signál (dva klesající tóny) se automaticky vypne, když bude headset znovu v dosahu.
► Stiskněte krátce tlačítko Bluetooth®, a vypněte tak výstražný signál.
► Stiskněte krátce některé tlačítko headsetu, a znovu tak zapněte výstražný signál.

10
11
12. Další kontrolky
Přerušení spojení GSM
Pokud telefon ztratí spojení s mobilní sítí, uslyšíte v headsetu výstražný tón každých 10 sekund.
Prol handsfree
Při komunikaci se zařízením využívajícím prol Bluetooth® Headset uslyšíte dva klesající tóny v okamžiku, kdy je hovor
přerušen.
13. Technické údaje
Katalogové číslo M2RX7AWS3, M2RX7P3EWS3, M2RX7BWS3, MIKROFON MT53
Typ: Elektretový diferenční mikrofon
Frekvenční rozsah: 70 – 10 000 Hz ±6 dB
Citlivost retního mikrofonu: 15 mV / 680 Ω
Impedance: >680 Ω
Potlačení šumu: 15 dB při 1 kHz
Poznámka: Mikrofon je polarizovaný. Při výměně mikrofonu vložte konektor vodičem směrem dopředu.
TLAČÍTKO FUNKCE (Obr. A:12)
Tlačítko funkce lze stisknout a otočit, a nastavit tak komunikaci Bluetooth®.
Dioda LED (Obr. A:13)
Dioda LED poskytuje vizuální indikaci po nastavení komunikace Bluetooth®.
Headset Peltor WS Alert je navržen podle standardu Bluetooth® 2.0 (proly headset, handsfree a A2DP) a je certikován
podle normy EN 300 328 (test rádia), EN 301 489-1/-7-17 (test elektromagnetické slučitelnosti), EN 60 950 (elektrická
bezpečnost, směrnice o nízkém napětí), FCC část 15.247 (test rádia, USA) a I.C. (test rádia, Kanada).
Technické údaje rádia (Bluetooth®):
Způsob přenosu: duplexní
Frekvence: 2,4–2,5 kHz
Výkon: 1 mW (0 dBm)
Dosah: asi 10 m (0 dBm)
Přenosová rychlost: 1 Mb/s
Přeskakování frekvenčního rozsahu: 1600 s-1
Headset Peltor WS Alert
Katalogové číslo MT53H7AWS2, Headset WS Alert s hlavovým mostem
MT53H7P3EWS2, Headset WS Alert s uchycením pro přilbu
MT53H7BWS2, Headset WS Alert s límcovým páskem
(Poznámky pod čarou)
1 Peltor WS™ a Peltor Wireless Solutions™ jsou ochranné známky společnosti Peltor AB.
2 Slovní značka a logo Bluetooth® jsou vlastnictvím společnosti Bluetooth® SIG, Inc., a veškeré jejich použití podléhá
licenčním smlouvám.
3 Standard Bluetooth® znamená, že produkt pracuje s přístroji, které podporují prol Bluetooth®headsetu, handsfree
nebo A2DP.

12
13
DA
PELTOR WS ALERT, NIVEAUAFHÆNGIG HØREVÆRNSRADIO
Peltors WS ALERT niveauafhængige høreværnsradio, M2RX7*WS4, er et bekvemt og effektivt værn mod skadelig
støj. Sikkerheden øges, ved at den niveauafhængige funktion dæmper høje lydniveauer og forstærker svage.
Ud over en niveauafhængig funktion har WS ALERT endvidere FM-radiomodtager og Bluetooth®, der understøtter
Headset, Handsfree og A2DP-prolerne.
Læs denne brugsanvisning omhyggeligt igennem for at få størst muligt udbytte af Peltors WS ALERT.
(A) HVAD ER HVAD?
1. Ekstra bred issebøjle (M2RX7A) med blød polstring for bedste komfort hele arbejdsdagen. Tilpassede hjelmfæster
(M2RX7P3E) med fastgørelse til visir og regnskærm.
2. Individuelt fjedrende bøjletråde i rustfrit fjederstål, der giver en jævn trykfordeling omkring ørerne. Beholder
spændstigheden bedre end almindelige plastikbøjler inden for et bredt temperaturområde.
3. Lavt topunktsfæste og nem højdeindstilling uden fremstående dele.
4. De bløde og brede skum-/væskefyldte tætningsringe med indbyggede trykudligningskanaler giver lavt tryk, effektiv
tætning og individuel komfort.
5. Kort eksibel antenne til stereomodtagelse med lavt fastgørelsespunkt og høj modtagefølsomhed.
6. Batterilåg for nem udskiftning af batterier.
7. Mikrofoner til niveauafhængig funktion. Opfanger og forstærker svage lyde op til det angivne maksimale niveau.
8. Justeringsknap til radio, On/Off og volumen.
9. Justeringsknap til kanalsøgning. Automatisk omskiftning fra stereo til mono ved svagt signal for at give den bedste
modtagelse.
10. Justeringsknap til niveauafhængig funktion. On/Off og volumen.
11. Talemikrofon, der muliggør tovejskommunikation med Bluetooth-tilslutning eller tilkobling af fx com-radio.
12. Justeringsknap til Blutooth-funktion.
13 Lysdiode til Bluetooth-funktion.
BATTERIER
Skru batterilåget løst, og bøj det tilbage. Sæt de to vedlagte 1,5 volts AA batterier i. Kontroller, at batteriernes + og
– poler er vendt rigtigt. Der kan også anvendes genopladelige batterier af typen AA.
RADIOFUNKTION
Tænd og sluk, volumenindstilling samt kanalvalg
Radioen tændes og slukkes, og lydstyrken justeres ved at dreje på volumenkontrollen (8). For at stille ind på den
ønskede kanal benyttes kanalvælgerknappen (9).
MEDHØR
Medhørsfunktionen tændes og slukkes, og lydstyrken justeres ved at dreje på volumenkontrollen (10).
BLUETOOTH
Bluetooth tændes og slukkes ved at dreje på justeringsknappen til Bluetooth (12). Denne knap bruges endvidere til
regulering af lydstyrken samt til synkronisering (pairing). Se brugsanvisningen vedrørende instruktioner til Bluetooth-
funktionen (F). Bluetooth-forbindelsen kan ikke være aktiv samtidig med, at medhør og/eller radiofunktionen er
aktive.
(B) MONTERING/INDSTILLING AF BØJLE/HJELMFÆSTE
Issebøjle:
(B:1) Træk ørekopperne udad. Anbring ørekopperne over ørerne, således at tætningsringene slutter helt tæt.
(B:2) Juster ørekopperne, så de sidder tæt og behageligt. Dette gøres ved at trække ørekopperne op eller ned, samtidig
med at issebøjlen holdes nede.
(B:3) Bøjlen skal sidde lige oven på hovedet.
Hjelmfæste:
Monter hjelmfæstet i hjelmens slidsefæste til det ”klikker” på plads (se g. B:4). Når der skal skiftes fra ventilerings- til
arbejdsstilling skal bøjletrådene trykkes indad, til du hører et ”klik” i begge sider. Du skal sikre dig, at ørekoppen og
bøjletråden i arbejdsstillingen ikke ligger mod hjelmforet eller beskyttelseshjelmens kant, så der kan opstå lækager.
OBS! Ørekopperne kan indstilles i to stillinger: (B:5) arbejdsstilling, (B:6) ventileringsstilling.
Vigtigt! For at opnå den bedste beskyttelseseffekt bør håret om nødvendigt stryges om bag ørerne, så tætningsringene
slutter tæt til hovedet!
Brillestænger skal være så tynde som muligt og sidde tæt til hovedet.
VIGTIG BRUGERINFORMATION
• Høreværnet skal anbringes, justeres, rengøres og vedligeholdes i henhold til instruktionerne i denne
brugsanvisning.
• Ved ophold i støjfyldte miljøer skal høreværnet bruges hele tiden for at opnå fuld beskyttelseseffekt.

12
13
• Rengør høreværnsradioen regelmæssigt udvendig med sæbe og lunkent vand. Må ikke dyppes ned i vandet!
• Opbevar ikke høreværnsradioen i temperaturer over +55 °C, f.eks. i en bilrude eller et vindue.
• Dette produkt kan påvirkes negativt af visse kemikalier. Yderligere information kan indhentes hos producenten.
• Det er på tide at udskifte batterierne, når forstyrrelserne øges og lyden bliver for svag. Skift aldrig batterier med
elektronikken slået til. Tjek, at batterierne er sat rigtigt i, inden høreværnet tages i brug.
• Høreværnsradion og i særdeleshed tætningsringerne bør undersøges med jævne mellemrum for at kontrollere, at
der ikke er opstået revner eller andre skader.
Advarsel: Visse Bluetooth-enheder, der kobles til WS Alert, kan komme op på skadelige lydniveauer.
OBS! Hvis disse anbefalinger ikke følges, kan dæmpning og funktion påvirkes negativt.
(C) TEKNISKE DATA
(C:1 og C:2) Dæmpningsværdier:
Dæmpningsværdier for Peltors niveauafhængige høreværnsradio er testet og godkendt i henhold til PPE-direktivet
89/686/EØF samt relevante dele af Europastandard EN 352-1:2002, EN 352-3:2002, EN 352-4:2001, EN 352-6 2002,
EN 352-8:2008. Certikat er udfærdiget af FIOH, Topeliuksenkatu 41, FI-00250 Helsinki, Finland, ID nr. 0403. Peltor
Alert opfylder kravene i henhold til EMK-direktiverne, 2002/108/EC, EN55013 og 55020 og er FCC-godkendt (nummer
FCC Part 15).
Forklaring til dæmpningsværditabellerne:
1. Vægt
2. Frekvens i Hz
3. Middelværdi dæmpning i dB
4. Standardafvigelse i dB
Høretelefonniveau for musik er opmålt til maks. 81 dB(A) ækvivalent lydniveau i henhold til kravene i PPE-direktivet.
(C:4) Niveaurelation: Testet i henhold til ISO 4869-4. Maksimalt A-vægtet lydtryksniveau uden for ørekoppen.
(C:5) Støjdæmpning: Frekvensgang og støjdæmpning for MT7 talemikrofon (kun i headsetudgave).
(D) MODELPROGRAM PELTOR WS ALERT
M2RX7AWS4 Med issebøjle
M2RX7P3EWS4 Med hjelmfæste til Peltors og andre almindeligt forekommende beskyttelseshjelme
(E) RESERVEDELE/TILBEHØR
Hygiejnesæt – HY79. Udskifteligt hygiejnesæt, der består af to dæmpningspuder og to tætningsringe. Udskift mindst
to gange om året for at sikre et konstant dæmpnings-, hygiejne- og komfortniveau.
Clean, engangsværn – HY100A Engangsværn, der er nemt at anbringe på tætningsringene. Pakning med 100 par
engangsværn.
Mikrofonbeskytter – HYM1000. Fugt- og vindtæt. Beskytter hygiejnisk og effektivt talemikrofonen og forlænger
levetiden. En pakning med 5 meter til ca. 50 udskiftninger.
Vindværn til medhørsmikrofoner – M60/2. Effektivt mod vindsus, øger levetiden og beskytter mikrofonerne.
Et par vindværn pr. pakke.
Batterilåg – 1173SV
Batterijack – ACK03. Genopladeligt batterijack
FR03. Lader til ACK03. Fås desuden med UK-stik – FR03-UK
(F) Brugsanvisning for Bluetooth-funktionen
Med Peltors WS Alert headset kan du kommunikere trådløst via kommunikationsradio og telefon selv i et støjfyldt miljø
samt høre stereomusik fra fx en mobiltelefon, mp3-afspiller eller en anden enhed, der er kompatibel med Bluetooth og
A2DP (Advanced Audio Distribution Prole)-prolen.
Peltors WS Alert headset indgår i sortimentet af Peltors Wireless Solutions™.
Sortimentet omfatter endvidere de øvrige Peltor-produkter, der benytter verdensstandarden Bluetooth®til trådløs
overførsel af lyd. Headsettet er effektivt støjdæmpende for at beskytte hørelsen og har en støjkompenseret mikrofon,
der muliggør pålidelig kommunikation, også hvor støjniveauet er højt.
Peltor WS Alert Headset er testet og godkendt i overensstemmelse med PPE direktivet 89/686/EØF og EMC-direktivet
89/336/EØF, hvilket indebærer, at kravene for CE-mærkning er overholdt.
For at du skal blive rigtig tilfreds med dit nye Peltor-produkt, er det vigtigt, at du læser hele brugsanvisningen
igennem.

14
15
Du skal også bruge brugsanvisningen til den anden enhed, som headsettet skal kommunikere med: mobiltelefon eller
et andet Bluetooth-kompatibelt udstyr.®.
Funktioner
• Headsettet kan kommunikere trådløst med en anden Bluetooth-enhed.
• Kommunikation kan foregå op til ca. 10 meter fra den anden Bluetooth-enhed, også hvis den er uden for
synsvidde.
• Headsettet understøtter følgende Bluetooth-proler:
Headset/Handsfree til telefonsamtale
A2DP til at høre stereomusik
• Kontrolknap til Bluetooth-funktionerne er placeret på venstre ørekop.
• ”Ringesignal” genereres ved indgående telefonsamtaler.
• Hvis telefonen har stemmestyringsfunktion kan opringning ske via headsettets mikrofon.
• Polaritetsbeskyttelse til beskyttelse af kredsløbet, hvis batterierne sættes forkert i.
• Advarselssignal udsendes ved lav batterispænding.
• Tonesignaler udsendes ved til- og frakobling af headsettet.
• Tonesignal udsendes ved synkronisering af Bluetooth-enheder.
1. Synkronisering med en anden Bluetooth-enhed
For at kunne oprette en trådløs kommunikationsforbindelse mellem to Bluetooth-enheder skal der udføres synkronisering
(pairing). Dette skal dog kun udføres én gang for hver kombination.
Start med headsettet helt slukket.
► Hold Bluetooth-knappen inde i mindst 6 sekunder for at klargøre headsettet til den første synkronisering med en
anden Bluetooth-enhed. Lysdioden lyser først grønt, og der høres et lydsignal med 4 toner med stigende frekvens i
headsettet. Derefter følger 5 korte blink efterfulgt af et konstant grønt lys, og en kort tone gentages hvert 3. sekund.
Gennemfør synkroniseringen fra den anden enhed. Synkronisering skal udføres inden for maks. 3 minutter.
En vellykket synkronisering bekræftes med 8 korte blink med grønt lys fra lysdioden, og der høres 3 korte lydsignaler
i headsettet. Herefter er det muligt at kommunikere via Bluetooth-forbindelsen. Hvis synkroniseringen mislykkes, lyser
lysdioden rødt i 1 sekund, og der høres et lydsignal med faldende frekvens i headsettet.
Hvis synkroniseringen ikke lykkes, eller hvis der trykkes på Bluetooth-knappen under synkroniseringen, slukker
headsettet automatisk.
Der kan lagres synkroniseringsdata for 8 Bluetooth-enheder i headsettet, og det er muligt at skifte mellem dem ved at
frakoble én enhed og aktivere tilslutningen fra en anden enhed.
Ved synkronisering med en telefon med Bluetooth viser displayet sædvanligvis, hvilken eller hvilke enheder der er
forbundet til den og inden for rækkevidde. Et Peltor WS Alert headset bekræftes med teksten ”Peltor WS4” i telefonens
display. Visse telefonmodeller kræver en pinkode, for at telefonen skal kunne identicere headsettet. Hvis en sådan
kræves, er pinkoden re nuller (0000). Denne gælder for samtlige Peltor WS Headset, og koden kan ikke ændres af
brugeren.
Frakobling af Bluetooth-forbindelsen efter synkroniseringen
► Hold Bluetooth-knappen inde i mindst 6 sekunder. Lysdioden lyser rødt i 1 sekund, og der høres et lydsignal på 4
toner med faldende frekvens i headsettet, som derefter er frakoblet.
2. Til- og frakobling af Bluetooth-funktionen
Bluetooth-funktionen tilkobles ved at holde Bluetooth-knappen på den venstre ørekop inde i 3 sekunder. Tilkoblingen
bekræftes af 4 toner med stigende frekvens, og lysdioden på headsettet blinker grønt hvert 5. sekund.
Bluetooth-funktionen slukker automatisk 15 timer efter, at Bluetooth-kommunikationen er afsluttet.
Hvis WS Alert alene skal anvendes som headset (uden radio eller medhør) er det kun nødvendigt at koble Bluetooth-
funktionen til.
► Hold Bluetooth-knappen inde i mere end 3 sekunder.
Slip knappen efter tonesignalet med 4 toner med stigende frekvens, som bekræfter tilkobling af headsettet. Straks
derefter, når Bluetooth-forbindelsen er opkoblet, høres 2 toner med stigende frekvens, der bekræfter, at Bluetooth-
forbindelsen er opkoblet. Lysdioden lyser grønt, indtil knappen slippes igen, og blinker derefter grønt hvert 5. sekund.
(Bemærk! Hvis knappen holdes inde i 6 sekunder, er headsettet klar til synkronisering med en anden Bluetooth-enhed.
Se punkt 1 ovenfor!)
Frakobling af Bluetooth-forbindelsen efter anvendelse som headset.
► Hold Bluetooth-knappen inde i mindst 6 sekunder.
Ignorer den tone, der høres efter 2 sekunder, slip knappen efter tonesignalet med 4 toner med faldende frekvens, og
lysdioden blinker rødt 1 gang. Headsettet er nu frakoblet.
3. Aytning af stereomusik
Der tændes for musikken ved at aktivere musikafspilleren på den enhed, der skal afspille musikken (mobiltelefon,
mp3-afspiller, computer osv.).
► Drej Bluetooth-knappen forsigtigt med uret for at skrue op for lyden.
► Drej Bluetooth-knappen forsigtigt mod uret for at skrue ned for lyden. Lydniveauet kan justeres i 8 trin.

14
15
Lydniveaujusteringen gemmes, når headsettet frakobles.
►Drej Bluetooth-knappen forsigtigt mod uret til slutstilling (laveste lydniveau) for at aktivere FM-radio eller medhør.
► Drej Bluetooth-knappen forsigtigt med uret for at aktivere stereomusikken igen.
4. Svar på indgående samtaler via tilsluttet telefon
Ringesignalet styres fra telefonen. Hvis telefonen udsender sit eget specielle ringesignal, høres dette signal. Ellers
høres headsettets signal, der består af 4 toner med skiftende frekvens.
► Tryk kortvarigt på Bluetooth-knappen for at tilslutte telefonsamtalen til headsettet. En tone bekræfter, at
telefonsamtalen er tilkoblet.
► Hold Bluetooth-knappen inde i mere end 2 sekunder for at nægte modtagelse. OBS! For at opnå maksimal
støjkompensation skal headsetetts mikrofon være placeret bare et par millimeter fra mundvigen!
5. Talestyret opringning fra headset via tilsluttet telefon
Denne funktion ligger i telefonen og er derfor specik for den enkelte telefon.
► Tryk kortvarigt på Bluetooth-knappen, og sig derefter ”stemmekoden”.
En del telefoner udsender ikke et kvitteringssignal, når stemmekoden skal indtales.
6. Genopkald til samtale via tilsluttet telefon
Denne funktion er kun mulig med mobiltelefoner, der benytter ”Bluetooth handsfree prole”.
► Hold Bluetooth-knappen inde i mere end 2 sekunder ved genopkald til den telefonopringning, der sidst er foretaget
fra WS Alert.
7. Viderestilling af samtale til/fra telefon
Denne funktion er kun mulig med mobiltelefoner, der benytter ”Bluetooth handsfree prole”.
► Hold Bluetooth-knappen inde i mere end 2 sekunder. Samtalen viderestilles til telefonen. For at stille samtalen
tilbage til WS Alert trykkes kortvarigt på Bluetooth-knappen.
8. Indstilling af lydniveauet ved samtale
Lyden kan justeres i 4 trin.
► Drej Bluetooth-knappen forsigtigt med uret for at skrue op for lyden.
► Drej Bluetooth-knappen forsigtigt mod uret for at skrue ned for lyden.
En tone høres, når lyden har nået den maksimale eller minimale indstilling.
Lydniveauet kan kun justeres under en samtale. Den sidst valgte indstilling gemmes, når samtalen afbrydes.
OBS! Tilpas volumenet, når du arbejder i støjfyldte miljøer, da alle advarselssignaler følger volumenindstillingen!
9. Afslutning af samtale via tilsluttet telefon
► Tryk kortvarigt på Bluetooth-knappen for at afslutte en telefonsamtale.
Afslutningen bekræftes med et tonesignal med 2 toner med faldende frekvens.
10. Advarsel ved lavt energiniveau for batteriet
Kort tid inden den maksimale anvendelsestid udløber, falder spændingsniveauet i batterierne, og når der er omkring 5
minutter tilbage af anvendelsestiden, advarer headsettet med 3 korte toner hvert 30. sekund om, at batterierne snart
bør udskiftes. Lysdioden lyser rødt, og headsettet slukker automatisk, når batterierne er brugt op.
11. Indikator for rækkevidde
Hvis der allerede er udført en første synkronisering, søger headsettet ved næste tilslutning automatisk efter den
tilknyttede Bluetooth-adapter eller -telefon. Når Bluetooth-forbindelsen er blevet oprettet, indikeres dette med 2 toner
med stigende frekvens. Hvis forbindelsen ikke kan oprettes, høres 2 toner med faldende frekvens. (Der sker ingen
automatiske gentilkoblingsforsøg).
Hvis rækkevidden har været overskredet, så den opkoblede Bluetooth-forbindelse har været afbrudt, søger headsettet
efter den synkroniserede enhed i 3 minutter. For at spare energi udføres der derefter kun gentilkoblingsforsøg hvert
15. minut, indtil forbindelsen igen er oprettet, eller indtil headsettet automatisk slukker (se ovenfor). Hvis forbindelsen
genoprettes, indikeres gentilkoblingen med 2 toner med stigende frekvens; men hvis headsettet ikke kan nde en
forbindelse, er det klar til at oprette Bluetooth-forbindelsen på et senere tidspunkt med den synkroniserede adapter
eller mobiltelefon.
Hvis forbindelsen til en mobiltelefon afbrydes, mens Bluetooth-forbindelsen er etableret, sker der dog ingen automatisk
gentilkobling. Advarselssignalet (2 toner med faldende frekvens) forsvinder automatisk, når headsettet atter er inden
for rækkevidden.
► Tryk kortvarigt på Bluetooth-knappen for at slukke for advarselssignalet.
► Tryk kortvarigt på en af headsettets knapper for eventuelt at tilkoble advarselssignalet igen.
12. Andre indikeringer
GSM-forbindelsen er afbrudt.
Hvis telefonen taber forbindelsen med telenettet, høres et advarselssignal i headsettet hvert 10. sekund.

16
17
Hands-Free Prole.
Ved kommunikation med udstyr, der arbejder med Bluetooth Headset Prole, giver 2 toner med faldende frekvens
besked om, at samtalen er frakoblet.
13. Tekniske data
Art.nr. M2RX7AWS3, M2RX7P3EWS3, M2RX7BWS3, MIKROFON MT53
Type: Elektret differensmikrofon
Frekvensområde: 70-10.000 Hz ±6 dB
Følsomhed som læbemikrofon: 15 mV / 680 Ω
Impedans: >680 Ω
Støjdæmpning: 15 dB ved 1 kHz
OBS! Mikrofonen er polariseret: Ved udskiftning af mikrofon skal kontaktorganet tilsluttes med ledningen fremad.
FUNKTIONSKNAP (Fig. A:12)
Funktionsknappen kan både trykkes ind og drejes ved indstilling af kommunikationen (Bluetooth®).
LYSDIODE (Fig. A:13)
Lysdioden giver visuel information efter justering af Bluetooth-kommunikationen (Bluetooth®).
Peltor WS Alert Headset er tilpasset til Bluetooth-standard 2.0 (headset, handsfree og A2DP-prolerne) og er
certiceret i overensstemmelse med: EN 300 328 (radiotest), EN 301 489-1/-7-17 (EMC-test), EN 60 950 (elsikkerhed,
lavspændingsdirektivet), FCC part 15.247 (US radiotest) og I.C. (canadisk radiotest).
Radioteknisk specikation (Bluetooth®):
Trakmåde: Duplex
Frekvens: 2,4-2,5 GHz
Udgangseffekt: 1 mW (0 dBm)
Rækkevidde: Ca. 10 m (0 dBm)
Overførselshastighed: 1 Mbit/sekund
Frekvensspring: 1.600 gange/sekund
Peltor WS Alert headset
Art.nr.: MT53H7AWS2 WS Alert headset med issebøjle
MT53H7P3EWS2 WS Alert headset med hjelmfæste
MT53H7BWS2 WS Alert headset med nakkebøjle
(Fodnoter)
Peltor WS™og Peltor Wireless Solutions™er varemærker, der anvendes af Peltor AB
Bluetooth®wordmark og logotype ejes af Bluetooth SIG, Inc., og al brug af disse sker med licens.
Bluetooth-standard betyder her, at produkterne fungerer med enheder, der understøtter Bluetooth headset- og/eller
handsfree og/eller A2DP-prol.

16
17
DE
PELTOR WS ALERT, NIVEAUABHÄNGIGES GEHÖRSCHUTZRADIO
Das niveauabhängige Gehörschutzradio Peltor WS ALERT, M2RX7*WS4, ist ein bequemer, wirkungsvoller Schutz vor
schädlichem Lärm. Die niveauabhängige Funktion dämpft hohe Schallpegel und verstärkt schwache Geräusche und
sorgt so für mehr Sicherheit. Darüber hinaus ist das WS ALERT auch mit FM-Radio und einer Bluetooth®-Funktion
ausgestattet, die Headset, Handsfree und A2DP-Prole unterstützt.
Lesen Sie bitte diese Gebrauchsanweisung sorgfältig durch, damit Sie Ihr Peltor WS ALERT Gehörschutzradio optimal
nutzen können.
(A) BESTANDTEILE
1. Extra breiter Kopfbügel (M2RX7A) mit weicher Polsterung für optimalen Komfort während des ganzen Arbeitstages.
Angepasste Helmbefestigung (M2RX7P3E) mit Haltern für Visier und Nackenschutz.
2. Individuell federnde Bügeldrähte aus rostfreiem Federstahl sorgen für eine gleichmäßige Druckverteilung
um die Ohren. Sie behalten die Spannung besser als einfache Kunststoffbügel, innerhalb eines großen
Temperaturbereichs.
3. Tief angesetzte Zweipunkt-Aufhängung und einfache Höheneinstellung ohne hervorstehende Teile.
4. Weiche, breite, mit Schaumstoff/Flüssigkeit gefüllte Dichtungsringe mit eingebauten Druckausgleichskanälen
ermöglichen eine effektive Dichtung, schwachen Andruck und individuellen Tragekomfort.
5. Kurze, exible Antenne für Stereoempfang mit tief angesetzter Befestigung und hoher Empfangsempndlichkeit.
6. Batteriefach, zum einfachen Austausch der Batterien.
7. Mikrofone für niveauabhängige Funktion. Fangen schwache Töne auf und verstärken sie bis auf eine vorgegebene
maximale Lautstärke.
8. Regler für Radio Ein/Aus und Lautstärke.
9. Regler für die Sendersuche. Für optimalen Empfang: automatisches Umschalten von Stereo auf Mono bei
schwachem Signal.
10. Regler für niveauabhängige Funktion. Ein/Aus und Lautstärke.
11. Sprechmikrofon für Zweiwegekommunikation bei Bluetooth-Verbindung oder beim Anschluss von Funkgerät o. ä.
12. Regler für Bluetooth-Funktion.
13 Leuchtdiode für Bluetooth-Funktion.
BATTERIEN
Den Batteriedeckel abschrauben und zur Seite biegen. Die beiden mitgelieferten 1,5-Volt-AA-Batterien einlegen.
Kontrollieren, ob die Plus- und Minuspole der Batterien richtig ausgerichtet sind. Es können auch auadbare Batterien
vom Typ AA verwendet werden.
RADIOFUNKTION
Ein- und Ausschalten, Lautstärke und Sendereinstellung
Das Ein- und Ausschalten sowie die Lautstärkeregelung des Radioempfangs erfolgen durch Drehen des
Lautstärkereglers (8). Der gewünschte Sender wird mit Hilfe des Senderwahl-Drehknopfs (9) eingestellt.
MITHÖREN
Das Ein- undAusschalten sowie die Lautstärkeregelung der Mithörfunktion erfolgen durch Drehen des Lautstärkereglers (10).
BLUETOOTH
Das Ein- und Ausschalten, die Lautstärkeregelung und die Synchronisation erfolgen durch Drehen oder Drücken des
Bluetooth-Knopfs (12). Siehe die Gebrauchsanweisung für die Bluetooth-Funktion (F). Die Bluetooth-Verbindung kann
nicht gleichzeitig mit der Mithör- und/oder Radiofunktion aktiv sein.
(B) MONTAGE/EINSTELLUNG DER BÜGEL/HELMBEFESTIGUNG
Kopfbügel:
(B:1) Die Kapseln nach außen ziehen. Die Kapseln so aufsetzen, dass die Dichtungsringe die Ohren ganz umschließen
und dicht am Kopf anliegen.
(B:2) Die Höhe der Kapseln einstellen, bis sie dicht und bequem sitzen. Dabei den Kopfbügel mit der einen Hand
festhalten.
(B:3) Der Bügel soll über die Kopfmitte verlaufen.
Helmbefestigung:
Die Helmbefestigung in den Schlitz am Helm schieben, bis sie einrastet (siehe Bild B:4). Zur Benutzung die Drahtbügel
aus der Lüftungs- in die Betriebsstellung nach innen drücken, bis auf beiden Seiten ein Klicken zu hören ist.
Sicherstellen, dass Kapseln und Bügeldrähte in der Betriebsstellung nicht gegen die Einrichtung oder die Kante des
Schutzhelms anliegen, damit keine undichten Stellen entstehen können.
Achtung! Die Kapseln haben zwei Positionen: (B:5) Betriebsstellung, (B:6) Lüftungsstellung.
Wichtig! Die optimale Dämmwirkung wird nur erreicht, wenn die Dichtungsringe dicht am Kopf anliegen. Das Haar
zurückstreichen.
Brillenbügel sollten möglichst dünn sein und ebenfalls dicht am Kopf anliegen.

18
19
WICHTIGE ANWENDERINFORMATION
• Das Gehörschutzradio ist gemäß den Anweisungen in dieser Gebrauchsanleitung aufzusetzen, einzustellen, zu
reinigen und zu warten.
• Die volle Schutzwirkung ist nur dann gewährleistet, wenn das Gehörschutzradio während des gesamten Aufenthalts
in lärmbelasteter Umgebung getragen wird.
• Das Gehörschutzradio regelmäßig äußerlich mit Seife und lauwarmem Wasser reinigen. Darf nicht unter Wasser
getaucht werden.
• Das Gehörschutzradio nicht bei Temperaturen über +55 °C aufbewahren, wie sie z. B. hinter einem Fenster oder
einer Windschutzscheibe erreicht werden können!
• Dieses Produkt kann durch bestimmte chemische Stoffe beeinträchtigt werden. Weitere Informationen können beim
Hersteller angefordert werden.
• Wenn sich die Störungen häufen oder die Lautstärke zu schwach wird, sind die Batterien auszutauschen. Batterien
niemals bei eingeschalteter Elektronik austauschen. Vor der Benutzung vergewissern, dass die Batterien richtig
eingelegt sind.
• Das Gehörschutzradio und besonders die Dichtungsringe können im Laufe der Zeit Alterungserscheinungen zeigen.
Sie sollten regelmäßig auf Risse und Undichtigkeiten untersucht werden.
Warnung! Bestimmte mit dem WS Alert Gehörschutzradio verbundene Bluetooth-Einheiten können schädliche
Lautstärken erreichen.
Achtung! Wenn diese Empfehlungen nicht befolgt werden, können Dämmwirkung und Funktion beeinträchtigt
werden.
(C) TECHNISCHE DATEN
(C:1 u. C:2) Dämmwerte:
Die Dämmwerte für das niveauabhängige Gehörschutzradio von Peltor wurden gemäß der PSA-Richtlinie 89/686/EWG
sowie den zutreffenden Teilen der Europanormen EN 352-1:2002, EN 352-3:2002, EN 352-4:2001, EN 352-6 2002,
EN 352-8:2008. gemessen, und das Produkt wurde dementsprechend als Gehörschützer zugelassen. Prüfzertikat
ausgestellt von FIOH, Topeliuksenkatu 41, FI-00250 Helsinki, Finnland, ID#0403. Peltor Alert erfüllt die Anforderungen
der EMV-Richtlinien, 2008/108/EC, EN 55013 und 55020 und ist FCC-zugelassen (Nummer FCC Part 15).
Erklärungen zu den Dämmwertetabellen:
1. Gewicht
2. Frequenz in Hz
3. Mittelwert Dämpfung in dB
4. Standardabweichung in dB
Entsprechend den Anforderungen der PSA-Richtlinie ist die Lautstärke in den Kopfhörern für Musik auf max. 81 dB(A)
äquivalenter Schallpegel begrenzt.
(C:4) Lautstärkeverhältnis: Getestet gemäß ISO 4869-4. Maximaler A-gewichteter Schalldruckpegel außerhalb der
Kapsel.
(C:5) Lärmunterdrückung: Frequenzgang und Lärmunterdrückung für MT7 Sprechmikrofon (nur Headsetausführung).
(D) MODELLPROGRAMM PELTOR WS ALERT
M2RX7AWS4 Mit Kopfbügel
M2RX7P3EWS4 Mit Befestigung für Peltorschutzhelme und andere gängige Schutzhelmfabrikate.
(E) ERSATZTEILE/ZUBEHÖR
Hygienesatz – HY79. Einfach austauschbarer Hygienesatz, bestehend aus zwei Dämmkissen und zwei
Dichtungsringen. Mindestens zweimal pro Jahr auswechseln, damit Dämmwirkung, Hygiene und Komfort auf einem
gleichmäßig hohen Niveau erhalten bleiben.
Einmalschutz – Clean HY100A. Hygienischer Einmalschutz, als Auage auf dem Dichtungsring. Einfach anzubringen.
Verpackung mit 100 Einweg-Paaren.
Mikrofonschutz – HYM1000. Feuchtigkeits- und winddicht. Hygienischer, effektiver Schutz für das Sprechmikrofon,
der die Lebensdauer verlängert.
Eine Verpackung à 5 Meter, für ca. 50 Wechsel.
Windschutz für Umgebungsmikrofone – M60/2. Ein wirkungsvoller Schutz vor Windgeräuschen, schützt die
Mikrofone und verlängert ihre Lebensdauer.
Ein Paar pro Verpackung.
Batteriedeckel – 1173SV
Akku – ACK03. Wieder auadbarer Akku.
FR03. Ladegerät für ACK03, auch mit Stecker für Großbritannien erhältlich, FR03-UK.
Table of contents
Languages:
Other 3M Headset manuals

3M
3M PELTOR LiteCom User manual

3M
3M PELTOR LiteCom Plus MT7H7 4410-EU Series User manual

3M
3M PELTOR WS LiteCom Plus User manual

3M
3M PELTOR WS MT73H74610WS6NA Series User manual

3M
3M G5 User manual

3M
3M PELTOR ComTac VI User manual

3M
3M Peltor Alert M2RX7A2-01 User manual

3M
3M PELTOR PIC-100 NA Installation instructions

3M
3M PELTOR WS LiteCom Plus User manual

3M
3M XT-1 User manual

3M
3M PELTOR LiteCom User manual

3M
3M PELTOR Tactical XP User manual

3M
3M PELTOR WS ALERT MRX21AWS6 Series User manual

3M
3M Peltor WS ProTac XP MT15H7 WS5 Series User manual

3M
3M G5 User manual

3M
3M Peltor WS5 User manual

3M
3M XT-1 User manual

3M
3M MRX21A2WS6 User manual

3M
3M XT-1 User manual

3M
3M Peltor WS5 User manual