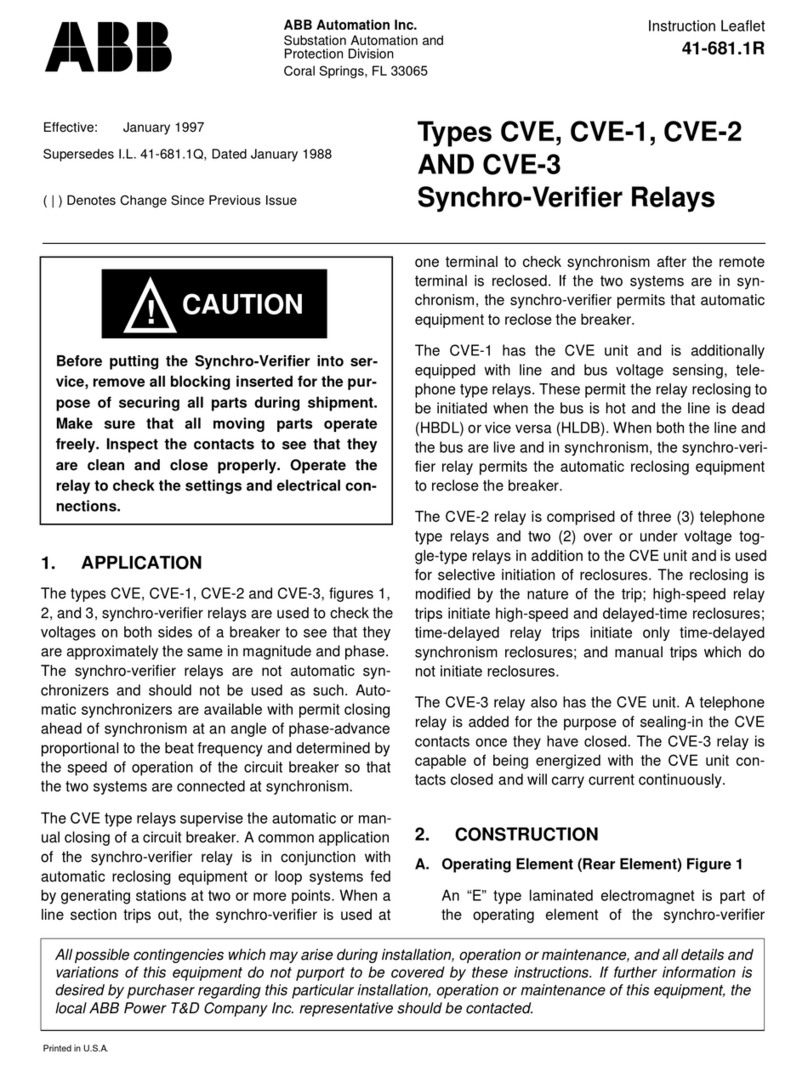
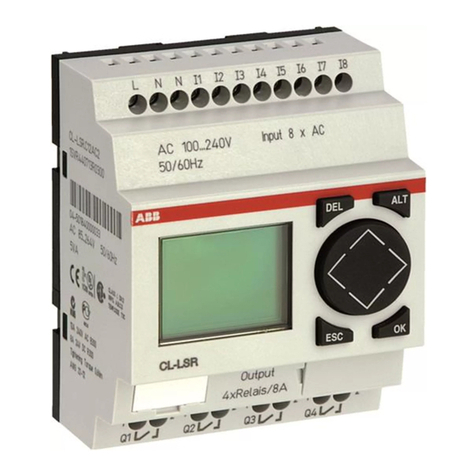
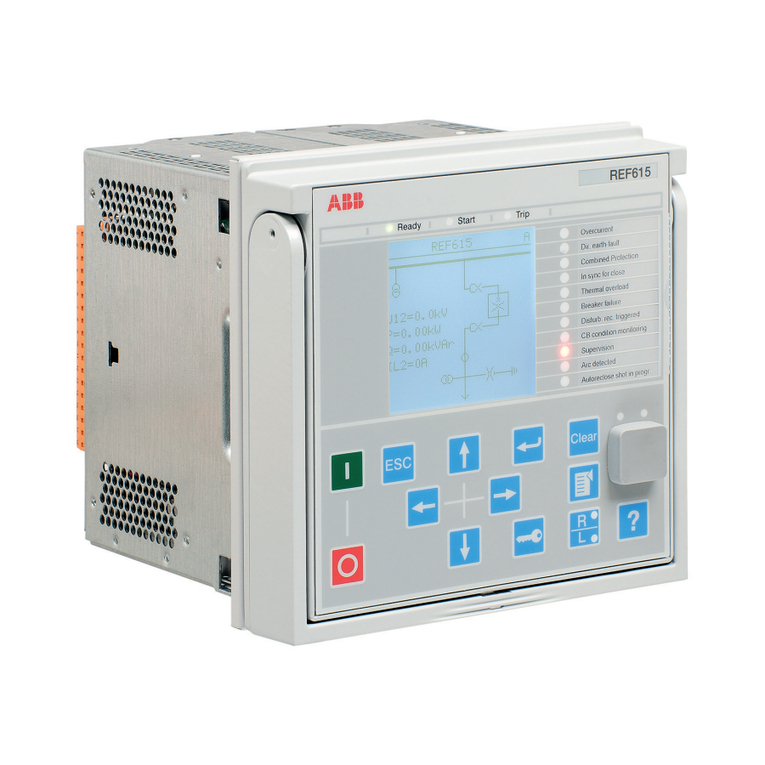
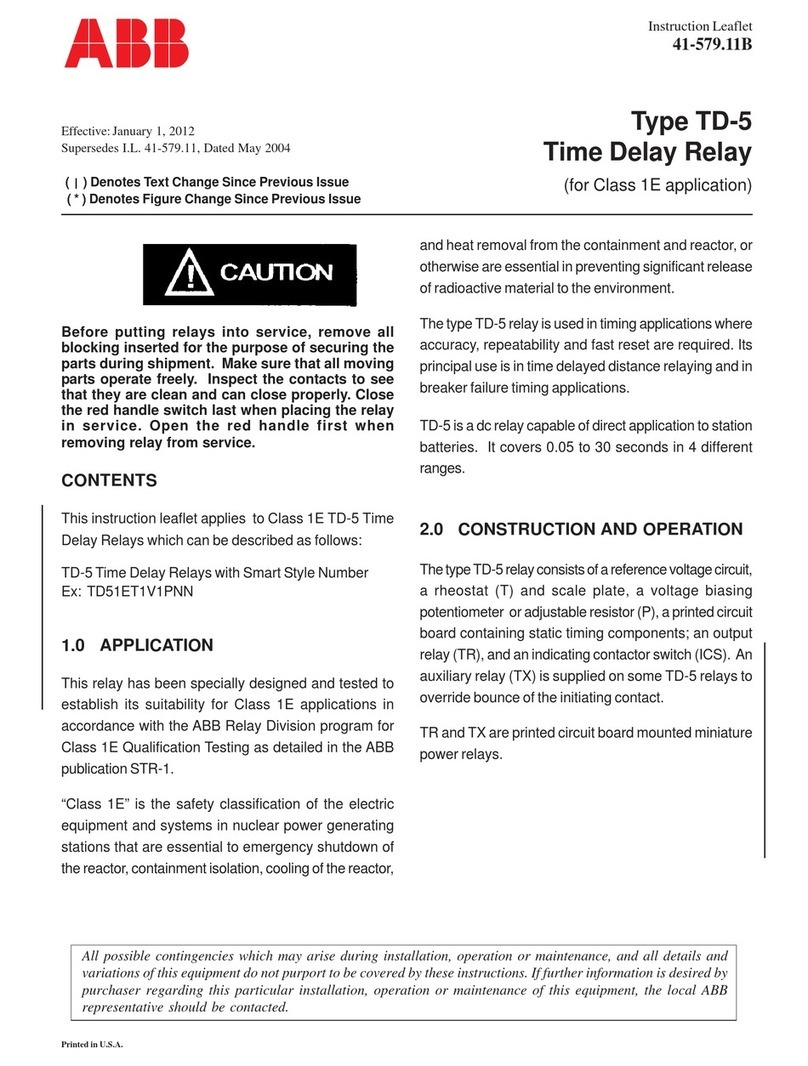
ABB CM-MSS.41 User manual

ABB STOTZ-KONTAKT GmbH, Eppelheimer Straße 82, 69123 Heidelberg / Germany; www.abb.com/lowvoltage
CM-MSS.41
Doc.no. 1SVC 730 650 M0000 D (07/16)
(DE) Betriebs- und Montageanleitung
Thermistormotorschutzrelais, CM Reihe
Hinweis: Diese Betriebs- und Montageanleitung enthält
nicht sämtliche Detailinformationen zu allen Typen der
Produktreihe und kann auch nicht jeden Einsatzfall
der Produkte berücksichtigen. Alle Angaben dienen
ausschließlich der Produktbeschreibung und sind nicht
als vertraglich vereinbarte Beschaffenheit aufzufassen.
Weiterführende Informationen und Daten erhalten Sie in
den Katalogen und Datenblättern der Produkte, über die
örtliche ABB-Niederlassung sowie auf der ABB Homepage
unter www.abb.com. Technische Änderungen jederzeit
vorbehalten. In Zweifelsfällen gilt der deutsche Text.
Warnung! Gefährliche Spannung! Installation
nur durch elektrotechnische Fachkraft. Landes-
spezifische Vorschriften (z.B. VDE, etc.)
beachten. Vor der Installation diese Betriebs- und
Montageanleitung sorgfältig lesen und beachten.
An die nicht beschrifteten Klemmen darf kein Leiter
angeschlossen werden.
(EN) Operating and installation instructions
Thermistor motor protection relays, CM range
Note: These operating and installation instructions cannot
claim to contain all detailed information of all types of this
product range and can even not consider every possible
application of the products. All statements serve exclusively
to describe the product and have not to be understood as
contractually agreed characteristics. Further information and
data is obtainable from the catalogues and data sheets of
this product, from the local ABB sales organisations as well
as on the ABB homepage www.abb.com. Subject to change
without prior notice. The German text applies in cases of
doubt.
Warning! Hazardous voltage! Installation by
person with electrotechnical expertise only and in
accordance with the specific national regulations
(e.g., VDE, etc). Before installing this unit, read
these operating and installation instructions carefully
and completely. Do not connect any conductor to
terminals not labelled.
(FR) Instructions de montage et de mise en service
Relais de protection thermique moteur,
gamme CM
Note: Ces instructions de service et de montage ne
contiennent pas toutes les informations relatives à tous les
types de cette gamme de produits et ne peuvent pas non
plus tenir compte de tous les cas d’application. Toutes les
indications ne sont données qu’à titre de description du
produit et ne constituent aucune obligation contractuelle.
Pour de plus amples informations, veuillez-vous référer aux
catalogues et aux fiches techniques des produits, à votre
agence ABB ou sur notre site www.abb.com. Sous réserve
de modifications techniques. En cas de divergences, le texte
allemand fait foi.
Avertissement! Tension électrique dangereuse!
Installation uniquement par des personnes qualifiées
en électrotechnique et en conformité avec les
prescriptions nationales (p.e. VDE, etc.). Avant
l’installation de cet appareil veuillez lire l’intégralité
de ces instructions. Ne pas connecter de conducteur
aux bornes non marquées.
(ES) Instrucciones de montaje y de servicio
Relé de protección térmica de motor, serie CM
Nota: Estas instrucciones no contienen todas las
informaciones detalladas relativas a todos los tipos del
producto ni pueden considerar todos los casos de operación.
Todas las indicaciones son a título descriptivo del producto
y no constituyen ninguna obligación contractual. Para
más información, consulte los catálogos, las hojas de
características, la sucursal local de ABB o la Web www.abb.
com. Sujeto a cambios técnicos sin previo aviso. En caso de
duda, prevalece el texto alemán.
¡Advertencia! ¡Tensión peligrosa! La instalación
deberá ser realizada únicamente por electricistas
especializados. Es necesario respetar las normas
especificas del país (p.ej. VDE, etc.). Antes de la
instalación lea completamente estas instrucciones.
No conectar ningún conductor a los bornes no
marcados.
(IT) Istruzioni per l’uso ed il montaggio
Relè di protezione motore per termistori,
serie CM
Nota: Le presenti istruzioni per l’uso ed il montaggio non
contengono tutte le informazioni di dettaglio sull‘intera
gamma di prodotti e non possono trattare tutti i casi
applicativi. Tutte le indicazioni servono esclusivamente
a descrivere il prodotto e non costituiscono alcuna
obbligazione contrattuale. Per ulteriori informazioni
consultare i cataloghi ed i data sheet dei prodotti, o la nostra
homepage www.abb.com, oppure rivolgersi alla filiale locale
di ABB. Ci riserviamo il diritto di effettuare eventuali modifiche
tecniche. In caso di discrepanze o fraintendimenti fa fede il
testo in lingua tedesca.
Avvertenza! Tensione pericolosa! Far installare solo
da un elettricista specializzato. Bisogna osservare
le specifiche norme nazionali p.e. VDE, etc.). Prima
dell’installazione leggere attentamente le seguenti
istruzioni. Non collegare nessun conduttore ai
morsetti non marcati.
(RU) Инструкция по установке и эксплуатации
Реле термисторной защиты электродвигателя
,
серия CM
Примечание: Настоящая инструкция по установке и
эксплуатации не претендует на полноту содержащейся
здесь информации по всем типам изделий серии и не
рассматривает все возможности применения настоящего
изделия. Вся информация служит исключительно для
его описания и не должна рассматриваться в качестве
гарантированных характеристик, имеющих юридическую
силу. Дополнительную информацию и данные можно
получить из каталогов и листа тех. данных на настоящее
изделие в местном представительстве компании АВВ,
а также на сайте компании АВВ по адресу: www.abb.
com. Возможны изменения без предварительного
уведомления. При возникновении сомнений текст на
немецком языке имеет приоритет.
Oсторожно! Опасное напряжение! Монтаж должен
выполняться только специалистом-электриком в
соответствии с нормативным законодательством
(т.к. VDE, итд). Перед установкой элемента
внимательно ознакомьтесь с инструкцией. Не
подключайте провода к клеммам, не имеющий
обозначений.

2
CM-MSS.xySCM-MSS.xyP
2CDC 253 007 F0011
CONNECT
(IN)
DISCONNECT
(OUT)
8 mm
0.315"
2 x 0.5...1.5 mm²
2 x 20...16 AWG
1 x 0.5...4.0 mm²
2 x 0.5...2.5 mm²
1 x 20...12 AWG
2 x 20...14 AWG
1 x 0.5...2.5 mm²
2 x 0.5...1.5 mm²
1 x 18...14 AWG
2 x 18...16 AWG
0.6...0.8 Nm
7.08 lb.in
DIN ISO 2380-1 Form A
0.8 x 4 mm / 0.0315 x 0.157 in
DIN ISO 8764-1 PZ 1
Ø 4.5 mm / 0.177 in
2 x 0.5...1.5 mm²
2 x 18...16 AWG
2CDC 252 014 F0015
8 mm
0.315"
1 x 0.5...2.5 mm²
2 x 0.5...1.5 mm²
1 x 18...14 AWG
2 x 18...16 AWG
2 x 0.5...1.5 mm²
2 x 18...16 AWG
8 mm
0.315"
DIN 46228-1-A
DIN 46228-4-E
3
4
1
2
2
COV.11 -
1SVR 730 005 R01000
2CDC 253 025 F0014
2CDC 253 013 F0014 2CDC 253 012 F0014
Additional information relating to cULus approval:
- For use in pollution degree 2 environment or equivalent
- These devices need to be provided with a 6 A Class CC Fuse
at the supply input
Information complémentaire relative à la certification cULus:
- Pour utilisation dans un environnement de degré de pollution 2
ou équivalent
- Ces appareils doivent être protégés en entrée par un fusible 6A
de type CC
Technical data:
Ta: -25 ... +60 °C (-13 ... +140 °F)
IP 20
Pollution degree 3
(ZH) ֡ፕᇑҾጎኸళ
!
ඤ௺ۉፆۉԍࢺۉഗLjCMဣଚ
ጀᅪǖԨ֡ፕኸళփԈࡤຍຕࢅඇևᆌᆩຫLjᆶຕ
ኻᆶܔׂ༬ႠႜຫڦፕᆩLjᅺُփԢ݆ୱၳ
ᆌăၘဦຫ൩֖ለຍᄣԨஏABBړںӸ๚ت៓બ
BCCྪበDŽwww.abb.comDžăසᆶ߸߀ທփཚኪăժᅜڤ࿔
ྺՔጚă
য়ߢƽླ၃ۉუƽৈᆯۉഘጆᄽටᇵҾጎႴޙ
ࢇ༬ۨڦࡔࡀۨDŽසVDEڪDžăҾጎമLj൩ጮဦ
ඇևለ܁ҾጎຫăՔ๎ڦ܋ጱփথ၍ă

3
I
II
Position 4 123
ON
OFF
ye
f
x
Remote
Reset
Remote
Test/Reset
2CDC 253 011 F0014
2CDC 253 026 F0014
3
1
2
III
2CDC 253 014 F0014
햴
햳
햲
Deutsch
I Frontansicht mit Bedienelementen
햲Betriebszustandsanzeige mit LEDs
U: LED grün - Anzeige Steuerspeisespannung
F: LED rot - Fehlermeldung
R: LED gelb - Anzeige der Schaltstellung der
Ausgangsrelais
햳Test / Reset
Reset = Behobenen Fehler bestätigen, Gerät nach Test
zurücksetzen oder Änderung der Konfiguration bestätigen
LEDs, Statusinformationen und Fehlermeldungen
(nach Priorität)
Betriebszustand U:
LED grün F:
LED rot R:
LED gelb
Fehlende Steuerspeise-
spannung aus aus aus
Interner Fehler 1) aus WW
Interner Fehler 1) XXX
Steuerspeisespannung
außerhalb des Toleranz-
bereichs
XVaus
Kurzschluss VY aus
Leitungsbruch VZ aus
Übertemperatur VV aus
Unbestätigter behobener
Fehler V-- 2) X
Testfunktion Xaus aus
Unbestätigte Änderung
der Konfiguration Vaus X
Kein Fehler Vaus V
1) Gerät neu starten. Wird danach derselbe Fehler angezeigt, das
Gerät austauschen
2) Abhängig vom Fehler mit der höchsten Priorität
Im Fall mehrerer Fehler wird der Fehler mit der höheren Priorität
angezeigt.
II DIP-Schalterstellungen
햴DIP-Schalter zur Einstellung von:
1 ON = Nullspannungssichere Fehlerspeicherung AUS
OFF = Nullspannungssichere Fehlerspeicherung AN
2ON=
Kurzschlusserkennung AUS
OFF = Kurzschlusserkennung AN
3 Keine Funktion
4 ON = Remote Test/Reset
OFF = Remote Reset
Auslieferungszustand: Alle DIP-Schalter in Position OFF
Eine Änderung der DIP-Schaltereinstellung wird durch den
entsprechenden LED-Code signalisiert. Die Konfigurations-
änderung wird jedoch erst durch Drücken der Test / Reset-
Taste oder durch einen Neustart bestätigt.
III DIP-Schalterposition
Achtung:
Bei Schaltströmen > 2 A ist ein seitlicher Geräteabstand von min-
destens 10 mm (0,39 in) einzuhalten.
Bei Geräten, die nach der ATEX-Richtlinie 2014/34/EU eingesetzt
werden, Packungsbeilage „Zusatzinformationen und Sicherheits-
hinweise“ beachten.

4
English
I Front view with operating controls
햲Indication of operational states with LEDs
U: green LED - Status indication of control supply
voltage
F: red LED - Fault message
R: yellow LED - Status indication of the output relays
햳Test / Reset
Reset = Confirm a rectified fault, reset device after test
routine, or confirm a change of configuration
LEDs, statuts information and fault messages (in
order of priority)
Operational state U:
green
LED
F:
red LED R:
yellow LED
Absence of control
supply voltage OFF OFF OFF
Internal fault 1) OFF WW
Internal fault 1) XX X
Control supply voltage not
within the tolerance range XVOFF
Short circuit VY OFF
Interrupted wire VZ OFF
Overtemperature VV OFF
Fault rectified but
not confirmed V-- 2) X
Test function XOFF OFF
Change of configuration
not confirmed VOFF X
No fault VOFF V
1) Restart the device. If after restart the same fault is indicated,
replace the device.
2) Depending on the fault with the highest priority
In case of several faults, the fault with the higher priority is shown.
II DIP switch functions
햴DIP switches for the adjustment of:
1 ON = Non-volatile fault storage OFF
OFF = Non-volatile fault storage ON
2ON=
Short-circuit detection OFF
OFF = Short-circuit detection ON
3 No function
4 ON = Remote Test/Reset
OFF = Remote Reset
Default setting: All DIP switches in position OFF
A change of the DIP switch settings is signaled by the
corresponding LED code. However, only pressing the
Test / Reset button or a restart will confirm the change of
configuration.
III DIP switch position
Attention:
In case of switching currents > 2 A, lateral spacing to other units
has to be min. 10 mm (0.39 in).
With products that are used following the ATEX guideline
2014/34/EU, attention should be paid to the attached instruction
sheet „Additional information and notes on safety“.
Français
I Face avant et dispositifs de commande
햲Indication de fonctionnement par LED
U: LED verte - Indication de la tension d’alimentation
F: LED rouge - Message de défaut
R: LED jaune - Indication de l’état des relais de sortie
햳Test / Réinitialisation
Réinitialisation = Confirmer un défaut corrigé, réinitialiser
le dispositif après une routine de test ou confirmer une
modification de configuration
LED, information d’état et messages de défaut
(dans l‘ordre de priorité)
Etat de fonctionnement U:
LED verte F:
LED rouge R:
LED jaune
Tension d’alimentation
manquante éteinte éteinte éteinte
Erreur interne 1) éteinte WW
Erreur interne 1) XXX
Tension d’alimentation hors
plage de tolérance XVéteinte
Court-circuit VY éteinte
Coupure de ligne VZ éteinte
Température excessive VV éteinte
Défaut corrigé mais pas
confirmé V-- 2) X
Fonction de test Xéteinte éteinte
Modification de configurati-
on pas confirmée Véteinte X
Aucun défaut Véteinte V
1) Redémarrer le dispositif. Si après cela, le même défaut est
indiqué, remplacer le dispositif.
2) Dépendant du défaut avec la priorité absolue
En cas de plusieurs défauts, le défaut avec la priorité majeure
est indiqué.
II Fonctions des micro-interrupteurs
햴Micro-interrupteurs pour le réglage de:
1 ON = Mémorisation de défaut rémanente désactivée
OFF = Mémorisation de défaut rémanente activée
2 ON = Détection de court-circuit désactivée
OFF = Détection de court-circuit activée
3 Pas de fonction
4 ON = Test/Réinitialisation à distance
OFF = Réinitialisation à distance
Etat de livraison:
Tous les micro-interrupteurs en position OFF
Une modification du réglage des micro-interrupteurs est
indiquée par le correspondant code LED. La modification de
la configuration est uniquement confirmée en actionnant le
bouton Test / Reset ou par un redémarrage.
III Position des micro-interrupteurs
Attention:
Dans le cas de courant de commutation > 2 A, l’espacement
latérale entre deux modules doit être de 10 mm (0,39 in) au
minimum.
Avec les produits utilisés selon la directive ATEX 2014/34/EU, une
attention toute particulière doit être faite à la feuille d‘instruction
jointe „Informations supplémentaires et notes sur la sécurité“.

5
Español
I Vista frontal con elementos de mando
햲Indicadores de servicio con LEDs
U: LED verde - Indicación tensión de alimentación
de mando
F: LED rojo - Mensaje de error
R: LED amarillo - Indicación del estado de los relés
de salida
햳Test / Reset
Reset = Confirmar un error solventado, reset del dispositivo
después de un test o confirmar una modificación de
configuración
LEDs, información de estado y mensajes de error
(en orden de prioridad)
Estado de funcionamiento U:
LED verde F:
LED rojo
R:
LED
amarillo
Ausencia de tensión de
alimentación de mando apagado apagado apagado
Error interno 1) apagado WW
Error interno 1) XXX
Tensión de alimentación de
mando no en el rango de
tolerancia
XVapagado
Cortocircuito VY
apagado
Rotura de cable VZ
apagado
Temperatura excesiva VV
apagado
Error solventado pero no
confirmado V-- 2) X
Función de test Xapagado apagado
Modificación de configura-
ción no confirmado Vapagado X
Ningún error Vapagado V
1) Reset del dispositivo. Si después del reset continúa el mismo
error, cambiar el dispositivo.
2) Depende del error, indica el más importante
En caso de que se produzcan varios errores al mismo tiempo, el
dispositivo indicará el error más prioritario.
II Funciones de los interruptores DIP
햴Interruptores DIP para el ajuste de:
1 ON = Memoria de fallo no-volátil inactiva
OFF = Memoria de fallo no-volátil activa
2ON=
Detección de cortocircuito inactiva
OFF = Detección de cortocircuito activa
3 Ninguna función
4 ON = Test/Reset a distancia
OFF = Reset a distancia
Entrega de fábrica:
Todos los interruptores DIP en posición OFF
Una modificación del ajuste de los interruptores DIP se indica
mediante el correspondiente código LED. La modificación
del ajuste sólo se confirma mediante activación del botón
Test / Reset o mediante un rearranque.
III Posición de los interruptores DIP
Atención:
Para corrientes de conmutación > 2 A dejar un espacio lateral entre
módulos como mínimo de 10 mm (0,39 in).
Para los productos utilizados según las normas ATEX 2014/34/EU,
ver las instrucciones adjuntas „Informaciones complementarias y
notas de seguridad“.
Italiano
I Vista frontale con gli elementi di comando
햲LED di visualizzazione dello stato di funzionamento
U: LED verde - Indicazione tensione di comando
F: LED rosso - Messaggio di guasto
R: LED giallo - Indicazione dello stato dei relè di
uscita
햳Test / Reset
Reset = Confermare un guasto eliminato, resettare
l’apparecchio dopo una routine di test oppure confermare
una modifica della configurazione.
LED, informazioni sullo stato e messaggi d’errore
(in ordine di priorità)
Stato operativo U:
LED verde F:
LED rosso R:
LED giallo
Assenza della tensione di
comando spento spento spento
Guasto interno 1) spento WW
Guasto interno 1) XXX
Tensione di comando al di
fuori dal range di tolleranza XVspento
Cortocircuito VY spento
Interruzione cavo VZ spento
Sovratemperatura VV spento
Guasto eliminato ma non
confermato V-- 2) X
Funzione di test Xspento spento
Modifica della configura-
zione non confermata Vspento X
Nessun guasto Vspento V
1) Riavviare l’apparecchio. Se dopo il riavvio l’apparecchio indica
lo stesso guasto, sostituire l’apparecchio.
2) A seconda del guasto con la priorità la più alta
Nel caso in cui diversi guasti siano presenti contemporaneamente,
viene indicato il guasto con la priorità più alta.
II Funzione dei DIP switch
햴DIP switch per l’impostazione di:
1ON=
Memorizzazione del guasto non volatile OFF
OFF = Memorizzazione del guasto non volatile ON
2ON=
Rilevamento del cortocircuito OFF
OFF = Rilevamento del cortocircuito ON
3 Senza funzione
4 ON = Test/Reset remoto
OFF = Reset remoto
Impostazioni di fabbrica:
Tutti i DIP switch in posizione OFF
La modifica di un’impostazione dei DIP switch viene indicata
tramite il corrispondente codice LED. Comunque, la modifica
della configurazione viene confermata solo tramite azionamento
del pulsante Test / Reset o tramite un riavvio.
III Posizione dei DIP switch
Attenzione:
Nel caso in cui la corrente di commutazione fosse > 2 A, prevedere
uno spazio laterale tra un modulo e l’altro di minimo 10 mm
(0,39 in).
Per i prodotti conformi a direttiva ATEX 2014/34/EU, va consultato
il documento di istruzioni aggiuntivo “Informazioni supplementari e
direttive di sicurezza”.

6
Russian
IВид спереди, органы управления
햲Индикация состояния Светодиодов (СИД)
U: зеленый СИД - Индикация состояния контроля
напряжения питания
F: красный СИД - сообщение о неисправности
R: желтый СИД - Индикация положения выходных
контактов
햳Test / Reset
Reset = подтверждение исправления неисправности,
сброс устройства после испытания или подтвердите
изменение конфигурации
СИДы, информация о состоянии и сообщения о
неисправности (в порядке очередности)
Рабочее состояние
U:
зеленый
СИД
F:
красный
СИД
R:
желтый
СИД
Отсутствие контроля
напряжения питания выкл выкл выкл
Внутренняя ошибка 1) выкл WW
Внутренняя ошибка 1) XX X
Контроль напряжения
питания не в пределах
допустимого диапазона
XVвыкл
Короткое замыкание VY выкл
Обрыв провода VZ выкл
Перегрев VV выкл
Неисправности устранены,
но не подтверждены V-- 2) X
Функция тест Xвыкл выкл
Изменение конфигурации
не подтверждено Vвыкл X
Нет ошибки Vвыкл V
1) Перезагрузите устройство. Если после перезагрузки та же
самая ошибка, замените устройство.
2) Зависит от ошибки с наивысшим приоритетом.
В случае нескольких ошибок, ошибки с высоким приоритетом.
II DIP-переключатель функций
햴DIP-переключатель функций для настройки:
1ON=
энергонезависимая память отключена
OFF = энергонезависимая память включена
2ON=
защита от короткого замыкания отключена
OFF = защита от короткого замыкания включена
3нет функции
4ON=
Удаленное тестирование / сброс
OFF = Удаленный сброс
Значение по умолчанию: все DIP-переключатели в
положение OFF
Изменение настроек DIP-переключателя сигнализируется
соответствующим СИД. Изменения вступят в силу только
после нажатия на кнопку Test / Reset или restart для
подтверждения изменения конфигурации.
III Положение ДИП-переключателей
Внимание:
В случае коммутации токов > 2 A, боковой интервал до других
устройств должно быть мин. 10 мм (0.39 дюймов).
Для оборудования ATEX стандарта 2014/34/EU, необходимо
ознакомиться с прилагаемой инструкцией „Дополнительные
сведения и примечания по безопасности“.
ዐ࿔
Iമ௬ӱ֡ፕ
햲LEDጒༀኸ๖
Uǖ୴LED . ࠃۉۉუጒༀ
FǖࢤLED . ࠤቱ႑တ
RǖࣜLED . ۉഗڦጒༀ၂๖
햳֪0ް࿋
ް࿋! >! ඓණࠤቱᅙၩأĂࡀ֪ࢫް࿋ยԢፇༀ
Ⴊ߀ඓණ
LED, ጒༀ႑တࢅࠤቱ႑တDŽߵᆫံಇႾDž
߾ፕጒༀ U:
୴LED
F:
ࢤ LED
R:
ࣜ LED
ࠃۉۉუၩ฿ OFF OFF OFF
ాևࠤቱ 1) OFF WW
ాևࠤቱ 1) XX X
ࠃۉۉუփሞဃֶ
ݔྷా XVOFF
܌ୟ VY OFF
၍ VZ OFF
ࡗඤ VV OFF
ࠤቱၩأڍ࿄ඓණ V-- 2) X
֪ࠀీ XOFF OFF
ፇༀႪ߀࿄ඓණ VOFF X
ࠤቱ VOFF V
1DžዘഔఇLjැዘഔࢫ၎ཞࠤቱምْ၄Lj߸࣑ఇă
2Džൽᇀፌߛᆫံڦࠤቱ
ැᆶܠ߲ࠤቱLjሶ၂๖ፌߛᆫံڦࠤቱă
II DIP࠲ࠀీ
햴DIP࠲Ljᆩᇀยዃǖ
1ON=ݥᅟ฿ࠤቱ٪ئOFF
OFF = ݥᅟ฿ࠤቱ٪ئON
2ON=܌ୟ֪OFF
OFF = ܌ୟ֪ON
3ࠀీ
4ON=
ᇺײ֪0ް࿋
OFF = ᇺײް࿋
ఐණยዃǖᆶDIP࠲تᇀOFF࿋ዃ
DIP࠲ڦยዃႪ߀ཚࡗ၎ᆌڦLEDஓઠ၂๖LjยዃႪ߀ࢫ
ႴᄲӀ֪0ް࿋Ӏ౧ዘഔఇLjፇༀڦႪ߀֍ࣷԥඓණă
III!DIP࠲ڦ࿋ዃ
ጀᅪǖ
ැ࠲ۉୁ>2 ALjఇኮ࢙ၠڦҾጎᆌٷᇀڪᇀ!
10 mm)0.39 in*ă
ැׂڦ๑ᆩႴፏATEXኸସ2014/34/EULjሶᄲጀᅪጮဦለ܁ຫ
ກዐĐ࠲ᇀҾඇڦܮྔ႑တࢅຫđڦాඹă

7
IV Connection diagram
M 3~
V
+
T2
T1
A1
μC
V-
t
A2
S1
24
11
21
22
14
12
Reset
2CDC 252 015 F0014
Bemessungssteuerspeisespannung dem seitlichen Typenschild am Gerät entnehmen.
For the rated control supply voltage, see label at the side of the unit.
Pour la tension assignée d’alimentation de commande voir l’étiquette placée sur le côté du relais.
Véase la etiqueta lateral de características para la tensión nominal de alimentación de mando.
Per la tensione nominale di comando vedi la targhetta laterale del relè.
Обратите внимание на маркировку, нанесенную на корпус изделия, для определения напряжения питания.
ܮۨۉუLj֖ఇ֨௬ڦՔധă

8
Deutsch
IV Anschlussdiagramm
Reihenschaltung von 1 bis max. 3 Fühler Typ A pro Fühlerkreis.
Summenkaltwiderstand max. 750 :.
Der Fühlerkreis darf nicht geerdet werden.
Überwachungsfunktionen
Das Thermistormotorschutzrelais CM-MSS überwacht die
Wicklungstemperatur und schützt somit den Motor vor
Überhitzung, Überlast und mangelhafter Kühlung. Dieser
muss hierzu mit Typ A Kaltleitertemperaturfühlern (PTC)
ausgestattet sein. Erwärmt sich der Motor über die zulässige
Grenze (Fühlerwiderstand > 2,83 k:), fallen die Ausgangsrelais
ab. Ein Reset ist erst nach Abkühlung des Motors möglich
(Fühlerwiderstand < 1,1 k:).
Kurzschlusserkennung:
Tritt zwischen den beiden Leitungen eines Fühlerkreises ein
Kurzschluss auf, fallen die Ausgangsrelais ab.
Dynamische Leitungsbrucherkennung:
Während des Betriebs überwacht das Gerät den Messkreis
dauerhaft. Tritt im Messkreis eine Änderung des Widerstandes
auf, so erkennt das Gerät anhand der Änderungsgeschwindigkeit,
ob ein Leitungsbruch vorliegt. Die Ausgangsrelais fallen dann ab.
Testfunktion
Ein Funktionstest ist nur möglich, wenn kein Fehler vorliegt.
In die Testroutine gelangt man durch Drücken der frontseitigen,
kombinierten Test / Reset-Taste. Ist die Funktion „Remote
Test / Reset“ (DIP-Schalter 4) aktiviert, so ist auch ein
Funktionstest über den Steuereingang S1-T2 möglich
Nach dem Start der Testroutine fallen die Ausgangsrelais ab.
Sie bleiben so lange abgefallen bis die Test / Reset-Taste erneut
gedrückt wird oder der Steuereingang S1-T2 geschlossen wird
(Remote Reset).
Fehlerspeicherung fund Reset
Die Fehlerspeicherung ist nullspannungssicher (remanent)
ausgeführt. Das heißt, nach Abschalten und Wiederkehr der
Steuerspeisespannung geht das Gerät in den Zustand über, der
vor dem Abschalten vorhanden war. Lag vor der Unterbrechung
der Steuerspeisespannung kein Fehler vor, läuft das Gerät nach
dem erneuten Anlegen der Steuerspeisespannung selbständig an.
Lag vor dem Abschalten ein Fehler vor, so kann der Reset manuell
über die Test / Reset-Taste oder extern über einen Remote-Reset
zwischen S1-T2 durchgeführt werden.
Bei deaktivierter Fehlerspeicherung kann der Reset manuell über
die Test / Reset-Taste, extern über einen Remote-Reset zwischen
S1-T2 oder automatisch durch Brücken von S1-T2 durchgeführt
werden.
Alle Betriebszustände werden von den frontseitigen LEDs
signalisiert. Siehe Tabelle „LEDs, Statusinformationen und
Fehlermeldungen“.
English
IV Connection diagram
Series connection of 1 to max. 3 sensors type A per sensor circuit.
Max. total PTC resistance 750 :.
The sensor circuit must not be earthed.
Monitoring functions
The thermistor motor protection relay CM-MSS monitors
the winding temperature and thus protects the motor from
overheating, overload and insufficient cooling.
For this the motor has to be equipped with PTC resistor sensors
type A. If the motor heats up excessively (sensor resistance
> 2.83 k:), the output relays de-energize. A reset is only possible
after cooling down of the motor (sensor resistance < 1.1 k:).
Short-circuit detection:
If a short circuit is detected between the two lines of a sensor
circuit, the output relays de-energize.
Dynamic interrupted wire detection:
During the operation the device is permanently monitoring the
measuring circuit. If the resistance in the measuring circuit is
changing, the device recognizes on the basis of the velocity of
change if there is a interrupted wire. Then the output relays de-
energize.
Test function
is only possible when there is no fault.
By pressing the front-face combined Test / Reset button a system
test routine is executed. If the function „Remote Test / Reset“ (DIP
switch 4) is activated, the system test routine is also possible via
control input S1-T2.
After starting the test routine the output relays de-energize. They
remain de-energized until the Test / Reset button is pressed again
or control input S1-T2 is closed (remote reset).
Fault storage fand reset
The fault storage is designed as non-volatile (remanent). This
means that after switch-off and return of the control supply voltage
the device returns to the state it was prior to the switch-off.
If prior to the interruption of control supply voltage there was no
fault, the device restarts automatically after re-applying control
supply voltage.
If there was a fault prior to the interruption, reset can be made
manually by the Test / Reset button or externally by a remote reset
between S1-T2.
With deactivated fault storage reset can be made manually by the
Test / Reset button, externally by a remote reset between S1-T2 or
automatically by jumpering S1-T2.
All operating states are signaled by the front-face LEDs.
See table „LEDs, status information and fault messages“.

9
Français
IV Schéma de connexion
Connexion en série de 1 à 3 capteurs PTC type A au maximum
par circuit de capteur.
Valeur maximale de la résistance PTC 750 :.
Il est interdit de mettre le circuit de capteur à la terre.
Fonctions de contrôle
Le relais de protection thermique de moteur CM-MSS contrôle
la température des enroulements et protège de cette manière le
moteur contre la surchauffe, la surcharge et le refroidissement
insuffisant.
Pour cela, le moteur doit être équipé de capteurs PTC type A. Si
le moteur s’échauffe de manière excessive (résistance capteur
> 2,83 k:), les relais de sortie se désactivent. Une réinitialisation
n’est seulement possible qu’après refroidissement du moteur
(résistance capteur < 1,1 k:).
Détection de court-circuit:
Si un court-circuit est détecté entre les deux lignes d’un circuit de
capteur, les relais de sortie se désactivent.
Détection de coupure de ligne dynamique:
Pendant le fonctionnement l’appareil contrôle en permanence
le circuit de mesure. Si la résistance dans le circuit de mesure
change, l’appareil reconnait au travers de la vitesse de
modification une coupure de ligne. Alors les relais de sortie se
désactivent.
Fonction de test
Uniquement possible si aucun défaut n’est présent.
Une routine de test système peut être exécutée en actionnant la
touche frontale Test/Reset. Si la fonction „Remote Test/Reset“
(micro-switch 4) est activée, la fonction de test est possible aussi
via l’entrée de commande S1-T2.
Après la mise en route de la séquence de test, les relais de sortie
se désactivent. Ils restent désactivés aussi longtemps que la
touche Test/Reset ne soit actionner de nouveau ou jusqu‘à ce
que l’entrée de commande S1-T2 soit fermée (réinitialisation à
distance).
Mémorisation de défaut fet réinitialisation
Il s’agit d’une mémorisation de défaut à la coupure d’alimentation
(rémanente). Cela signifie que’après la coupure et rétablissement
de la tension d’alimentation, l’appareil reprend l’état qu’il avait
avant la coupure.
S’il n’y avait pas de défaut avant la coupure de la tension
d’alimentation, le dispositif redémarre automatiquement après
le rétablissement de la tension d’alimentation. S’il y avait un
défaut avant la mise à l’arrêt, la réinitialisation peut être effectuée
manuellement par la touche combinée Test / Reset ou externe par
une réinitialisation à distance entre S1-T2.
Avec la mémorisation de défaut à la coupure d’alimentation
désactivée, la réinitialisation peut être effectuée manuellement par
la touche combinée Test / Reset, externe par une réinitialisation à
distance entre S1-T2 ou automatiquement en pontant S1-T2.
Tous les états de fonctionnement sont signalés par des LED sur la
face avant. Voir le tableau «LED, information d’état et messages
de défaut».
Español
IV Esquema de conexión
Hasta 3 sondas resistivas PTC tipo A pueden conectarse en serie
por circuito de sonda
Resistencia máx. total de la sondas 750 :.
Está prohibido poner el circuito de sonda a tierra.
Funciones de control
Vigilando la temperatura en las bobinas del estator el relé de
protección térmica de motor CM-MSS protege el motor de
sobrecalentamiento, sobrecarga e insuficiente refrigeración.
Para eso el motor deben incorporar sondas resistivas PTC tipo
A. Si el motor se calienta excesivamente (resistencia del sensor
> 2,83 k:), los relés de salida se desactivan. Un reset sólo es
posible después de un enfriamiento del motor (resistencia del
sensor < 1,1 k:).
Detección de cortocircuito:
Si se detecta un cortocircuito entre dos líneas del circuito de
sensores, los relés de salida se desactivan.
Detección dinámica de rotura cable :
El relé monitoriza permanentemente el circuito al que está
conectado. Si la resistencia en este circuito cambia, el relé
reconoce mediante la velocidad de este cambio una rotura de
cable. Los relés de salida actuarán desconectándose.
Función de test
es sólo posible si no existen errores.
El programa de prueba del sistema se inicia cuando se pulsa el
botón combinado Test / Reset en el frontal. Si la función „Remote
Test / Reset“ (interruptor DIP 4) está activada, la función de test se
puede iniciar también vía la entrada de mando S1-T2.
Después de iniciar el programa de prueba los relés de salida se
desactivan y continúan desactivados hasta que se pulsa el botón
Test / Reset nuevamente o se cierra la entrada de mando S1-T2
(reset a distancia).
Memoria de fallo fy reset
La memoria de fallo es una memoria no-volátil (remanente). Esto
quiere decir que, después de desconectar y reconectar la tensión
de alimentación de mando, el aparato conmutará al estado
precedente al corte de tensión.
Si previamente a la interrupción de la tension de alimentación no
había fallo, el dispositivo se activa automáticamente después de
recuperar la tensión de alimentación.
Si antes de la interrupción existía algún fallo, es necesario un
reset, bien manualmente con el botón Test / Reset o de forma
remota usando la entrada de control S1-T2.
Con la opción de fallo de almacenamiento desactivado, el reset
se puede hacer manualmente con el botón Test / Reset, de forma
remota usando la entrada de control S1-T2 o finalmente, también
automáticamente puenteando la entrada de control S1-T2.
Todos los estados de funcionamiento se indican por LEDs en
el lado frontal. Véase la tabla „LED, información de estado y
mensajes de error“.

10
Italiano
IV Schema di collegamento
In ogni circuito sensore si possono collegare in serie da 1 fino ad
un massimo di 3 sensori di tipo A.
Resistenza PTC totale a freddo massimo 750 :.
Il circuito dei sensori non va collegato a terra.
Funzioni di controllo
Il relè di protezione motore per termistori CM-MSS controlla
la temperatura dell’avvolgimento e protegge di questa
maniera il motore dal surriscaldamento, dal sovraccarico e da
raffreddamento insufficiente. Il motore deve essere equipaggiato
con sensori resistivi PTC tipo A. Se il motore si riscalda
eccessivamente (resistenza del sensore > 2,83 k:), i relè di uscita
si diseccitano. Il reset è possibile solo dopo il raffreddamento del
motore (resistenza del sensore < 1,1 k:).
Rilevamento del cortocircuito:
Se avviene un cortocircuito tra i fili di un circuito di sensore, i relè
di uscita si diseccitano.
Rilevamento dinamico dell’interruzione del cavo:
Durante il funzionamento l’apparecchio controlla permanente-
mente il circuito di misura. Se avviene un cambiamento della
resistenza nel circuito di misura, l’apparecchio riconosce sulla
base della velocità di cambiamento se si tratta di un interruzione
cavo. Nel caso i relè di uscita si diseccitano.
Funzione di test
è possibile solo se non sono presenti guasti.
La routine di test del sistema può essere eseguita azionando il
pulsante combinato Test/Reset sul lato frontale dell’apparecchio.
Se la funzione „Remote Test/Reset“ (DIP switch 4) è attivata, la
routine di test è azionabile anche mediante l‘ingresso di comando
S1-T2.
Dopo lo start della routine di test i relè di uscita si diseccitano e
rimangono diseccitati finché si prema di nuovo il pulsante Test/
Reset o finché si chiuda l’ingresso di comando S1-T2 (Reset
remoto).
Memorizzazione di guasto fe funzione di reset
La memorizzazione del guasto non è volatile (per assenza di
tensione). Ciò significa che, scollegando e ricollegando la tensione
di comando, l’apparecchio ritorna nello stato in cui si trovava
prima dello spegnimento. Se prima dell’interruzione della tensione
di comando non c’era nessun guasto, l’apparecchio riparte
autonomamente dopo aver ricollegato la tensione di comando.
Se prima dell’interruzione della tensione di comando era presente
un guasto, il reset può essere eseguito manualmente mediante il
pulsante Test / Reset o esternamente via un reset remoto tra S1-
T2.
Se la memorizzazione del guasto è disattivata il reset può
essere eseguito manualmente mediante il pulsante Test /
Reset, esternamente via un reset remoto tra S1-T2 oppure
automaticamente ponticellando S1-T2.
Tutti gli stati operativi vengono segnalati dai LED sul lato frontale
dell’apparecchio. Vedere la tabella „LED, informazioni sullo stato e
messaggi d’errore“
Russian
IV Схема подключения
Последовательное соединение 1 до 3 датчиков типа А.
Суммароное сопротивление PTC 750 :.
Цепь датчиков не должна быть заземлена.
Функции контроля
Термисторное реле защиты двигателя CM-MSS контролирует
температуру обмотки двигателя и таким образом защищает
его от перегрева, перегрузки и недостаточного охлаждения.
Для этого двигатель должен быть оснащен PTC датчиками
типа А. Если двигатель перегреется (сопротивления
датчика > 2.83 к:), выходные контакты реле разомкнутся.
Сброс возможен только после охлаждения двигателя
(сопротивления датчика < 1,1 к:).
Обнаружение короткого замыкания:
В случае возникновения короткого замыкания между двумя
линиями датчика цепи, выходной контакт реле отключится.
Динамические определение обрыва провода:
Во время работы устройство постоянно контролирует
измерительные цепи. Устройство определяет обрыв провода
на основе скорости изменения сопротивления измерительный
измерительной цепи. Затем выходной контакт реле
отключатся.
Функция тестирования
ээто возможно только в случае отсутствия ошибок.
При нажатии на кнопку Test / Reset на фронтальной панели,
производится тестирование системы. Если активирована
функция „Remote Test / Reset“ (DIP-переключатель 4), то
тестирование системы также может быть активировано
замыканием контактов S1-T2.
После запуска тестирования системы выходные контакты
реле переходят в положение покоя и остаются разомкнутыми,
до тех пор, пока не будет повторна нажата кнопка Test / Reset
или замкнуты контакты S1-T2 (удаленный сброс).
Память для неисправностей (аварий) fи сброс
Память для хранения аварий разработана энергонезависимой.
Это означает, что после выключения и включения повторно
устройство возвращается в состояние, в котором оно было до
выключения.
Если до пропажи напряжения питания не было аварий, то
устройство автоматически перезагрузится после повторного
подачи напряжения питания.
Если была авария до пропажи питания, то сброс можно
сделать вручную кнопка Test / Reset или дистанционно,
перемкнув выходы сброса S1-T2.
При отключенной функции памяти сброс может быть
выполнен вручную при помощи кнопок Test / Reset,
дистанционно перемкнув контакты между S1-T2 или
автоматически поставив перемычку на эти контакты.
Все рабочие состояния фронтальных СИД.
См. таблицу „СИДы, информационные сообщения о
неисправности“.

11
ዐ࿔
IV থ၍
߲دߌഗ࣮ୟፌܠز1ڟ3߲ૌ႙Aڦدߌഗă
PTCፆኵፌٷڟ750 :ă
دߌഗ࣮ୟփথںă
ࠀీ
ඤ௺ۉፆۉԍࢺۉഗCM-MSSཚࡗۉڦ၍ං࿒܈ઠՆ௨
ۉࡗඤĂࡗሜࢅૐඐփፁă
ۉՂႷాዃૌ႙AڦPTCඤۉፆدߌഗLjړۉ࿒܈ࡗߛ)دߌഗ
ۉፆ>2.83 k:*Ljԍࢺۉഗڦ฿ۉăኻᆶړۉૐඐူઠ)د
ߌഗۉፆ<1.1 k:*ࢫLjԍࢺۉഗ֍ް࿋ă
܌ୟ֪ǖ
ැدߌഗ࣮ୟڦଇߵڞ၍ኮ֪ڟ܌ୟLjఇڦۉഗ฿
ۉă
ۯༀ၍֪ǖ
ሞ߾ፕዐఇࣷᆦ৳Ⴀڦ֪ଉ࣮ୟڦጒༀLjැ֪ଉ࣮ୟڦۉፆ
ኵᅃتᇀՎࣅዐLjఇࣷߵՎࣅڦ୲ઠಒޏᆶ၍Lj
ࢫఇڦۉഗ฿ۉă
֪ࠀీ
ৈሞࠤቱጒༀ֍ీႜă
ཚࡗӀఇമ௬ӱڦ֪0ް࿋Ӏ౧Ljኴႜဣཥ֪ײႾăැĐ
ᇺײ֪0ް࿋đࠀీᆶၳDŽDIP࠲4DžLjሶဣཥ֪ײႾᄺཚ
ࡗS1-T2ኴႜă
ഔۯ֪ײႾࢫLjۉഗް࿋Ljڟ֪0ް࿋Ӏ౧ምْԥӀ
ူS1-T2ԿࢇDŽᇺײް࿋Džࢫۉഗ֍Կࢇă
ࠤቱ٪ئfࢅް࿋
ࠤቱ٪ئԥยׯݥᅟ฿ڦDŽԍାDžă
ኄᅪ࿆ጣఇڦۉᇸԥ࠲ࢫLjምዘႎฉۉLjఇ࣮ࣷڟ࠲
ᅜമڦጒༀă
ැሞۉኮമఇுᆶ֪ڟࠤቱLjሶฉۉࢫఇጲۯዘഔă
ැۉമᆶࠤቱ݀ิLjཚࡗӀ֪0ް࿋Ӏ౧ႜۯް࿋Lj
ཚࡗ܋ጱS1-T2ႜྔևᇺײް࿋ă
ැࠤቱ٪ئࠀీԥೡԸLjሶް࿋ཚࡗӀ֪0ް࿋Ӏ౧ۯํ
၄Ljཚࡗ܋ጱS1-T2ႜྔևᇺײް࿋Lj܌থS1-T2ઠํ၄ጲ
ۯް࿋ă
ᆶڦ߾ፕጒༀཚࡗമ௬ӱڦLED၂๖
֖ĐLED, ጒༀ႑တࢅࠤቱ႑တđ

12
Table of contents
Other ABB Relay manuals