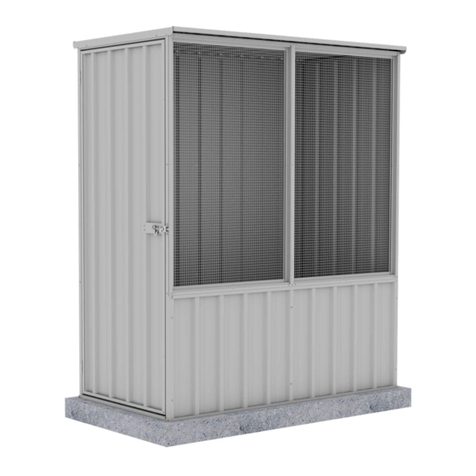
ABSCO SHEDS A15151FKFD-PTX User manual

Absco Industries Assembly Instruction Manual
ABSCO CHICKEN COOP
MODEL: A15151FKFD-PTX
5’ W x 5’ D x 5’11” H
Model: A15151FKFD-PTX 2/03/23 2.2 1
+
We highly recommend downloading the Absco Sheds
Assembly App to assist with your build.
ASSEMBLY APP AVAILABLE ON
Scan to
download
STEP BY STEP ASSEMBLY VIDEOS • PARTS CHECKLISTS • FAQ • 7 DAY
CUSTOMER SERVICE • WARRANTY INFORMATION • COUNCIL FORMS
CONCRETE SLAB
63.78”
63.78”
AU: 1800 029 701
N Z: 0800 466 444
www.abscosheds.com.au
www.abscogardensheds.com
+1 (866) 788 3046 PLEASE LEAVE A REVIEW
www.abscosheds.com.au/review
4”

Absco Industries Assembly Instruction Manual
ABSCO CHICKEN COOP
MODEL: A15151FKFD-PTX
5’ W x 5’ D x 5’11” H
Model: A15151FKFD-PTX 2/03/23 2.2 2
1-2 people Approx. 5 hours
5
NUMBER OF HOURS REQUIRED
ASSEMBLY DIFFICULTY
NUMBER OF PEOPLE REQUIRED
Basic Complex
TOOLS REQUIRED
RECOMMENDED
Personal protective
equipment for tools
Hand
Protection
Enclosed
Shoes
Raised work surface. EG
Sawhorses and timbers
Heavy and/or bulky. Multi-
person lift or mechanical aid.
Ladder Hammer drill Shifter
metal & masonry drill bits
to suit anchor fasteners
Pop riveterCordless drill
GENERAL INSTRUCTIONS
• Before commencing any assembly, read
through these instructions in detail to gain
a thorough understanding of assembly
methods and associated details.
• Unpack the carton and carefully identify
and check off all the parts against the
parts described and illustrated on
"COMPONENTS PACKING LIST" pages.
SITE PREPARATION
• The site for the shed must be level. An
uneven surface may result in misalignment
of parts.
• The shed shall be erected on top of a
reinforced concrete slab and anchored
down appropriately illustrated on “FINAL
CONSTRUCTION” page.
SAFETY NOTES
• Some parts may have sharp edges. It is
advisable to wear gloves when handling these
items and safety glasses if drilling holes.
Sensible shoes are highly recommended.
• Do not erect your shed in windy conditions.
• Ensure that the shed is securely anchored
to a solid foundation immediately after
construction is completed.
• It is highly recommended to erect the shed
with two or more people.
• Do not sit, stand or walk on the roof of your
shed.
Tinsnips

Absco Industries Assembly Instruction Manual
ABSCO CHICKEN COOP
MODEL: A15151FKFD-PTX
5’ W x 5’ D x 5’11” H
Model: A15151FKFD-PTX 2/03/23 2.2 3
Check off all components.
Nominal sheet widths are shown, +/- 0.08” is within tolerance
SHEETING
QTY COMPONENT
DESCRIPTION
PART
No. CHK QTY COMPONENT
DESCRIPTION
PART
No. CHK
1STEEL SHEET
70.3” x 30.4” 30A 1 STEEL SHEET
70.3” x 30.4” 30E
1STEEL SHEET
70.3” x 30.4” 30G 1 STEEL SHEET
67.9” x 28” 37A
2STEEL SHEET
62.7” x 30.4” 43A 4 STEEL SHEET
23.6” x 30.4” 31D
4MESH SHEET
47” x 27.8” MESH20
INSTRUCTIONS AND FITTINGS PACKET
1DOOR PLATE 12A 1
8G x 3/8” SELF
TAPPING SCREW
PACK QTY 220
FAST001
61/8” POP RIVET FAST009 1INSTRUCTION
MANUAL IM
1PADBOLT
4.5” LONG FAST006 1PADBOLT
HASP FAST007
6
3/16 x 1/2”
CSK SCREW
& NUT
FAST004
FAST005 1PHILLIPS HD
DRIVER BIT FAST038
11/8”
DRILL BIT DRILL 15 8G x 3/4” SELF
TAPPING SCREW FAST013
COMPONENTS LIST

Absco Industries Assembly Instruction Manual
ABSCO CHICKEN COOP
MODEL: A15151FKFD-PTX
5’ W x 5’ D x 5’11” H
Model: A15151FKFD-PTX 2/03/23 2.2 4
CHANNEL PACK
QTY COMPONENT
DESCRIPTION
PART
No. CHK QTY COMPONENT
DESCRIPTION
PART
No. CHK
3CHANNEL
70.3” 80L 1 CHANNEL
59.6” 81F
1CHANNEL
59.6” 53C 2 CHANNEL
58.6 53T
2CHANNEL
59” 150 2 CHANNEL
59” 151
8CHANNEL
28” 181 2 CHANNEL
59.6” 81E
2CHANNEL
28” 58M 1 CHANNEL
67.9” 58B
1CHANNEL
68” 58A 1 CHANNEL
28.3” 54G
1JAMB
70.3” 89A 1 JAMB
47.4” 70E
1JAMB
70.3” 89B 2 JAMB
42.5” 91E
7JAMB
70.3” 70D 1 JAMB
31.1” 91D
2LIP TRIM
33.3” 88A
Check off all components.
COMPONENTS LIST

Absco Industries Assembly Instruction Manual
ABSCO CHICKEN COOP
MODEL: A15151FKFD-PTX
5’ W x 5’ D x 5’11” H
Model: A15151FKFD-PTX 2/03/23 2.2 5
PAGE 12
ABSCO INDUSTRIES ASSEMBLY INSTRUCTION - MODEL: 30152GK 13/04/16
Premier Garden Shed
Model: 30152GK
INSTRUCTIONS
AND VIDEOS
ABSCO ASSEMBLY INTRODUCTION
FASTENING SYMBOLS
The snaptite assembly system locks most perimeter channels to all roof and wall
sheets without the need for tools and fasteners.
To pre-assemble the four wall panels
and two roof panels, the perimeter
channels are secured to the top and
bottom of each panel using the
snaptite system, as detailed on the
following pages wherever you see
the symbol.
Position sheets on timbers,
trestles or partly over edge of
concrete slab.
Each perimeter channel must finish flush with the
edges of the sheets.The snaptite system allows
adjustment for this process by simply tapping the
channel along the sheets until each end is neatly
flush. If you need to remove channels from the
panels, pull the channel along the panel from
opposing ends. You may need someone to help
with this.
Join components together with one screw at this
location only, as some channel sections have extra
holes that are not required for this model of garden
shed
Do not join components together at this location yet,
as the screw may obstruct further assembly of other
components
4mm NUT & BOLT SET
3mm POP RIVETS
PUSH
PUSH
HIGH SIDE
HIGH SIDE
PUSH
HIGH SIDE
HIGH SIDE
After joining sheets together, position channel over one end of the sheets, gently
tapping it over the snaptite lugs, working along the sheets to the other end.
HIGH SIDE
SNAP
T TE
i
SNAP
T TE
i
SNAP
T TE
i
Join components together by pre-drilling the holes
first. Use one component as a template to mark where
the holes are. Drill with 3mm drill bit.
D

Absco Industries Assembly Instruction Manual
ABSCO CHICKEN COOP
MODEL: A15151FKFD-PTX
5’ W x 5’ D x 5’11” H
Model: A15151FKFD-PTX 2/03/23 2.2 6
ROOF AND WALL OVERVIEW
81E
88A
88A
81E
43A
43A
Door and mesh panels not shown for illustrative purposes.
Detailed steps on following pages.
70E
89B
150
151
151
150
89A
91D
53T
31D
54G
80L
81F
53C
80L
80L
181
70D
70D
181
181
181
31D
31D
31D
30G
30A 30E
70D
181
181
181
70D

Absco Industries Assembly Instruction Manual
ABSCO CHICKEN COOP
MODEL: A15151FKFD-PTX
5’ W x 5’ D x 5’11” H
Model: A15151FKFD-PTX 2/03/23 2.2 7
1. Overlap specified sheets by a
rib.
Make sure ends are flush and
orientated as shown.
2. Fasten with self tapping
screws through prepunched
sheet-to-sheet holes on overlap.
If you can’t see bottom hole twist
the sheet left or right.
Make a new hole with supplied
drill bit if bottom hole is too far
up or down the sheet or not
found.
3. Attach the top and bottom
channels using the SNAP-TiTE
method.
Make sure you have the short
side of the channel to the
outside of the sheeting
REAR PANEL ASSEMBLY
53C
81F
30A
30G
edge holes to outside
four top holes to outside
- This completes the rear panel -
1 required
FAST001

Absco Industries Assembly Instruction Manual
ABSCO CHICKEN COOP
MODEL: A15151FKFD-PTX
5’ W x 5’ D x 5’11” H
Model: A15151FKFD-PTX 2/03/23 2.2 8
ROOF PANEL ASSEMBLY
1x required
81E
81E
43A
43A
SNAP
T TE
i
FAST001 x8
88A
88A
1. Overlap specified sheets as
shown. Make sure ends are flush.
Where possible, keep sheets in
the same orientation from the
box.
2. Fasten with self tapping
screws through prepunched
sheet-to-sheet holes on overlap.
If you can’t see bottom hole twist
the sheet left or right.
Make a new hole with supplied
drill bit if bottom hole is too far
up or down the sheet or not
found.
4. Place the 88A lips on both
ends with the shorter side on
top.
Align with holes in sheet and
fasten with four self tapping
screws each.
3. Attach the top and bottom
channels using the SNAP-TiTE
method.
Make sure you have the short
side of the channel to the
outside of the sheeting
FAST001
- This completes the roof panel -

Absco Industries Assembly Instruction Manual
ABSCO CHICKEN COOP
MODEL: A15151FKFD-PTX
5’ W x 5’ D x 5’11” H
Model: A15151FKFD-PTX 2/03/23 2.2 9
DOOR PANEL ASSEMBLY
1x required
58A 58B
12A
37A
58M
SNAP
T TE
i
SNAP
T TE
i
58M
Narrow pan of sheet
to this side
0.8”
Side channels of door
are to be orientated
opposite to top and
bottom channels.
Side channels are
positioned behind top
and bottom channel.
0.6”
0.8” flange
0.6” flange
FAST006
FAST001 x12
FAST001 x4
D
D
D
D
D
D
D
D
D
D
D
D
D
D
Position 12A
midway along the
door.

Absco Industries Assembly Instruction Manual
ABSCO CHICKEN COOP
MODEL: A15151FKFD-PTX
5’ W x 5’ D x 5’11” H
Model: A15151FKFD-PTX 2/03/23 2.2 10
91E
91E
37A
Using the jambs as templates
drill 1/8” holes into the sheet
and secure with screws from
the outside of the sheet.
Turn over the panel and fit
braces.
FAST001 x14
D
D
D D
- This completes the door panel -

Absco Industries Assembly Instruction Manual
ABSCO CHICKEN COOP
MODEL: A15151FKFD-PTX
5’ W x 5’ D x 5’11” H
Model: A15151FKFD-PTX 2/03/23 2.2 11
LEFT SIDE PANEL
1x required
1.
3.
2.
150
151
Prepare one
short sheet
FAST001 x7
1.2”
0.6”
SNAP
T TE
i
181
31D
Notch out both bottom corners as
shown using tinsnips.
89A
89B
70E
70D
80L
80L
150
89B
80L
89A
80L
70D

Absco Industries Assembly Instruction Manual
ABSCO CHICKEN COOP
MODEL: A15151FKFD-PTX
5’ W x 5’ D x 5’11” H
Model: A15151FKFD-PTX 2/03/23 2.2 12
LEFT SIDE PANEL
4. 5.
SNAP
T TE
i
54G
91D
181
31D
NOTE: 31D sheet is positioned
behind jamb 89B
INSIDE VIEW
- This completes the left side panel -

Absco Industries Assembly Instruction Manual
ABSCO CHICKEN COOP
MODEL: A15151FKFD-PTX
5’ W x 5’ D x 5’11” H
Model: A15151FKFD-PTX 2/03/23 2.2 13
DOOR PANEL ASSEMBLY
Lay the LEFT SIDE PANEL
face up and lay the DOOR
PANEL down in the open
position on top as shown.
Using three rivets per hinge,
FAST009, secure the door to
the frame.
NOTE: Run the 1/8” drill bit
through the punched holes
in the jamb before riveting
the hinge on.
FAST009 x6
D
D
D
D
D
D

Absco Industries Assembly Instruction Manual
ABSCO CHICKEN COOP
MODEL: A15151FKFD-PTX
5’ W x 5’ D x 5’11” H
Model: A15151FKFD-PTX 2/03/23 2.2 14
RIGHT SIDE PANEL
1x required
Part overview
80L
70D
151
70D
150
1.
70D
151
80L
70D
30E
31D 30E
150
151
70D
70D
80L
181

Absco Industries Assembly Instruction Manual
ABSCO CHICKEN COOP
MODEL: A15151FKFD-PTX
5’ W x 5’ D x 5’11” H
Model: A15151FKFD-PTX 2/03/23 2.2 15
RIGHT SIDE PANEL
3.
SNAP
T TE
i
181
31D
FAST001 x2
4.
D
D
INSIDE VIEW
FAST001 x10
2.
Prepare a short
sheet
1.2”
0.6”
SNAP
T TE
i
181
31D
Notch out both bottom corners as
shown using tinsnips.
- This completes the right side panel -

Absco Industries Assembly Instruction Manual
ABSCO CHICKEN COOP
MODEL: A15151FKFD-PTX
5’ W x 5’ D x 5’11” H
Model: A15151FKFD-PTX 2/03/23 2.2 16
FRONT PANEL
1.
3.
2.
53T
53T
70D
70D
53T
Prepare two
short sheets
70D
FAST001 x7
1.2”
0.6”
SNAP
T TE
i
181
31D
Notch out both bottom corners as
shown using tinsnips.

Absco Industries Assembly Instruction Manual
ABSCO CHICKEN COOP
MODEL: A15151FKFD-PTX
5’ W x 5’ D x 5’11” H
Model: A15151FKFD-PTX 2/03/23 2.2 17
SNAP
T TE
i
SNAP
T TE
i
181
181
31D
31D
4. 5.
FAST001 x4
INSIDE VIEW
FAST001 x13
- This completes the front panel -

Absco Industries Assembly Instruction Manual
ABSCO CHICKEN COOP
MODEL: A15151FKFD-PTX
5’ W x 5’ D x 5’11” H
Model: A15151FKFD-PTX 2/03/23 2.2 18
FITTING MESH PANELS
The mesh panels are fixed to the inside of
the wall panels.
There’s six holes in the border of the
mesh panel, these are fixed with FAST001
screws.
1. Start by aligning the middle pair of
mesh holes with these lower 70D holes
and fasten with screws from outside.
2. The four corner holes are to be drilled
out into the top and bottom channels
using the with the supplied 1/8” drill bit
and fastened from inside the panel using
four FAST001 screws.
3. Repeat these steps for every mesh
position.
FAST001 x6
WARNING: It is recommended that new galvanised mesh should be weathered for two
(2) months or scrubbed with a mild acidic solution, such as vinegar, then rinsed with
water before being used in bird housing applications.
70D
FAST001 x6
MESH
20
NOTE: If the mesh panel is not sitting flush
enough for your liking you may drill more 1/8”
holes and fasten with additional FAST001.

Absco Industries Assembly Instruction Manual
ABSCO CHICKEN COOP
MODEL: A15151FKFD-PTX
5’ W x 5’ D x 5’11” H
Model: A15151FKFD-PTX 2/03/23 2.2 19
Side wall
channels
fit into the
notched
rear wall
channels.
Position hasp centrally
over the padbolt shaft
and drill 1/8” holes and
secure with screws.
NOTE: Take care to ensure that all wall panels are not upside down. The top channels of each panel
are pre-punched for attaching roof sheeting. The base channels are not pre-punched.
Mesh panels are not shown for
illustrative purposes.
PANEL CONSTRUCTION
D
D
FAST001 x4
FAST013 x4
FAST013 x4
FAST013 x4
FAST001 x2

Absco Industries Assembly Instruction Manual
ABSCO CHICKEN COOP
MODEL: A15151FKFD-PTX
5’ W x 5’ D x 5’11” H
Model: A15151FKFD-PTX 2/03/23 2.2 20
FINAL CONSTRUCTION
Each anchor consists of one nut, bolt, dynabolt
and steel angle.
Drill a hole into the wall sheet to suit the bolt
Drill a hole into the concrete to suit the dynabolt
ANCHORING OF
COOP
Location of 8
concrete anchors
Line up the holes in
the roof sheet with
front and back top
channels.
Secure with screws.
Line up the holes in
the roof lips with holes
in the top channel of
the side panels.
Secure with screws.
FAST001 x16
D
D
D
D
D
D
Bolt and Nut*
M10 4.6/S
Steel Angle*
35 x 35 x 3
M10 Dynabolt*
* Denotes hot dip galvanised finish
Wall Sheet
Slab
Table of contents
Other ABSCO SHEDS Farm Equipment manuals