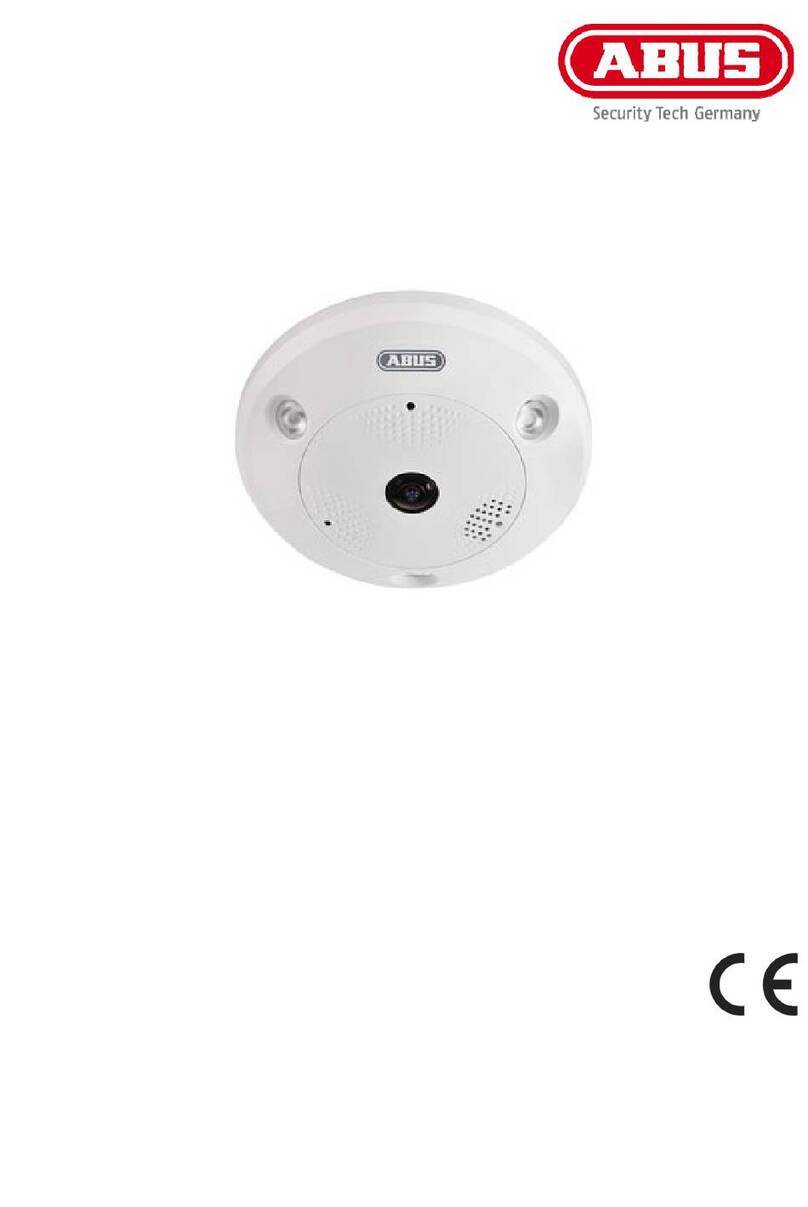
Abus TVAC19000C User manual

Wi-Fi-enabled Indoor Dome Camera
TVAC19000C
US
User guide
FR
Notice d’utilisation
PT
Manual de instruções
ES
Manual de instrucciones
For more information and additional FAQ’s please visit us online at:
www.abus.com/plug-and-play
Version 10/2014

This user guide contains important operating instructions for this device.
This guide should be kept in a convenient location for continued reference.
For a table of contents, see page 9.
Ce manuel d'utilisateur contient des instructions d'utilisation importantes pour cet appareil.
Ce manuel devrait être conservé dans un endroit pratique aux fins de référence.
Pour consulter la table des matières, veuillez ouvrir le manuel à la page 36.
Este guia do usuário contém importantes instruções de operação para este dispositivo.
Este guia deve ser mantido num local conveniente para servir de contínua referência.
Para um índice de conteúdos, ver a página 64.
Esta guía del usuario contiene instrucciones de manejo importantes para este dispositivo.
Esta guía debe conservarse en un lugar apropiado para su consulta permanente.
Véase la tabla de contenido en la página 92.
English
Français
Português
Español

Wi-Fi-enabled Indoor Dome Security Camera
TVAC19000C
User guide
For more information and additional FAQ’s please visit us online at:
www.abus.com/plug-and-play
Version 10/2014
Original user guide in English.
Retain for future reference.

4
English
Introduction
Dear Customer,
Thank you for purchasing the ABUS TVAC19000C Wireless Indoor Dome Security Camera.
To ensure optimum performance and condition of this system is maintained, please read the enclosed
operating manual.
This operating manual is meant to guide you through the process of operating the TVAC19000C Wireless
Indoor Dome Security Camera. This manual contains instructions for the system’s setup, installation
maintenance and relevant safety information.
In the event you have questions regarding the system, installation or operating procedures please consult
your local authorized dealer or our customer service team.
ABUS USA, LLC surveillance products are not manufactured and/or sold with the intent to be used for illegal
purposes. ABUS USA, LLC expects consumer’s use of these products to be in compliance with local, state
and federal law. For further information on video and audio recording legal requirements, please consult your
local, state and federal law.
Thank you,
ABUS USA, LLC
Data storage is subject to national data privacy guidelines.
Disclaimer
This user guide has been produced with the greatest of care. Should you discover any missing information or
inaccuracies, please contact us under the address shown on the back of the manual.
ABUS USA, LLC does not accept any liability for technical and typographical errors, and reserves the right to
make changes to the product and user guide at any time and without prior warning.
ABUS USA, LLC is not liable or responsible for direct or indirect damage resulting from the equipment,
performance and use of this product. No forms of guarantee are accepted for the contents of this document.
ABUS USA, LLC products are not manufactured and/or sold with the intent to be used for illegal purposes.
ABUS USA, LLC expects consumer’s use of these products to be in compliance with all local, state and
federal law. For further information on video surveillance and audio recording legal requirements, please
consult your local, state and federal law.
© 2014, All rights allowed by law are hereby reserved.

5
English
Icon explanation
Danger of electrical shock.
Important warning regarding operation of device
Important information regarding operation of device
Important safety advice
All warranty claims are invalid in the event of damage. caused by operating the system in
non-compliance with this user guide. ABUS USA, LLC cannot be held liable for resulting
damages.
In the event of material or personal damage caused by improper operation or non-
compliance with the safety information, ABUS USA, LLC cannot be held liable. All warranty
claims are voided in such cases.
The device has been manufactured in compliance with international safety standards. Please read these
safety advices carefully.
Safety advice
1. Mains supply
110 V AC voltage, 60 Hz (using a power supply unit for 5 V DC)
Operate this product only from the type of power supply indicated on the marking label. If you are not sure
of the type of power supplied to your home, consult your local power company. Disconnect the product
from the mains before you start any maintenance or installation procedures. The power supplies are only
for indoor usage.
2. Overloading
Do not overload a wall outlet, extension cord or adapter as this may result in electric fire or shock.
3. Liquids
Protect the device from any kind of liquids entering.
4. Cleaning
Disconnect the product from the wall outlet before cleaning. Use a light damp cloth (no solvents) to dust
the product.
5. Accessories
Do not use any unsupported accessories as these may be hazardous or cause damage the product.
6. Location
This device can be used only inside.
The product will be damaged even it falls from a low height.
During the installation of the camera please take care that the camera image sensor does not
point directly into the sunlight. Please follow the installation instructions in the corresponding
chapter of this user manual.
Do not place the device near a radiator or heat register.
Only operate the device at locations where temperatures within the permitted ambient
temperature range of 14 °F to 122 °F. Outside the predetermined temperature range operation is
possible, but cannot be guaranteed.

6
English
7. Wireless transmission
The wireless range depends on a variety of environmental factors. The local conditions at the installation
site may have a negative impact on the range. When there are no obstructions between the receiver and
transmitter, a range of up to 325 feet is possible, but this range will be considerably less within buildings.
The following environmental conditions compromise both the range as well as the frame rate:
Mobile communication towers, high-tension pylons, electrical wires, ceilings and walls, devices with the
same or an adjacent wireless frequency.
Disclaimer
ABUS USA LLC products are not manufactured and/or sold with the intent to be used for
illegal purposes. ABUS USA, LLC expects consumer’s use of these products to be in
compliance with all local, state and federal law. For further information on video surveillance
and audio recording legal requirements, please consult your local, state and federal law. It is
your responsibility to be aware of the local, state and federal regulations regarding image
storage and use.
Warnings
Follow all safety and operating advice before starting-up the device!
1. Follow these directions in order to avoid damage of the power cord or plug:
Do not modify or process the power cord or plug arbitrarily.
Make sure to disconnect the power cord holding the plug.
Keep heating appliances as far as possible from the power cord in order to prevent the vinyl
cover from melting.
The outdoor camera’s power supply unit must be protected against humidity and damp
conditions.
It is only for indoor usage.
2. Failure to follow these directions may cause electrical shock.
Do not open the main body or the power supply.
Do not insert metal or inflammable objects inside the product.
In order to avoid any damage during lightning use a surge protector.
3. Do not use if it is found to be defective. If you continue to use the product when defective, serious
damage can occur. Make sure to contact your local product distributor if the product is found to be
defective.
During the installation into an existing video surveillance system make sure that all devices are
disconnected from the low supply voltage circuit.
If in doubt allow a professional electrician to mount, install and wire-up your device. Improper
electrical connection to the mains does not only represent at threat to you but also to other
persons.
Wire-up the entire system making sure that the mains and low voltage circuit remain separated
and cannot come into contact with each other in normal use or due to any malfunctioning.
Avoid using the device under the following unfavorable conditions:
moisture or excessive air humidity
extreme cold or heat
direct sunlight
dust or combustible gases, vapors or solvents
strong vibration
strong magnetic fields, such as those found in the vicinity of machinery or loudspeakers
the camera must not be directed into the sun as this can destroy the sensor.
the camera may not be installed on unstable surfaces

7
English
Unpacking
While you are unpacking the device please handle it with utmost care.
If you notice any damage to original packaging, please check the device.
If the device shows damage, please contact your local dealer.
FCC Compliance Information
Part 15 Compliance Statement
This device complies with Part 15 of the FCC Rules. Operation is subjected to the following two conditions:
(1) this device may not cause harmful interference, and (2) this device must accept any interference received,
including interference that may cause undesired operation.
This equipment has been tested and found to comply with limits for a Class B digital device, pursuant to
Part 15 of the FCC rules and ETSI (EN) 300328. These limits are designed to provide reasonable protection
against harmful interference in residential installations. This equipment generates, uses, and can radiate
radio frequency energy, and if not installed and used in accordance with the instructions, may cause harmful
interference to radio communications.
However, there is no guarantee that interference will not occur in a particular installation. If this equipment
does cause interference to radio or television equipment reception, which can be determined by turning
the equipment off and on, the user is encouraged to try to correct the interference by one or more of the
following measures:
Reorient or relocate the receiving antenna.
Move the equipment away from the receiver.
Plug the equipment into an outlet on a circuit different from that to which the receiver is connected.
Consult the dealer or an experienced radio/television technician for additional suggestions.
CAUTION! Any changes or modifications to this equipment not expressly approved by the party
responsible for compliance could void your authority to operate the equipment.
RF Exposure Information
The antenna used for this transmitter must be installed to provide a separation distance of at least 20 cm
(7.9”) from all persons and must not be collocated or operating in conjunction with any other antenna or
transmitter.
All declarations and certificates of conformity can be ordered from:
ABUS USA, LLC
23910 N. 19th Ave.
Unit #56
Phoenix, AZ 85085-1850
Ph.: 1-623-516-9933
Mail: customers[email protected]
One-year Limited Warranty
Important: Evidence of original purchase is required for warranty service.
WARRANTOR:
ABUS USA LLC

8
English
ELEMENTS OF WARRANTY:
ABUS USA LLC warrants, for one year, to the original retail owner, this ABUS Product to be free from defects
in materials & craftsmanship with only the limitations or exclusions set out below.
WARRANTY DURATION:
This warranty to the original user shall terminate & be of no further effect 12 months after the date of original
retail sale. The warranty is invalid if the Product is (A) damaged or not maintained as reasonable or
necessary, (B) modified, altered, or used as part of any conversion kits, subassemblies, or any configurations
not sold by ABUS USA LLC, (C) improperly installed, (D) serviced or repaired by someone other than an
authorized ABUS service center for a defect or malfunction covered by this warranty, (E) used in any
conjunction with equipment or parts or as part of any system not manufactured by ABUS, or (F) installed or
programmed by anyone other than as detailed by the owner’s manual for this product.
STATEMENT OF REMEDY:
In the event that the product does not conform to this warranty at any time while this warranty is in effect,
warrantor will either, at its option, repair or replace the defective unit & return it to you without charge for parts,
service, or any other cost (except shipping & handling) incurred by warrantor or its representatives in
connection with the performance of this warranty. Warrantor, at its option, may replace the unit with a new or
refurbished unit. THE LIMITED WARRANTY SET FORTH ABOVE IS THE SOLE & ENTIRE WARRANTY
PERTAINING TO THE PRODUCT & IS IN LIEU OF & EXCLUDES ALL OTHER WARRANTIES OF ANY
NATURE WHATSOEVER, WHETHER EXPRESSED, IMPLIED OR ARISING BY OPERATION OF LAW,
INCLUDING, BUT NOT LIMITED TO ANY IMPLIED WARRANTIES OF MERCHANTABILITY OR FITNESS
FOR A PARTICULAR PURPOSE. THIS WARRANTY DOES NOT COVER OR PROVIDE FOR THE
REIMBURSEMENT OR PAYMENT OF INCIDENTAL OR CONSEQUENTIAL DAMAGES.
Some states do not allow this exclusion or limitation of incidental or consequential damages so the above
limitation or exclusion may not apply to you.
LEGAL REMEDIES:
This warranty gives you specific legal rights, & you may also have other rights which vary from state to state.
This warranty is void outside the United States of America & Canada.
PROCEDURE FOR OBTAINING PERFORMANCE OF WARRANTY:
If, after following the instructions in the owner’s manual you are certain that the Product is defective, pack the
Product carefully (preferably in its original packaging). Disconnect the battery from the Product & separately
secure the battery in its own separate packaging within the shipping carton. The Product should include all
parts & accessories originally packaged with the Product. Include evidence of original purchase & a note
describing the defect that has caused you to return it.
The Product should be shipped freight prepaid, by traceable means, to warrantor at:
ABUS USA, LLC
23910 N. 19th Ave.
Unit #56
Phoenix, AZ 85085-1850
Ph.: 1-623-516-9933
Mail: customers[email protected]
Website: www.abus.com/us
(See www.abus.com for current hours of operation.)
9
English
Table of contents
1. Intended use .........................................................................................................................................10
2. Package Contents ................................................................................................................................10
3. Features and functions........................................................................................................................10
4. Device description ...............................................................................................................................11
4.1 Overview ......................................................................................................................................11
4.2 Camera description......................................................................................................................11
5. Installation.............................................................................................................................................13
5.1 Camera mounting.........................................................................................................................13
6. Operating and configuring via app.....................................................................................................14
7. Maintenance and cleaning...................................................................................................................27
7.1 Maintenance.................................................................................................................................27
7.2 Cleaning .......................................................................................................................................27
8. Disposal.................................................................................................................................................27
9. Tips for troubleshooting......................................................................................................................28
10. Technical data.......................................................................................................................................29

10
English
1. Intended use
The Wi-Fi-enabled Indoor Dome Security Camera make powerful monitoring possible. This camera is
designed for indoor installation. The integrated infrared LEDs enable day and night surveillance for objects
up to a maximum distance of 3 metres.
Thanks to the ceiling mount, the camera can be installed individually indoors.
The easy configuration and operation via app enable access to the camera from all over the world. You
can control the camera from the live image.
For a detailed description of functions, refer to Section 3, “Features and functions”.
2. Package Contents
Wi-Fi pan/tilt camera & app
Power supply unit
LAN cable
Ceiling mount
Antenna
3. Features and functions
For effective all-round monitoring of interior spaces
Guided step-by-step installation via app (iOS, Android)
HD 720p resolution and infrared night vision function for brilliant image quality
Recording to SD card (accessory, max. 32 GB)

11
English
4. Device description
4.1 Overview
Item number
TVAC19000C
Resolution
720p
IR LEDs
IR swivel filter (ICR)
Operating voltage
5 V DC
4.2 Camera description
Front:
Light sensor
IR LEDs
Microphone

12
English
Rear:
micro SD card slot
Power supply connection
5 V DC/1 A
Power LED
LAN interface
Antenna
connection
reset button

13
English
5. Installation
5.1 Camera mounting
1. Use the camera to help you find a suitable place for installation.
Use the base plate to mark the drill holes on the surface, then drill the holes. Insert the wall plugs
supplied before you attach the base plate with the screws.
2. Next, tighten the base plate of the camera; use the enclosed screws to do this.

14
English
3. Then place the camera on the base plate and turn it so that the arrow is pointed at Lock.
The camera is now securely mounted. Connect the power supply unit with the camera.
6. Operating and configuring via app
The TVAC19000 Wi-Fi pan/tilt camera & app gives you the option of switching to live on the cameras and to
configure the recorder. The app for this device can be found in the App Store under the name of “App2Cam”.
To configure access to the camera, proceed as follows:
“App2Cam” app
Download the “App2Cam” app and install it on your
smartphone.
Make sure that your smartphone or tablet has internet
access.
You have two options to connect the camera to the network:
Option 1:
Connect the LAN cable provided to the camera. Then
connect the cable to your router.
Connect the cable to your router in the next step.
Then connect the power supply unit provided.
Do not start to set up the camera until the LED lights up
constantly. This can take about 60 seconds.
Following this you can proceed with the setup at point .

15
English
Option 2: No adapter cable necessary
Connect the camera with the power supply unit and wait
approx. 1 minute until the red and green LEDs light up.
Look in the network settings on your mobile end device in the
“Wireless” menu for available Wi-Fi networks. For initial
setup, the camera presents its own SSID named:
XXXXXXXXX
Connect your mobile end device to this Wi-Fi. The Wi-Fi is
secured with the 12345678 security code.
Begin setting up the camera once the two LEDs are lit up
permanently. This can take about 60 seconds.
Following this you can proceed with the setup at point .
Adding the system
Open the app on your mobile phone and click on “Press to
add new system”.
When starting the app for the first time, you are asked
whether you want to activate or refuse push notifications for
motion detection.
Please note that false alarms can occur for video surveillance
in outdoor areas.

16
English
Entering system information
1. Enter a name for your camera at “System Name” which
should then be displayed on your mobile phone.
2. To enter the DID automatically, click on “Search” to
display all the cameras which are connected to your
network or directly to your mobile end device. Select the
required camera and click on “Add”. You can also enter
the 20-digit DID number manually. You can find this on
the product sticker on the product. .
3. Then enter your password.
The standard security code is: 123456. When you logon
successfully, you receive a warning to inform you that
you are using the standard security code and that you
should change it for your own security.
4. Save the settings by pressing “Save”.
5. To change the camera settings, press the settings button.
Menu options then appear for every camera. Select the
settings icon to edit the system settings.
6. To obtain the live view, click on the required camera.
The camera can now be reached locally in your network. To
connect the camera to the internet, go to menu item 8.
“Advanced Settings” at “Wi-Fi” settings.
Once you have changed the camera password, it must also
be changed in the app. To do so, open the camera settings.
Connection status
If you have added you system successfully, the name of your
system and the current connection status appear. The picture
shown is the last video image of the previous session.
You can add up to 8 cameras in the app.
Press the required camera to go to the live view.
System name
e.g. Test
Connection status
Connected = you are connected with your system
Disconnected = there is no connection to the system
Press to add new system
Here you can add an additional system
System configuration
Go to the system configuration here.
Press to go to the live view again.
Updating the connection
The connection is updated.

17
English
Firmware information / PIN code / Notify
setting
Here you can see the current firmware version of
the system and save a PIN code. You can find
out how to enter a PIN code at.
Saving the PIN code
If you want to save a PIN code for this app, proceed as
follows:
1. Open the “Setup PIN Lock” at
2. Enter a 4-digit PIN code and repeat it.
3. Put a tick at “Enable lock when starting”.
When you have saved a PIN code, it will be requested when
you want to open the app.
Live view
Select the required camera from the selection list. Now you
see the live view of the camera. The picture is shown in the
4:3 mode. To view a 16:9 format, turn your mobile end device
90°.
Camera control:
To control the camera, tap in the middle of the live image and
swipe in the desired direction.
Turn to the left: Swipe from left to right.
Turn to the right: Swipe from right to left.
Tilt up: Swipe from top to bottom.
Tilt down: Swipe from bottom to top.
Snapshot
Here you have the option of making a
screenshot of your live image. The image is
then saved in your photos on your mobile
device.
The pictures saved are stamped with the date
and time and saved in the photo gallery.
Audio
You have the option of activating or
deactivating the audio here.
Starting the recording
Here you can start a manual recording; the
recording time is one minute. The recording is
saved locally on the SD card and the following
icon appears in the live view. The
recording runs for 1 minute automatically and
cannot be interrupted.

18
English
Saving the preset position
Here you have the option to define a preset
position.
To save a position, proceed as follows:
Android:
Navigate to the desired position by swiping.
To save the position, press and hold your
finger on the centre of the image for
5 seconds. Once the position is saved, the
message “Position saved” appears.
To bring up the preset function, press the PTZ
button; the camera automatically moves to the
preset position.
iOS:
Navigate to the desired position by swiping.
To save the position, press the PTZ button.
A pop-up window appears. Select “Save
position”; the preset position is now saved.
To bring up the preset function, press the PTZ
button; a pop-up window will appear. Select
“Move to preset” to bring up the preset
position.
Duplex communication
You can speak to someone else using the
microphone of the mobile terminal device on
the camera. Keep the button pressed
while speaking.
Back
You can return to the camera overview here.
The last screenshot is always shown.
Camera configuration
You go to camera configuration here.
You can choose one of the following options:
Configure the camera
Remove camera
Access to recordings on the SD card
Press to go to the live view again.

19
English
Settings
Click on to go to the settings.
You can change the camera settings here. You can also
activate or deactivate the e-mail messages here.
Click on “Advanced settings” to start the configuration.
E-mail alert
E-mail notifications are activated by motion.
Please note that false alarms can occur for video surveillance
in outdoor areas.
Enter your password to go to the settings. The standard
password is “123456”.

20
English
You can configure the camera at settings.
Admin password
The Admin password must be entered to add the camera
and to go to the settings. The standard password is
“123456”.
Change this at the initial installation to protect your camera
from unauthorised access.
If you have forgotten your password you can reset the
camera to the factory settings by pressing the reset button
for 5 seconds. The red LED starts to flash.
The camera must then be reinstalled.
Time zone
The world time zones are shown in the selection list.
Select the time zone in which the camera is installed.
Activate daylight saving if summertime applies to the world
time zone.
Daylight saving
Activate/deactivate daylight saving time.
Device security code
The standard security code is: 12345678
For reasons of security, change this code and enter a new
one (max. 8 digits).
Enter the code again to confirm.
Then confirm with “OK”.
You will need the security code later if you want to access
the cameras via the app.
If you have forgotten your security code, you can reset the
camera to the factory settings by pressing the reset button
for 5 seconds.
The camera must then be reinstalled.
Other manuals for TVAC19000C
2
Table of contents
Other Abus Security Camera manuals

Abus
Abus HDCC72550 User manual

Abus
Abus IPCS24500 User manual

Abus
Abus IPCS84550 User manual

Abus
Abus TVIP91 Series User manual

Abus
Abus IPCS82500 User manual

Abus
Abus PPIC32020 User manual

Abus
Abus PPIC90000 User manual

Abus
Abus TVIP41660 User manual

Abus
Abus TVCC34010 User manual

Abus
Abus TVAC18010C User manual

Abus
Abus PPIC46520 User manual

Abus
Abus HDCC62510 User manual

Abus
Abus eyseo TVCC40530 User manual

Abus
Abus TV7602 User manual

Abus
Abus TVIP44510 User manual

Abus
Abus TV7230 User manual

Abus
Abus TVCC50011 User manual

Abus
Abus PPIC31020 User manual

Abus
Abus Eyseo TV7220 User manual

Abus
Abus TVCC34020 User manual