Access LORADO Quick start guide

1
Thank you for purchasing ACCESS® LORADO®Roll-Up Cover. ACI®
manufactured this cover with pride using superior quality materials and
workmanship. With proper care, your cover will provide years of service and
enjoyment.
NOTICE TO INSTALLER: It is recommended instructions are read before
installation, even if familiar with cover. Improvements may be made without
prior notice. Always handle cover and components with care. If you have any
problems or questions, have serial number ready and call customer service.
When done, this owner’s manual must be given to the consumer.
NOTICE TO CONSUMER: Before using cover, read operating, maintenance,
and safety sections and save owner’s manual for future reference.
Tested. Trusted. Guaranteed.
FOR YOUR RECORDS
DATE PURCHASED:
WHERE PURCHASED:
SERIAL NUMBER:
Customer Service Hours:
8:00am-5:00pm CST, Mon. - Fri.
Problems? Questions? Missing or
Damaged Parts? Install Questions?
Call Us First!
1-866-630-8726
(Located on decal under rear bar by tailgate)
INSTALLATION INSTRUCTIONS
AND OWNER’S MANUAL
HELP LINE
HELP LINE
STOP

2
A. Position side rail with weather strip
against inside lip of box. Push rail
forward until it touches front of
box. End of rail with strike goes to
rear.
1. INSTALLING COVER SIDE RAILS
Top of rail should be
ush with top side
of box at front
Nylon
strike
to rear
NOTE ON BED LINERS: With an under-the-rail drop-in bed liner, installation is
possible with minimal trim/cutting of bed liner at front corner of box and back by
tailgate to allow side rail to install properly. Considerable trim/cutting is required
with an over-the-rail drop-in bed liner.
INSTALLATION INSTRUCTIONS:
NOTE: For additional installation assistance go to LORADO.COM for install video.
PREPARATION
This edge of rail ush
with top on side of
box at front
This surface of
the rail should
be level
B. At front, adjust top of rail ush with
top of box and hold it there with as-
sistance of another person or with a
spring clamp.
NOTE: Some installs require drilling/bolting. Those kits will contain special side
rail instructions. Follow those instructions for rail attachment in conjunction with
instructions in this owner’s manual.
Unpack cover components.
Clean truck box if dirty.
COMPONENTS:
1 driver side rail
1 passenger side rail
1 ELEMENT SEALTM kit
6 clamps (long box kits 8 clamps)
1 left and 1 right tension adjuster with nuts & bolts
1 pre-rolled up cover assembly
TOOLS NEEDED:
2 - 1/2” wrenches 1 - Tape measure or ruler
1 - Spring clamp optional Protective eyewear
(to hold rails in place while clamping) 1 - Scissor

2 3
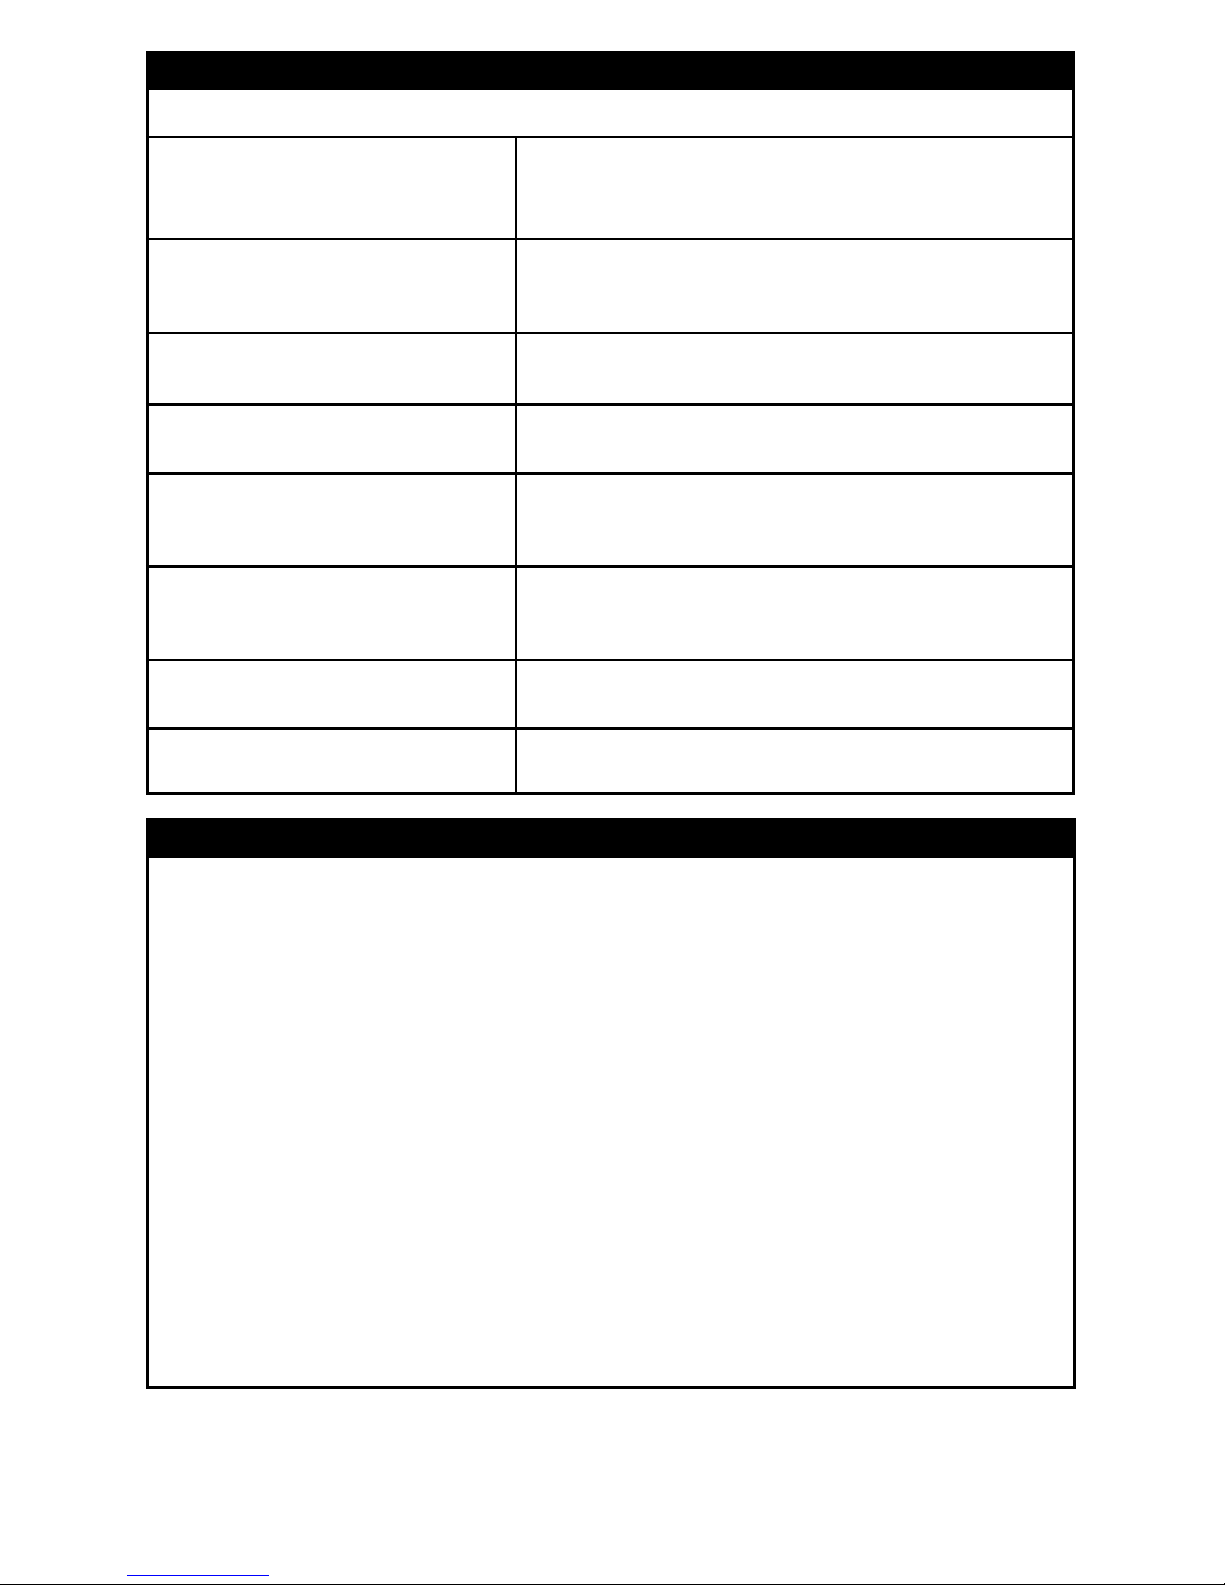
This surface of rail should
be level after clamps are
tightened and even with
top of tailgate or tailgate
protector
Height of tailgate
with protector
Adjust clamps up
or down until they
hold rail level when
tightened
2nd clamp
See note for 4th clamp
3rd clamp
1. INSTALLING COVER SIDE RAILS (Continued)
This surface of
the rail should
be level
Adjust clamps
UP ( ) or DOWN ( )
until they hold rail
level when tightened
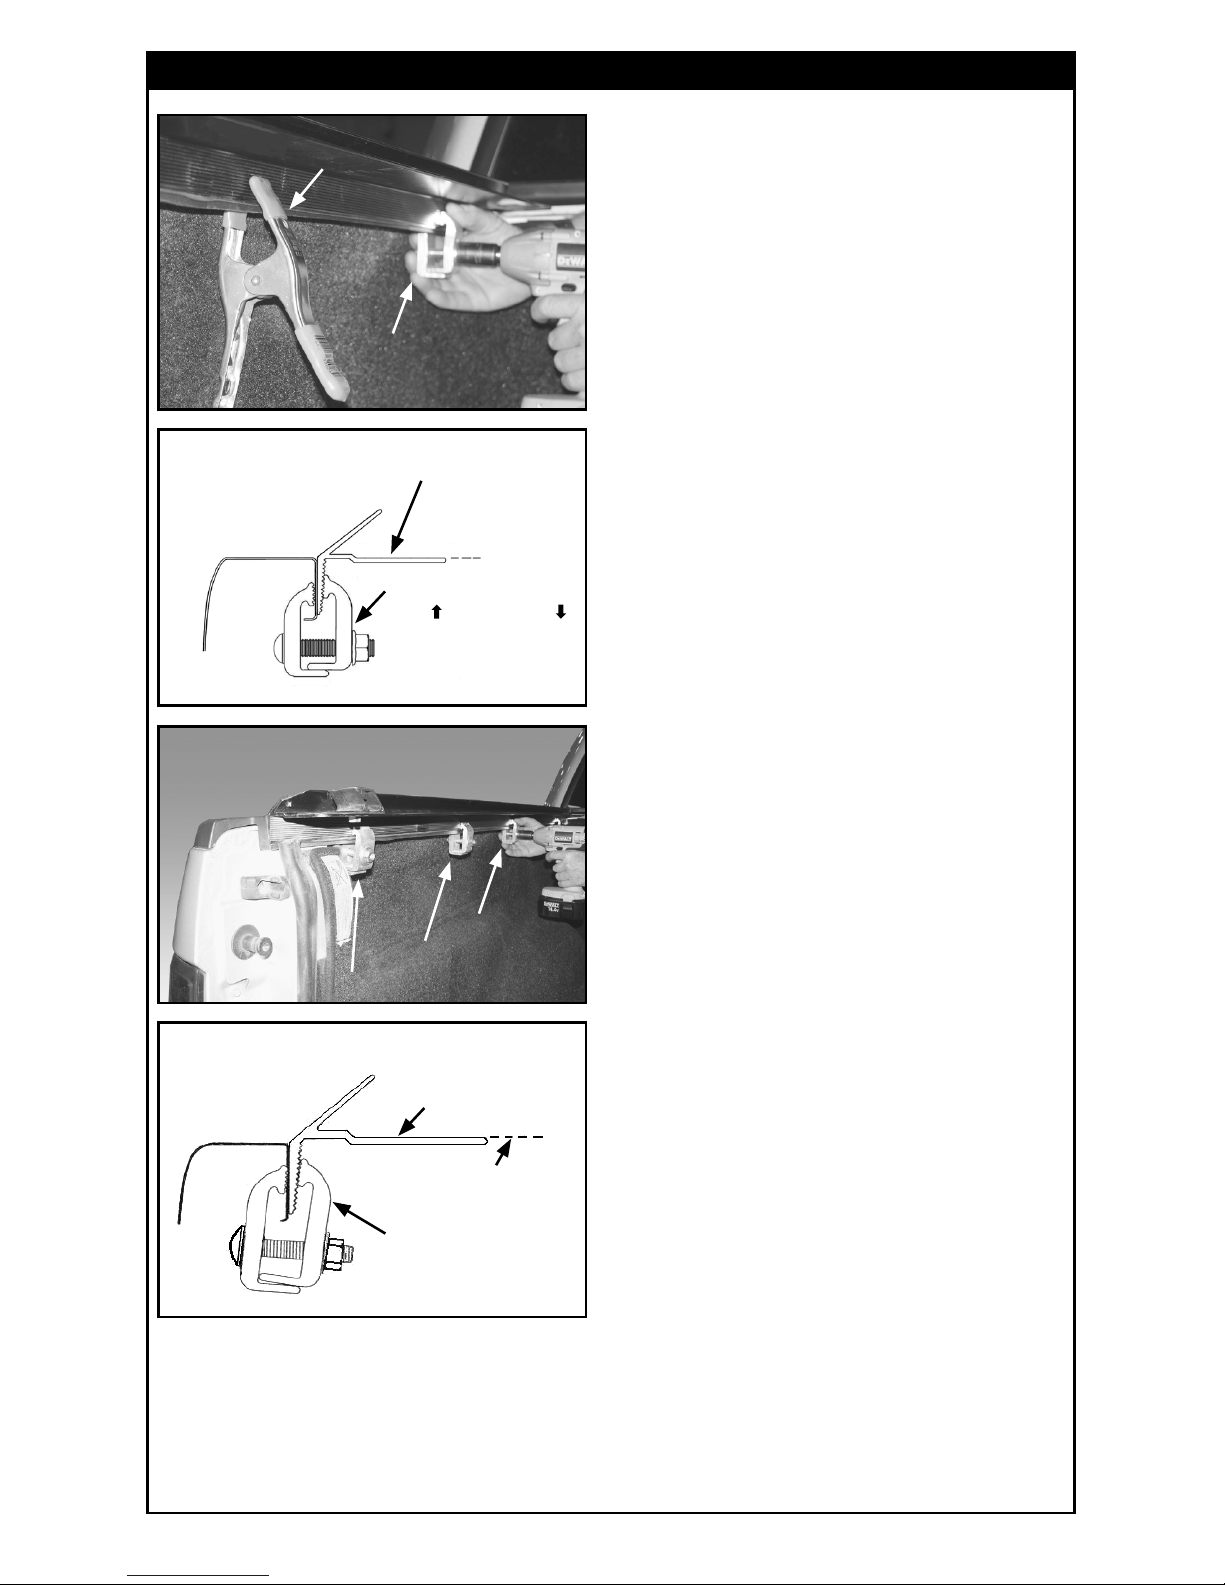
C. Install rst clamp as close to front
of bed as possible and use 1/2”
wrench to tighten.
1st clamp
Temporary
spring clamp
E. Install second clamp on rail at
midway point of box. Adjust rail ush
at top of box and repeat clamping
procedure, always making sure teeth
are engaged on rail grooves.
D. With rail ush at top of box and
clamp teeth engaged, tighten clamp.
Check if rail is level. If rail tilts up,
loosen clamp; lower it; engage teeth;
and tighten it. If rail tilts down, loosen
clamp; raise it; engage teeth; and
tighten it.
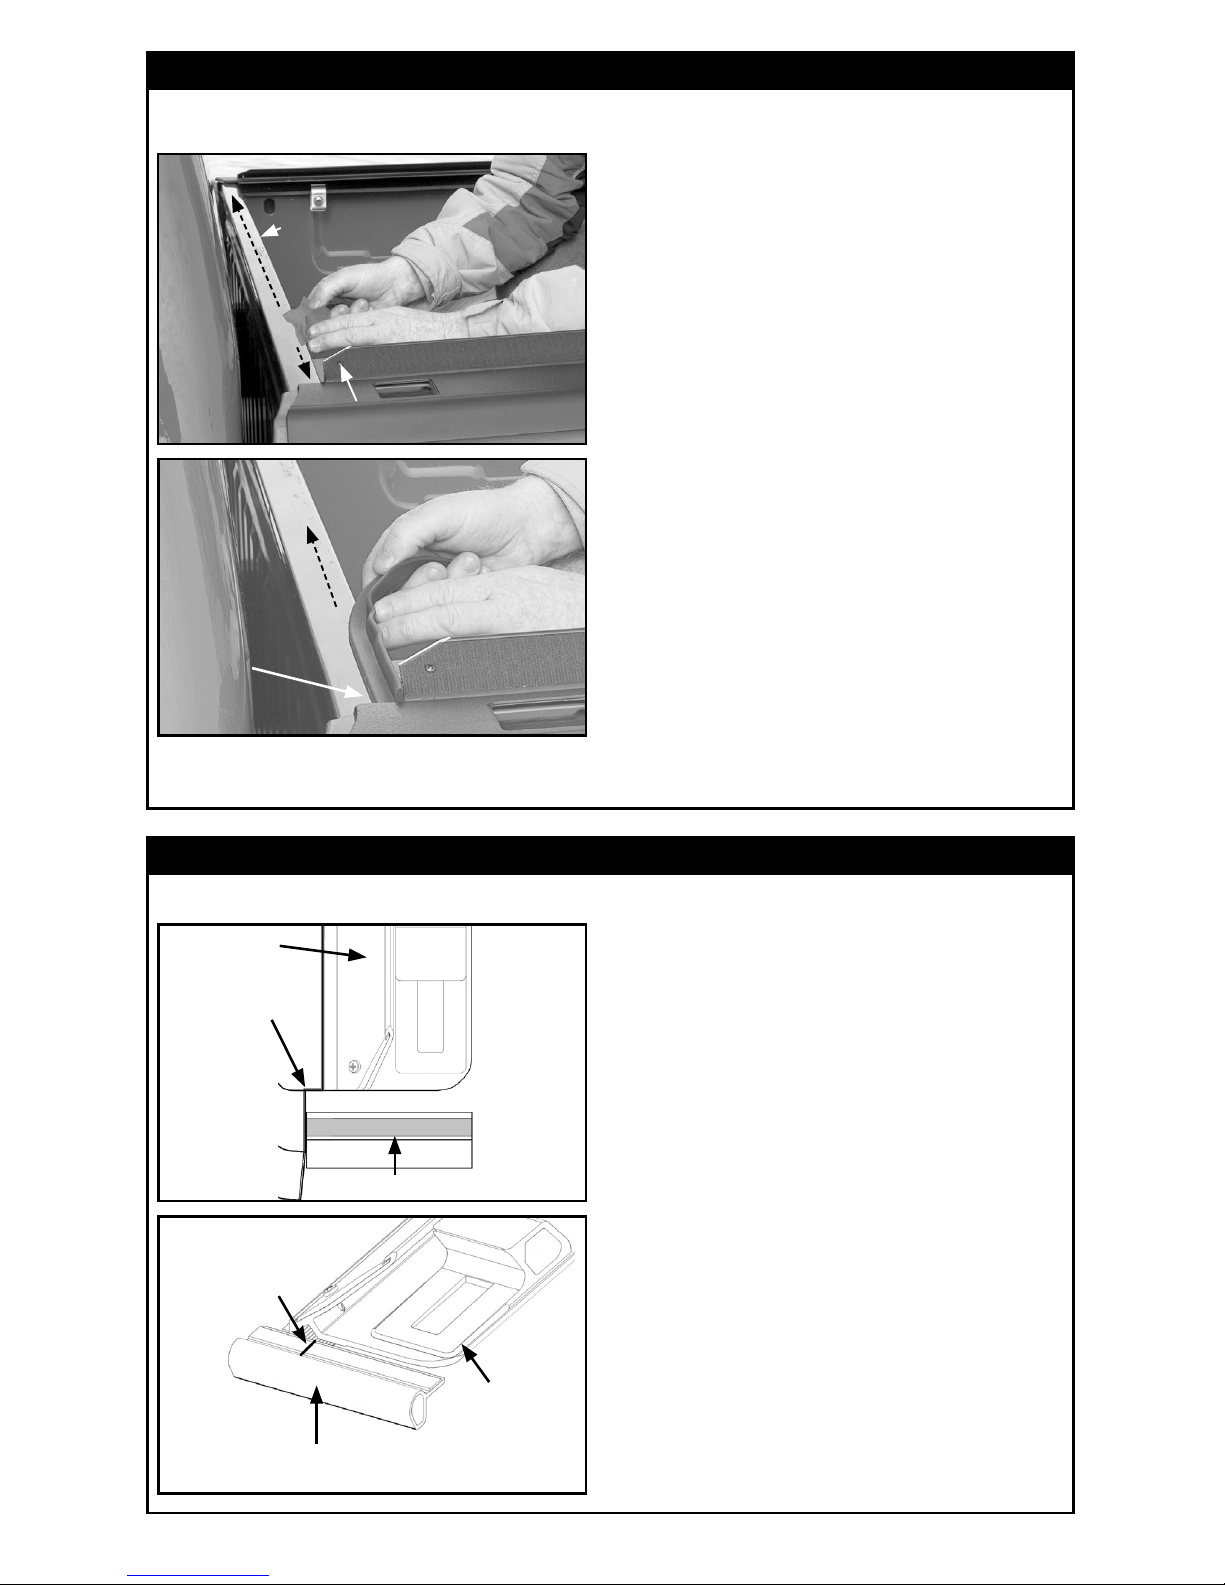
F. At tailgate, adjust rail height ush
with top of tailgate. Repeat clamp-
ing procedures placing third clamp
as close to tailgate as possible.
NOTE: For trucks with an elec-
tric tailgate, rails will have to be
installed slightly higher (approxi-
mately 3/16”) to eliminate interfer-
ence. Most short box kits contain 6
total clamps. Install 3 per side rail.
For kits with 8 total clamps, install
the 4th clamp between 2nd and 3rd
clamp on each side rail. Repeat
STEP 1 to install rail on opposite
side. When done, make sure all
clamps are torqued to 20 ft-lbs on
both rails.
IMPORTANT: To keep rail on
truck secure, make sure clamp
teeth engage grooves on rail,
turn nut nger tight and then use
wrench to nish tightening.

4
NOTE: For best adhesion, air and surface temperature should be above 600F.
A. Clean underside of rail with
alcohol pad included. Hold seal up
to end of rail, make sure end of seal
contacts edge of box.
B. Mark leg of seal and cut notch in
seal.
Rail
Edge of
box
Mark for
cutting
Rear seal
Rail
A.
B.
2: APPLY ELEMENT SEALTM GASKET
NOTE: For additional protection–locate and seal miscellaneous factory
holes, crevices, stake pockets, etc. that may be on box (sealant not included).
NOTE: For best adhesion, air and surface temperature should be above 600F.
Align seal
against front
of rail and
inside edge of
box starting
here
B. Peel paper back, align and
adhere ELEMENT SEAL™ at one
corner across box to opposite corner
and cut to length.
A. At front of box header, clean top
surface with alcohol pad (if needed
wash rst). Save alcohol pad for
use in step #3.
Clean top of box
Side rail (shape may
vary from photo)
Rear seal
3: APPLY REAR SEAL

4 5
C. Peel paper back, align and
adhere seal at end of rail.
D. Edge seal installed.
Rail
Edge of
box
Rear seal
Trim
excess
seal
C.
D.
3: APPLY REAR SEAL (Continued)
A. The cover comes pre-rolled in
its normal open position for ease
of installation. Set pre-rolled cover
on tailgate with front bar facing up.
Align XT-DIALTM Tension Adjuster
(marked “L”) on driver side of cover
- positioned as shown in photo.
4. ASSEMBLING TENSION ADJUSTERS TO COVER
B. Turn 1-1/4” bolt with at washer
onto nut in bar. Leave loose for now.
Repeat for XT-DIALTM (marked “R”)
on passenger side of cover, and
leave that bolt loose as well.
Nut
“L” left
XT-DIALTM

6
C. Hold bolt at top and tighten nut
under side rail. Repeat procedure
for right tension adjuster.
Center front bar between rails
until space is equal at both ends
Tab goes under -
then tighten bolt
5. MOUNTING COVER TO SIDE RAILS
A. Set rolled up cover on rails at front
of box (behind cab) with front bar
facing up. Roll cover bar onto front
of rails and fold/tuck vinyl ap under.
Now, bar will face down. Let straps
hang to inside of box. Push cover bar
forward until it is at on front of side
rails and overhangs them.
B. Slide left tension adjuster over
until it engages under side rail. (See
photo in Step 5E for tension adjuster
tab under side rail.) Push bar back
and forth to line up holes. Do not turn
dial wheel. Insert bolt from top, at
washer and nut from bottom.
D. Center the front bar between the
two side rails.
E. Tighten bolt (left loose earlier)
under front bar on each tension
adjuster.
NOTE: Before tightening, make sure vinyl
ap is still tucked under front bar.

6 7
A. Unroll cover and place rear bar
into strikes on side rails. Press down
on bar to close (20-30 lbs pressure).
The cover fabric may be tight. Over
time, under tension, it will conform
to its hardware and loosen slightly. If
bar is too hard to push down, adjust
tensioners equally as needed to
close.
6. INITIAL OPERATION AND ADJUSTMENTS
C. Check cover tension by releasing
AUTOLATCHTM II and open and
close rear bar several times. It
should snap down when closing.
Cover fabric should be tight with
no sagging between the bows. If
adjustment is needed, roll cover
open and to loosen turn XT-DIALTM
clockwise. To tighten turn XT-
DIALTM counter clockwise. Always
turn dials in equal amounts.
To loosen Cover
Turn Clockwise
To Tighten Cover
Turn Counter
Clockwise
D. When done, always seal both
sides of cover with hook and loop
system. For detailed operating
instructions see Page 8.
TIP: Reasons to keep cover drum
tight:
1) Lasts longer
2) Less noise
3) Looks nicer
IMPORTANT: When done, go back and double check each clamp and
make sure they are fully tight. Start behind cab and work towards tailgate.
B. Close tailgate slowly - top of
tailgate should t snug under cover
bar. If tonneau cover hampers
normal tailgate operation, raise rails
by loosening rear clamps; adjust
rails up; and tighten clamps. If
there is too much space between
tailgate and cover bar, lower rails by
loosening rear clamps: adjust rails
down; and retighten clamp.

8
Release retainer straps at
front and using both hands, roll
cover to rear of box.
Alongside of box, seal cover
edges with hook and loop seal-
ing system the full length of
cover on both sides. Pull with
one hand and seal with other
hand.
Position roll-up bar against
strikes. Push down on bar
until AUTOLATCHTM II locks in
place.
Using both hands, roll cover
toward front of box (not against
the cab).
TO CLOSE
Note: view opening and closing demonstration video on lorado.com
Open tailgate, lightly pull
down on AUTOLATCHTM II
and rotate rear bar with other
hand.
TO OPEN
Securely fasten retainer straps
to store the cover.
SEE NEXT PAGE FOR
STORAGE STRAP
ADJUSTMENT
OPERATING ROLL-UP COVER

8 9
Premium
storage straps
Front bar
XT-DIALTM
tension adjuster
Front
ELEMENT
SEALTM
Rail clamps
6–most short boxes
8–long boxes Left side rail
Rear seal
AUTOLATCHTM
II dual locking
system on rear bar
Right side rail
Rear bar
Support
bows
To tighten storage strap, pull back on
top layer of strap loop until strap is snug.
To take out slack in loop, slide slip
bracket down.
STRAP ADJUSTMENT
PARTS DIAGRAM

10
AUTOLATCHTM II doesn’t engage Check side rails for height and level. (Refer to Step
1F) Inspect latches for jammed or broken parts.
PROBLEM SOLUTION
TROUBLESHOOTING
Cover too loose Turn both tension adjusters counter clockwise to
move front bar forward. (Refer to Step 6C, see
arrows next to adjuster)
Cover too tight Turn both tension adjusters clockwise to move front
bar back. (Refer to Step 6C, see arrows next to
adjuster)
Gap between roll-up bar and
tailgate
Rails set too high (Refer to Step 6B)
Cover too narrow Check if rail is level. If rail tilts up, loosen clamp;
lower it; engage teeth; and tighten it. (Refer to Step
1D)
Cover too wide Check if rail is level. If rail tilts down, loosen clamp;
raise it; engage teeth; and tighten it. (Refer to Step
1D)
Lopsided cover (too much on one
side)
Check front bar. It must be centered side to side.
(Refer to Step 5D)
Top of tailgate hits rear bar when
attempting to close
Raise side rails at rear of box until tailgate closes
without pushing rear bar up (Refer to Step 6B)
• Keep cover closed when not in use and always seal cover edges the full
length of box on both sides with hook and loop sealing system.
• Keep the cover tight; cover vinyl should sound drum-like when
tapped on.
• Make sure cover is properly latched and sealed. Lock while traveling and
before entering automatic drive-through car washes.
• Avoid storing cover in its rolled up position for long periods of time.
• When cleaning, for best results use mild liquid soap and water. Never clean
with petroleum or citrus based products.
• Periodically treat cover with our COVER CARE®Cleaner & UV protectant
instead of petroleum based products that may dry out and damage the vinyl.
• Avoid allowing cargo to rub against cover while transporting, whether in
open or closed position.
TIPS FOR A LONGER LASTING COVER

1111
• Inspection and much of the maintenance can be done by the
operator. It may be necessary to review the installation and operating
instructions.
• Periodically inspect the cover assembly and the condition of all parts.
Check for loose bolts and parts, tighten if needed. Test the operation
to ensure that the parts are functioning properly and that the cover is
in top operational condition.
• If latch has been damaged, replace with new one. NOTE: Inspection
and/or maintenance should also be performed anytime a malfunction
is observed or suspected. If you need assistance inspecting and/or
servicing your cover, or if you want to order a replacement part, call
the customer service number on the back page. Always use original
equipment replacement parts for your cover.
• Do not cover cargo that is higher than the cover.
• Do not place object(s) on or against the cover or its framework at any time.
• Always secure cargo so it cannot shift and damage the cover or its parts.
• Do not use the cover’s framework to tie down cargo.
• Never stand, sit or ride on the cover or allow others to do so.
• Do not leave valuables in an unattended vehicle as cover does not prevent
theft of cargo in truck box.
• The cover does not eliminate moisture and dust from entering the truck
box. Special wrappings or packaging of the cargo may be necessary.
• Due to poor ventilation, if you allow a pet/animal in the box, leave cover
open. Do not allow people or animals to occupy box with the cover closed.
• When towing vehicle backwards, cover must be rolled fully open and
secured with safety straps or fully closed and secured.
• ALWAYS nish securing the cover by sealing sides.
• Use caution when operating cover in windy conditions.
• Periodically check and/or retighten clamp and front bar tensioning
bolts as needed.
• Periodically check AUTOLATCHTM II cord to ensure latches fully
engage side rails.
INSPECTION AND MAINTENANCE
SAFETY INFORMATION

12
ACCESS®and LORADO®are registered United States trademarks of AGRI-COVER, INC.
For ACI patent information, please visit: http://www.agricover.com/patents/
PHONE 866-630-8726 8:00 am - 5:00 pm CST Monday through Friday except Holidays
ACCESS - A Division of Agri-Cover, Inc.
062016PN 50219_7
Product subject to change without notice
© 2016 AGRI-COVER, INC. ALL RIGHTS RESERVED.
MANUFACTURER’S LIMITED WARRANTY
Agri-Cover, Inc. extends the following ve (5) year Limited Warranty for the
ACCESS®LORADO®Roll-Up Cover:
Agri-Cover, Inc. warrants a period of ve (5) years from the date of manufacture
that its ACCESS®LORADO®Roll-Up Cover is free from defects in workmanship,
under normal use for the truck model it was intended for. This Limited Warranty
does not cover any damage due to accident, abuse, misuse, alteration, neglect,
improper installation, or ordinary wear and tear.
Agri-Cover, Inc.’s sole obligation under this Limited Warranty is limited to the
repair or replacement, at its option, of defective parts only. No labor or service
allowance is given or implied. IN NO EVENT SHALL AGRI-COVER, INC. BE LI-
ABLE FOR INCIDENTAL, CONSEQUENTIAL, OR SPECIAL DAMAGES. AGRI-
COVER, INC. EXPRESSLY DISCLAIMS ANY AND ALL IMPLIED WARRAN-
TIES OF MERCHANTABILITY, AND THERE ARE NO WARRANTIES WHICH
EXTEND BEYOND THE LIMITED WARRANTY DESCRIPTION CONTAINED
HEREIN.
For warranty, have your serial number ready and call our Customer Service
Department at 866-630-8726 to determine if only a replacement part is needed or
if the cover needs to be returned for inspection and repair. Goods to be returned
must have a pre-authorized RA # (Returned Authorization Number) - obtained by
calling the number above. Mark the number on the package and ship it freight
prepaid to address below. Agri-Cover, Inc. will pay freight to return goods to
sender.
This Limited Warranty gives you specic legal rights and you may have other
rights, which vary, from state to state.
For replacement parts shop at www.accesscoverparts.com or call Customer
Service at 866-630-8726.
Agri-Cover, Inc.
Customer Service Dept
PO Box 508 | 3000 Hwy 281 SE
Jamestown, ND 58402
Phone: 866-630-8726
Other manuals for LORADO
1
Table of contents
Other Access Automobile Accessories manuals