Acdeos AXS-MOCR User manual

Manual
ACDEOS BV
Touwbaan 1A
2352 CZ Leiderdorp
Netherlands
WWW.ACDEOS.COM
Date: 05-2020
Rev. 2
AXS –MOCR

AXS –MOCR manual
MOCR RAMP Manual
2
Index
1Technical specifications.................................................................................... 2
2Safety instructions ............................................................................................. 3
3Constraints ......................................................................................................... 3
4Controls .............................................................................................................. 4
4.1 Ramp Control............................................................................................................................ 4
4.2 Signals ...................................................................................................................................... 4
4.3 Legal requirement according 2001-85 EC:............................................................................... 4
4.4 Electrical Components.............................................................................................................. 4
5Operation ............................................................................................................ 4
5.1 Deploy Operation procedure .................................................................................................... 4
5.2 Stow operation procedure ........................................................................................................ 4
6Mounting / Installation ....................................................................................... 5
7Repair .................................................................................................................. 5
7.1 Disassembly ............................................................................................................................. 5
7.2 Assembly .................................................................................................................................. 5
8Environment ....................................................................................................... 5
9Certification ........................................................................................................ 6
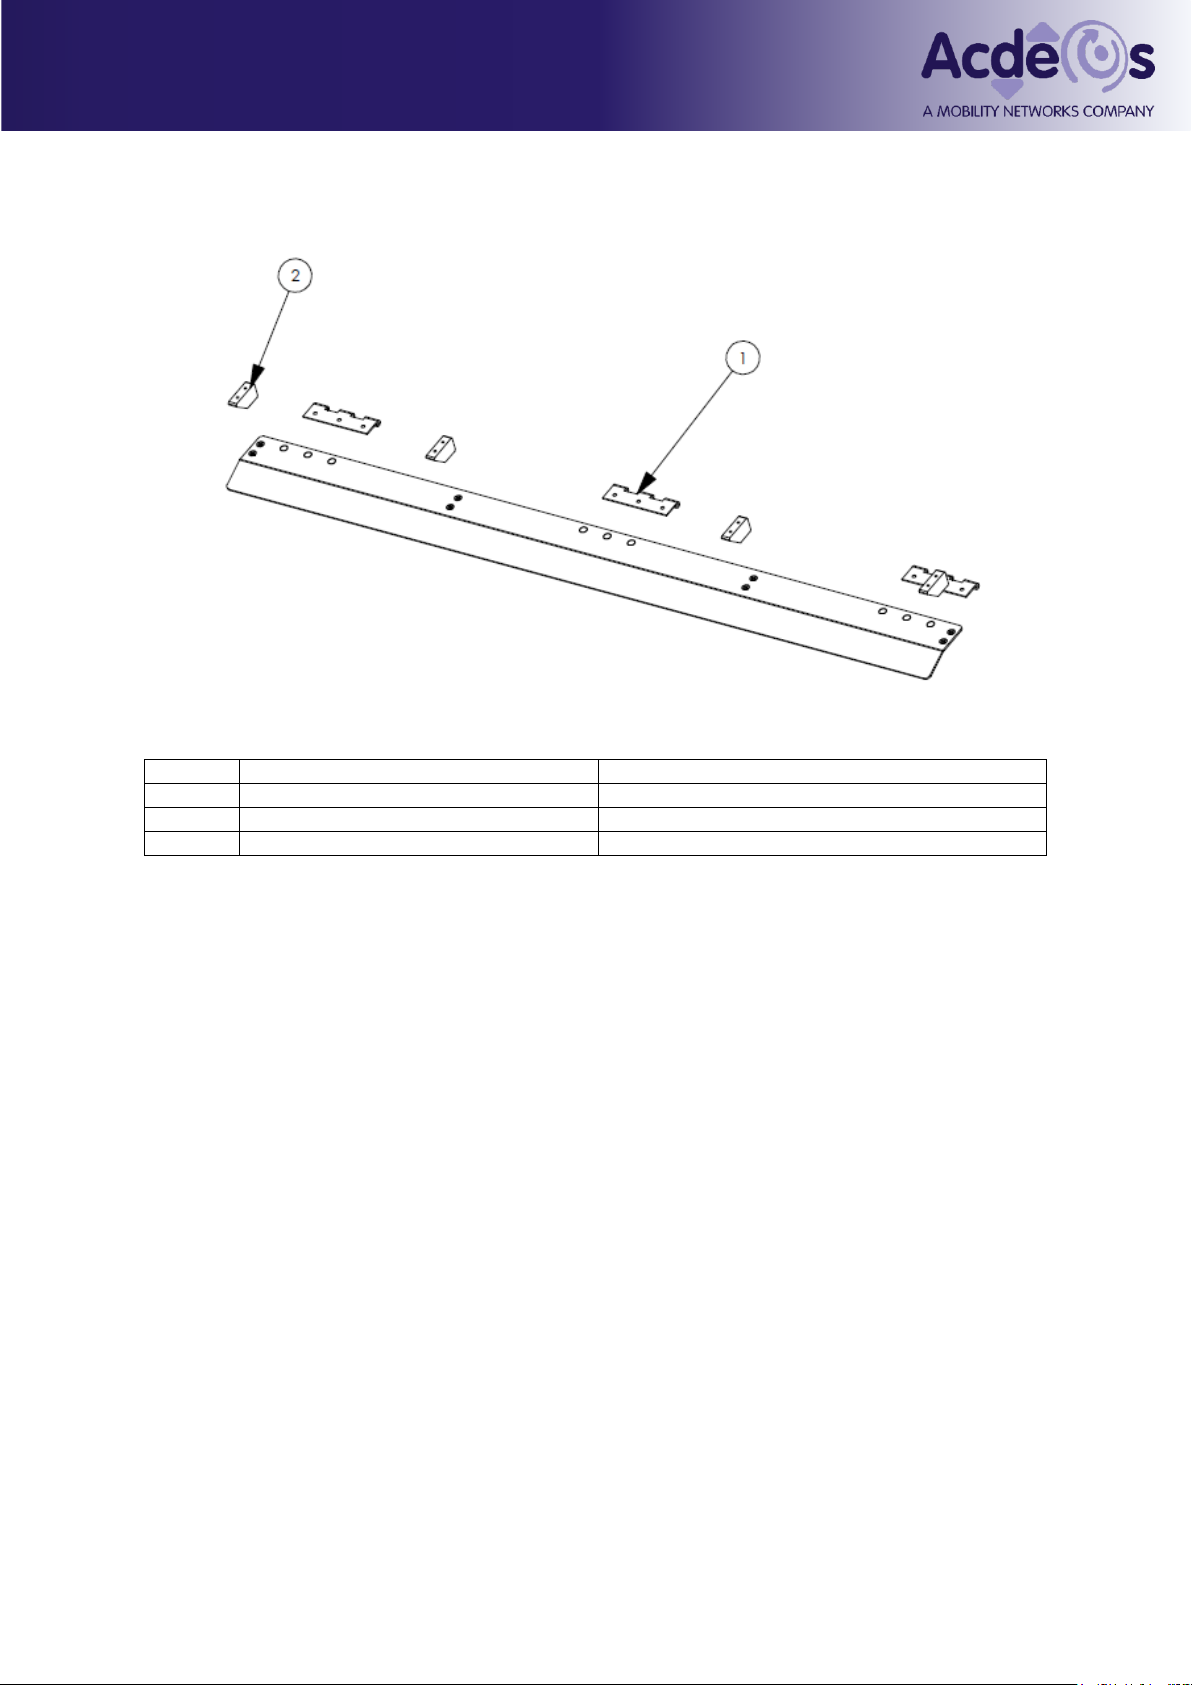
10 Spare parts....................................................................................................... 7
11 Appendix 1; Installation drawings: ............ Fout! Bladwijzer niet gedefinieerd.
1 Technical specifications
Product description Manual operated ramp for mounting outside under the floor of a vehicle.
Installation Under the vehicle Floor at the front- middle or rear door
Dimensions Ramp length 850 mm/1000mm - width 880 mm
For detailed dimensions please refer to the installation drawings
Weight total 27 Kg.
Load Maximum load 300 Kg (3000 N) this is always labeled on the ramp.
Materials Frame; steel plate work, powder coated.
Ramp: Polyester sandwich plate with Stainless steel edges.
Electric signals following electric signals are available: Ramp closed / stowed.
Legislation The product fulfils 2001/85 EC Bus directive and 98/37 EC Machine directive.

AXS –MOCR manual
MOCR RAMP Manual
3
2Safety instructions
These Safety instructions should always be with the ramp. The operator must
be made aware of these instructions before operating the Ramp. Read these
safety instructions carefully and follow them.
The ramp is constructed to be a ramp to enter a low floor vehicle with a wheelchair. It should be used
appropriately by passengers as long as they are not heavier as the maximum load, to enter or exit a
low floor minibus.
1. Before you can operate the ramp you have to stop the Vehicle and make sure that the
hand or park brake is on.
2. Before you operate the ramp, make sure that there is no person or obstacle at or close
to the ramp. Look out that there is no person or obstacle outside the vehicle in the motion
direction of the ramp.
3. It is recommended that the ramp is only operated by the driver or other qualified
operators.
4. The driver or operator must have a clear view at the ramp when he is operating the ramp.
5. It is recommended to stay at the center of the ramp platform.
6. NEVER drive away when the RED LED light is still on. The ramp is not properly stowed.
7. The ramp platform must be kept clean and free of oil and other slippery materials.
8. When you have any doubt about the safety of passenger when using the ramp make sure
he is assisted.
9. For any questions about the safe operation of the ramp, directly contact the responsible
persons.
10. Never use the ramp for any other use than here described.
11. Never overload the ramp.
12. The ramp should always be operated until it is fully in or out.
13. Repair and maintenance must be done by qualified and trained staff only.
14. Only use original parts if you have to exchange parts from the ramp.
15. If the anti slip profile at the ramp becomes slippery because of wear, the ramp platform
must be replaced.
16. Always use the recommended cleaning materials.
17. Report any unsafe condition of the ramp, or during it’s operation, to the ramp supplier.
3Constraints
The Ramp has been designed to be functional and reliable. The product is made as simple and
reliable as possible. It has been taken in consideration that the ramp will be mounted under a vehicle
in severe environmental conditions

AXS –MOCR manual
MOCR RAMP Manual
4
4Controls
4.1 Ramp Control
The ramp control is made as easy as possible. The controls comply with European 98/37 EC
machine directives. Functions and measurements are compliant with the EU Bus directive 2001/85
EC.
4.2 Signals
The following output signals are available from the ramp:
•Ramp stowed and ramp door closed.
There is an proximity switch located at the door, indicating that the ramp door is closed.
4.3 Legal requirement according 2001-85 EC:
•Driver must have an indication that the ramp is fully stowed.
•Maximum gradient of 12% at floor height of 270 mm at a 150 mm curbstone.
•Rounded edges with minimum radius of 5 mm
The Ramp On fulfils all these requirements.
4.4 Electrical Components
All electrical components directly outside the ramp cassette are water resistant to IP 65.
5Operation
5.1 Deploy Operation procedure
The vehicle must have the parking brake on, and then the ramp can be safely operated.
Unlock the two door locks.
There are two versions of
door locks:
1. Sliding
Slide those to the
center of the door
and than open the
door.
2. Turning
Unfold the turning arm of the lock and turn it a ¼ turn clockwise at the right lock and anti
clockwise at the left lock.
Open the door, lift the yellow flap under the door, put a finger in the
nylon strap and pull out the ramp about 30 cm. Than take it with
both hands on both sides and pull out the ramp completely until it
can not slide any further, and than gently lower it to the ground
5.2 Stow operation procedure
Lift the ramp from the ground until the end is a little higher as the bus floor. Slide the ramp in under
the bus floor lowering the end to come Horizontal when you slide ramp in the cassette.
Push it until the front edge has past the ramp door and the door can be closed.
Close the ramp door.
Sliding door locks:
Push the door firmly on both sides and the locks will lock automatically
Turning locks
Close the door and push it firmly. Turn the lock to close and place the turning link back in closed
position.
1
2

AXS –MOCR manual
MOCR RAMP Manual
5
6Mounting / Installation
The installation must only be done by a company that is well known with bodybuilding or modifying
vehicles, which has the trained technical staff to do this job.
The ramp is designed to be fitted direct under the bus floor, where the bus floor is a 15 mm Alucore
sandwich panel.
There should be a hole in the main chassis bar from the vehicle leaving enough space to fit the ramp.
Ramp should be supported at the front end with a steel part from the vehicle floor.
If the front edge of the ramp is made to an integral part of the chassis, it will be of the responsibility of
the vehicle builder.
The Bus floor should be fitted on top of the cassette from the ramp with an PU glue.
The top of the cassette has to be closed complete to prevent dirt getting in the cassette.
The cassette should be supported by the main vehicle chassis bar for strength and stiffness. It is
recommended to use PU glue between the cassette and the chassis bar.
Vehicle builder will be responsible for the total strength and stiffness of the complete installation.
The door will be supplied separate from the cassette. The door should be fitted at the cassette when
the vehicle is nearly finished to prevent damage on the paint.
We recommend to place an anti slip foil on top of the door as this is used as step edge.
Flooring materials should not go under the door. We recommend using an aluminum floor edge profile
between the door and the flooring.
If you have any question: contact the supplier of the ramp.
7Repair
The repair of the ramp is simple and can be done with the normal available workshop equipment.
7.1 Disassembly
The ramp can be removed from the cassette by
removing the buffer block at the side of the ramp.
Once they are removed the ramp platform can be
removed from the cassette.
Than small parts can be replaced.
7.2 Assembly
Slide the platform in the cassette and place the
buffer blocks back in place.
8Environment
The AXS - Ramp is made of durable materials which all can be recycled. All different materials can
easily be separated from each other for separate recycling.

AXS –MOCR manual
MOCR RAMP Manual
6
9 Certification
Certification
Product description
Product AXS RAMP
Manual operated Sliding ramp
Type MOCR 850 / MOCR 1000
A
Production under responsibility of
Company Acdeos BV
Address Touwbaan 1A
City 2352 CZ Leiderdorp
Country Netherlands
Website WWW.ACDEOS.COM
Legal represented by Mr. A de Moes
Conformity
Product is designed, tested and produced confirm:
The loading recommendations in the Machine directive
98/37/EG
Ramp is tested for a maximum weight of 300 Kg
On behalf of producer:
Name / Function
A de Moes / Engineering
Date
15 September 2009
Place
Leiderdorp, Netherlands

AXS –MOCR manual
MOCR RAMP Manual
7
10 Spare parts
Chassis
item
Part
Part number
1
Proximity switch
C148 001
2
Buffer block
C134 04 03
3
Hinges (3 / door)
C134 03 09
1
Hinges (4 / door)
C134 03 08
Ramp assembly
item
Part
Part number
1
Wheel
C134 02 07
2
Platform complete 1000 mm (OLD)
C148 02 01
Platform complete 850 mm
C148 08 01
Platform complete 1000 SP
C148 10 01
Platform complete 1180
C148 08 02
3
Pull strap
C148 02 12

AXS –MOCR manual
MOCR RAMP Manual
8
Door assembly sliding locks
item
Part
Part number
1
Sliding lock
C148 04 03
2
Hinge (at 4 hinges / door)
C134 03 08
Door assembly turning locks
item
Part
Part number
1
Turning lock left
C148 04 05
2
Hinge (3 / door)
C134 03 09
3
Turning lock Right
C148 04 04

AXS –MOCR manual
MOCR RAMP Manual
9
Flap assembly
item
Part
Part number
1
Hinge ( 3 / flap)
C134 03 09
1
Hinge ( 4 / flap)
C134 03 08
2
Sliding block
C148 05 03

AXSTEC is a brand From
ACDEOS BV
Touwbaan 1A
2352 CZ Leiderdorp
The Netherlands
+31 71 5891819
www ACDEOS.com
Table of contents
Popular Lifting System manuals by other brands

Genie
Genie Super Tower ST-20 Operator's manual

AAQ
AAQ AutoLift AL-182093 Installation manual & operation instructions

Stratus
Stratus SAE-S66M manual

Ergoswiss
Ergoswiss SLA 13 Series Operating instruction

Harbor Freight Tools
Harbor Freight Tools Central Machinery 5402 Assembly & operating instructions

Nussbaum
Nussbaum SPRINTER Unpacking & Installing

Tractel Group
Tractel Group jockey Operation and maintenance manual

Terex
Terex GS90D-4695 Service and repair manual

Vestil
Vestil CH-200 Series instruction manual

Bertrand
Bertrand Hydro-Lift 12000 manual

Advance Lifts
Advance Lifts BFL Series Installation, operation and maintenance manual

Textron
Textron Greenlee H4905A manual