aci ACCESS series Installation instructions

Automation Components, Inc.
2305 Pleasant View Road | Middleton, WI 53562
Phone: 1-888-967-5224 | Website: workaci.com
Page 1
Version: 6.0
I0000588
FIGURE 1: DIMENSIONS
INTERFACE SERIES
Installation & Operation Instructions
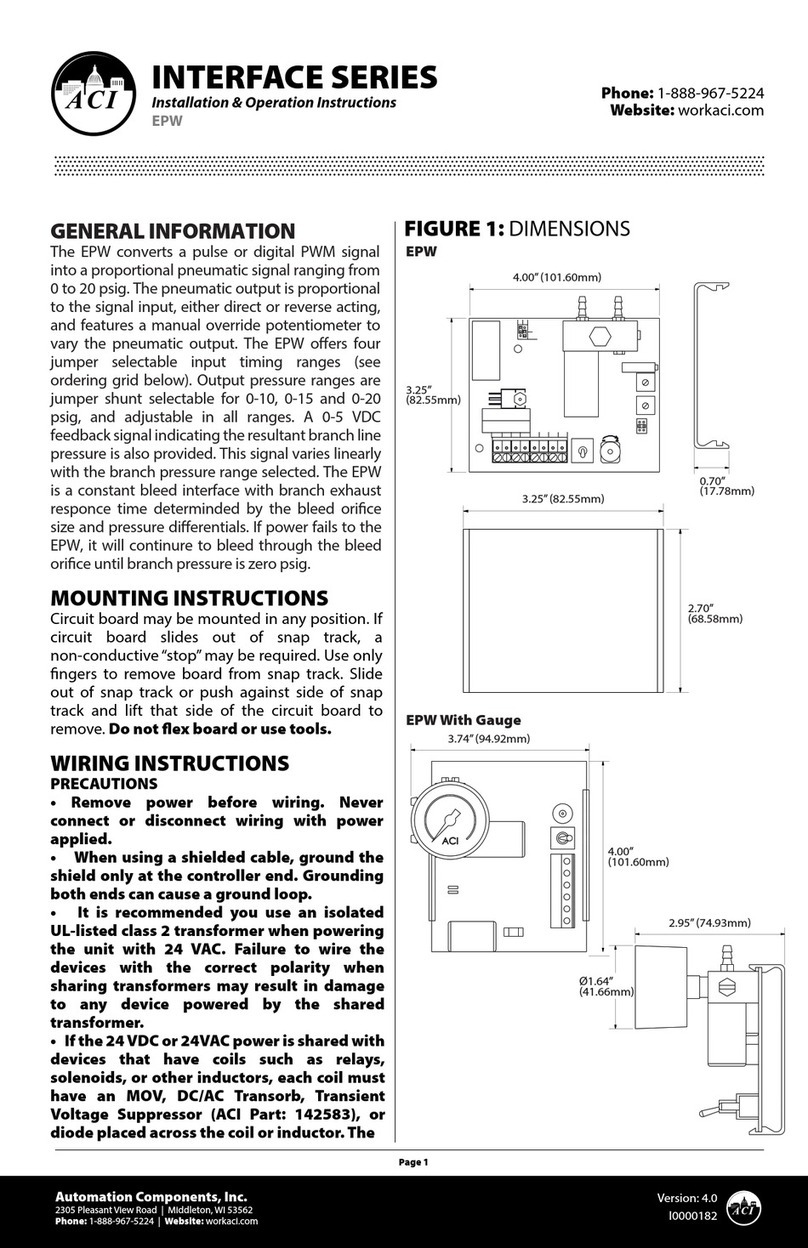
EFP2, EFP2FS
Phone: 1-888-967-5224
Website: workaci.com
GENERAL INFORMATION
The EFP2 converts a oating point signal into a
proportional pneumatic signal ranging from
0-20 psig. The pneumatic output is proportional
to the signal input. The EFP2 has a manual
override switch with terminal strip contacts to
indicate its status and a potentiometer to vary
the pneumatic output. Two LEDs indicate UP or
DOWN excursions, with an additional one for
power indication. The EFP2 oers four jumper
selectable rates of change in the output
pressure. Output pressure ranges are jumper
shunt selectable for 0 to 10, 0 to 15 and 0 to 20
psig, and adjustable in all ranges. A 0-5 VDC
feedback signal, indicating the resultant branch
line pressure, is also provided. This signal varies
linearly with the branch pressure range selected.
It is designed with electrical terminals on one
end and pneumatic connections on the other,
allowing for maximum convenience in wiring
and tubing installation when panel mounted.
The EFP2 incorporates two valves (one controls
exhaust) and does not bleed air at set point. Its
branch exhaust ow and response time are not
limited by an internal restrictor and are similar to its
load rate. If power fails to the EFP2, branch line
pressure remains constant if the branch line does
not leak air. The EFP2FS is a two valve fail safe model.
Its three-way branch exhaust valve allows exhaust of
branch line air on a power failure.
MOUNTING INSTRUCTIONS
Circuit board may be mounted in any position. If
circuit board slides out of snap track, a
non-conductive “stop”may be required. Use only
ngers to remove board from snap track. Slide
out of snap track or push against side of snap
track and lift that side of the circuit board to
remove. Do not flex board or use tools.
WIRING INSTRUCTIONS
PRECAUTIONS
• Remove power before wiring. Never connect or disconnect wiring with power applied.
• When using a shielded cable, ground the shield only at the controller end. Grounding both ends
can cause a ground loop.
• It is recommended you use an isolated UL-listed class 2 transformer when powering the unit
with 24 VAC. Failure to wire the devices with the correct polarity when sharing transformers may
result in damage to any device powered by the shared transformer.
• If the 24 VDC or 24VAC power is shared with devices that have coils such as relays, solenoids, or
other inductors, each coil must have an MOV, DC/AC Transorb, Transient Voltage Suppressor (ACI
Part: 142583), or diode placed across the coil or inductor. The cathode, or banded side of theDC
Transorb or diode, connects to the positive side of the power supply. Without these snubbers,
EFP2
coils produce very large voltage spikes when de-energizing that can cause malfunction or
destruction of electronic circuits.
• All wiring must comply with all local and National Electric Codes.
The gauge port will accept a miniature 1/8”-27 FNPT back-ported pressure gauge to allow direct reading of
branch line pressure. The gauge should be sealed by Teon sealing tape, and should be tightened just
snug, using a backup wrench to hold the manifold. ADJUSTMENT OF INSTALLED GAUGES. If installation
requires adjustment of the gauge for proper reading of the face, turn the gauge no more than ½ turn in
either direction. O-rings in the bottom of the gauge port will allow this without leakage.
Warranty does not include malfunction due to clogged valve. Main air port is ltered with the supplied 80
– 100 micron integral-in-barb lter. Periodically check the lter for contamination and ow reduction, and
clean with a brush or replace if needed (Part # PN004).
The surface between the manifold and pressure transducer is a pressure seal: do NOT stress the circuit
board or allow the manifold to move. Hold the manifold in one hand while installing pneumatic tubing
onto the barbed ttings, and use care when removing tubing to avoid damaging ttings or moving
manifold.
1. Setting the input timing range: With power removed, place jumpers in the conguration that most
closely matches the timing range from the controller.
2. Setting the output pressure range: Apply power. Choose a pressure range on the EFP2/EFP2FS that
matches or is just above maximum range of device being controlled. Example: 8-13 psi choose B (15 psi
setting).
3. Setting the maximum pressure: With all pneumatic and power connections made, place the Manual
override switch in the “MAN” position. Turn the override pot full clockwise. Adjust the “SPAN” pot until
the desired maximum output is achieved.
4. Setting the oset: Conrm the green “DN” LED is blinking only, this indicates the output is at
minimum. Place the Manual override switch in the “AUTO” position. Turn the “OFFSET” pot until the
desired minimum pressure is achieved.
5. Calibration can also be made by sending the appropriate timing pulse and adjusting the“OFFSET”and
“SPAN”pots to the desired pressure output.
LED INDICATIONS
POWER LED: LED lit indicates power is received by the board.
UP and DOWN LED’s: Solid lit LED indicates the EFP2 is receiving an Up or Down command. Single
blinking LED indicates that the EFP is at the minimum or maximum of the timing range selected. Both
LED’s blinking indicates the EFP2/EFP2FS is at set-point.
Connect the normally open (NO) terminals of two separate relays, triac outputs, or the normally open
terminals of a tri-state relay to the “DN” and “UP” inputs. Connect the common terminal of the relay(s) to
terminal SC (signal common) on the EFP2 or EFP2FS. A
signal to both up and down inputs for 3 seconds will
cause branch line pressure to drop to 0 psi (see Table
1).
The branch exhaust response time is determined by
the combined exhaust air ow as well as pressure
dierentials. If power to the EFP2 is lost, it will contin-
ue to hold branch pressure if no branch line leaks. If
power to the EFP2FS is lost, the branch line will bleed
to 0 psi.
Manual override
Move the AUTO/MAN toggle switch to the MAN position. Turn the shaft on the MAN pot to vary the
pneumatic output. Return AUTO/MAN switch to AUTO position when nished.
Override Terminals (OV)
When manual override switch is in manual position, contact between terminals is closed. When manual
override switch is in auto position, contact between terminals is open.
For optimum performance and reduced
noise, the EFP2FS unit requires a branch
air line capacity equal to at least 25 feet of
1/4" O.D. polyethylene tubing to operate
without oscillation, and the EFP2 unit
requires a branch air line capacity equal
to at least 15 feet of 1/4" O.D.
polyethylene tubing to operate without
oscillation.
FIELD CALIBRATION
The default jumper setting from the
factory for the EFP2/EFP2FS is B (15 psi)
for the output range and A0, B0 for the
input timing range. There are four (4)
input timing ranges available per version
and three (3) selectable output pressure
ranges. NOTE: The ZERO potentiometer
is factory calibrated. Do not adjust.
[101.60mm]
4.00”
[68.58mm]
2.70”
[82.55mm]
3.25”
[92.71mm]
3.65”
[17.78mm]
.70”
[76.01mm]
2.99”
[17.78mm]
.70”
[76.01mm]
2.99”

FIGURE 2: WIRING
Automation Components, Inc.
2305 Pleasant View Road | Middleton, WI 53562
Phone: 1-888-967-5224 | Website: workaci.com
Page 2
Version: 6.0
I0000588
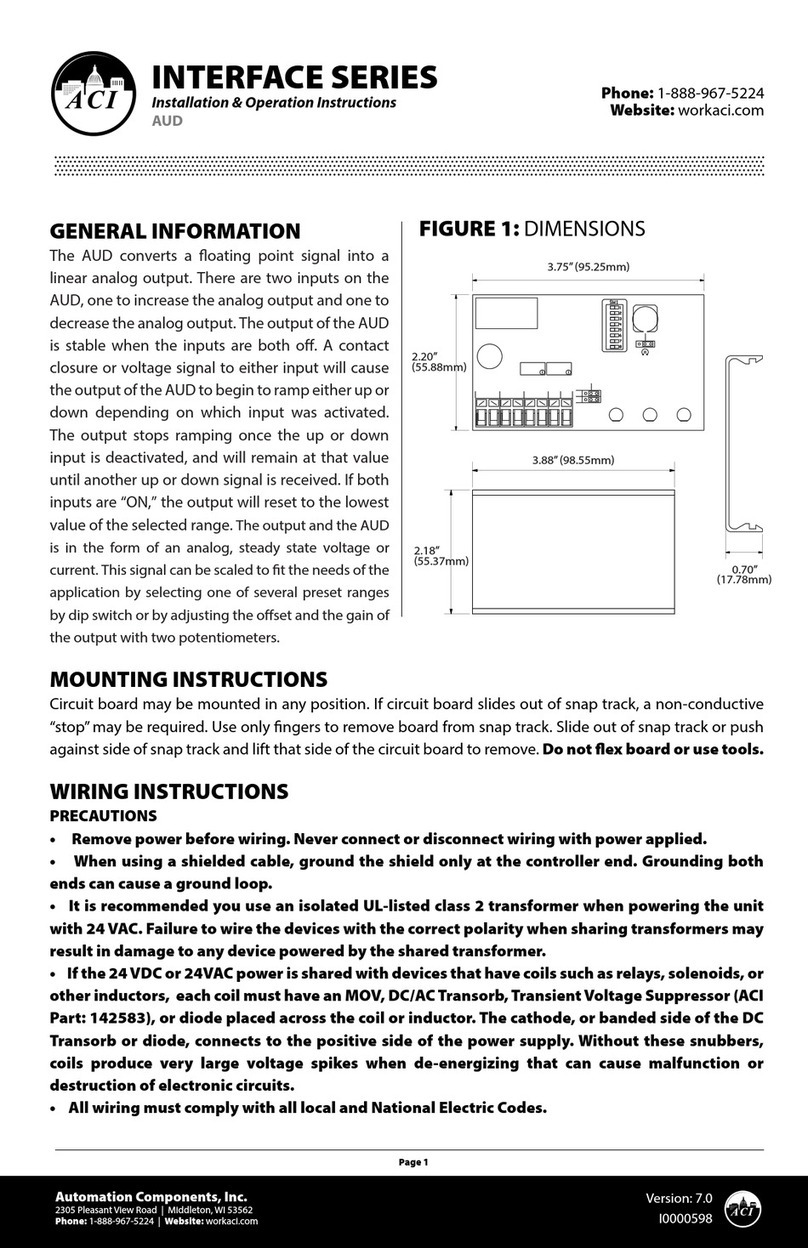
GENERAL INFORMATION
The EFP2 converts a oating point signal into a
proportional pneumatic signal ranging from
0-20 psig. The pneumatic output is proportional
to the signal input. The EFP2 has a manual
override switch with terminal strip contacts to
indicate its status and a potentiometer to vary
the pneumatic output. Two LEDs indicate UP or
DOWN excursions, with an additional one for
power indication. The EFP2 oers four jumper
selectable rates of change in the output
pressure. Output pressure ranges are jumper
shunt selectable for 0 to 10, 0 to 15 and 0 to 20
psig, and adjustable in all ranges. A 0-5 VDC
feedback signal, indicating the resultant branch
line pressure, is also provided. This signal varies
linearly with the branch pressure range selected.
It is designed with electrical terminals on one
end and pneumatic connections on the other,
allowing for maximum convenience in wiring
and tubing installation when panel mounted.
The EFP2 incorporates two valves (one controls
exhaust) and does not bleed air at set point. Its
branch exhaust ow and response time are not
limited by an internal restrictor and are similar to its
load rate. If power fails to the EFP2, branch line
pressure remains constant if the branch line does
not leak air. The EFP2FS is a two valve fail safe model.
Its three-way branch exhaust valve allows exhaust of
branch line air on a power failure.
MOUNTING INSTRUCTIONS
Circuit board may be mounted in any position. If
circuit board slides out of snap track, a
non-conductive “stop”may be required. Use only
ngers to remove board from snap track. Slide
out of snap track or push against side of snap
track and lift that side of the circuit board to
remove. Do not flex board or use tools.
WIRING INSTRUCTIONS
PRECAUTIONS
• Remove power before wiring. Never connect or disconnect wiring with power applied.
• When using a shielded cable, ground the shield only at the controller end. Grounding both ends
can cause a ground loop.
• It is recommended you use an isolated UL-listed class 2 transformer when powering the unit
with 24 VAC. Failure to wire the devices with the correct polarity when sharing transformers may
result in damage to any device powered by the shared transformer.
• If the 24 VDC or 24VAC power is shared with devices that have coils such as relays, solenoids, or
other inductors, each coil must have an MOV, DC/AC Transorb, Transient Voltage Suppressor (ACI
Part: 142583), or diode placed across the coil or inductor. The cathode, or banded side of theDC
Transorb or diode, connects to the positive side of the power supply. Without these snubbers,
MAN
AUTO
POWER
LED
Manual Override Potentiometer
Manual Override Switch
MAN
- +
PWR CSC DN UP FB OV OV
L3
Factory set - do not adjust
Branch Line Output
SPAN Potentiometer
Set for maximum
desired pressure with
maximum input signal
Offset Potentiometer
Set for minimum desired
pressure with minimum
input signal
OFFSET
SPAN
ZERO
A B J1
0
1
Set Timing Range
Main Air Supply
UP
Down
(LED)
(LED)
(+)
Power
24 VDC/VAC
(-)
Signal Common (-)
Down
Up
Override Feedback (Dry Contact)
(+)
Branch Pressure
Feedback Signal
(-)
A
B
C
J2
Output pressure range
selector factory set 0-15
coils produce very large voltage spikes when de-energizing that can cause malfunction or
destruction of electronic circuits.
• All wiring must comply with all local and National Electric Codes.
The gauge port will accept a miniature 1/8”-27 FNPT back-ported pressure gauge to allow direct reading of
branch line pressure. The gauge should be sealed by Teon sealing tape, and should be tightened just
snug, using a backup wrench to hold the manifold. ADJUSTMENT OF INSTALLED GAUGES. If installation
requires adjustment of the gauge for proper reading of the face, turn the gauge no more than ½ turn in
either direction. O-rings in the bottom of the gauge port will allow this without leakage.
Warranty does not include malfunction due to clogged valve. Main air port is ltered with the supplied 80
– 100 micron integral-in-barb lter. Periodically check the lter for contamination and ow reduction, and
clean with a brush or replace if needed (Part # PN004).
The surface between the manifold and pressure transducer is a pressure seal: do NOT stress the circuit
board or allow the manifold to move. Hold the manifold in one hand while installing pneumatic tubing
onto the barbed ttings, and use care when removing tubing to avoid damaging ttings or moving
manifold.
Pulsed relay contacts
(optically isolated)
PWR CSC DN UP FB
24 VAC
Power
Supply
or VDC
(+) (-)
24 VAC
Power
Supply
or VDC
(+) (-)
Pulsed relay contacts
(not isolated)
PWR CSC DN UP FB
24 VAC
Power
Supply
or VDC
(+) (-)
PWR CSC DN UP FB
24 VAC
Power
Supply
or VDC
(+) (-)
Controller / Triac Output
(isolated)
Controller
Down Output
Controller
Up Output
24 VAC
Power
Supply
PWR CSC DN UP FB
Controller / Triac Output
(not isolated)
Controller
Down Output
Controller
Up Output
24 VAC
Power
Supply
1. Setting the input timing range: With power removed, place jumpers in the conguration that most
closely matches the timing range from the controller.
2. Setting the output pressure range: Apply power. Choose a pressure range on the EFP2/EFP2FS that
matches or is just above maximum range of device being controlled. Example: 8-13 psi choose B (15 psi
setting).
3. Setting the maximum pressure: With all pneumatic and power connections made, place the Manual
override switch in the “MAN” position. Turn the override pot full clockwise. Adjust the “SPAN” pot until
the desired maximum output is achieved.
4. Setting the oset: Conrm the green “DN” LED is blinking only, this indicates the output is at
minimum. Place the Manual override switch in the “AUTO” position. Turn the “OFFSET” pot until the
desired minimum pressure is achieved.
5. Calibration can also be made by sending the appropriate timing pulse and adjusting the“OFFSET”and
“SPAN”pots to the desired pressure output.
LED INDICATIONS
POWER LED: LED lit indicates power is received by the board.
UP and DOWN LED’s: Solid lit LED indicates the EFP2 is receiving an Up or Down command. Single
blinking LED indicates that the EFP is at the minimum or maximum of the timing range selected. Both
LED’s blinking indicates the EFP2/EFP2FS is at set-point.
Connect the normally open (NO) terminals of two separate relays, triac outputs, or the normally open
terminals of a tri-state relay to the “DN” and “UP” inputs. Connect the common terminal of the relay(s) to
terminal SC (signal common) on the EFP2 or EFP2FS. A
signal to both up and down inputs for 3 seconds will
cause branch line pressure to drop to 0 psi (see Table
1).
The branch exhaust response time is determined by
the combined exhaust air ow as well as pressure
dierentials. If power to the EFP2 is lost, it will contin-
ue to hold branch pressure if no branch line leaks. If
power to the EFP2FS is lost, the branch line will bleed
to 0 psi.
Manual override
Move the AUTO/MAN toggle switch to the MAN position. Turn the shaft on the MAN pot to vary the
pneumatic output. Return AUTO/MAN switch to AUTO position when nished.
Override Terminals (OV)
When manual override switch is in manual position, contact between terminals is closed. When manual
override switch is in auto position, contact between terminals is open.
For optimum performance and reduced
noise, the EFP2FS unit requires a branch
air line capacity equal to at least 25 feet of
1/4" O.D. polyethylene tubing to operate
without oscillation, and the EFP2 unit
requires a branch air line capacity equal
to at least 15 feet of 1/4" O.D.
polyethylene tubing to operate without
oscillation.
FIELD CALIBRATION
The default jumper setting from the
factory for the EFP2/EFP2FS is B (15 psi)
for the output range and A0, B0 for the
input timing range. There are four (4)
input timing ranges available per version
and three (3) selectable output pressure
ranges. NOTE: The ZERO potentiometer
is factory calibrated. Do not adjust.

FIGURE 3: JUMPER SETTINGS
FIGURE 4: PNEUMATIC TUBING
INSTALLATION
GENERAL INFORMATION
The EFP2 converts a oating point signal into a
proportional pneumatic signal ranging from
0-20 psig. The pneumatic output is proportional
to the signal input. The EFP2 has a manual
override switch with terminal strip contacts to
indicate its status and a potentiometer to vary
the pneumatic output. Two LEDs indicate UP or
DOWN excursions, with an additional one for
power indication. The EFP2 oers four jumper
selectable rates of change in the output
pressure. Output pressure ranges are jumper
shunt selectable for 0 to 10, 0 to 15 and 0 to 20
psig, and adjustable in all ranges. A 0-5 VDC
feedback signal, indicating the resultant branch
line pressure, is also provided. This signal varies
linearly with the branch pressure range selected.
It is designed with electrical terminals on one
end and pneumatic connections on the other,
allowing for maximum convenience in wiring
and tubing installation when panel mounted.
The EFP2 incorporates two valves (one controls
exhaust) and does not bleed air at set point. Its
branch exhaust ow and response time are not
limited by an internal restrictor and are similar to its
load rate. If power fails to the EFP2, branch line
pressure remains constant if the branch line does
not leak air. The EFP2FS is a two valve fail safe model.
Its three-way branch exhaust valve allows exhaust of
branch line air on a power failure.
MOUNTING INSTRUCTIONS
Circuit board may be mounted in any position. If
circuit board slides out of snap track, a
non-conductive “stop”may be required. Use only
ngers to remove board from snap track. Slide
out of snap track or push against side of snap
track and lift that side of the circuit board to
remove. Do not flex board or use tools.
Automation Components, Inc.
2305 Pleasant View Road | Middleton, WI 53562
Phone: 1-888-967-5224 | Website: workaci.com
Page 3
Version: 6.0
I0000588
WIRING INSTRUCTIONS
PRECAUTIONS
• Remove power before wiring. Never connect or disconnect wiring with power applied.
• When using a shielded cable, ground the shield only at the controller end. Grounding both ends
can cause a ground loop.
• It is recommended you use an isolated UL-listed class 2 transformer when powering the unit
with 24 VAC. Failure to wire the devices with the correct polarity when sharing transformers may
result in damage to any device powered by the shared transformer.
• If the 24 VDC or 24VAC power is shared with devices that have coils such as relays, solenoids, or
other inductors, each coil must have an MOV, DC/AC Transorb, Transient Voltage Suppressor (ACI
Part: 142583), or diode placed across the coil or inductor. The cathode, or banded side of theDC
Transorb or diode, connects to the positive side of the power supply. Without these snubbers,
coils produce very large voltage spikes when de-energizing that can cause malfunction or
destruction of electronic circuits.
• All wiring must comply with all local and National Electric Codes.
The gauge port will accept a miniature 1/8”-27 FNPT back-ported pressure gauge to allow direct reading of
branch line pressure. The gauge should be sealed by Teon sealing tape, and should be tightened just
snug, using a backup wrench to hold the manifold. ADJUSTMENT OF INSTALLED GAUGES. If installation
requires adjustment of the gauge for proper reading of the face, turn the gauge no more than ½ turn in
either direction. O-rings in the bottom of the gauge port will allow this without leakage.
Warranty does not include malfunction due to clogged valve. Main air port is ltered with the supplied 80
– 100 micron integral-in-barb lter. Periodically check the lter for contamination and ow reduction, and
clean with a brush or replace if needed (Part # PN004).
The surface between the manifold and pressure transducer is a pressure seal: do NOT stress the circuit
board or allow the manifold to move. Hold the manifold in one hand while installing pneumatic tubing
onto the barbed ttings, and use care when removing tubing to avoid damaging ttings or moving
manifold.
A B J1
0
1
30 Seconds
3 Minutes
6 Minutes
8 Minutes
Version #2
0206Y0B.HEX
45 Seconds
60 Seconds
90 Seconds
120 Seconds
Version #1
0186Y1A.HEX
0 to 15 psig
(Factory Setting)
0 to 10 psig
0 to 20 psig
A
B
C
J2
A
B
C
J2
A
B
C
J2
1. Setting the input timing range: With power removed, place jumpers in the conguration that most
closely matches the timing range from the controller.
2. Setting the output pressure range: Apply power. Choose a pressure range on the EFP2/EFP2FS that
matches or is just above maximum range of device being controlled. Example: 8-13 psi choose B (15 psi
setting).
3. Setting the maximum pressure: With all pneumatic and power connections made, place the Manual
override switch in the “MAN” position. Turn the override pot full clockwise. Adjust the “SPAN” pot until
the desired maximum output is achieved.
4. Setting the oset: Conrm the green “DN” LED is blinking only, this indicates the output is at
minimum. Place the Manual override switch in the “AUTO” position. Turn the “OFFSET” pot until the
desired minimum pressure is achieved.
5. Calibration can also be made by sending the appropriate timing pulse and adjusting the“OFFSET”and
“SPAN”pots to the desired pressure output.
LED INDICATIONS
POWER LED: LED lit indicates power is received by the board.
UP and DOWN LED’s: Solid lit LED indicates the EFP2 is receiving an Up or Down command. Single
blinking LED indicates that the EFP is at the minimum or maximum of the timing range selected. Both
LED’s blinking indicates the EFP2/EFP2FS is at set-point.
Connect the normally open (NO) terminals of two separate relays, triac outputs, or the normally open
terminals of a tri-state relay to the “DN” and “UP” inputs. Connect the common terminal of the relay(s) to
terminal SC (signal common) on the EFP2 or EFP2FS. A
signal to both up and down inputs for 3 seconds will
cause branch line pressure to drop to 0 psi (see Table
1).
The branch exhaust response time is determined by
the combined exhaust air ow as well as pressure
dierentials. If power to the EFP2 is lost, it will contin-
ue to hold branch pressure if no branch line leaks. If
power to the EFP2FS is lost, the branch line will bleed
to 0 psi.
Manual override
Move the AUTO/MAN toggle switch to the MAN position. Turn the shaft on the MAN pot to vary the
pneumatic output. Return AUTO/MAN switch to AUTO position when nished.
Override Terminals (OV)
When manual override switch is in manual position, contact between terminals is closed. When manual
override switch is in auto position, contact between terminals is open.
Min. Tubing Length:
EFP2: 15 ft [4.752 m]
EFP2FS: 25 ft [7.62 m]
Air Compressor
For optimum performance and reduced
noise, the EFP2FS unit requires a branch
air line capacity equal to at least 25 feet of
1/4" O.D. polyethylene tubing to operate
without oscillation, and the EFP2 unit
requires a branch air line capacity equal
to at least 15 feet of 1/4" O.D.
polyethylene tubing to operate without
oscillation.
FIELD CALIBRATION
The default jumper setting from the
factory for the EFP2/EFP2FS is B (15 psi)
for the output range and A0, B0 for the
input timing range. There are four (4)
input timing ranges available per version
and three (3) selectable output pressure
ranges. NOTE: The ZERO potentiometer
is factory calibrated. Do not adjust.

Table 1: LED INDICATIONS
GENERAL INFORMATION
The EFP2 converts a oating point signal into a
proportional pneumatic signal ranging from
0-20 psig. The pneumatic output is proportional
to the signal input. The EFP2 has a manual
override switch with terminal strip contacts to
indicate its status and a potentiometer to vary
the pneumatic output. Two LEDs indicate UP or
DOWN excursions, with an additional one for
power indication. The EFP2 oers four jumper
selectable rates of change in the output
pressure. Output pressure ranges are jumper
shunt selectable for 0 to 10, 0 to 15 and 0 to 20
psig, and adjustable in all ranges. A 0-5 VDC
feedback signal, indicating the resultant branch
line pressure, is also provided. This signal varies
linearly with the branch pressure range selected.
It is designed with electrical terminals on one
end and pneumatic connections on the other,
allowing for maximum convenience in wiring
and tubing installation when panel mounted.
The EFP2 incorporates two valves (one controls
exhaust) and does not bleed air at set point. Its
branch exhaust ow and response time are not
limited by an internal restrictor and are similar to its
load rate. If power fails to the EFP2, branch line
pressure remains constant if the branch line does
not leak air. The EFP2FS is a two valve fail safe model.
Its three-way branch exhaust valve allows exhaust of
branch line air on a power failure.
MOUNTING INSTRUCTIONS
Circuit board may be mounted in any position. If
circuit board slides out of snap track, a
non-conductive “stop”may be required. Use only
ngers to remove board from snap track. Slide
out of snap track or push against side of snap
track and lift that side of the circuit board to
remove. Do not flex board or use tools.
WARRANTY
The EFP Series is covered by ACI’s Two (2) Year Limited Warranty, which is located in the front of ACI’S SENSORS &
TRANSMITTERS CATALOG or can be found on ACI’s website: www.workaci.com.
W.E.E.E. DIRECTIVE
At the end of their useful life the packaging and product should be disposed of via a suitable recycling
centre. Do not dispose of with household waste. Do not burn.
Automation Components, Inc.
2305 Pleasant View Road | Middleton, WI 53562
Phone: 1-888-967-5224 | Website: workaci.com
Page 4
Version: 6.0
I0000588
WIRING INSTRUCTIONS
PRECAUTIONS
• Remove power before wiring. Never connect or disconnect wiring with power applied.
• When using a shielded cable, ground the shield only at the controller end. Grounding both ends
can cause a ground loop.
• It is recommended you use an isolated UL-listed class 2 transformer when powering the unit
with 24 VAC. Failure to wire the devices with the correct polarity when sharing transformers may
result in damage to any device powered by the shared transformer.
• If the 24 VDC or 24VAC power is shared with devices that have coils such as relays, solenoids, or
other inductors, each coil must have an MOV, DC/AC Transorb, Transient Voltage Suppressor (ACI
Part: 142583), or diode placed across the coil or inductor. The cathode, or banded side of theDC
Transorb or diode, connects to the positive side of the power supply. Without these snubbers,
coils produce very large voltage spikes when de-energizing that can cause malfunction or
destruction of electronic circuits.
• All wiring must comply with all local and National Electric Codes.
The gauge port will accept a miniature 1/8”-27 FNPT back-ported pressure gauge to allow direct reading of
branch line pressure. The gauge should be sealed by Teon sealing tape, and should be tightened just
snug, using a backup wrench to hold the manifold. ADJUSTMENT OF INSTALLED GAUGES. If installation
requires adjustment of the gauge for proper reading of the face, turn the gauge no more than ½ turn in
either direction. O-rings in the bottom of the gauge port will allow this without leakage.
Warranty does not include malfunction due to clogged valve. Main air port is ltered with the supplied 80
– 100 micron integral-in-barb lter. Periodically check the lter for contamination and ow reduction, and
clean with a brush or replace if needed (Part # PN004).
The surface between the manifold and pressure transducer is a pressure seal: do NOT stress the circuit
board or allow the manifold to move. Hold the manifold in one hand while installing pneumatic tubing
onto the barbed ttings, and use care when removing tubing to avoid damaging ttings or moving
manifold.
UP LED DOWN LED INDICATION
On Off Ramping Up
Off On Ramping Down
Fast Blink Off Maximum Output
Off Fast Blink Minimum Output
Slow Blink Slow Blink Output Holding
1. Setting the input timing range: With power removed, place jumpers in the conguration that most
closely matches the timing range from the controller.
2. Setting the output pressure range: Apply power. Choose a pressure range on the EFP2/EFP2FS that
matches or is just above maximum range of device being controlled. Example: 8-13 psi choose B (15 psi
setting).
3. Setting the maximum pressure: With all pneumatic and power connections made, place the Manual
override switch in the “MAN” position. Turn the override pot full clockwise. Adjust the “SPAN” pot until
the desired maximum output is achieved.
4. Setting the oset: Conrm the green “DN” LED is blinking only, this indicates the output is at
minimum. Place the Manual override switch in the “AUTO” position. Turn the “OFFSET” pot until the
desired minimum pressure is achieved.
5. Calibration can also be made by sending the appropriate timing pulse and adjusting the“OFFSET”and
“SPAN”pots to the desired pressure output.
LED INDICATIONS
POWER LED: LED lit indicates power is received by the board.
UP and DOWN LED’s: Solid lit LED indicates the EFP2 is receiving an Up or Down command. Single
blinking LED indicates that the EFP is at the minimum or maximum of the timing range selected. Both
LED’s blinking indicates the EFP2/EFP2FS is at set-point.
Connect the normally open (NO) terminals of two separate relays, triac outputs, or the normally open
terminals of a tri-state relay to the “DN” and “UP” inputs. Connect the common terminal of the relay(s) to
terminal SC (signal common) on the EFP2 or EFP2FS. A
signal to both up and down inputs for 3 seconds will
cause branch line pressure to drop to 0 psi (see Table
1).
The branch exhaust response time is determined by
the combined exhaust air ow as well as pressure
dierentials. If power to the EFP2 is lost, it will contin-
ue to hold branch pressure if no branch line leaks. If
power to the EFP2FS is lost, the branch line will bleed
to 0 psi.
Manual override
Move the AUTO/MAN toggle switch to the MAN position. Turn the shaft on the MAN pot to vary the
pneumatic output. Return AUTO/MAN switch to AUTO position when nished.
Override Terminals (OV)
When manual override switch is in manual position, contact between terminals is closed. When manual
override switch is in auto position, contact between terminals is open.
For optimum performance and reduced
noise, the EFP2FS unit requires a branch
air line capacity equal to at least 25 feet of
1/4" O.D. polyethylene tubing to operate
without oscillation, and the EFP2 unit
requires a branch air line capacity equal
to at least 15 feet of 1/4" O.D.
polyethylene tubing to operate without
oscillation.
FIELD CALIBRATION
The default jumper setting from the
factory for the EFP2/EFP2FS is B (15 psi)
for the output range and A0, B0 for the
input timing range. There are four (4)
input timing ranges available per version
and three (3) selectable output pressure
ranges. NOTE: The ZERO potentiometer
is factory calibrated. Do not adjust.

PRODUCT SPECIFICATIONS
24 VAC (+/-10%), 50 or 60Hz, 24 VDC (+10%/- 5%)
50 mA, 150 mA (3.6 VA) on pressure excursions, 180 mA (4.3 VA) on pressure
excursions (FS model)
Relay Contact Closure, Transistor or Triac
9-24 VAC/VDC @ 750
EFP2: 45s, 90s, 1 min, 2 min | EFP2 Version 2: 30s, 3min, 6 min, 8 min
MAN function = output can be varied | AUTO function = output is controlled
from input signal
24 VDC/VAC @ 1A maximum, N.O. in AUTO operation (Optional: N.O. in MAN
operation)
0-5 VDC = Output Span
Maximum 28 psig (193.06 kPa), minimum 22 psig (151.69 kPa)
750 SCIM (12.29 liters)
0-10 psig (0-68.95 kPa), 0-15 psig (0-103.43 kPa) or 0-20 psig (137.9 kPa)
2% full scale at room temperature (above 1 psig or 6.895 kPa)
3% full scale across operating temperature range (above 1 psig)
Supply valves @ 20 psig (138 kPa) main/15 psig (103 kPa) out, 750 scim.
Branch Line requires 2 in or 33.78 cm (minimum) | Min. 25 ft of 1/4” O.D. poly
branch tubing
Furnished with integral-in-barb 80-100 micron lter (Part # PN004)
Optional standard barb (PN002) with external 5 micron in-line lter (PN021)
90° Pluggable Screw Terminal Blocks | 16 (1.31 mm) to 26 AWG (0.129 mm)
0.5 Nm (Minimum); 0.6 Nm (Maximum)
1/4" O.D. nominal (1/8” I.D.) polyethylene
Removeable brass ttings for Main & Branch in machined manifold, Plugged
1/8-27-FNPT gauge port
0-30 psig (0-200 kPa)
± 2.5% Midscale (± 3.5% Full Scale)
35 to 120°F (1.7 to 48.9°C)
10 to 95% non-condensing
-20 to 150°F (-28.9 to 65.5°C)
NON-SPECIFIC INFORMATION
Supply Voltage:
Supply Current:
Digital Input Signal Source:
Digital Input Signal Level (@
Impedance):
Digital Input Rates of Change:
Manual / Auto Override Switch:
Manual / Auto Override
Feedback Output:
Feedback Output Signal Range:
Air Supply Pressure:
Air Supply Consumption:
Output Pressure Range
(Jumper Selectable):
Output Pressure Accuracy:
Air Flow:
Filtering:
Connections | Wire Size:
Terminal Block Torque Rating:
Connections | Pneumatic
Tubing Size-Type:
Pneumatic Fitting:
Gauge Pressure Range (Gauge
Models):
Gauge Pressure Accuracy
(Gauge Models):
Operating Temperature Range:
Operating Humidity Range:
Storage Temperature:
Automation Components, Inc.
2305 Pleasant View Road | Middleton, WI 53562
Phone: 1-888-967-5224 | Website: workaci.com
Page 5
Version: 6.0
I0000588

NOTES
Page 6
Automation Components, Inc.
2305 Pleasant View Road | Middleton, WI 53562
Phone: 1-888-967-5224 | Website: workaci.com
Version: 6.0
I0000588

NOTES
Page 7
Automation Components, Inc.
2305 Pleasant View Road | Middleton, WI 53562
Phone: 1-888-967-5224 | Website: workaci.com
Version: 6.0
I0000588

Automation Components, Inc.
2305 Pleasant View Road
Middleton, WI 53562
Phone: 1-888-967-5224
Website: workaci.com
Page 8
Automation Components, Inc.
2305 Pleasant View Road | Middleton, WI 53562
Phone: 1-888-967-5224 | Website: workaci.com
Version: 6.0
I0000588
Other manuals for ACCESS series
16
This manual suits for next models
2
Table of contents
Other aci Media Converter manuals
Popular Media Converter manuals by other brands

PS Audio
PS Audio PerfectWave Transport Instructions for use

Cabletron Systems
Cabletron Systems MCC-16 user guide

StarTech.com
StarTech.com ET90110SC Spec sheet

almando
almando Multiplay Surround Decoder Installation and operating instructions

Sinovision
Sinovision HDCRGB102 user manual

Anda Telecom
Anda Telecom FE1/V.35 user manual
