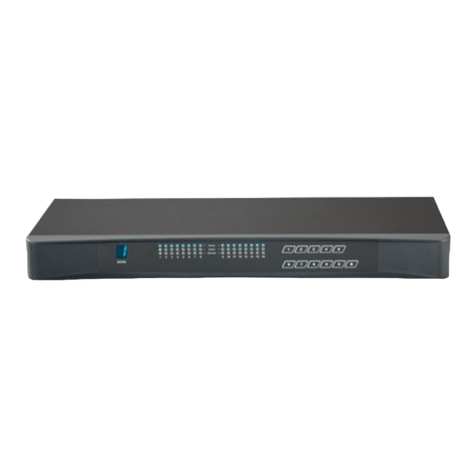
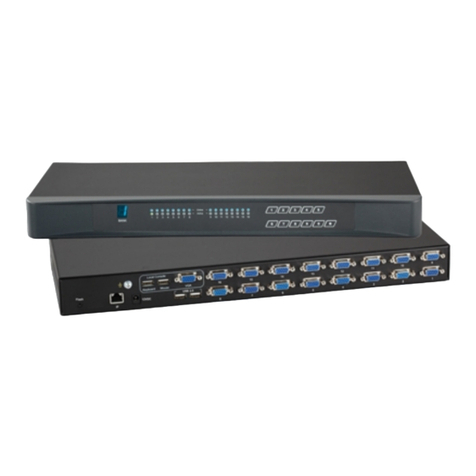
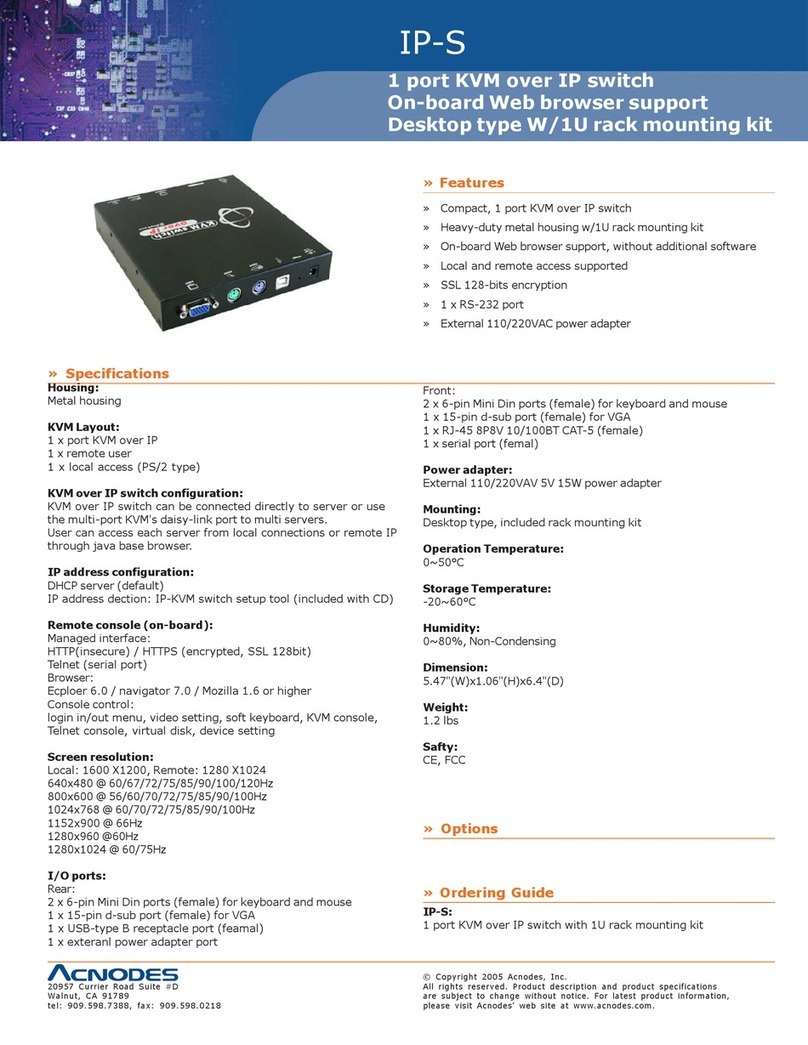
manuals.online logo
Brands
  1. Home
  2. •
  3. Brands
  4. •
  5. Acnodes
  6. •
  7. Switch
  8. •
  9. Acnodes KP802 User manual

Acnodes KP802 User manual

14628 Central Ave,
Chino, CA 91710
tel:909.597.7588, fax:909.597.1939
© Copyright 2013 Acnodes, Inc.
All rights reserved. Product description and product specifications
are subject to change without notice. For latest product information,
please visit Acnodes’ web site at www.acnodes.com.
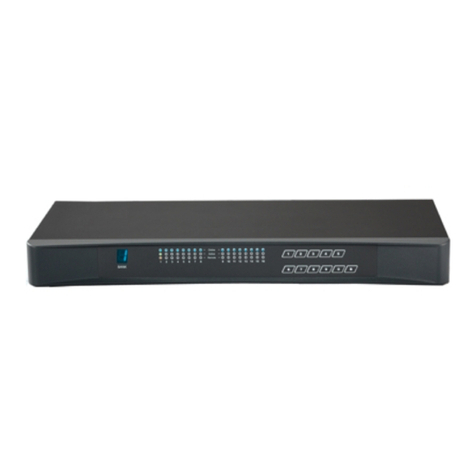
KP802/1602
1U Rackmount Combo IP KVM Switch
User Manual
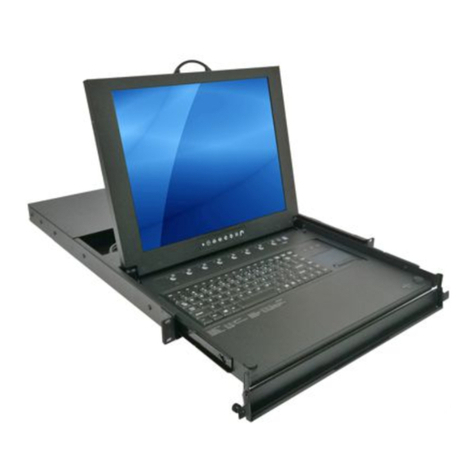
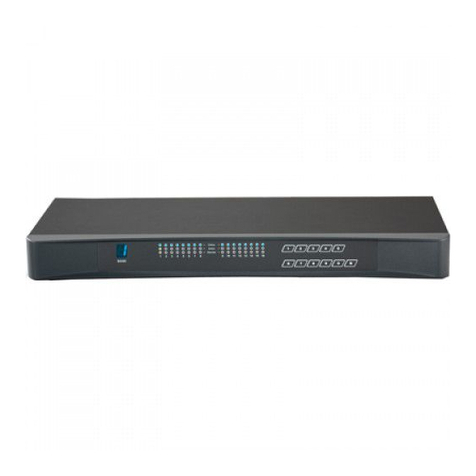
KP802/1602: 1U rackmount ComboIP KVM switch
8/16-port RJ45 with 2 user console
14628 Central Ave,
Chino, CA 91710
tel:909.597.7588, fax:909.597.1939
© Copyright 2013 Acnodes, Inc.
All rights reserved. Product description and product specifications
are subject to change without notice. For latest product information,
please visit Acnodes’ web site at www.acnodes.com.
KP802/1602
1U Rackmount Combo IP KVM Switch
Legal Information
First En glish p rinting, October 2 002
Inform ation in this docum ent has been care fully che cked for accuracy; ho weve r, no guarantee is g iven to the correctne ss of th e
con tents. The information in this document is subje ct to change withou t notice. W e are n ot liable fo r any injury or loss th at
results from the use o f th is eq uipmen t.
Safety Instructions
Please read all of these instructions carefully before you use the device. Save this manual for future reference.
¦ Un plug equipm ent before cleanin g. Don’t use liquid or spray deterge nt; use a moist cloth.
¦ Kee p equipme nt away from excessive humidity and he at. Preferabl y, keep it in an a ir -conditione d environm ent with
temperatures n ot exceeding 40º Celsius (10 4º Fah renh eit).
¦ W hen installing , place th e eq uipme nt o n a st urd y, level surface to prevent it from accidenta lly falling and causing da m
age to ot her equipment or injury to persons n earb y.
¦ W hen the e quipme nt is in an open po sition , do not cove r, block or in an y way obstruct the gap bet ween it and the
power suppl y. Prop er air convection is necessa ry to keep it from o verheating.
¦ Arrange th e eq uipme nt ’s p ower cord in such a way that o thers wo n’t trip or fall over it.
¦ If you are using a power cord th at didn’t ship with th e eq uipme nt, ensure that it is rate d fo r the vo ltage and current
lab eled on the eq uipment ’s e lectrical ratin gs label. The voltage rating on the cord sho uld be high er than the o ne listed
on th e eq uipme nt ’s rat ings label.
¦ Observe all precautions an d warnin gs att ached to the equipm ent.
¦ If you d on’t intend on u sing t he equipm ent for a lo ng tim e, d isconn ect it from the pow er out let to prevent being dam
aged by transient over -volta ge.
¦ Kee p all liquids aw ay from the equ ipmen t to minimize the risk of accidental spillage. Liquid spilled on to the p ower
sup ply or on o ther h ardwa re m ay cause d ama ge, fire or electrical shock.
¦ Only qua lified se rvice personnel shou ld ope n the chassis. Op ening it you rself cou ld dam age the eq uipme nt and invali
date its wa rrant y.
¦ If any p art of the equ ipmen t be comes damaged or stops functioning, have it checked by qualified service personnel.
What the w arranty does not cover
¦ An y pro duct, on w hich the serial n umb er has b een defaced, modified or rem oved.
¦ Da mag e, dete riorat ion or m alfunction resultin g from :
? Accide nt, m isuse, ne gle ct, fire, wa te r, lightn ing, o r o ther acts of n ature , unauthorized prod uct mo difica tion, or
failure to follow in struction s supplied with the produ ct.
? Repair or at temp ted repa ir by a nyone not authorized by us.
? Any damage o f th e prod uct due t o shipme nt.
? Removal or installation of th e product.
? Causes extern al to the p ro duct, su ch as electric power fluctu ation or failu re .
? Use of sup plies o r p arts not mee ting o ur specifications.
? Normal wear and tea r.
? Any other cau ses which doe s not re late to a p ro duct def ect.
¦ Re moval, insta llation, and set -up service charges.
R egulatory Notices Federal Communications C om mission (FCC)
Th is equipme nt has been tested and found to comply with the limits for a Class B digital de vice, p ursuant to Part 15 o f th e F CC
rules. The se lim its a re designed to provide reasonable protection against ha rm ful interfe rence in a residential instal - lation.
Any chan ges o r modifications made to t his equipm ent ma y void the u ser’s autho rity to opera te th is equipm ent. This equipment
gene ra tes, u ses, and can ra diate rad io freq uen cy energy and, if not installe d and use d in accorda nce w ith the instruction s, m ay
cau se harm ful inte rfe rence to radio com mu nicatio ns.
H owever, t here is no gu arantee th at int erferen ce will not occur in a particular installation. If this eq uipmen t does cause
harmfu l interference to radio or television recept ion, which can be determined by tu rn ing the equipme nt off and on, the user
is encourage d to try to correct the interference by one or more of the following m easure s:
¦ Re -positio n or relocate the receiving antenna .
¦ In crease the separation betwe en the equipm ent and receive r.
¦ Co nne ct the equip men t into an outlet on a circuit di fferent from that to w hich the receiver is conn ected.
14628 Central Ave,
Chino, CA 91710
tel:909.597.7588, fax:909.597.1939
© Copyright 2013 Acnodes, Inc.
All rights reserved. Product description and product specifications
are subject to change without notice. For latest product information,
please visit Acnodes’ web site at www.acnodes.com.
KP802/1602
1U Rackmount Combo IP KVM Switch
Contents
< Part 1 > Combo 2-console KVM
KP802 KP1602
1.1 Package contents
1.2 KVM port connection
1.3 IP & Local console connection
1.4 IP console setting
1.5 KVM Cascade
1.6 Specifications
P.1
P.2
P.2
P.3
P.4
P.5
< Part 2 > Usage
2.1 KVM Button
2.2 Password
2.3 KVM OSD
2.4 KVM Hotkey & Remote Console Hotkey
2.5 DC power 12V, 24V, 48V Input
P.6
P.7
P.8
P.9
P.10
14628 Central Ave,
Chino, CA 91710
tel:909.597.7588, fax:909.597.1939
© Copyright 2013 Acnodes, Inc.
All rights reserved. Product description and product specifications
are subject to change without notice. For latest product information,
please visit Acnodes’ web site at www.acnodes.com.
KP802/1602
1U Rackmount Combo IP KVM Switch
Before Installation
¦It is very important to mount the equipment in a suitable cabinet or on a stable surface.
¦Make sure the place has a good ventilation, is out of direct sunlight, away from sources of excessive
dust, dirt, heat, water, moisture and vibration.
Unpacking
The equipment comes with the standard parts shown in package content. Check and make sure they are
included and in good condition. If anything is missing, or damaged, contact the supplier immediatel y.
Installation for standalone KVM
Screw A: 2 pcs Screw B: 8 pcs
M3.2 x 4.5 mm M4 x 10 mm
¦Install each bracket using screws
AB provided shown in Figure 1.
¦Fix the KVM into the rack
Figure 1.
14628 Central Ave,
Chino, CA 91710
tel:909.597.7588, fax:909.597.1939
© Copyright 2013 Acnodes, Inc.
All rights reserved. Product description and product specifications
are subject to change without notice. For latest product information,
please visit Acnodes’ web site at www.acnodes.com.
KP802/1602
1U Rackmount Combo IP KVM Switch
< Part 1 > Combo KVM
< 1.1 > Package Contents Combo IP KVM
KP802 / KP1602
KVM unit
• KP802 or KP1602 KVM unit x 1
• Mounting set w/ bracket & screws x 1
• Power adapter w/ power cord ( for KVM ) x 1
Loc al Co nsole KP802
Power Cascade
KP1602
< 1.2 > KVM port connection Combo IP KVM
¦6 / 10 / 15 ft Combo KVM cable
¦Support PS/2 or USB server
USB Servers
Combo KVM port
PS/2 Servers
Combo KVM cable
support PS/2 or USB server
< 1.3 > IP & Local console connection
14628 Central Ave,
Chino, CA 91710
tel:909.597.7588, fax:909.597.1939
© Copyright 2013 Acnodes, Inc.
All rights reserved. Product description and product specifications
are subject to change without notice. For latest product information,
please visit Acnodes’ web site at www.acnodes.com.
KP802/1602
1U Rackmount Combo IP KVM Switch
< 1.4 > IP console setting
After the cable connection, please take the following steps to configure the IP KVM :
1. Download IPKVMsetup.exe
2. Double click IPKVMsetup.exe to configure the IP KVM by device setup as belo w.
3. Click Refresh Device to search the connected IP KVM
4. Select the M.A.C. address, which you want to setup, then click Query Device
5. Enter Super user login. The default is super
6. Enter Super user password. The default is pass
7. Enter the new super user password
8. Re-enter the new password
9. Change the desired IP address / Subnet mask / Gatewa y, then click Setup Device to confirm the setting to IP KVM
10. The default address is as below: --
¦The single IP KVM model, such as KP1602 - http://192.168.1.22
11. Open Internet Explorer ( I.E. ), version 6.0 or above
12. Enter the IP KVM address into the address bar
- For Single IP - http://192.168.1.22
13. Enter username ( default is super )
Password ( default is pass )
14. After successful login to IP KVM, the user will enter the main page of IP KVM
< 1.5 > KVM Cascade
¦Cascade up to 8 levels, 128 servers
¦Cascading multiple KVM with cascade cable.
Cascaded KVMs from level 2 to 8 must be the models of KVS801 / KVS1601.
When multiple combo KVMs cascade together, the master KVM at level 1 will take all control
of other slave KVM switches (e.g. level 2 to 8).
Master KVM
Slave KVM
level 2
To console VGA por t
KVS801
Slave KVM
level 3
Slave KVM
level 4
Slave KVM
level 5
Slave KVM
level 6
Slave KVM
level 7
Slave KVM
level 8
KVS801
KVS801
KVS801
KVS1601
KVS1601
KVS1601
¦6ft Combo KVM cascade cable
< 1.6 > Specifications
KP802 KP1602
¯KVM Port
Number of ports: 8 or 16
Connector: combo connector
Connectivity: Combo 4-in-1 KVM cable, up to 6, 10 & 15 feet
¯Local Console
Graphic connector: 1 x DB-15 VGA
Resolution: Up to 1600 x 1200
Input device: 2 x USB type A for keyboard & mouse
¯IP Remote Console
Connector: RJ45 Ethernet
User management: 15-user login, 1 x active user
Network protocol: DHCP / BOOTP / DNS
Security: SSL v3, RSA, AES, HTTP / HTTPs, CSR
Resolution: Up to 1600 x 1200
Browser : IE, Firefox, Safari, Netscape
¯Expansion: Up to 128 servers by 8-level cascade
¯Compatibility
Multi-platform: Mix PCs, SUN and Mac G3 / G4 Mac / iMac
Support: Windows 7 / Vista / 2003 / XP, Linux, Unix
¯Power
Input: 100 or 240V AC at 50 or 60 Hz via IEC type cord
Option DC: 12V / 24V / 48V DC input
Consumption: Max. 24 Watt, Standby 5 Watt
¯Regulatory Approval: cUL, FCC, CE
¯Environmental
Operating: 0 to 50°C
Storage: -5 to 60°C
Relative humidity: 90%, non-condensing
Shock: 50G peak acceleration (11ms, half-sine wave)
Vibration: 58~100Hz / 0.98G (11ms / cycle)
¯Product Information
Dimension (W x D x H): 443 x 171 x 43.6 mm / 17.4 x 6.7 x 1.72 inch
Net weight: 3 kg / 6.5 lb
¯Packing Information
Dimension (W x D x H): 500 x 400 x 90 mm / 19.7 x 15.7 x 3.5 inch
Gross weight: 5 kg / 11 lb
Part 2. Usage
2.1 KVM Button
Power ON
¦Turn off all servers and KVM switches
¦Make sure all cables / connectors are properly connected
¦Recommend Power ON sequence is monitor, KVM switch finally computer
Front Panel - Port LED Indications
8 ports
Bank no. PC port LEDs Channel
button
Bank
button
16 ports
Bank no. 7-Segment BANK LED indication
PC port LEDs Online :Blue LED on indicating a PC is connecting to the port
Active :Green LED on indicating a selected channel
Channel button Press to select channel from 01 to 16
Bank button Select the bank from 1 to 8
2.2 Password
The password is enabled by default, the default password is “00000000” eight zeros (Do not use “0” on
number pad)
¦Enable password
1. Press the KVM hotkey Scroll Lock + Scroll Lock + U
2. Logout the KVM by pressing the hotkey Scroll Lock + Scroll Lock + P
3. In SUPERVISOR level, enter “00000000” eight zeros in user name & password field
(Do not use “0” on number pad)
4. In USER level, press Space bar +Enter in user name & password field
Remark: Automatic logout after 10 minutes of inactivity
¦Set your own user name & password
1. Login the KVM in SUPERVISOR level by pressing “00000000” eight zeros in user name & password
field
2. Call KVM OSD menu by pressing t he KVM hotkey Scroll Lock + Scroll Lock + Space Bar
3. Press F1 to the MAIN MENU
4. Select “USER SECURITY”
5. Set password in SUPERVISOR & USER level
a. In the left-top row “S” (SUPERVISOR), press Enter to set your own user name & password
b. In the row 1 to 8 (USER), press Enter to set your own user name & password
6. Press Enter to save the setting or press Esc to cancel the editing without any change
Remark: a. Blank has underscore, while SPACE doesn’t have
b. Press any alphanumeric key to move to next input item. SPACE is treated as a valid
character
¦Change your password
1. Login the KVM in SUPERVISOR level by pressing your own user name & password
2. Call KVM OSD menu by pressing the KVM hotkey Scroll Lock + Scroll Lock + Space Bar
3. Press F1 to the MAIN MENU
4. Select “USER SECURITY”
5. Change password in SUPERVISOR & USER level
a. In the left-top row “S” (SUPERVISOR), press Enter to change your user name & password
b. In the row 1 to 8 (USER), press Enter to change your user name & pass word
6. Press Enter to save the setting or press Esc to cancel the editing without any change
Remark: a. Blank has underscore, while SPACE doesn’t have
b. Press any alphanumeric key to move to next input item. SPACE is treated as a valid
character
¦Disable your password
1. Press the KVM hotkey Scroll Lock + Scroll Lock + U
2. Logout the KVM by pressing the KVM hotkey Scroll Lock + Scroll Lock + P
3. You don’t need user name & password to access the KVM OSD menu
¦Forget your password
Please contact your supplier for further support
Remark:
¦You must press the KVM hotkey within 2 seconds
¦A beep sound will be heard for successful entering KVM hotkey
2.3 KVM OSD
OSD Menu
OSD operation
next to the system name The PC is powered on
next to the system name The PC is selected
F1 Access F1 MAIN MENU
F2 Logout the OSD menu
F3 Previous menu
Esc Cancel / Quit
Enter Complete / Switch to selected port
Switch to previous or next port
PgUp/PgDn Switch to previous bank or next bank
Display port 01 ~ 08 / 09 ~ 16 / 17 ~ 24 / 25 ~ 32
1 / 2 / 3 / 4 Remark: Display port 17 ~ 32 for 32 port model only
F1 Main Menu
01
LANGUAGE
OSD language change
02
PORT NAME EDIT
Define port name
03
PORT SEARCH
Quick searching by port name
04
USER SECURITY
Change password
05
ACCESS LIST
Define user access authority
06
HOTKEY
Change hotkey
07
TIME SETTINGS
Modify scan display time interval
08
OSD MOUSE
Modify OSD mouse speed
Scroll Lock +Scroll Lock +
Space Bar
Calling OSD menu
Right-button mouse +Esc
Calling OSD menu
+
Port no.
Switch to specific port
Turn the buzzer ON and OFF
* Default the buzzer is ON
Logout the KVM if password security is
ON. Show up the status windows
2.4 KVM Hotkey & Remote Console Hotkey
Local Console Hotkey Function
Scroll Lock
+
Scroll Lock
+
Switch to previous port
Scroll Lock
+
Scroll Lock
+
Switch to next port
Scroll Lock
+
Scroll Lock
+
PgUp / PgDn
Switch to previous bank or next bank
Scroll Lock +Scroll Lock + Bank no.
Scroll Lock +Scroll Lock +B
Scroll Lock +Scroll Lock +P
Advance hotkeys (for Supervisor login only)
Scroll Lock +Scroll Lock +S
Scroll Lock +Scroll Lock +R
Activate auto-scan mode for connected
servers
*Press any key to exit the auto-scan
mode
Reset all the KVM settings to factory
default
*Except User Security settings
Scroll Lock
+
Scroll Lock
+
U
Disable and enable password security
*Default security is ON
To enable / disable the screen saving
Scroll Lock
+
Scroll Lock
+
L
function and 10 minutes auto-logout
*Default the screen saving is OFF
Remarks:
¦Example of “Scroll Lock +Scroll Lock + Bank no. + Port no.”
-Bank No. : 1 to 8
-Port No. : 01 to 16
-e.g. Bank 1 Port 4 : Scroll Lock +Scroll Lock +1+0+4
-e.g. Bank 2 Port 16 : Scroll Lock +Scroll Lock +2+1+6
¦You must press the hotkey within 2 seconds
¦A beep sound will be heard for successful entering
¦The numeric keypad is not supported, while in OSD screen, the arrow keys, PgUp, PgDn, and Enter keys
are supports
Remote Console Hotkey Function
Scroll Lock +Scroll Lock +CToggle switch between remote & local port
Scroll Lock +Scroll Lock +QTurn the buzzer ON & OFF
*Default the buzzer is ON
Scroll Lock
+
Scroll Lock
+
S
Activate auto-scan mode for remote & local port
*The scan time interval is 5 seconds
Scroll Lock
+
Scroll Lock
+
A
Auto-adjust the video signal
14628 Central Ave,
Chino, CA 91710
tel:909.597.7588, fax:909.597.1939
© Copyright 2013 Acnodes, Inc.
All rights reserved. Product description and product specifications
are subject to change without notice. For latest product information,
please visit Acnodes’ web site at www.acnodes.com.
KP802/1602
1U Rackmount Combo IP KVM Switch
2.5 DC Power 12V, 24V, 48V Input
Model
12V
24V
48V
Input rating
Input voltage:
12-Volt
24-Volt
48-Volt
Input range:
9 ~ 18V
18 ~ 36V
36 ~ 75V
Input current
- No load
50 mA
50 mA
50 mA
- Full load
4950 mA
2450 mA
1220 mA
Output rating
Output voltage:
12-Volt
12-Volt
12-Volt
Output current:
4.16A
4.16A
4.16A
Efficiency
84%
85%
85%
Remarks:
¦Package does not include power cord

Other manuals for KP802

1

This manual suits for next models

1

Other Acnodes Switch manuals

Acnodes KVH801 User manual

Acnodes

Acnodes KVH801 User manual

Acnodes KDM82712 User manual

Acnodes

Acnodes KDM82712 User manual

Acnodes KD82212 User manual

Acnodes

Acnodes KD82212 User manual

Acnodes KVD1201 User manual

Acnodes

Acnodes KVD1201 User manual

Acnodes KV1602 User manual

Acnodes

Acnodes KV1602 User manual

Acnodes KV802 User manual

Acnodes

Acnodes KV802 User manual

Acnodes KPH802 User manual

Acnodes

Acnodes KPH802 User manual

Acnodes KDI 81716 User manual

Acnodes

Acnodes KDI 81716 User manual

Acnodes MKD6220M User manual

Acnodes

Acnodes MKD6220M User manual

Acnodes MKCS1602 User manual

Acnodes

Acnodes MKCS1602 User manual

Acnodes KVS802 User manual

Acnodes

Acnodes KVS802 User manual

Acnodes MKS803 User manual

Acnodes

Acnodes MKS803 User manual

Acnodes KC802 User manual

Acnodes

Acnodes KC802 User manual

Acnodes KPH802 User manual

Acnodes

Acnodes KPH802 User manual

Acnodes KVD1201 User manual

Acnodes

Acnodes KVD1201 User manual

Acnodes KVS1601 User manual

Acnodes

Acnodes KVS1601 User manual

Acnodes KVS1602 User manual

Acnodes

Acnodes KVS1602 User manual

Acnodes MKCS3203 User manual

Acnodes

Acnodes MKCS3203 User manual

Acnodes KCP802 User manual

Acnodes

Acnodes KCP802 User manual

Acnodes IP-8 User manual

Acnodes

Acnodes IP-8 User manual

Acnodes MKS802 User manual

Acnodes

Acnodes MKS802 User manual

Acnodes MKP804 User manual

Acnodes

Acnodes MKP804 User manual

Acnodes KD83174 User manual

Acnodes

Acnodes KD83174 User manual

Acnodes KV801 User manual

Acnodes

Acnodes KV801 User manual

Popular Switch manuals by other brands

MCOHome MH-S314 user manual

MCOHome

MCOHome MH-S314 user manual

HTRONIC WPS 1000 manual

HTRONIC

HTRONIC WPS 1000 manual

Allied Telesis T-8100L/8 user guide

Allied Telesis

Allied Telesis T-8100L/8 user guide

HIK VISION DS-3E1X05P Series quick start guide

HIK VISION

HIK VISION DS-3E1X05P Series quick start guide

Data Video SE-900 instruction manual

Data Video

Data Video SE-900 instruction manual

AirLive SNMP-GSF12M Quick setup guide

AirLive

AirLive SNMP-GSF12M Quick setup guide

Black Box SERVSWITCH ACU1006DRA user manual

Black Box

Black Box SERVSWITCH ACU1006DRA user manual

Planet FGSD-1022P user manual

Planet

Planet FGSD-1022P user manual

Black Box KV6222H Quick start guide & user manual

Black Box

Black Box KV6222H Quick start guide & user manual

Black Box KVT8CATUV user manual

Black Box

Black Box KVT8CATUV user manual

HYDACELECTRONIC EDS 820 operating instructions

HYDACELECTRONIC

HYDACELECTRONIC EDS 820 operating instructions

Planet FGSD-1022 Quick installation guide

Planet

Planet FGSD-1022 Quick installation guide

AirLive POE-FSH1008AT Quick setup guide

AirLive

AirLive POE-FSH1008AT Quick setup guide

Itec U3HUBMETAL4 user guide

Itec

Itec U3HUBMETAL4 user guide

SMART-AVI SM-UHS-4S user manual

SMART-AVI

SMART-AVI SM-UHS-4S user manual

Leading Edge GA-CTRL-008C quick start guide

Leading Edge

Leading Edge GA-CTRL-008C quick start guide

HIK VISION DS-3E15 P Series user manual

HIK VISION

HIK VISION DS-3E15 P Series user manual

SMART-AVI HDMVplus manual

SMART-AVI

SMART-AVI HDMVplus manual

manuals.online logo
manuals.online logoBrands
  • About & Mission
  • Contact us
  • Privacy Policy
  • Terms and Conditions

Copyright 2025 Manuals.Online. All Rights Reserved.