8 ● User’s Manual Mini LED ORTHO 2 ● J05221 ● V1 ● (13) ● 09/2013 ● N005EN010A
Storage: 0% to 100% condensation included
II – INSTALLATION/STARTUP
2.1 oPerating For the First time
On reception of the unit, look for any damage that may
have occurred during transportation.
If necessary, contact your supplier.
Prior to any use, it is essential that the sterilizable
accessories (light guide and protective shield) be
sterilized and that the unit base be disinfected (see the
maintenance chapter in the general user’s manual for
SATELEC curing lamps).
2.2 installation
Ensure that the unit is not installed adjacent to or on
top of any other equipment.
Do not place the power cord in a cable feed through
or cable cover.
Remove the protective caps from the handpiece (to be
kept during maintenance to prevent the liquid products
from damaging the LEDs), screw the battery onto the
handpiece and insert the sterilized light guide into the
handpiece.
Ensure that the light guide is properly inserted,
confirmed by a click.
Ensure that all sections of the LCD screen are
illuminated once the battery has been properly
screwed on.
Place the base on a hard and stable surface that is not
inclined by more than 5°.
Put the plug corresponding to the network on the
adapter.
Connect the AC adapter after ensuring that the voltage
indicated corresponds to the electrical installation
available in the dental practice.
Two audible beeps confirm that the unit has been
correctly placed on its holder.
The translucent holder base lights up blue and starts
flashing, indicating that the battery is charging.
As soon as the battery is charged, the translucent
holder base stops flashing and the blue light remains
illuminated continuously.
The battery supplied is only charged to 60% prior to
shipment. Charge it fully prior to using it each time.
2.3 exPosure times available
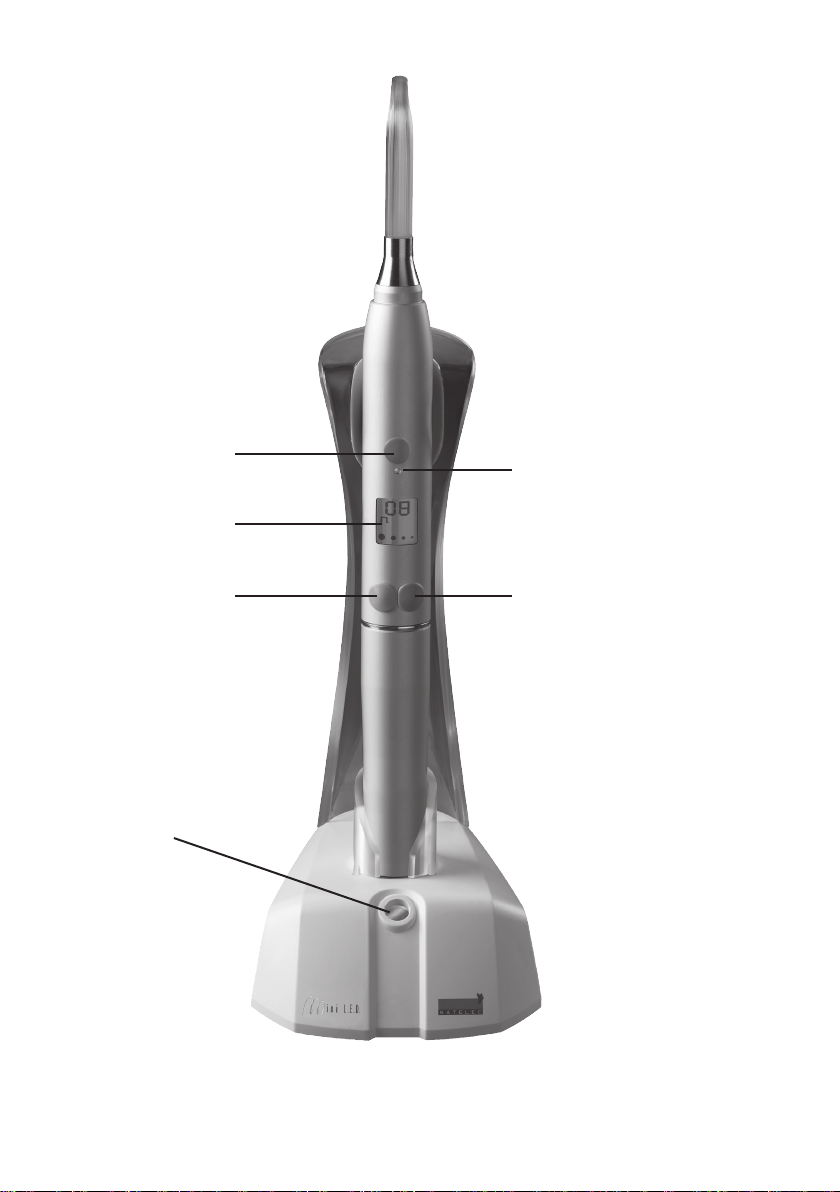
Mini LED™ ORTHO 2 offers 4 exposure times, selected
by pushing the right button (Fig. 2–7):
4 seconds;
8 seconds;
12 seconds;
32 seconds.
2.3 alerts oFFered
You can choose two kinds of alerts: beep or flash. Every
five seconds the selected alert informs you of the
progress of the current cycle.
By pushing the left button (Fig. 2–6), you can select the
following combinations:
Beep (shows b) ;
Flash (shows F) ;
Beep and Flash (shows Fb) ;
Neither Beep nor Flash (shows --).
III – ROUTINE OPERATION
The Mini LED™ ORTHO 2 is normally placed on its
holder. The first time you plug it into the battery it
will default to the 4 seconds fast curing mode and the
beep alert. Your Mini LED™ ORTHO 2 is ready to operate
once the curing time and the kind of alert have been
selected. Place the light guide as close as possible to
the surface of the material to be polymerized, without
touching it as this may adversely affect the quality
of the polymerization. The polymerization starts
by pushing the ON/OFF button. The setting will be
confirmed by an audible signal (beep). A countdown on
the LCD screen shows you how much time remains, and
every five seconds the selected alert informs you of the
progress of the current cycle. When the polymerization
cycle is completed, the time that was applied is
displayed. You can press the ON/OFF button at any
time to interrupt the current polymerization cycle.
After 5 minutes without use, the unit goes into standby
mode (low consumption). The green indicator light and
the LCD screen backlighting switch off. The unit can be