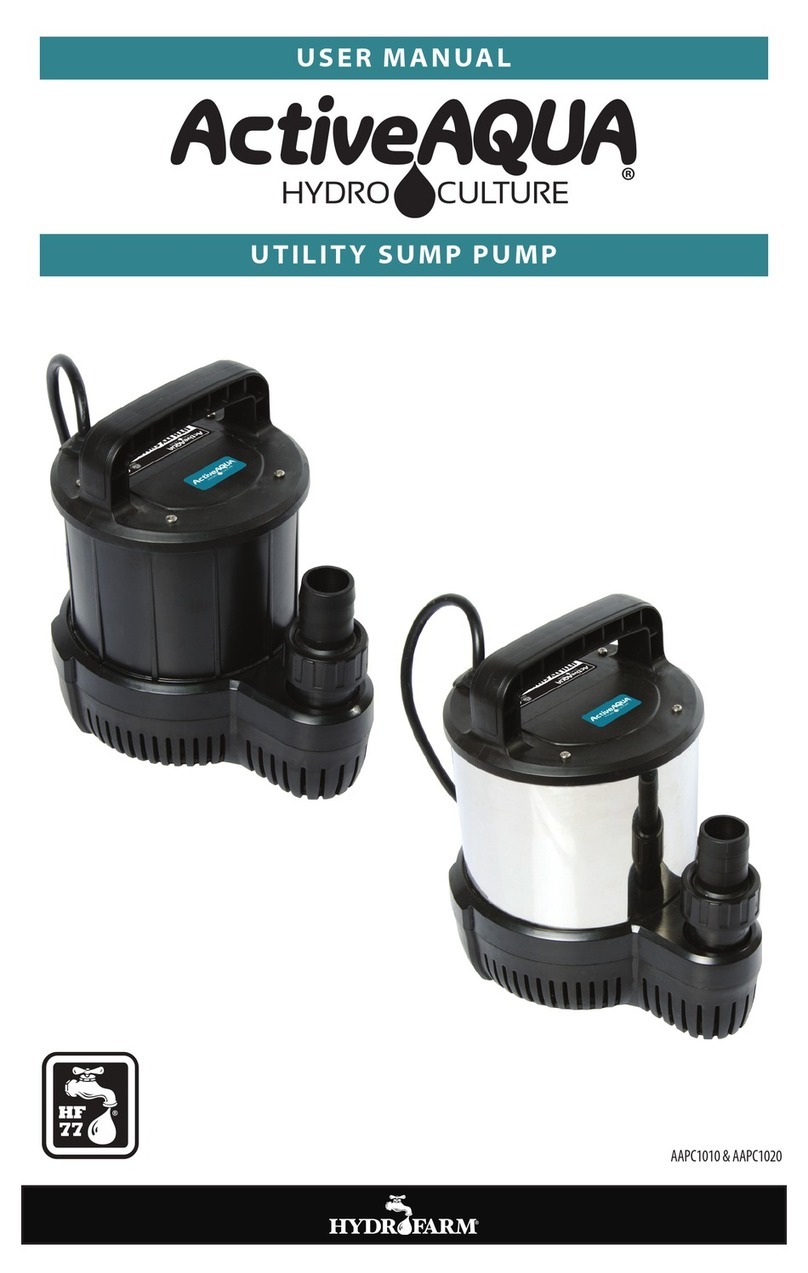
ActiveAqua AAPC2010 User manual

USER MANUAL
UTILITY SUBMERSIBLE PUMP
AAPC2010 & AAPC2020

OVERVIEW
Thank you for purchasing the AAPC2010 or AAPC2020 Utility Submersible Pump from Active Aqua.
Before operating this pump, please read this instruction manual carefully and keep it handy for
future reference. Please pay special attention to the safety and caution sections, and operate the
pump only once you have a complete understanding of these instructions.
These pumps are ideal for use in hydroponics as well as many other applications including
aquariums, ponds, etc. They can be run as submersible pumps and can also be run inline (out of
water/not submersed) when the inlet connection is properly made.
For information on additional Active Aqua products, please visit Hydrofarm.com.
SPECIFICATIONS
MODEL VOLTAGE FREQUENCY POWER QMAX HMAX HOSE DIA.
AAPC2010
120V 60 Hz
147W 2642 GPH 14.1'
1.0"/1.25"/1.5"
AAPC2020 378W 5284 GPH 23.6'
1.0"/1.25"/1.5"/2.0"
TABLE OF CONTENTS
SPECIFICATIONS 2
PARTS LIST 3
PERFORMANCE CURVE 3
IMPORTANT SAFETY INSTRUCTIONS 4
USAGE CAUTION 5
BEFORE OPERATION 5
THE PUMP SHOULD NOT BE USED IF: 5
DURING OPERATION 5
AFTER OPERATION 5
FEATURES 6
USES 6
INSTALLATION INSTRUCTIONS 6
MAINTENANCE 7
TROUBLESHOOTING 7
DISPOSAL 7
WARRANTY 8
2

PARTS LIST
1
- Water Inlet Cover
2
- Clip
3
- Water Chamber
4
- Impeller
5
- Multi-angle Connector
6
- Tubing Adapters
7
- Main Housing
8
- Cord Jacket
9
- Handle
10
- Screws
ft
5
10
15
20
25
30
35
1322 2615 3968 5291 GPH
AAPC2010
AAPC2020
PUMP HEAD HEIGHT
PERFORMANCE CURVE
AAPC2010 comes with one tubing adapter (#6 A)
and one multi-angle connector (#5) AAPC2020 comes with two tubing adapters
(#6 A&B) and one multi-angle connector (#5)
A B
3

IMPORTANT SAFETY INSTRUCTIONS
For safety reasons, children and young persons under 16 years of age, as well as persons who cannot
recognize possible danger or who are not familiar with these operating instructions, should not
be permitted to use this pump. Keep children under supervision to ensure that they do not play
with the pump. The combination of water and electricity is inherently hazardous, and can lead to
death or severe injury from electrocution if the pump is incorrectly connected or misused and if safe
handling is not observed.
• Ensure that the power source (outlet) you plug the pump into is the correct voltage and is
properly grounded.
• Do not stand in water when plugging in or unplugging the pump.
• When unplugging the pump, grasp only the plug itself. Never pull by the power cord.
• Never snip off the plug and replace it by yourself, as this may create an electrical hazard. If the
power cord or plug is damaged, the appliance should be replaced.
• Do not attempt to disassemble and/or repair the pump.
4

USAGE CAUTION
BEFORE OPERATION
• Check to ensure that your electric service's voltage and frequency conform with those on the
pump's nameplate.
• The pump should be powered through a Ground Fault Circuit Interrupter (GFCI) outlet.
• Never lift, lower, or carry the pump by the power cord.
• Always unplug or switch off the mains before doing any maintenance or placing your hands in
the water to which this pump is connected.
• Do not attempt to lubricate the pump or operate it without water. It will damage the pump.
• Do not use the pump in water with a temperature higher than 104°F (40°C), as it will
significantly shorten the life of the pump.
• The pump should always be unplugged before examination.
THE PUMP SHOULD NOT BE USED IF:
• Its power supply cord or other important parts are damaged in any way
• Its plug or the power outlet are wet
• Its output appears to be reduced or restricted
• Some part of the pump is broken or cracked and water is leaking into the pump chassis
• Anything abnormal with it occurs
DURING OPERATION
• Unplug the pump immediately to prevent the motor from being burned out if the motor
becomes overloaded due to being clogged with foreign matter.
• Do not move or reposition the pump while it is powered and running.
• Do not allow the power cord to be kinked.
AFTER OPERATION
1. If freezing temperatures are predicted, remove the pump from the water and dry out the
impeller chamber completely. If water trapped inside the impeller chamber is allowed to freeze,
it may damage the pump.
2. If the pump is allowed to remain submerged in water for a long period of time without
operation, it might rust the pump, so it is best to remove it and dry it out if it will not be
operated for any length of time. Also, organic residue may accumulate inside the pump, which
can reduce its performance. If this happens, run the pump in clean water for a while to remove
most organic matter from it, then store it after draining and drying.
5

FEATURES
• Oil free and environmentally safe
• Can also be used inline (non-submersed) below the water level
• Vortex impeller
• Durable impeller can withstand operation in water containing solids and sediment (up to a 6
mm particle size)
• Ceramic bearings for continuous use
• All electrical parts are embedded in a block of plastic resin
• Energy-saving split tube motor
• Overload protection by means of thermal overload trip
• Removable rotor assembly for simple maintenance
• Optimal filtration
• Dual use (submersed and inline)
USES
• Hydroponics
• Aquaponics
• Aquariums
• Fountains and other water features
• Pond filtration
• Home uses
min.1.5m
min.15cm
Installation when used submersed:
1. Screw the tubing adapter to the water outlet (the threaded part that emerges straight upward)
from the pump chassis) and attach your outow tubing to it.
2. The pump must be completely immersed in water with a minimum depth of 6" (15 cm) to
ensure that it does not ingest air.
3. When used in a pond or brook, the pump must be installed on some solid, at stones a few
inches above the bottom to prevent it from sucking up sand and silt and to keep the lter
(sponge) from becoming clogged.
NOTE: This pump can be used indoors or outdoors. However, when used outdoors, the power outlet
used must be located in a dry place. The minimum distance between the power outlet and the pond
should be 5' (1.5 m).
INSTALLATION INSTRUCTIONS
6

MAINTENANCE
DISPOSAL
The motor unit is hermetically sealed by high quality resin and does not require any care. The
impeller assembly rests inside an easy-open cover to allow occasional spot checks for grime and dirt.
The water chamber has an eective self-cleaning feature, but regular maintenance will lengthen the
life of the impeller and motor unit. To do maintenance cleaning, open the clips at the two sides of
the water inlet cover, and remove it and the water chamber cover from the pump.
Please note that soaps and detergents are not recommended for pump maintenance because their
residues can be toxic to plants and sh.
Do not dispose of this unit with domestic waste! For
disposal purposes, please use the return system provided.
Disable the unit beforehand by cutting o the cables.
Installation when used inline:
1. Remove the water inlet cover by rst removing the bottom screw, then by prying the two green
tabs rearward with a large athead screwdriver. Now remove the sponge lter.
2. Allow some water to ow into the pump's water chamber.
3. Note that the multi-angle connector allows you to choose from many dierent connection
angles simply by loosening the large central ring nut, selecting your desired angle, then
tightening it again. Set your desired connection angle before attaching it to the pump.
4. Screw the multi-angle connector onto the water inlet, which is the horizontal male threaded
1.0" tting which faces into the water inlet cover. Attach your incoming 1.0" pipe, using a female
threaded 1.0" fitting, to the multi-angle connector.
5. Now screw the tubing adapter to the pump's outlet (the vertical male threaded 1½" tting
which faces straight up). The tubing diameters compatible with the adapter are 1.0" and 1.25"
(model AAPC2010) and 1.0" and 1.25" (model AAPC2020). Using a common hose clamp, secure
your outow tubing to the adapter. The pump is now ready for use.
TROUBLESHOOTING
SYMPTOM CAUSE REMEDY
The pump doesn't run
Power is not turned on Turn on the power
Pump is not plugged in sufficiently Plug in sufficiently
Impeller is binding Remove foreign matter from impeller
The motor cycles on and off
immediately without the pump
running or the motor suddenly
stops and can’t be started again
Wrong voltage is being used Apply correct voltage
The water inlet or outlet pipe is
clogged with foreign matter Remove foreign matter
The pump runs normally at
the beginning, but then water
flows out sluggishly or stops
flowing completely
Impeller is worn out Replace impeller
Water level goes down too far and
the pump is exposed Increase water level
Hose is too long or is clogged with
foreign matter Shorten the hose or clean it out
(During inline use) There is air in
the impeller chamber (”air-lock”)
Unplug pump. Submerge pump, disconnect the inlet fitting,
and turn power on. This will prime the pump's internal
components and release the trapped air. Reconnect the
inlet fitting, remove the pump from the water, and plug it
in again.
7

Hydrofarm.com
WARRANTY
AAPC2010 & AAPC2020 Instructions revised - February 13, 2018 4:50 PM
Thank you for choosing Active Aqua by Hydrofarm. For further information about Active
Aqua products, videos, and technical information,
please visit Hydrofarm.com
ADDITIONAL LANGUAGES OF THESE INSTRUCTIONS CAN BE FOUND AT Hydrofarm.com
LIMITED WARRANTY
Hydrofarm warrants the AAPC2010 & AAPC2020 to be free from defects in materials and workmanship. The
warranty term is for 1 year beginning on the date of purchase. Misuse, abuse, or failure to follow instructions is not
covered under this warranty. Hydrofarm’s warranty liability extends only to the replacement cost of the product.
Hydrofarm will not be liable for any consequential, indirect, or incidental damages of any kind, including lost
revenues, lost profits, or other losses in connection with the product. Some states do not allow limitation on how
long an implied warranty lasts or the exclusion of incidental or consequential damages, so the above limitations
or exclusions may not apply to you. Hydrofarm will, at our discretion, repair or replace the AAPC2010/AAPC2020
covered under this warranty if it is returned to the original place of purchase. To request warranty service, please
return the AAPC2010/AAPC2020, with original sales receipt and original packaging, to your place of purchase. The
purchase date is based on your original sales receipt.
Like us on Facebook, follow us on Twitter,
and check out Hydrofarmtv on YouTube and Instagram!
Get Connected with the Hydrofarm Community:

MANUAL DE INSTRUCCIONES
PRÁCTICA BOMBA SUMERGIBLE
AAPC2010 & AAPC2020

INFORMACIÓN GENERAL
Gracias por elegir la práctica bomba sumergible Active Aqua AAPC2010 o AAPC2020. Antes de
utilizar este producto, lea el manual de instrucciones detenidamente y téngalo a mano para futuras
consultas. Preste especial atención a los apartados sobre seguridad y precauciones y ponga en
funcionamiento la bomba únicamente cuando haya entendido completamente las instrucciones.
Estas bombas están indicadas para utilizarse en sistemas hidropónicos así como en muchas otras
aplicaciones como acuarios, estanques, etc. Pueden funcionar como bombas sumergibles y también
dentro de conductos (fuera del agua, sin sumergir) si la conexión de entrada es correcta.
Si necesita más información acerca de otros productos Active Aqua, visite la página Hydrofarm.com
ESPECIFICACIONES
MODELO VOLTAJE FRECUENCIA POTENCIA QMAX ALTURA MAX: DIAMET. CONDUCTO
AAPC2010 120V 60 Hz 147W 2642 GPH 14.1' 2,54/3,18 cm
AAPC2020 378W 5284 GPH 23.6'
LISTADO DE CONTENIDOS
ESPECIFICACIONES 2
LISTA DE COMPONENTES 3
CURVA DE RENDIMIENTO 3
INSTRUCCIONES DE SEGURIDAD IMPORTANTES 4
PRECAUCIONES DE USO 5
ANTES DE SU USO 5
LA BOMBA NO DEBE UTILIZARSE SI: 5
DURANTE EL USO 5
DESPUÉS DEL USO 5
CARACTERÍSTICAS 6
USOS 6
INSTRUCCIONES DE INSTALACIÓN 6
MANTENIMIENTO 7
SOLUCIÓN DE PROBLEMAS 7
CÓMO DESECHAR EL PRODUCTO 7
GARANTÍA 8
2

PARTS LIST
1
- Cubierta de entrada de agua
2
- Enganche
3
- Cámara de agua
4
-Rodete
5
- Conector multiángulo
6
- Adaptador de conducto
7
- Cámara principal
8
- Cubierta del cable
9
- Asa
10
- Tornillos
PERFORMANCE CURVE
ft
5
10
15
20
25
30
35
1322 2615 3968 5291 GPH
AAPC2010
AAPC2020
ALTURA DE LA CABECERA DE LA BOMBA
3

INSTRUCCIONES DE SEGURIDAD IMPORTANTES
Por razones de seguridad, los niños y los menores de 16 años, así como toda aquella persona que no
sea capaz de reconocer los signos de peligro o que no esté familiarizada con estas instrucciones de
uso no debería utilizar esta bomba. Los niños deben estar supervisados para que no jueguen con la
bomba. La combinación de agua con electricidad es inherentemente peligrosa y podría conllevar
daños graves o incluso la muerte por electrocución si la bomba no está correctamente conectada o
se utiliza de manera inapropiada o poco segura.
• Compruebe que la fuente de alimentación (toma de corriente) donde se enchufa la bomba
tiene la tensión correcta y una adecuada toma a tierra.
• No permanezca dentro del agua al enchufar o desenchufar la bomba.
• Al desenchufar la bomba, sujete únicamente la clavija. Nunca tire del cable de alimentación.
• No corte la clavija ni la sustituya usted mismo ya que supone un peligro eléctrico. En caso
de que el cable de alimentación o la clavija estén dañados, debería sustituirse el dispositivo
completo
• No intente desmontar y/o reparar la bomba.
4

PRECAUCIONES DE USO
ANTES DE SU USO
• Compruebe que la tensión eléctrica y la frecuencia se ajustan a las indicadas en la placa de
características de la bomba.
• La bomba debería conectarse a través de una entrada con interruptor de circuito por falla a
tierra (GFCI).
• No levante, baje ni transporte la bomba sujetándola por el cable de alimentación.
• Desenchufe o desconecte siempre el dispositivo antes de realizar cualquier tipo de
mantenimiento en el producto o si va a introducir las manos en el agua donde se sitúa la
bomba conectada a la corriente.
• No intente engrasar la bomba ni hacerla funcionar fuera del agua ya que podría verse dañada.
• No utilice la bomba en agua con temperatura superior a 104°F (40°C) ya que reducirá
significativamente la vida útil de la bomba.
• La bomba debe estar siempre desconectada antes de realizar cualquier comprobación en la
misma.
LA BOMBA NO DEBE UTILIZARSE SI:
• El cable de suministro eléctrico u otras piezas importantes están dañadas.
• La clavija o la toma de corriente están mojadas.
• La salida parece estar reducida en tamaño u obstruida
• Alguna de las piezas está rota o agrietada y el agua gotea en el interior del chasis de la bomba
• Se observa cualquier anomalía.
DESPUÉS DEL USO
• Desconecte la bomba inmediatamente para evitar que el motor se queme si éste se sobrecarga
en caso de que se vea obstruido por un objeto extraño.
• No mueva ni recoloque la bomba mientras está conectada a la corriente y en funcionamiento.
• Compruebe que el cable de alimentación no está retorcido.
DESPUÉS DEL USO
1. Si se prevén temperaturas muy bajas, retire la bomba del agua y seque por completo la cámara
del rodete. Si queda agua dentro de la cámara del rodete y se congela, la bomba puede verse
dañada.
2. Si la bomba permanece sumergida en agua durante un largo periodo de tiempo sin estar en
funcionamiento podría oxidarse, por lo que es recomendable sacarla del agua y secarla si no va
a utilizarse durante un tiempo considerable. Además, podrían acumularse en la bomba residuos
orgánicos que harían disminuir su rendimiento. Si esto sucede, ponga en funcionamiento la
bomba en agua limpia durante un tiempo para eliminar la mayor parte de la materia orgánica
de la misma y, después, guárdela tras drenarla y secarla.
5

CARACTERÍSTICAS
• Sin aceite y ambientalmente seguro
• También puede utilizarse en el interior de conductos (sin sumergir) por debajo del nivel del
agua
• Rodete abierto
• Rodete duradero que puede funcionar en agua que contenga partículas sólidas y sedimentos
(de hasta 6 mm de tamaño)
• Rodamientos cerámicos para un uso continuado
• Todas las piezas eléctricas están incrustadas en una placa de resina plástica
• Motor a tubo hendido de bajo consumo
• Protección contra sobrecargas mediante un disparador por sobrecarga térmica
• Conjunto de rodete desmontable para un mantenimiento más sencillo
• Filtración óptima
• Doble uso (sumergido y en el interior de conductos)
USOS
• Hidroponía
• Acuaponía
• Acuarios
• Fuentes y otros elementos con agua
• Filtración de estanques
• Usos domésticos
min.1.5m
min.15cm
Instalación para su uso sumergido:
1. Enrosque el adaptador de conducto a la salida de agua (la parte roscada que sale hacia arriba
desde el chasis de la bomba) y conecte el tubo de salida al adaptador.
2. La bomba debe estar completamente sumergida en agua con una profundidad mínima de 6"
(15 cm) para garantizar que no se introduzca aire.
3. Cuando se utiliza en un estanque o arroyo, la bomba debe colocarse sobre piedras planas y
estables que se encuentren unos centímetros por encima del fondo para evitar que succione
arena y lodo y para evitar que el filtro (esponja) se obstruya.
NOTA: La bomba puede utilizarse tanto en interiores como en exteriores pero, cuando se use en
exteriores, la toma de corriente utilizada debe localizarse en un lugar seco. La distancia mínima entre
la toma de corriente y el estanque debería ser de 5' (1,5 m).
INSTRUCCIONES DE INSTALACIÓN
6

MANTENIMIENTO
CÓMO DESECHAR EL PRODUCTO
La unidad del motor está herméticamente sellada mediante una resina de alta calidad que no
necesita ningún mantenimiento. Elconjunto del rodete se encuentra dentro de una cubierta de
fácil apertura que facilita las inspecciones ocasionales en caso de presentar suciedad. La cámara de
agua dispone de una efectiva prestación de autolimpieza pero las limpiezas frecuentes alargarán
la vida de la unidad del rodete y motor. Para realizar la limpieza de mantenimiento, abra los clips
situados a ambos lados de la cubierta de entrada de agua y retírela de la bomba, al igual que
la cámara de agua.
Tenga en cuenta que no se recomienda el uso de jabones y detergentes para el mantenimiento de
las bombas porque sus residuos podrían ser tóxicos para las plantas y los peces.
No deseche esta unidad junto con los residuos domésticos.
Utilice los puntos de reciclaje indicados para ello.
En primer lugar, corte los cables para deshabilitar la unidad
Instalación para su uso en el interior de conductos:
1. Retire la cubierta de entrada de agua, para ello desenrosque el tornillo de la parte inferior y
después levante las dos lengüetas verdes hacia atrás con un destornillador grande de punta
plana. No retire la esponja que funciona como filtro.
2. Deje que fluya un poco de agua dentro de la cámara de agua de la bomba.
3. Tenga en cuenta que el conector multiángulo permite elegir distintos ángulos de conexión
simplemente al aflojar la tuerca central, seleccionar el ángulo deseado y, después, apretarla de
nuevo. Seleccione el ángulo de conexión que se desee antes de conectarlo a la bomba.
4. Enrosque el conector multiángulo a la entrada de agua, que se trata del saliente roscado
horizontal de 2,5 cm que se orienta hacia la cubierta de entrada de agua. Acople el tubo
entrante de 2,5 cm utilizando un conector hembra roscado de 2,5 cm al conector multiángulo.
5. Después enrosque el adaptador de conducto a la salida de la bomba (saliente roscado vertical
de 3,8 cm que se orienta hacia arriba). Los diámetros de tubos compatibles con el adaptador son
2,5 y 3 cm (modelo AAPC2010), y 2,5 y 3 cm (modelo AAPC2020). Si se utiliza una abrazadera, fije
correctamente el tubo de salida al adaptador. La bomba ya está lista para utilizarse.
RESOLUCIÓN DE PROBLEMAS
SÍNTOMAS CAUSA SOLUCIÓN
La bomba no funciona
La bomba no está encendida Encienda el interruptor
La bomba no está bien enchufada Enchúfela correctamente
El rodete está atrapado Retire la sustancias extrañas del rodete
El motor se enciende y apaga
cíclicamente sin que la bomba
esté funcionando o el motor se
detiene repentinamente y no se
puede activar de nuevo.
Se está utilizando la tensión
incorrecta Apply correct voltage
El conducto de entrada o salida del
agua está obstruido por sustancias
extrañas
Remove foreign matter
La bomba funciona con
normalidad
al principio pero, después,
el agua sale al exterior
lentamente o deja de fluir por
completo
El rodete está desgastado Sustituya el rodete
El nivel del agua desciende
demasiado rápido y la bomba
queda al aire
Aumente el nivel del agua
El tubo es demasiado largo o está
obstruido por sustancias extrañas Acorte el tubo o límpielo
(Durante su uso en el interior de
conductos) Hay aire en la cámara
del rodete (cámara estanca)
Desenchufe la bomba. Sumerja la bomba, desacople el
conector de entrada y encienda el interruptor. Esto preparará
los componentes internos de la bomba y dejará salir el
aire retenido en el interior. Vuelva a acoplar el conector de
entrada, retire la bomba del agua y enchúfela de nuevo.
7

Hydrofarm.com
WARRANTY
AAPC2010 & AAPC2020 Instructions revised - January 12, 2018 12:19 PM
Thank you for choosing Active Aqua by Hydrofarm. For further information about Active
Aqua products, videos, and technical information,
please visit Hydrofarm.com
ADDITIONAL LANGUAGES OF THESE INSTRUCTIONS CAN BE FOUND AT Hydrofarm.com
GARANTÍA LIMITADA
Hydrofarm garantiza que el AAPC2010 y AAPC2020 no presentarán defectos de fabricación. La garantía tendrá
una duración de 1 año desde la fecha de compra. En caso de no respetarse estas instrucciones o de un uso
inadecuado del producto, la garantía no cubrirá los posibles daños. La cobertura de la garantía ofrecida por
Hydrofarm únicamente incluye los costes de sustitución del producto. Hydrofarm no será responsable de ningún
daño indirecto, accidental o derivado de ningún tipo, incluyendo pérdidas de ingresos o beneficios, o cualquier
otra pérdida relacionada con el producto. En algunos estados no se permiten limitaciones sobre la duración de una
garantía implícita o la exclusión de los daños accidentales o derivados; en cuyo caso las limitaciones y exclusiones
anteriores no serán de aplicación. Hydrofarm, a su discreción, podrá reparar o sustituir el AAPC2010/AAPC2020 que
cubre la presente garantía siempre que se devuelva al lugar original de compra. Para reclamar la garantía, devuelva el
AAPC2010/AAPC2020 con el ticket de compra y el embalaje original al lugar de compra. La fecha de compra será la
indicada en el ticket original.
Dale me gusta en Facebook, síguenos en Twitter, ¡y echa un vistazo a
Hydrofarmtv en YouTube e Instagram!
Conéctese con la comunidad Hydrofarm:

MANUEL D’UTILISATION
POMPE SEMI-IMMERGÉE À USAGE GÉNÉRAL
AAPC2010 & AAPC2020

APERÇU
Nous vous remercions d’avoir acheté la pompe semi-immergée à usage général AAPC2010 ou
AAPC2020 Active Aqua. Avant d’utiliser la pompe, veuillez lire attentivement ce manuel d’utilisation
et conservez-le à portée de main pour toute consultation ultérieure. Veuillez notamment tenir
compte des paragraphes relatifs à la sécurité et la prudence, et utilisez la pompe uniquement après
avoir entièrement compris ces consignes.
Ces pompes sont parfaitement adaptées à la culture hydroponique ainsi qu’à beaucoup d’autres
applications (aquariums, bassins, etc.). Elles peuvent fonctionner sous forme de pompes semi-
immergées et en ligne (hors de l’eau/non immergées) si l’admission est correctement raccordée.
Pour toute information sur d’autres produits Active Aqua, veuillez consulter Hydrofarm.com.
SPÉCIFICATIONS
MODÈLE TENSION FRÉQUENCE PUISSANCE QMAX HMAX DIAM. DE FLEXIBLE
AAPC2010
120V 60 Hz
147W
2 642 GPH
(gallon par
heure)
14,1'
(~4,3 m) 1,0"/1,25" (2,54
cm/3,175 cm)
AAPC2020 378W
5 284 GPH
(gallon par
heure)
23,6'
(~7,2 m)
TABLE DES MATIÈRES
SPÉCIFICATIONS 2
NOMENCLATURE 3
COURBE DE RENDEMENT 3
CONSIGNES IMPORTANTES DE SÉCURITÉ 4
PRÉCAUTIONS D’UTILISATION 5
AVANT L’UTILISATION 5
NE PAS UTILISER LA POMPE SI : 5
PENDANT L’UTILISATION 5
APRÈS L’UTILISATION 5
CARACTÉRISTIQUES 6
USAGES 6
CONSIGNES D’INSTALLATION 6
MAINTENANCE 7
DÉPANNAGE 7
MISE AU REBUT 7
GARANTIE 8
2

NOMENCLATURE
1
- Couvercle d’alimentation en
eau
2
- Agrafe
3
-Compartiment hydraulique
4
-Turbine
5
- Connecteur multi-angle
6
- Adaptateur tubulaire
7
- Carter principal
8
- Gaine du cordon
d’alimentation
9
- Poignée
10
- Vis
COURBE DE RENDEMENT
ft
5
10
15
20
25
30
35
1322 2615 3968 5291 GPH
AAPC2010
AAPC2020
HAUTEUR DE LA TÊTE DE POMPE
3

CONSIGNES IMPORTANTES DE SÉCURITÉ
Pour des raisons de sécurité, les enfants et adolescents de moins de 16 ans, ainsi que les personnes
incapables d’identifier un danger potentiel ou non familiarisées avec ce mode d’emploi ne doivent
pas être autorisées à utiliser cette pompe. Surveillez les enfants pour éviter qu’ils ne jouent avec la
pompe. La combinaison d’eau et d’électricité est par nature dangereuse et peut entraîner la mort ou
des blessures graves par électrocution en cas de mauvais raccordement ou mauvaise utilisation de
la pompe et de manipulation non sécurisée.
. Assurez-vous que la source d’alimentation (prise) que vous branchez à la pompe possède
la tension correcte et est correctement mise à la terre.
. Ne restez pas dans l’eau lorsque vous branchez ou débranchez la pompe.
. Pour débrancher la pompe, saisissez exclusivement la fiche. Ne tirez jamais sur le cordon
d’alimentation.
. Ne coupez et ne remplacez jamais la fiche par vous-même, car cela peut entraîner un
danger électrique. Si le cordon d’alimentation ou la fiche est endommagé (e),
remplacez l’appareil.
. N’essayez pas de désassembler et/ou réparer la pompe.
4
This manual suits for next models
1
Table of contents
Languages:
Other ActiveAqua Water Pump manuals
Popular Water Pump manuals by other brands

Kärcher
Kärcher SP 16.000 Dual manual
Grundfos
Grundfos CR Installation and operating instructions

U.S. Products
U.S. Products FLOOD KING 120 Information & operating instructions

GÜDE
GÜDE GTT 900 operating instructions
Agilent Technologies
Agilent Technologies 1260 Infinity II user manual
Agilent Technologies
Agilent Technologies MS 120 Major Service and repair manual

