Acumen XR10 4K User manual

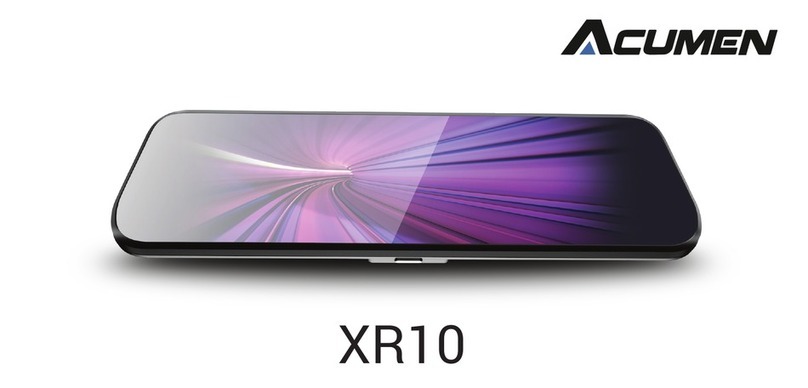
XR10 4K
USER GUIDE

Content
XR10 4K Introduction
Notice & Warning
Installation Notice
Product Guide
Video Recording
Settings
Home Page
Playback
General Installation Guide
Troubleshooting
Disclaimer
Specification
Product Accessories
Micro SD Card
Features
Wi-Fi and App Connectivity
1
2
3
4
6
7
8
9
11
14
16
19
21
23
24
25

XR10 4K
Thank you for choosing Acumen. XR10 4K is designed to protect the driver
and passengers by providing a better view of the rear traffic with a digital
rearview mirror display. Acumen XR10 4K features industry-leading tech-
nology, such as ultra HD recording, seamless loop-recording, wide-angle
camera, real-time playback, parking mode, WDR enchanced camera,
impact sensor.
.
1

Notice
Warning
As the specifications may be changed due to the technical upgrades, Acumen
reserves the right to change, modify, add or remove portions of these terms at
any time without prior notice. Please note that this product is for personal use only
and may not be used in violation of national or international copyright/privacy laws.
The recorded images are for personal use only and may not be distributed to the
public. The use of this product to record images of performances, exhibitions or
commercial activities may infringe the legal rights of the others.
Dissembling the device may void the warranty.
Please read the instruction carefully before installing or ask for professional help.
Do not change any settings while driving only after the vehicle is parked.
2

Installation Notice
This product should be installed onto the windshield in order to obtain the
best view of the front traffic. H owever, some states prohibit drivers from
mounting devices on the windshield or on certain area of the windshield.
I t is owner’ s responsibility to mount and use this device in compliance with
local laws.
To ensure a good view in rainy environments please make sure the digital
rearview mirror’ s front camera is placed behind the windshield area that is
within the reach of the windshield wiper. Do not touch the lens with fingers
and please clean the lens regularly. Please mount the rear camera near
the license plate. 3

Product Guide
1 2 3 4
5
6
1
2
3
4
4

Product Guide
1
2
3
4
5
6
USB Port
Back Up camera
Memory card slot
GPS Port
Power Button
Reset Button
Plug the power cable into the mini USB port.
Plug the rear camera cable into this port.
Micro SD memory card slot make sure it is
inserted in the correct direction.
Plug the GPS antenna into this port.
Press the power button to temporarily turn off
screen, hold to turn the unit off.
Access the reset button with a pin to reboot the
device.
5

Product Accessories
H ardwire K it
R ear C amera with 3 2ft cable
G PS Antenna
M emory C ard
U S B C ard R eader
U ser’ s G uide
The following items are product accessories. I f there are any missing or
damaged items, please contact seller immediately.
W iretap C lip
6
R earview M irror R ubber B ands

Micro SD Card
1. Plug the memory card into the Micro SD Card slot:
Please follow the direction on the device to insert the memory card. Push
in the micro SD card until it clicks and locks in place. XR10 4K is a high
bit-rate dash cam and supports up to 128GB micro SD cards but requires
class 10 or above micro SD card.
2. To remove the micro SD card press the memory card and the card will eject
from the SD card slot.
Note: Please format micro SD cards before use.
Note: Do not remove or insert the card while the device is in use. Turn off
the device before removing the card to avoid damaging the card.
7

Video Recording
1. The device will automatically start recording when powered on. Normal
recordings will stop after the car is off. Or use the REC button on The
XR10 4K to manually stop recording, use Power button to turn off the device.
Note: Choose either 1min, 2min, 3min video length in Settings ( set to
1min by default ), XR10 4K automatically deletes the oldest file
when the memory card is full. Locked footage will not be over-
written and need to be manually deleted.
2. Event recording can be activated if the impact sensor is turned on, the
impact sensor will trigger the camera to lock and protect footages if a collision
is detected.
8

Features
Impact Sensor
With the Impact Sensor turned on, the dash cam will automatically lock and
protect footages after collisions. The locked footages will not be overwritten
by loop recording. You may change the sensitivity level in the settings to off,
low, medium or high.
Parking Time-Lapse Recording
With the hardwire kit installed parked time-lapse recording will automatically
start recording for 8, 12 or 24 hours after the vehicle is turned off. Time-lapse
footages can be found in playback.
9

GPS
Visualize the location of your vehicle on the map during video playback and
overlay speed on videos.
Parking Assist
Connect the red cable of the backup camera power cable to the positive line
of the vehicle’s reverse light’s power cable to automatically activate the parking
lines when reversing. After turning on the car, the screen should display parking
lines when shifted into reverse gear.
Reset
If the dash cam freezes during use, you can perform a system reboot by pressing
the RESET button using a pin or sim card remover.
10

Please download the AcumenC am app on
your mobile devices to gain access to your
footage without having to removing the S D
card.
Please enter the X R 1 0 4 K settings menu and turn on W i- F i option. O nce
the option is turned on, you will find out the network name and password
will be displayed on the W i- F i settings.
ON XR10 4K
Wi-Fi and App Connectivity
W i- F i O n O ff
W i- F i N ame Acumen_ xxxx
W i- F i Password xxxxxxxxxxxx
1 1

ON Y OU R M OB I L E D E V I C E
1 . Download the AcumenC am application on your smartphone.
2. N avigate to the W i- F i setting on your smartphone.
3 . S elect the corresponding network name and enter the password. The initial
password is “ 1 23 4 5 6 7 8 ” .
4 . After the connection is established, enter theAcumenC am application on your
smart phone and C lick “ C onnect Device” you will have access to your footages.
5 . Download videos to your phone at blaz ing speed.
1 2

A C U M E NC A M A P P Toggle between C a m e r a S D
c a r d and phone storage.
F ootages will be available for
playback A F T E R downloading
onto phone storage.
Toggle between
R egular and
E mergency footages.
U se the S e l e c t
option to select multiple
footages to download or
delete.
Tap the
Playback icon
to access your
recording footages.
onto phone storage.
oggle between
E mergency footages.
T
ap the
Tap theT
Playback icon
to access your
recording footages.
S lide left to
switch camera
view
Tap capture
button to take
pictures
Tap the icon
to enter full screen
Tap the icon
to enter S ettings
of the dashcam
1 3

Settings
Resolution: 3840 x 2160 (4K) Max.
Footage Duration: Choose the duration of each footage, between 1min , 2min
or 3min.
Time-Lapse Recording FPS: Select the frame rate of time-lapse footages.
Time-Lapse Recording Duration: Select the duration of time-lapse footages.
Impact Sensitivity: Set impact sensitivity off, high, medium or low. High being most
sensitive to impacts, may cause more footage to be protected.
Audio Record: Turn on / off the microphone.
Clock Settings: Adjust system clock.
Watermark: Turn on or off this feature to add or remove the Date/Time and device
information watermark on the footage.
14

Settings
Rear Camera Rotation:This allows for the rear camera to be mounted upside down.
Wi-Fi Settings: Turn on / off the Wi-Fi function.
Restore Factory Settings: Restore to default settings.
Format SD-Card: Format SD card and delete all data on the current SD card.
Firmware Version: Display current firmware version.
Speed Unit: Choose between MPH and KM/H
Rear Camera Mirror: Reflect the rear camera image horizontally.
Display Icons: Show or remove the status icons from recording interface.
Frequency: If you are located in the US please set it to 60Hz.
Button Press Sound: Select on or off.
Language: Select language.
15

05/15/2021 SAT
AM
Home page
4K
1 3 4
5 6 7 8 9 10 11 12 13
16
2

1. Recording: The red dot indicates the camera is currently recording.
3. Brightness: Swipe left and right on the screen to adjust the display brightness.
4. Time and Date
5. Speed and Direction Info
6. Start and Pause: Tap this icon to start/pause recording
7. Photo: Tap this icon to capture a photo
8. Lock: Tap this icon to manually lock the current video. The locked video won’t
be overwritten by loop recording.
9. Microphone: Tap the microphone icon to turn on/off the microphone.
10. Switch camera view: Tap this icon to cycle through the different cameras installed.
17
2. Resolution: Indicate the current recording resolution.

11. Brightness: Tap this icon to bring up brightness adjustment. Swiping left and
right on the mirror display will adjust display brightness.
12. Playback: Tap this icon to enter playback menu.
13. Settings: Tap the settings icon to enter settings menu.
18
Table of contents
Other Acumen Dashcam manuals
