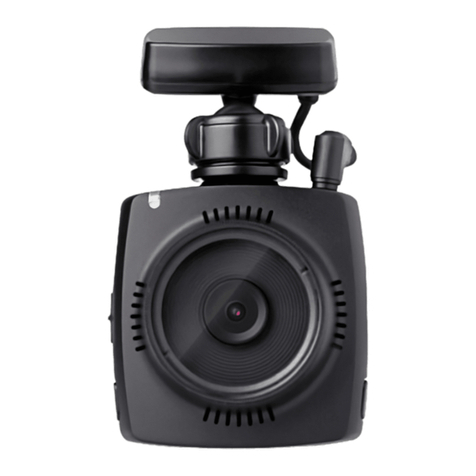
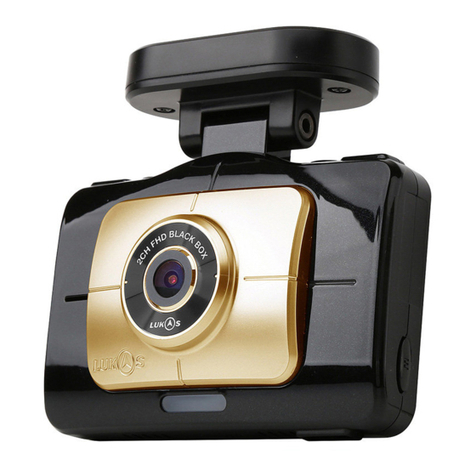
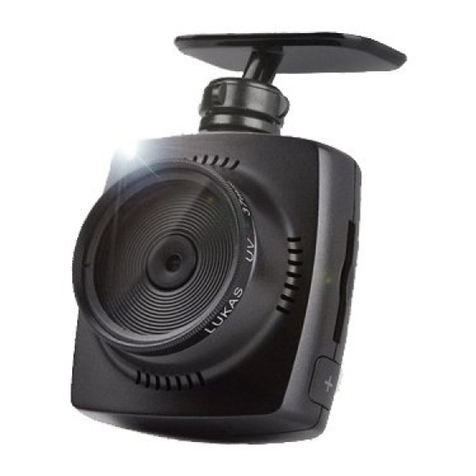
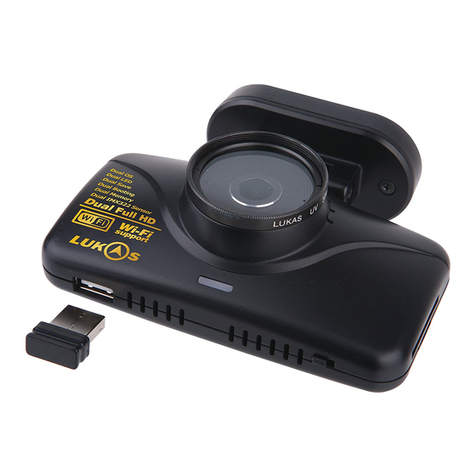
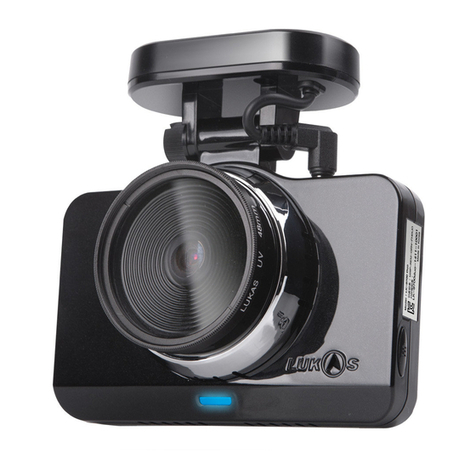
Lukas Blackbox LK5100 User manual

1
User’s Manual
Driving Recorder
Driving recorder : LK5100
- For proper use of the product, please be sure to read the user’s manual thoroughly.
- This product is an ancillary device for the safe vehicle operation. in case of any accident, all re
sponsiblilities belong to the consumer. Therefore, please operate the product in accordance
to its purpose.
- Depending on the PC specication, LUKAS exclusive Viewer won’t be supported.
- Electromagentic wave may be produced by Black Box operation which interfering receptions of
other receivers ( FM Radio, DMB and etc.). Therefore, please install the box as far as possible
from the receiver’s antenna(s).
- Since the night vicdo quality may be degraded by CPL and other lters, the use of CPL lter is
not recommended to the driver conduct night parking surveillance and night driving
frequently.
- Depending on GPS reception condition, the automatic parking mode may not be available in
shadow areas of GPS signal such as apartment complexes and building concentrated areas.
2
Thanks for buying our LUKAS black box.
This manual was prepared for a Lukas HD class black box model of
QRONTECH Co., Ltd., so there may be errors or omissions in technology or editing.
The homepage address of Lukas black box is www.lukas.or.kr, through which you
can download the newest rmware and viewer.
1. Certied Compay : QRONTECH Co., Ltd.
2. Product (Model) Name : LUKAS Black Box (LK5100)
3. Certicate No. :
4. Manufacturing Date :
5. Manufacturer/Manufacturing suitable equipment as classled in Business Purpose
(Class B) with the purpose mainly for home-use and various application areas.
Certied Company Information
The Coverage of Warranty and Responsibility
# The main purpose of this product is the video recording of trac accident. However,
the complete recording of the video and/or sound of all involved or surrounding trac ac-
cidents are NOT guaranteed with this product.
# QRONTECH will not be responsible for any damage or any loss including the data loss
caused by the failure and/or malfunction of this product as well as other matters regarding
this product.
# The typical storage media has the specic product life span. Also, the data damage can be
occurred by the static or any other external voltage. Therefore, any important data should
be copied and stored in other media ( hard disk, CD and portable storage media).
# In case of an accident, if the impact caused by the accident is weak, the automatic record-
ing may not be activated due to the built-in sensor
# SD memory card may cause defects in video quality (omissions, interruptions, frame
changes and drops and other defects in video recording). Genuine memory card prod ucts
should be used. Also, the memory card, for example a 16 G card, should be formatted once
in every two weeks.
# This product is an ancillary device recording video during the vehicle driving. Depend
ing on the operational environment, the recording may fail. Please use this product as a
reference to verify the driving video.
2... LUKAS BLACKBOX

3
Content
1. The Caution during Operation.......................................... 4P
2. The Product Composition................................................... 7P
3. The Name of Each Component......................................... 8P
4. Installation Sequence ...........................................................9P
5. Installation Angle Recommendation............................ 10P
6. The Product Feature ............................................................11P
7. Segments and Buzzer Signals ..........................................12P
8. Operation Instruction .........................................................13P
- Power Connection
- Recording during Driving
- Recording Termination
- Recording during Parking
- Current Video Review
- Recorded Video Play
- Driving Record Review
9. LUKAS Exclusive Viewer-------------------------------------17P
10. Memory Card Instruction................................................ 24P
10. Product Specication........................................................ 25P
12. Product Warranty.................................................................26P
User’s Manual....3
4
Cautions during Operation
1. Do not leave the product under high or low temperature for a long period of time. If the
product is exposed to the sun light for a long period time in the summer or left in a cold
place in the winter, a malfunction and/or failure may be occurred to the product. When
the product is not used, please be careful for the storage temperature of the product.
2. The user’s own disassembly or modication of the product is prohibited. The product
disassembled and/or modied by other than QRONTECH’s authorized personnel
will not be covered by the warranty. Please contact QRONTECH’s Customer Support Center
for the product’s check and repair.
3. Do not cut or modify the cigar jack cable. Such actions may cause damages on the
product and/or the vehicle for which the product user is responsible.
4. Do not touch the product’s power supply area with a wet hand. Be cautious not to have
water come inside of the product. Since the product is not waterproof, the water may
cause the product failure, the re and/or the electric shock. Do not use water, any volatile
chemicals or cleaners, but, soft and dry cloth to clean the product.
5. Excessive impact and any foreign material insertion to the product should be prevented.
Be cautious because excessive force or impact application or a foreign material insertion
to the product may result the product failure.
6. Be careful for any dust or foreign substances on the lens area of the camera. If an
object is located around the product, the glare of the object on the window or the
windshield may be shown. Therefore, do not put any other object in the surrounding area
of the product.
7. For the safety, do not operate the product during driving. Such action may result a
vehicle accident.
8. Attach the product rmly to prevent falling during driving.
Improper attachment of the product may cause the product’s abnormal operation or the
fall of the product interferes the safe driving.
4... LUKAS BLACKBOX

5
User’s Manual....5
9. Please use QRONTECH authorized genuine products for the power cable or accessories.
QRONTECH will not be responsible for any product damage and
other relevant happenings caused by the use of unauthorized products or parts.
10. QRONTECH does not guarantee the compatibility regarding any devices or accessories
which are not provided by the company. The user is responsible for any product
failure caused by the use of the device or accessory made by other than QRONTECH.
11. Do not operate Black Box while engine is not running. The engine start may fail due to
the battery discharge.
12. In case of using the product being attached for a long time, check the product location
and the camera angle frequently in a severe driving environment by rough road
condition, excessive vibration or etc..
13. Please be careful that the recorded video quality may degraded severely in extreme
light conditions including the rapid surrounding light change such as in entering a
tunnel, excessive strong backlight or the night without any light source,
14. In a vehicle with the excessively tinted wind shield, the video image of the product may
be recorded in a dim or a distorted quality.
15. On an accident with the impact lower than certain degree, please be aware that the
event data may not be recorded in the product. Also, the user should notice that no
video data may be recorded in case of the power break due to a large scaled accident.
16. Do not force the SD memory card to eject during video recording. Be sure to turn the
power o before removing the SD memory card. If the SD memory card is removed
when the power is on, the recorded video le may be damaged and cause serious
malfunctions to the product or the memory card.
17. Do not separate the power cable during the operation. It may cause the damage to the
product. Do not use other than the rated voltage. It may cause the damage of the
product or the re.
6
18. Format the SD memory card at least once a week. (Recommendation based on 8GB)
Black Box always can write and delete. However, the actions can generate the strain to
the SD memory card. Repeating of writing and deleting may cause the damage to les
of the SD memory card. The SD card has a certain lifespan. QRONTECH is not responsible
regarding the recording error caused by using the SD memory card over its lifespan.
19. To protect the product and stable recording, the feature to stop the product’s operation
in the excessive temperature is applied. The product is set to stop the recording in the
environment with high temperature exceeding 65°at the factory. (if“High Temperature
Safety Mode”is set in the PC Viewer’s program environment conguration.)
20. If there is a suspicion for a problem in the product or if an actual problem is found in any
degree, please contact the customer center for a consultation. If the produce is used
ignoring the fact, the symptom can be developed more seriously to be excluded from
the normal customer support.
Cautions regarding GPS (Optional)
1. The general GPS for commercial use has the error range of more than 15m. In case of
the inuence from buildings, undergrounds, tunnels, street trees, the error range is
expanded. And, in certain circumstances, it can be impossible to receive GPS signal.
2. Depending on the weather or other environment, it may take a long time to receive GPS
signal right after the power is turned on.
3. Tinted windows or devices (automatic tollgate fee terminals and etc.) installed on or in
the vehicle may inuence GPS reception.
4. When the vehicle is parked, depending on the reception area, the speed may vary within
the range from 1 to 30 Km/h.
5. When Black Box’s power is o, the data may be omitted.
6... LUKAS BLACKBOX

7
The Product Composition
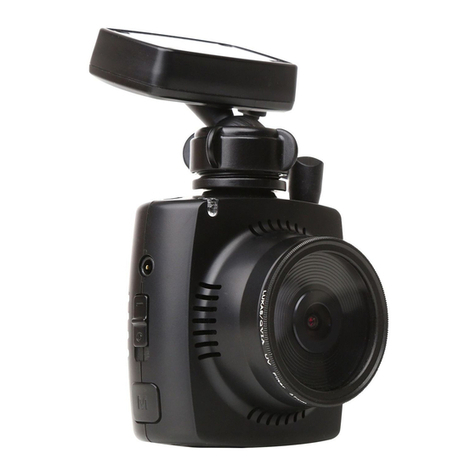
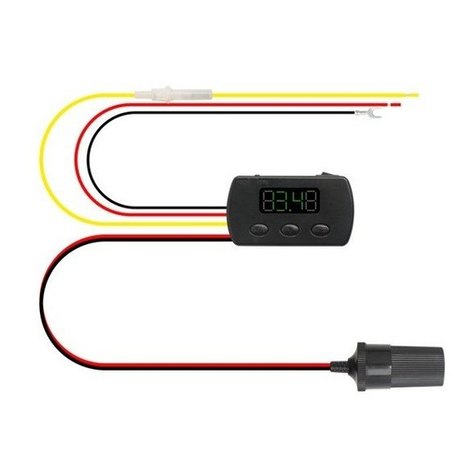
- Please check if there is any missing component from the product component items as
shown on the photo.
- AV Cable(Optional) can be used to connect the Black Box to a navigator device or monitor
with Av IN-Terminal.
Main Device Adhesive Tape
SD Memory card
Power Cable
Fixing Clip The User’s Manual UV Filter CPL Filter(Optional)
AV Cable(Optional)
Permanent Power
Supply ( Optional) Gift Box
User’s Manual....7
# The components are subjected to change without a prior notice for the product perfor
mance and/or quality.
8
Name Feature
1 Camera lens Recording video, CMOS Digital
Sensor
2 37mm UV Filter Protecting Lens
3 watching LED
LED on when driving
Security operating when
parking
4 Power input port 12~24Volt power
5 GPS input port GPS Connection
6 SD Memory slot Insert SD Memory Card
7Emergency recording
button
over 2 sec : driving <-> parking
under 2 sec : Emergency
recording
8 Cradle window shield type
9 Buzzer each warning sound
10 Segment LED time, speed display
11 AV Video Jack Video output
12 Power switch Power ON/OFF
13 Sound selection button
Over 2 sec : segment LED on/o
under 2 sec : Sound recording
on/o
The Name of Eash Component
►if you do the sound recording & buzzer on/off, when rebooting
the value will be setted up to configuration automatically .
[ Button addition feature]
►Changing the Event buzzer on/off : on pushing the“E”button + push a “M”button shortly.
[ Formating SD Card]
8... LUKAS BLACKBOX
Format at PC Format at Black box
Method
1. Insert SD card to PC
2. Click at right of mouse
3. Selecting the format methode
4. Insert the SD card to Blackbox
1. Insert SD card to Blackbox
2. Power on
3. Push “M” button + “E” button
4. Blinking Segment LED for 15
sec with “For” character.
►Excuting : push“E”button
►Cancel : push“M”button
Merits
In case doing format at PC, a “Setup”
folder be setted up by factory may be
removed.
The “Setup”folder is keeping on

9
User’s Manual....9
Installation Sequence
►Make sure to read below procedures thoroughly in order to make safely.
1. Stop the engin and remove the kay from the ignition in a bright and at place.
2. Wipe all foreign material and moisture from the surface to which the double sided tape
will be attached using a soft and dry cloth.
3. Make sure the Power port and Video output port of the Blackbox thoroughly.
4. If the lens forward up, the product could be happend a malfunction.
5. In order to keep a clear resolution, wipe the window shield thoroughly.
6. if the product’s lens is stained with foreign materials ( nger print), it may aect the video
recording negatively. So, please keep the lens clean all the time.
1. apply the dou-
ble sided tape to
the cradle of the
product.
2. install the product
on the front window
that does not hinder
your visibility.
insert the SD card to
the product.
4. after inserting the
cigar jack and turn
on the engin, make
sure the segment LED
whether or not the ver-
sion is appear. ( when
making an angle ad-
justment, it’s better on
seeing the video image
of the monitor).
3. after connecting
the power cable to
the product, put the
the cable to A llar.
10
10... LUKAS BLACKBOX
Recommended Installation Angle
LUKAS Black Box enables the user to adjust the view angle to various directions of up/down/left/
right. Since the view point does aect the video quality, the description is made with the examples
of the proper view angles.
►The video display on the right is the video recorded at the same time and the same place
with dierent up/down view angle. The Black Box’s angle on the left is the example for
the description which varies depending on slope of the wind shield.
Video
Image
60%
Video
Image
50%
Video
Image
100%
Video
Image
50%
Video
Image
40%
(Recommended)
(Not Recommended)
(Not Recommended)
20% 20%60%
Still Image 40%,
Video Image 60%
(Impact Sensor
Z= -0.22)
Still Image 50%,
Video Image 50%
(Impact Sensor
Z= -0.27)
The angle points
to the end of the
hood(bonnet).
(Impact Sensor
Z= +0.15)
This is the video with 4:6 ra-
tio as recommended for the
installation. It can be veried
that the video maintains the
proper brightness and deni-
tion while recording the front
trac signal when the vehicle
is stopped right at the stop
line.
This is the problem happens
when the angle is pointed
downward too much. As it
shows, the brightness is not
the problem. However, since
the trac light is blocked,
the problem happens so that
accurate information is not
available to acquire.
In case of the installation with
the angle pointing upward
too much, it shows that the
video becomes too dark be-
cause of the sunshine from
the upper left direction. As it
shows the video’s brightness
changes depending on the
angle.
## The Installation by G Sensor: Z Axis Value
is in between -0.1 and -0.3, For general pas-
senger cars, -0.2 is recommended.
## In the character of the wide optical lens,
about 20% distortion of right/left side could
be happen.

11
User’s Manual....11
The Product Feature
►HD Level High Quality Recording Resolution
- 1280X720P Pixel, Max. 24 Frame
►16:9 HD Display Ratio
- With two times larger sized display compared to VGA image, more detailed video
information is delivered.
►Adaptation of more bright lens with F1.88
►Lens:Opposte angle (Approx.132°) / Angle of view : Horizontal (Approx91.7°),
Vertical (Approx 45.5°)
►Various 37mm lters are mountable (UV Filter, MCUV Filter, CPL Filter and etc.).
►Formating directly
- formating directly at the product without PC ( Refer to 7 page )
►Built in LED for keeping security.
- when parking, the LED is blinking in order to show that this car has the Blackbox.
►Built-in Super Capacitor.
- The video le could be saved safely because the Super Capacitor keep on the power.
►Parking Mode
- The parking recording which is twice longer than the max. recording time during the
driving, is available.
►Automatic Switch between Driving and Parking Modes
- Without any additional control, the switch between the driving and parking modes is mode
►Built-in High Performance Microphone
- Simultaneously Records the sound data with the video recording. (The set sound
recording conguration is unchanged or sustained even the power is turned o.)
►Built-in VIDEO OUT Terminal for video output to the other devices.
►Built-in Segment Display to show the status of the product.
►Built-in BEEP Sounds
►Built-in RTC(REAL TIME CLOCK)
- Create the date and time of the recording.
►3-Axis Impact Sensor(G-SENSOR) is built in to store the recorded les by sensing
the impact.
►Automatic delete of the recorded video.
- If the memory’s capacity is full, the earliest video is deleted automatically and the
most current video is stored.
►Product Conguration Feature
- Through the produc’s environment conguration, customized set-up for each circumstance
is possible.
►Video Play on the General or Exclusive Players
- The analysis program for recorded video is provided
12
Segment and Buzzer Signal
12... LUKAS BLACKBOX
LUKAS Black Box SEGMENT LED Messages
Segment & Buzzer Description
The display shown on the ini-
tial booting of Black Box gives
the number of the current
rmware version. (The number
of the rmware can be up-
graded and varies depending
the model.)
On the completion of booting
process, the time of parking/
stop is displayed. (May vary
depending on the environ-
ment conguration.)
On the completion of booting
process, the date of parking/
stop is displayed. (May vary
depending on the environ-
ment conguration.)
On activation of the sound
recording, the right side DOT
blinks.
Buzzer o
On the start of the rmware
updating, the sign‘UPdA’is
displayed.
When operated in Parking
Mode, the status is notied
displaying ‘Par’.
When the operation is hanged
to Driving Mode, the status is
notied displaying ‘drv’.
Segment & Buzzer Description
When formating, waiting
status
If a SD card is absent or impos-
sible to recognize A sentence
Sd_FAIL slide to give a warn-
ing with a Buzzer sound.
If a SD Card is absent or
impossible to recognize, a
sentence SD_FAIL Slide to
give a warming with a buzzer
sound.
If a bad block or error is
occurred on the SD memory
card, the sign‘CHK’ is dis-
played, and, the SD memory
card recovery is automatically
activated.
When happening a high
temperation around device, it
enter to safe mode
When the power is turned o,
the sign ‘SEE You’ is sliding on
the display.
When installed GPS, The speed
is displayed during driving.
(May vary depending on the
environment conguration.)
When the weekday alarm fea-
ture is activated, the sign‘dAY’
is displayed with the buzzer
signal.
13
User’s Manual....13
Operating Instruction
Power Connection
First of all, check if the SD memory card is inserted in the main device. Then, start the engine
when the power is connected (having the power button on).
- During the booting is in progression
After the power is supplied, the version number is shown on the Segment display. When the
Recording during Driving
- Persistent Recording : After the booting process is completed, the buzzer signals 5 times and
the recording is started to record and store the les in Always Movie
folder.
- Impact Sensing Recording : When the impact higher than the sensitivity level set by the user
(vehicle collision, sudden stop, speed bar and etc.), recording of
the event is started with the activation of the one buzzer signal
and blinks on Segment display. The total 30 sec. recorded video
including 10 sec. prior to the event and 20 sec. after the event is
stored in Event Movie folder.
►The acceleration sensor s rewind speed can be set in PC Viewer Program s Environment
Conguration.
►If another impact is occurred during an Event Recording, the recoding regarding the impact
won t be initiated before the Event Recording is completed.
►If the power is o during an event recording, the device completes the event recording
before being turned o.
- Manual Recording : If Emergent Recording Button is pressed, the video is recorded including 10
sec. prior to the activation and 20 sec. after the activation and stored in
Event Movie folder even when no impact is occurred.
►During an event recording, the Emergent Recording cannot be activated.
►During the Emergent Recording is in process, the event recording will not be activated even an
impact is occurred.
- If SD memory card is removed during Persistent Recording
(1) If the SD memory card is removed deliberately removed from the product during Persistent
Recording, the recording le being recorded and stored will not be stored normally.
(2) May cause serious damage to SD memory card or the product.
14
14... LUKAS BLACKBOX
Recording Termination
►When the engine is turned o, the power to the product is o and the recording is terminated.
(When using the cigar power.) Please turn o the product as the following order for the
product s life maintenance and better data preservation.
1. It is recommended to wait 20 sec. before removing the power during manual recording.
2. When the product is terminated, the sign See you shows on Segment display followed by 3
buzzer signals before the power is o.
●Warning : If SD memory card is removed before the product s termination, the error is
occurred on the recorded video. Please be sure to remove the SD memory card
after the product is completely terminated.
3. Complete disconnection of the power cable connected to the cigar jack prevents the vehicle
Recording during Parking
1. Parking mode change supports both manual and automatic methods.
Manual: Pressing Emergent Recording Button for more than 2 seconds, the buzzer signals
twice and the sign Par blinks on the segment display, then the device changes to
parking Mode.
Automatic: If Automatic Parking Mode Change in the user s environment is checked, about
10 seconds after the parking, the parking mode changes to the automatic mode
blinking Par sign on the display. After the parking mode change is completed,
Par sign shows continuously without blinking.
●During the mode changes to parking to driving, the recording stops.
Therefore, there may be loss of the video data.
2. The video is stored in Always Movie folder and Parking is shown when it is veried with
Exclusive Viewer program.
●When the change is made from Persistent Recording, Event Recording and Manual
Recording to Parking Mode, the le in recording process is stopped before the change so
that time duration may be resulted

15
User’s Manual....15
Current Video Review
1. If a model has the video out, the current video can be displayed on an external device such as
a navigation device or a TV connected with AV in feature which can be useful for Black Box
s angle adjustment.
►After the angle is adjusted, please remove the video out cable. A malfunction may be occurred
by the connected device externally.
Recorded Video Play
1. If there is a need to check the video quickly, turn the main device s power o, and after
verifying See you sign on the Black Box s segment display and the buzzer sound, remove
the memory card.
2. After connecting the memory card to a PC or a laptop, run LUKAS viewer or other general
viewer.
[Playing the video with a general video player]
Open My Computer/Removable Disk/Recorded Video folder. Double click on the video le to
play or drag the le to the video player.
[Video Playing on LUKAS Exclusive Viewer]
Run LUKAS Viewer.
Click on Open Folder at the upper part of the player.
After selecting My Computer/Removable Disk/Recorded Video folder, click on the OK
Button.
Double click on the le to play from the video list at the right side of the play screen.
16
16... LUKAS BLACKBOX
Driving Record Review
This feature is only available on the GPS model.
LUKAS Black Box stores approx. 32,000 driving record internally. By setting the Driving Record
period at SETUP initially, the vehicle s Driving Record is recorded with the set period.
[Driving Record Storing Process]
1) Open Flash Command tap on Environment Conguration Window.
2) Check on Read for Driving Record conguration and store the setting.
3) It is stored as Lukas_Command.bin under SD memory card s Setup Folder.
4) After inserting the SD memory card in Black Box terminal and activated, the reading
progression from [r 0.0] to [r99.9] is shown on the display, then Black Box s typical
action is initiated and the storage is completed.
5) The stored le is stored as Lukas_Flash.bin in SD memory card s root folder.
[Driving Record Verication]
1) After connecting the SD memory card storing Driving Record (Lukas_Flash.bin)to the
computer, run the viewer. And, click on [Information] tap at the bottom of the congura
tion screen.
2) Driving Record is available to review as the storage period set by the user.
3) When the selected data is clicked on Driving Record Data, the stored location is
interlocked with the map at the right side.

17
LUKAS Exclusive Viewer
Installation Instruction
1. Install “LUKAS-CUTY V5.3.1.msi”.
(When the blackbox is purchased, it is stored in the memory card.
Or, you can download it from LUKAS homepage.)
2. Execute“LUKAS-CUTY” installed on the windows desktop.
Compostion of viewer
No Name Function
1 Power Menu Open, Capture, Print, Environment Setup
2 Image Screen Window screen to present the played image
3 Image Controller Controlling part of played image
4 Sound Controller Adjusting part of sound volume
5 G-senor Graph To present the variation of G-sensor
6 Record To present the le list and the events
6-1 File list To present the list of saved les
6-2 Event information File informatino and GPS information
7 information To present the event information of currently played le
7-1 File Information To present the event information of currently played le
7-2 GPS information To present the position of currently played le
(When GPS is installed)
7-3 Map Screen To present the event information of currently played le
( When GPS is installed)
7-4 Map screen
Controller
To support the Expansion/Reduction of map screen
(when GPS is installed)
►These contents may dier by models
User’s Manual....17
18
GPS Map Information Window
►The map showing the driven vehicle s location in displayed at the right bottom of LUAKS
Viewer. (If the PC is not connected to the internet or the GPS reception is not good, the map
may not show.) With the map, the driving location and route is available to check.
LUKAS Viewer Button Description
►The map interlink is possible on
the Internet Explorer 7.0 or higher.
Open To bring out the video
le saved in SD card. Full secreen
To expand the current
video to the full
screen
Capture
to save the currently
played video as an
image(Picture le)
10 sec Back To move the current
image back by 10 sec
Print to print the currently
played image Play to play the image
Environment
set up
To set up the terminal
environment of the
product
Pause to pause the image
Time setup To set up the time when
GPS is not installed Stop to stop the current
image
Map
zoom up
To expend the map (
When GPS installed) 10 sec forward
to move the current
image forward by
10 sec
Map zoom
down
To reduce the map (
when GPS installed)
Dubble Speed
play
to play the image
twice as fast as
ordinary one. at this
time, the icon color
turns red.
18... LUKAS BLACKBOX

19
User’s Manual....19
Termianl Environment Conguration
With “Environment Setup” on the program menu, The user can change the setup value of the
product arbitrarily. (When the SD memory card is formated, it is automatically set up as the
default value.)
1. Connect the SD memory card to the PC in use, and then execute the viewer program.
2. Click the environment setup icon( ) in the program menu which lies on the top of viewer
program. Then the terminal environment setup menu is popped up as below.
[ The storage process on Terminal Environment Conguration change ]
1. Stop the driving, and turn o Black Box. and
then, remove the memory card.
2. Connect the SD memory card to the using PC
and execute LUKAS viewer Program.
3. By clicking the Environment Conguration
thumbnail in Program Menu located at the
upper part of LUKAS viewer Program, the
Environment conguration window as under
appears.
4. After the setting in Terminal Environment
Conguration Window, click “Store”.
5. The storage location shold be Set-up Folder in
the SD memory card. ( The Set-up Folder is not
created at the initial stage of the product. the
folder is created automatically after the driving
starts. To store Terminal Environment Cong-
uration before driving, the user should make
the Set-up Folder.)
[ The Environment Conguration Storage Process when the SD memory card is formatted ]
1. In case of the stored Environment Conguration setting, format the SD memory card
after copy the SD memory card s Set Up Folder to the PC.
2. Copy the backup Set Up folder in PC to SD memory card.
►If the video quality changes, store the existing data and use the SD memory card
after the format.
►The initial set value s standard is congured with the passenger car (white).
20
No Name Function
1SD Card Capacity
Cog To set up the ratio of saving spaces for Aways and Event Movies.•
2 Gyro-sensor
To set the sensitivity of G-sensor to be level 1~5.•
Sensitivities of driving mode and parking mode can be set up respectively•
It can be set up with the user’s denision (to•
intpu X,Y,Z value for each sensitivity)
3Etc.
Enable Audio Recording•
: Check when sound recording is necessary
Enable Event Buzzer•
: Check when buzzer operation is necessary
Enable High-Temperature Safe Mode•
: Check to protect the blackbox in the hot environment of car.
Enable Switch AutoDriving Mode•
: Check to cancel the parking mode automatically for driving.
Enable Switch AutoParking Mode•
: Check to enter the parking mode automatically while parking.
4Video Congura-
tion
Resolution : To set up the resolution of video•
Saturation : To set up the Saturation of video•
Eect : To set up the eect of video•
Video mode : To adjust the up/down direction of video•
5Brightness Con-
guration
to change the brightness of screen at a specic time by setting the time of day/
night.
6Display
Conguration to set up the segments of blackbox (speed, date, time functions)
7 Video quality to set up the recording quality of image. ( Default : High quality)
* the higher quality, the larger saving le and the shorter total recording hour.
8Select a day of the
week Alarm To set up the weekday to generate an alarm on the setup day.
9Driving speed
Display To set up the unit of speed on GPS. ( Korea : Km/h)
10 Protect LED To operate the security during the parking recording
11 Timezone to adjust the GPS time when it is used in abroad
12 Video Out Con-
guration To select the video type of connected external machine
13 Lisence Plate
Number
to record the vehicle number of 4 digits on the left bottom of recordered image
along with the image. input the 4 digit number of car where the blackbox is
installed.
►After nishing the setup, the contents are saved in the‘Setup”folder of SD card.
it is automatically saved if the saving location is not asked.
20... LUKAS BLACKBOX

21
User’s Manual....21
►Video Conguration
1. Resolution : it sets up the resoltion of video.
Step1(Default) Step2 Step3 Step4 Step5
Low -------------------------------------------------> High
2. Saturation : it sets up the saturation of video.
75% 100%(Default) 112.5% 125% 150%
Low -------------------------------------------------> High
3. Eect : it sets up the eect of video.
No Eect(default) Mono Sepia Negative
4. Video Move : it adjusts the up/down direction of video
28pixel(default) 44pixel 60pixel 76pixel 92pixel
Downward -------------------------------------------------> upward
22
►Brightness Conguration
It changes the brightness of screen at a specic time by setting the time of day/night. If you
want to make it the same both at night and day, check the “x”. Default setup values are shown
in [Fig 1].
[Fig 1] Brightness Conguration
The grade of brightness is composed as levels 1~10. Level 1 is the darkest, and level 10 is
the brightest. The recommended brightness is level 1 or 2 in the day time and 5~7 at night.
When CPL lter is used, it is much better to select the recommended brightness.
►If the car has a shading lm on its front window or is driving a lane with few street lights at
night, the brightness may be adjusted according to the driving condition to raise the visibility
of materials
(Example) Brightness Conguration Setup
In the above wxample, the brightness was set up as level 2 and 6 for 6 AM and 7 PM respec-
tively. With this setup, it works in the brightness of level 2 during 6 AM~ 7 PM and in level
6 during 7 PM ~ 6 AM of next day. it is better to adjust it in consideration of sunrise/sunset
times and user’s environment.
* Notice : The daytime brightness cannot be set up higher than the night one.
►Display Conguration
It is the function to set up the segments of blackbox.
• Speed-Time-Date : During the driving, the speed is indicated.
When stopped, it presents the time for 20 sec and the date for 10 sec.
(When GPS is installed)
• Just Time : It presents the time at all times.
• Speed-Time : During the driving, the speed is indicated.
When stopped, it presents only the time. (When GPS is installed)
• Speed-Date: During the driving, the speed is indicated.
When stopped, it presents only the date. (When GPS is installed)
[Fig 2] Example of Brightness Conguration Setup
22... LUKAS BLACKBOX

23
User’s Manual....23
►Select a day of the week Alarm (When GPS is installed)
In case that the user selected a driving limit weekday, it generates an alarm if the day has come.
The relevant weekday is selected and set up in [Select a day of the week Alarm] on the bottom of
viewer setup screen as below. If the terminal is operated on the relevant weekday, the blackbox
generates the alarm sound no longer than 3 sec at intervals of about 10 min.
►Etc.
1. Enable Audio Recording :
When recording the sound along with the image, check it for use.
If you want the mute function, do not check it. (Default: Use)
2. Enable Event Buzzer :
In case that there is an event on the car, it can inform it to the user with a buzzer sound. If you
want to use this function, check it. If you want to mute the buzzer, do not check it. (Default: Use)
3. Enable High-Temperature Safe Mode :
If you want to protect the blackbox in the hot car environment (direct sun beam higher than
70℃), check it for its use. The use of blackbox in the hot condition may influence on the reliability
of some parts of the product. At the high temperature, the recording of blackbox stops automati-
cally. (Default: Use)
4. Enable Switch Auto Driving Mode :
If you want to use the function to detect the driving of car and convert it from the parking mode
to the driving mode automatically, check it. If you don’t want the auto switching, do not check it.
(Default: Not Use)
5. Enable Switch Auto Parking Mode :
If you want to use the function to detect the driving of car and convert it from the driving mode
to the parking mode automatically, check it. If you don’t want the auto switching, do not check it.
(Default: Not Use)
►To switch the driving mode and the parking mode manually, press the emergency
button for 2 sec or longer.
►If the emergency button is pressed shortly once, the emergency recording is executed
and the image before and after the button press is saved separately to the event folder.
24
24... LUKAS BLACKBOX
Recording Time for each Memory size
►The below specied recording time is the max. time length regarding the relevant recording
mode. In actual application, the time may vary in some degree.
►The storage time may dier depending on the video data transmission amount.
►The each table is made according to 4M/sec.
Memory size
setting
High Resolution
4GB 8GB 16GB 32GB
75:25
(Based)
Approx.30ea
(Max.90Min)
Approx.62ea
(Max.96Min)
Approx.126ea
(Max.378Min)
Approx.253ea
(Max.810Min)
80:20 Approx.32ea
(Max.96Min)
Approx.66ea
(Max.198Min)
Approx.134ea
(Max.402Min)
Approx.270ea
(Max.810Min)
90:10 Approx.37ea
(Max.111Min)
Approx.75ea
(Max.225Min)
Approx.151ea
(Max.453Min)
Approx.304ea
(Max.912Min)
< Persistent Recording : Recording unit 3 minute >
Memory size
setting
High Resolution
4GB 8GB 16GB 32GB
75:25
(Based)
Approx.30ea
(Max.180Min)
Approx.62ea
(Max.372Min)
Approx.126ea
(Max.756Min)
Approx.253ea
(Max.1518Min)
80:20 Approx.32ea
(Max.192Min)
Approx.66ea
(Max.396Min)
Approx.134ea
(Max.804Min)
Approx.270ea
(Max.1620Min)
90:10 Approx.37ea
(Max.222Min)
Approx.75ea
(Max.450Min)
Approx.151ea
(Max.906Min)
Approx.304ea
(Max.1824Min)
< Parking Recording : Recording unit 6 minute >
Memory size
setting
High Resolution
4GB 8GB 16GB 32GB
75:25
(Based)
Approx.62ea
(Max.31Min)
Approx.126ea
(Max.63Min)
Approx.253ea
(Max.126Min)
Approx.507ea
(Max.253Min)
80:20 Approx.49ea
(Max.192Min)
Approx.100ea
(Max.50Min)
Approx.202ea
(Max.50Min)
Approx.405ea
(Max.202Min)
90:10 Approx.24ea
(Max.12Min)
Approx.49ea
(Max.25Min)
Approx.100ea
(Max.50Min)
Approx.202ea
(Max.101Min)
< Event Recording : Recording unit 30 sec >

25
Product Specication
Item Specication
Camera 1 Camera (1.3M Pixel CMOS Digital Sensor
View Angle Lens : Opposte angle(Approzx. 132º
/Angle of view : Horizontal (Approx91.7º), Vertical(Approx
45.5º)
Recording Resolution 1280 x 720p
Recording Speed(Max) Max. 24fps ( Auto. frame control for the surronding bright-
ness)
Sensitivity 1 Lux
Video Compression Mpeg 4
Impact Sensor Built-in 3-D impact sensor ( Impact, Sudden Break and
Sudden start)
Recording Medium SD/SDHC Memory card ( standard 4GB, Max. 32GB)
Play Program General / Exclusive Program
Audio Built-in Microphone
Power DC 8 ~ 24Volt
Operation Temperature -20℃~ 70℃
Storge Temperature -30℃~ 80℃
Dimension 81 x 59 x 36 mm
Weight Approx. 75g
►The operating temperature can change depending on the SD memory card performance.
►Since the SD memory card operates in high temperature, please be cautious for the risk of burn
during inserting and removing the card.
►When the device is operated in the high temperature more than 65 C, the change and/or the
damage in the video quality can occur.
►Due to the characteristics of wide angle lens, the product s recording qualities of the left and the
right may become dierent.
►The recoding speed is 20~24 frame/sec and automatically adjusted by the surrounding brightness.
If the recording speed is continued to be under 15 frames/sec due to low light level or sudden light
change, the camera sensor may produce the data loss for 1~2 sec.
►The power and segment must be turned o when the SD memory card is removed/inserted.
If when the SD memory card is removed/inserted while the power is on, the SD card may be
damaged or the product will operate abnormally.
►The use of CPL Filter is not recommended for the drivers frequently conducts night parking
surveillance or night driving.
►The Product Specication can be changed to improve the performance.
User’s Manual....25
26
Product Warranty
Product name Product S/N
Customer name Purchase Date
Customer
Phone number
Purchase
Place(Dealer)
1. This product s free service warranty period is for one year from the purchase date.
2. This product is manufactured through strict and accurate quality control and inspection
processes.
3. This user s manual is the warranty which won t be reissued. Therefore, please keep the manual
carefully.
4. If the product for repair is dened to be a chargeable service to the customer will be serviced
with the cost charged to the customer regardless of the warranty status.
5. If the failure is occurred during the user s normal product operation within the warranty
period, the repair service will be provided by Manufacture’ s Customer Support Center for free
of charge.
6. The warranty should be submitted for the repair request.
26... LUKAS BLACKBOX

27
User’s Manual....27
Contact information
Other Lukas Dashcam manuals

Lukas
Lukas LK-919 QAD User manual

Lukas
Lukas LK-6200 Plus User manual

Lukas
Lukas Q900 User manual

Lukas
Lukas LK-9500 Duo User manual

Lukas
Lukas LK-9300 DUO User manual

Lukas
Lukas LK-9370 WD User manual

Lukas
Lukas lk-7950 wd User manual

Lukas
Lukas Blackbox PRO User manual

Lukas
Lukas LK-7900 User manual

Lukas
Lukas lk-7950 wd User manual