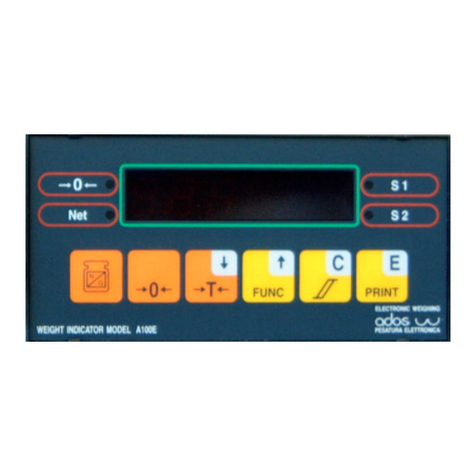
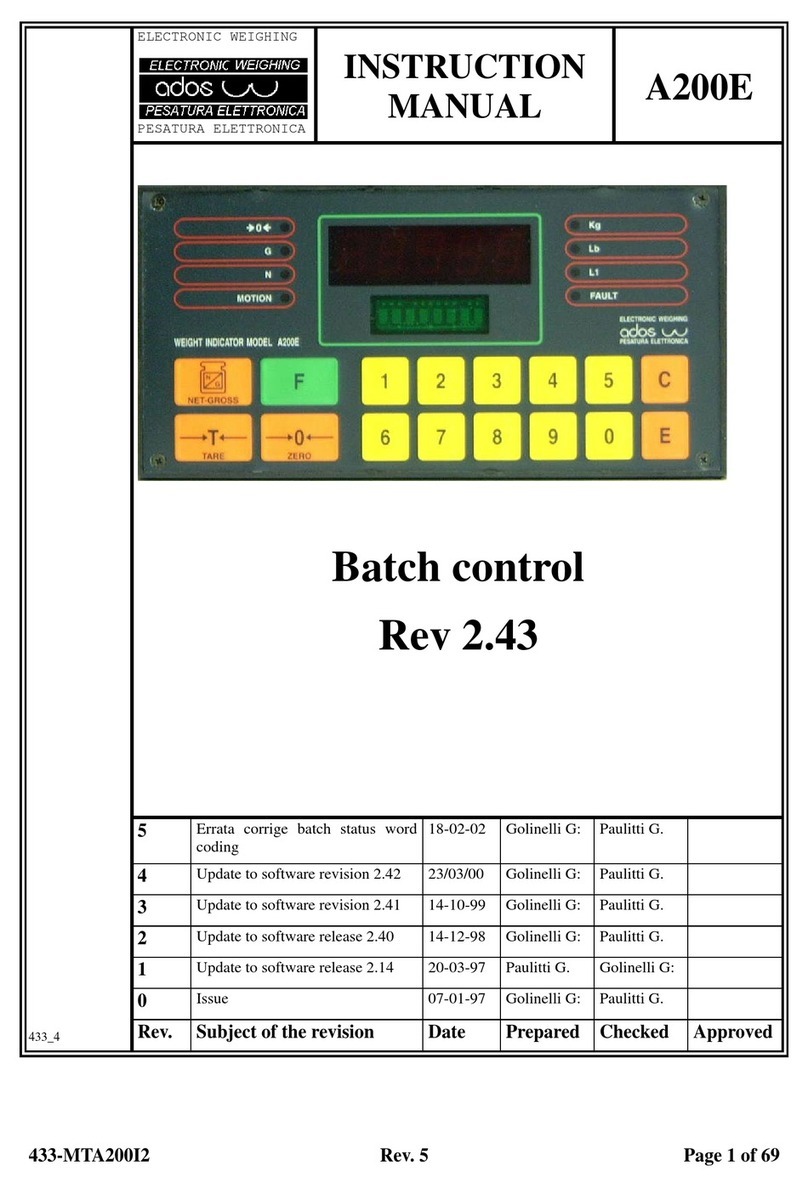
Ados A200E User manual

417-MTA200I1 Rev. 9 Page 1 of 77
INSTRUCTION
MANUAL A200E
SW Release 1.54
9
Change of Modbus registers table 06/06/05 Paulitti G. Laserra C.
8
Update to Software revision 1.53 08/03/04 Omodeo S.
7
Update to Software revision 1.52 25/11/02 Golinelli G. Paulitti G.
6
Update to Software revision 1.51 23/01/01 Golinelli G. Paulitti G.
5
Update to Software revision 1.42 23/03/00 Golinelli G. Paulitti G.
4
Update to Software revision 1.41 15-10-99 Golinelli G. Paulitti G.
3
Update to Software release 1.40 10-10-98 Golinelli G. Paulitti G.
2
Update to Software release 1.20 22-01-97 Golinelli G. Paulitti G.
0
Issue 30/11/95 Golinelli G. Paulitti G.
417_9.doc Rev. Subject of the revision Date Prepared Checked Approved

ADOS S.R.L. Buccinasco (MI)
417-MTA200I1 Rev. 9 Page 2 of 77
Contents
1. INTRODUCTION .................................................................................................................................5
1.1 General................................................................................................................................................5
1.2 Versions/options.................................................................................................................................5
1.3 Documentation ...................................................................................................................................5
1.4 Equipment marking description.......................................................................................................6
1.5 Technical data ....................................................................................................................................7
2. INSTRUMENT OPERATIONS...........................................................................................................8
2.1 Turning on the instrument................................................................................................................8
2.1.1 Load cell signal averaging.............................................................................................................................. 9
2.2 Display indication.............................................................................................................................10
2.2.1 Primary display............................................................................................................................................. 10
2.2.2 Auxiliary display .......................................................................................................................................... 10
2.3 Tare operations ................................................................................................................................11
2.3.1 Tare selection................................................................................................................................................ 11
2.3.2 Manual tare data entry .................................................................................................................................. 11
2.3.3 Auto tare ....................................................................................................................................................... 11
2.4 Peak handling...................................................................................................................................12
2.4.1 Peak load value indication............................................................................................................................ 12
2.4.2 Peak value printout....................................................................................................................................... 12
2.4.3 Peak reset...................................................................................................................................................... 12
2.5 LED status indicators ......................................................................................................................13
2.6 Key functions....................................................................................................................................14
2.7 Switch................................................................................................................................................15
2.8 Self diagnostic...................................................................................................................................16
2.8.1 Configuration memory integrity check......................................................................................................... 16
2.8.2 Configuration parameter integrity check...................................................................................................... 17
2.9 Digital input......................................................................................................................................18
2.10 Output relay operation....................................................................................................................20
2.10.1 Relay operation in Set point mode............................................................................................................ 20
2.10.2 Relay operation in Batch mode................................................................................................................. 21
2.11 Batch mode.......................................................................................................................................23
2.11.1 Load batch cycle....................................................................................................................................... 24
2.11.2 Unload batch cycle ................................................................................................................................... 27
2.12 Dosed material totalizer...................................................................................................................29
2.12.1 Totalizer display ....................................................................................................................................... 29
2.12.2 Totalizer report ......................................................................................................................................... 30
2.13 Batch report......................................................................................................................................31
2.13.1 Load batch report...................................................................................................................................... 31
2.13.2 Unload batch report .................................................................................................................................. 31
2.14 SERIAL INTERFACE MANAGEMENT.....................................................................................32
2.14.1 Primary serial interface............................................................................................................................. 32
2.14.2 Multidrop networks .................................................................................................................................. 33
2.14.3 Continuous modality................................................................................................................................. 33
2.14.4 Bi-directional modality with ADOS protocol........................................................................................... 33
2.14.5 Print On Request modality........................................................................................................................ 35
2.14.6 MODBUS protocol................................................................................................................................... 36
2.14.7 Auxiliary serial interface .......................................................................................................................... 43
2.15 ANALOG OUTPUT MANAGEMENT .........................................................................................44
2.15.1 Analog signal adjustment.......................................................................................................................... 44
3. INSTALLATION.................................................................................................................................45
3.1 Material receiving............................................................................................................................45
3.2 Instrument mounting.......................................................................................................................45
3.3 Connections ......................................................................................................................................46
3.3.1 Wiring the instrument to the protective earthing system.............................................................................. 47

ADOS S.R.L. Buccinasco (MI)
417-MTA200I1 Rev. 9 Page 3 of 77
3.3.2 Power supply connection.............................................................................................................................. 47
3.3.3 Load cell connection..................................................................................................................................... 48
3.3.4 Digital input connection ............................................................................................................................... 49
3.3.5 Relay output connection ............................................................................................................................... 50
3.3.6 Primary serial port connection...................................................................................................................... 51
3.3.7 Auxiliary serial port connection ................................................................................................................... 51
3.3.8 Analog output connection (option)............................................................................................................... 52
4. MAINTENANCE.................................................................................................................................53
4.1 Preventive maintenance...................................................................................................................53
4.2 Corrective maintenance...................................................................................................................53
5. INSTRUMENT CONTROL...............................................................................................................54
5.1 Introduction......................................................................................................................................54
5.2 Control function selection ...............................................................................................................55
5.2.1 Password....................................................................................................................................................... 56
5.2.2 Keyboard time out ........................................................................................................................................ 56
5.2.3 Keyboard disable function............................................................................................................................ 56
5.3 Operating parameter configuration...............................................................................................57
5.3.1 Operating parameter selection...................................................................................................................... 57
5.3.2 Modifying the value of the operating parameters......................................................................................... 58
5.3.3 Graduation .................................................................................................................................................... 59
5.3.4 Resolution..................................................................................................................................................... 59
5.3.5 Decimal point................................................................................................................................................ 59
5.3.6 Averages....................................................................................................................................................... 60
5.3.7 Language selection ....................................................................................................................................... 60
5.3.8 Opening on AZM.......................................................................................................................................... 60
5.3.9 Motion band.................................................................................................................................................. 60
5.3.10 Zero tracking limit.................................................................................................................................... 61
5.3.11 Keyboard disable...................................................................................................................................... 61
5.3.12 Operating Mode........................................................................................................................................ 61
5.3.13 Baud rate................................................................................................................................................... 62
5.3.14 Primary serial port .................................................................................................................................... 62
5.3.15 Address on RS485 .................................................................................................................................... 62
5.3.16 Digital input function................................................................................................................................ 63
5.3.17 Relay function........................................................................................................................................... 63
5.3.18 Relay threshold......................................................................................................................................... 64
5.3.19 Dead Band ................................................................................................................................................ 64
5.3.20 D/A converter function............................................................................................................................. 65
5.3.21 D/A Zero................................................................................................................................................... 65
5.3.22 D/A Full Scale .......................................................................................................................................... 65
5.4 Batch parameter configuration.......................................................................................................66
5.4.1 Zero band...................................................................................................................................................... 66
5.4.2 Maximum balance load................................................................................................................................. 66
5.4.3 Stabilization time.......................................................................................................................................... 66
5.4.4 Wait time ...................................................................................................................................................... 66
5.4.5 Totalization coefficient................................................................................................................................. 66
5.4.6 Set point........................................................................................................................................................ 67
5.4.7 Slow.............................................................................................................................................................. 67
5.4.8 Fly................................................................................................................................................................. 67
5.4.9 Tolerance ...................................................................................................................................................... 67
5.5 Calibration........................................................................................................................................68
5.5.1 Zero calibration............................................................................................................................................. 69
5.5.2 Span calibration............................................................................................................................................ 70
5.6 Date and time set up.........................................................................................................................71
5.7 Test....................................................................................................................................................72
5.7.1 Load cell test................................................................................................................................................. 72
5.8 System Initialization ........................................................................................................................74
5.8.1 Switch controlled initialization..................................................................................................................... 74
6. INSTRUMENT CONFIGURATION TABLE..................................................................................75

ADOS S.R.L. Buccinasco (MI)
417-MTA200I1 Rev. 9 Page 4 of 77
6.1 General parameters .........................................................................................................................75
6.2 Batch parameters.............................................................................................................................76

ADOS S.R.L. Buccinasco (MI)
417-MTA200I1 Rev. 9 Page 5 of 77
1. INTRODUCTION
1.1 General
The A200E instrument is a microprocessor based weight amplifier and indicator.
When fitted with SW release 1.53e it can be configured to handle setpoint or simple batch control.
In set point mode the 3+8 relay operation is based on simple threshold.
In batch mode the unit can handle the charge of up to 3 components (double speed) and the
discahrge of one component (dual speed).
In set point mode the unit has added the load peak function (gross weight)
It was designed to connected to a maximum of 8 load cells (350 Ωbridge), connected in parallel.
The keyboard can be used to carry out all the programming, configuration and calibration functions.
A series of display messages guides the operator through all the phases.
A series of options sets up the instrument for the main functions related to electronic weighing.
1.2 Versions/options
A200EXXS
Type of power supply (1-2-3-4-5)
Version with analog output 4-20 mA (A) - 0-10V (V)
Version set up for management: Threshold (S) Batch (D)
Code Power supply
1 115 Vac
2 230 Vac*
3 24 Vac
4 24 Vdc
5 12 Vdc
* Versione standard - * Standard version
SAMPLE ORDER
A200E wired for 230 Vac operation and set up with analog output 4-20 mA option and batch:
A 2 0 0 E 2 A D
1.3 Documentation
This technical manual is relevant to the threshold version of the instrument.
The manual relevant to the Batch version of the instrument is 352-MTA200E4.
The manual relevant to the continuos belt weighing version is 553-MTA200BE.
The manual relevant to the L:I.W. weighing version is 554-MTA200LE.

ADOS S.R.L. Buccinasco (MI)
417-MTA200I1 Rev. 9 Page 6 of 77
1.4 Equipment marking description
A200E is marked with symbols compliant with European Standard EN61010-1 (April 1993).
SYMBOL DESCRIPTION
∼
Alternating current
Protective conductor terminal
Earth (ground) terminal
Caution (refer to accompanying
documents)
Caution, risk of electric shock

ADOS S.R.L. Buccinasco (MI)
417-MTA200I1 Rev. 9 Page 7 of 77
1.5 Technical data
Power supply 230 Vac 50/60 Hz (standard version)-15%.+10%
(see 1.2 for others power supply versions)
Consumption 10VA (15 VA MAX.)
Fuse 230 Vac: 125 mAT
120 Vac: 250 mAT
Operating temperature from - 10 °C to + 40 °C
Storage temperature from - 40 °C to + 70 °C
Relative humidity 95% non-condensing
Load cell power supply 8 Vdc (short-circuit proof)
Maximum current 190 mA ( 8 x 350 Ωload cells in parallel)
Electric connection 4 wires (standard), 6 wires with sense on request
Analog signal 0.5 - 2.5mV/V
Resolution 0.8 µV/Grad
Conversion speed 55 conversion/sec
Graduation 1000-2000-4000-5000-10000-20000
Resolution 1-2-5-10-20-50
Off scale limit (UL/OL) 20% of full scale load
Display Primary: five (5) digits LED
Auxiliary: eight (8) alphanumeric characters
Polarity sign -
Keyboard sixteen (16) keys in matrix 8x2
Status indicators eight (8) LED indicators
Decimal point user defined: 0 - 0.0 - 0.00 - 0.000 - 0.0000
Zero tracking user defined (0.5 - 1 - 2 - 5 - 10 div/s)
AZM aperture user defined (OFF - 1.9% - 100% of F.S.)
Motion band user defined (OFF - 0.5 - 1 - 2 - 5- 10- 20 div)
Serial outputs main output RS232 or RS485 Half-duplex, aux
output RS232, Tx only
Digital inputs three (3) optoinsulated digital inputs (12/24 dc)
Digital outputs three (3) base relay outputs and eight (8) extra
Contact rating 0.5 A @ 24 Vdc
Housing Anodized aluminum construction for assembly on
board front panel (Standard DIN 43700)
Dimensions 96 x 192 x 140
Drilling 91 x 188
Weight 1.5 Kg
Mounting Front panel mounting with two holding brackets
mounted on the sides of the enclosure
Analog output 0-10V (option) Voltage output 0-10V, 16 bit resolution,
min. 10 KΩoptoinsulated 1000 V
Analog output 4-20 mA (option) Current output 4-20 mA, 16 bit resolution,
500 Ωmax. optoinsulated 1000 V

ADOS S.R.L. Buccinasco (MI)
417-MTA200I1 Rev. 9 Page 8 of 77
2. INSTRUMENT OPERATIONS
2.1 Turning on the instrument
When the instrument is turned on, the primary display indicates the following:
−−−−−
and the auxiliary display indicates the following, at intervals of about two seconds:
A D O S S r L
A 2 0 0 E
R e v 1 . 5 4 (Revision of the installed software)
After this phase, the instrument is immediately operative.
B
C
D
E
F
A
SW1
TP3
TP2
BT1
ZS1
U8
Figure 1

ADOS S.R.L. Buccinasco (MI)
417-MTA200I1 Rev. 9 Page 9 of 77
2.1.1 Load cell signal averaging
Starting with SW rev 1.50 a new load cell signal averaging method have been introduced (FIR
filters). This method is based upon Digital Signal Processing (DSP) methodologies and is useful
when the load cell signal has a large amount of harmonics (due for instance to mixers, agitators or
similar).
In configuration phase user can select one of three classic ( mobile average) and five DSP filters.
First type of filter has a fester response time but are less efficient against disturbance and can be
used when fast changing loads have to be detected.
Second type of filter are very efficient against noise and disturbances (having a higher filter effect)
but have of course a higher response time.
In both cases higher filter coefficient corresponds to higher filtering effect and higher response
time.
As example the following graphic shows the answer to a step changing load signal as function of
different filters.
As can be noticed FIR 1 has a response time of about 0.2 seconds and FIR 5 has a response time of
about 2.5 second.
0
500000
1000000
1500000
2000000
2500000
3000000
3500000
-1,00 -0,50 0,00 0,50 1,00 1,50 2,00 2,50 3,00
Cella FIR 1-12 FIR 2-24 FIR 3-42 FIR 4-62 FIR 5-80

ADOS S.R.L. Buccinasco (MI)
417-MTA200I1 Rev. 9 Page 10 of 77
2.2 Display indication
2.2.1 Primary display
Under normal operating condition the display shows the value of weight, using the following criteria:
•leading zeroes will presented as blank
•if the value is greater then 99999 only the 5 less significant digit are displayed and the display
will blink to indicate that there is another digit, which value is 1, not displayed (please note that
during configuration is not possible to set any combination of graduation and resolution which
leads to results higher than 199999)
•the polarity “minus” (in case of negative values) is indicated in the leftmost digit
•if the negative value is composed of five digits (for example -32420), the leftmost digit will
show alternatively the “minus” and the fifth digit value.
•if the negative value is composed of six digits only the 5 less significant digit are displayed and
the display will blink to indicate that there is another digit, which value is 1, not displayed. The
leftmost digit will show alternatively the “minus” and the fifth digit value.
Indication limits are the following:
lower limit: - 20% of full scale
higher limit: 120% of full scale
if the weight is under the lower limit the following will be displayed:
−−U L −
if the weight is over the upper limit (or if the load cell signal is higher than 20 mV the following
will be displayed:
−−O L −
2.2.2 Auxiliary display
Under normal operating conditions and with the instrument in GROSS, the auxiliary display
indicates the current time, in the format hours-minutes-seconds:
0 9 : 1 1 : 5 5
Press 0on the display to indicate the current date, in the format day-month-year, for two seconds:
1 5 - 0 5 - 9 6
Under normal operating conditions and with the instrument in NET, the auxiliary display shows the
value of the TARE with two alternating messages:
T A R E 1
1 2 3 . 4
In the configuration and calibration phase, the auxiliary display is used to guide the operator in
carrying out the functions.
In batch mode the display shows the batch status.

ADOS S.R.L. Buccinasco (MI)
417-MTA200I1 Rev. 9 Page 11 of 77
2.3 Tare operations
Up to four tare values can be defined to handle the net value of material on balance.
At power on the unit operates with tara value #1.
Operator programmed tare values are maintained in non volatile memory and are available even
after a loss of power.
Automatically acquired tare values are value are lost at power down.
2.3.1 Tare selection
The procedure to select the operating tare is the following:
•set the unit in GROSS
•press the T key. The instrument shows the operating tare.
•press the T key to switch among tavailable tare
•press the E key to confirm the selected tare. The instrument goes back to operatiion in NET.
•press the C key to abort the operation
2.3.2 Manual tare data entry
The procedure to change the value of the operating tare is the following:
•set the unit in GROSS
•press the T key. The instrument shows the operating tare.
•press the T key to switch among tavailable tare
•change the Tare value using numeric keys, F key or N/G key (as explained in chapter
“Configuration”)
•press the E key to confirm changes to the selected tare. The instrument goes back to operatiion in
NET.
press the C key to abort the operation
Manually entered tare values are maintained in non volatile memory
2.3.3 Auto tare
Pressing the T key when the unit is in NET the value of the Gross weight of the load on balance is
acquired as the actual tare.

ADOS S.R.L. Buccinasco (MI)
417-MTA200I1 Rev. 9 Page 12 of 77
2.4 Peak handling
The unit continuously check the actual GROSS load value against the acquired peak load value and
if the actual value is higher the peak load value will be updated.
Peak load value is showed on auxiliary display.
2.4.1 Peak load value indication
Pressing the key 9the unit shows the value of the peak load acquired.
The value is updated continuously in case of load value increase.
2.4.2 Peak value printout
The A200 can be programmed to print the peak load value on a 24 column printer.
Printing is sent on the primary serial line if it is programmed as “DE” and can be initiated pressing
the “E” on keyboard or by closure of an external input programmed as “PRINT”.
Printout format is as follows:
18-11-99 11:09 Date and time
Peak: 5678 Kg Peak load value
---------------------- Separator
2.4.3 Peak reset
Peak value can be reset by:
•by closure of an external input programmed as “RESET”.
•by serial line with ADOS protocol (“m” command)
•by Modbus protocol (E Coil)
•Using the keyboard
To reset the peak value from keyboard the operator must press the >0< key.
The unit will prompt for confirmation:
O K ? ? blinking
And the operator can confirm pressing the “E” key.

ADOS S.R.L. Buccinasco (MI)
417-MTA200I1 Rev. 9 Page 13 of 77
2.5 LED status indicators
The indications provided by the signal LED’s located on the front panel of the instrument are
explained below:
→0←
The LED is on when the value of the weight is 0 and is stable within 1/4 of a division.
The indication is available under gross weight and net weight conditions.
G
The LED is on when the instrument displays the gross weight.
Under this condition the Tkey is not operative.
N
The LED is on when the instrument displays the net weight (gross weight minus the tare).
Pressing the Tkey in NET the instrument copies the current value of the gross weight into the tare
value, thus clearing the value of the net weight.
MOTION
The LED is on when the measurement is moving with a gradient that is greater than what is set in
the configuration.
KG
The LED is on to signal that the weight indication is in kilograms.
LB
This signal is currently not used. Lamp is always OFF.
L1
This signal is currently not used. Lamp is always OFF.
FAULT
The LED is ON to indicate that the instrument need to be calibrated (Zero or Span or both).
The LED is BLINK to indicate errors in confguration parameters.

ADOS S.R.L. Buccinasco (MI)
417-MTA200I1 Rev. 9 Page 14 of 77
2.6 Key functions
ZERO
Press this key (with the instrument in the Gross mode and the weight stable) to clear the divisions
indicated on the display within the limits set by the configuration of the “AZM limit” parameter.
G/N
Press this key to toggle between the Gross and Net condition.
T
Press this key (with the instrument in NET mode and the weight stable) the instrument will copy the
current value of the gross weight into the tare value, thus clearing the net weight value. Press this
key (with the instrument in the GROSS mode ) the instrument shows the actual tare value.
F
Press this key to enter the configuration modality.
E
Press this key to perform a print request on the primary serial port. The request takes effect only if
the serial port is configured for “print on request”.
1-2-3-4-5-6-7-8-9
If the unit is configured for SET POINT operation, pressing these keys the operator can edit the
values of thresholds 1 to 9 without passing from the configuration mode.
Note: if the serial line is active, the status flag still reports the “configuration” indication.
1-2-3-4
If the unit is configured for NET operation, pressing these keys the operator can edit the values of
parameters relevant to charge components 1,2 and 3 or to discharge component without passing
from the configuration mode.
Note: if the serial line is active, the status flag still reports the “configuration” indication.
6
If the unit is configured for NET operation, pressing these keys the operator will enter the
production totalizer display
5-7-8
If the unit is configured for NET operation these keys have no meaning.
0
Date display. Press this key (with the unit in GROSS) to display the current date, expressed in day-
month-year, for 2 seconds.

ADOS S.R.L. Buccinasco (MI)
417-MTA200I1 Rev. 9 Page 15 of 77
2.7 Switch
The instrument is equipped with a DIP switch bank having the following functions:
Position Function Normal State
SW1-1 Initialization of configuration parameter memory
Can be used as an alternative to the normal init procedure.
See “Initialization” paragraph for operation details.
OFF
SW1-2 Not used OFF

ADOS S.R.L. Buccinasco (MI)
417-MTA200I1 Rev. 9 Page 16 of 77
2.8 Self diagnostic
A200E has a number of built-in self diagnostic features intended to improve the overall operating
safety.
Generally speaking, when a fault condition is detected, the instrument is driven to a safety condition
deenergizing alarm relays.
Display indications are provided to help in fault finding.
2.8.1 Configuration memory integrity check
Check is carried out at power on.
If the configuration memory is found defective, the power on sequence will not be completed, all
relays are driven to alarm condition (deenergized), the analog output is cleared and the serial line is
deactivated.
A forced reconfiguration to default is then performed and the primary display shows the following
message:
I N I T Blinking
The transmitter stays in this condition as long as a key is pressed by operator to acknowledge the
situation.
The instrument must be reconfigured and recalibrated.

ADOS S.R.L. Buccinasco (MI)
417-MTA200I1 Rev. 9 Page 17 of 77
2.8.2 Configuration parameter integrity check
Check is carried out every operating cycle.
If a configuration parameter is found defective, the message “ER XX” will be reported on display
for half a second every two seconds, where XX is the code of the wrong parameter, according to the
following table:
CODE Meaning Effect on transmitter Resolution
ER 01 Error in the
CALIBRATION
parameters
The ZERO funcion is disabled,
relays are deenergized and analog
output is forced to error condition.
Instrument must be
recalibrated
ER 02 Error in the DIVIS and
SENS parameters The ZERO funcion is disabled,
relays are deenergized and analog
output is forced to error condition.
Verify and reconfigure
defective parameters
ER 03 Error in the DP, AVER,
MOTION, AZM, Z TRK
parameters
The ZERO funcion is disabled.. Verify and reconfigure
defective parameters
ER 04 Error in the Analog
output parameters The analog output is zeroed Verify and reconfigure
defective parameters
ER 05 Error in BAUD - SER P
- AD485 parameters Transmitter stays in operation.
Probably malfunctions on serial line
operation.
Verify and reconfigure
defective parameters
ER 06 Error in the IN1 - IN2 -
IN3 parameters No effect. Verify and reconfigure
defective parameters
ER 07 Error in the RELAY
parameters Relays are deenergized. Verify and reconfigure
defective parameters
ER 08 Error in the BATCH
parameters Relays are deenergized. Verify and reconfigure
defective parameters
ER 09 Error in the TARE
parameters The ZERO funcion is disabled,
relays are deenergized.. Verify and reconfigure
defective parameters

ADOS S.R.L. Buccinasco (MI)
417-MTA200I1 Rev. 9 Page 18 of 77
2.9 Digital input
Unit is equipped with three user programmable digital inputs. Inputs are driven by voltage free
contacts.
Each input can be configured in one of the following functions:
OFF
Input is non used.
ZERO
The closure of the input contact can clear the value of gross weight if the value is lower than the the
value defined as “MAX AZM”.
Command is accepted both in GROSS or NET and also if the load value is non stable (MOTION is
On).
GROSS/NET
On closure of the input contact the instruments switches the GROSS / NET status.
TARE
On closure of the input contact the actual value of Gross weight is acquired as Tare value.
Command is accepted both in GROSS or NET and also if the load value is non stable (MOTION
On).
START CHARGE / CHARGE ALARM ACKNOWLEDGE
This function is effective only if the unit is operating in BATCH MODE.
If the batch is not started the closure of the contact will start the load of the first component.
If the batch is in progress and there are alarms (out of zero, time out or aout of tolerance) or the unit
is paused, the closure of the contact will resume the batch sequence.
If the batch is in progress and there are no alarms the closure of the contact will have no effect.
START DISCHARGE / DISCHARGE ALARM ACKNOWLEDGE
This function is effective only if the unit is operating in BATCH MODE.
If the unload is not started the closure of the contact will start the product unload.
If the unload is in progress and there are alarms (out of zero, time out or aout of tolerance) or the
unit is paused, the closure of the contact will resume the batch sequence.
If the batch is in progress and there are no alarms the closure of the contact will have no effect.

ADOS S.R.L. Buccinasco (MI)
417-MTA200I1 Rev. 9 Page 19 of 77
PAUSE / ABORT
This function is effective only if the unit is operating in BATCH MODE.
If the load or unload sequence is not started the closure of the contact will have no effect.
If the load or unload sequence is in progress the closure of the contact will force the unit to PAUSE
deenergizing the output relays.
If the batch is paused closure of the contact will ABORT the batch sequence.
PRINT
If the primary serial line is configured for “Print on demand” the closing of input contact will
generate a printout.
RESET PEAK VALUE
The closing of input contact will generate a peak reset
PRINT PEAK VALUE
If the primary serial line is configured for “Print on demand” the closing of input contact will
generate a printout of the peak value.
WEIGHTACQUISITION
This mode is active only if the instrument is configured to work in threshold mode, the input
closing allows to acquire the gross weight value (if weight is stable or anyhow within 2,5 seconds
from contact closing). The value of acquired gross weight is stored in the MODBUS 10 and 11
register

ADOS S.R.L. Buccinasco (MI)
417-MTA200I1 Rev. 9 Page 20 of 77
2.10 Output relay operation
The instrument can be programmed to drive the output relays in two difefrent ways:
•SET POINT MODE: relays are operated based upon the actual value of load on balance and the
programmed operating mode of each relay.
•BATCH MODE: relays are driven by unit to perform an automatic load or unload sequence or
one or mora components with one oer two speeds.
2.10.1 Relay operation in Set point mode
The base instrument is equipped with three relays that can be configured as required. The
instrument can be expanded with eight additional relays that also can be configured as required.
A voltage-free normally open (NO) contact is available for each relay.
The action of the relay depends on the weight condition (gross or net) defined in the configuration
phase independently from what is indicated on the display. Therefore, the user can switch the
display selection as required without accidentally enabling the thresholds.
The relay returns to “normal” conditions when the weight value drops below the value calculated as
the sum of the threshold value and the programmed dead band value.
Each relay can be configured to operate in one of the following modes:
Off
The relay is permanently disabled.
Closing on Gross
The relay is de-energized (and the output contact opened) for all the gross weight values lower than
the threshold set in the configuration. The relay is energized (and the output contact closed) for all
the gross weight values greater than or equal to the threshold set in the configuration.
Closing on Net upon Loading
The relay is de-energized (and the output contact opened) for all the gross net values lower than the
threshold set in the configuration. The relay is energized (and the output contact closed) for all the
net weight values greater than or equal to the threshold set in the configuration.
Closing on Net upon Unloading
The relay is de-energized (and the output contact opened) for all the negative net weight values
lower than (in terms of absolute value) the threshold set in the configuration. The relay is energized
(and the output contact closed) for all the negative net weight values greater than or equal to (in
terms of absolute value) the threshold set in the configuration.
Example: if the threshold set is 1250, the relay is de-energized for positive values and for the
negative values from -1 to -1249. The relay is energized for values ranging between -1250 and -F.S.
Other manuals for A200E
1
Table of contents
Other Ados Accessories manuals
Popular Accessories manuals by other brands

Leviton
Leviton enocean alliance WAC1x-M9N Installation

EXIT Toys
EXIT Toys Supreme user manual
Netio
Netio PowerBOX 3PE Quick installation guide

AVCOM
AVCOM Galaxy Installation & operation manual

Honeywell Home
Honeywell Home HS3PIR1 Series quick start guide

HYTROL
HYTROL ProSort 100 Elite Operating, installation and maintenance manual

JXCT
JXCT JXBS-3001-TH-RS user manual
Servodan
Servodan 54-275 Fitting and operating instructions
Siko
Siko MSAC501 Original Installation Instructions

Seifert
Seifert SlimLine Pro KG 8506 instruction manual

Fike
Fike FIK-CO351 Installation and maintenance instructions

Vega
Vega VEGAPULS 67 operating instructions
