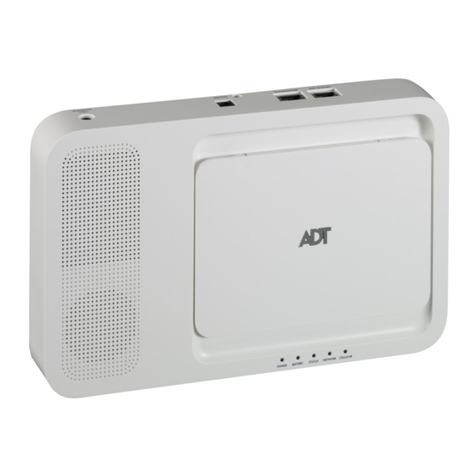
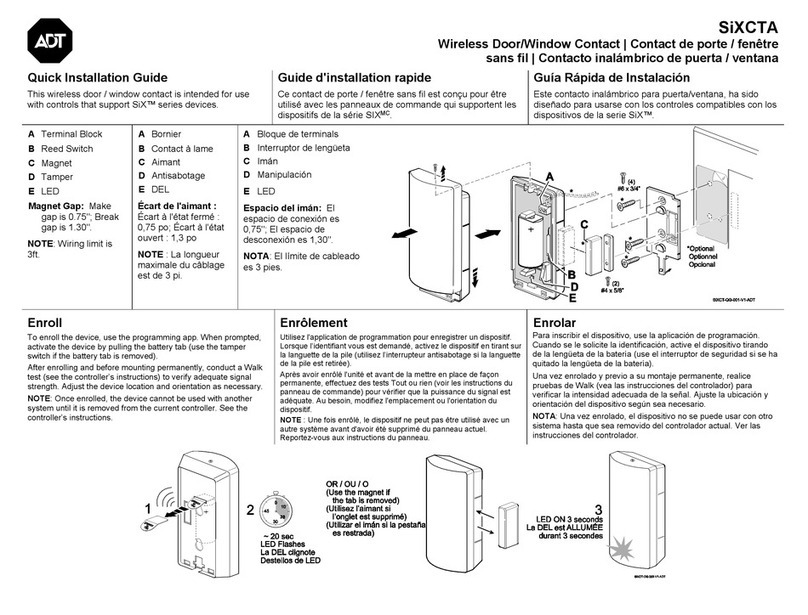
ADT Door and Window Detector User manual

ADT Door and
Window Detector
Setup Guide
PRINTER’S INSTRUCTIONS:
MANUAL,QUICK START,NOVA,DW - NORTEK P/N: 10015708C - INK: BLACK PLUS PMS 286C - MATERIAL: 105G COATED PAPER - SIZE: 105MM X 105MM -
SCALE: 1-1 - BINDING: TRIM, FOLD AND SADDLE STITCHED - PAGE 1 OF 16

Take the ADT Door and Window Detector to where
you intend to mount it after setup.
1. 2.
Setup
A
• Make sure you are within 350 feet from the
ADT Security Hub. (Exact range depends on
your home’s construction, the environment, the
position of the ADT Security Hub, and the position
and number of other connected devices.)
• Make sure that your ADT Security Hub is disarmed
before connecting a new device.
• Make sure that you only setup one new device
at a time.
3.
• Do not remove the battery tab until you are ready
to set up the detector.

Take the ADT Door and Window Detector to where
you intend to mount it after setup.
2. Use the SmartThings app on your smartphone
to select the “My Home” tab. Select "Things", and
then “Add a Thing".
Setup
Setup
• Make sure you are within 350 feet from the
ADT Security Hub. (Exact range depends on
your home’s construction, the environment, the
position of the ADT Security Hub, and the position
and number of other connected devices.)
• Make sure that your ADT Security Hub is disarmed
before connecting a new device.
• Make sure that you only setup one new device
at a time.
Use the SmartThings app to scan the QR code on the
back of the detector and then follow the on-screen
instructions to complete setup.
3.
Detector (Back)
QR Code
• Do not remove the battery tab until you are ready
to set up the detector.

5.
Setup
Remove the QR code from the back of the detector
and attach it inside the ADT Security Hub User Guide
for future reference.
4. Remove the tab on the detector marked “Pull This
Tab”.
Battery Tab
B
Make sure that the alignment marks on both parts of the
detector are aligned and facing each other.

Remove the QR code from the back of the detector
and attach it inside the ADT Security Hub User Guide
for future reference.
Remove the tab on the detector marked “Pull This
Tab”.
Placement
B
Make sure that the alignment marks on both parts of the
detector are aligned and facing each other.
Detector
Magnet
Alignment Marks

Placement on doors:
Door Frame
Detector On Door Frame
Magnet Mounted On Door
Placement

Placement
Detector On Door Frame
Placement on windows:
Single-Hung Windows Double-Hung Windows
Detector On Window Sill

Mounting
C
1. Use the pre-applied adhesive tape when attaching
both parts of the detector to your door or window.
• Make sure that all surfaces are clean and dry.
• Make sure to place both parts of the detector
correctly as the adhesive tape will be difcult
to remove.
• Place the detector at the top of door or window
frames to avoid accidental damage.
2.

Mounting
Use the pre-applied adhesive tape when attaching
both parts of the detector to your door or window.
• Make sure that all surfaces are clean and dry.
• Make sure to place both parts of the detector
correctly as the adhesive tape will be difcult
to remove.
• Place the detector at the top of door or window
frames to avoid accidental damage.
Mounting
2. Place one part of the detector on your door or
window, and the other part on the frame of the
door or window.
• Make sure that both parts of the detector are less
than 0.5 inches apart when the door or window
is closed. Use optional spacer if required.
• For double doors, attach the smaller part of the
detector to the most-used door and the larger
part to the least-used door.

1. Insert spacer pin into magnet base slot.
Mounting
Magnet
Spacer
2. Slide spacer forward to lock it onto the magnet.
Magnet
Spacer
You can test your ADT Door and Window Detector by
performing a Walk Test on the ADT Security Hub, opening
and closing the door or window where it's been installed,
and then checking its status on the ADT Security Hub
touchscreen. See the ADT Security Hub User Guide for
more details.
D
Note: If you have an ADT professional monitoring service
activated, additional testing is required whenever you
connect a new device. Follow the on-screen instructions
in the SmartThings app to complete testing.
If it's difcult to align both parts of the detector
properly, you may want to adjust the height of the
magnet by squeezing the tabs on the side or by adding
the supplied spacer:

Insert spacer pin into magnet base slot.
Slide spacer forward to lock it onto the magnet.
You can test your ADT Door and Window Detector by
performing a Walk Test on the ADT Security Hub, opening
and closing the door or window where it's been installed,
and then checking its status on the ADT Security Hub
touchscreen. See the ADT Security Hub User Guide for
more details.
DTesting
Note: If you have an ADT professional monitoring service
activated, additional testing is required whenever you
connect a new device. Follow the on-screen instructions
in the SmartThings app to complete testing.
If it's difcult to align both parts of the detector
properly, you may want to adjust the height of the
magnet by squeezing the tabs on the side or by adding
the supplied spacer:

F
There are many ways you can use an ADT Door and
Window Detector in your home:
The ADT Door and Window Detector monitors whether
doors and windows are open or closed. When the two
parts of the detector move away from each other, a
notication is sent wirelessly to your ADT Security Hub.
•
Put one on your door or window and set it to initiate
optional ADT professional monitoring services if an
intrusion is detected in your home (additional fees
apply).
Your ADT Security Hub can then send an alert to your
smartphone, automate connected devices, or initiate
optional ADT professional monitoring services
(additional fees apply).
Troubleshooting
Press and release the button on the front of the
detector twice.
Press and hold the button. The red LED will begin
to blink quickly, and after a short period of time will
stay on.
Release the button and after 5 seconds the red LED
will begin to blink slowly.
Use the SmartThings app to complete setup.
If the detector did not pair successfully with the ADT
Security Hub, follow these instructions to reset it:
1.
2.
3.
4.
E
If you're still having trouble connecting the ADT Door
and Window Detector, please visit SmartThings.com/
Support-ADT for assistance.

FSuggestions
There are many ways you can use an ADT Door and
Window Detector in your home:
The ADT Door and Window Detector monitors whether
doors and windows are open or closed. When the two
parts of the detector move away from each other, a
notication is sent wirelessly to your ADT Security Hub.
• Put one on your door or window and set it to initiate
optional ADT professional monitoring services if an
intrusion is detected in your home (additional fees
apply).
Your ADT Security Hub can then send an alert to your
smartphone, automate connected devices, or initiate
optional ADT professional monitoring services
(additional fees apply).
Press and release the button on the front of the
detector twice.
Press and hold the button. The red LED will begin
to blink quickly, and after a short period of time will
stay on.
Release the button and after 5 seconds the red LED
will begin to blink slowly.
Use the SmartThings app to complete setup.
If the detector did not pair successfully with the ADT
Security Hub, follow these instructions to reset it:
If you're still having trouble connecting the ADT Door
and Window Detector, please visit SmartThings.com/
Support-ADT for assistance.

Visit SmartThings.com/Welcome for more ideas, tips,
and special offers.
• Put one on your back door and set it to activate
a connected lock when it’s been closed for a few
minutes.
Note: To ensure proper functioning, all connected
devices must be congured correctly.
Suggestions
• Put one on your front door and set it to turn on
connected lights when you arrive home in the
evening.
• Put one on your front door and set it to send you
a message if it’s left open for too long.
• Put one on your door or window and set it to send
you a message if they’re left open at night.
SmartThings works with a wide range of connected
devices, including lights, cameras, locks, thermostats,
and sensors. It also works with the Google Assistant
and Amazon Alexa so you can control your smart home
with voice commands.
Look for the Works with SmartThings label next time
you’re buying a connected device for your home, or visit
SmartThings.com to see the full list of compatible
devices.
G

Visit SmartThings.com/Welcome for more ideas, tips,
and special offers.
• Put one on your back door and set it to activate
a connected lock when it’s been closed for a few
minutes.
Note: To ensure proper functioning, all connected
devices must be congured correctly.
• Put one on your front door and set it to turn on
connected lights when you arrive home in the
evening.
• Put one on your front door and set it to send you
a message if it’s left open for too long.
• Put one on your door or window and set it to send
you a message if they’re left open at night.
SmartThings works with a wide range of connected
devices, including lights, cameras, locks, thermostats,
and sensors. It also works with the Google Assistant
and Amazon Alexa so you can control your smart home
with voice commands.
Look for the Works with SmartThings label next time
you’re buying a connected device for your home, or visit
SmartThings.com to see the full list of compatible
devices.
Works With SmartThings
G

SmartThings, Inc., 665 Clyde Ave, Mountain View, CA 94043, USA. Information in this document
is subject to change without notice. Copyright 2017 SmartThings, Inc. All rights reserved.
ADT and the ADT logo are marks and/or registered marks of ADT. Unauthorized use is strictly
prohibited. Revised 06/17.
P/N 10015708C
Table of contents
Other ADT Security Sensor manuals
Popular Security Sensor manuals by other brands

ASO Safety Solutions
ASO Safety Solutions GE F-series manual

Extech Instruments
Extech Instruments DV690 user manual

DSG
DSG DG-50 installation instructions

Jaycar Electronics
Jaycar Electronics LA-5044 Installation and operating instructions

TRIGA
TRIGA TR-PC2RL Installation and maintenance instructions

Microlink
Microlink 9448 manual