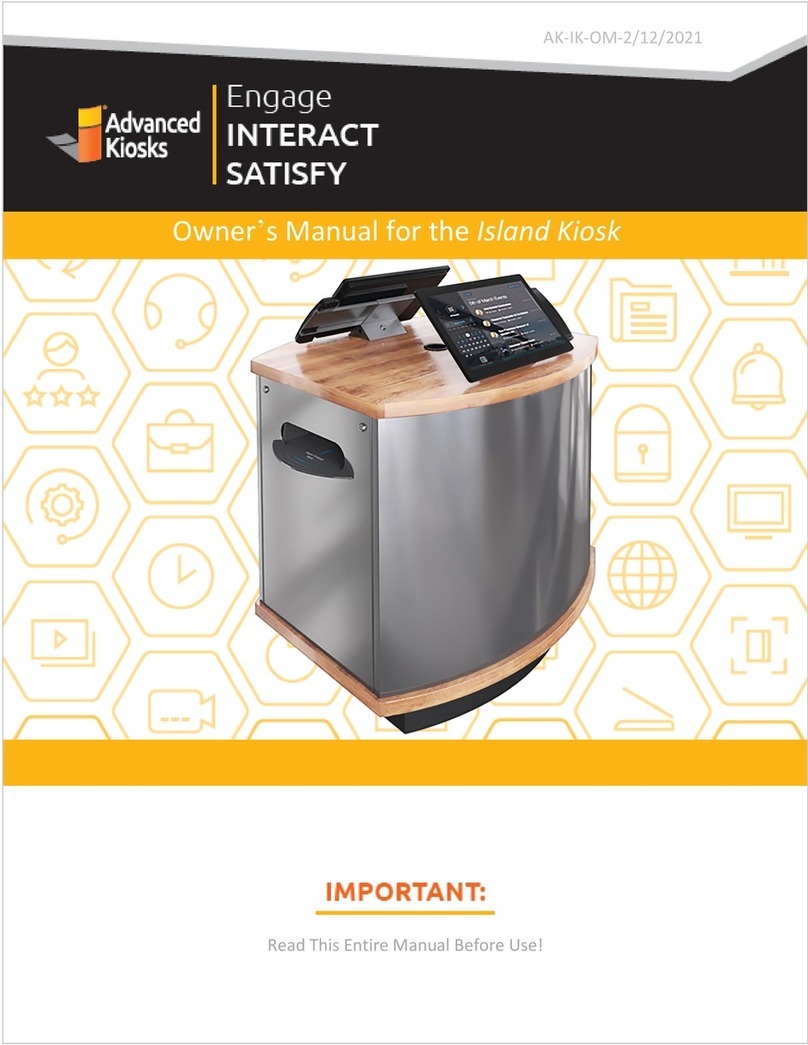
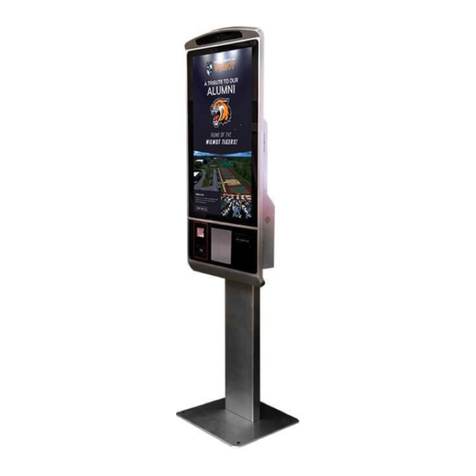
Advanced Kiosks Free Standing Kiosk User manual

Important:
Read this whole manual
before assembling
Owners Manual for
Free Standing Kiosk with
WiFi, Mag Strip Reader,
VIOP, Printer and
Keyboard options.
AK-FSK-OM-09/04/15
Engage Interact Satisfy

9/04/2015
Free Standing Kiosk Assembly and Operation Instructions
www.advancedkiosks.com
2
Table of Contents
INTRODUCTION........................................................................................................................................ 3
PRODUCT DESCRIPTION.............................................................................................................................. 3
PRECAUTIONS............................................................................................................................................. 3
OUR SUPPORT............................................................................................................................................. 4
GETTING STARTED.................................................................................................................................. 5
INSPECT BOXES .......................................................................................................................................... 5
UNPACKING THE KIOSK.............................................................................................................................. 5
INSTALLATION ......................................................................................................................................... 7
ASSEMBLING THE KIOSK ............................................................................................................................ 7
Installing the Computer ........................................................................................................................ 7
Additional USB Ports............................................................................................................................ 8
INSTALLING THE KIOSK.............................................................................................................................. 9
Location................................................................................................................................................ 9
Securing the Kiosk to the Floor ............................................................................................................ 9
Securing the Kiosk to a Wall............................................................................................................... 10
INSTALLING OPTIONAL EQUIPMENT......................................................................................................... 12
Label Printer....................................................................................................................................... 12
Receipt Printer.................................................................................................................................... 13
Bar Code Reader................................................................................................................................. 14
External Keyboard Installation........................................................................................................... 16
SETUP AND OPERATION ...................................................................................................................... 18
BASIC SETUP ............................................................................................................................................ 18
Before Powering On the Kiosk............................................................................................................ 18
Startup................................................................................................................................................. 19
Back Up Your Information.................................................................................................................. 20
Adjusting Speaker Volume.................................................................................................................. 20
SPECIFICATIONS.................................................................................................................................... 21
COMPUTER ............................................................................................................................................... 21
Mini-ITX Main board.......................................................................................................................... 21
Power Requirements........................................................................................................................... 22
General Dimensional Information...................................................................................................... 22
Equipment Manuals............................................................................................................................ 23
SOLVING PROBLEMS................................................................................................................................. 24
Troubleshooting Tips.......................................................................................................................... 24
MAINTENANCE OF KIOSK................................................................................................................... 25
CLEANING AND MAINTENANCE................................................................................................................ 25
Touch Screen....................................................................................................................................... 25
Stainless Steel Cleaning and Maintenance ......................................................................................... 25
Painted Enclosure Cleaning and Maintenance................................................................................... 25
WARRANTY.............................................................................................................................................. 26
POLICY ..................................................................................................................................................... 26
Limited Warranty................................................................................................................................ 26
Returned Item...................................................................................................................................... 26
Shipping.............................................................................................................................................. 26

9/04/2015
Free Standing Kiosk Assembly and Operation Instructions
www.advancedkiosks.com
3
Introduction
Product Description
The Free Standing Kiosk’s features include a 19" LCD touch screen monitor, amplified
stereo speakers, Wi-Fi and an all steel enclosure for sturdy and trouble-free use. With
options such as wheels, credit card reader, camera, label, or receipt printers, external
keyboard, biometrics and bar code scanners, the Free Standing kiosk can be customized
to suit a wide range of needs.
The Kiosk is powered by a 1.6 GHz Dual Core Processor, 2 GB of Ram,
a 160 GB HDD, or 32 GB SSD. The Free Standing Kiosk operates Windows XP
Professional or Windows 7.
Precautions
Do not assemble the kiosk until all the directions have
been read and understood.
Do not plug in the power until all the directions have been read and the kiosk is
fully assembled.
Do not use kiosk with an extension cord that does not have grounding.
When moving the kiosk using the wheels never run, only walk with the kiosk in a
controlled manner. Running, or not having control of the kiosk while moving can
result in injury. The kiosk must only be moved by an adult.
The Free Standing Kiosk has been designed for indoor use only. Outdoor use to
the Free Standing kiosk may result in damage to the kiosk, or injury to persons.
If you have any questions on how to install this kiosk please call us at 603-865-
9:00 am to 5:00 pm EST

9/04/2015
Free Standing Kiosk Assembly and Operation Instructions
www.advancedkiosks.com
4
Our Support
The Free Standing Kiosk is a reasonably priced, high quality kiosk. We are happy to help
you with any problems after you have read the manuals to learn about this product.
Advanced Kiosks will support you in ownership as long as you own your kiosk, within
reason. Selling or giving it to another company or person will void any and all support
and warranty. There are a few prerequisites:
The person assembling and installing the kiosk must be familiar with setting up
computers, printers, monitors and must be able to read and follow directions.
You have to read and follow the directions in this document as well as the
directions for the touch screen monitor and the computer. These documents are
included with your equipment, or may be on the computer as a PDF. We
strongly suggest you read these documents, so that you can get the full value of
this kiosk.
The following are questions we can not answer:
oNetwork questions. This is not part of our equipment and we do
not know your network, so we can not help you here.
oVirus questions - this is also part of your network/software.
oElectrical wiring of your building or location.
Taxes
All products from Advanced Kiosks are made and shipped from New Hampshire. New
Hampshire has no sales tax. If it is a required for anyone who is purchasing one of our
products to pay taxes to another state this is the responsibility of the person or
organization purchasing from us.

9/04/2015
Free Standing Kiosk Assembly and Operation Instructions
www.advancedkiosks.com
5
Getting Started
Inspect Boxes
Great care has been taken to ensure that your kiosk is packaged well. Before you sign
any paperwork from the shipping company, inspect all boxes to ensure that none of your
boxes have been damaged. If there is damage to any box call the shipping company
immediately and make a note of the damage on the acceptance paperwork when signing
for the shipment. Your kiosk has been shipped fully insured, so please keep any shipping
paperwork. If damage has occurred, it is recommended that you take pictures of the
damaged. Any damage due to shipping must be reported to Advanced Kiosk within 48
hours after the arrival of the shipment. After this allotted time, shipping insurance is void.
Unpacking the Kiosk
The Free Standing Kiosk is always shipped on a pallet that will look like the picture
below. Remove the plastic wrap and the straps around the box.
You will then be left with the kiosk on the pallet like the picture above. Remove the box
and protective wrapping on the kiosk.

9/04/2015
Free Standing Kiosk Assembly and Operation Instructions
www.advancedkiosks.com
6
The base of the kiosk is secured to the pallet with 2 Phillips head screws. These screws
must be removed before the kiosk can be taken off of the pallet.
You will find the keys to the kiosk loosely cable tied to the power cord. Carefully
remove the cable tie. The hardware and software are contained in a bag, inside the box
tapped to the front of the kiosk. Keep the keys in a safe place. Note: Advanced Kiosks
does not record key numbers.
Hint: Write down the number and manufacturer that are on the key and keep it in a
safe place. If you loose your keys you will be able to call Advanced Kiosks and have
it remade.
Note: Keep the boxes and packaging material that the kiosk and computer were
shipped in. This packaging has been specially designed to handle these delicate items.
Shipping the kiosk with out proper packaging will void your warranty.

9/04/2015
Free Standing Kiosk Assembly and Operation Instructions
www.advancedkiosks.com
7
Installation
Assembling the Kiosk
The directions below are detailed for installing all the components of the kiosk and
instructions for permanent mounting. The standard kiosk comes already assembled.
Installing the Computer
Install the computer into the bottom of the kiosk. This is accomplished by opening the
bottom door. Plugging in the cables before the computer is physically inside the kiosk is
much easier. Set the computer right next to the kiosk’s opening and plug the cables in
there.
When installing the computer it is important to follow the orientation label. The fans need
to be centered and pointing up. This is required for the kiosk to cool efficiently.
The following cables should be connected for a standard Free Standing Kiosk:
Note: The USB plugs are not port specific and can be plugged into any open USB jack.
Cables to Computer Optional Equipment
Monitor – VGA or DVI Printer - USB
Speaker – USB and 3.5 mm TRS plug Camera - USB
Dual External USB – USB(x2) Keyboard - USB
Wi-Fi – USB(x2) Bar Code Scanner - USB
Power Cable Credit Card Reader - USB
Network Cable – Cat5 plug Biometrics - USB

9/04/2015
Free Standing Kiosk Assembly and Operation Instructions
www.advancedkiosks.com
8
Additional USB Ports
The standard Free Standing Kiosk requires five USB connections. If additional
peripherals (e.g. credit card reader, biometrics) are included in your kiosk you may need
to utilize the two USB ports located on the bottom (when located in kiosk) of the
computer.
Once the standard devices have been plugged in lay the computer flat. This will give you
access the front the computer. Plug in the two longer USB cords into the front USB ports
of the kiosks’ computer. Carefully place the computer into the kiosk.
*Note: If the two external USB ports located on the back of the kiosk are not needed for
daily operation, it is perfectly acceptable to leave them unplugged from the computer and
to allow additional devices to be used in those ports instead.

9/04/2015
Free Standing Kiosk Assembly and Operation Instructions
www.advancedkiosks.com
9
Installing the Kiosk
The Free Standing Kiosk can be left free standing, secured to the floor permanently or
mounted to the wall. Find a suitable location that you would like to mount the kiosk.
Location
The kiosk should not be placed in an area where a heating vent is directly venting
on the kiosk. The floor area also must be level, so that the kiosk does not wobble.
Securing the Kiosk to the Floor
There are two holes located in the back of the base for securing the kiosk to the floor, see
image below, these holes are located 17 inches apart. Place the kiosk in the location that
you want it to be mounted at, keeping enough room for people to use the kiosk and not
interrupt the flow of traffic. Use the kiosk as a template and mark the location of the
holes. Drill the holes at the marked locations sized for the hardware. Then with
appropriate hardware for your floor, bolt, or screw through the holes in the back of the
kiosk base and into the floor. Your kiosk is now secured in place.
Diagram 1, Free Standing Base

9/04/2015
Free Standing Kiosk Assembly and Operation Instructions
www.advancedkiosks.com
10
Securing the Kiosk to a Wall
In this configuration the Kiosk’s free standing base has been removed. The bottom of the
kiosk will rest on the floor and the Free Standing Wall Mount is attached to the back of
the kiosk and to the wall. Adhesive rubber feet are attached to the bottom of the kiosk -
one in each corner.
Prepare the wall to attach the Wall Bracket. The bracket has 6 holes. The holes in the
wall need to be 38 inches off the floor. These holes must be able to take a 300 lbs pull
load to securely hold the kiosk. It is recommended that the bracket be mounted into a
stud. Use the anchor chart below to help with this. If you are using a different type of
anchor make sure that that the bracket can handle a 300 lb pulling load. The bracket
side that has a 90 degree bend attaches to the wall - the other mounts to the kiosk.
FreeStanding Wall Bracket

9/04/2015
Free Standing Kiosk Assembly and Operation Instructions
www.advancedkiosks.com
11
FreeStanding Wall Mount Dimensions

9/04/2015
Free Standing Kiosk Assembly and Operation Instructions
www.advancedkiosks.com
12
Installing Optional Equipment
Label Printer
The Free Standing Kiosk’s printer option is designed to handle several different label
printers. These being the: Zebra LP2844, Zebra LP2844-Z, Brother QL-1050 and many
other models.
To install the printing hardware you first must mount the printer shelf. Insert the printer
shelf through the back of the kiosk. Secure to the shelf to the studs on the inside of the
kiosk using two wing (8-32). Then use two standard (8-32) bolts to secure the shelf to the
outside of the kiosk. See pictures below.
Top view of printer shelf Bottom View Printer shelf with
Power supply attached.
Once the printer shelf is installed, place the printer on the shelf. Before sliding the printer
forwards, pull out some of the media to make sure that the printer paper lines up with the
printer slot. The label should exit the middle of the slot. Having the labels come out too
high can interfere with tearing off the labels. Adjust the shelf up and down if needed and
then tighten screws. The cables for connection to the computer and the power supply
should be connected. Use Velcro to hold these in place. Slide the printer in place and use
the bungee cord to secure it. See picture below.
Wing Nut 2X Screws
Feed Cables In

9/04/2015
Free Standing Kiosk Assembly and Operation Instructions
www.advancedkiosks.com
13
Receipt Printer
The APS receipt printer is mounted to a plate to make servicing the printer easy. The
printer is mounted in the kiosk upside down in reference to the labels on the printer. This
makes it easy for the user to connect the power cable and the USB cables. The Printer is
held in place by 2 #8 wing nuts.

9/04/2015
Free Standing Kiosk Assembly and Operation Instructions
www.advancedkiosks.com
14
The printer takes standard Receipt Thermal Paper. Please be aware that the quality of this
paper can greatly effect your print out.
Bar Code Reader
The mounting of the barcode scanner described below applies to only the Honeywell
MS9520 Hand-held scanner. If you have another type of scanner that you have
purchased, try using industrial Velcro to hold the handle to the side of the kiosk. To
mount the MS9520 hand-held scanner, please proceed with the following steps.
You will need the following parts for each kiosk. A 3.0 inch long 8-32 pan head machine
screw, two #8 nuts and blue lock tight, the type that can be removed.
Barcode Reader holder Assembled Barcode Reader in holder
Tube is no
longer needed.

9/04/2015
Free Standing Kiosk Assembly and Operation Instructions
www.advancedkiosks.com
15
All the Parts for Bar code Scanner mount.
1. Take apart the plastic bar code reader mount that came with the bar code reader. You
will be left with the above parts: (from Left to Right) bottom, body, head, 3 inch long #8
screw (provided by AK) #8 washer, plastic washers, spacer, and washer. You need the
head piece and the two plastic washers that hold the head in the mount.
Scanner Bracket parts
2. The above picture shows how the parts need to be assembled. Using the 3 inch long
screw, put the #8 washer followed by the plastic washer (longer barrel ends toward the
washer) the scanner bracket head, the other plastic spacer (longer barrel end away from
bracket head) Spacer and fender washer.
3. The above assembly can now be screwed in to the blind threaded hole on the side of
the kiosk. The hole is only .20 deep, so thread the assembly into the desired hole and
when it bottoms out, tighten the nut to the wall of the kiosk.
4. Now tighten the other nut to keep the head from spinning. Do not over tighten.

9/04/2015
Free Standing Kiosk Assembly and Operation Instructions
www.advancedkiosks.com
16
External Keyboard Installation
The keyboard tray can be installed for temporary use or for permanent use. If the
keyboard is only going to be used occasionally we recommend the keyboard’s USB cable
come out the side of the assembly and plug into the external USB ports on the back of the
kiosk. For a permanent installation have the USB cable come out the hole in the back of
the keyboard.
Cord coming out the side of Tray. Cord coming out hole in back.
Cord coming out the side of Tray. Cord coming out hole in back.
If this is a permanent installation the knock out hole in the front of the kiosk will need to
be punched out. You will need a hammer and a metal punch, or screw driver to knock
out the plug. First locate the knock out. It is under the speaker holes, on the right side,
above the printer slot. Place some duck tape over the hole - this will keep the punch from
sliding and scratching the front of the kiosk. Place the punch on the knockout plug (make
sure you are in the center of the plug) and hit with a hammer until the plug falls out. See
pictures below.

9/04/2015
Free Standing Kiosk Assembly and Operation Instructions
www.advancedkiosks.com
17
Now the Keyboard can be assembled to the front of the kiosk. Use a hex wrench and
socket head screws to secure the keyboard to the kiosk. There are 4 holes on each side of
the keyboard. The bottom holes must be installed first, then choose which of the two top
holes are best for the angle of the keyboard you would like.

9/04/2015
Free Standing Kiosk Assembly and Operation Instructions
www.advancedkiosks.com
18
Setup and Operation
Basic Setup
The kiosk is shipped with a full, standard installation of Windows XP Professional, or
Windows 7 Professional.
Before Powering On the Kiosk
Verify that the required cables are plugged in (it’s possible for cables to become loose, or
unplugged during shipping).
Attach the included Wi-Fi antenna to the threaded connection on the back of the kiosk.
Plug the kiosk into a standard 110v wall outlet.
Note: It is possible for a power cord to exit the bottom of the kiosk and connect
directly to a floor outlet, but the kiosk MUST be secured to the floor to prevent the cord
from being damaged. See “Permanent Mounting”.
Take care that the power cord is managed in a manner, so that it will not catch someone
walking by.

9/04/2015
Free Standing Kiosk Assembly and Operation Instructions
www.advancedkiosks.com
19
Startup
Turn the computer power switch “ON”.
The first time that the monitor is used the power button on the back on the monitor needs
to be turned on. After turning the monitor on it will not need to be turned on again.
If the touch screen needs configuration (mouse doesn’t follow your finger), “Align” the
monitor by selecting this icon located on your desktop, or control panel.
A copy of this Free Standing Kiosk manual is located on your desktop.
Drivers and other product manuals are located on your computer here:
Start Menu>Documents>Kiosk Files
The Free Standing Kiosk comes standard with Wi-Fi. This hardware is installed already;
however you will need to configure the settings to connect with your network.
To setup the network, go to the Control Panel and click on the Network Connections or
Wireless Network Settings tab and follow the directions.
Power
button

9/04/2015
Free Standing Kiosk Assembly and Operation Instructions
www.advancedkiosks.com
20
Back Up Your Information
Superheroes need it, police depend on it and everyone that uses a computer should use
some form of it. Computers aren't perfect. Files become corrupt, motherboards
malfunction, electrical storms strike and CPUs call it quits taking our precious data with
them.
Advanced Kiosks cannot recover your data. If a replacement, or repaired kiosk is
required it will be shipped setup with our standard format.
Adjusting Speaker Volume
This speaker bar uses a USB connection for amplified power. If you are connecting your
own speaker system disconnect the USB and audio connector. To adjust the volume, use
the volume settings in Windows.
Table of contents
Other Advanced Kiosks Touch Terminal manuals

