AEG Birdy User manual

Birdy &
Birdy Voice
Cordless DECT phone featuring caller identification
Birdy Voice with built-in digital answering machine
Operating Guide

This device is in conformity with the Directions of the European Union:
91/263/EWG Terminal equipment for telecommunication
73/23/EWG Low voltage directions
89/336/EWG Electromagnetic compatibility
Conformity of the phone with the above-mentioned directions is guaranteed
by the CE symbol.
Box Contents:
• Phone (base + handset)
• Belt clip
• Battery (disconnected)
• Power adapter with connection cable
• Telephone line
• Operating guide, gift box
• Warranty card
Check the contents of the box and contact your retailer if you miss items.
Copyright: ITM Technology AG
All rights reserved.
No part of this manual may be reproduced in any form without written per-
mission from ITM Technology AG.
Ref. ANTH 1868-EVersion 24-11-2000

Table of Contents
1. Safety Prescriptions .....................................................................................5
2. Description ...................................................................................................6
3. Installation ....................................................................................................9
3.1 Power Supply ....................................................................................................9
3.2 Telephone Line ..................................................................................................9
3.3 Belt Clip ............................................................................................................10
3.4 Replacing the Battery ....................................................................................10
3.5 Charge Indication ..........................................................................................10
3.6 Out of Range ..................................................................................................10
3.7 Switching On/Off the Handset ......................................................................11
3.8 Subscribing a Handset to a Base Set ...........................................................11
3.9 Removing a Handset from a Base Set .........................................................12
3.10 Selecting a Base Set .......................................................................................13
4. Settings .......................................................................................................14
4.1 Language ........................................................................................................14
4.2 Selection Mode ..............................................................................................14
4.3 Programming the PIN Code ..........................................................................15
4.4 Day/Time Setting for the CLIP register ..........................................................15
4.5 Locking/Unlocking the Keypad ....................................................................16
4.6 Switching On/Off Key Click ...........................................................................17
4.7 Setting the Earpiece Volume ........................................................................17
4.8 Setting the Ring Volume of the Handset ......................................................17
4.9 Setting the Ring Melody of the Handset ......................................................18
4.10 Setting of Flash Time (R) .................................................................................19
4.11 Pause Key ........................................................................................................20
4.12 Call Barring ......................................................................................................20
4.13 Parameter Reset .............................................................................................21
4.14 Factory Reset ..................................................................................................22
5. Phone Operation .......................................................................................23
5.1 Handsfree Calling ...........................................................................................23
5.2 Handsfree Volume Adjustment .....................................................................23
5.3 Dialing a Number ...........................................................................................23
5.4 Answering Calls ...............................................................................................25
5.5 Intercom ..........................................................................................................26
5.6 Transferring a Call to Another Handset ........................................................26
5.7 Consultation and Brokering (Switch Between Calls) ..................................27
5.8 Conference Call (3-Party Call) .....................................................................27
3

5.9 Calling the Handsets From the Base Set ......................................................27
5.10 Mute .................................................................................................................28
5.11 Call Duration Display ......................................................................................28
6. Phone Book ................................................................................................29
6.1 Alphanumerical Keypad Operation ............................................................29
6.2 Entries in the Phone Book ..............................................................................29
6.3 Searching the Phone Book ............................................................................30
6.4 Editing Phone Book Entries ............................................................................30
6.5 Deleting Phone Book Entries .........................................................................31
7. Call Log (CLIP) ...........................................................................................32
7.1 Viewing the Call Log ......................................................................................32
7.2 Calling a Number From the Call Log ...........................................................32
7.3 Storing a Number From the Call Log Into the Phone Book ........................33
7.4 Deleting Records From the Call Log ............................................................33
8. Answering Machine ..................................................................................34
8.1 Handsfree Operation .....................................................................................34
8.2 Answering Machine Operation Mode .........................................................34
8.3 Switching On/Off the Answering Machine .................................................34
8.4 Selecting the Answering Mode ....................................................................35
8.5 Default Outgoing Messages .........................................................................35
8.6 Recording the Outgoing Messages .............................................................36
8.7 Playing Back Outgoing Messages (1 and 2) ...............................................37
8.8 Retrieving the Default Outgoing Messages (1 and 2) ...............................37
8.9 Automatic Answering Time ...........................................................................37
8.10 Recording a Personal Message (Memo) .....................................................39
8.11 Playing Back Received Messages and Memos ..........................................39
8.12 Deleting Messages .........................................................................................40
8.13 Memory Full .....................................................................................................40
8.14 Programming the PIN Code ..........................................................................41
8.15 Day/Time Setting ............................................................................................42
8.16 Remote Control ..............................................................................................43
8.17 Remote Control Codes ..................................................................................43
9. Menu Operation ........................................................................................45
10. Troubleshooting .........................................................................................46
11. Features ......................................................................................................47
12. Specifications .............................................................................................49
Menu Structure ..................................................................................................50
Remote Control - Short Manual .......................................................................51
4

1. Safety Prescriptions
•Please read this Operating Guide carefully and keep it at hand. Address your
questions to an expert. Reparations may only be carried out by an expert,
never open the device yourself.
•Never touch the jacks with pointed, metal or damp objects.
•Install the device on a non-slip surface, because furniture varnish and other
synthetic coatings often attack and soften the synthetic support pads of the
device. If the pads are damaged by foreign material, they can leave unde-
sirable marks on the surface of furniture. It is understood that the manufac-
turer cannot be held liable for such damage.
•Do not expose the device to the sun and do not install it in the vicinity of a
source of heat.
•Protect the device against humidity, dust, abrasive liquids and vapour.
•Do not expose the device to strong magnetic fields (electric motors, televi-
sion, video, hi-fi, domestic machines), because they can influence the sound
quality.
•Only connect the power cable of the device to the corresponding power
outlet. Do not replace the connection plugs.
•Do not lift the device holding it by the connecting cables.
•Do not use the phone in a humid environment (bathroom).
•Only clean the device with a soft, slightly humid or antistatic cloth. Do not
use detergents nor chemical substances.
•Opening the power adapter while it is still connected to the mains can be
dangerous to life !!!
5

2. Description
6
Handset
Birdy Voice
Base Set

7
Birdy & Birdy Voice
1LCD display
2Line key to pick up and hang up
the phone
3Arrow up key to scroll the call log
or the menu, to activate/deacti-
vate the speakerphone and to view
the call log
4Program key to open menus
and submenus
5Phone book key to enter
numbers into the memory
6Pause / redial key Pto insert a
pause and to redial one of the five
last numbers dialed
7Microphone
8Volume / ring key to set the
listening volume and to select the
ring volume and melody of the
handset
9Alphanumerical keypad to dial
numbers and to enter names in the
phone book
10 Mute/delete key to switch
on/off the microphone and to
delete the call log, messages and
to exit menus and submenus
11 Arrow down / Rkey to scroll the
call log or the menu and to access
info services (if available), to set the
ring melody and volume, to transfer
calls, for consultation and brokering
(switch between calls)
12 Earpiece
13 Power supply line with adaptor
14 Telephone line cord
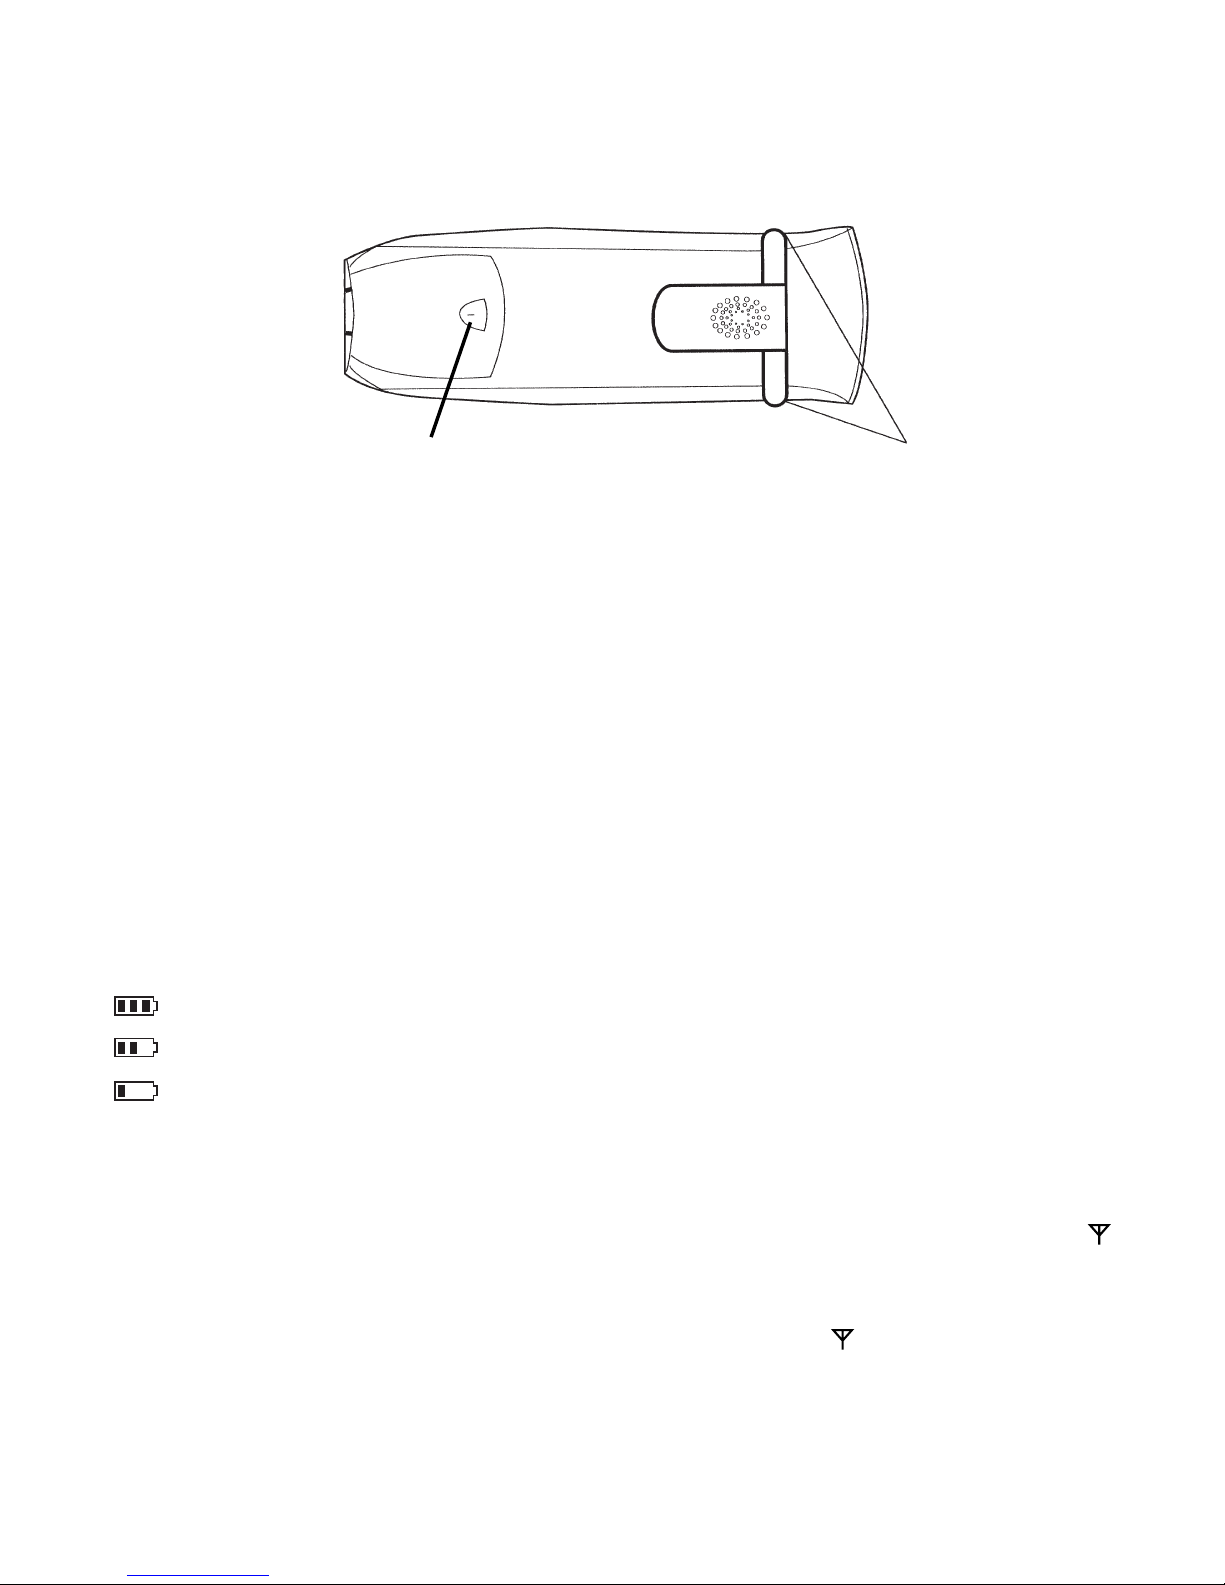
15 Battery compartment
16 Handset charge contacts
17 Telephone line jack
18 Power jack
19 Page / subscription key to call a
handset and to subscribe a handset
to a base set
20 Line / charge indicator /
21 Base charge contacts
22 Belt clip
Birdy Voice
Numerical keys in answering mode:
1To play back the previous
message, to return to the first
message and to record outgoing
message 1 (answering + record-
ing)
2To play back messages and to
pause during playback
3To go to the next message
and to record outgoing message
2 (answering only)
4To record a memo
5To play back the outgoing
message (1 or 2)
6To stop message playback
and to toggle between both
answering modes (answering +
recording / answering only)
7Voice announcement of PIN
code
8Setting and announcement
of the number of rings before
answering
9Voice announcement of
date/time of the answering
machine
Asterisk key to switch on the
answering machine
#Hash key to switch off the
answering machine
0To access programming of the
PIN code, the time, the number
of rings before answering and
the OGM

LCD Display of Birdy Voice
8
Incoming call counter
Date (day/month) of incoming call
Information line
Time (hours:minutes) of incoming call
Birdy & Birdy Voice
Message in the mailbox
On: You have got messages
Off: You have no messages
Flashing: You have new mes-
sages
Phone book active
Menu active
Battery capacity
On: Battery level display
Flashing: Low battery warning
Ring off for external calls
Contact
On: In talk & answering mode
Flashing: Incoming call ringing
Mute on
Call log
On: Calls in call log
Flashing: New calls in call log
Handsfree on
Antenna
On: communication is possible
Flashing: Out of range
Birdy Voice
Answering machine
On: Automatic answering on
Flashing: You have new mes-
sages
Number display

3. Installation
3.1 Power Supply
For maximum battery capacity, charge the battery for the first time at least 20
hours without connecting the telephone line.
1. Insert the power plug (13) in the power jack (18) in the back of the base
set.
2. Plug the adaptor (13) into a power outlet (220 V ~)
(Fig. 1).
3. Open the battery compartment (15) (Fig. a).
4. Connect the battery and install it into the compartment
(15) (Fig. b).
5. Close the battery compartment (15) (Fig. c).
6. Install the handset on the base set. The line/charge
indicator (20) / will light up.
9
Fig. a Fig. b Fig. c
Fig. 1
Install the phone on a stable and flat surface with at least 25 mm free space
for ventilation.
3.2 Telephone Line
1. Plug the telephone line cord (14) into the telephone line jack (17) in the
back of the base set (Fig. 2).
2. Plug the other end of the telephone line cord in the telephone wall outlet
(Fig. 2).
Fig. 2
Back of the base set
Power outlet
Telephone wall outlet
Power
outlet
17 18
14
13

3.3 Belt Clip
1. Slide the belt clip (22) over the back of the handset up to the notches (Fig. 3).
2. To remove the belt clip (22), lift one end from a notch.
Fig. 3
10
Notches
3.4 Replacing the Battery
1. Open the cover of the battery compartment.
2. Diconnect the battery plug.
3. Place the new battery pack into the compartment and connect the plug.
4. Close properly.
Important: Batteries are dangerous chemical waste. Used batteries cannot
be thrown away with household refuse but have to be discarded in an eco-
logical way, e.g. special battery collection.
Batteries are poisonous. Keep them away from children.
3.5 Charge Indication
100 % charged
50 % charged
+ warning tones: Weak battery
3.6 Out of Range
1. When the handset gets too far away from the base set, the handset emits
a warning tone. SEARCHING is displayed and the antenna symbol
flashes.
2. Go nearer to the base set.
3. When you hear a tone and the antenna symbol lights permanently
contact is restored.
Battery compartment
Push to open

3.7 Switching On/Off the Handset
a) Switching On the handset
1. The handset is off.
2. Press the program key (4) or any other key. SEARCHING is displayed.
3. The handset restores contact with its base and is on again, if 00/00 MSG of
HS1 BS1 is displayed.
b) Switching Off the handset
1. The handset is on.
2. Press the program key (4).
3. Press the arrow down (11) or arrow up (3) key until POWER OFF is dis-
played.
4. Press the program key (4).
5. The handset is off, you can no longer dial numbers nor receive calls.
With Birdy Voice the answering machine remains activated even if the hand-
set is turned off!
3.8 Subscribing a Handset to a Base Set
To a BIRDY base set 5 handsets can be subscribed. You can also subscribe the
BIRDY handset to another GAP compatible DECT base set. The RFPI of the base
set is the universal code for all GAP compatible DECT base sets.
a) Subscribing the Handset to a BIRDY Base Set
1. The handset is in standby (no tone).
2. Press 10 seconds the page/subscribe key (19) until the line/charge indi-
cator / (20) starts flashing quickly.
3. Now the base set is in subscribing mode. All following operations must be
performed as long as the line/charge indicator / (20) is flashing quick-
ly (approximately 3 minutes). Although the indicator is flashing, the phone
works normally.
4. Press the program key (4).
5. Press the arrow down (11) or arrow up (3) key until BASE SUB is displayed.
6. Press the program key (4).
7. BASE is displayed.
8. Enter the number (1 to 4) which will be assigned to this base set by press-
ing the numerical keys.
9. SEARCHING is displayed and the antenna symbol is flashing.
11

10. The RFPI code of the base set is displayed and the handset emits a tone
when it recognises the base.
11. Press the program key (4).
12. PIN is displayed.
13. Enter the 4 digits of the PIN code of this base (default 0000) by pressing the
numerical keys.
14. Press the program key (4).
15. The handset is subscribed to this base.
b) Subscribing the Handset to Another (GAP compatible DECT) Base
1. The handset is in standby (no tone).
2. Read the Operating Guide of your base to set it to subscribing mode.
3. Continue from item 4 under a) above.
3.9 Removing a Handset from a Base Set
A handset can be deprogrammed from a base set. This feature enables you
to remove a defective handset and to replace it by a new one.
NOTE: You can only remove a handset from a base set with another handset
that is subscribed to the same base.
1. The handset is in standby (no tone).
2. Press the program key (4).
3. Press the arrow down (11) or arrow up (3) key until SETTING is dis-
played.
4. Press the program key (4).
5. DATE/TIME is displayed.
6. Press the arrow down (11) or arrow up (3) key until REMOVE HS is dis-
played.
7. Press the program key (4).
8. PIN is displayed.
9. Enter the PIN code by pressing the numerical keys.
10. Press the program key (4).
11. REMOVE HS—is displayed
12. Enter the number of the handset (HS1 to HS5) you want to remove by
pressing the numerical keys.
13. Press the program key (4).
14. REMOVE HS is displayed, then the selected handset is removed.
12

15. NOT SUB is displayed if the removed handset is not submitted to another
base, or SEARCHING if it is submitted to another base set.
3.10 Selecting a Base Set
If the handset is subscribed to several base sets, it can only operate on one at
a time. Therefore it has to select a base set.
a) Automatic Base Selection
The handset will operate on the first base set found.
1. The handset is in standby (no tone).
2. Press the program key (4).
3. Press the arrow down (11) or arrow up (3) key until SETTING is dis-
played.
4. Press the program key (4).
5. DATE/TIME is displayed.
6. Press the arrow down (11) or arrow up (3) key until BASE SEL is displayed.
7. Press the program key (4).
8. Press the arrow down (11) or arrow up (3) key until AUTO is displayed.
9. Press the program key (4).
10. SEARCHING is displayed and the antenna symbol is flashing.
11. The handset emits a tone and returns to standby. It has found a base set.
b) Manual Base Selection
1. Same procedure as under a) above up to item 8.
8. Press the arrow down (11) or arrow up (3) key until MANUAL is displayed.
9. Press the program key (4).
10. The display shows BASE_.
11. Enter the number of the base set you want to use by pressing the numeri-
cal keys.
12. Press the program key (4).
13. SEARCHING is displayed and the antenna symbol is flashing.
14. The handset emits a tone and returns to standby. It uses the selected base
set.
NOTE: To select a base set, the handset already has to be subscribed to it.
13

4. Settings
4.1 Language
You can choose between five languages to display the menus: English, French,
German, Italian and Swedish. Default setting is German (DEUTSCH). To set the
language, proceed as follows:
1. The handset is in standby (no tone).
2. Press the program key (4).
3. Press the arrow down (11) or arrow up (3) key until EINSTELLEN (SETTING)
is displayed.
4. Press the program key (4).
5. TAG/ZEIT (DATE/TIME) is displayed.
6. Press the arrow down (11) or arrow up (3) key until SPRACHE (LAN-
GUAGE) is displayed.
7. Press the program key (4).
8. The set language is displayed.
9. Press the arrow down (11) or arrow up (3) key to select the language
you want to use.
10. Press the program key (4) to confirm the selected language.
4.2 Selection Mode
1. The handset is in standby (no tone).
2. Press the program key (4).
3. Press the arrow down (11) or arrow up (3) key until SETTING is dis-
played.
4. Press the program key (4).
5. DATE/TIME is displayed.
6. Press the arrow down (11) key. DIAL MODE is displayed.
7. Press the program key (4). TONE is displayed.
8. Press the arrow down (11) key. PULSE is displayed.
9. Press the program key (4) to set the phone to PULSE selection.
10. To set the phone to tone dialing, repeat items 1 to 7 and confirm your selec-
tion by pressing the program key (4).
NOTE: For quick and reliable phone operation we recommend tone dialing.
Factory/default setting is tone dialing.
14

4.3 Programming the PIN Code
Some features are only accessible after entering a PIN code. This feature
enables you to secure access to your settings or certain features and to pro-
hibit operation of handsets which are not subscribed to this base set. The PIN
code consists of 4 digits. The default PIN code is 0000.
To modify the PIN code:
1. The handset is in standby (no tone).
2. Press the program key (4).
3. Press the arrow down (11) or arrow up (3) key until SETTING is dis-
played.
4. Press the program key (4).
5. DATE/TIME is displayed.
6. Press the arrow down (11) or arrow up (3) key until PIN CODE is dis-
played.
7. Press the program key (4).
8. OLD CODE is displayed.
9. Enter the old PIN code by pressing the numerical keys.
10. Press the program key (4).
11. NEW CODE is displayed.
12. Enter the new PIN code by pressing the numerical keys.
13. Press the program key (4).
14. AGAIN is displayed
15. Enter the new PIN code again.
16. Press the program key (4).
17. The handset emits a confirmation tone to confirm storage of the new PIN code.
NOTE: If you have forgotten your PIN code, you have to run a complete reset.
4.4 Day/Time Setting for the CLIP register
If the day and time are not transmitted by the public telephone network, you
have to program these settings manually, otherwise the call log will not regis-
ter the day and time the call came in. In case of doubt, please ask your
provider.
1. The phone is in standby mode (no tone).
2. Press the program key (4).
3. Press the arrow up (3) or arrow down (11) key until SETTING is dis-
played.
15

4. Press the program key (4). DATE/TIME is displayed
5. Press the program key (4). The display shows YEAR and the year num-
ber (for ex. 00 for 2000).
6. Enter the last two figures of the year with the numerical keys (2001 -> 01).
7. Press the program key (4). MONTH is displayed
8. Enter the number of the month (01-12) with the numerical keys.
9. Press the program key (4). DAY is displayed.
10. Enter the number of the day (01-31).
11. Press the program key (4). HOUR is displayed
12. Enter the hour with the numerical keys.
13. Press the program key (4). MINUTE is displayed.
14. Enter the minutes with the numerical keys.
15. Press the program key (4) to confirm.
NOTES:
If date/time is not transmitted by the public telephone network and they are
not manualy set before taking the unit into use, the caller list (call log) will not
display the date/time of the incoming messages.
Please check the date/time setting after the battery has been disconnected
or dead. Set again, if necessary.
4.5 Locking/Unlocking the Keypad
This feature enables you to prevent numbers from being called accidentally.
When the keypad is locked, only the program key (4) is operative and KEY
LOCKED is displayed.
1. The handset is in standby (no tone).
2. Press the program key (4).
3. Press the arrow down (11) or arrow up (3) key until KEY SETUP is dis-
played.
4. Press the program key (4).
5. KEY LOCK is displayed.
6. Press the program key (4).
7. The set keypad mode is displayed:
UNLOCK: the keypad is unlocked; or
LOCK: the keypad is locked.
8. Press the arrow down (11) or arrow up (3) key to select your choice.
9. Press the program key (4) to confirm your choice.
16

4.6 Switching On/Off Key Click
The handset emits a tone each time you press a key. You can switch off key
click.
1. The handset is in standby (no tone).
2. Press the program key (4).
3. Press the arrow down (11) or arrow up (3) key until KEY SETUP is dis-
played.
4. Press the program key (4).
5. KEY LOCK is displayed.
6. Press the arrow down (11) or arrow up (3) key until KEY CLICK is dis-
played.
7. Press the program key (4).
CLICK ON is displayed: key click is on; or
CLICK OFF is displayed: key click is off.
8. Press the arrow down (11) or arrow up (3) key to select your choice.
9. Press the program key (4) to confirm your choice.
4.7 Setting the Earpiece Volume
This features enables you to set the volume of the earpiece.
There are 5 levels (1 = minimum to 5 = maximum). Default volume setting is 3.
The earpiece volume is set during a communication.
1. Press the volume/ring key / (8).
2. The set earpiece volume is displayed.
3. Press a numerical key from 1 to 5 to select the wanted volume.
4. Press the volume/ring key / (8) to confirm the selected volume.
4.8 Setting the Ring Volume of the Handset
There are 10 levels (0 to 9) to set the ring volume. Level 0 switches off the ring-
ing. The ring off symbol is displayed for external calls. Level 9 is the maximum
ring volume. The default ring level is 5. The ring volume of an external call can
be different from the one of an internal call.
a) Setting the Ring Volume of an External Call
1. The handset is in standby (no tone).
2. Press the program key (4).
3. Press the arrow down (11) or arrow up (3) key until RING SEL is displayed.
4. Press the program key (4).
5. EXTERNAL is displayed.
17

6. Press the program key (4).
7. MELODIES is displayed.
8. Press the arrow down (11) or arrow up (3) key until VOLUME is displayed.
9. Press the program key (4).
10. The set ring volume is displayed.
11. Press a numerical key from 0 to 9 to select the wanted volume.
12. Press the program key (4) to confirm the selected volume.
b) Setting the Ring Volume of an Internal Call
1. The handset is in standby (no tone).
2. Press the program key (4).
3. Press the arrow down (11) or arrow up (3) key until RING SEL is displayed.
4. Press the program key (4).
5. EXTERNAL is displayed.
6. Press the arrow down (11) or arrow up (3) key until INTERNAL is displayed.
7. Press the program key (4).
8. MELODIES is displayed.
9. Press the arrow down (11) or arrow up (3) key until VOLUME is displayed.
10. Press the program key (4).
11. The set ring volume is displayed.
12. Press a numerical key from 1 to 9 to select the wanted volume.
13. Press the program key (4) to confirm the selected volume.
4.9 Setting the Ring Melody of the Handset
The handset has 9 melodies (1 to 9). The default ring melody is 1. The ring melody
of an external call can be different from the one of an internal call.
a) Setting the Ring Melody of an External Call
1. The handset is in standby (no tone).
2. Press the program key (4).
3. Press the arrow down (11) or arrow up (3) key until RING SEL is displayed.
4. Press the program key (4).
5. EXTERNAL is displayed.
6. Press the program key (4).
7. MELODIES is displayed.
8. Press the program key (4).
9. The number of the set ring melody is displayed.
18

10. Press a numerical key from 1 to 9 to select the wanted melody.
11. Press the program key (4) to confirm the selected melody.
b) Setting the Ring Melody of an Internal Call
1. The handset is in standby (no tone).
2. Press the program key (4).
3. Press the arrow down (11) or arrow up (3) key until RING SEL is displayed.
4. Press the program key (4).
5. EXTERNAL is displayed.
6. Press the arrow down (11) or arrow up (3) key until INTERNAL is displayed.
7. Press the program key (4).
8. MELODIES is displayed.
9. Press the program key (4).
10. The number of the set ring melody is displayed.
11. Press a numerical key from 1 to 9 to select the wanted melody.
12. Press the program key (4) to confirm the selected melody.
4.10 Setting of Flash Time (R)
You can program a LONG or SHORT line interruption on the R-key. Some
services will not operate with a short delay, such as call waiting management
for instance. But for some professional applications or extensions, setting to
SHORT may be necessary. If used on a PABX, the right flash time must be set
according to the PABX’s user manual.
1. The handset is in standby (no tone).
2. Press the program key (4).
3. Press the arrow down (11) or arrow up (3) key until SETTING is dis-
played.
4. Press the program key (4).
5. DATE/TIME is displayed.
6. Press the arrow down (11) or arrow up (3) key until RECALL is dis-
played.
7. Press the program key (4).
LONG is displayed: the delay is set to LONG; or
SHORT is displayed: the delay is set to SHORT.
8. Press the arrow down (11) or arrow up (3) key to select your choice:
9. Press the program key (4) to confirm your choice.
19

4.11 Pause Key
If you want to insert a pause while you are dialing a number, just press the
pause/redial key P(6). A pause takes up the place of a digit in the memory.
4.12 Call Barring
This feature is only accessible with the PIN code. It enables you to bar outgo-
ing calls of 5 groups of numbers consisting of maximum 5 digits each. The
emergency numbers (all numbers consisting of three or four digits without
area code) cannot be barred, even if you have programmed them.
Some examples:
• 00: international numbers cannot be called;
• 075: mobile phone numbers starting with 075 cannot be called;
• 0900: numbers starting with 0900 cannot be called.
a) Switching On Call Barring:
1. The handset is in standby (no tone).
2. Press the program key (4).
3. Press the arrow down (11) or arrow up (3) key until SETTING is dis-
played.
4. Press the program key (4).
5. DATE/TIME is displayed.
6. Press the arrow down (11) or arrow up (3) key until BARRING is displayed.
7. Press the program key (4).
8. PIN is displayed.
9. Enter the PIN code by pressing the numerical keys.
10. Press the program key (4).
11. BAR NUM 1 is displayed.
12. Press the arrow down (11) or arrow up (3) key to select one of the 5
memory places for call barring.
13. Enter the digits (max. 5) of the numbers to be barred by pressing the
numerical keys.
14. Press the program key (4).
15. HS and the entered digits are displayed.
16. Enter the numbers of the handsets from which the number may not be
called by pressing the numerical keys.
E.g.: Press the numerical keys 2, 3 and 5 to prevent the numbers starting with
0900 to be called from handsets 2, 3 and 5.
17. Press the program key (4) to confirm the programming.
20
This manual suits for next models
1
Table of contents
Other AEG Cordless Telephone manuals

AEG
AEG Voxtel D570 twin Guide

AEG
AEG Prism 15 Instruction manual

AEG
AEG LOOP Instruction manual

AEG
AEG Voxtel D235 User manual

AEG
AEG LloydCombo 15 Instruction manual

AEG
AEG VOXTEL D500 User manual

AEG
AEG Voxtel D550 Instruction manual

AEG
AEG Voxtel D235 User manual

AEG
AEG Voxtel D80 User manual

AEG
AEG Beat 15 User manual

AEG
AEG Boomerang 10 User manual

AEG
AEG Voxtel D81 User manual

AEG
AEG Voxtel D210 User manual

AEG
AEG Voxtel S120 User manual

AEG
AEG Voxtel D85 twin User manual

AEG
AEG Lloyd Combo15 Instruction manual

AEG
AEG Voxtel S100 User manual

AEG
AEG Voxtel S110 Combo User manual

AEG
AEG Voxtel D100 User manual

AEG
AEG Spirit 100 User manual